Living Room Updates and A Comfort Works Sofa Cover Review

Hi everyone! We are almost to the end of the school year here and these last few weeks are jammed packed with activities, field trips, and even a spring concert. Counting down the days…almost there!

I am blaming spring cleaning but we have been on an organizing kick over here. With the house feeling all fresh and clean, I realized that the living room needed a little facelift. This room is the most hard working room in the house. It lives directly off of the kitchen and is the hub of all activity. So, when the lovely Felicia contacted me from Comfort Works and asked if I wanted to review their replacement slipcovers, I said, YES!

Let me start by saying that we have been buying IKEA sofas for almost ten years. They are durable, stylish, and affordable. A combination that I believe to be perfect for families with small kids. When we bought our house last year, we bought a big sectional (the Norsborg sectional with a chaise) for our living room and love the amount of seating that it provides. It was a darker gray and that is the general tone that I wanted, but in person, the material felt a bit tired (maybe because the baby uses it as a napkin on the reg? hmmm.).

Comfort Works makes beautiful replacement slipcovers for IKEA sofas and custom slipcovers that will fit whatever style of sofa that you might have. Isn’t that cool? You get the look of a very high-end sofa without spending the money! Yes, please. I picked some fabric samples and they arrived in a week. Right away, I was impressed with my options. I couldn’t have made a wrong choice as they were all so lovely.

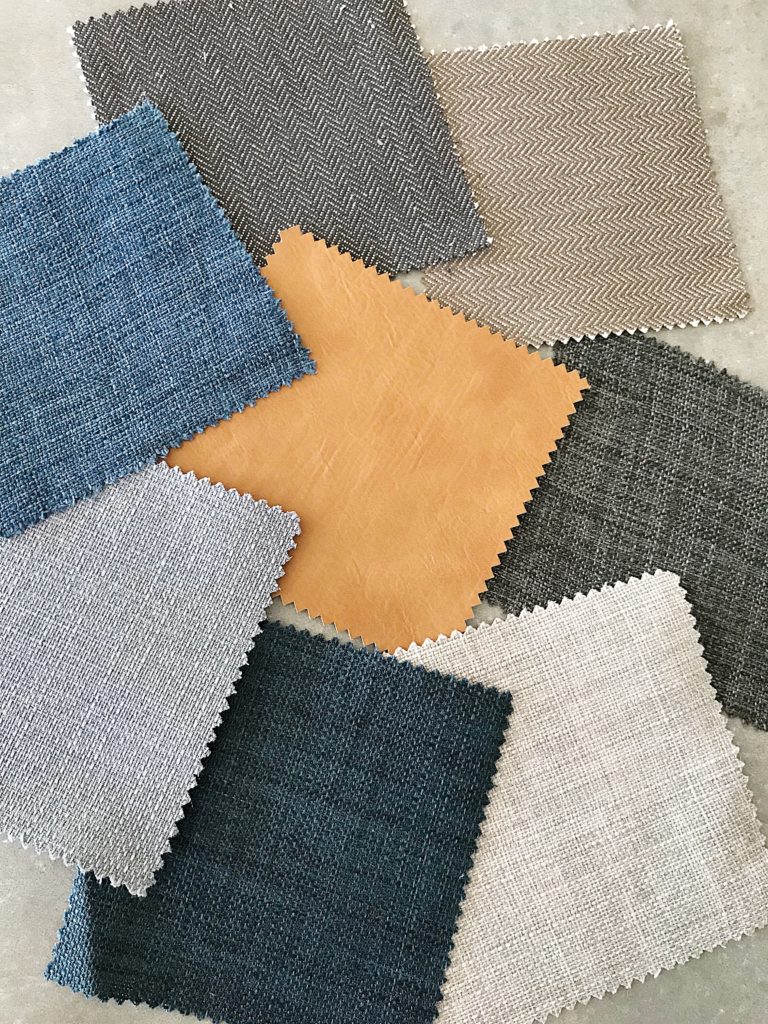
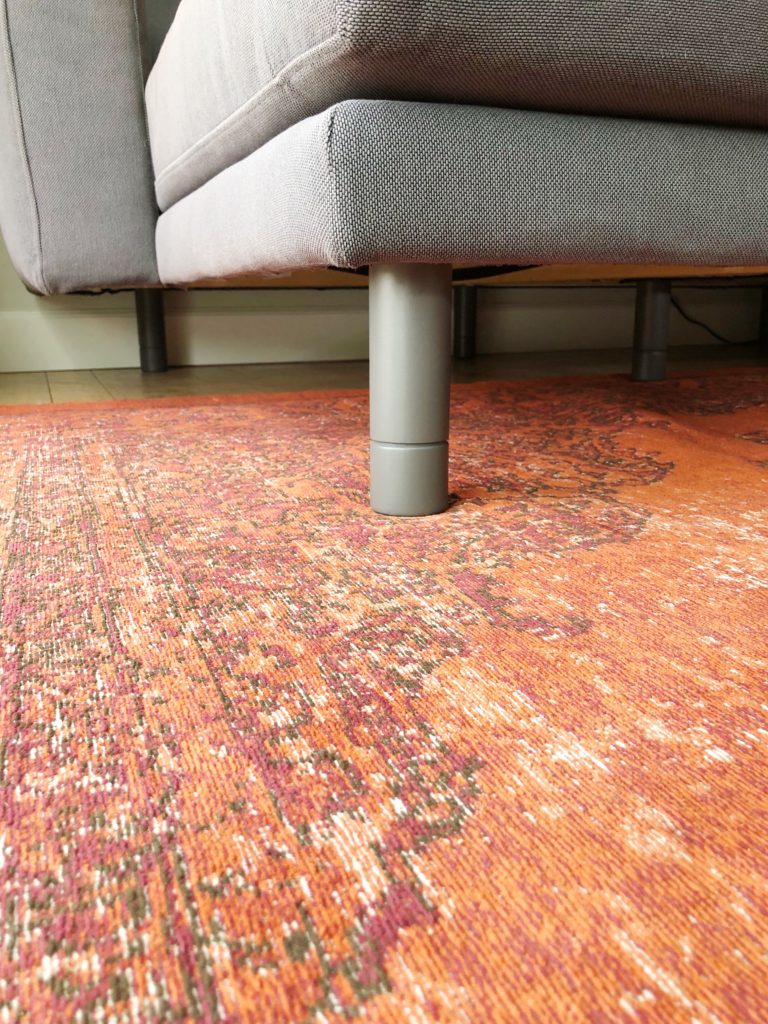
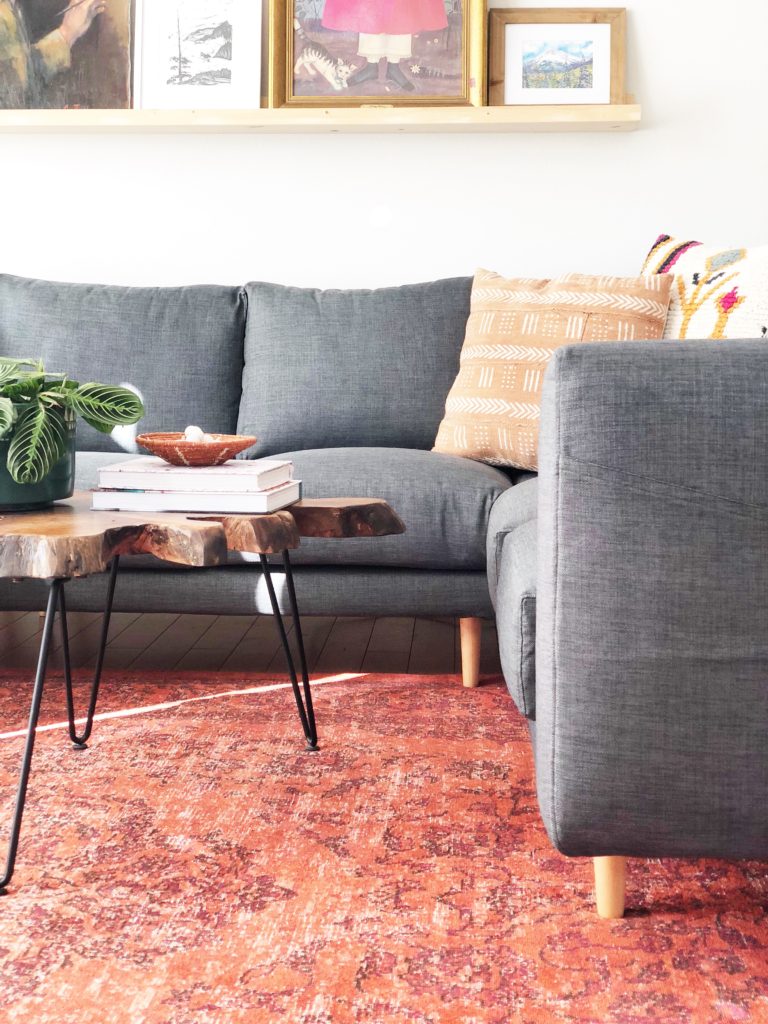
I picked the Kino Shadow in their heavy duty material because…well, KIDS. This fabric felt like the perfect choice for us with its darker tone and can even be machine washed. Seriously! Machine Washed! We also decided on their Bailey Wooden Sofa Leg to replace the old, chunky ones that originally came with the sofa.

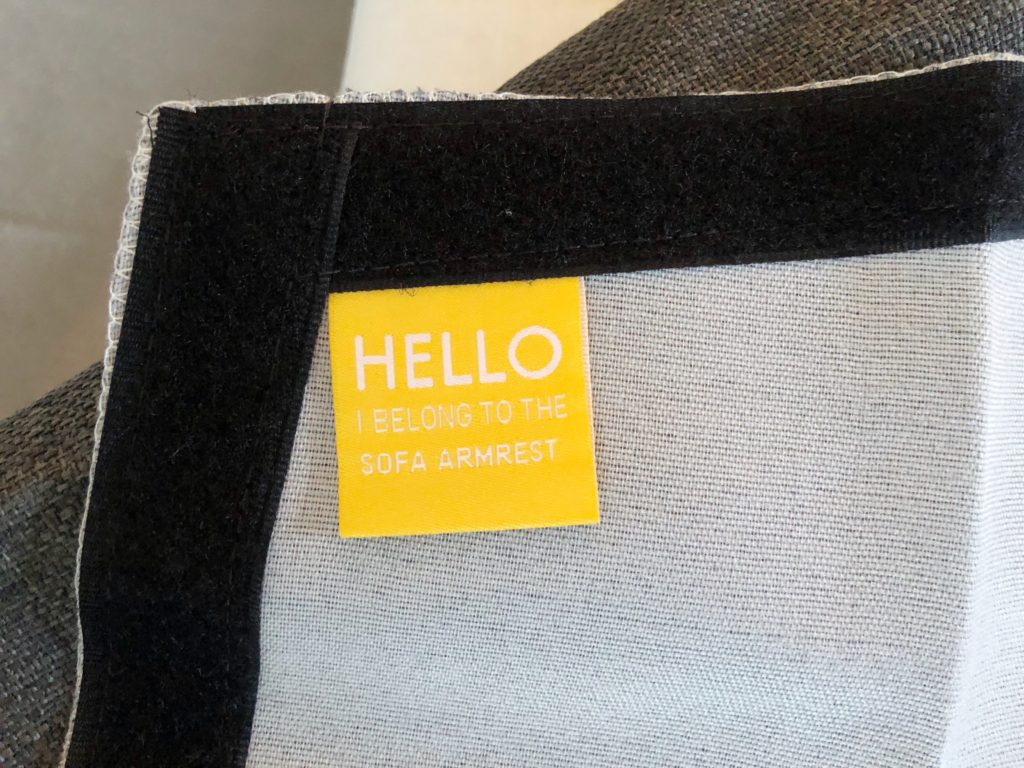
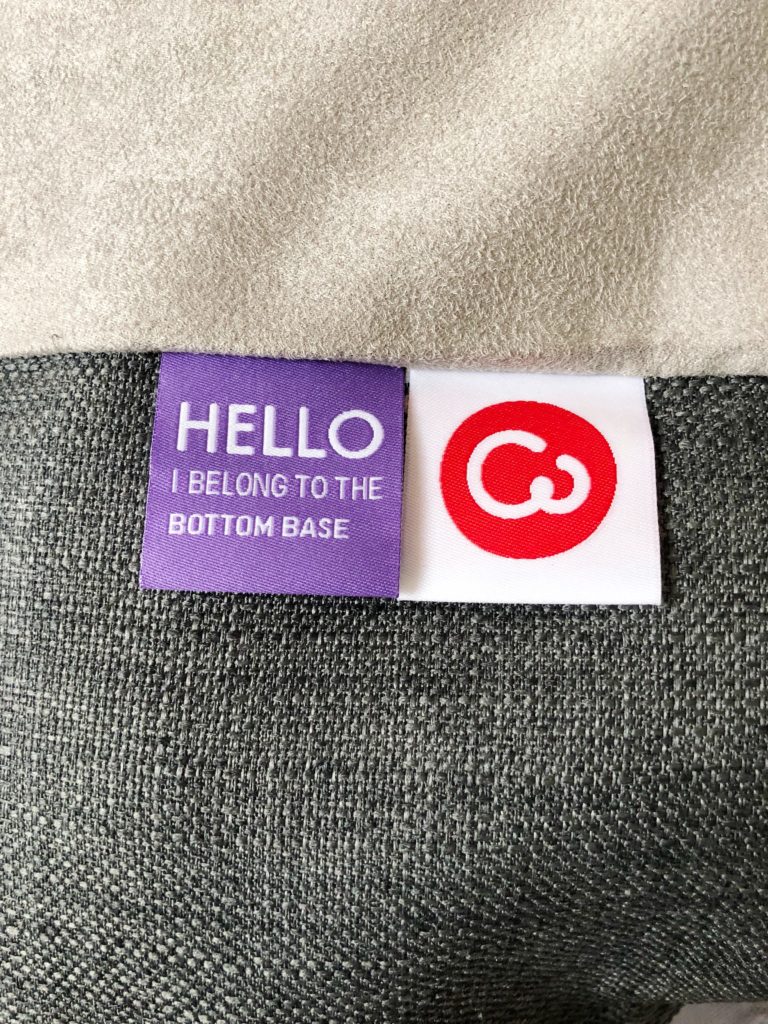
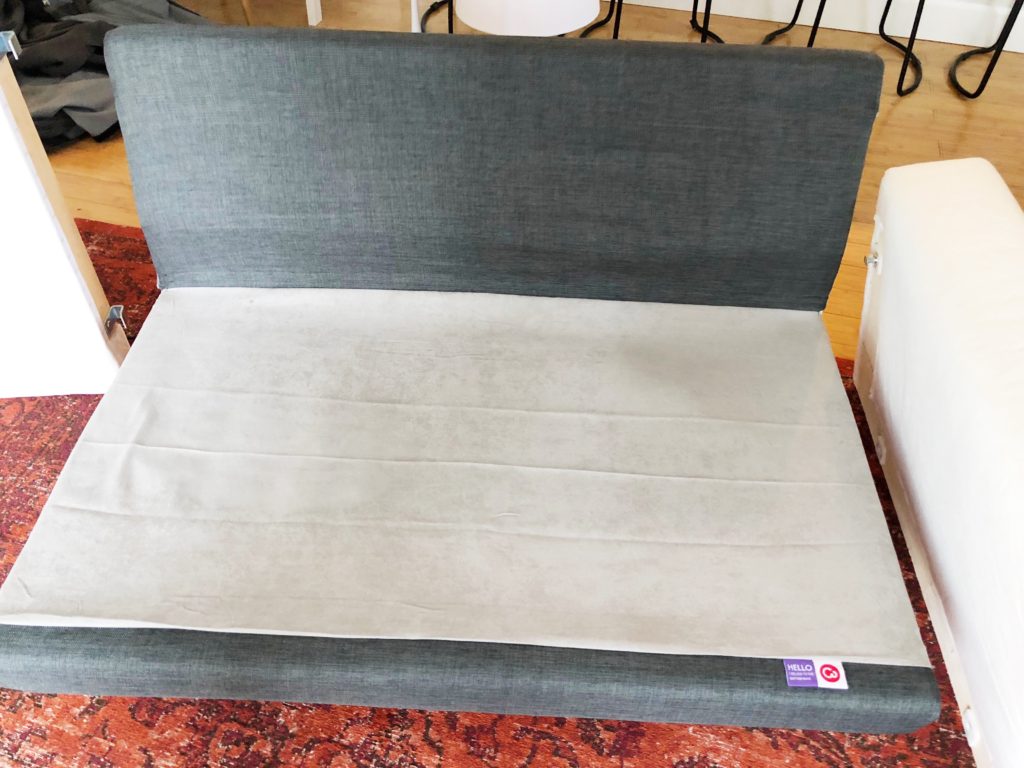
When our cover and legs arrived, I knew we made the right choice! The cover is beautiful, full of texture and the color is a deep, saturated gray. The quality is GOOD. And the best part? My husband and I both agreed that our replacement cover was easier to put on the frame than the original cover from IKEA. I loved how Comfort Works made it a no hassle process with the help from their little prompts. So smart, right?

All of the pieces fit like a glove and there wasn’t any excess fabric.

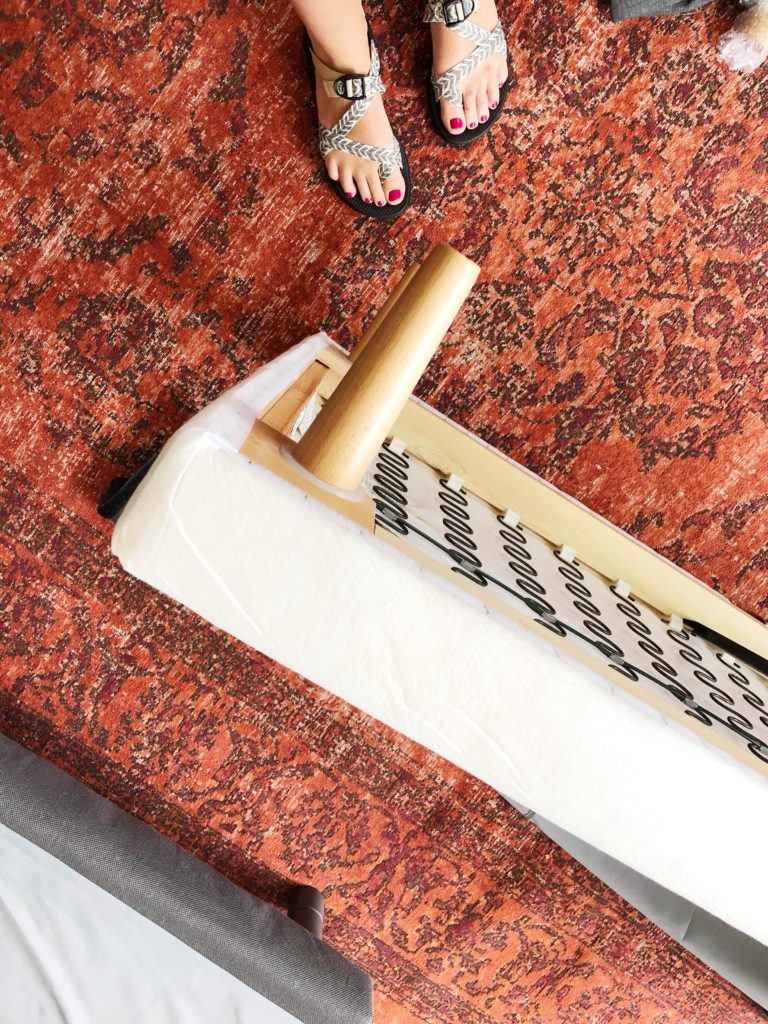
Overall, it was a pretty painless process. Even with our big sectional, we had everything taken off and our new cover put back on in less than an hour.

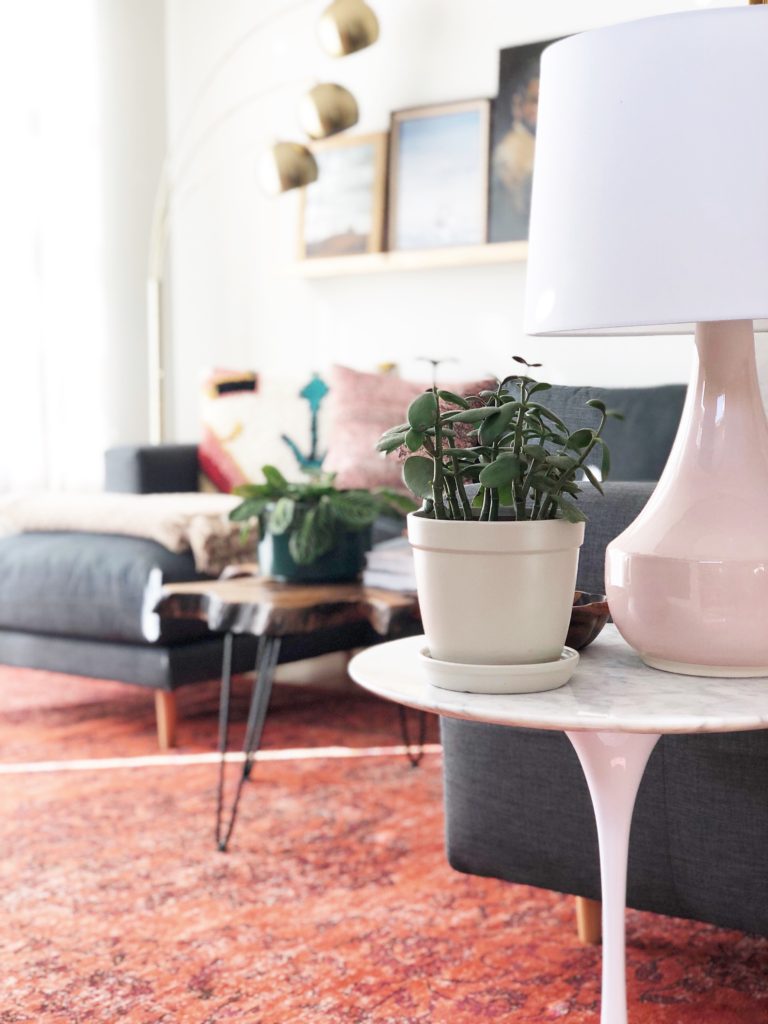
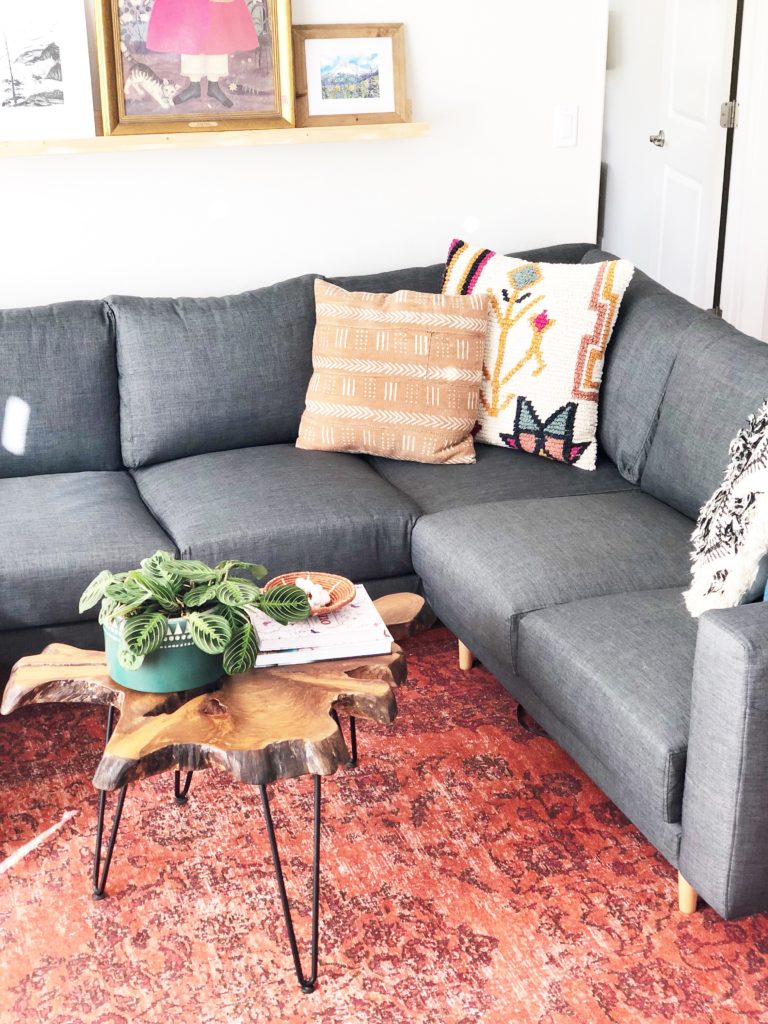
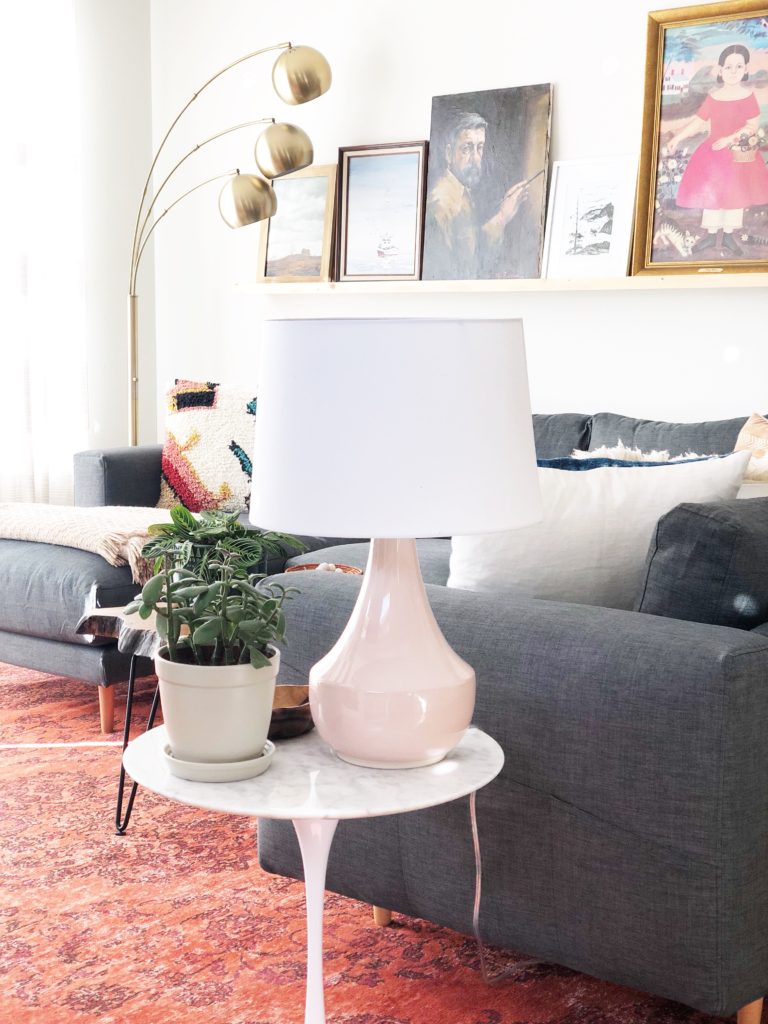
I am so excited about our new replacement slipcover and the new look it gives my IKEA sofa! It really feels like a new piece of furniture. Hope you guys love it as much as I do!

This post is sponsored by Comfort Works. All opinions expressed are 100% my own.

Our DIY Entryway Bench

We built a bench in our entryway and it feels so good. Hehe, I just sort of jumped right in without any pleasantries or warning. I’m a tad excited about this project, can you tell? Behold, our refreshed entryway:

It feels like a whole new space. Ah, the power of diy.

As you can see, we weren’t using this space in a functional way. Besides not being functional, it was so boring. Major snooze factor. There wasn’t any storage, no hooks for coats, and no mirror to check your hair when you leave. Doesn’t everyone do that? I knew it needed all these components, but I wasn’t sure how to implement them.

Via

So a couple weeks ago, I was on instagram one evening and came across this image from a favorite blogger of mine. Gorgeous, no? That floating, simple bench would be perfect for my blah entryway! This is why I love a good diy blog – so much good content to be shared for others to use.  She had a link to her blog with a genius set of instructions. I showed them to Nate and he thought we could handle the bench portion of the project – no problem.

We followed the instructions she provided without any problems. Her instructions were thorough and easy to follow. So, because I documented our steps and took photos along the way, I will include our step by step process. This is a great project that could be modified to fit a number of different spaces and homes.

First, we picked up some project boards and had them cut to size right at Lowe’s. We also grabbed some stain, poly, a couple 2×4’s, and two brackets. For staining the boards, I followed the instructions from brepurposed.com and she swears that the perfect stain recipe is two coats of special walnut with one coat of golden oak in between. I don’t have very much experience with staining, so I thought I would give it a whirl. I stained the boards outside with a lint-free rag and let them dry overnight. After they were dry, I applied a couple coats of poly.

To decide how high we wanted the bench to be, we measured our dining table bench from West Elm. It seemed to be a good height and even moved it over in the entryway space to have a visual aid to help.

Next up, attaching the 2×4’s to studs in the wall for the framing of the bench.

Then we attached a piece of the project board to the top of the framing.

To make sure that the bench was sturdy and extra strong, our next step was adding two 2×4’s across the top of the project board.

Finally, the top went on and we attached the brackets that the front piece would be screwed into.

We screwed in the last piece from the back so there aren’t any visible screws from the front. After this step, we got the nail gun out and used finishing nails to secure the piece all the way across. After that, done!

To make the bench even more of a work horse for us, I added three baskets underneath, one for each kiddo. I have room for a fourth basket but for now, I left some space for some taller boots. The baskets have been a life saver to corral coats, backpacks and shoes. The hooks were a cheap amazon find and help to finish off the space. I bought a mirror from Target a while back and hung it up above the hooks.

We love how this project turned out. Maybe love isn’t a strong enough word, maybe obsessed is more accurate. Now, we have the itch to get started on some other diy’s around here, so stay tuned!

Project Porch

Spring has sprung here in Texas which means the temps are high, the bugs are plentiful and the storms are frequent. We have been enjoying the lovely weather and never get sick of a good thunder storm, but the bugs…not so much. Lucky for us, our house has a screened porch; the perfect solution for being outside without being bothered by pesky mosquitoes.

But until last week, our porch looked like this.

Whoa. That’s a lot of flesh-colored paint. I love updating spaces like this because it really shows what a difference some paint makes. And that’s all we did, with the exception of rearranging some furniture and adding some plants. Paint!

Last summer, when we painted the exterior of our house, we skipped the porch. Why you ask? I’m not exactly sure but I am going to blame the hot temps. It was summer in Central Texas and I was almost five months pregnant with Urban. First on the to-do list was painting the siding to match the rest of the exterior. If you’ve been following along, you might already know we chose a charcoal color with some metallic undertones. It sounds crazy but the metallic undertones are bronze and they are lovely. Kind of like the way that oil and water swirl around and in just the right light you can make out little rainbows. Only the paint on our house isn’t an environmental hazard. We LOVE the color. We love it more and more all the time and have even had neighbors knock on our door and ask us what color we used. I will never get sick of that!

The rest of the walls were painted a bright white, and on the floor we used a stormy gray color. We started out painting the walls with a brush and roller until we were ready to lose our minds and rented a paint sprayer to apply the second coat. If we were doing this project all over again, we would definitely rent the paint sprayer from the start. To paint the floors, I went around the edges with a paint brush and then Nate rolled the rest. I always do the cutting in and he always does the rolling. It’s become a thing. I know, I know, we’re crazy.

The rest of the project was fun. I used things we already owned to decorate the room (I say “room,” but I mean porch) except a new outdoor rug, an outdoor light, and a plant stand. Remember my chandelier that got bumped from the dining room inside? She found herself a new home on the porch and I think it’s a perfect fit.

The table and chairs were put back on the opposite side of the porch because originally, I placed them on the same side as the bump-out with the windows on the house. The more I thought about it though, it makes waaaaay more sense to have it on the other side with more space. Duh. Now that side has a seating area with a rug. Also, plants. And more plants. My plants love Texas. Plants that I used to kill in Oregon thrive here. Must be all the sunshine and humidity in the air. Like living in a greenhouse.

Isn’t it looking so much better? And the best part is that we are now using this space. Nolan and Grey have been using the space for playing and we’ve even had dinner together at the table. Yay us!

Finally, I know I always do this but it’s just too much fun, so let’s look back at where we started:

And now:

Dear paint, I love you so.


The Bathroom is Done Done

A few weeks ago, I shared our finished bathroom with the promise that I would be back with some pictures of the space with all the accessories and art. So today, I will honor my promise (even though technically, I think I’m a bit late on my delivery) and show all the fun details that make the bathroom feel complete. Drum roll please:

We are very pleased with the finished product. And I use the word finished loosely because it seems like I am never quite done tweaking things. Nate hates that, but I loooove it. Tomato tomahto. I have to say, this was my favorite part of revamping a space…all the little details.

When the mirror was hung, I was nervous it was all wrong. And it would have been an annoying error to make because I had already painted the frame a flat black so there was no turning back and returning to the store. To remedy this, I brought in as many black elements as I could. All of the other pops of black help make the mirror feel less chunky. Now, it feels much more balanced to me and less like “look at this mirror with a giant black frame.” The basket on top of the toilet, the towel hooks, toilet paper holder, and hand towel ring are all black.

I thought that hooks for towels might be a fun change of pace from the old towel bar. And now that they’re up; our kids can actually hang their towel up on their chosen hook. When the old towel bar lived there, the kids would haphazardly throw their damp towels up on the bar. The messy towels drove me nuts because it looked sloppy and the towels couldn’t easily dry. Nobody likes a damp towel.

We installed a shelf above the toilet which is a nice spot for a few decorative pieces and a tray to wrangle bobby pins and Nolan’s hair barrettes. I had a lot of fun completing my first “paint by numbers” picture and framed it in an inexpensive wood frame from Target. Also, notice the black brackets on the shelf? I thought they complimented the mirror nicely.

My little vintage rug that we found at Round Top last fall fits perfectly in our little bathroom and I think it makes the room feel special. It’s perfect for a bathroom because it adds some color and pattern. I also like that it’s low profile so the door can open and close over it but it’s heavy enough to not slide around.

The light above the vanity is a galvanized steel finish and I like its casual feel. It is our preferred light for the bathroom as it casts a soft light directly onto the vanity.

That’s about it for our main bathroom. We can check this off our list and call this one done. One last time, let’s look back at where we started:

And now we look like this:

And speaking of making good progress, our master bathroom is looking a lot like our main bathroom these days. We have two bathrooms in our house and they are located right around the corner from one another. When we started planning to update them, we decided early on that they should have the same look and feel since they are so close. It seemed odd to give them each a completely different design. They aren’t quite twins but maybe they could be sisters?

We used all the same materials that were used in our main bathroom. Same tiles on the floor, same countertop, same sink, you get the idea. Here’s an old shot I dug up of this same spot right after our move.

So what do you guys think? Is there anyone out there who recently took on a similar DIY bathroom project? Any first-time tilers who are contemplating getting started? Were you as nervous as we were? Really, once you dive in it’s not that scary. I’d love to hear from you so feel free to leave me a comment below:-)


updating our light fixtures

I was thiiiis close to entitling this post, “The Great Light Switch-Out” or “Switching Up our Lights,” but I decided to spare you of my clever puns. This past weekend was President’s Day and with the extra day off we were able to start work on the second bathroom and update some lighting around the house. So let’s start today with a photo of my new favorite view:

Since we moved in and got busy scraping our popcorn ceilings, we took down all of the existing overhead lighting (boob lights galore). Nearly every room was left with the remnants of this problem that I have been conveniently cropping out of all house photos.

I felt a little stumped about what to pick since we would essentially be choosing lighting for the entire house. If I made the wrong choice, it would be on such a large scale that I was scared to pull the proverbial trigger. I liked this light and when it finally went on sale, Nate convinced me to order them up. So order we did, and when they arrived, we were impressed with the quality and the size. The only worry that we had about these guys was that they wouldn’t be big enough and look skimpy or cheap. However, they look lovely and really compliment the black door hardware.

Since we were on a lighting roll, I decided that I was going to play a sort of musical chairs with some lighting choices that we previously made. When we moved in, the dining room looked like this:

Then, I found a cool fixture on sale and the space was transformed to this:

I like this fixture very much but after a while I started feeling like it wasn’t really “us.” Maybe it was too small for the dining room? Maybe it felt a little “fancy” for our house? Still not sure but when I saw this light, I knew we had to make another change. Nate was not exactly thrilled to be changing our dining room light again but I have assured him that this new light is here to stay.


It feels just the right size for the dining room and with the natural bamboo, it feels warm and adds some texture. I don’t have a rug in our dining room because my OCD doesn’t afford me such a luxury with our kids eating there on a daily basis. The number of gold fish crackers, crumbs and spaghetti noodles that I sweep/clean off our wood floors is crazy.

But I didn’t stop there. The entry lighting situation went from this (sorry about the dark photo):

To this:

I can officially put a fork in it and call the entryway finished. It’s one of the smallest spaces in the house but I am still calling this a victory. It’s funny how many revisions a space has before it starts to feel right and I can move on to something else. Sometimes it’s hard to put your finger on what’s working and what isn’t.

The pendant that lived in the entryway has now found a new home in the master bedroom. Told ya this was musical chairs for lights.

So that’s the jist of what we have been working on around the house. I am down to just a few final touches in the bathroom and we are just waiting on a sconce to arrive (I know, I know. More lighting?). I will update the blog accordingly as soon as that comes. As a little bonus, I have some photos to share of Urban. He is already three months and has been busy terrorizing me all night and looking adorable all the time. Look at that bald head…it smells as good as it looks.


Switching things up

Yup, I have already changed up our new office area. I guess I can’t help myself. I am a compulsive tweaker…err or a lady who likes to rearrange things around the house. Does that sound better? Last time we left off, it looked like this.

There wasn’t anything wrong with the office area but then I was cleaning out Nolan and Grey’s closet last week and I came across some old shelves that I had shoved in there when we moved. I remember thinking that I might use them in the kiddos’ room but we ended up going in another direction when we hacked some IKEA shelving. With all that new storage, they didn’t need any more shelves. Maybe these babies could be fun above my new desk? Yes!

I just threw some random decor on them so don’t be surprised if they look different every time these new shelves pop up in pictures. Also, notice the chair? Nate surprised me with this chair after he read the last blog post. What a guy! I guess it was easy to tell which chair was his favorite choice. I love it though. The cushion is surprisingly comfy and the warm wood is just lovely with the modern, bright white desk.

The little cactus is the only new addition and I picked it up at Target. It is FAKE! You would never be able to tell. Seriously. I am a bit of a fake plant snob and this is one of the best ones I have seen. Makes me reconsider everything…not really. But I am definitely going to give some more faux plants a try. Maybe the shelves need some books? Or my mom suggested a chalk board or cork board. That could be cute. Weeeee!

The other project that we did is probably the easiest DIY that anyone could ever attempt. Okay, there is a super long hallway when you walk in our front door opposite of the wall that I stamped with my tribal stamp a few months ago. This naked wall was driving me crazy (not in a good way) and I wasn’t quite sure what to do with it. My solution was to hang some art and call it a day. This is how it turned out.

I liked it just fine but it kinda bugged me because I wanted our entryway to be both pretty and functional, no? Welp, I took down the gallery wall and started looking for some cool coat racks. It didn’t take long before I spotted this beauty.

Via

I love the industrial design but even the extra-large option wouldn’t be long enough for the wall. So, Nate and I decided that we could just make our own and this would allow us to customize the size. We had some old boards in the garage left over from an old headboard project and the rest of the process is as simple as finding the right hooks and affixing them to our board. Done and done.

So simple. So easy. And I love it. Here’s a few more pictures of the updated spaces so you have a point of reference.

We have lots of projects lined up so stay tuned for baseboard trim progress…finally. Also, we are still working on some bathroom updates. Whew. I think we might be on a roll! If you’ve noticed that my posts have become sporadic, you’re right. Here’s why.

New Year, New workspace

Happy New Year friends! It feels so good to be back to normal, well, a new kind of normal for our family of five. Our Christmas break was packed. The baby and I flew to Oregon to be with my sister as she had her baby girl in the middle of the biggest snow storm I have ever seen. She is happy and healthy and I am so grateful that I was able to be there for the special occasion. Nate and the kids drove up to join all the fun when they finished up school for the holiday. Our time in Oregon was spent with all the family we could cram into my sisters’ house and the cousins played in the snow, went ice skating, and ran around like hooligans. This was our best Christmas yet!

Even though my break was full of sleepless nights with the new baby, I feel energized and eager to begin this new year. We have so many projects planned in the next few months, it’s very exciting. Our house has a long ways to go but at the same time, it feels like we have turned a corner and our little place is taking shape! Let’s do this 2017! Thanks for hanging in there as I reflect for a second.

My time off wasn’t just a swirling blur of bottles and diapers. We still managed to get a few things accomplished. First, Nate and I decided that some new appliances for the kitchen would be the perfect Christmas gift to one another. Aren’t we exciting? Some people go on vacation, we buy dishwashers. Although it isn’t a DIY project, it does really improve the overall feel of the kitchen. Is it weird that I want to pet the new refrigerator?

A few months ago, we bought a new range and hood and planned on replacing the refrigerator and dishwasher just as soon as we saved enough for them. Well, that time is here and I couldn’t be happier about it. Appliance shopping is my idea of a good time. So. Much. Pretty. Any big purchases we make, especially when it involves electronics/appliances, Nate does the research and I narrow down the options based on appearance or other practical aspects that I experience with every day use.

The other little project is a shared office of sorts or workspace for Nate and me. Nate often finds himself doing some work from home and it isn’t unusual to find him answering emails or checking his calendar from our home computer. He usually just does this from our dining room table but with our kids spending close to an hour every night doing homework at the same table (that’s a whole different issue…don’t get me started), it made more sense to make a designated space that he could work from, separate from the kids. I also have enjoyed having this space for photo editing, blogging and emailing. It’s a win, win, win.

There is an awkward corner behind our sectional in the living room that I have been scratching my head over since we moved in. Previously, I just shoved a shelf in the corner and I was using it to corral random decor that I didn’t know what to do with. That solution quickly began to feel like a waste of space and with three kids and only 1,648 square feet of living space, why would I waste a single inch of it? Enter workspace idea!

The desk is a parsons desk from West Elm that I scored off of Craigslist. I have always admired this particular desk from West Elm so when I found one for cheap on Craigslist, it felt like it was meant to be. I am still hunting for a chair and have been stealing a chair from the dining table until I find the right one. Here’s a couple of options that I am considering:

Via

I spotted this chair at World Market and was thinking that it might be perfect. I love the rich color of the wood and the upholstered seat is super fun. Since the desk has such modern lines, a wood chair might be a good way to bring in some warmth and texture.

Via

I love these acrylic chairs. I have seen them a million times and they seem to work in just about any kind of design situation. That’s super appealing to me as I could just move it somewhere else if I got sick of it or didn’t like it for an office chair. Hmmmm….oh the choices.

So those are just a few of the things we have been up to around this house. Like I said, I feel so good to be getting back in the swing of things around here. Oh, and we have some exciting progress to share that’s been happening in the bathrooms. If you’ve been following along you may remember our bathrooms were in serious need of attention. You might have blocked those pictures from your memory though and I wouldn’t blame you for that.

P.s. Be sure to check my house tour page because I FINALLY updated it!

an urban nursery

img_1188

Well, we are officially a family of five. Urban Price Equall (Price is my maiden name) was born on November 11, 2016 at 12:24 pm. He weighed in at a whopping 8 lbs. 13.5 oz. and was 20 inches long. I’m feeling ALL the feelings but mostly, I am very grateful.

img_0135-edited

Remember about a month ago, when I put together a list of my five favorite baby items for a nursery? Well, the finished product turned out a bit different from my list. Mostly because I procrastinated for so long that a few of the items were on backorder and I wouldn’t have received them for a few months. So, I improvised and refocused on items that would actually arrive before my baby did.

I finished Urban’s nursery the day before he was born. Nothing like waiting until the last minute, huh?  So, now that we are home and all settled back in, I thought I would share how it turned out. I had so much fun planning his room and am convinced that baby rooms are the most fun to design and put together.

img_1187-edited

img_1202-edited

img_1198-edited

My goal was to keep his space simple without being too babyish. I kept patterns to a minimum and let the rug stand out with all the color and pattern. Speaking of the rug, I ordered it from RUGSUSA and it’s on sale for Black Friday right now. I’m super happy with the quality of the rug and the colors are just as pictured on their website. Lots of times, I have ordered items that arrive and look nothing like their picture did on the website. So frustrating. So NOT the case here. It’s just lovely.

img_1192

img_1208

The crib sheet has little orange arrows that I picked from Land of Nod. It’s very soft and I love the way it plays with the oranges in the rug. When Nolan and Grey were babies, I bought them crib bumpers but in my quest to keep things simple this time around, I decided to skip it and am happy with the way it looks.

img_1207

img_1193

img_1194

I bought the art in a set of two at Target. The frames are a warm wood tone that breaks up the otherwise mostly white pallet. The giraffe head is a hand-me-down from Grey that I bought from Dwell Studio when he was a baby. Whoa – five years ago. Where does the time go?! The closet doors were given a fresh coat of white paint as they were the last of the trim that needed to be painted. When we moved in, the whole house had very dark trim and now every bit of it has been painted white.

img_1199

img_1196

On the wall opposite of the crib, we used an IKEA dresser with a changing pad and framed some printable art from TheCrownPrints. Originally, I thought about doing a gallery wall above his changing station, but Urban’s room is small. The space is only 10’x11′ so I wanted to be careful to not overwhelm the space with a million frames. Also, I have some gallery walls going on in other areas of the house so it was fun to try something new with one larger, simple framed piece.

So, that’s it! In my last post, I over promised when I said I would have a post done with his nursery photos AND an updated house tour. Hopefully, I will be able to get the house tour page updated this week.


My 5 current crushes for the nursery

goodbabyroom

Image via

Happy Monday! It is finally cooling off and raining here in Texas and I am thrilled. This has been a very hot, long summer and I am ready for Fall and the cooler temps that come with it. Bring on all the pumpkins! Over the weekend, my seven year old, Nolan, asked me why I haven’t been getting the baby room ready? She is right, it’s time to get busy. I have all things nursery on the brain. Isn’t the one above just dreamy? We have about seven weeks left until my c-section and this very slow moving lady needs to pick up the pace.

Here is the space. Yikes. Since we have moved into the new house, we have used this room as a dumping ground for extra art and frames.

IMG_0574

I want the nursery to be a simple space with just the necessities. The room is small (about 10×11) and I want it to feel modern, open, and without a lot of frills. This is our third baby and we have learned our lesson about buying all the things. We went crazy when Nolan was born and she had every baby item on the market. She had swings, bassinets, strollers (yes, we had more than one), toys, activity mats, and on and on and on. We scaled back when Grey came along and he had much less. This time, the plan is to start with just a few of the basics. If we find that we absolutely cannot survive without a particular item, we will add as needed. So, I started putting together a small list to accomplish this simple, open space. As always, I kept the price points at what I thought to be affordable. Big impact + small budget = my cup of tea.

  1. First, lets start from the floor and work our way up.

rugforbaby

Image via

This rug is fun and its low price tag makes it not too precious. I think this is perfect to inject some pattern and ground the space. I think a 5×7 would be just the right size and allow me to place the other pieces of furniture around it.

2. Obviously, I need a crib for our guy. Nolan and Grey used the same crib and it looked worn out by the time Grey grew out of it. Think teeth marks, dents and a squeaky mattress from jumping.

baby-crib

Image via

This crib has clean lines and with its bright white color is perfect for our small room. My sister bought this very same crib for her daughter, Finley, and has loved it. Finley approved!

3. Crib bedding is hard. I looked and looked for something that was cute for a baby boy but not over the top with monster trucks or fire engines.

baby-bedding

Image via

 It might be hard to tell from the picture, but this pattern has a small feather pattern. Cute, huh? I thought so. I haven’t ordered from Land of Nod before, so I am excited to test them out in the nursery. I want some of these for my bed!

4. This changing pad and cover is another Land of Nod find. There were so many options that I may end up changing my mind again. But I was drawn to this one because of the fun pop of color it would bring to the space.

babychangingcover

Image via

It seems like the baby gear is so much cooler since I was last in the baby game. Like those yummy pouches that I see so many toddlers happily devouring. What?! I’m not even sure if those were around when Grey was transitioning to baby food. Maybe they were, but I wasn’t privy to them.

5. This mobile could be cute in a boy nursery, girl nursery or maybe I plan on stealing this from our baby when he’s done with it and hanging it in our living room.

westelmbaby

Image via

 Nate thinks this mobile is perfect as it pays homage to our time here in Texas. Nolan and Grey were both born in Portland so this is a cute reminder that our new baby is a Texan. I wonder if he’ll have an accent?

So that’s my list of baby finds for the nursery to come! Grey is donating his old dresser to his baby brother that will house his clothes (ahem…that we have yet to buy) and his new changing pad. It is an IKEA dresser we bought a couple years ago that we stained and painted the drawer fronts white.

img_0975

Don’t you love a good list? I sure do. Something about having things laid out in print helps to ease my type-A tendencies. During my whole pregnancy, I kept telling myself that I had plenty of time to get going on the baby’s room. But, as Nolan pointed out, my window is closing.

P.s. Our new floors have come in and are being installed on Saturday, this Saturday! I took lots of horrible before pictures of our current flooring situation so you’ll be able to appreciate my crazy enthusiasm. Take a deep breath….eeek!


Crushed Ice

img_0790

Oh my goodness. It’s been crazy at our house the last few weeks. We have been busy adjusting to our new school schedule. Hello 6:15am! This is not a natural time for anyone in our family to get up in the morning. We fall more into the night owl category, for sure. In addition to our new school schedule, Grey started fall football and Nolan is finishing up her swimming classes and gearing up for tryouts for swim team. Nate has also been recruited as head coach for Grey’s football team…gulp. Nate is competitive. He is so competitive that we have “no board-game” rule in our house for the general well being/happiness for everyone who lives here. But, I’m sure he will be able to keep his competitive nature in check for these cute little football players, right?

Things have been really busy at home as well. We have my C-section officially scheduled for November 11 so I have to get busy and get some projects done around the house before baby boy is here and the holidays soon thereafter. So, in an effort to keep this train moving, I finally chose a paint color for the interior of the house. I knew I wanted something in the greige family, i.e. a warm gray color. I also decided that this color is going to be pretty much everywhere. This means the living room, dining room, kitchen, entryway, hallway, etc. You get the idea. I’m thinking this will bring a nice flowing and cohesive look to the inside of the house.

A few weeks ago, I went and picked quite a few swatches of paint that I brought home to study. I quickly narrowed down my options as so many of these colors looked too dark in our house. The lighting is super tricky in here with the screened porch on the back of the house that blocks a lot of natural light. I quickly had three favorites for which I went and grabbed test pots at Lowe’s.

img_0795

All three colors are Sherwin Williams. The top was Nebulous White, the middle swatch was Crushed Ice and the bottom was On the Rocks. I painted these swatches in several different places around the house all in different lighting situations. Dark, darker, and barely visible to the human eye. In the end, I went with the middle swatch because I felt it brought the most warmth to the game. And that’s what this place needs. A warm and fresh pallet.

img_0796

This is a shot of the hallway with a fresh coat of Crushed Ice. I especially love the way it pops against the trim. I also just finished painting ALL the trim in the whole house. I was able to leave the baseboards because we will be replacing them when we have our new floors installed, but more on that in a minute. Remember what our hall used to look like on move in day? Wow. I feel bad for THAT Courtney. She had a lot of work ahead of her.

Main Hall

The walls were super shiny and it drove me crazy. It made the texture on the wall stand out as well. This particular texture has so much texture with sharp-ish peaks that it looks like it might scratch you if you rubbed against it. So, while I know most people do not recommend painting their walls in a flat sheen, I went ahead and did it anyways. It seems to tone down our crazy texture and doesn’t draw your eye to the texture, the way it did when the walls were a satin sheen. I hear the warnings against flat paint as it isn’t as washable as some of the more shiny sheens and to this I say, if our walls are so dirty that I am constantly needing to wash them, I suppose I will be repainting anyways. Also, I think that the paint formulas have come a long ways. All of the sheens seem to be washable these days. Anyways, that wraps up my mini-rant and now, more pretty pictures!

img_0801

img_0787-edited

img_0797

Did you spot our new light fixture in the dining room? I have been hunting for something for this space for a while now. We have had an IKEA one above our table for several years but I have been wanting something a little more special. The lightbulbs are dipped in silver which is really fun.

img_0790

img_0802

Remember before how I mentioned floors? Well, we finally made a decision and ordered our wood floors! So, they will be coming in over the next few weeks and then demo and installation should be at the end of this month. They will go down everywhere except the bathrooms and bedrooms. I am so excited/nervous. Here is a little sneak peek of what will soon be our new floors.

img_0481-1

So that’s the dish in our house. I can’t believe we are going to have new floors soon! Picture me with a serious case of perma-grin.