DIY tribal stamp

IMG_0600

Last week I shared a photo of my newly stamped entryway because I was trying to decide how I felt about the finished product. This week, I am feeling exactly the same! I STILL can’t decide if I am loving it or hating it. The good news is that this project cost $0 in materials and used just a little bit of paint that we already had so we aren’t talking about life altering issues here.

It is so much more fun to complete some “fluff” projects around here since we have finished the ceilings and can finally move on with our lives. This is a really fun one and I think with just a few tools, anyone could do this.

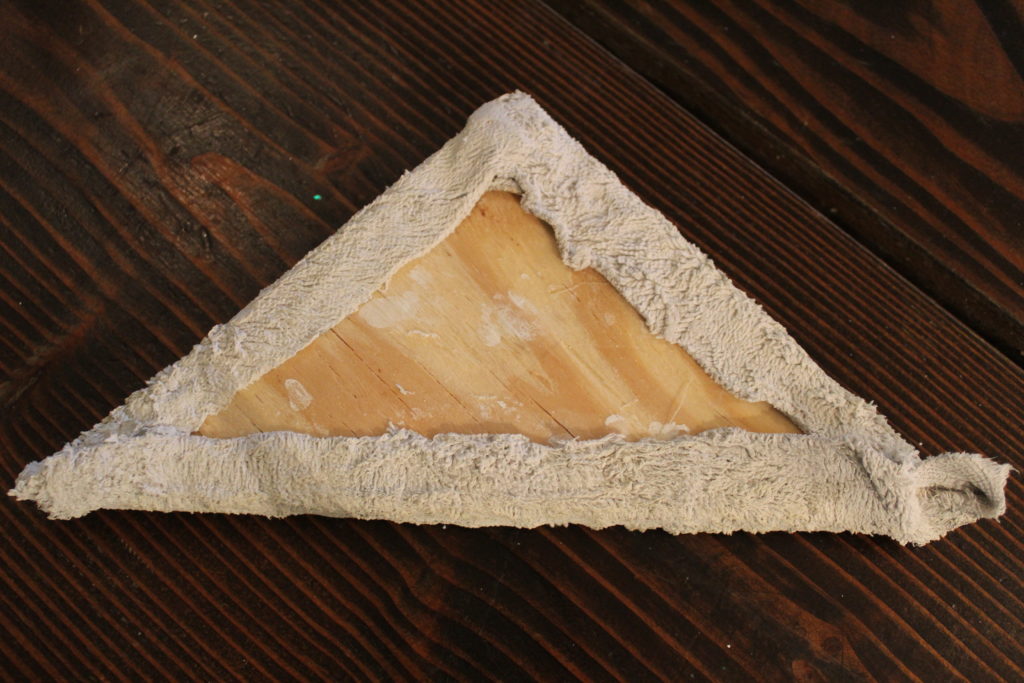
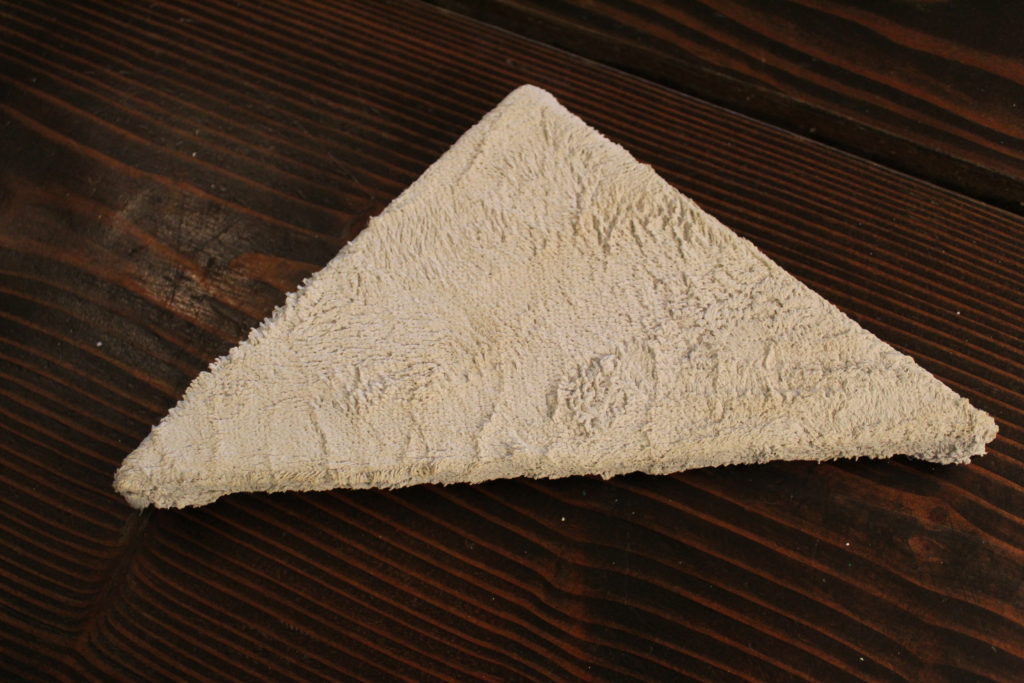
We had some scrap wood laying around the garage and I asked Nate if he wouldn’t mind using some of those spare pieces to make an isosceles triangle for me (whoa…isosceles…haven’t used that term in a while). After a strange look, he agreed and it took him less than five minutes. I grabbed an old terry cloth dish towel, wrapped it around the edges of the triangle and secured it with hot glue. HOT GLUE, what?!!! I know, I couldn’t find my staple gun. Simply stapling the cloth to the wood would make way more sense. But, if you’re like me and your garage is a black hole where you can’t find anything, go ahead and use hot glue. It stayed in place throughout the whole process so it actually didn’t turn out to be a problem. Except, I still don’t have any idea where my staple gun might be…

IMG_0617

IMG_0618

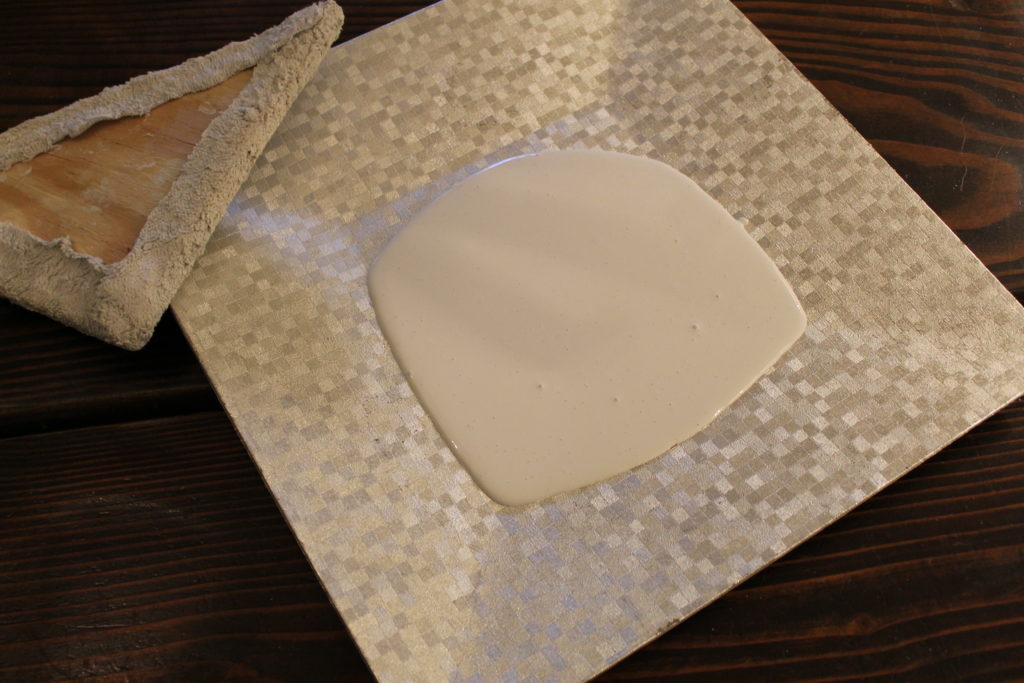
For the paint, I just used some of our flat, white ceiling paint for this job. I poured just a little bit onto a tray that was wide enough to press the stamp down into the paint. I found an old plastic charger from Christmas a few years back. Fancy shmancy, right?

IMG_0620

As for applying the pattern to the wall, it was pretty simple and I mostly just eyeballed where I wanted everything to fit. I didn’t want the pattern to look too perfect or planned out. I think that would take away from the “tribal” effect. I set up a laser level to help me keep my triangles in straight lines, vertically. However, I just used my fingers to measure how far apart each row went horizontally. Totally easy. Just make sure to not use too much paint so you start looking gloppy and runny.

IMG_0622 - Edited

IMG_0621

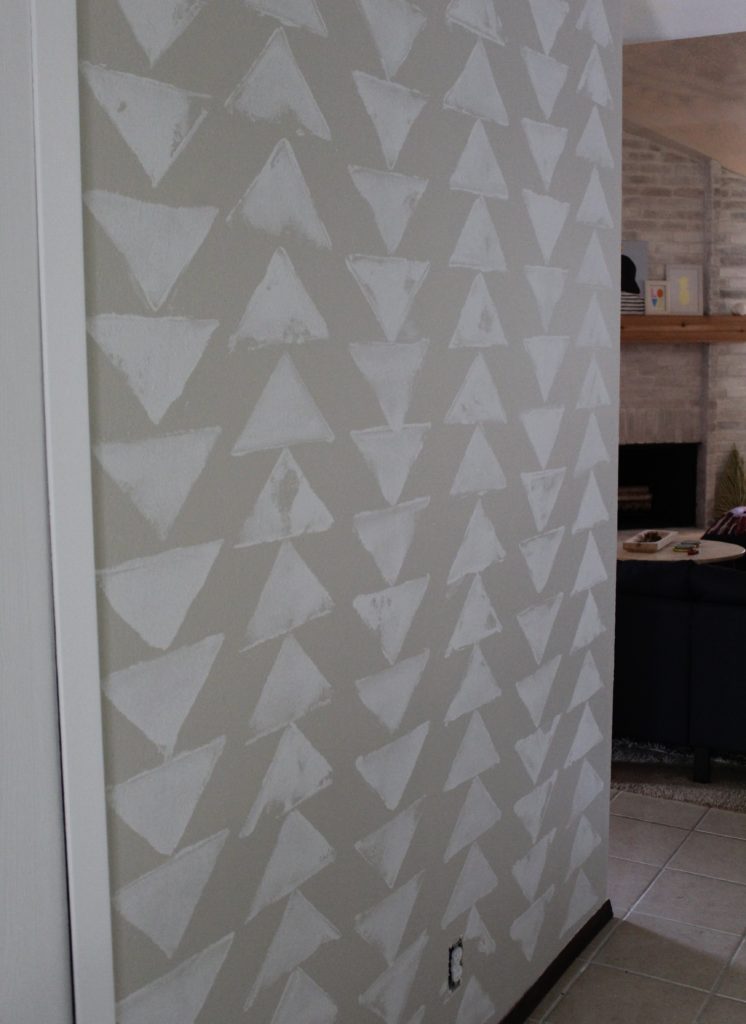
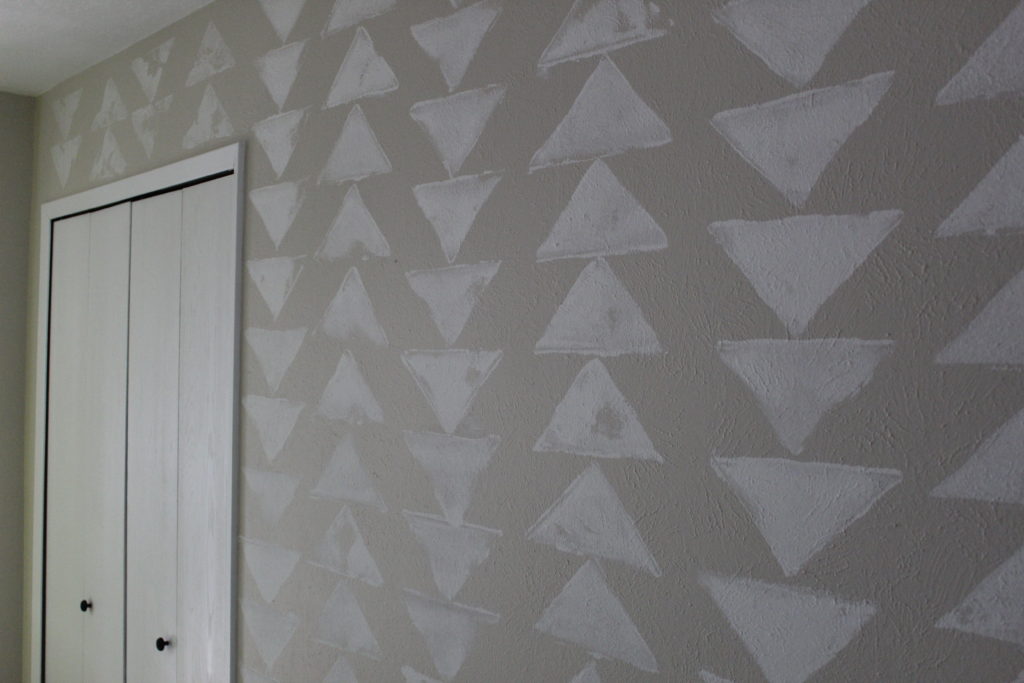
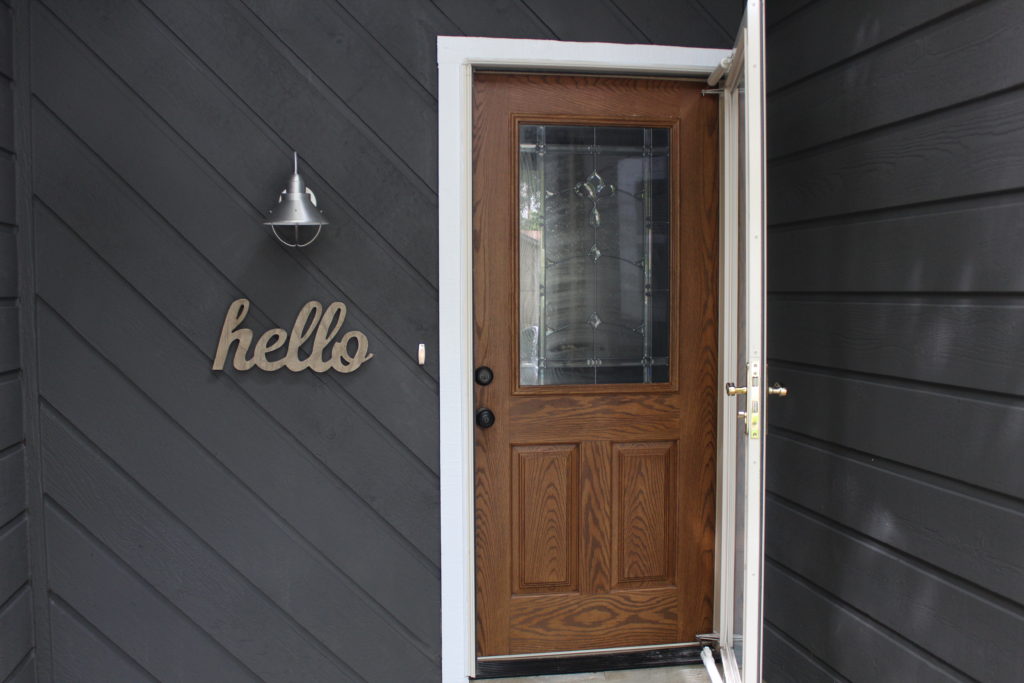
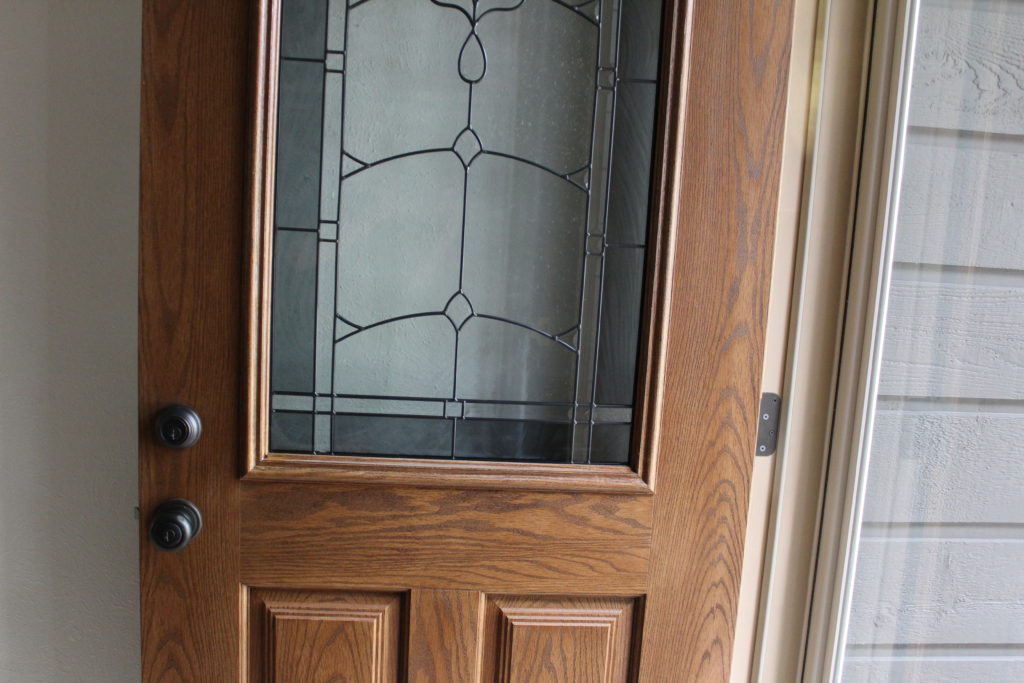
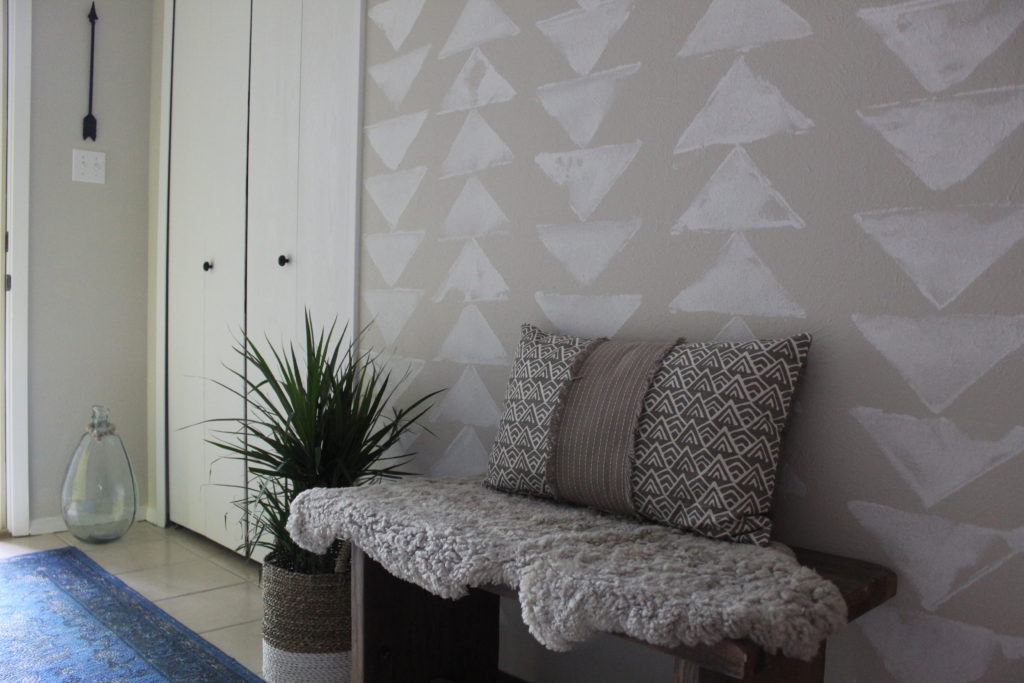
Notice the trim and closet doors?? They are white! Beautiful. Clean. White. I can’t get enough of it. Soon, I will have all the trim and doors painted white. I will post on that soon! Here is an after shot with the entry looking all pretty again.

IMG_0600

I will live with it for a while before I make up my mind. Originally, I was going to do all four walls with the stamp but after I finished the first wall, I thought maybe less was more. Well, we will see.

Fireplace facelift

IMG_0487 (1) - Edited

Whew! This weekend we celebrated the 4th of July and attended a parade, a fireworks show and two different BBQ’s. It was kind of a whirlwind but we all had fun. The parade was one of the best I have seen and shouldn’t have been surprised that Texans know how to do a parade right. The kiddos scored major in the candy department and we all nearly died in the almost 100 degree heat.

IMG_0505

In between all of the festivities over the weekend, we were able to get a project done at home. Yes! Am I talking about our ceilings that still need texture and paint? No! I swear though, it is happening this weekend. Seriously.

I think I mentioned previously that I was going to try my hand at white washing the brick fireplace. I have been looking at tons of inspo pics of white washed brick and I love the way it looks. My favorite thing about white washing is how it leaves the differences in the individual bricks behind and doesn’t completely cover them in an opaque finish the way a latex paint would. So the overall impression is a much less polished look which I think is appropriate for brick because it’s not meant to be perfect. Here is our fireplace.

IMG_0462

Usually, I love unpainted brick because I am always partial to rustic finishes, but this particular brick was related to the brick that was used on the outside of the house and most definitely had some pink undertones. Pink brick = not a good look. So, let the white washing begin already!

IMG_0469

IMG_0472

In addition to white washing the brick, I knew the existing mantel needed to be altered. Some ideas included starting a fire in our fireplace, ripping it off with sledge hammers and throwing the mantel in the fire. But, instead of going down this road, I found some pictures online of some simple chunky mantels that people built themselves. I showed these pictures to Nate and asked him if he thought he could do the same. After quite the pep talk, he reluctantly agreed and was nice enough to give it a try to see what he could come up with.

IMG_0466

IMG_0467

The white washing part of the project was FUN! I already had some white, flat paint and just mixed equal parts water and paint and painted it on with a brush. It went much faster than traditional painting and the bricks do all the work for you. After you apply the wash, the bricks soak up the water and paint that leaves the uneven, white washed effect.

IMG_0479

Please ignore my sun burnt arms, I went outside for three minutes and only used a sun block with spf 1000. Also, please ignore our ceilings. Seriously, we are going to get them done this weekend.

After Nate had taken down the old mantel, only the supports were left. Nolan and I decided that it would be fun to write a message in a bottle and hide in the frame before Nate attached the new mantel. We had so much fun dreaming up scenarios where/when someone would find our letter. Her ideas were too cute.

IMG_0482

IMG_0486

After our letter was hidden away, there were a few, last minute jobs that needed to be done in order to check this project off our list. There were some very visible cracks that became even more visible once the bricks were white washed. It was a pretty simple task but I had to mix some mortar cement and patch all the gaps and cracks. We also used some black, high-heat spray paint and sprayed the inside of the fireplace so the brick inside looked new again with a fresh coat of black paint. And, finally, Nate finished the mantel and attached it to the existing frame. I am so proud of him. Not too shabby for his first try at building something, right?

IMG_0512 - Edited

IMG_0507 - Edited

IMG_0511

IMG_0510

IMG_0516

IMG_0515

He made the mantel out of cedar planks and I haven’t decided if I should seal and/or stain it. This was a really fun project and being able to include Nate and Nolan made it even more fun. And because I already had the paint for the white washing, the grand total for lumber, mortar mix and a can of spray paint only made a $32 dent in our pockets. Big impact for a small amount of cash! Everybody wins.

Mellow Yellow

I painted the front door over the course of the weekend. What a difference such a small change can make! I’ve said this before, like when we painted our mailbox a few weeks ago. It’s fun to complete some smaller scale projects when there are such big ones looming…ahem…texturing the ceilings. I’m starting to think that we might be living with naked drywall above our heads forever! Nate and I were supposed to be working on said ceilings this weekend but instead, we found ourselves doing other things like playing Foot Golf (Nate, not me) and painting the front door yellow (Me, not Nate).

Back to the front door though. Here is what we were working with before paint.

IMG_0445

IMG_0440

The door is actually new and looks as if it was installed in the last few years. Other than the fact it makes me want to take a nap every time I look at it, it’s a nice front door. Even the way I describe it is boring, “nice front door.” We have definitely decided that the window in the front door has to go. It’s not our style. I’m thinking about something a little less ornate and a little more modern. Or maybe even just a plain, glass window would do the trick. My parents are coming down for a visit in August and my dad is going to help us make this change. He is our resident window expert:-)

When I started looking for inspo pictures for ideas for this project, I immediately ruled out any colors on the darker side of the spectrum. Our house itself is very dark so the front door needed to serve as a pop of color. There are so many cute options though, I liked everything. And I was really drawn to the pinks and lavenders because it seemed like such an unusual option, I mean, who would be brave enough to paint their front door pink!? Well, not me because I ended up going with a cheery yellow. But, I am going to file this away for a possibility for the future. I do like to change things up. I kept going back to this one particular image.

54c1566dad361_-_06-hbx-yellow-front-door-0611-s2

Image via

I loved the way the yellow looked against the navy exterior. Our house isn’t navy but it is dark and even has the white trim that this color pallet is paired with. Sold!

IMG_0453

It was a relatively easy process except this yellow paint surprised me with just how many coats the door took to get the proper coverage. 27 coats! I’m exaggerating but it did feel like that when I was painting. I suppose it was mostly because I was covering a dark door with such a light color. So now you are warned, if you want to paint something yellow, be prepared for multiple coats.

Ta da!

IMG_0459 - Edited

I moved my lemon tree from our screened porch in the back of the house to the front entrance because I couldn’t resist putting our lemon tree next to our new yellow front door. I have also been worried he isn’t getting enough sunlight. So, I fertilized him and gave him a new spot. Maybe the yellow door and his new yellow pot will inspire him to produce lots of lemons?

IMG_0461

I am so happy with the color. It’s so happy and welcoming. If our door could talk, it might say, “come on in! Happy people are inside!”

Fjalkinge to the rescue!

When I decided that the kids would be sharing a room at this new house, I didn’t give much thought about the combining of the toys and books that each of them would be bringing from their respective bedrooms. Even though we have a “less is more” theory with toys, there still seem to be quite a lot of them floating around. If a kiddo hasn’t played with something in a while, out it goes. Nolan just started collecting Shopkins which I think is perfect because they are so small. Nate and I had to Google what Shopkins were…and we still have no idea. Grey likes cars, trucks, trains and just about anything with wheels. But I do try very hard to make sure that the toys don’t take over the whole house. Nate and I definitely don’t want to be living in a big play room.

I have been hunting for some toy storage solutions and found lots of ideas that I liked, but sadly, were not in the budget. I was especially in love with some open shelving from Serena and Lily. I am loving the wood+white look and always find myself attracted to the rustic/modern look in homes and furniture. The space in their room would have called for two of the taller shelves to take up the better portion of a wall. So this little purchase would have set me back $2,390 before taxes and shipping charges. Ummm…yikes.lark_white

Somehow, I ended up at Ikea…again. But found the perfect shelf! I could buy two of them and they would easily fit into the space I had in mind. A couple of ideas popped into my head to modify them to satisfy my wood+white obsession. Meet Ikea’s Fjalkinge shelving unit.

fjalkinge-shelf-unit-white__0194033_PE359398_S4

Nate and I ran to Lowe’s and grabbed two pieces of plywood and some dark walnut stain. We had a friendly fellow cut our pieces down to the size of each individual shelf right in the store for us so we didn’t have to rip any of the boards ourselves, which Nate loved. So all that was left to do was stain the wood and let it dry outside for a couple days. As far as Ikea assembly goes, (and we have had a lot of practice) these shelves were super simple. Once the plywood pieces were all dry and no longer smelly, we just slid right into place on top of the white shelf insert. My dad always says, measure twice, cut once. Well, we might have measured seven times, but no mistakes were made and the boards were just the right size.

IMG_0417

IMG_0419

 I also scored a little night stand and a rug too! Notice the wood and white theme? Points for consistency, no?

IMG_0411

IMG_0413

The best part is the kids toys look so super cute out on display on their new shelves. I kind of did a Grey side and a Nolan side, although there was no way his cars and trucks weren’t going to spill over onto her side. I will probably tweak the arrangement of everything as I add some better looking baskets and move everything around. I can’t help myself. Nate always laughs at me because objects are always moved, furniture is rearranged and nothing really stays the same in our house for very long.

IMG_0416

The room is starting to really come together in such a fun way. I thought it was going to be really tough to decorate for a boy and a girl in the same space but as it turns out, I’m kind of a neutral kinda lady. Who knew?

It’s the small things

With all these big projects that need to happen around our house, it’s easy to feel overwhelmed sometimes. Big projects + Big money = Nervous Nate. Haha…just kidding. Well, sort of. Anyways, tackling these little projects feels really good too. Enter our mailbox.

IMG_0330

Nice, huh? I think at some point this little painting on the side of the mailbox was cute. But, after years of sitting outside in the elements, the paint had begun to chip and wear off. So, this baby either needed to be replaced or given a fresh coat of paint.

 IMG_0329

IMG_0334

IMG_0331

Since the box seemed to be in fine shape without any dents or any other major probs, I decided I would just spray paint it. I went over a bunch of color options with my sister, Collin and she had some good suggestions. How about matching the mailbox to the color you are going to paint the front door? Or, what about a handsome navy blue? Both good ideas but we are getting ready to paint the exterior of the house and I am fairly sure we are going with a very bold color so in an effort not to scare the neighbors and send them running for the hills (and they would have to run quite a distance to reach any kind of hills here in Central Texas), I went with a safe option.

IMG_0343

Nate took the mailbox off the stand for me easy peasy besides the fight he started with a few stripped screws for a minute or two that were securely holding the box to its stand. We gave it a quick wipe down with a damp cloth and sanded down the painting on the sides to ensure a smooth finish.

IMG_0335

After a few coats of spray paint, the mailbox looks brand new! This is my first before and after…I love reading blogs and am a huge sucker for a good before and after.

IMG_0341

 The cool thing about oil rubbed bronze spray paint and probably why it’s used so much is from far away, it looks almost black, but upon closer inspection, its brown, gray and sparkly all over.

IMG_0340

IMG_0338

IMG_0337

This is a small feat but it feels good and is a good reminder that projects will get done, one by one.