Crushed Ice

img_0790

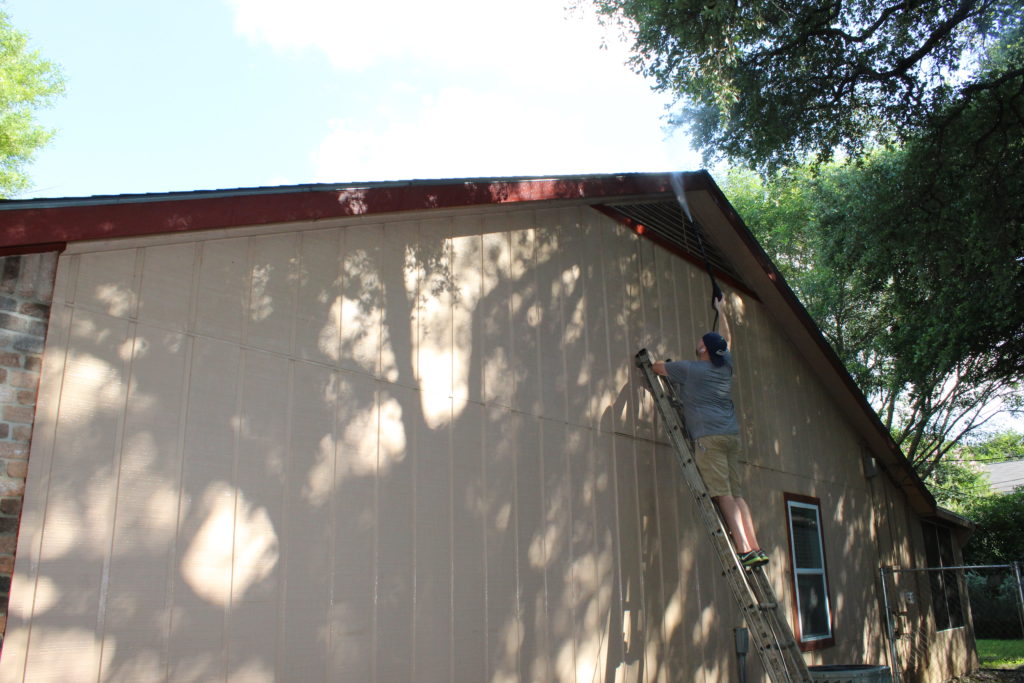
Oh my goodness. It’s been crazy at our house the last few weeks. We have been busy adjusting to our new school schedule. Hello 6:15am! This is not a natural time for anyone in our family to get up in the morning. We fall more into the night owl category, for sure. In addition to our new school schedule, Grey started fall football and Nolan is finishing up her swimming classes and gearing up for tryouts for swim team. Nate has also been recruited as head coach for Grey’s football team…gulp. Nate is competitive. He is so competitive that we have “no board-game” rule in our house for the general well being/happiness for everyone who lives here. But, I’m sure he will be able to keep his competitive nature in check for these cute little football players, right?

Things have been really busy at home as well. We have my C-section officially scheduled for November 11 so I have to get busy and get some projects done around the house before baby boy is here and the holidays soon thereafter. So, in an effort to keep this train moving, I finally chose a paint color for the interior of the house. I knew I wanted something in the greige family, i.e. a warm gray color. I also decided that this color is going to be pretty much everywhere. This means the living room, dining room, kitchen, entryway, hallway, etc. You get the idea. I’m thinking this will bring a nice flowing and cohesive look to the inside of the house.

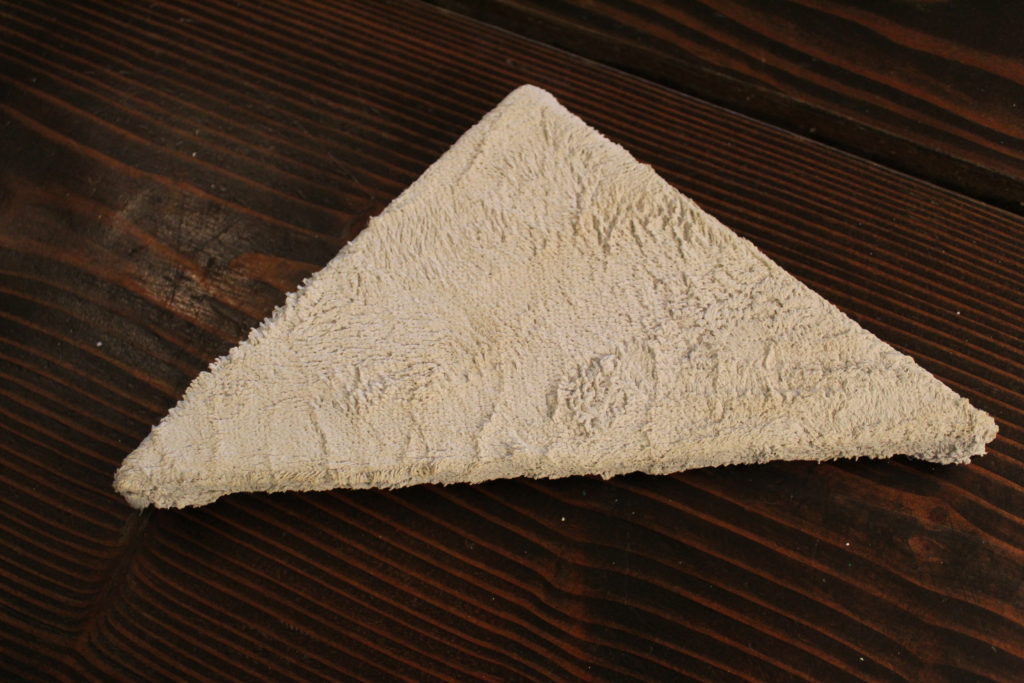
A few weeks ago, I went and picked quite a few swatches of paint that I brought home to study. I quickly narrowed down my options as so many of these colors looked too dark in our house. The lighting is super tricky in here with the screened porch on the back of the house that blocks a lot of natural light. I quickly had three favorites for which I went and grabbed test pots at Lowe’s.

img_0795

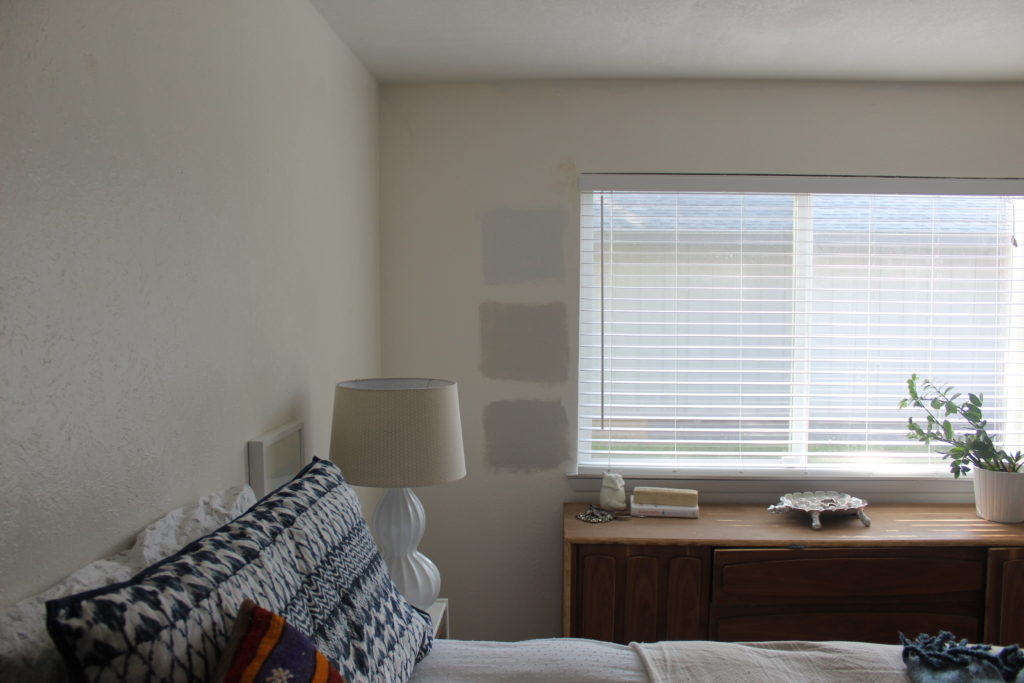
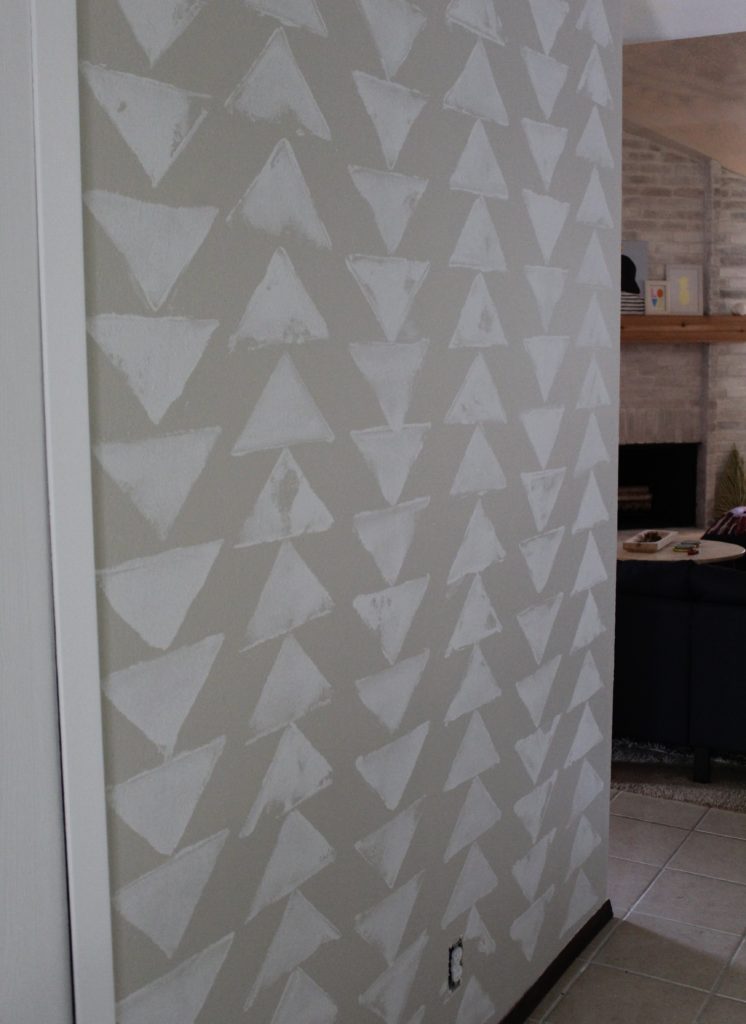
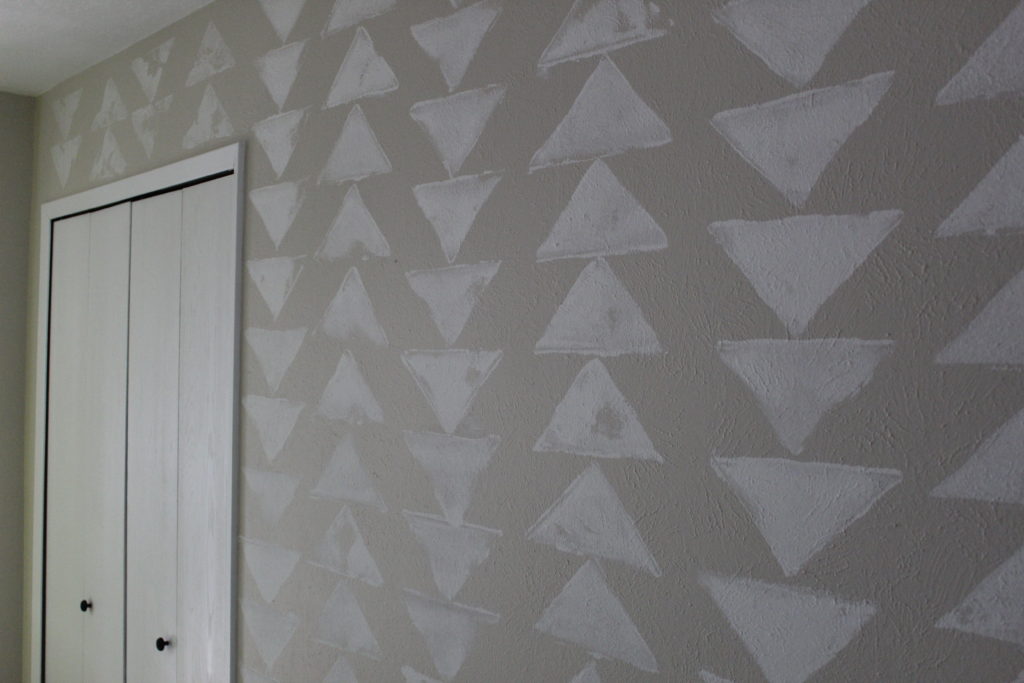
All three colors are Sherwin Williams. The top was Nebulous White, the middle swatch was Crushed Ice and the bottom was On the Rocks. I painted these swatches in several different places around the house all in different lighting situations. Dark, darker, and barely visible to the human eye. In the end, I went with the middle swatch because I felt it brought the most warmth to the game. And that’s what this place needs. A warm and fresh pallet.

img_0796

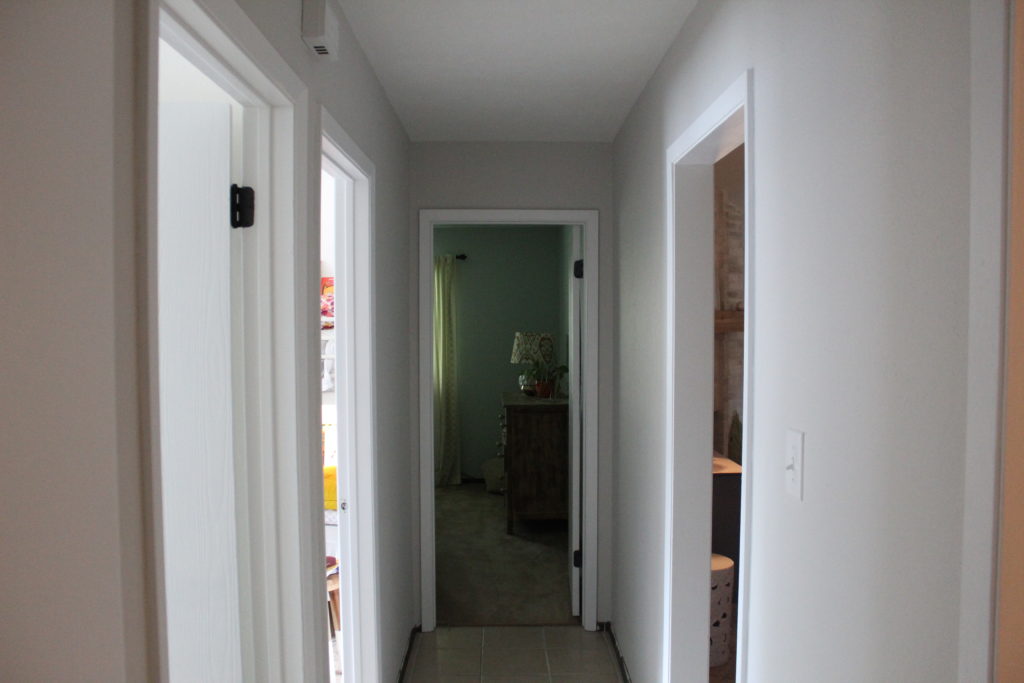
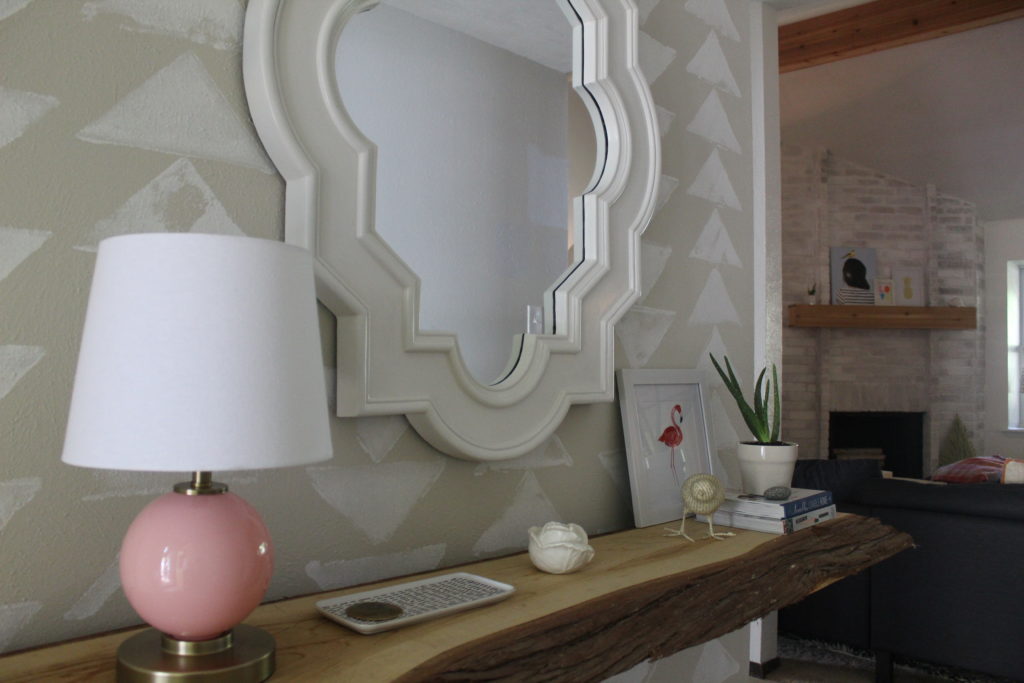
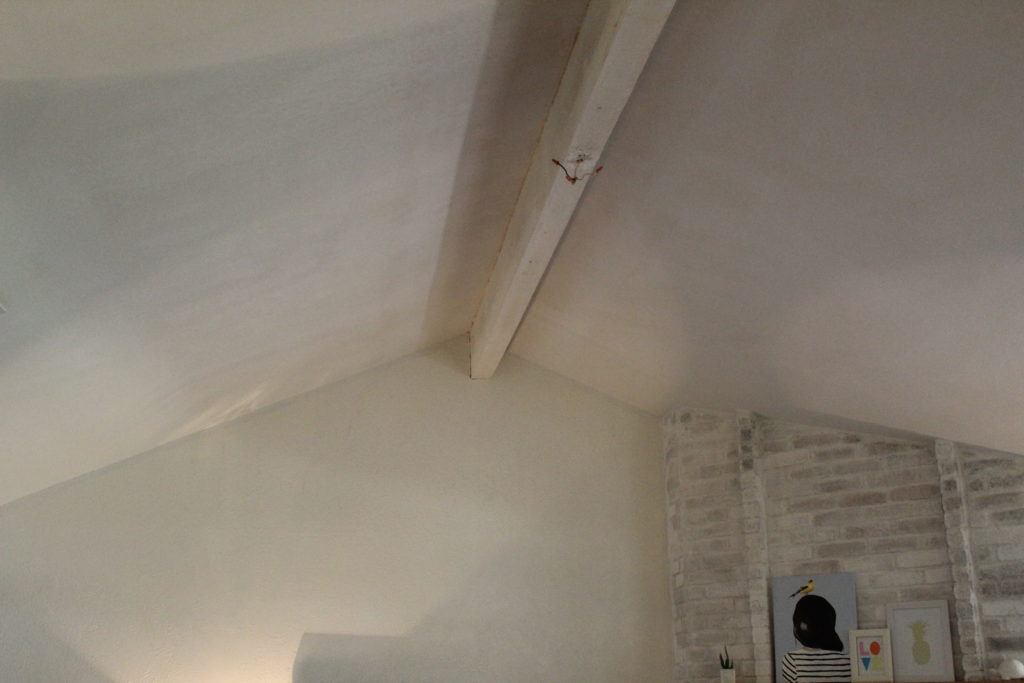
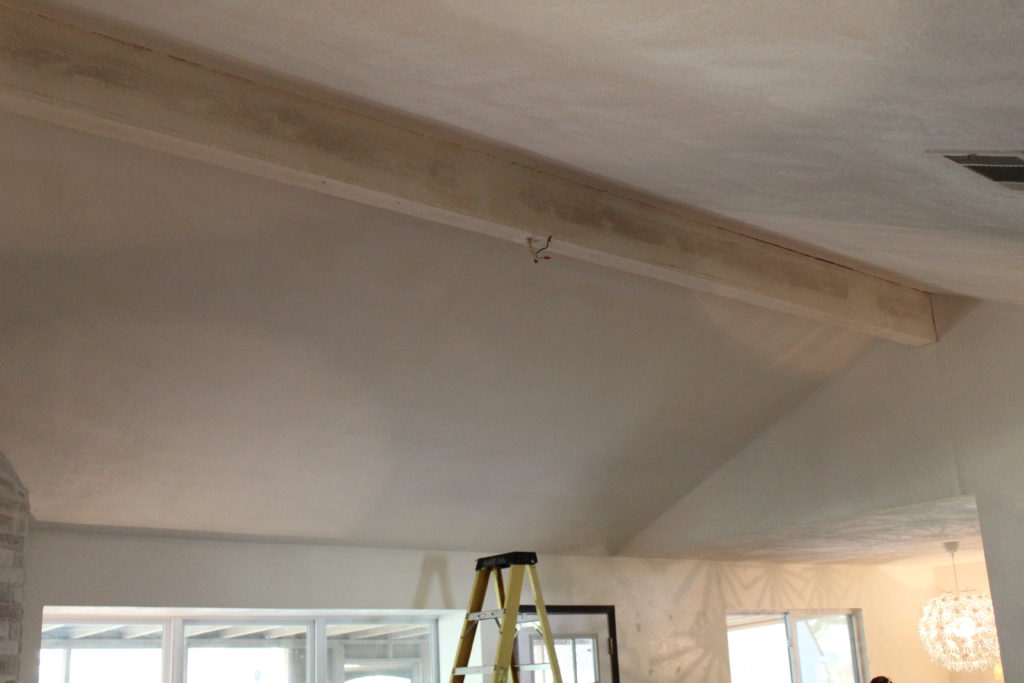
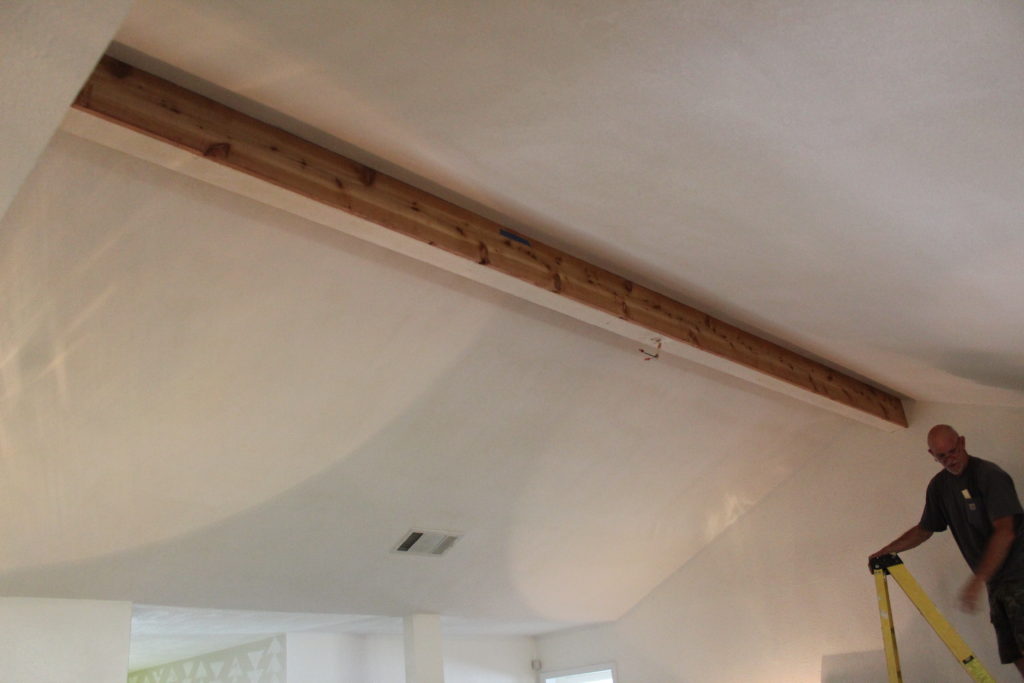
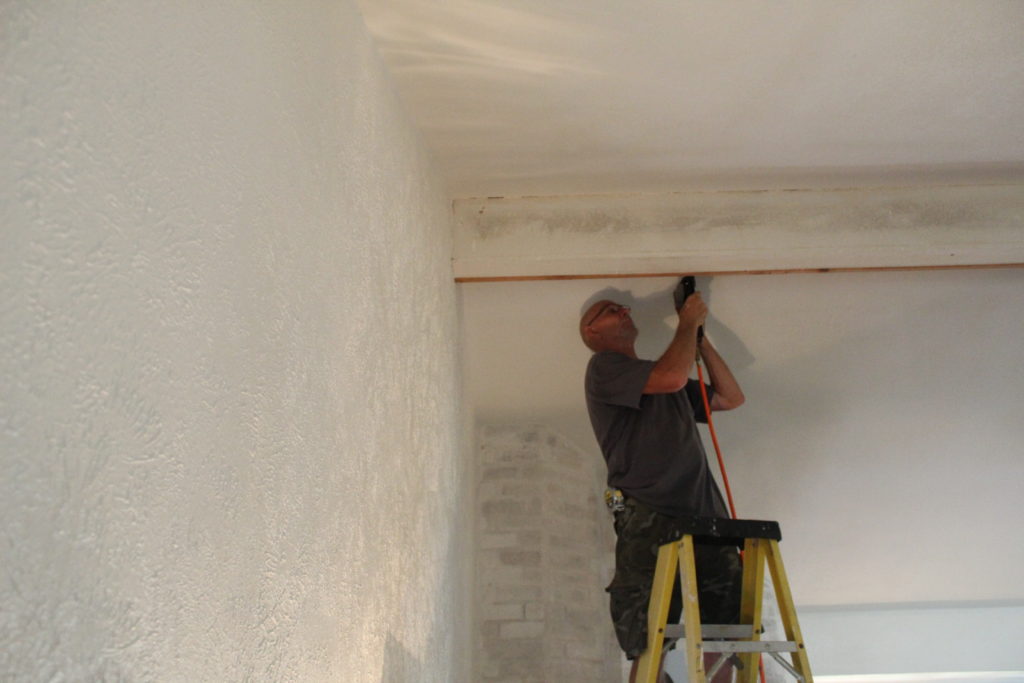
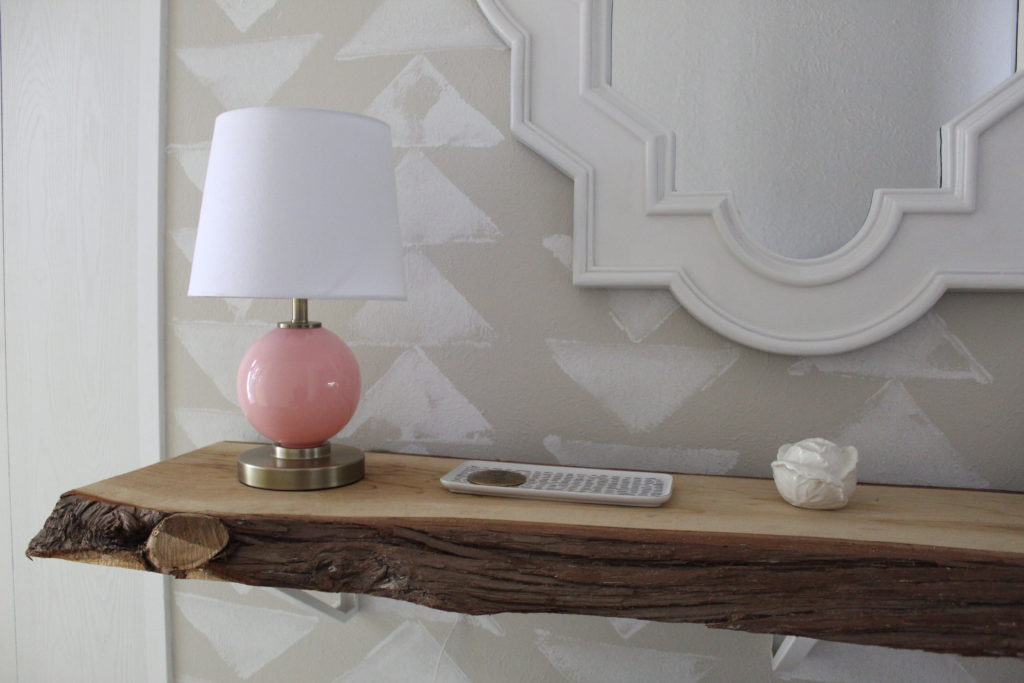
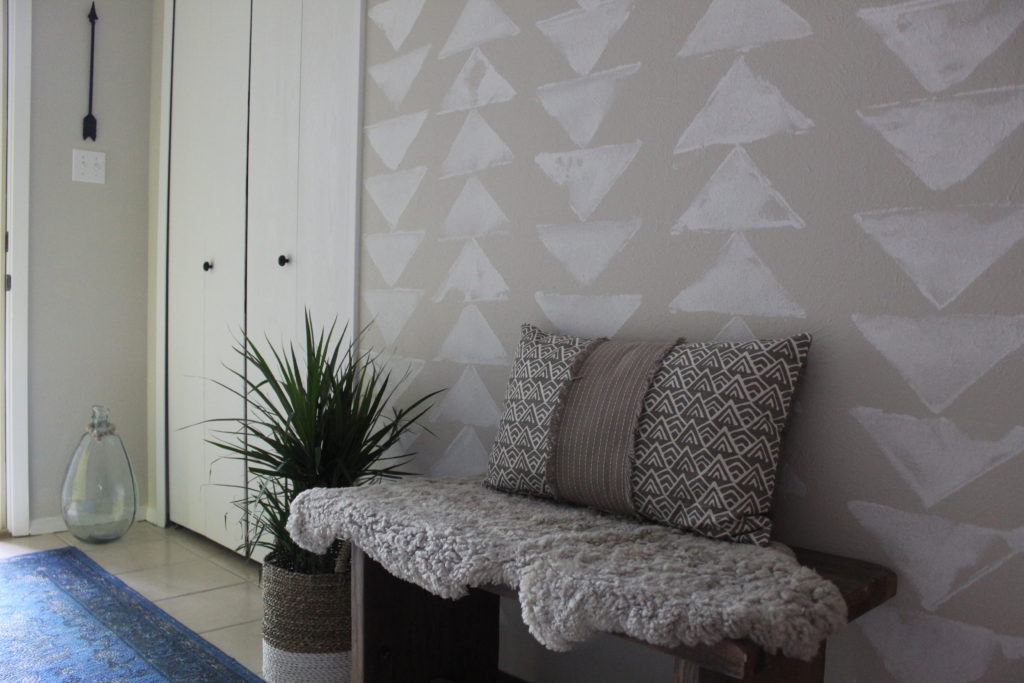
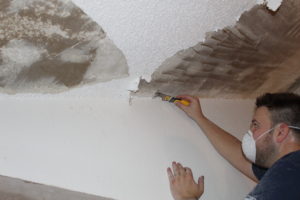
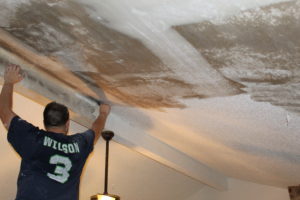
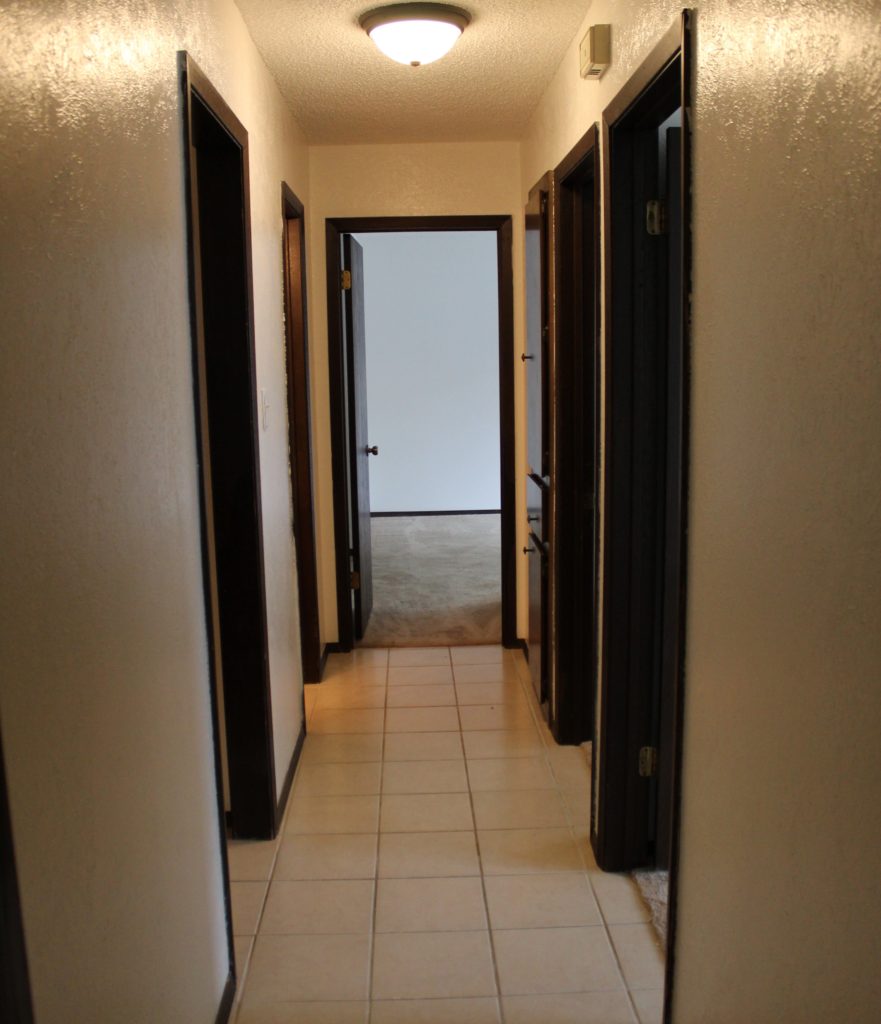
This is a shot of the hallway with a fresh coat of Crushed Ice. I especially love the way it pops against the trim. I also just finished painting ALL the trim in the whole house. I was able to leave the baseboards because we will be replacing them when we have our new floors installed, but more on that in a minute. Remember what our hall used to look like on move in day? Wow. I feel bad for THAT Courtney. She had a lot of work ahead of her.

Main Hall

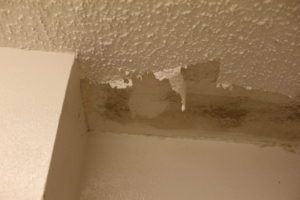
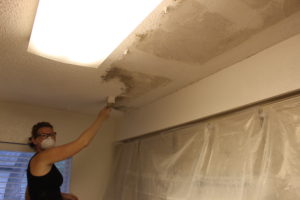
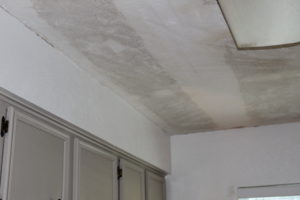
The walls were super shiny and it drove me crazy. It made the texture on the wall stand out as well. This particular texture has so much texture with sharp-ish peaks that it looks like it might scratch you if you rubbed against it. So, while I know most people do not recommend painting their walls in a flat sheen, I went ahead and did it anyways. It seems to tone down our crazy texture and doesn’t draw your eye to the texture, the way it did when the walls were a satin sheen. I hear the warnings against flat paint as it isn’t as washable as some of the more shiny sheens and to this I say, if our walls are so dirty that I am constantly needing to wash them, I suppose I will be repainting anyways. Also, I think that the paint formulas have come a long ways. All of the sheens seem to be washable these days. Anyways, that wraps up my mini-rant and now, more pretty pictures!

img_0801

img_0787-edited

img_0797

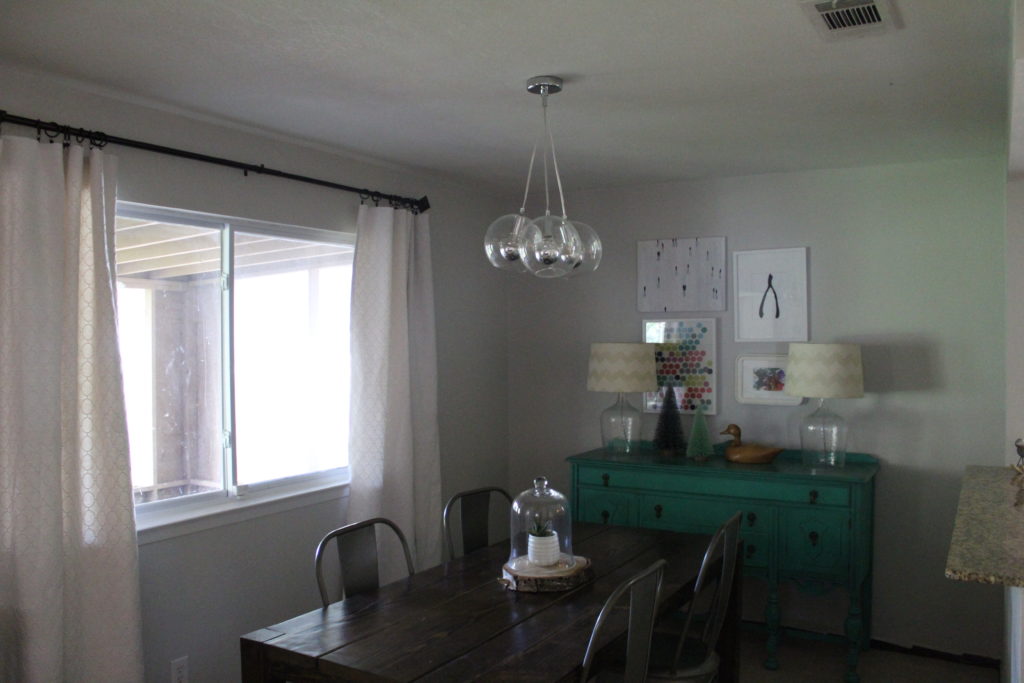
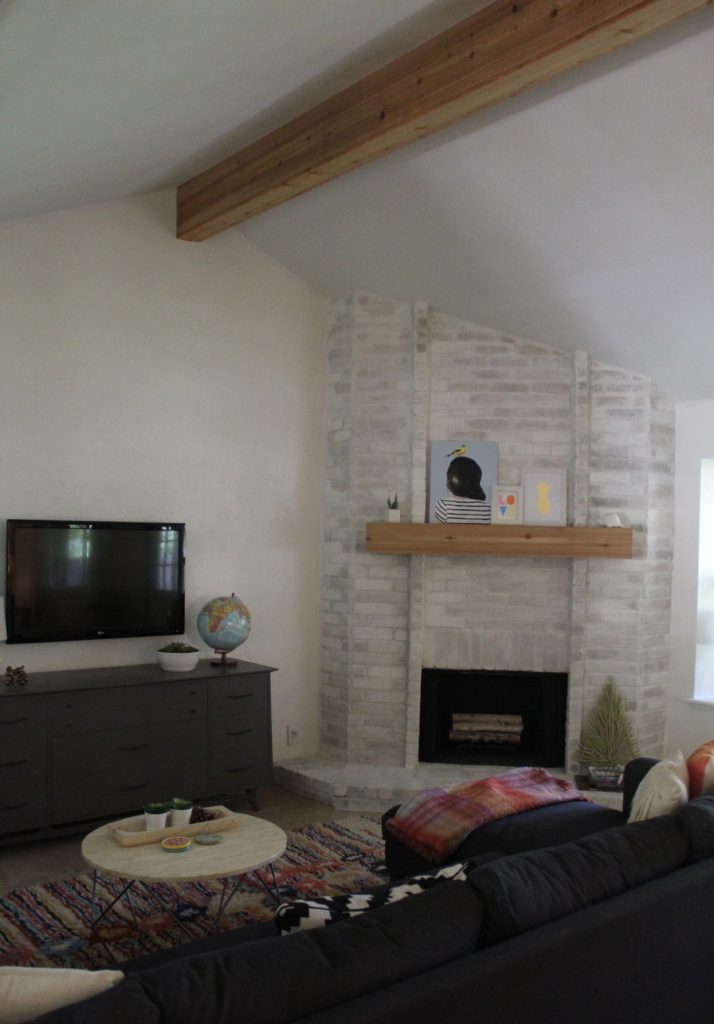
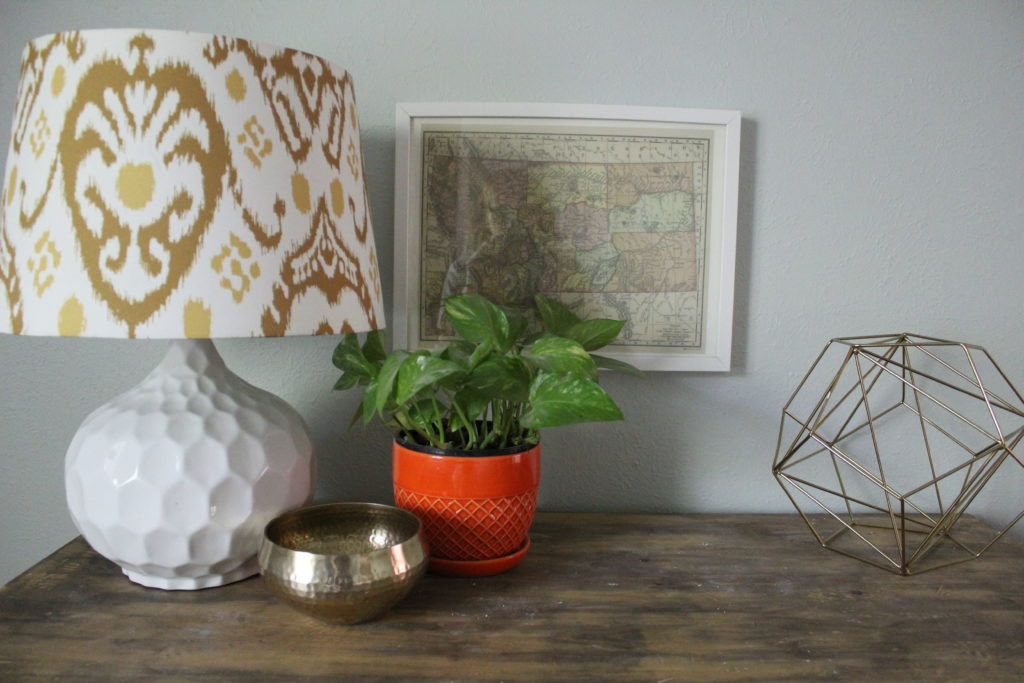
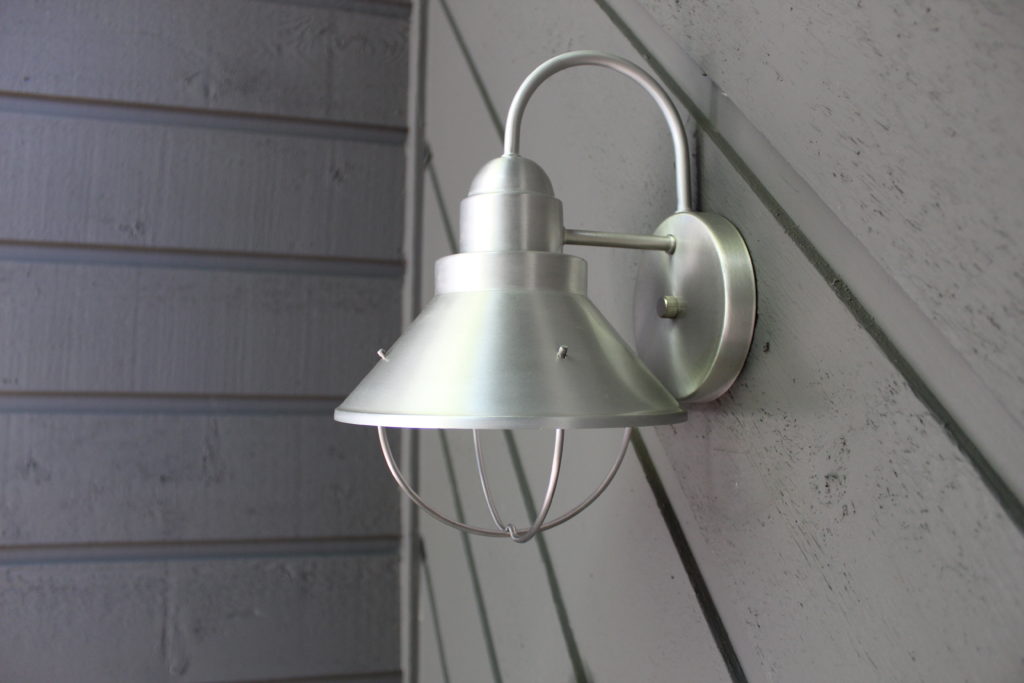
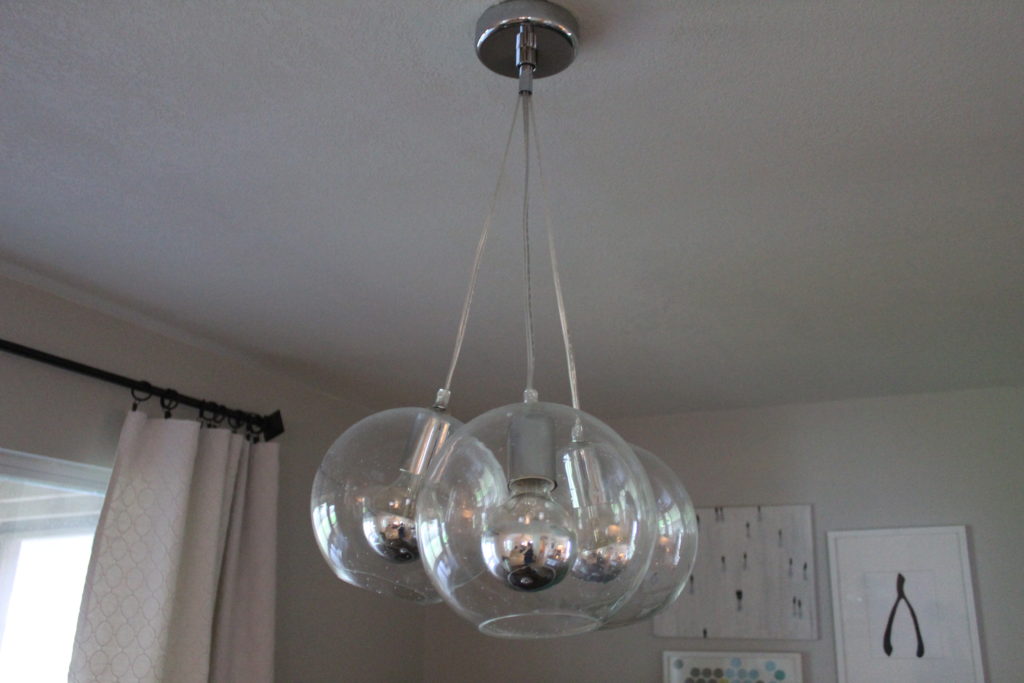
Did you spot our new light fixture in the dining room? I have been hunting for something for this space for a while now. We have had an IKEA one above our table for several years but I have been wanting something a little more special. The lightbulbs are dipped in silver which is really fun.

img_0790

img_0802

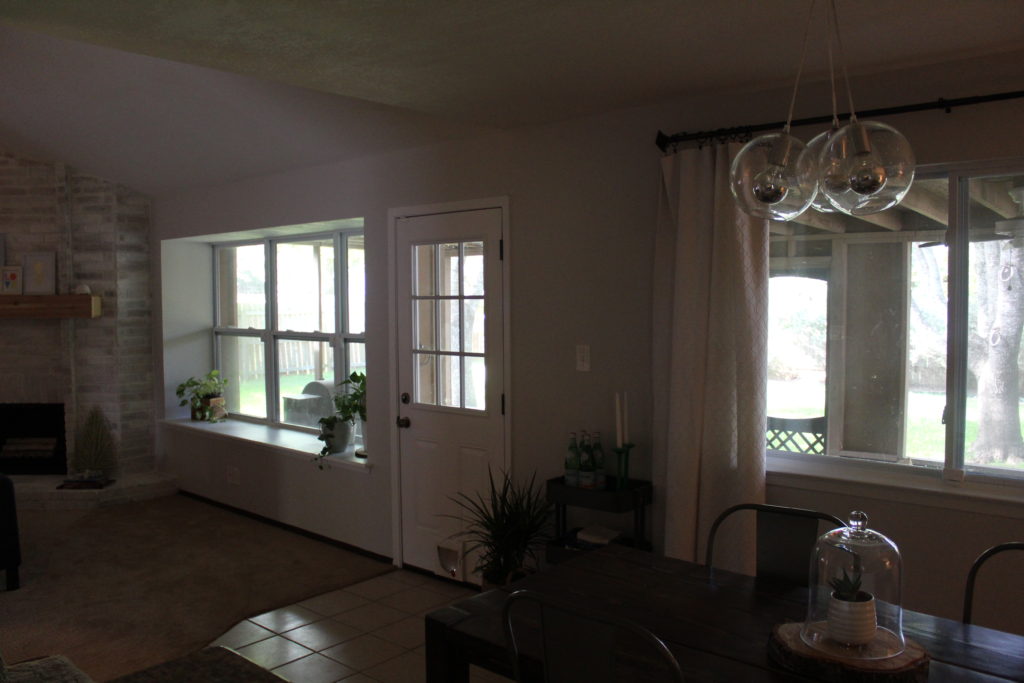
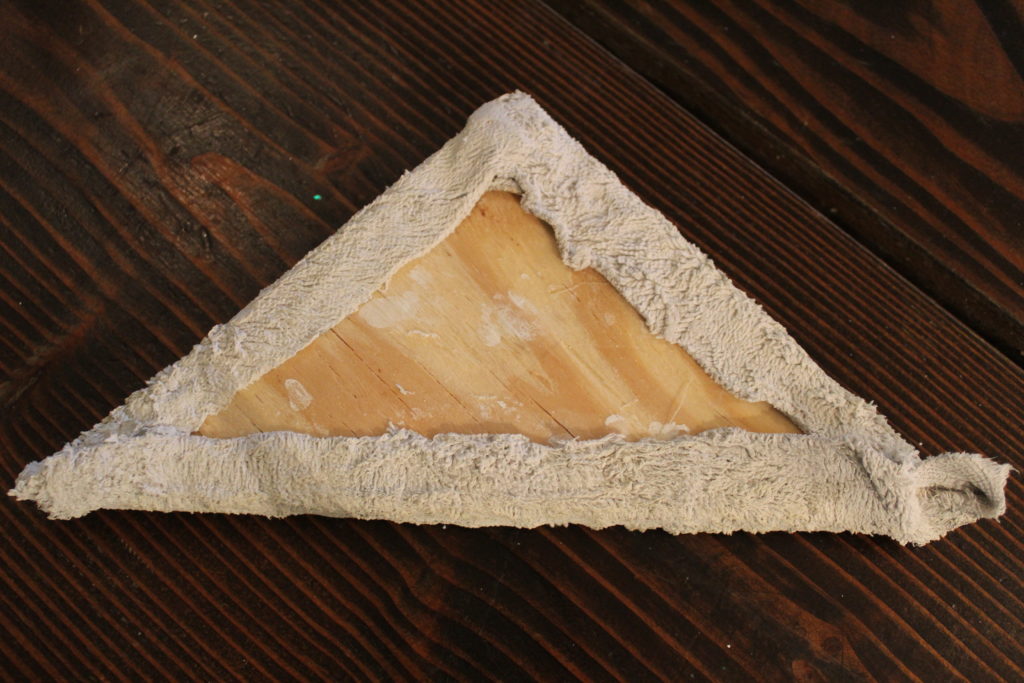
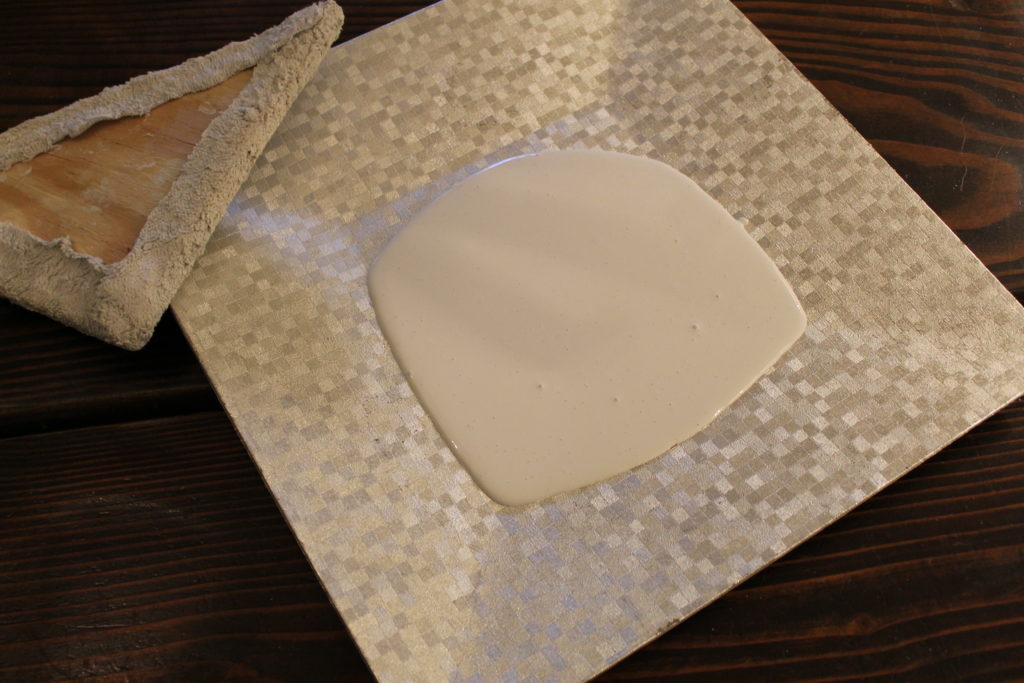
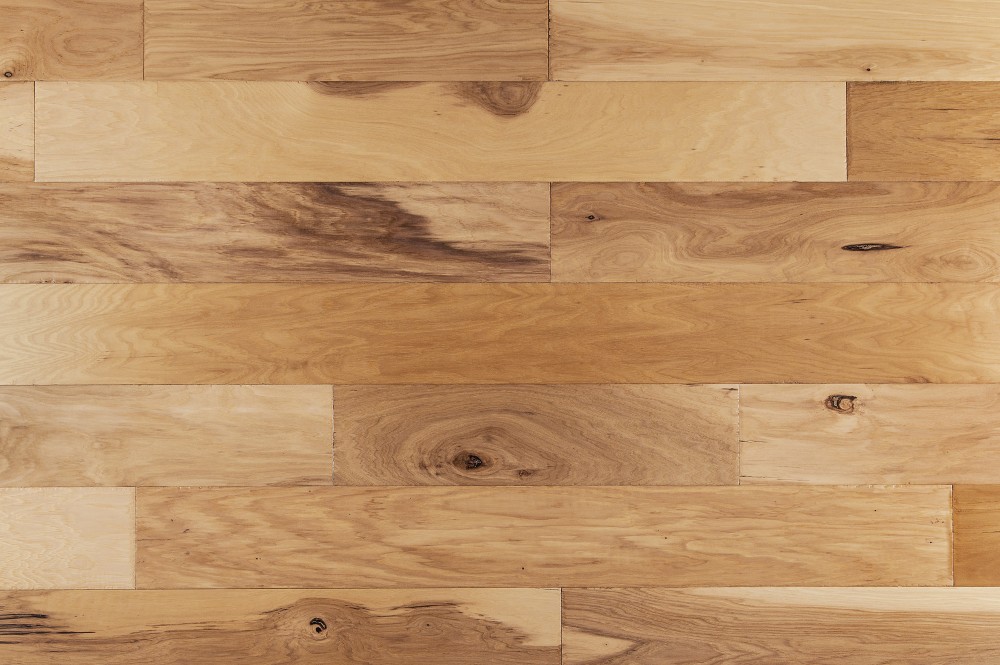
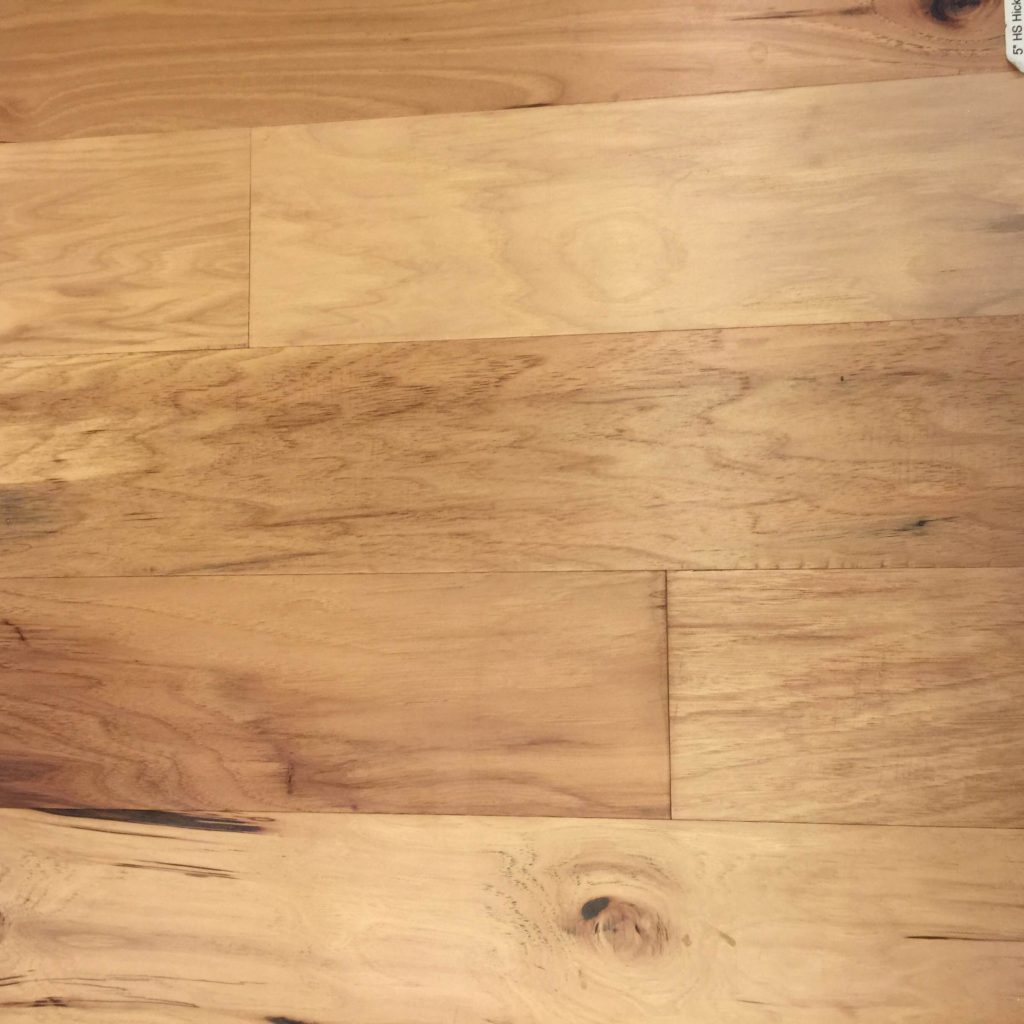
Remember before how I mentioned floors? Well, we finally made a decision and ordered our wood floors! So, they will be coming in over the next few weeks and then demo and installation should be at the end of this month. They will go down everywhere except the bathrooms and bedrooms. I am so excited/nervous. Here is a little sneak peek of what will soon be our new floors.

img_0481-1

So that’s the dish in our house. I can’t believe we are going to have new floors soon! Picture me with a serious case of perma-grin.


I’m Baaack!


IMG_0784

It’s been a while! Last time I updated the blog, I was busy getting ready for my folks to arrive from Oregon for two weeks. In preparation, I painted and made some easy updates to the guest room. Well, I am happy to report that my parents loved the room and were very comfy in there for the duration of their visit. We had such a wonderful two weeks. The weather was terrible and it rained almost every day they were here. Everyone kept joking that they must have brought the rain with them from Oregon because rain in Texas during the month of August just isn’t a thing.

They have been here a handful of times for visits so we weren’t too worried about doing touristy type stuff around the area but instead focused on projects around the house that Nate needed help to complete. Also, my parents had only seen our new house in pictures so they were anxious to finally see it in person. Because of the bad weather, we mostly hung out together, cooked, (oh, how I miss EVERYTHING my mom makes) completed some projects around the house and watched some good TV (Game of Thrones and The Night Of on HBO) But, it was so nice to spend some time with my mom and dad and we actually got a lot accomplished too!

Also, the kids started school. Grey started kindergarten and Nolan started second grade. I was a little (ahem…a lot) sad to see them go because it feels so early this year. Before Labor Day? What? And don’t even get me started on Grey starting school…how did this happen so fast?? Here is the obligatory first day of school picture. Now let’s move on before I start to weep…again.

IMG_0745

But I mentioned projects! It was amazing to have the help of my dad! Nate and I found that it was easier to pull the trigger on some decisions with his help with some things that we previously had been talking to death. Talking with no action to follow. The first couple days they were here, we turned attention toward this eye sore in the middle of our living room.

IMG_0714

IMG_0715

This beam goes across our entire living room and was covered in popcorn texture when we moved in. When we scraped the ceiling, we scraped the beam and never made a plan for what we would do next. My mom and dad loved our fireplace mantel that we made and thought that wrapping the beam in the same cedar planks we used for the mantel would be the easiest way to dress this baby up and would compliment the existing mantel. Here is a reminder of what the finished fireplace mantel looked like back before we had the ceilings done.

IMG_0512 - Edited

After calling around to a couple lumber yards, we found our lumber in stock and had it delivered right to the house. We had to go though an actual lumber yard because the planks that we needed were over 18 feet long and we knew that we didn’t want any seams where we joined more than one piece together. After they were delivered, it was just a matter of CAREFULLY measuring and ripping the boards to size. After a few nails with the nail gun, we were in cedar love. Just call me Joanna Gaines.

IMG_0719

IMG_0720

We had some exposed electrical in the middle of the beam that was used to wire a ceiling fan when we moved in but we had taken it down and decided that we didn’t need a ceiling fan in the middle of the room. We have been pretty comfortable in Texas with the A/C in the summer and heat in the winter, without the help of any ceiling fans. With all that being said, we turned the breaker off and capped the wiring with plastic connectors and used electrical tape to ensure that everybody stayed where they should be when it went back up in the ceiling.

IMG_0785 - Edited

I love the way it breaks up all that white and gives the room some texture. Also, how cute does the mantel and the beam look together? MFEO. Totally.

While we were on a cedar kick, I have had this live edge chunk of cedar that has been sitting in our garage for two years. It’s twelve feet long that I bought from a guy in Oregon who had his own mill for cutting lumber. Why twelve feet? Well, our sectional is twelve feet long and I thought this live edge would be a perfect table top to live behind the sofa for lamps, remotes and books. But, our sectional floats in the middle in the room here at our new house and so there is no need for a table behind the sofa.

Well, my mom had the brilliant idea to make a floating shelf in our entryway. Previously, I had made a DIY tribal stamp for the walls in the entryway but hadn’t given much thought to what furniture should live in that space. I had a little bench in there but in person, it felt much too small for the space so we decided that a shelf with a mirror would be a much more practical use for the space. We used three brackets from IKEA and my dad secured it to the wall one afternoon while Nate was at work.

IMG_0782

IMG_0761

IMG_0784

I love that we finally got to use this piece after all this time. Now, I am thinking that I just need some cute baskets for underneath and a runner for the floor and I will call this space done…for now.

Also, remember how I said I wanted to change the glass out of our front door because the pattern was feeling a little too traditional for our house?

IMG_0738 - Edited

We tracked down a clear window to replace it with and my dad installed it for me. It’s very simple but it has blinds on the inside so with the little flick of a switch, the blinds come down at night for privacy. To say that I love this upgrade would be an understatement.

IMG_0769 - Edited

IMG_0776 - Edited

So, those are just some of the fun things that have been going on around here for the last two weeks. I am already missing my parents but they are coming back to Austin in November just in time for baby boy to arrive. Wait until you see what we did to the kitchen! It’s a good one.


Guest room makeover

IMG_0689

I use the word “makeover” loosely. Mostly because the room was in such bad shape before, I had to get it cleaned up just to get to a decent starting point. Like a clean slate. For those of you who are keeping up, my parents are due in town from Portland today for two weeks. We are all so excited to have them!

Since we had this visit planned for a while, I knew I had to get the guest room in shape. It was gross. When we bought the house, every wall was painted a super shiny, creamy white except for this accent wall in the guest room. I am not really a fan of accent walls in the first place but this color happened to be quite offensive to my senses when I looked at it.

IMG_0676

This is the color. I love me some blue but this one was a dusty, sky blue that was just bad. It actually hurt me physically to look at this color. The walls in the room also had traces of popcorn texture that was scraped when we first moved in and then white ceiling paint after they were painted when we did the new texture. IMG_0677

When we moved in, I moved some spare furniture in there and called it a day. Last week, with my parents visit quickly approaching, I made a plan to get this room a little more cozy and inviting without spending a lot of money. I wanted them to be comfortable during their visit with us. This meant that my plan would be quick and dirty. Hang curtains, paint, change out the bedding for something a little more fresh and hang some art. First order of business, paint the walls. I chose a color called sea salt by Sherwin Williams. This color has been on my radar for years and I haven’t really had a place to use it…until now.

IMG_0687

This paint color is really pretty in real life. It’s one of those fun ones that sometimes looks green, sometimes looks blue, and sometimes looks gray. My poor color blind husband doesn’t have a clue but he did agree that it was a definite upgrade from the white walls and the horrible accent wall.

I hung some Nate Berkus curtains that I bought a few years ago at Target. Lastly, I bought a couple of new pillows from Home Goods that are scratchy and cute. I guess I am becoming known for this because when I brought these home, Nate said that all my favorite pillows are super scratchy and that the kids and him steer clear of them. Perfect…my plan worked.

IMG_0686

IMG_0692

IMG_0691

All of the art I hung, I already had but hadn’t found a home for it since we have been in the new house. As always, my “art” is super cheap. The two prints are stolen from a children’s book called, Wherever you are, My love will find you. If you don’t have it in your collection, get it now. But, be prepared to answer questions about why you are crying when you read it to your kiddos. Consider yourself warned. The map above the dresser is out of an educational book meant to be ripped out for place mats for the dinner table. I chose Montana because my Granny used to live there and I like to think about that when I see it. I guess I am feeling sentimental and sappy today with my parents coming into town. Geesh.

IMG_0681

Overall, this room has undergone a lot of change since we moved in. We scraped the popcorn ceilings and the new texture went up, ceilings were painted, walls were painted, trim and doors were painted white, furniture, accessories, and lastly, art was hung. Whew!

DIY tribal stamp

IMG_0600

Last week I shared a photo of my newly stamped entryway because I was trying to decide how I felt about the finished product. This week, I am feeling exactly the same! I STILL can’t decide if I am loving it or hating it. The good news is that this project cost $0 in materials and used just a little bit of paint that we already had so we aren’t talking about life altering issues here.

It is so much more fun to complete some “fluff” projects around here since we have finished the ceilings and can finally move on with our lives. This is a really fun one and I think with just a few tools, anyone could do this.

We had some scrap wood laying around the garage and I asked Nate if he wouldn’t mind using some of those spare pieces to make an isosceles triangle for me (whoa…isosceles…haven’t used that term in a while). After a strange look, he agreed and it took him less than five minutes. I grabbed an old terry cloth dish towel, wrapped it around the edges of the triangle and secured it with hot glue. HOT GLUE, what?!!! I know, I couldn’t find my staple gun. Simply stapling the cloth to the wood would make way more sense. But, if you’re like me and your garage is a black hole where you can’t find anything, go ahead and use hot glue. It stayed in place throughout the whole process so it actually didn’t turn out to be a problem. Except, I still don’t have any idea where my staple gun might be…

IMG_0617

IMG_0618

For the paint, I just used some of our flat, white ceiling paint for this job. I poured just a little bit onto a tray that was wide enough to press the stamp down into the paint. I found an old plastic charger from Christmas a few years back. Fancy shmancy, right?

IMG_0620

As for applying the pattern to the wall, it was pretty simple and I mostly just eyeballed where I wanted everything to fit. I didn’t want the pattern to look too perfect or planned out. I think that would take away from the “tribal” effect. I set up a laser level to help me keep my triangles in straight lines, vertically. However, I just used my fingers to measure how far apart each row went horizontally. Totally easy. Just make sure to not use too much paint so you start looking gloppy and runny.

IMG_0622 - Edited

IMG_0621

Notice the trim and closet doors?? They are white! Beautiful. Clean. White. I can’t get enough of it. Soon, I will have all the trim and doors painted white. I will post on that soon! Here is an after shot with the entry looking all pretty again.

IMG_0600

I will live with it for a while before I make up my mind. Originally, I was going to do all four walls with the stamp but after I finished the first wall, I thought maybe less was more. Well, we will see.

#housegoals

Have you ever watched an episode of House Hunters? Well, I have. More times than not, a couple goes through a property and they start saying things like, “we would need all new floors, the bathrooms need to be gutted and everything in the kitchen needs to go.” Nate and I were just as guilty as these folks when we looked at our house. We actually said those things! These “simple cosmetic swaps” mean major work which also means major money.

So Nate and I have been discussing which projects are realistic for us as we plan on doing most of these ourselves. We also flip flop back and forth as to which improvements would make the most impact for resale value and which ones we have to get done for our own sanity (like our beautiful pink exterior before we painted last weekend). Ideally, we are hoping that most of our updating will fall into both categories. But, I think we have come up with a list. Not a to-do list because I don’t even like to read my own to-do lists but more of a list of goals we want to accomplish during our time here. Here we go!

  • New floors – this is going to be the biggest and most expensive project that we tackle here. Currently, our house has brownish, beige, gray carpet in the bedrooms and living room while the entry, kitchen, dining room and hallway has cream colored tile. Tile seems to be very popular here in Texas and I can understand why. It is a very durable, hard surface that also stays very cool to the foot which is a bonus with the warm climate. For us, tile doesn’t seem to be a very livable surface with little kids and clumsy adults. Everything that is dropped on tile, undoubtedly breaks. Toys, dishes, phones, iPads and dog dishes don’t stand a chance if they are dropped on tile. Also, I have to close my eyes and hold my breath if I see a dripping wet kiddo hop out of the bath and run down the hallway. Yes, we have had quite a few slips and head bumps. But I have big dreams of wood floors and wood floors that span everywhere in the house. Kitchen, dining room, living room, bedrooms…basically everywhere except the two bathrooms. Since Nate and I both have zero experience installing floors of any kind, we will hire this job out and leave it to the pros. So let the saving begin! And while we squirrel away our pennies to get these floors done, I’ll be daydreaming about oak…hickory…engineered wood…bamboo. Wouldn’t something like this just be a game changer? I think so…

floors

  • Painting the Exterior – we are mostly done with this baby! Some touching up and trim work still needs to be done but I think we can call this one done.
  • Landscaping front and back yards – the house is kind of a blank slate as far as landscaping goes. The flower beds around the house need to be filled with…something. I’m just not sure what yet. One of our neighbors has this whole landscaping thing figured out. I am hoping our flower beds can be as beautiful as this house.

IMG_0431

  • Adding a patio to the backyard – I would like to put some kind of material down in the screened porch on the floors and extend this flooring out onto some kind of a patio so there is a place to spend time in the backyard outside of the screened porch.
  • Scraping the popcorn ceilings and texturing/painting – the scraping part is done. The texturing and painting of the ceiling still has to be done. This job actually might kill me…the jury is still out. I’ll keep updating as I go.
  • Painting trim and doors inside house – the trim is currently stained an almost black color. I want to lighten this place up and paint everything white.
  • Whitewash the fireplace brick – in my quest to lighten and brighten, the fireplace needs a dose of white paint too. I’m going to try my hand at whitewashing.
  • New appliances for the kitchen – our current appliances are old and white but are functioning fine, for now.
  • New counter tops for the bathrooms – the plan is to keep the current vanities with some updating with paint and hardware. But, counters are a must.
  • Paint the front door – I can’t decide if it needs to be replaced or if paint will be enough. I’m debating between these two colors right now. Thoughts?

Valspar-Full-Sun-EB1-1 Valspar-Wasabi-W35010A

So these are our goals as of right now. I’m sure we will change our minds about some of these but for right now, this is what we are planning. There’s definitely no shortage of things to do but I love a good challenge and these projects are definitely going to challenge us.

The house is painted!

Well, we did it! The house is painted and we are so happy with how it looks. The weather was kind of tricky here to plan this project around because we knew we wanted to paint before it was too hot but also didn’t want to have to combat the rain that we have been getting here in Central Texas. So, finding that sweet spot right in between the two was tricky, but I think we did it. It was still pretty hot for a couple of Northwest peeps but we just kept reminding ourselves that this is just the beginning of the heat that is to come! Sounds like the name of a really bad movie about the apocolypse, The Heat that is to Come. I’d probably go and see it. Anyways, we are hoping that, in August, we’ll be glad that we did it in June.

We rented a paint sprayer from Home Depot and Nate picked it up first thing in the morning. He has used this same sprayer a couple of times before so it was helpful that he was familiar with how it worked. But, it’s pretty simple to figure out even if you haven’t used one. A little trial and error and you should be good to go. The biggest problem you can run into with using these sprayers is spraying on your coats too thick. Think light coverage with multiple coats and you should avoid those pesky drips. Here is yet another reminder of what our house looked like when we moved in.

IMG_0087

Here’s where we are at today.

IMG_0395

Love this. There is actually still a lot of work to do and touch ups all over the house. The open beams in the entrance still need to be painted to match the body of the house and close up, there are many spots that still need some attention.

We also went ahead and updated our exterior lights, doorbell and house numbers. When Nate was hanging these for me, I kept thinking about how these details are like accessories. Like a good pair of earrings, but for the house. The house numbers used to look like this.

IMG_0370

 Now, look like this!

IMG_0389 - Edited

IMG_0392

We couldn’t be happier with how it turned out! Even some friendly folks from down the street have stopped by to tell us how much they like our colors.

IMG_0393

I love the contrast. It feels so fresh and with the new paint and accessories, the whole house is taking on a much more modern feel. Before we painted, the house didn’t really have any particular style or category that it fit into besides 80’s ranch style. Now, it has some much needed personality.

IMG_0390

IMG_0391

IMG_0387

IMG_0397

IMG_0388

While we still have some touching up to do, we can check this off our list of to-do’s. And this was a biggie. But, it feels really good that we did this ourselves. Back inside I go to get back to mudding and texturing the ceilings. No more excuses!

Prep, paint, and power washing

When Nate and I saw the house for the first time, we decided this house needed to be painted before we even got out of the car. Seriously. The house is pink. The trim is maroon. Help me. This is what it looked like when we moved in.

IMG_0081

But, before we can paint, we have some work to do. There are sheets of plastic covering the entrance to the house that needed to be taken down. I am not sure if we will need something else to go in its place to protect the entry from rain, but we are going to try and live without it to see how we do. It is laying on top of some exposed beams that I think would look really interesting to the eye uncovered and exposed to the world.

PlasticRoof - Edited

Because these plastic sheets filter the light trying to peek through, I’m hoping that taking these down will let more natural light flow into the front entrance. While Nate was taking them down, he uncovered four wasp nests! I kept reminding him to be careful and he only ended up getting stung once. Which I thought was sort of hilarious…sorry Nate.

IMG_0386

So. Much. Better. I will not miss you plastic sheets (I’m sure there is an actual name for these plastic sheets, I just don’t know what it is). Now that they are gone, the entrance reminds me of one of those mid-century modern houses that have an atrium with plants or trees growing out of them.

Now that the plastic is down, the next thing we needed to do to get ready to paint was pressure washing the house. Our neighbor, Chuck (thank you, Chuck!), was nice enough to let us borrow his pressure washer so we didn’t have to rent one. I was very surprised to see the amount of dirt that is just sitting on the surface of the house. I guess it makes sense but still surprising. We also went ahead and took this opportunity to clean up our driveway and sidewalks. What? Sidewalks aren’t supposed to be black? This was news to us because our driveway and sidewalks were all totally scuzzy and black.

IMG_0368

IMG_0350

IMG_0358

IMG_0352

My next task was choosing a pallet for the house. I thought this would be easy because I have always loved picking paint colors. There aren’t any colors that scare me and I don’t find myself nervous and agonizing over choosing a paint color because if I don’t love a color, I will just paint over it. We have lived in a lot of rental houses over the years and I have done a lot of painting. Trying to cover dirty walls and trim and trying to add some interest in blah spaces with beige carpet is nothing new to me. But, choosing paint colors for the exterior of your house is serious business. It is loads of work (and loads of prep work, i.e. taping off foundation and windows) and I couldn’t have Nate spraying the house a second time because I wasn’t happy with the colors that I chose. So, for the first time, I found myself stressing over these colors. I read every article online about exterior color choices, scoured pinterest for inspo, and even went to the library to find books on the topic! I couldn’t come up colors. I was driving myself and Nate crazy.

So I decided that I would email a few of my fave bloggers and see if any of them would have the time to get back to me. I sent them pics of our house and told them about my dilemma. Sherry, from Young House Love, was nice enough to email me back her thoughts. I couldn’t believe she emailed me back! She is practically a celebrity to me and I have been a big fan for years! Their newest book, Lovable, Livable, Home, lives on my coffee table this very minute. She suggested a color that I have seen a lot on pinterest, but never considered it as a color for the body of the house. The color is Urbane Bronze, a deep charcoal, with some brown, gray, and metallic undertones. She said she has seen it on some houses in her area and paired with a crisp, white, trim is stunning! So, off to grab a tester pot!

IMG_0360

IMG_0367

IMG_0363

I tested it in a few different spots for light comparisons. After a day of walking outside and staring at it during different times of the day, I was sold! I love its richness and I think it’s going to bring some life back to the house! Here we go! Hope we don’t shock everyone on the street!

Once you pop, we can’t stop…..scraping

Once upon a time there was a girl who bought a 1648 sq. foot house. Every ceiling in this house had that famous popcorn texture that we all know and love. Every. Single. Inch. It’s even on the ceilings of the closets! This same girl thought she would be able to scrape this popcorn texture from these ceilings and it was no big deal. Boy, was she wrong.

IMG_0245

IMG_0246

Here’s how all the ceilings looked before we started scraping. We have told several of our new neighbors about our project and how we are going to start scraping and their reactions have been pretty funny. We have heard things like, “yuck,” and “what a mess.” We soon found out that those are just a few of the ways you could describe this job…among other, less blog-appropriate words.

The process itself is simple. First, spray the area you plan on scraping with water and let it soak so it saturates the surface. We found that magic number was around 15 minutes but it definitely didn’t hurt anything to let it soak for longer stretches of time. While it soaked, we used this time to prep for the mess. Although, I’m not sure there is any amount of prepping that a human being can do to prepare for the mess that is about to ensue. Then, the scraping begins…and never ends. Okay, it does end at some point. We just haven’t found that point yet.

IMG_0143

Lovely, isn’t it? It was a little shocking to see the drywall for the first time all dark and soaking wet. But, it quickly dries and looks lighter and more like drywall is supposed to look.

IMG_0144

The plastic tarp was a life saver for us as the dust that comes with this job is very fine and goes just about everywhere. Your hair, your ears, and even manages to make its way through your clothes. In the kitchen, I was able to tuck the plastic right under the doors of the cabinets. Originally, I was going to use painters tape to secure it to the top of the cabinets but when I went in the the garage to find the tape, I was greeted by a very large wasp. Nate wasn’t due home from work for another 45 minutes so I decided I would work with what I had and tuck that plastic right under the doors. It worked like a charm.

Preparation is really the key to this job. We quickly learned that the more you prep – the less time you spend cleaning up. A shop vac would have been very helpful. We don’t have one but would definitely buy one if we were doing it over because our regular vacuum for the house isn’t speaking to us anymore after all this extra work we have put it through.

IMG_0148            IMG_0160

That fluorescent light used to live in the kitchen but we took it down so we could scrape under it. It definitely won’t be returning. I am going to start hunting for a flush mount fixture for the kitchen. This was sort of a theme as we finished each room. I had Nate take down the light fixtures for scraping ease but am thinking that none of them should go back up so we can take this opportunity to replace them with something more our style. Either that, or we will be living in the dark.

IMG_0164

IMG_0203

IMG_0205

Nate was a good sport and climbed all the way to the top of the vaulted ceilings for me because I was too scared to get up there.

IMG_0211

After the long weekend of scraping, we finished up the kitchen, dining and living rooms, entryway, hallways and one bedroom. We have three bedrooms with their closets and the bathrooms to go…and we will finish it! Next up, figure out how we are going to get these naked ceilings textured and painted.