Our New Cafe Appliances: Range and Hood Edition

This post is sponsored by Cafe

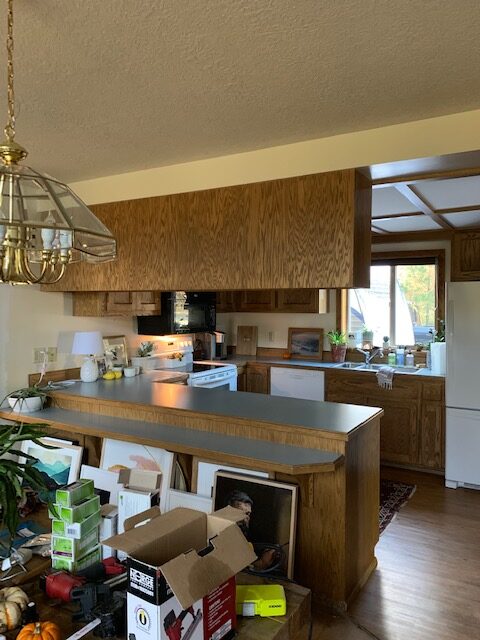
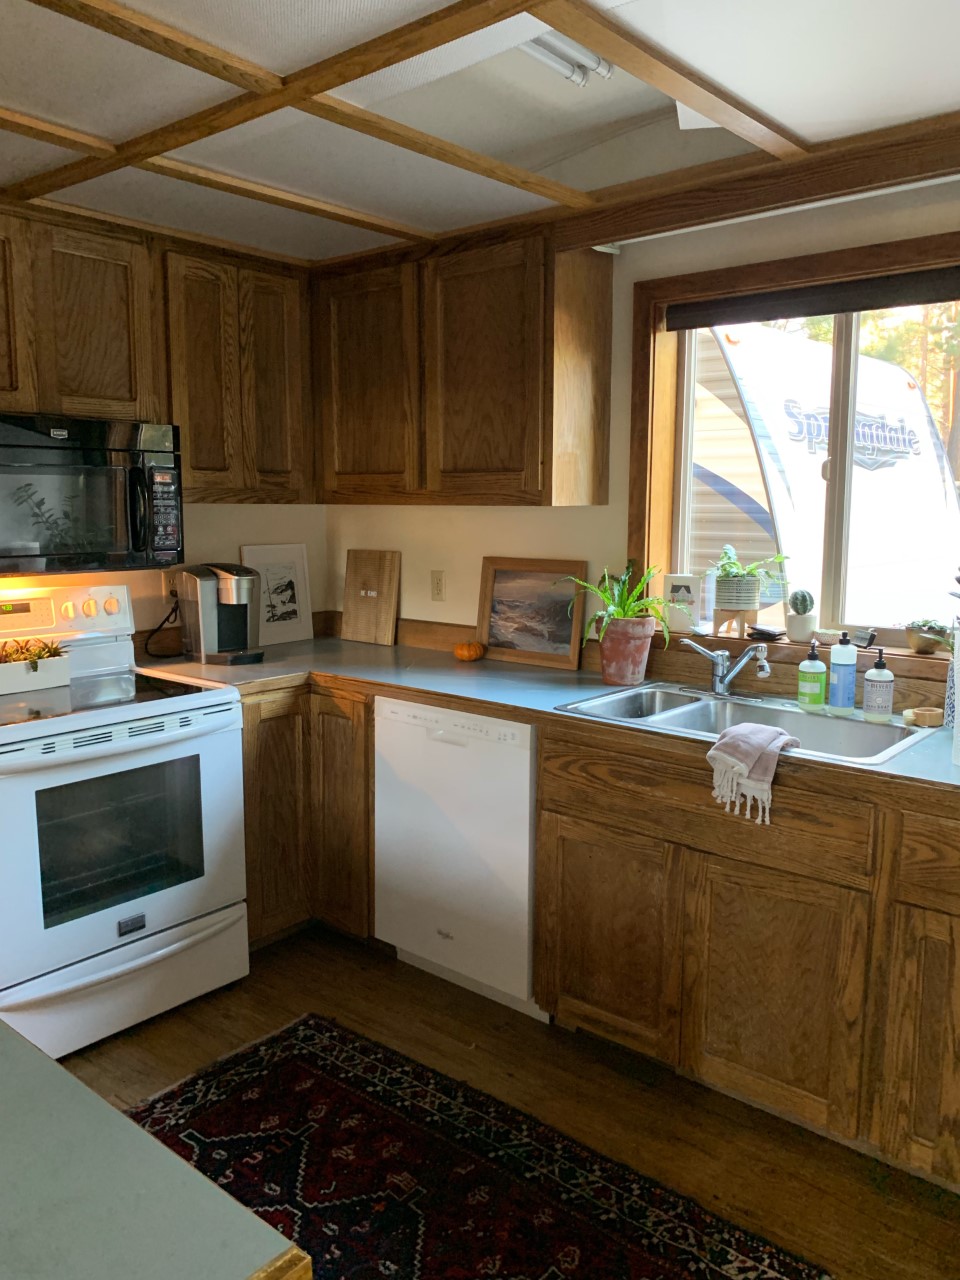
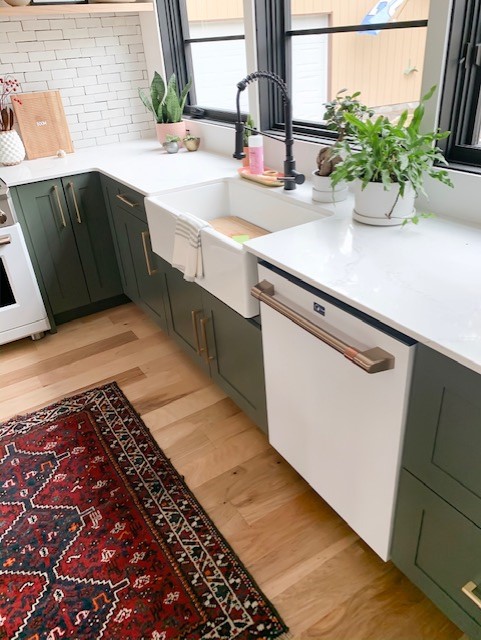
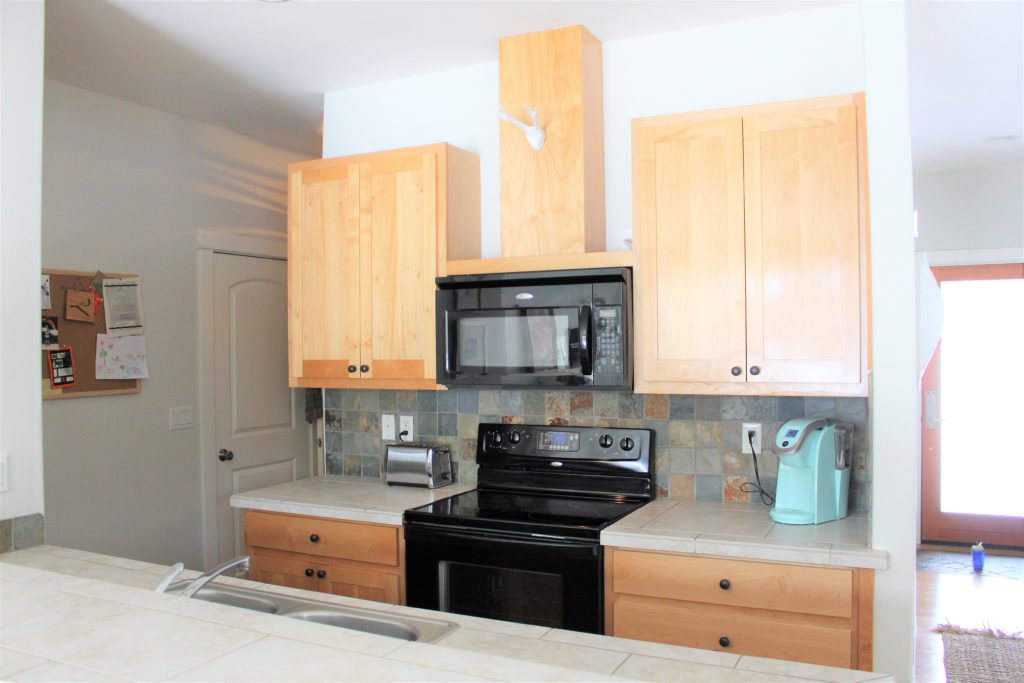
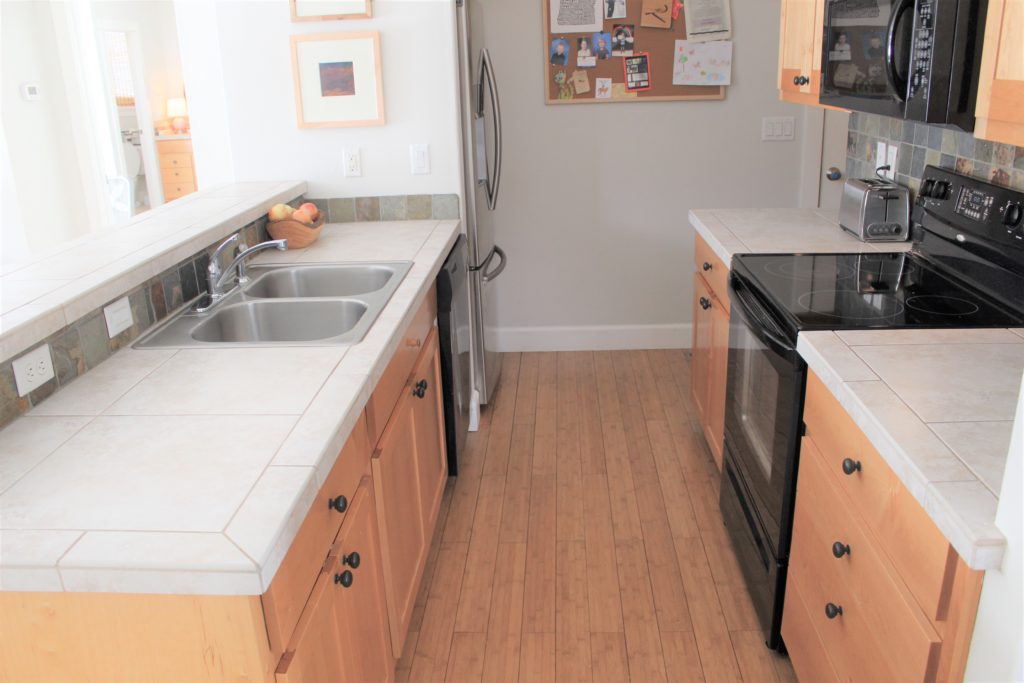
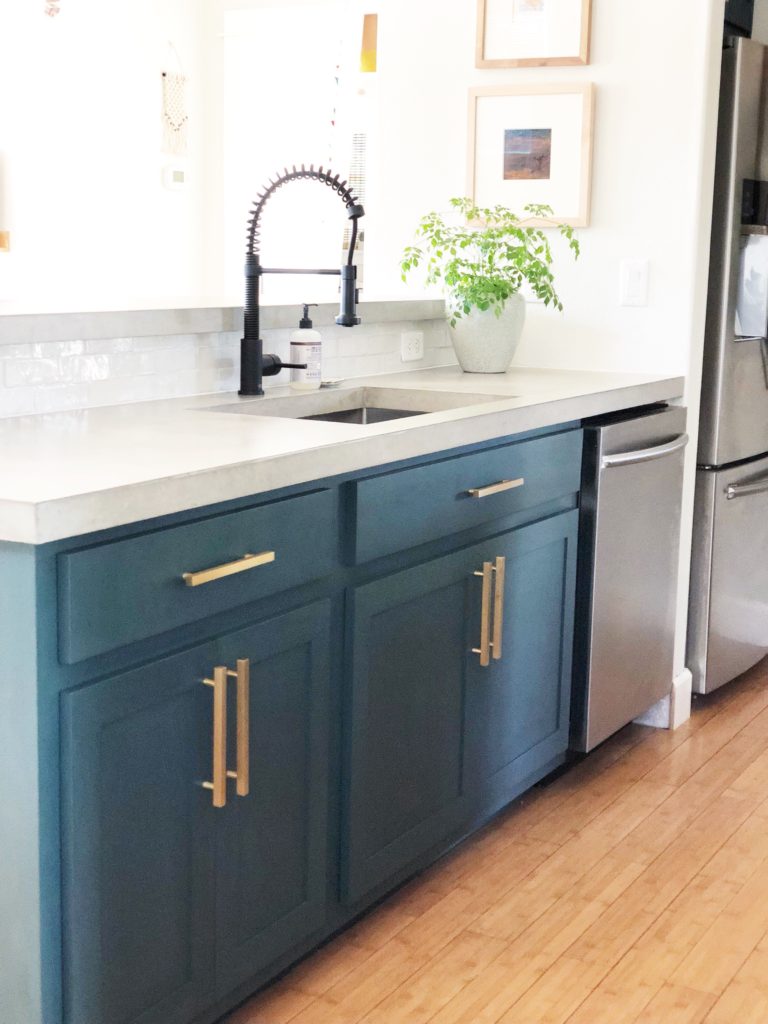
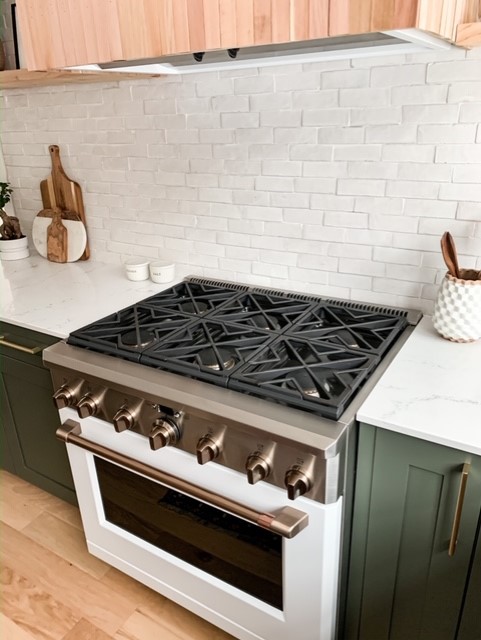
Since we finished the kitchen for the One Room Challenge, one of the questions that keeps coming up is; what do we think of our new range from Cafe? Well, I LOVE IT! This range was quite an upgrade for us. We went from a 30″ mid 1990’s white electric range to Cafe’s Dual-Fuel Professional Range with six burners. I talked a little bit about Cafe a few posts ago, the ones that are customizable, and allow you to choose a base color as well as the hardware color. Which I am loving so much because I am a big fan of mixing metals in the kitchen.

This range is the perfect combination of form and function. Everyone is always saying how you have to choose between the two, but with this range, you get both.

Because this baby is a duel fuel (natural gas cooktop + convection oven) range, we had to add a gas line which was an additional cost of about $1,500 after permits and the cost of the plumber, but it was worth every penny. Nate, who is the cook in our family, has always wanted a duel fuel range so this was kind of a dream come true for him. Another thing to note is that if you live in higher elevations, like we do, then the convection oven will make your life so much easier. Higher elevation baking often means that your cookies are raw in the middle and your cakes will not rise, but not with this convection oven. We are able to follow regular baking instructions on mostly everything now and it comes out just perfectly!

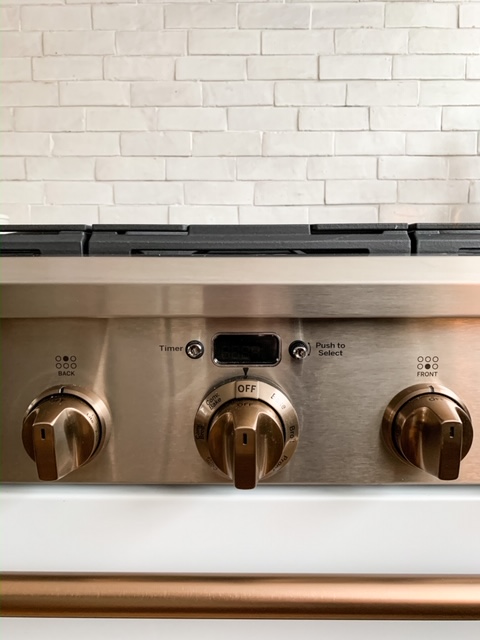
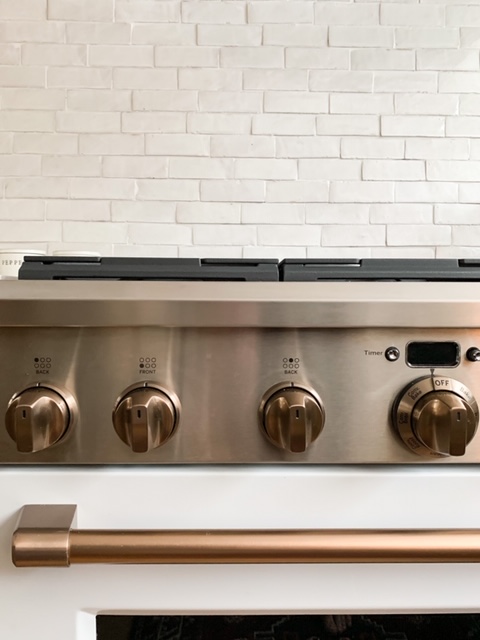
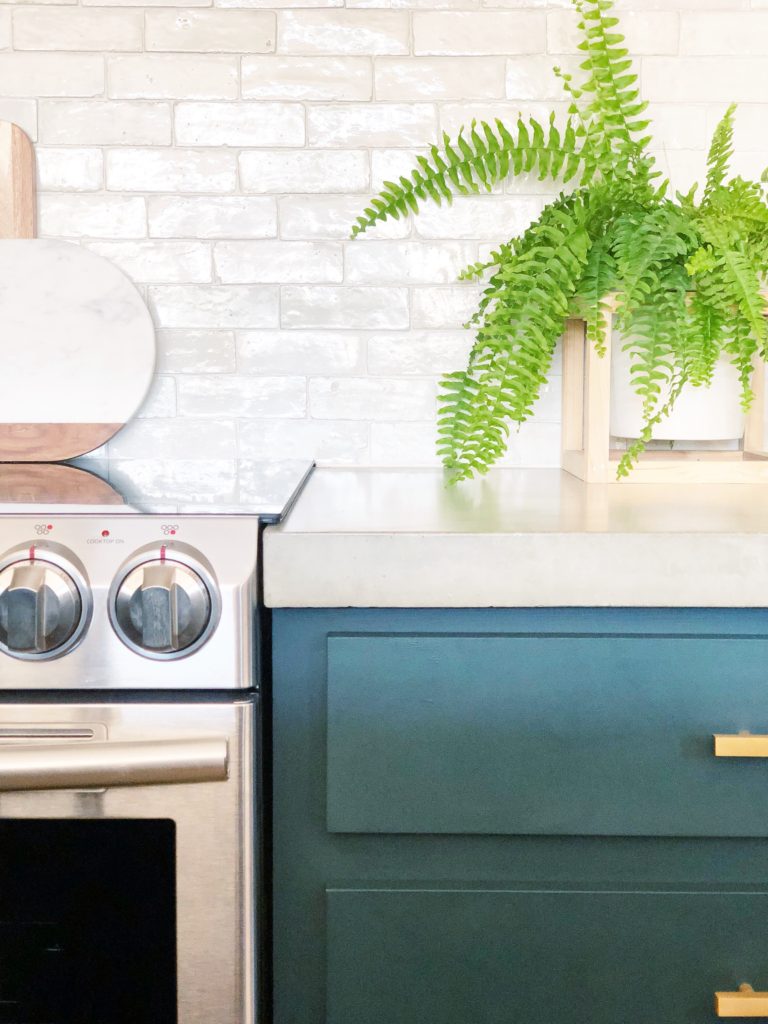
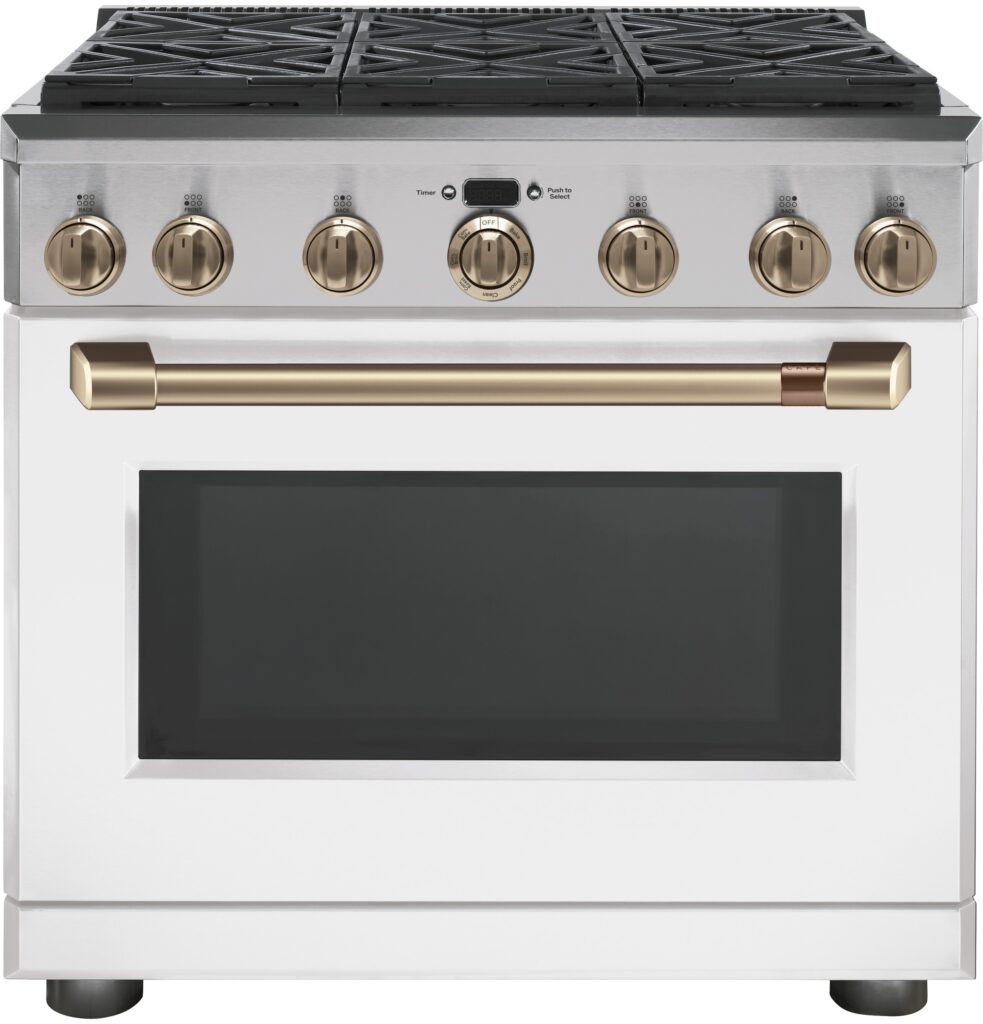
Each of the six burners have their own knob (plus one for the oven) which makes operating the range very straightforward.

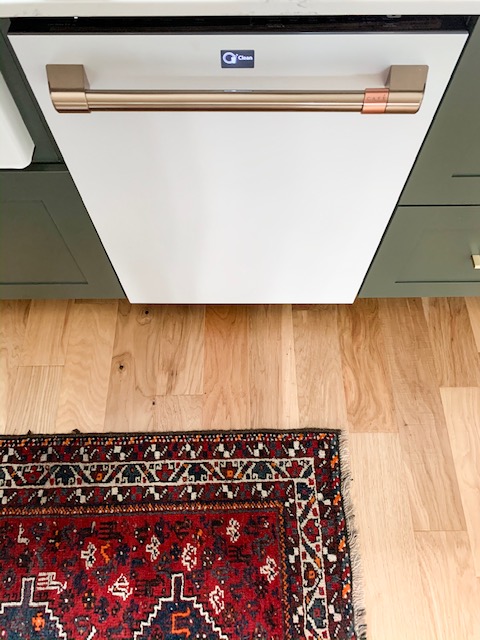
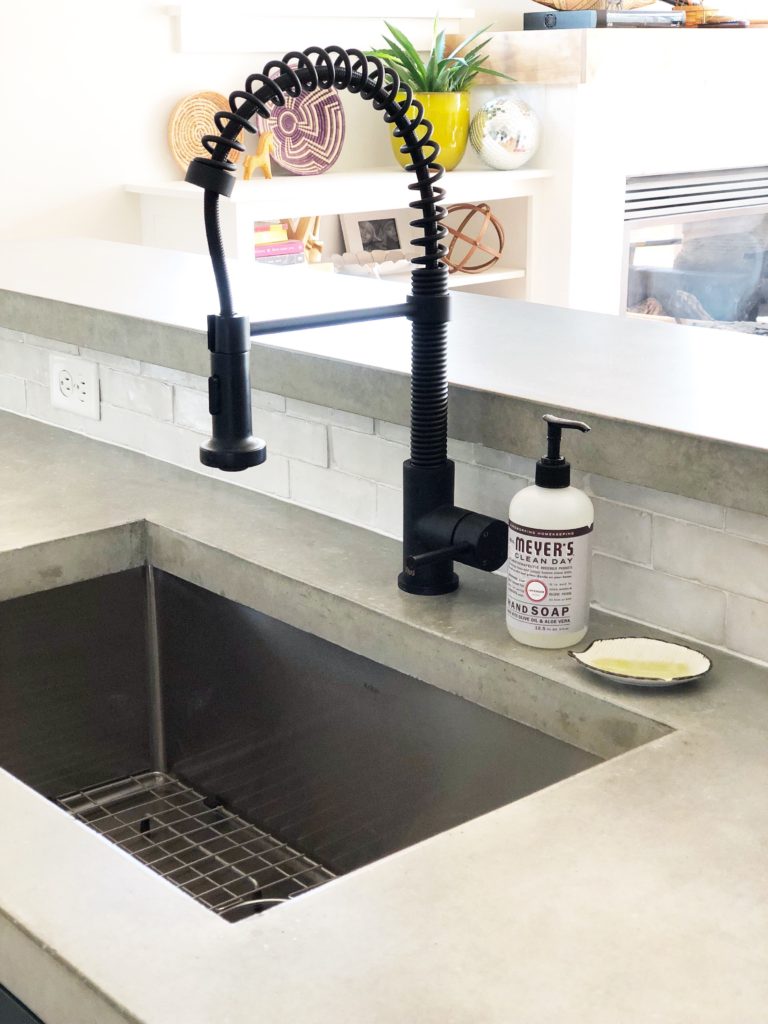
The grates are easy to remove and when I notice they need cleaning,  I just place them all in the sink and give them a good rinse. While the grates are off, I usually use this opportunity to wipe off the cooktop. Just a sponge with a spot of dish soap, and all of the cooking messes wipe right up. Easy peasy.

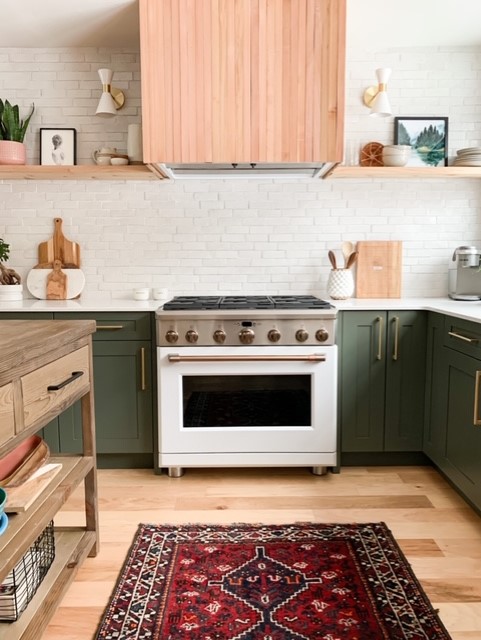
The width of this range is 36″, when a standard range is 30″, and this extra six inches allows you to bake multiple dishes at once. This came in handy over the holidays when the green bean casserole was ready to go in the oven, while the turkey was still roasting away. My mom and I made Thanksgiving dinner together this year, and she LOVED that the racks are on rollers and slide in and out with ease. It’s these small details that make a big difference!

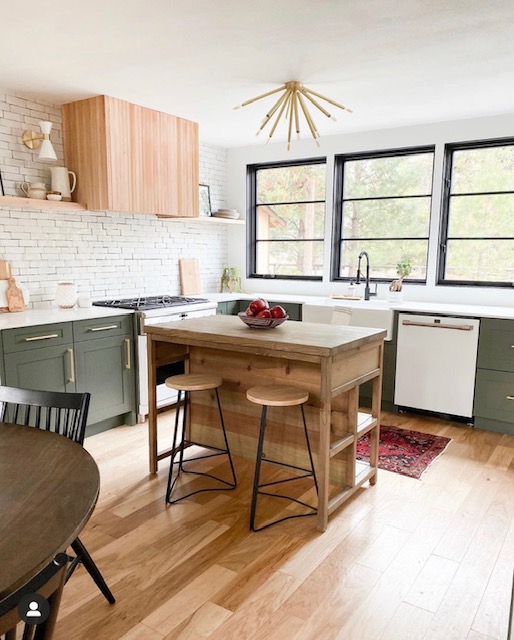
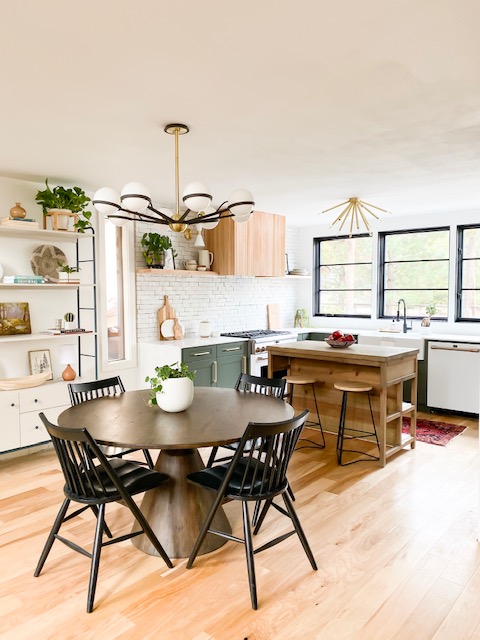
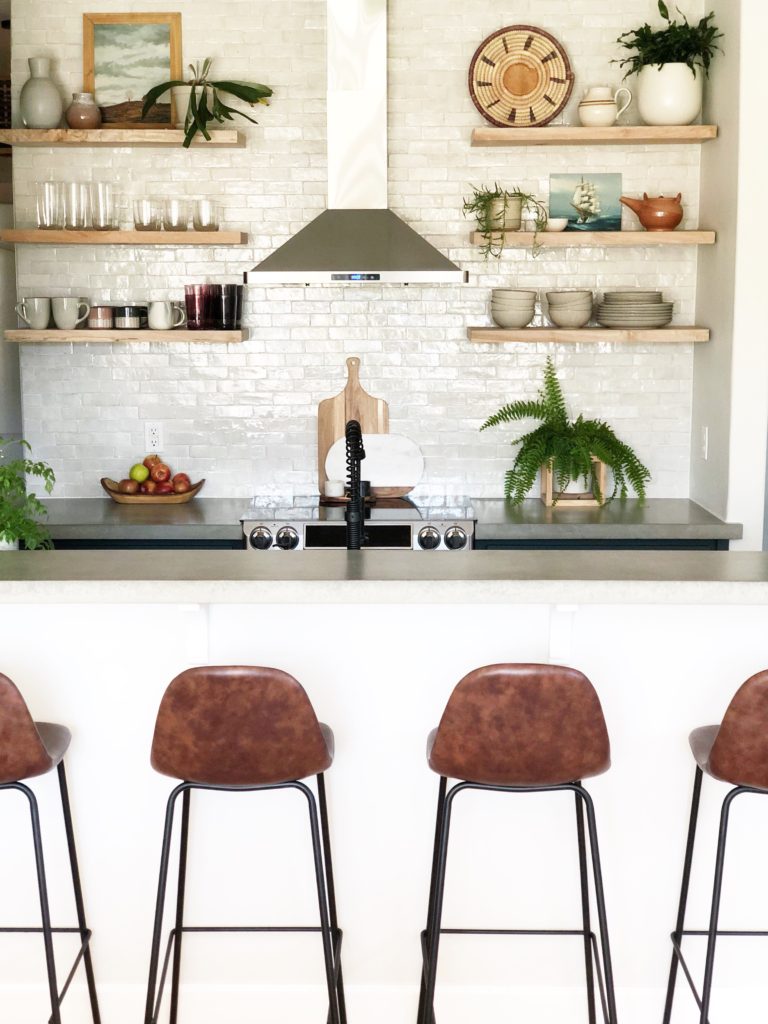
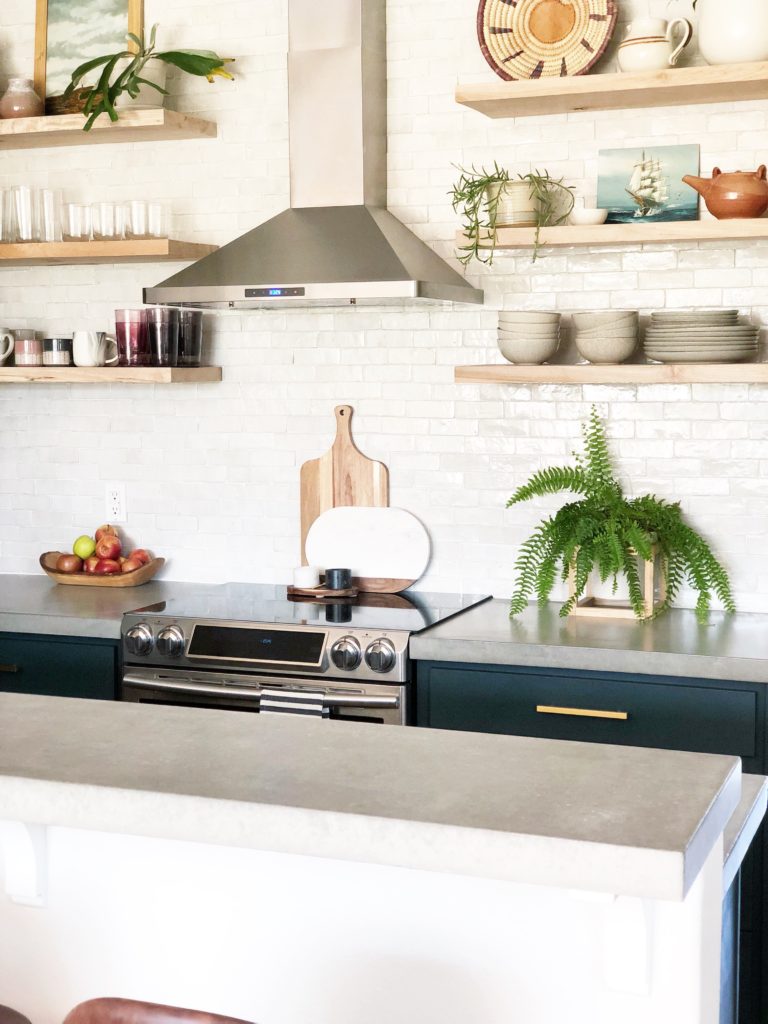
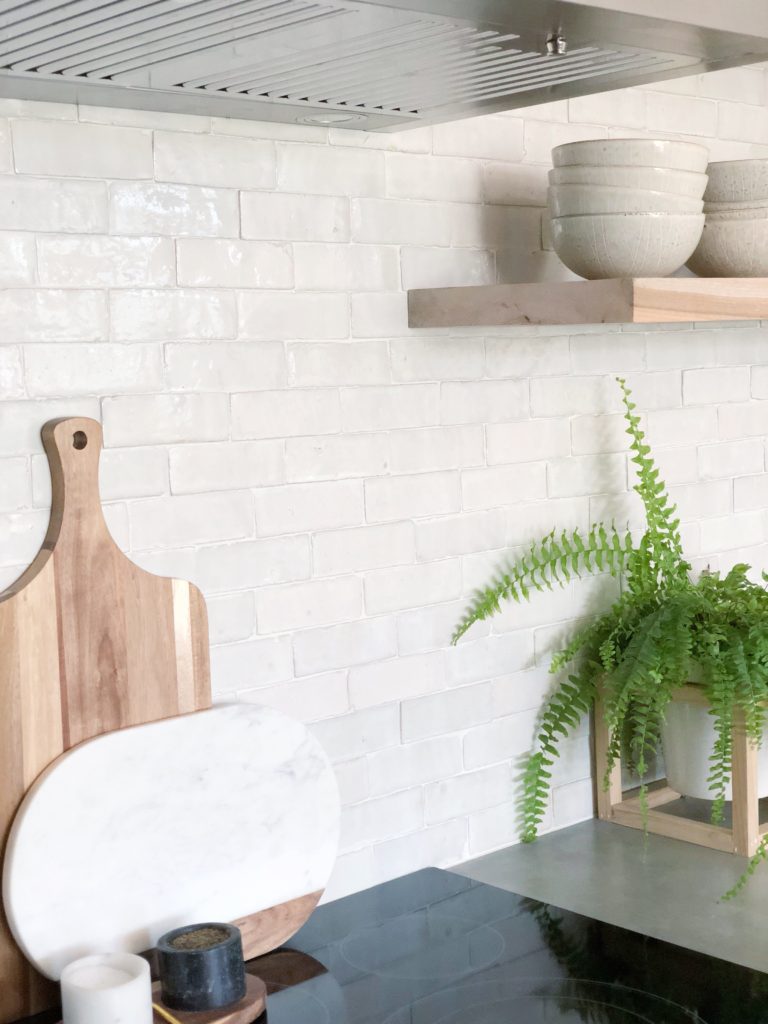
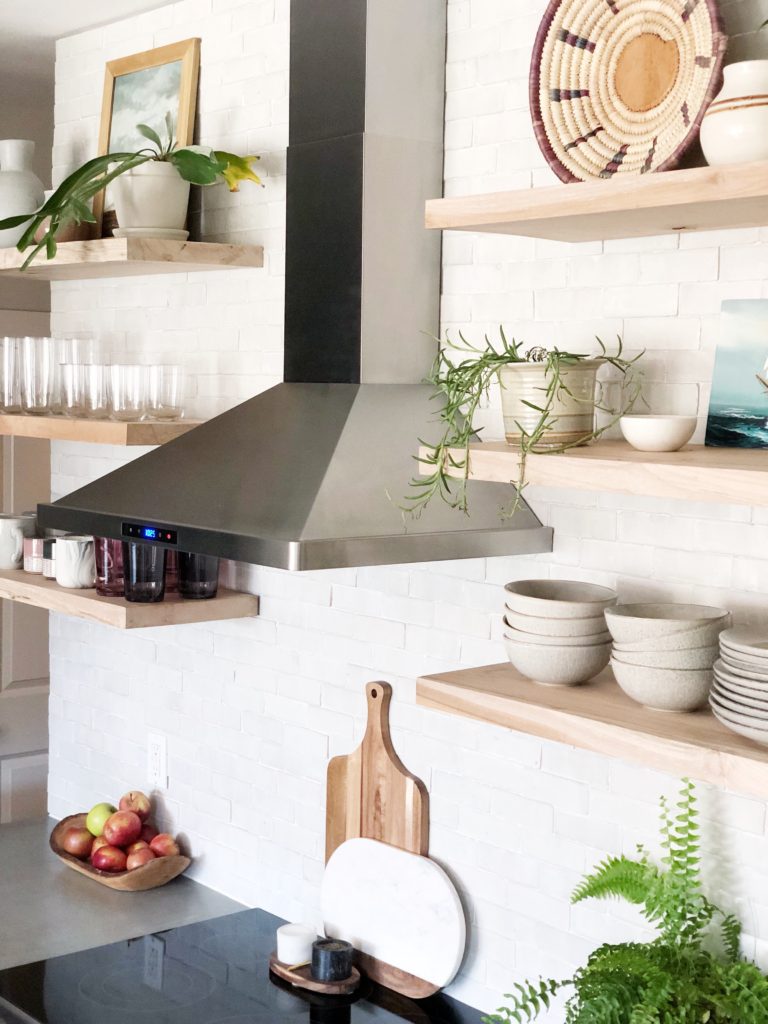
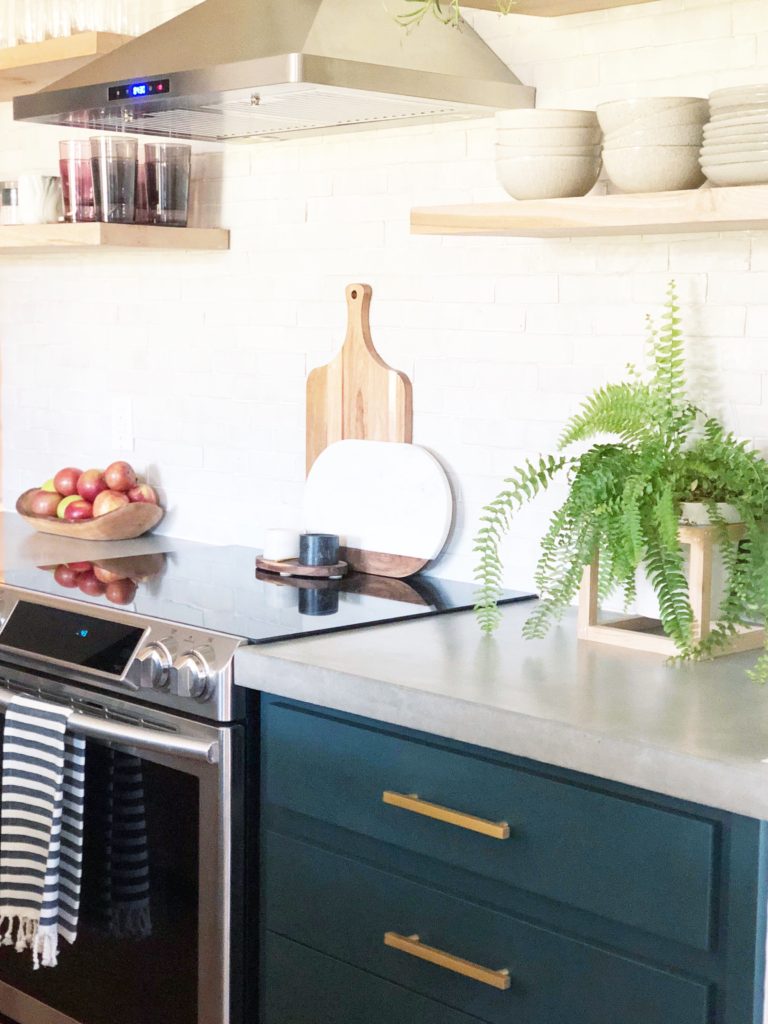
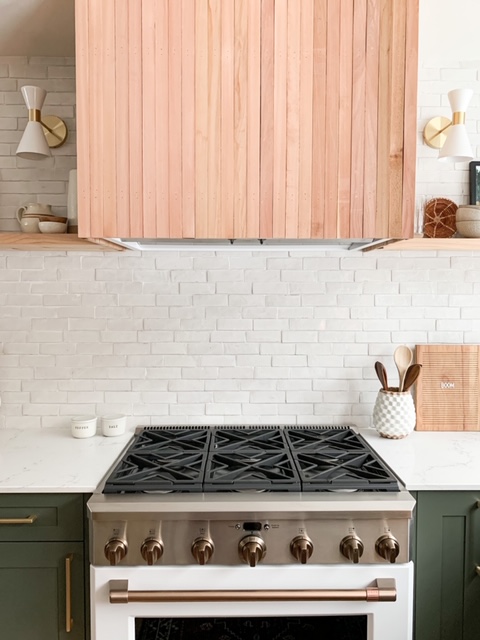
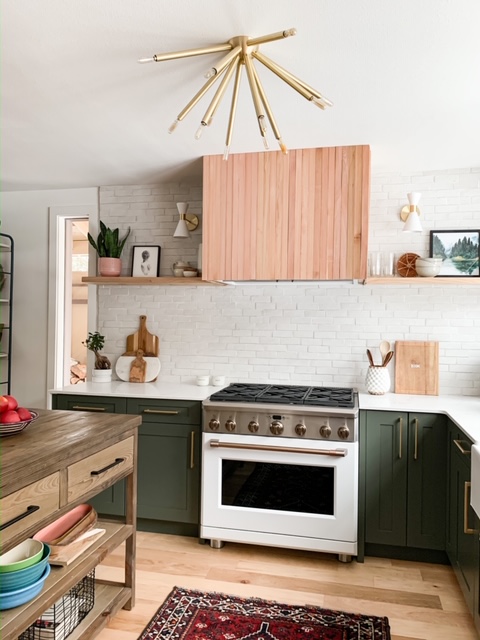
For our hood, we went with their 36″ commercial style hood. It’s mounted to the wall and then we built the cedar surround. The hood cover was a relatively simple DIY. After the hood was installed and secured to the wall, Nate built a frame around it with 2×4’s, and then wrapped the entire structure with cedar 1×2’s. I am always a fan of adding natural wood tones whenever and wherever I can, I love the warmth that wood adds to a space. It’s a statement maker and only cost around $75 in materials.

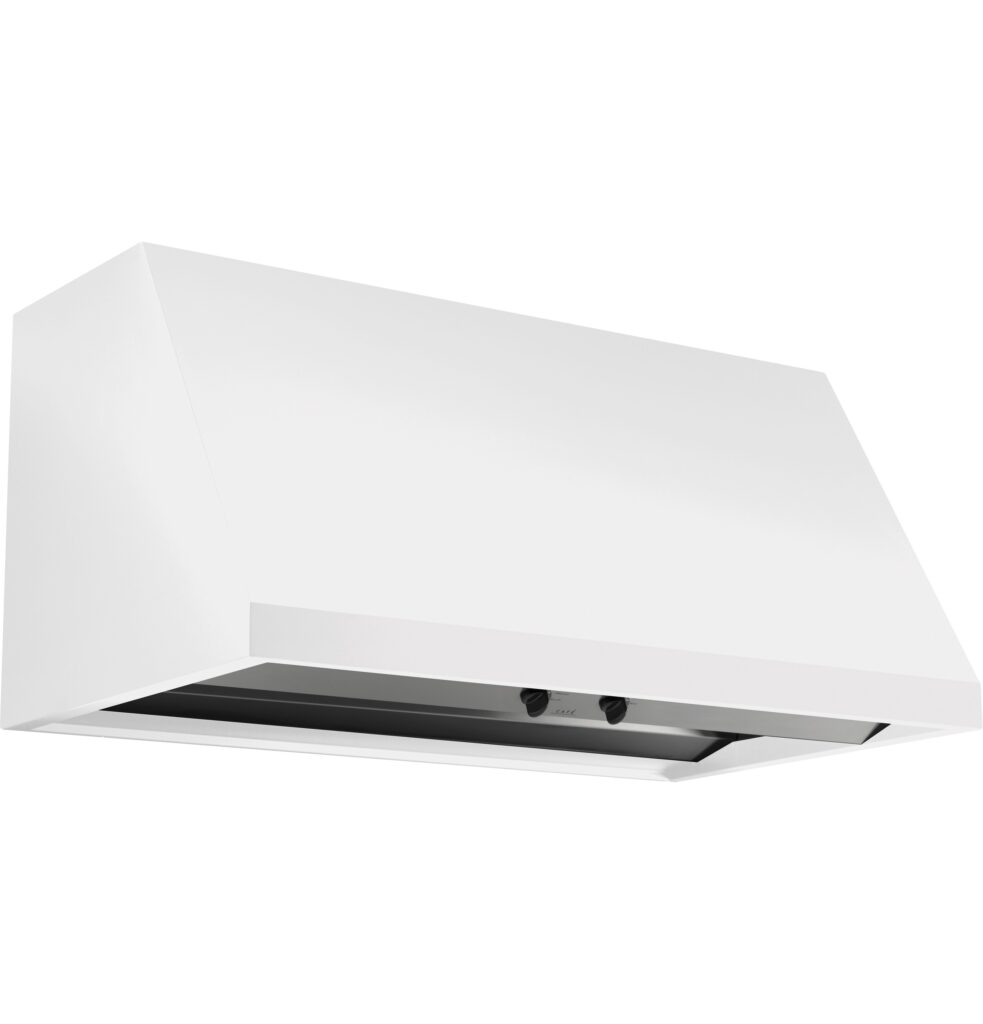
Here is what the hood looked like before we wrapped it with the cedar. I love how it matches the white appliances, but also comes in all of the same color options that the range is offered in, so you can coordinate accordingly. It’s pretty enough to leave as is, or you can customize your look, like we did.

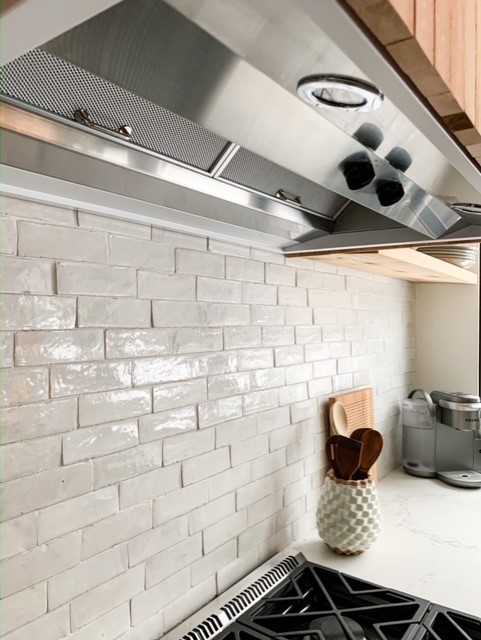
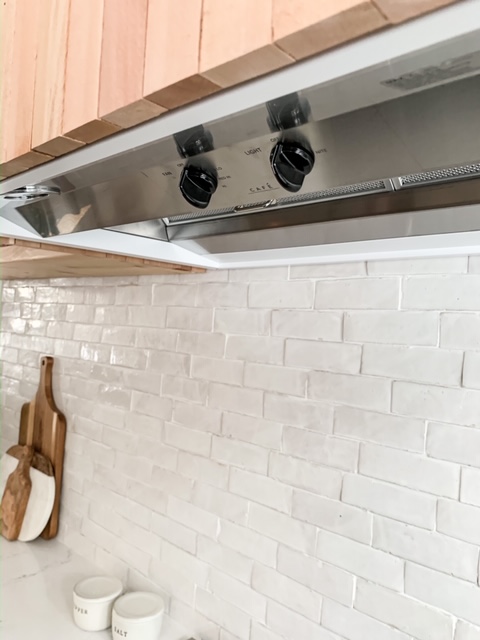
The fan is so quiet, even on the highest of settings and the grates easily remove in case they need a good cleaning. Also, I love the light that comes inside the hood. You guys know how I HATE a cold, blue LED light bulb…makes me feel like I’m the operating room at the hospital. But, these lights are warm and lovely and even have a Nite setting, which is a very low light that I have been turning on every evening after the kids are in bed. It’s soft and adds such a nice ambience to the kitchen.

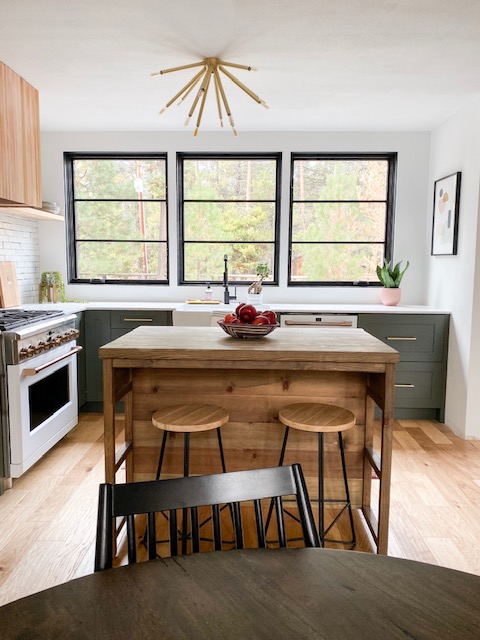
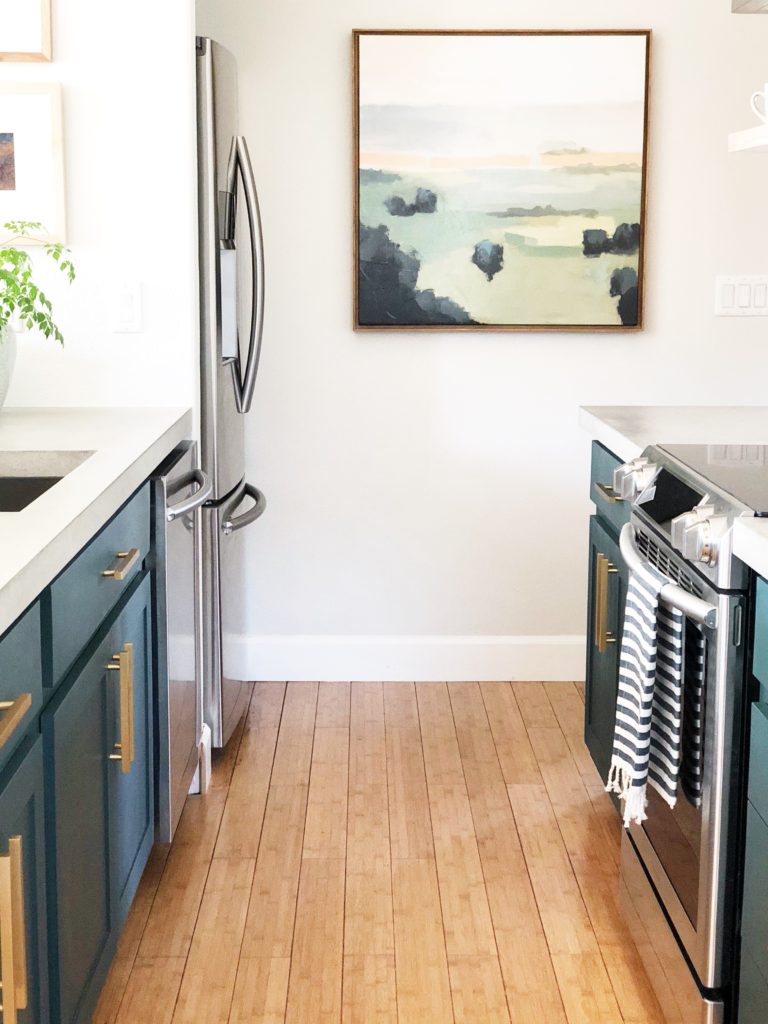
With the kitchen finally complete and all of the Cafe Appliances stealing the show, we are just LOVING all of them! They all look and function the part. We knew we loved how they looked when we picked them out, but now that we’ve been using them in our kitchen for a few months, we are hooked!


The Sink And Faucet That I Couldn’t Stop Pinning

This post is sponsored by Kraus

I don’t know if I told you guys this but when we were remodeling our kitchen for the One Room Challenge, we were without a working sink in the kitchen for twelve weeks…yep, you heard that right. TWELVE LONG WEEKS! So when our sink from Kraus was finally installed, I was a over the moon! Has anyone else washed dishes in the bath tub before? Well, believe me…it’s not a fun job.

It seems kind of funny, but when you’re planning a full kitchen remodel, the sink has to be selected at the very early stages. Which makes sense if you think about it because cabinets can’t be ordered and counter tops can’t be measured until the exact dimensions for the sink are set. And there are lots of options too; under-mount, apron-style (like mine), drop-in style, single or double bowl….whew! In our last house, we had a single bowl, under-mount sink and I LOVED being able to drop a full baking sheet right to the bottom for washing. But, I didn’t love the stainless steel finish and was always fighting with water spots. So I knew I didn’t want to do a stainless steel sink again but wasn’t sure what new direction to go…until I saw it. THE ONE. I went with the 33″ Reversible Apron front Fireclay Single Bowl Sink in gloss white from Kraus. Are you wondering what they mean when they say reversible???? I know I was when I first read the description. Well, this sink is so cool and allows you to choose which style you would like for the front, or the exposed apron. Isn’t it rad that you have the option?

I opted for the flat front because I was attracted to the slightly more modern vibe of the flat front, versus the rounded front, which felt more traditional to me. It’s such a great size too! You could easily fit two baby bums for a soak in the sink or to hide all the dirty dinner pots and pans until you feel like doing the dishes.


It comes with a grid that lives on the bottom that I LOVE! It’s so handy, especially for watering all of your plant babes as it lets the water drain freely from the bottom of the pot.

For the faucet, I selected the 18″ Commercial Style Pull-Down in matte black. This baby is sleek and I will never get over how it pairs so well with the black windows. Meow.

I also have really been enjoying the pull down option, and the button on the back which allows you to switch the water stream to a spray. It makes cleaning up a breeze. And the shiny finish always looks clean and sparkly, which is such a nice perk! I couldn’t be happier with this duo from Kraus, and know we will love them for many years. A BIG thank you goes out to Nick from Kraus who was so helpful and even tracked down another sink option for us at the last minute, when the sink we had originally selected was out of stock. He made it possible for us to keep our ORC deadline and for that, I’m so grateful!


I Can See Clearly Now: My New Kitchen Windows

This post is sponsored by Sierra Pacific Windows. All opinions are my own.

Hi guys! I’m back today to fill you in on some more kitchen details! We recently remodeled our kitchen in our new house, as part of the One Room Challenge, and we added the most beautiful windows to the space. I’m not sure if I’ve ever shared before, but my Dad(who can almost always be seen in all of my insta stories, working along side Nate) worked as a Commercial Glazier AKA he installed windows, for more than forty years before retiring six years ago. And on one of our many walk-throughs of the new house during the purchasing process, pointed out how he thought that the old kitchen window was feeling a little “skimpy.” When he said this, I looked at it and instantly knew he was right. We actually have a lovely view from the front of our house, we just needed to showcase it!

See what I mean?

And wouldya just take a look at the difference! Here’s how the kitchen looks now!

Isn’t it just amazing how transformative windows can be? There’s a lot of buzz around furniture, art, and decor…you know, all the pretty things. But, adding an architectural element, like windows, is a game changer. I read a blog post by Emily Henderson where she said, “a small odd vinyl window can ruin a perfectly good room, but a large pretty window that is rightly appointed can literally make a room.” Well, I used to have that small odd vinyl window and replaced it with three (imho) rightly appointed windows…and woweee, was she ever right?! I’m still shocked sometimes when I look into that kitchen and see those beautiful windows staring back at me. I LOVE them.

Like any good fairy tale with a happy ending, I found my knight in shining armor, with Sierra Pacific Windows. When they agreed to partner with me for the One Room Challenge, I was over the moon! But, even with all of my Dad’s window expertise, I was still a little hesitant about replacing windows. It just seems so intimidating! Even the ordering process seemed like it might be tough. What if my measurements are off? There are so many styles of windows; how do you decide which one is best? Well, Sierra Pacific Windows made it SO easy! Allow me to break down their ordering process for you in case you’re intimidated, like I was.

They put me in touch with their local territory manager, Ted, who let me know that he would be happy to come and meet me on-site to talk through details and measurements. We agreed on a date and Ted met Nate and I at the new house where I filled him on all the details about the (massive) project and described the look I wanted. I had been dreaming of a more modern look for the kitchen and adjoining living space and most importantly, allowing some more light to flow throughout the house. Ted was so knowledgeable and educated me on all the options that were available, and also did all the measuring for me…whew! I was so worried that I might flub a number and then my windows would arrive, only to not fit properly. A MAJOR mistake. But after he left, I knew I was in good hands. The next day, he emailed the quote for the windows with all of their specs for me to review. When I was satisfied with how everything looked on paper, I signed off and he finalized the order. Seriously…so easy. Ted was so patient with me as I had a thousand questions along the way and even tweaked the measurements, and added the three lites at the last minute. A few weeks later, they arrived at our door. Easy peasy.

Here’s a progress shot of the kitchen after demolition but before the new windows were installed.

And after install…

We went with their Urban casement style and it’s so sleek and beautiful. With their powder-coated aluminum on the exterior and solid wood on the interior, they are low maintenance, but HIGH impact(in the best way possible). They give our home more of a Modern Pacific Northwest feel that I am hoping to achieve. Eventually, the plan is to change all of our windows in the entire house to these black beauties…we already have another one on order for the entryway! Can’t wait to show you all!

The middle window is a picture window, which is code for, doesn’t open, or is fixed.

The two windows on the left and right both have screens and crank all the way open to a full 90 degrees, if you’d like. They also came with screens so you can open them on a cool summer evening without having to worry about pesky bugs/mosquitoes.

These new windows have been such an impactful addition to our home and now I’m wondering, where else can I add a window?! If you’re considering replacing windows, then look no further than Sierra Pacific Windows. I am forever a fan! They have an amazing assortment of styles, options and colors…something to suit everyone, I’m sure of it! A BIG thank you to Jennifer and Ted for being so awesome to work with…you both made the entire process so seamless! Here’s a few more shots of how these windows have changed the entire look of our home.

And one more before and after because you guys know I can’t resist…

Thanks for reading! XOXO


Our new CAFE Appliances: Dishwasher and Refrigerator Edition

This post is sponsored by CAFE

Hi guys! I’m back this week to talk kitchen appliances. When I first started planning my kitchen, the first thing I put on my wishlist were Cafe appliances. I had been seeing them pop up when I was purusing pinterest for inspo pics. Every time I spotted one of their gorgeous appliances in a kitchen, I had to pick my jaw up off the floor. Seriously, they are show-stoppers!

If you aren’t familiar with GE’s Cafe line, it’s unlike any other appliances around. They have everything you need to plan your kitchen from any and all sizes of refrigerators, ranges with many styles of range hoods to match, dishwashers, and even microwaves. But my favorite thing about their appliances is that you can customize the color and hardware combinations. Isn’t that exciting? ps…you know your adulting HARD when kitchen appliances really get your blood flowing. HA!

But for each piece, you decide the base color you’d like–we chose their Matte White. And the white is AMAZING! We had a stainless steel refrigerator in our last house and with our three kids running around, I had to wipe the refrigerator clean from fingerprints and smudges every. single. day. Cafe’s matte white doesn’t smudge. I swear that I haven’t even cleaned the front once since we installed them over four weeks ago. Life changing!!!! They also have stainless and matte black options which I really liked as well. After you’ve decided on your base color, you get to choose your hardware color. They have brushed bronze, black, copper, and stainless. I chose the brushed bronze because it’s just so beautiful. It’s like jewelry for your kitchen appliances!

For the refrigerator, I wanted a clean front and didn’t want the water dispenser on the outside. Our kitchen is pretty small, and I didn’t want that visual distraction. I went with this one. But with Cafe, it doesn’t mean that you lose the convenience of a water dispenser. They put it on the inside! Isn’t that genius? That’s what I call thoughtful design, amiright? It also connects to your wifi so you have the power to control your refrigerator from your phone. They have thought of everything.

Another nifty perk is that the refrigerator door has an alarm that dings in case you too, have an absent minded kiddo who is constantly leaving the doors wide open.

The dishwasher is a little power house and washes our dishes until they sparkle…literally, they actually sparkle. Nate has been teasing me all week because I actually get excited to load and start the dishwasher. This baby has adjustable racks, controllable wash zones to save water, and enough room to even fit larger trays and pots. The LCD screen that displays the dishwasher cycle status is one of my favorite features.

I’m just loving these appliances and would like to thank the kind folks at Cafe (a BIG thank you to Megan who rushed a new range hood to us when I discovered that I ordered the wrong one just days before the big ORC reveal) for entrusting me with this sponsorship. I am very grateful. I’ll be back next week to give you guys all the deets on the range and range hood because those babies deserve their own post…heck, they deserve a song written about them!

Six months and three faucets later…the true story of a diy kitchen remodel

This post is sponsored by Inmod

I’m so excited to share our finished kitchen with you guys today! It was a long, long process and it feels BEYOND good to be all finished up! Our kitchen was a diy through and through and has me feeling some major pride. We were newbies to some of the projects (tiling) but also old hats at others (painting the kitchen cabs). But, this story has a happy ending and we are thrilled with how it came out!

Let’s take a look back at where we began, shall we?

Although we kept the original footprint of the kitchen, we changed almost everything else. There wasn’t really anything wrong with the kitchen before, but it wasn’t our style and just kinda fell flat. That feeling of blah.

Our first task was removing the old upper cabinets and the vent hood. I hated how the original cabinets were floating in the middle of the wall. Our ceilings are high at nine feet and that area above the cabinets didn’t seem like a good use of space. Our kitchen is small so wasted space is a no no. This seemed like an opportunity for tile all the way up to the ceiling and some open shelving.

For tile, we chose the 2×6 weathered white zellige from Cle Tile. I have been in love with this tile ever since Emily Henderson used it in her kitchen last year. I have never tiled anything of this scale before and I was actually pretty nervous about tackling this project, but it turned out to be kinda fun! My sister and her husband came for the weekend to help us and we made a party out of it! I definitely recommend drinking cocktails while tiling…as long as you can keep your lines straight. The tile came out beautifully and I LOVE it. It’s my favorite part of the kitchen. And let me tell ya…it’s even better in person.

For the open shelves, we tracked down a local who sells wood slabs of all kinds. All we had to do was decide on a type of wood and he cut it down to size for us. We ended up going with a couple of slabs of maple. I wanted a light colored wood with some grain and the maple fit the bill. It’s a hardwood too so that’s another bonus. After they were hung, I sealed the shelves with wax.

Our countertops are concrete and we poured them ourselves. I’ve actually been getting so many questions about them and the process that I am going to dedicate an entire post just to the countertops. Coming soon! It was a BIG job but they are perfectly imperfect and just what I was envisioning for the kitchen! A big thank you to Jimmy and Dani for coming from Idaho and showing us the ropes.

Deciding on the faucet for the kitchen sink was a tough one for me. I don’t know why exactly, but I ended up ordering three before I settled on this matte black guy. My husband wanted to kill me (not really…but, kinda) but my folks ended up adopting the first one for their kitchen and the second one is living out its days in the box in the garage. I’m confident we will find it a new home though! Maybe Facebook marketplace or craigslist?

For our cabinets, we painted them Hidden Falls by Benjamin Moore and added new brass hardware from Cb2. The new color is a deep green with some blue undertones and I love the moody vibe it gives the kitchen.

And just when we were putting the finishing touches on the kitchen, Inmod approached me and asked if I would be interested in working together. I jumped at the shot. You see, I couldn’t decide on bar stools for the new kitchen and after the whole faucet debacle, I knew I needed to be sure of my decision (i.e. not order online and then hate them in person). Inmod is famous for their crazy big selection of modern, mid-century, industrial, and Scandinavian furniture. They also sell styles from world revered designers such as Eames, Wegner, and Saarinen, just to name a few! So knowing this, I knew I could pick some bar stools that would function well and look beautiful in the new kitchen.

I ended up choosing their Sigfred Barstools in the tobacco color and I’m. In. Love. They have a beautiful leather padded seat with the most lovely stitching detail. The legs are a black metal and I love how it plays so well with my matte black faucet. Aren’t they the perfect pair? Putting them together was a breeze, and I assembled them by myself one evening while my husband gave the baby a bath. I finished before he had his jams on!

And because we eat all of our meals at the bar in these barstools, I can attest to their comfort. We spend a lot of time in this area because we don’t have a dining room (but this is a whole different story, for another time). Also, it is worth mentioning that there may have been a spaghetti supper on their first night in the house and they wipe up beautifully. I’m a big fan, can you tell?

So there you have it! The kitchen is done! What do you think? Does anyone have any DIY tales where something went horribly awry?? Did anyone order multiple kitchen faucets? I want all the details. Leave me a comment…I’d love to hear!