rustic modern office space – one room challenge: week one

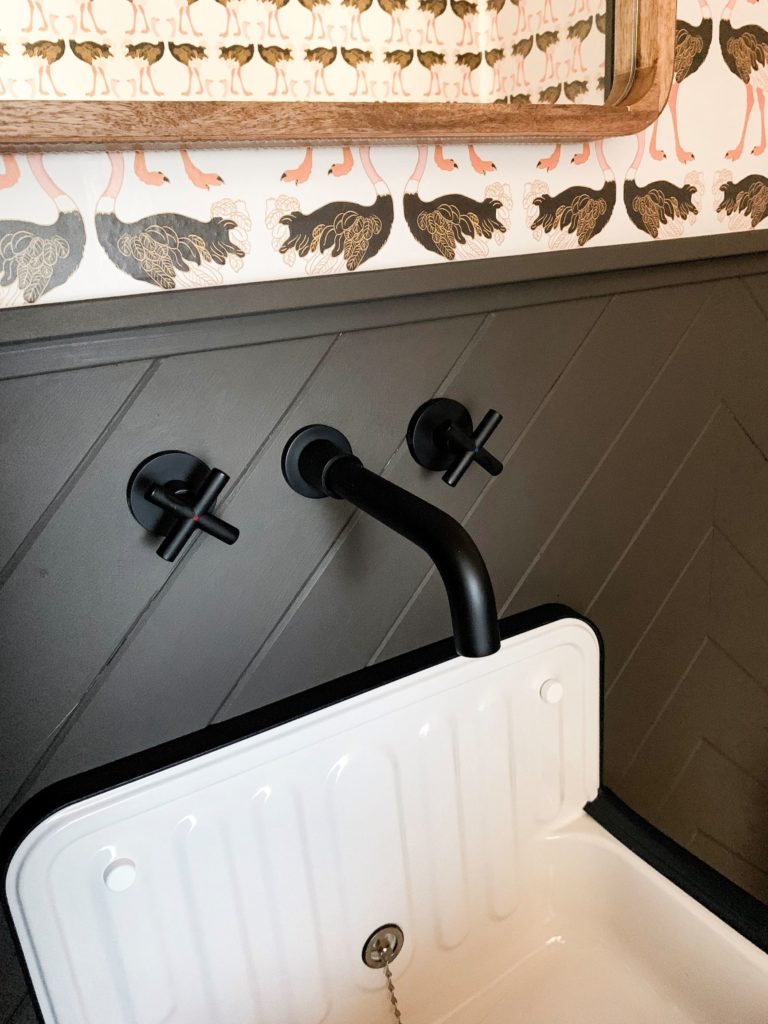
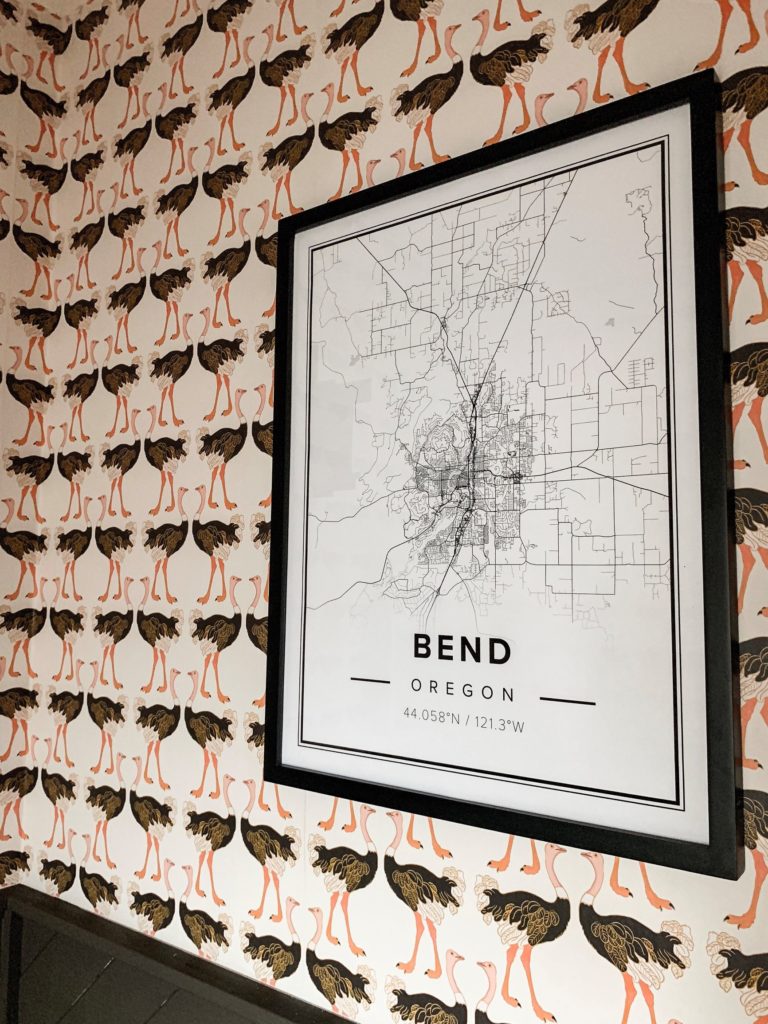
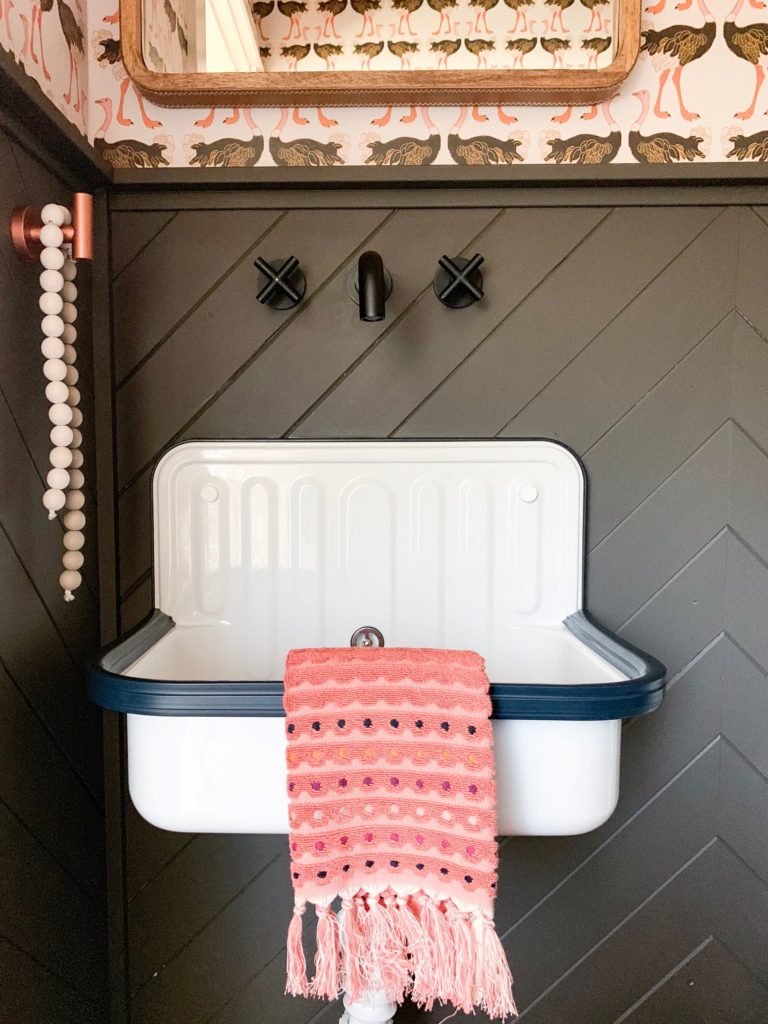
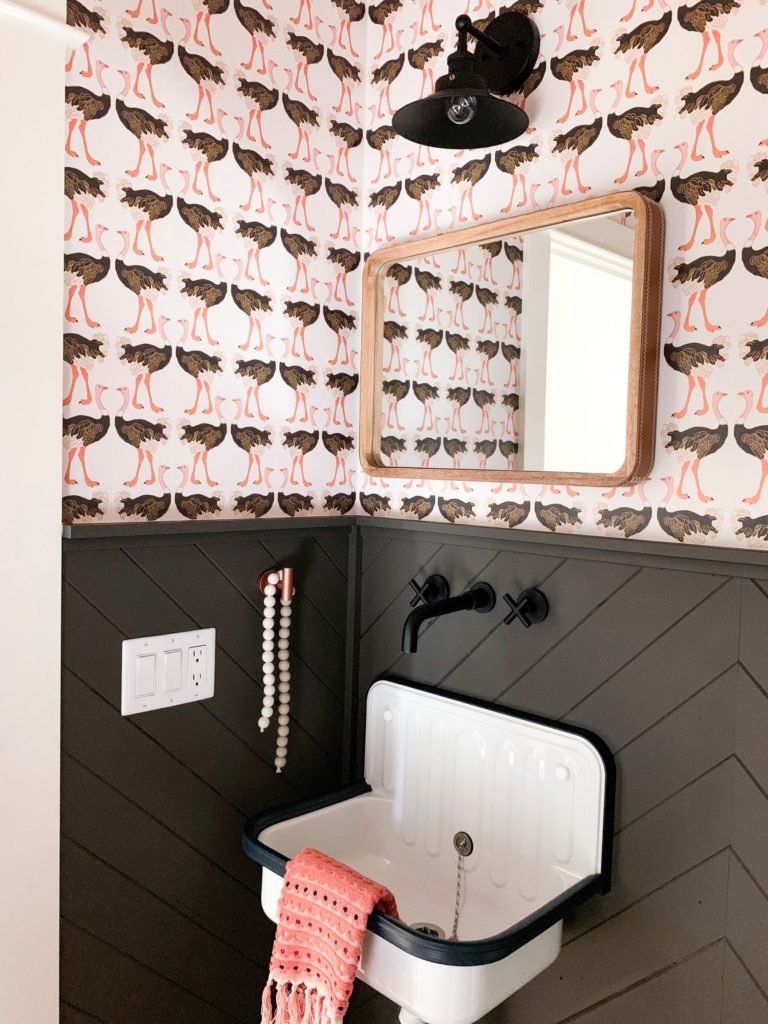
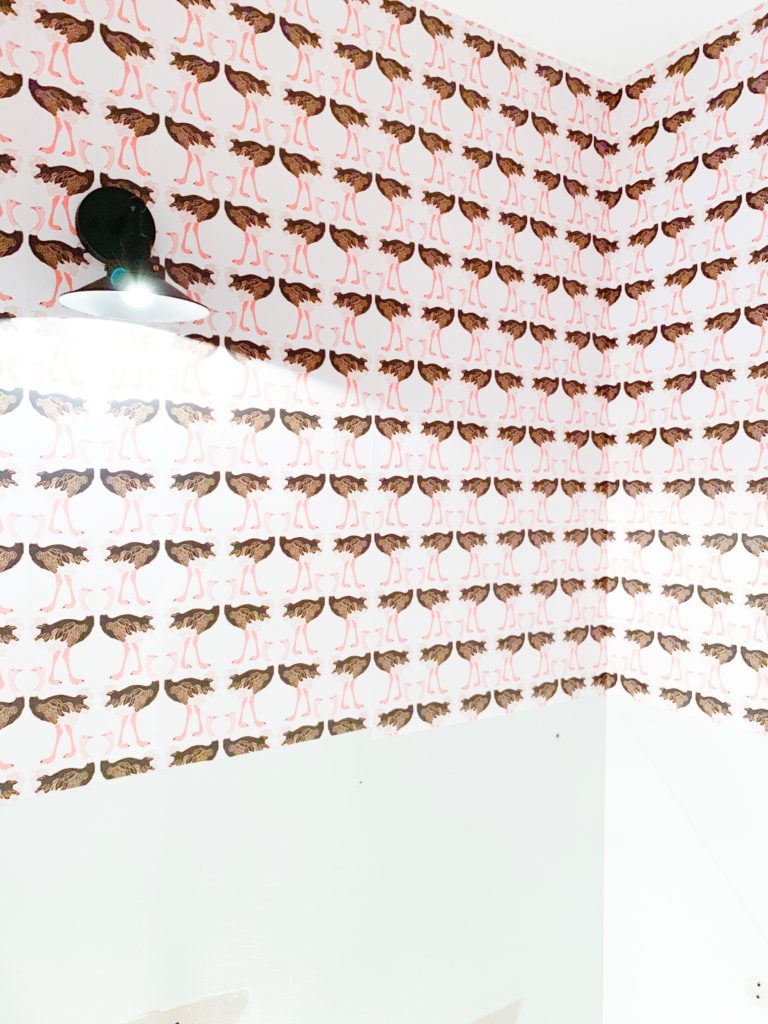
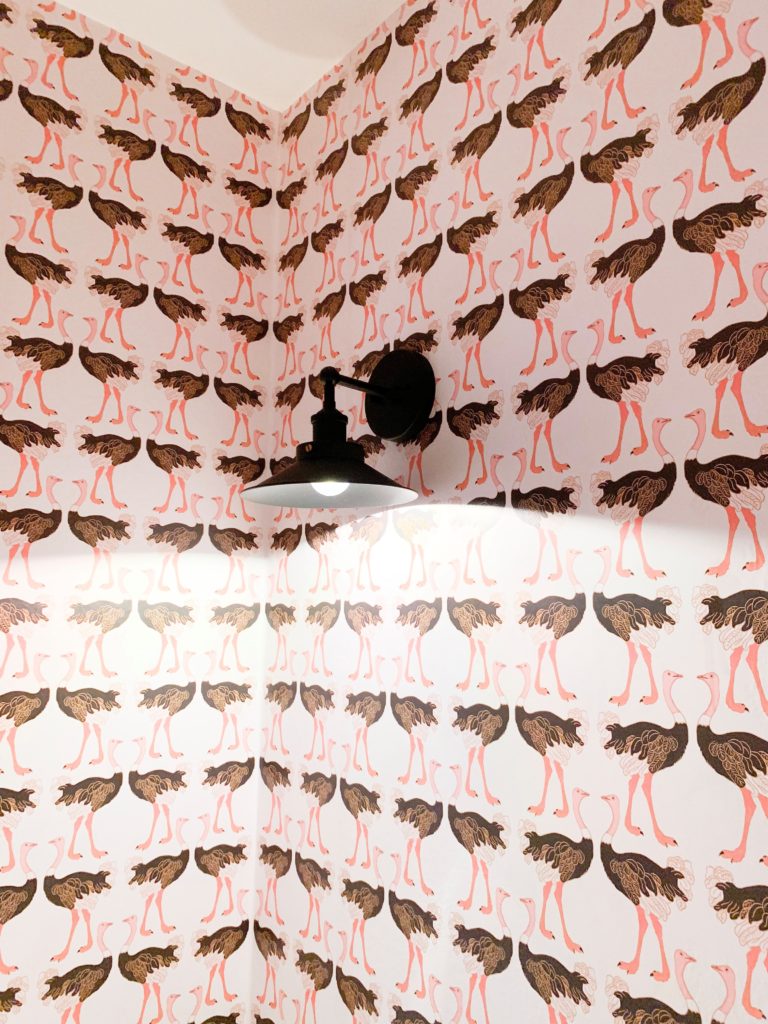
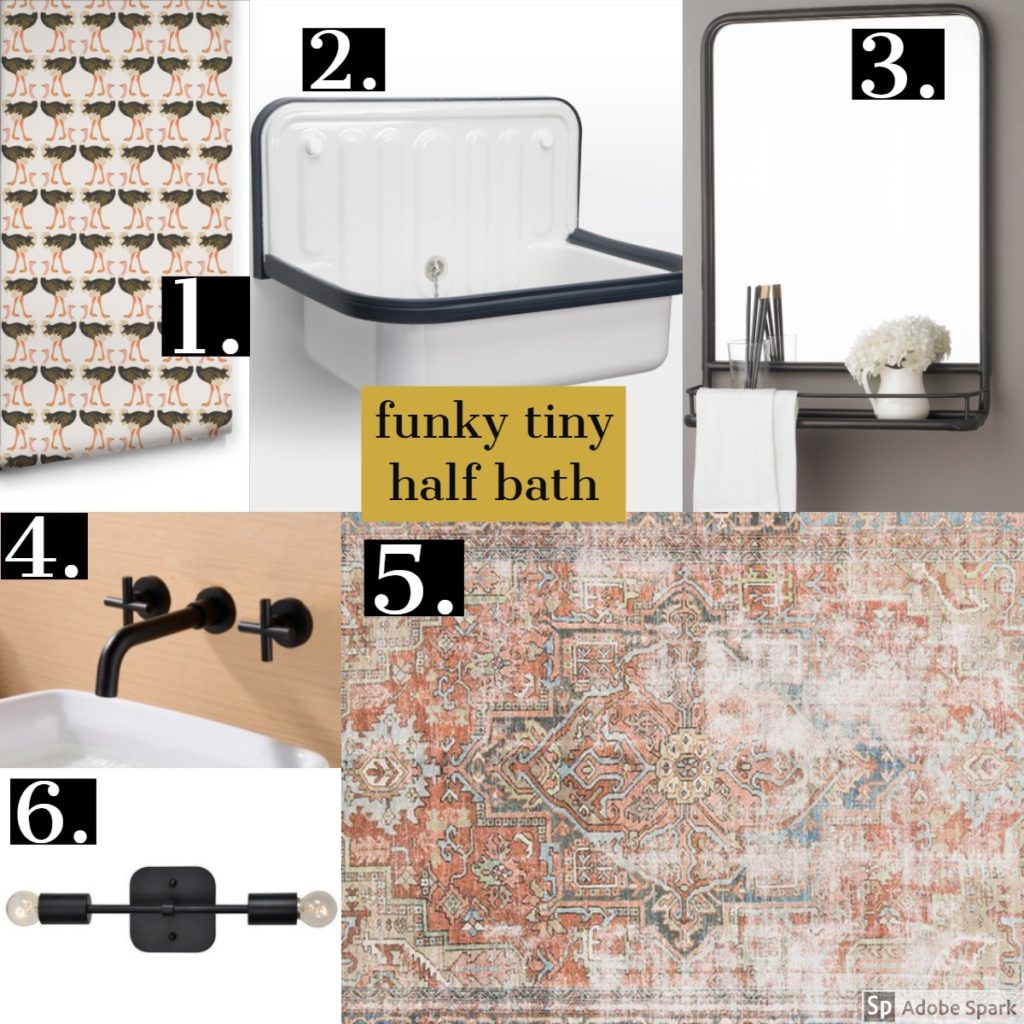
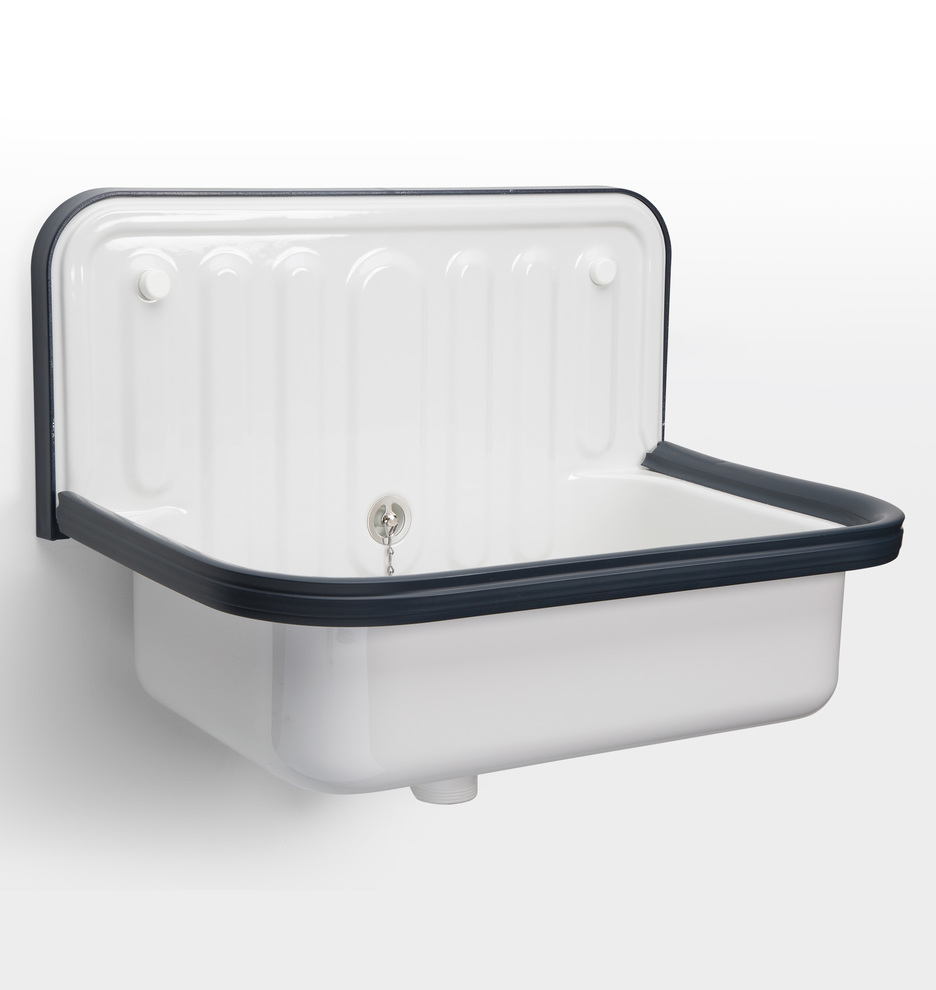
Well….here we go again! It’s time start another round of the One Room Challenge…only this time, spring edition 2019. Last fall, was my first stab at the ORC and I had so much fun transforming a boring little half bath into a rad, ostrich filled powder room. So, I’m back again, but with a whole new game plan! Here’s what I’m thinking!

1./2./3./4./5./6.

Now, as some of you know, my hubs works from home full-time. When we first moved into our house, we made the loft area at the top of the stairs (the space that I now lovingly refer to as the mom loft) into his office. Well, it didn’t take us long to figure out that that space was not going to work…think screaming toddlers, barking puppies, and a constant flow of kids coming and going with their friends. My hubs needed a quiet place to work so we had to come up with a solution that would better suit the needs of our very busy, and very LOUD family. After some research, we found a local place where you design your own shed online and they bring your designs to life and build it on site. The whole process only takes a few weeks and then they come and deliver your new shed in the spot of your choice. It took some convincing by the hubs, but eventually I caved and here we are!
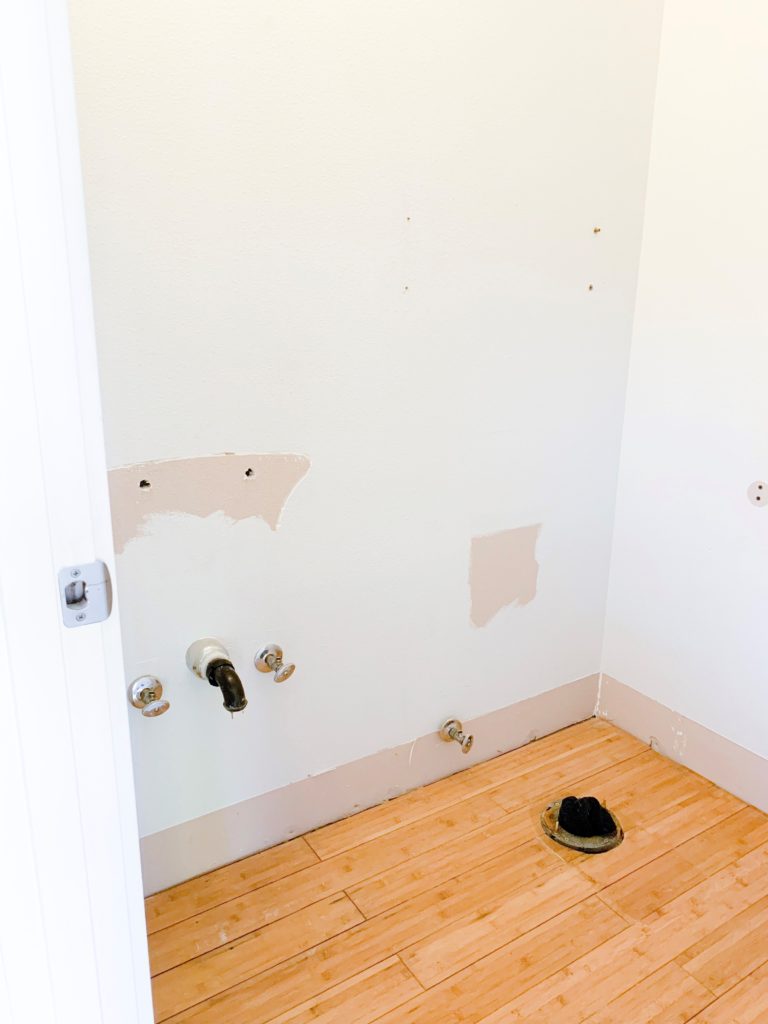
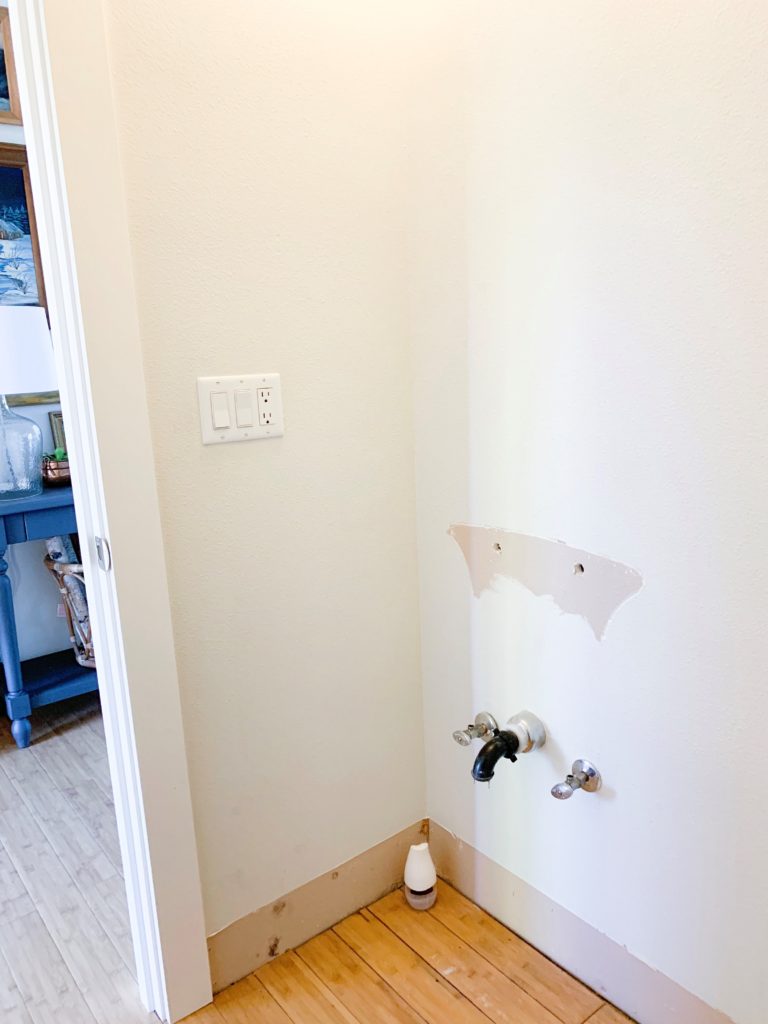
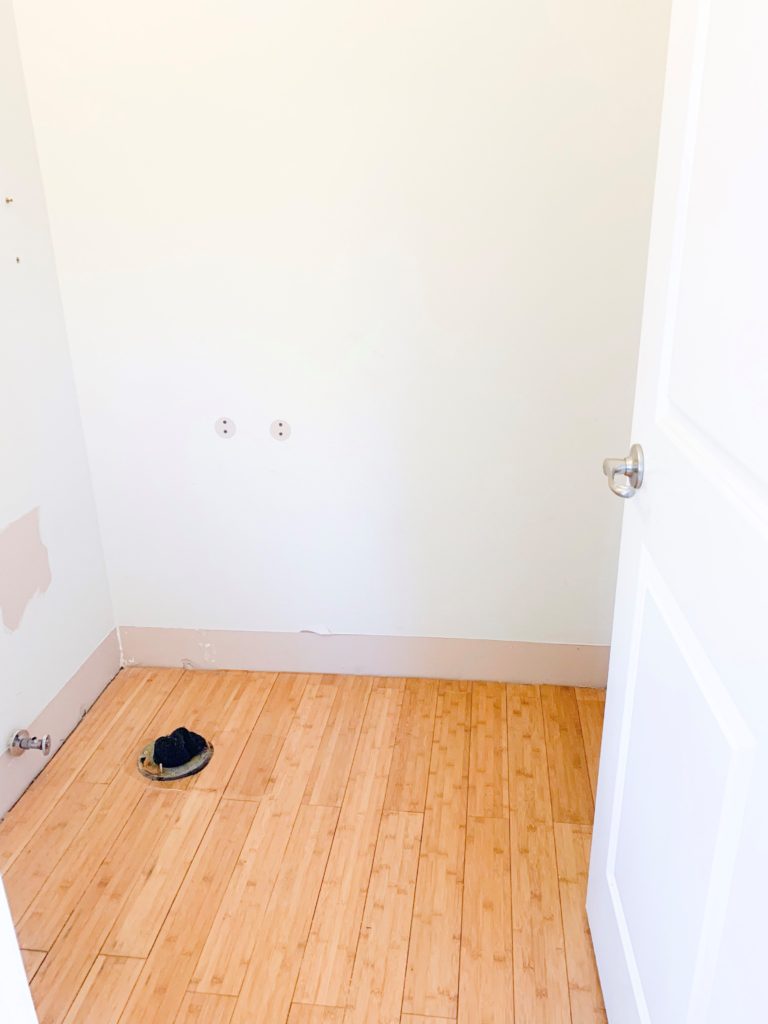
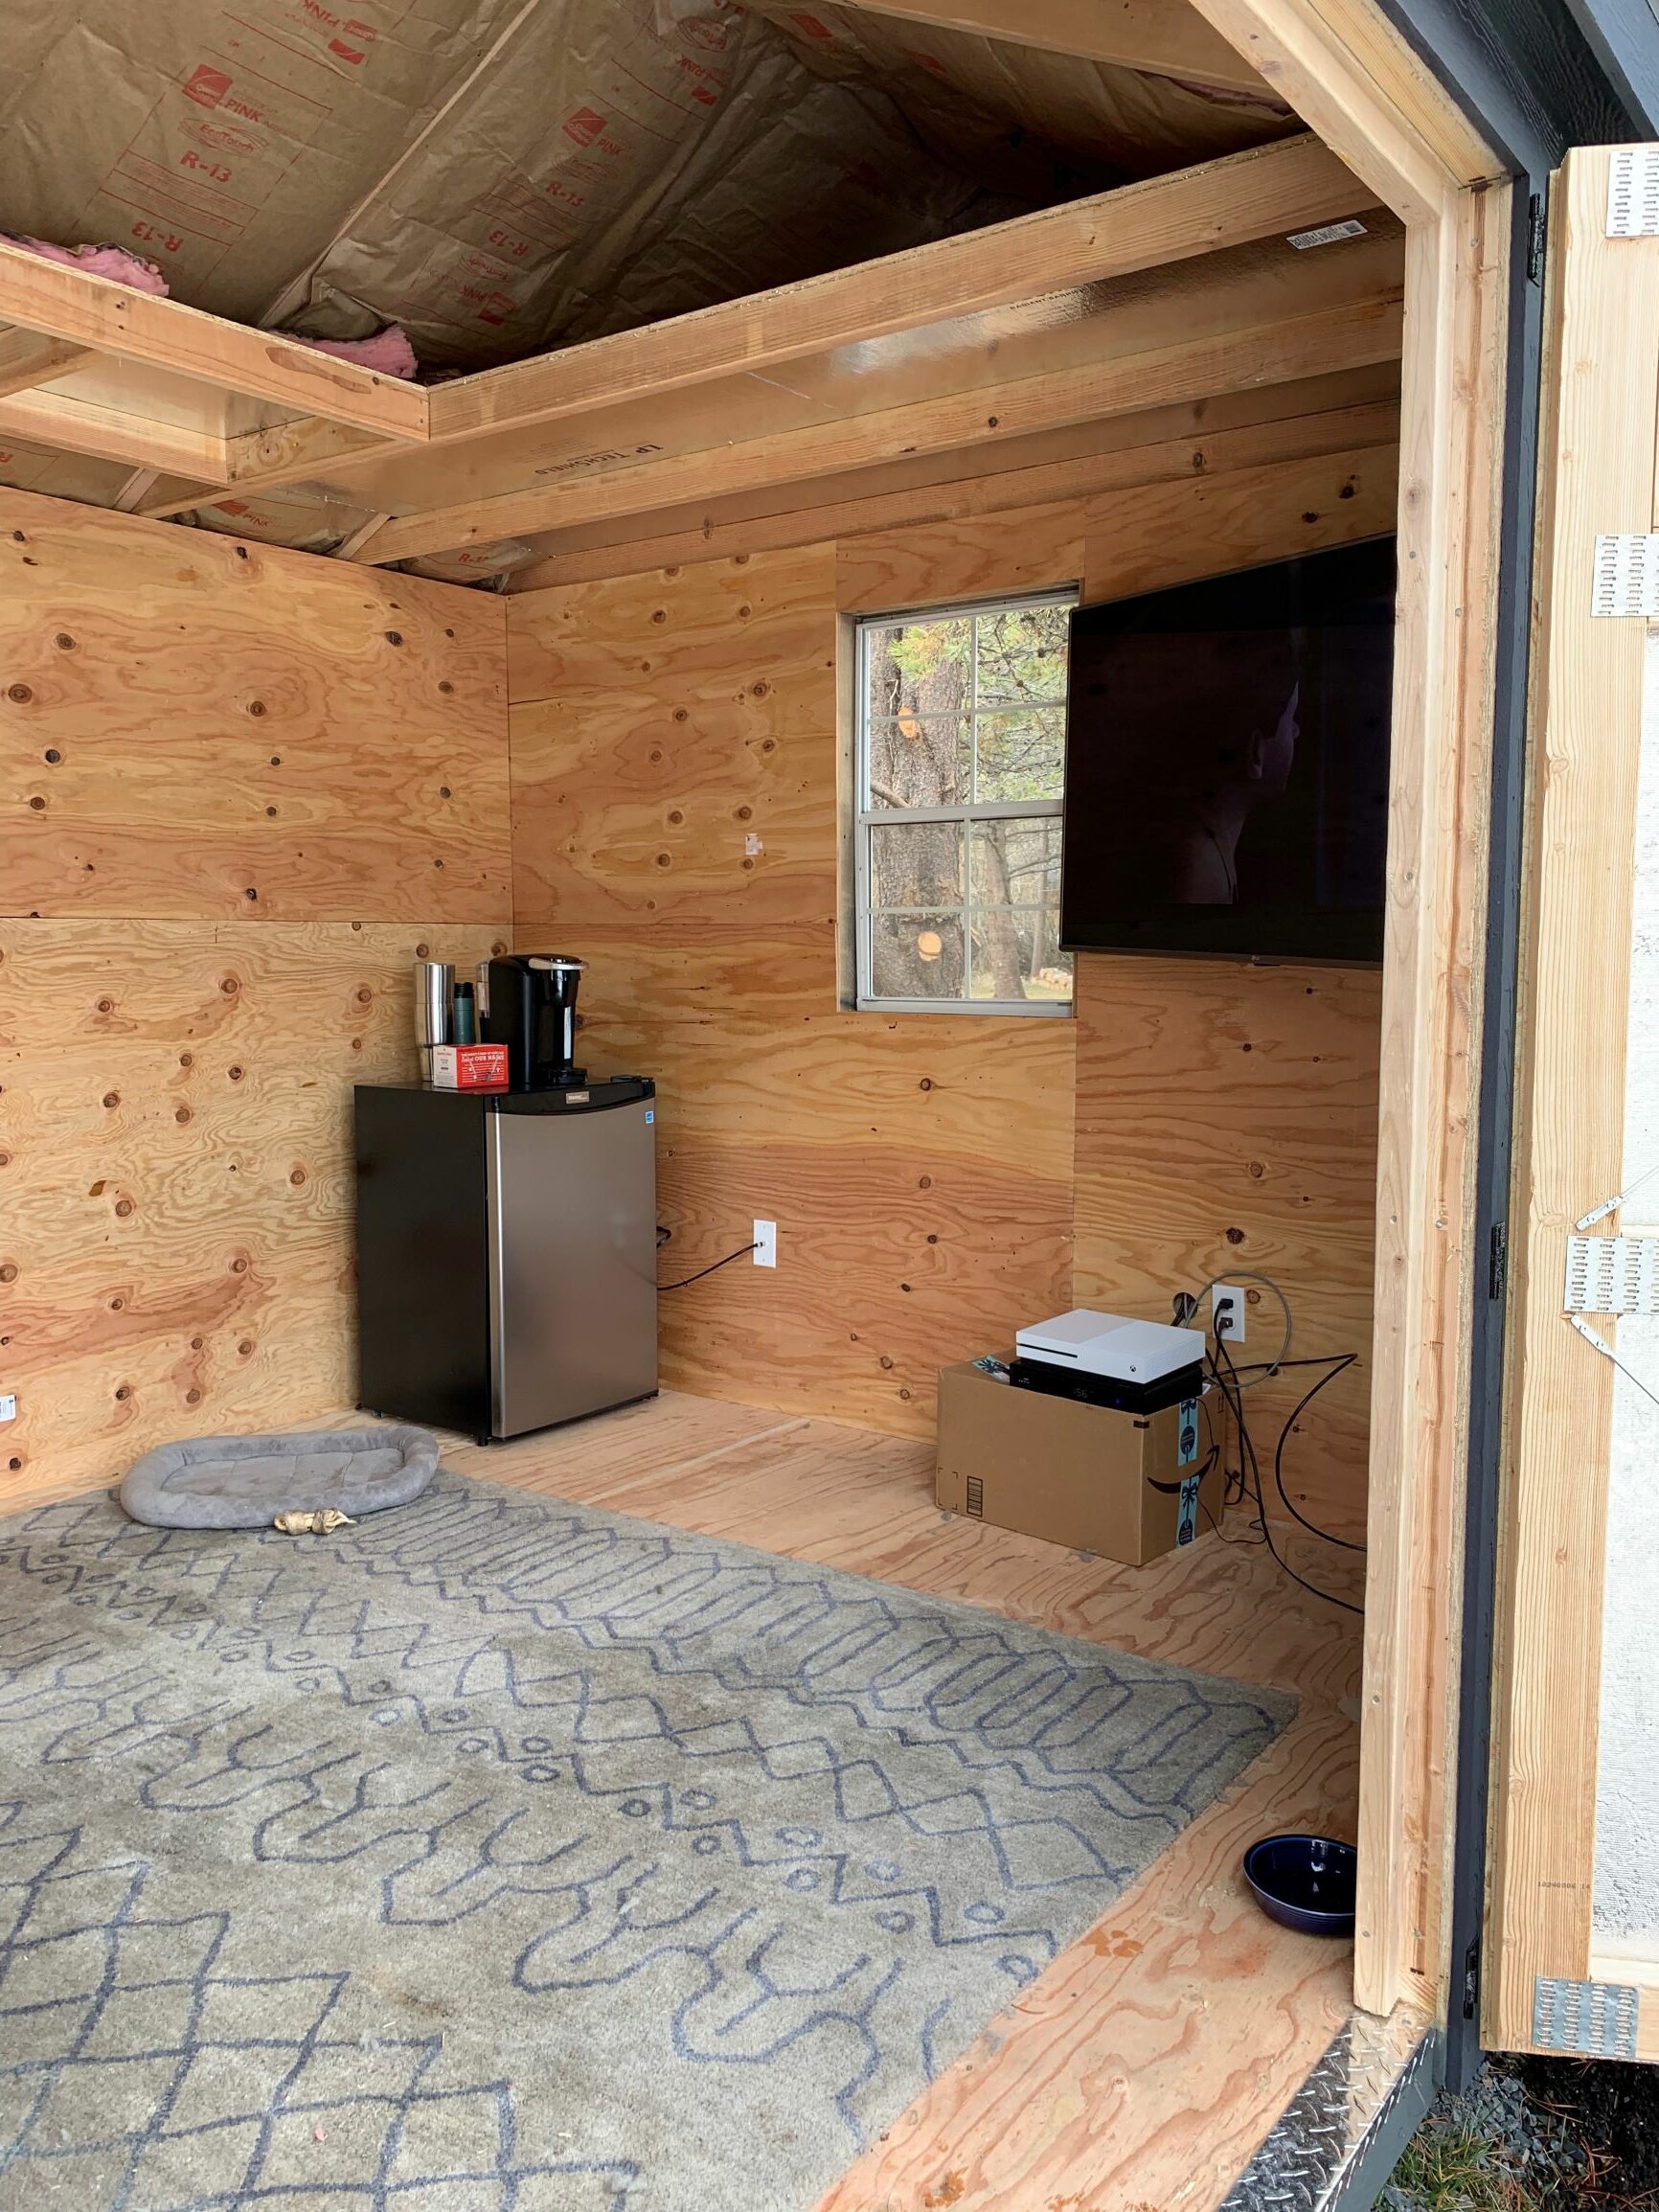
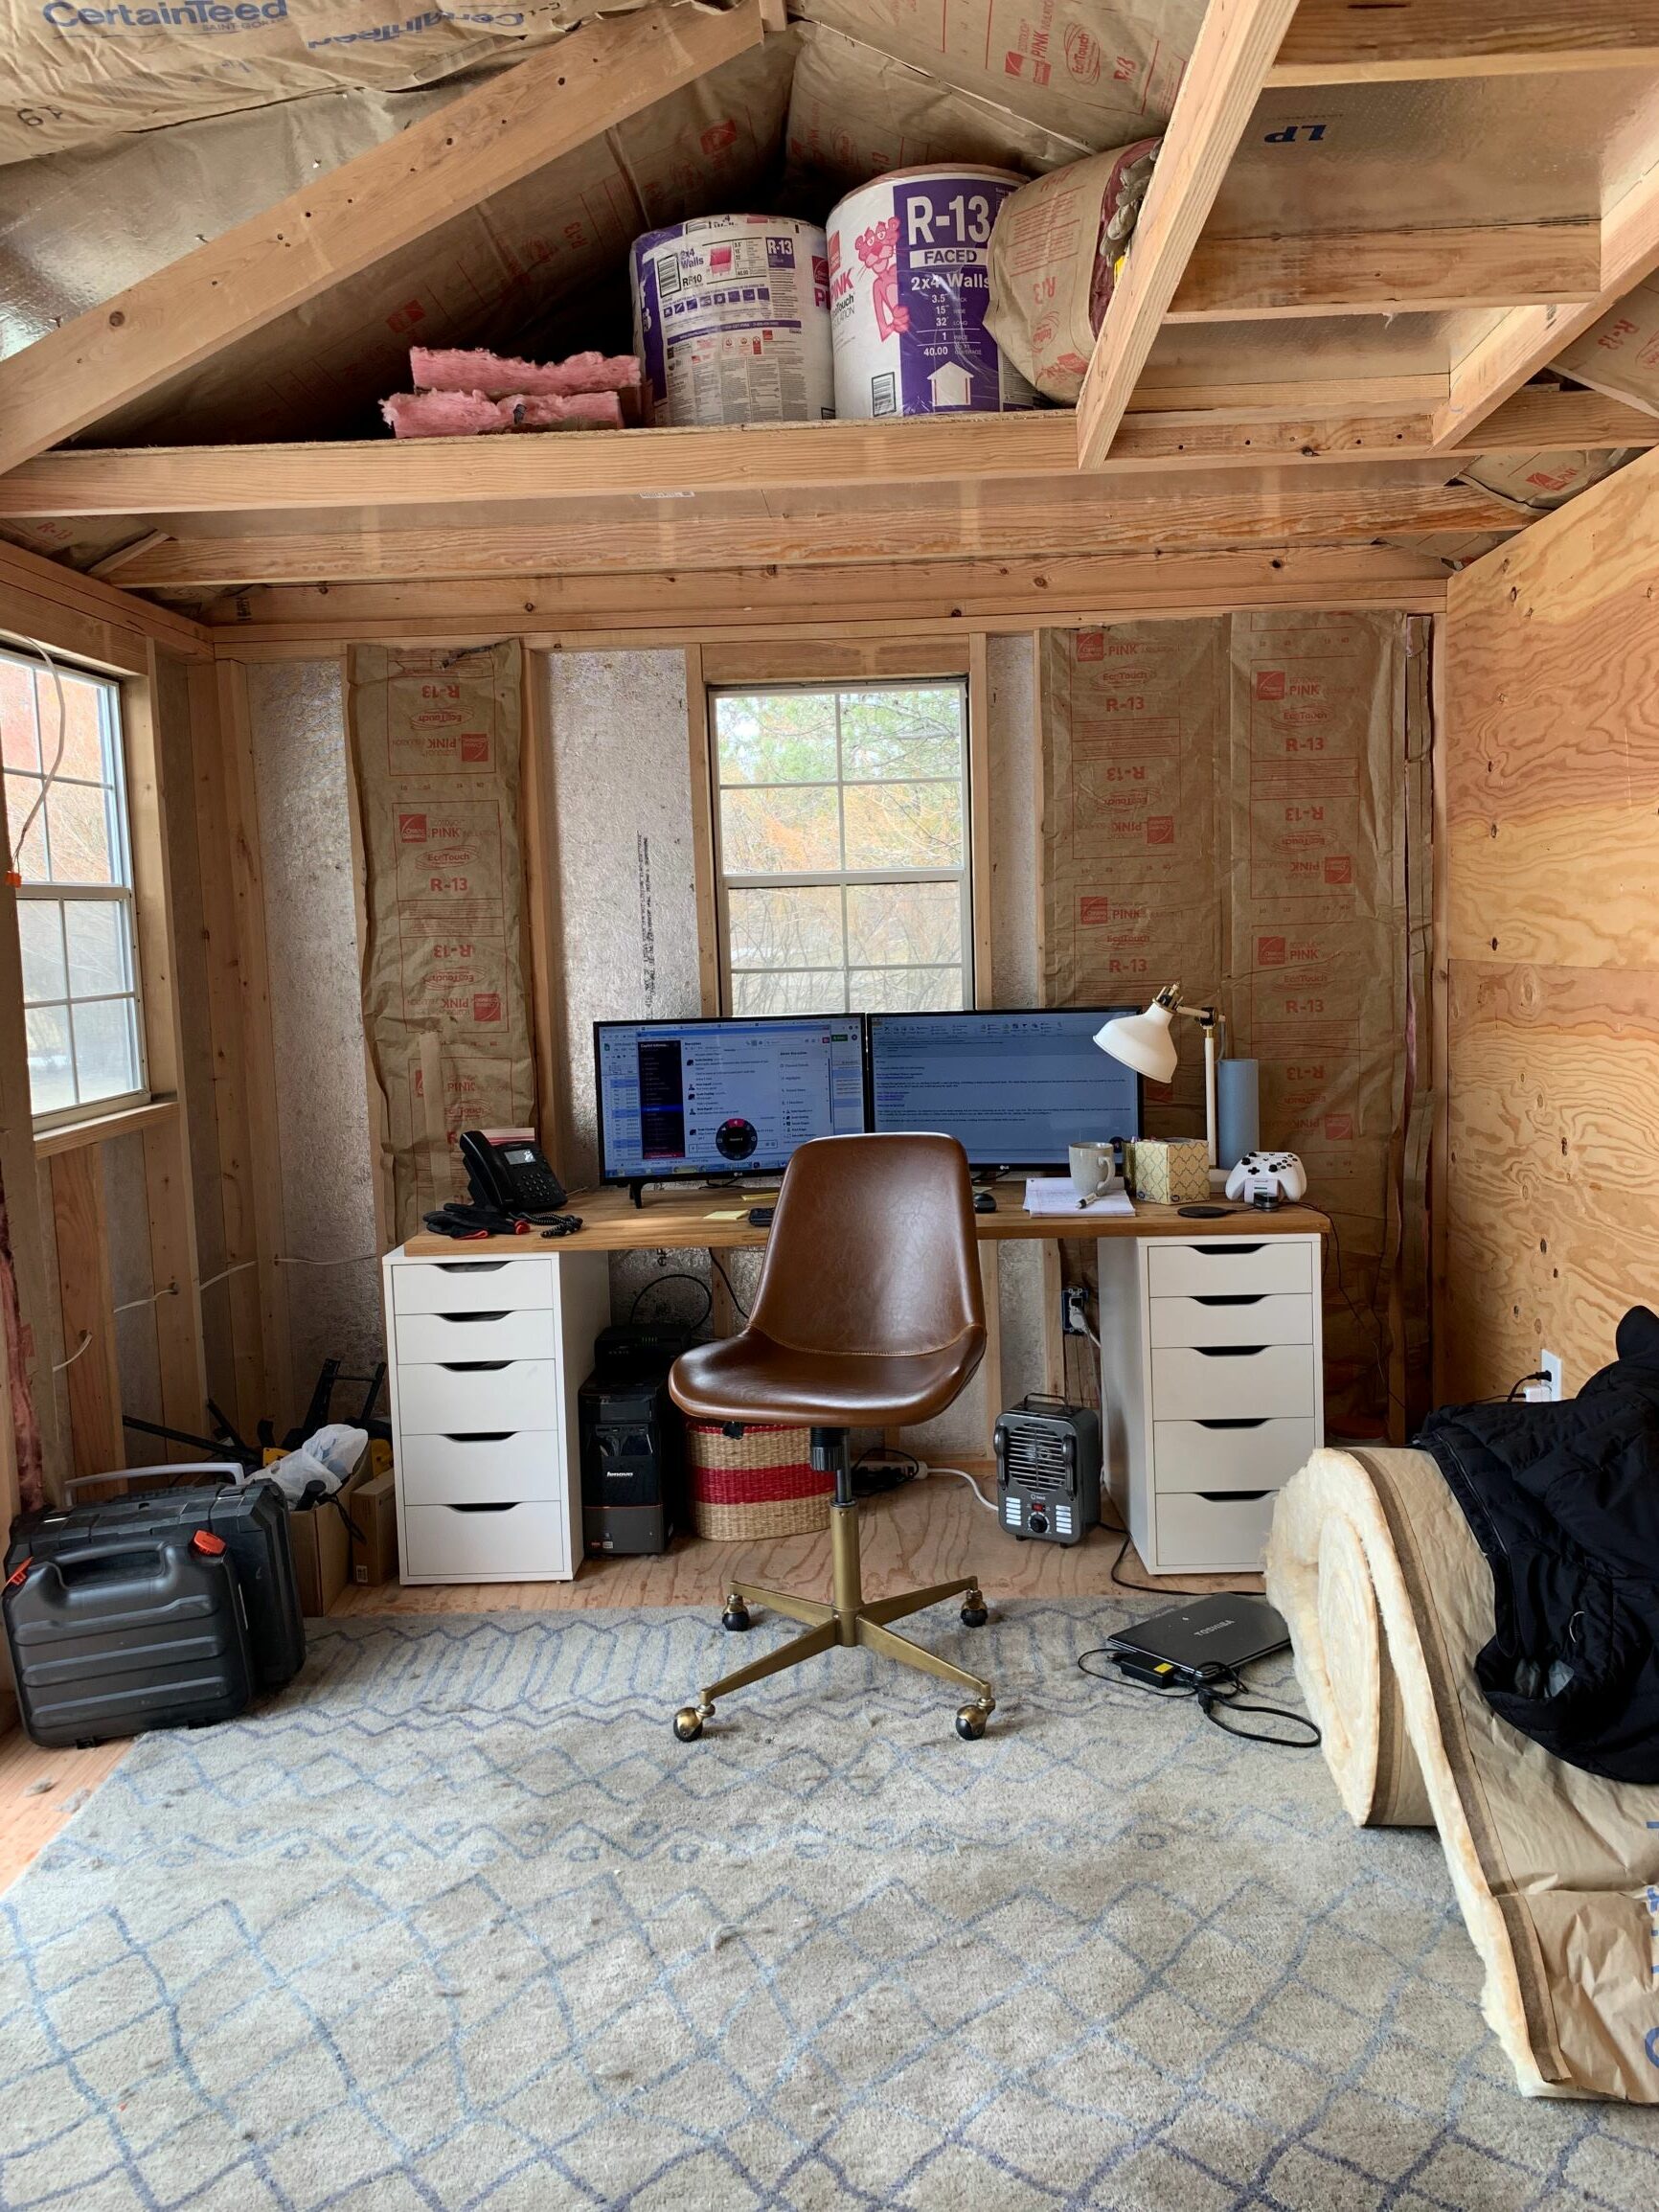
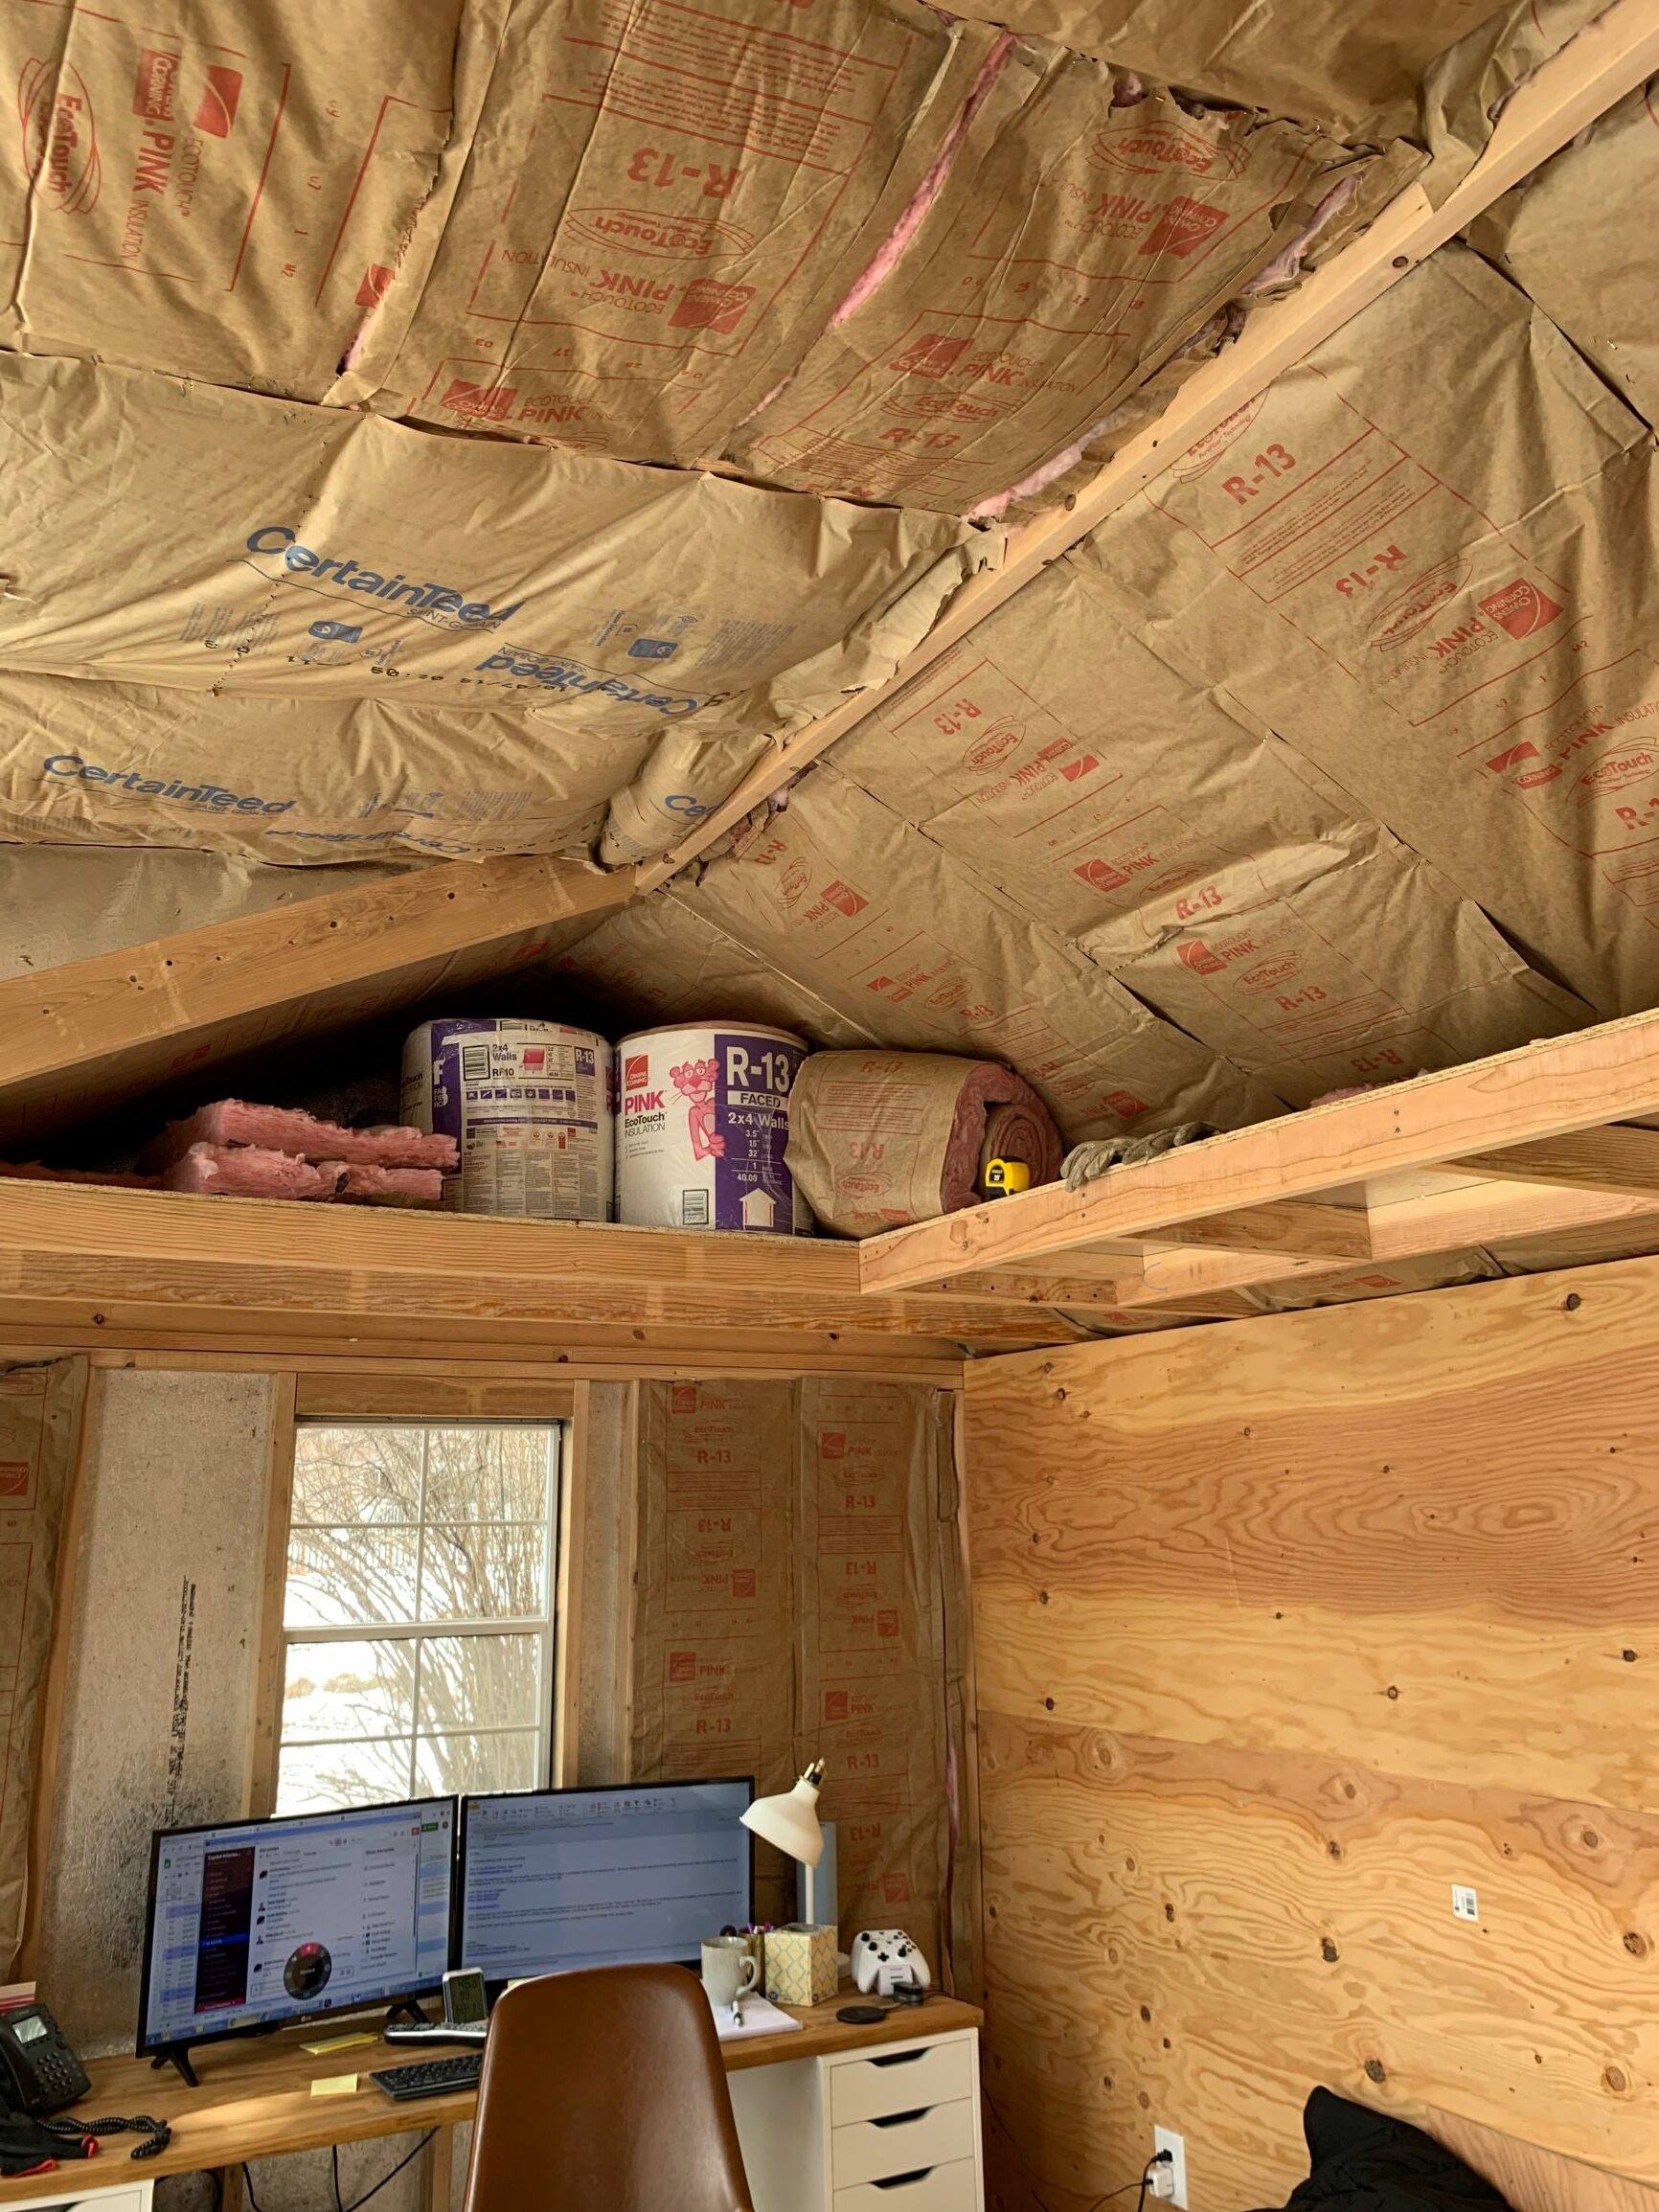
THE BEFORE

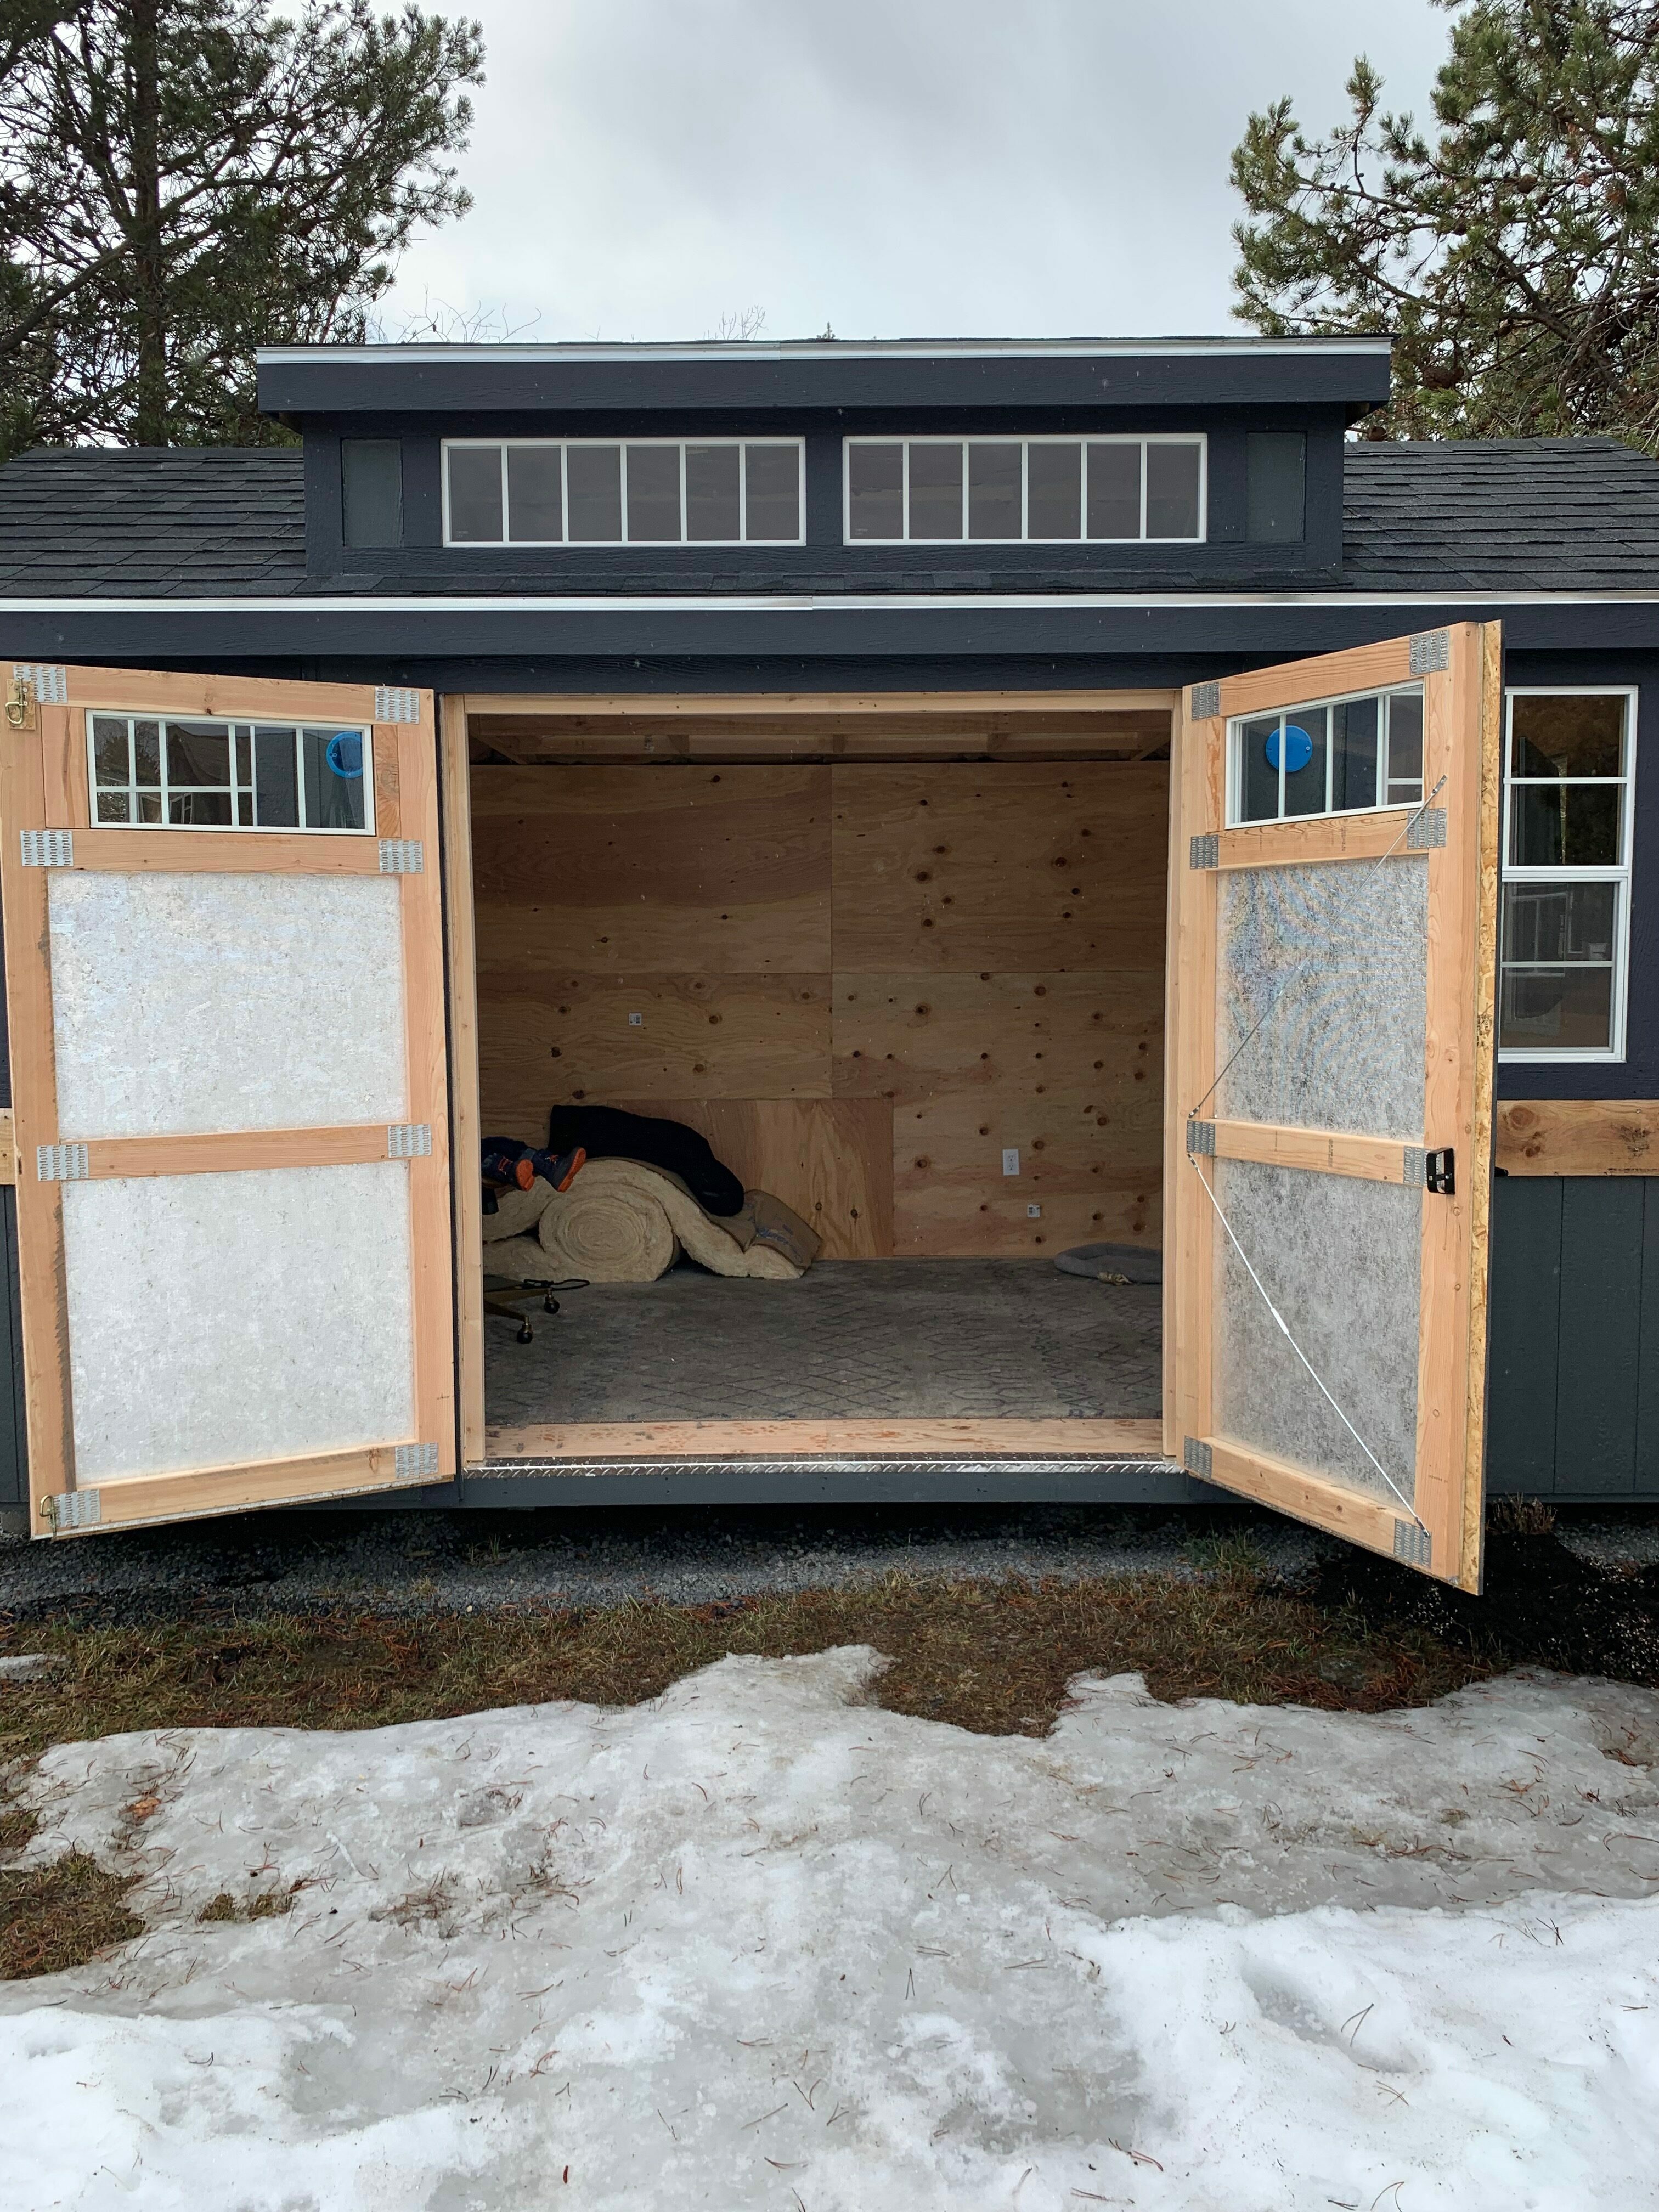
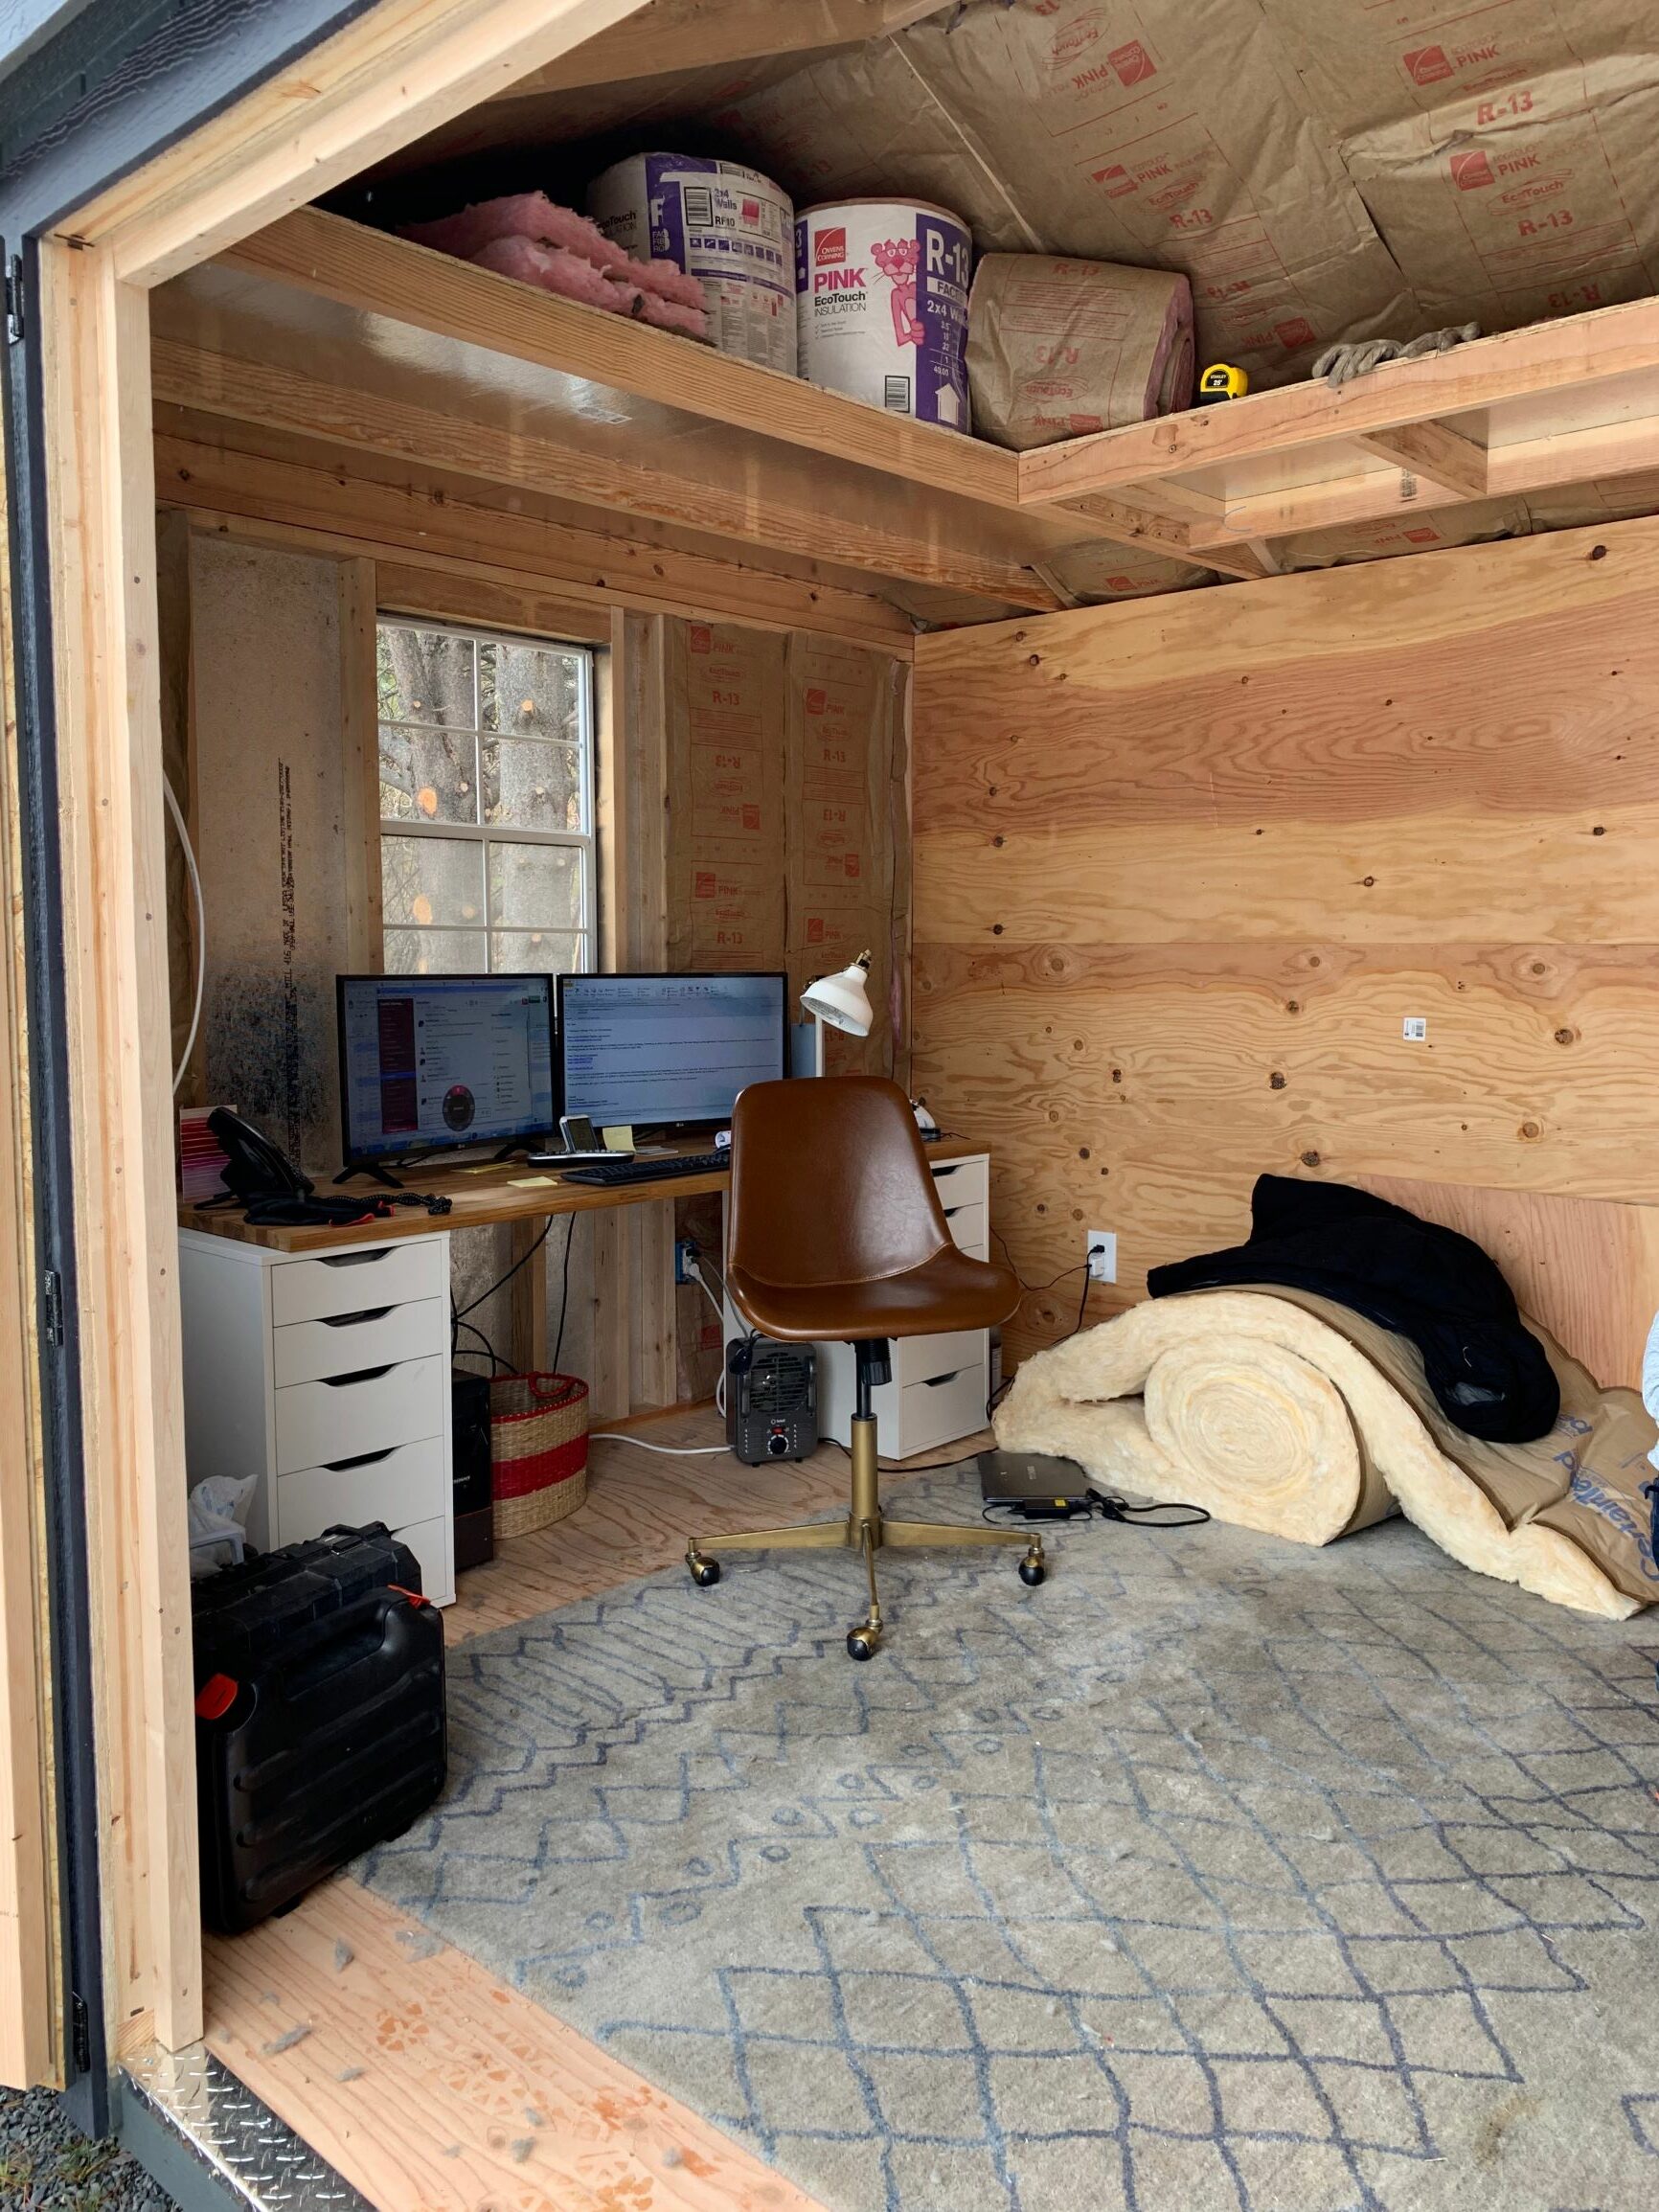
Okay, here’s our starting point. A truly blank slate.

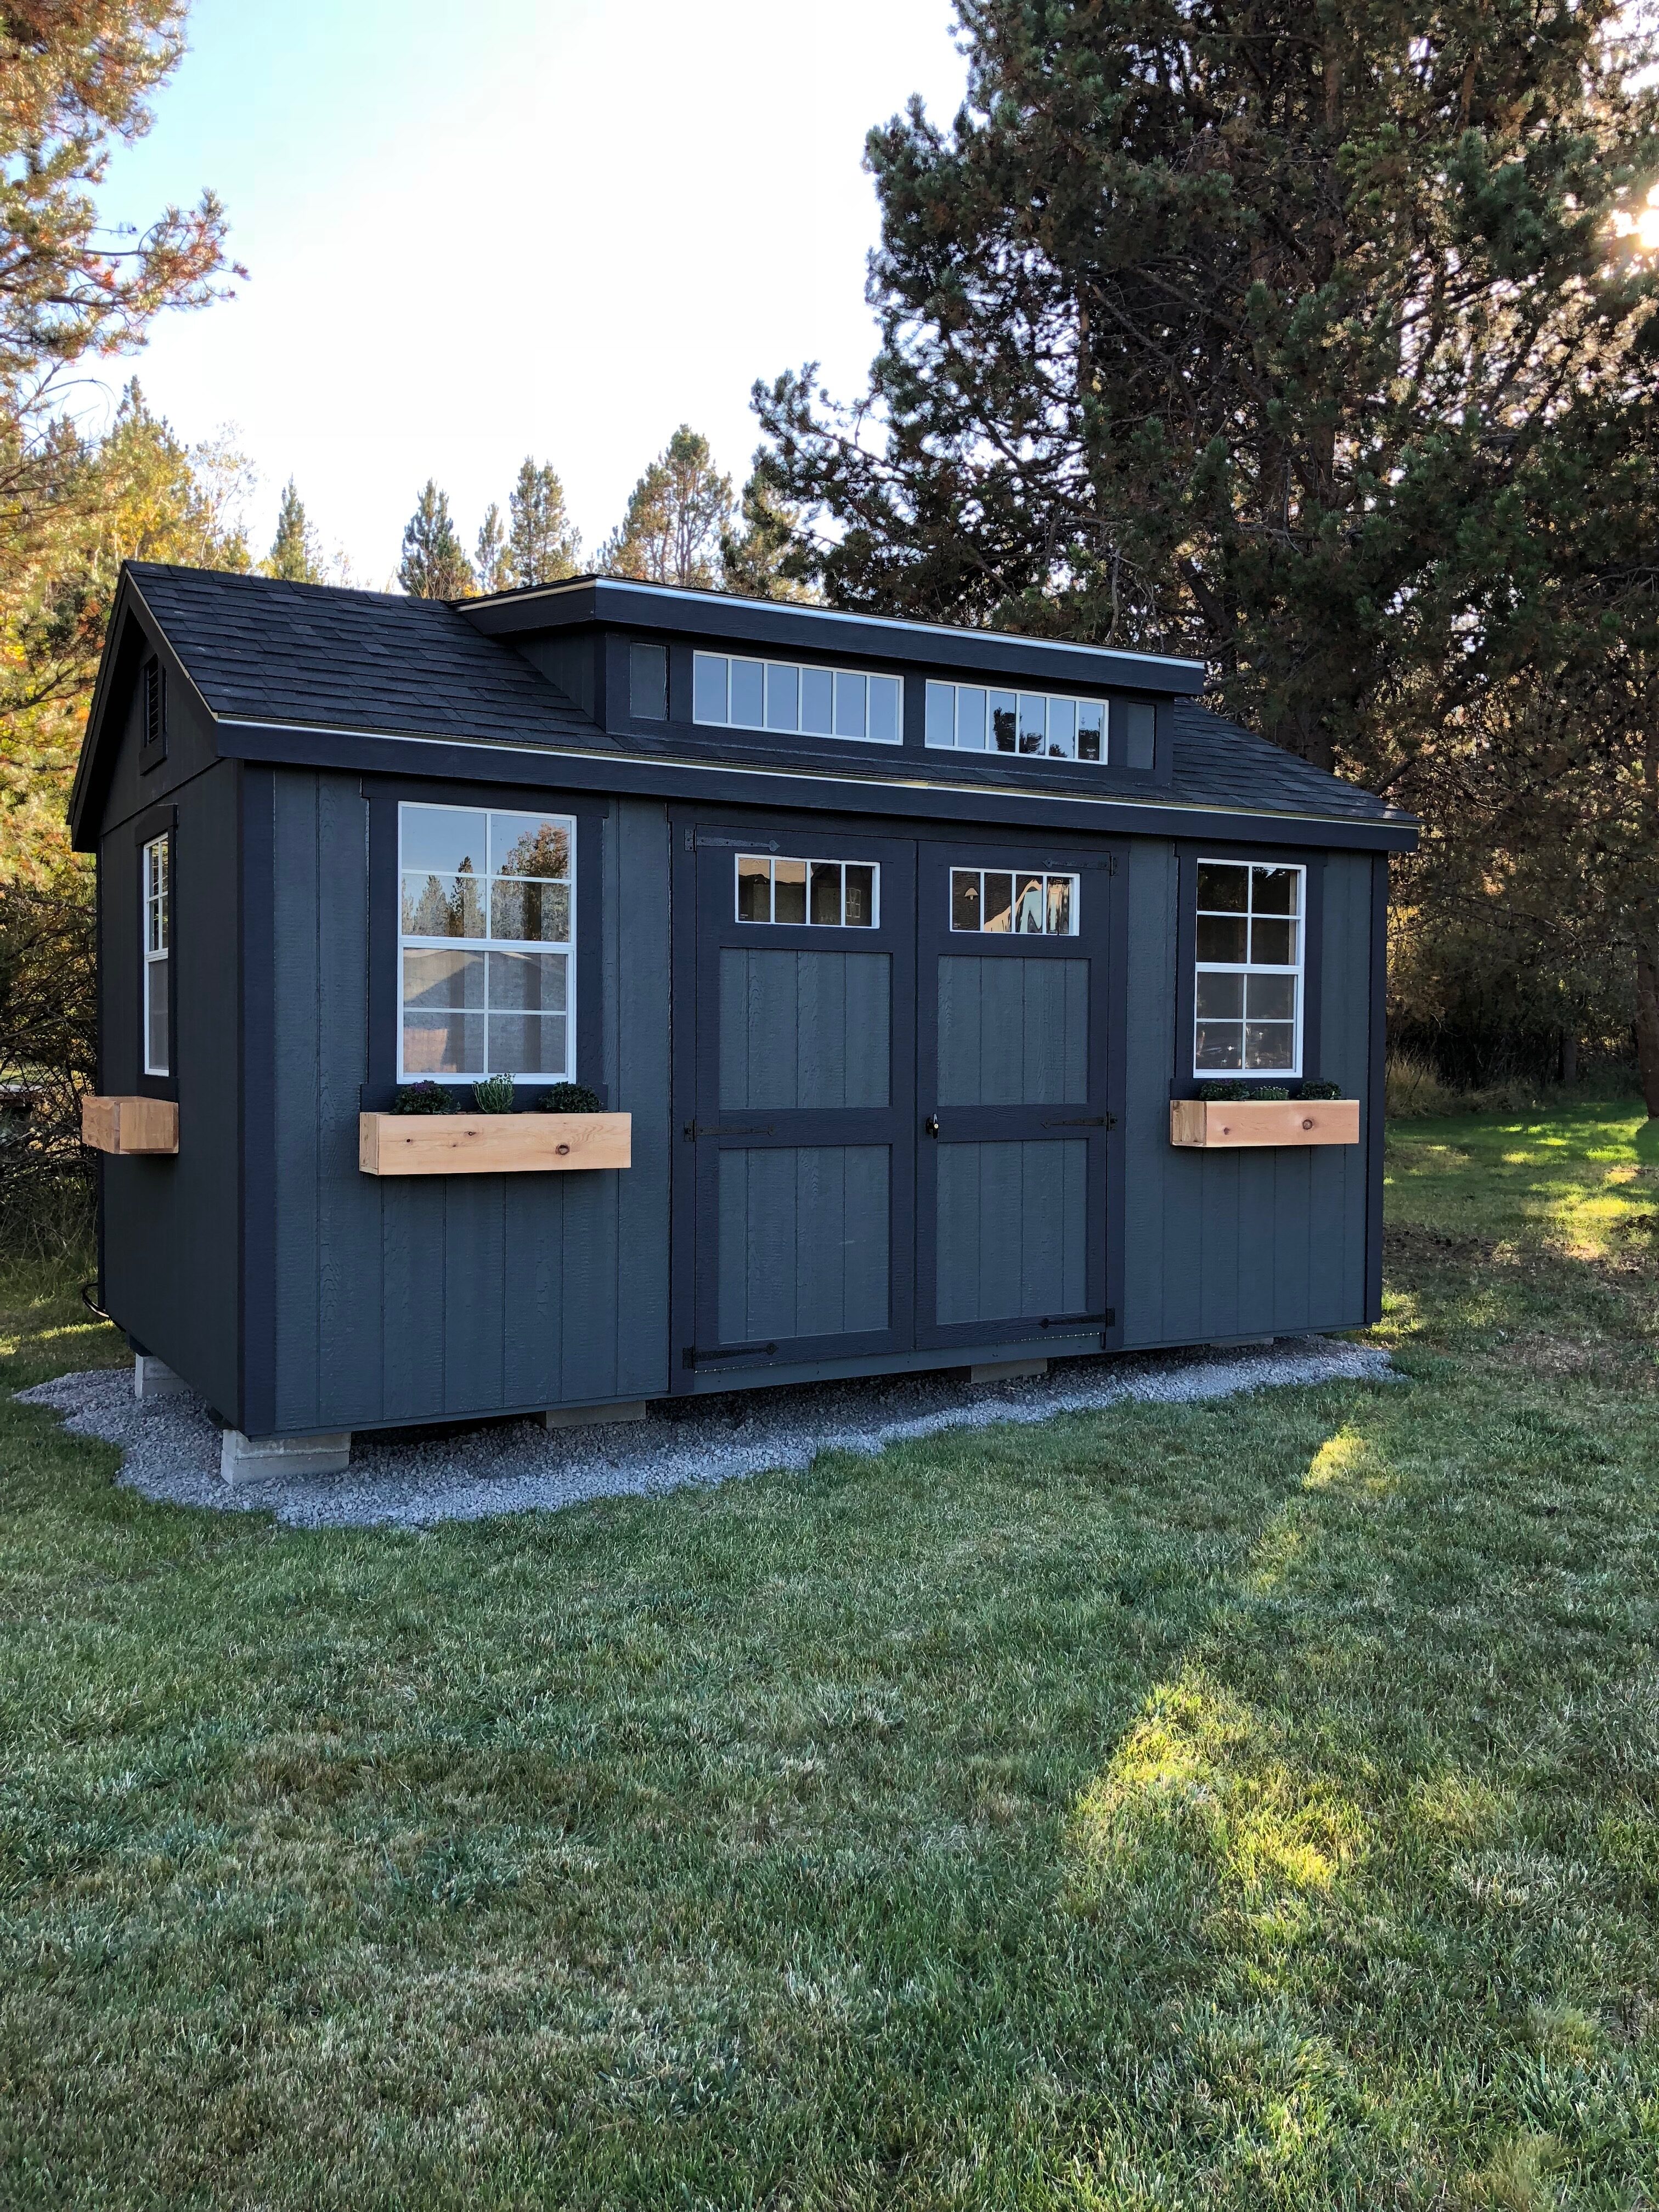
We added the window boxes that you see but they didn’t make it through the winter…but that’s another story (insert eye roll here). We also added electricity, cable/internet and have also wired it for two exterior lights that will flank the front door. The outside is cute….but wait until you see the inside…gulp.

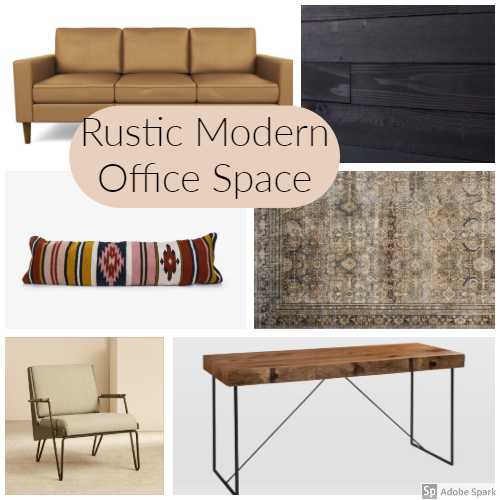
GENERAL DIRECTION I’M HEADING

Ok…so the goal for this project is to transform this murder shack into a cozy, rustic office; heavy on the PNW vibes. The walls will be shiplap all the way around and the long wall without any windows is going to get the shou sugi ban treatment. Can’t wait to try that! If I can find one that is the right size, a wood stove for the corner and a built-in to house some stacked wood. His desk will stay in the same location but we have a new desk picked. There will also be a seating area to hang out for when one of the kids or myself go out to deliver a hot coffee or a sandwich for lunch. This is just a quick run-down and meant to give you an overall and very general idea of the direction that I’m heading. That’s it for now!

And stay tuned because I have a few surprises up my sleeve too! See ya next week!


Spring refresh for the living room with Barn & Willow

This post is sponsored by Barn & Willow

Hiya guys! Long time, no see…errrrr blog?? Anyways, I’m writing today to talk curtains. And to admit that I am guilty of committing a big faux pas when it came to hanging curtains in my living room. I know, I am ashamed. I now see the error of my ways, and am trying to redeem myself. Wait until you guys see how some new curtains DRAMATICALLY changed the look and feel of my living room!

Having nice curtains somehow makes me feel very adult. I liken it to spending a Saturday shopping for a new refrigerator or getting excited at the checkout line at the grocery store because the checker offers up a coupon for one of your items. Both things I love! Anyways, back to business…curtain business!

Here is my old curtain situation and a perfect example of how NOT to hang your curtains. I was making a couple of mistakes that are often made when hanging curtains. The panels were too short which forced me to hang the rod just slightly above the window frame. It leaves you with a very blah effect, and nobody wants blah! Let this be a lesson to you, and learn from my mistakes. If you lift the rod, it lifts the eye which makes your ceilings look higher and your space bigger. Another common mistake is not having the rod wide enough (also guilty of this), on both sides of the window, so that your curtains are forced to be hanging partially over the window, blocking light and making the window look smaller (windows look small = room looks small). Extend the rod at least 6-10″ on either side of the window frame so that when the curtains are pushed totally open you can see almost all of the window.

I partnered with Barn & Willow and replaced these tired, old panels with the most beautiful drapes…notice how I used the word drapes instead of curtain? It’s because I’m fancy like that, now. But seriously, it was such a fun process to choose my new panels because they allow you to get the exact look that you have in mind. I wanted my new panels to look light and bright, so I chose their organic cotton panels in the ivory color. They even allow you to decide how you want the tops to look with pleats, the style of pleats, or a soft top. Yes, really! I didn’t realize that I had a preference until I went through the options and studied the differences between all the different looks. Isn’t that such a cool option?!

This is my panel with the soft top option that lends itself to a more casual look, which I love!

I chose these panels, and am so impressed with the texture and weight of the fabric. They definitely look and feel like a quality product. And as a bonus, they are fully lined and have drapery weights at the bottom of each panel. Why weights, you ask??? Well, they make your curtains look better! The weights keep your pleats in place and make it so they don’t flap about. A little detail that makes them feel so special, ya know?

Now, on to the pretty pictures.

What do you guys think? Isn’t it amazing how different my living room feels? And did anyone notice how much bigger my windows appear? My living room feels so fresh and bright now! A BIG thank you goes out to Barn & Willow for sponsoring this post, and for being so helpful and patient! Thank you for reading and Happy Spring…only one more day!!!

Tiny, Funky Half Bath: One Room Challenge Reveal

*this post contains affiliate links

Ohhhhh myyyyyy goshhh….today is the day! It’s been six weeks in the making and I am so excited (and SOOOOOOO relieved) that today is FINALLY reveal day for the One Room Challenge!

Are you ready for this? Ok – first, if anyone needs to catch up, here are links to Week 5, Week 4, Week 3, Week 2, and Week 1. Also, let’s take a walk down memory lane to remind you what this space used to look like.

This little powder room is just off our front entrance so this update was much needed as it’s one of the first sights you see when you enter our home. Did you just die of boredom? Or maybe just doze off for a quick nap? Just me? Well…this new view is giving me all those good feeling feels.

One of my goals for this house when it comes to design choices is to just go for it! Every wall (and ceiling) was beige when we moved in and so I am doing my best to inject some personality into this place of ours.

The room all started with when I found this wallpaper from Milton & King. Everything else was planned with this paper in mind. I wanted to keep the art simple and opted for a single statement piece with a map from Mapiful. It was so fun to customize this baby with a simple black and white map of the city in which we live. It feels like a special touch!

I’ve always loved this sink and think that it gives the room a funky, retro vibe. I’m so happy to have finally found a place to use it!

I wanted to keep the lighting modern and simple and I think this light from Modern Komfort works perfectly for this small space.

I’m so excited to have a new powder room for our guests to enjoy as we will have a house full of family while we host Christmas this year. I owe my boo a BIG thank you for all his hard work and for not running away when I said, “I found some ostrich wallpaper that I wanna use in the bathroom.” Also, a big thank you to Phil, my dad, and my sister and her husband for donating their time to help me out as well!  Welllll…what do you think? I hope you love it as much as I do! And be sure to check out all of the other reveals! I did a little snooping around today and have already found some amazing transformations!

one room challenge: week 5 – wainscoting

It’s week Five of the One Room Challenge! This is also the week where I realize there is only one week left to finish up – everything! Well, you know what they say, time really does fly when you’re having fun…errrrrr renovating a bathroom. Last week, for Week Four, we finished the wallpaper but we still don’t have ya know, a toilet, a sink or anything else that makes this space a proper bathroom. And just in case you need to do some catching up, here are links to Week Three, Week Two, and Week One. Also, here is my mood board that has been serving as a blue print and as sort of my inspiration for the space.

And now that we’re on the subject of the moodboard, I have made a few modifications since we are so close to finishing this thing up! The first change is small but the light that I originally had picked was actually more of a bronze in color and after I saw the black, black faucet and some other finishes in person, I knew it needed to be black. So the new one is black and just a single light, instead of the double that is pictured above. The other change is the rug. I had been eyeing a vintage rug for weeks and I finally went ahead and pulled the trigger. I am so excited to show you guys but I think I am going to save it for the reveal. Gotta have a couple surprises, right? And the third and final change is the mirror. I started feeling like the space needed some warmth in all that matte black so I changed my mind and went with a wood mirror. Again, you’re gonna have to wait to see that until next week!

Ok – now back to business. This week we focused on the wainscoting! Remember the inspiration photo I showed you all a couple weeks ago?

We’ve made a few modifications to the design, mostly just with the angles of the wood and a few pieces of trim that we added. I’m really proud of this wainscoting and really think it’s going to give the space some serious pizzazz.

My husband and I both thought that this process was going to be a lot more difficult than it actually was. We found this material at Lowe’s and we love it! We are going to be using it for another project in the future, I’m just not sure what, yet.

The first thing we decided on was how high we wanted the wainscoting to go up the wall. For us, we wanted it a bit higher than traditional wainscoting and opted for 54″ from the floor. We snapped a horizontal chalk line around the room at that 54″ mark. Next, we snapped a vertical chalk line at the mid-point of each wall. This would mark where we wanted the planking to meet. After those two things were done, we had another decision to make: at what angle do we want the planks? Once we held a few pieces up on the wall so that I could visually see the angles (cause I’m a visual person and that’s what makes it easiest for me to make decisions) we pretty quickly landed on a good ol’45 degree angle for the win! And then it’s slow and steady progress from there…plank by plank and cut by cut.

Since the wainscoting was going up, this meant that it was time for us to make the plumbing modifications for our new wall mount faucet. But, we are the luckiest people around because our neighbor happens to be a plumber! I know, I know, don’t be jealous. So, he was nice enough to donate his time and showed my husband the ropes and they got that new faucet installed and looking GOOD. Thank you, Phil!!

The wainscoting is almost completely done and that means that I’m going to be filling ALL those nail holes and then painting it. I can’t wait to see this all painted! Here’s a progress shot so you can see exactly just how many nail holes are in the planks. Holy moly…there’s a lot.

Also, I found a paint color and here’s a sneak peak for ya!

So that’s our progress report for this week! Can you believe we only have one week left??? I’m so excited to finish this project and I’m also giddy to see some of the other makeovers. I’ve been poking around on some other blogs to see how the progress is coming along and it’s looking like some pretty fabulous projects are in the works. Can’t wait!

Oh and here’s my final to-do list so I can finish this baby up:

  1. trim out wainscoting
  2. fill all nail holes and caulk and sand wainscoting
  3. paint wainscoting
  4. install toilet
  5. install sink
  6. clean the whole space – all that construction dust and mess
  7. accessory time – install mirror, toilet paper holder, and towel hook. Hang art!

So much to do in so little time! Think I can do it???


One Room Challenge: Week Four – Wallpaper

Well…it’s that time again! It’s time for the weekly update for the One Room Challenge. Can you believe it’s already week four of my bathroom remodel? As a quick recap, I am redoing my bathroom over six weeks and am sharing the progress here, in real time, as part of the One Room Challenge. Here’s a link back to Week One, Week two, and Week Three. And just in case you need another refresh, here is the mood board that I put together as a sort of blue print and for inspiration.

This week was a fun one! We spent the last few days wallpapering the bathroom and although I was a little nervous about diving in, it was actually pretty fun once we got into a groove! When the wallpaper arrived, I was so delighted/excited that I couldn’t wait to get started.

I’ll give you the general rundown on the actual process of wallpapering so you can get the jist. The process is pretty simple and if I can do it, you can do it, too! It’s all about paying attention to details and making sure your lines are straight. Once you have straight lines, the process starts cruising. Measure first, and pre-cut your strips of wallpaper so that you aren’t measuring and trying to cut the paper when the adhesive is on the wall. Because we found that it starts drying really fast. We used a chalk line to mark straight lines and used that as a guide to line the individual pieces of paper to. The adhesive goes into the wall with a roller, and the sheet just sticks right onto the wall. Start smoothing with your flat edge to get all the bubbles out and use a SHARP razor to make your cuts at the ceiling. Done and done! Like I said, this is a very short summary of the process.

We decided we were going to st0p half way down the wall as we are installing wainscoting on the lower portion of the walls to really give this tiny space some pizzazz. The light fixture arrived yesterday and I’m smitten. It’s just perfect and looks so sharp next to all those black ostriches.

Now that the wallpaper is up, next on the to-do list is the plumbing. We are changing the plumbing so that it can accommodate a faucet that comes directly out of the wall. Once this is done, then we can start installing the wainscoting. My hubby started on one of the walls so I will give you a sneaky peaky. I will have to fill in all the knots and nail holes with wood filler and then all of the wood will be painted black. Or a color that’s very close to black.

So that’s where we’re at! What do you think of the ostriches? Do  you love them as much as I do? Anybody have any wallpapering horror stories they want to share? I sure read about some doozies online when I was doing research before we started. Only two weeks to go so I’ll be back next week with lots (hopefully) to report on!


one room challenge: week three – DEMO!

Hi all! It’s week three of our funky tiny half-bath remodel! Time is flying! As a quick catch up, I am redoing our half-bath as part of the One Room Challenge. If you need to refresh your memory or maybe you’re new here (WELCOME!), here is Week One with my mood board and Week Two with even more deets, and some very fancy wainscoting plans.

So the biggest change this week is that we finally have a freshly demo’d space! I love this part so much. Taking out all the old helps me envision the new! Goodbye tiny toilet! Goodbye boring sink!

The most exciting part of this process is that some of the items that we chose for the bathroom have started to arrive! My wallpaper came (it’s amazing) and it’s going in this weekend. My sister has graciously volunteered to come over for the weekend and we are gonna get our wallpaper ONNNNNN. Love you, Collin! Also, a few of the accessories have arrived and seeing them in person is an absolute delight!

Here’s the to-do list (in order):

  1. Decide whether or not to paint the ceiling
  2. Install wallpaper
  3. Change the plumbing to accomodate a wall mounted faucet
  4. Wainscoting construction and install
  5. New toilet install
  6. Sink install
  7. Light fixture, mirror and accessories

Now the fun really begins! I’ll be back next week with some good progress for ya! Now…does anyone have any wallpaper tips for me? Or maybe what NOT to do? This is my first time! Wish me luck!

Mission accomplished: the perfect entryway rug

This post is sponsored by Magic Rugs

Hi guys! It’s Monday and the sun is out in Oregon! Seems like the perfect time to show you a little refresh that I’ve been working on to give my house some more fall vibes. First of all, does anyone else decorate for the Holidays? I’ve been hearing a lot of buzz about decorating in a more subtle way (i.e. introducing rich colors with pillows and layering up cozy throws for added texture) rather than flooding your house with pumpkins, ghosts, and goblins. I’m kind of riding the fence on this because I love a good excuse to add a pillow or a throw, but I also enjoy the occasional corny decoration. All in moderation, right? And why not? Anyways…feast your eyes on my fall entryway!

I have been searching and searching for the right vintage rug and I finally found her, ain’t she a beaut? I was sold on a vintage rug for this space as its a high traffic zone and vintage rugs are made to LAST. I have purchased many a rug from big box stores and always found myself replacing them once a year (or even a couple times a year). WHAAAAAA? Eventually, I began to realize that with all the money I was spending on disposable rugs, I could buy a better quality rug and clean them myself or take them to have them cleaned when needed. With all this being said, I am not opposed to buying a rug from a big box store, but I really appreciate a rug that’s made with materials that are meant to last, year after year.

For my entryway, I was lucky enough to work with Magic Rugs and am so excited to share this source with all of you because if you are like me, and cannot resist the charms of a vintage rug, I gotcha covered. Magic Rugs has over four thousand rugs in stock and you can call them any time with questions that they will be happy to answer for you. And….wanna know the best part? Their prices are actually affordable! So let’s go shopping! I thought I would share a few of my favorites that I found on their site. The first and second rugs would be perfect in a kitchen or a bathroom (adds tons of patina and warmth to a room full of hard surfaces) and I like the third one for a living/family room type situation…maybe layered on top of a jute rug if you’re feeling fancy. Ps. If you like any of these rugs, just click the images for links to see each rug in closer detail.


The rug that I chose for my entryway is so beautiful and I am SO happy with the quality. It is soft underfoot and fits my entryway like a glove. It was exactly as pictured on their website which I think is really important. There’s nothing worse than ordering something online, only to be disappointed that the pictures didn’t accurately represent what you thought you were buying. amiright? The colors are perfect for my house with deep reds (I can’t seem to stop using reds lately. Who am I???), blues, and pops of orange. I’m in love!

I think it really makes a big impact to my entryway while adding lots of texture. And I am getting all the cozy vibes now!

So there you have it! My entryway is looking all Fall-y and cozy with its beautiful new rug! We are busy planning Halloween costumes over here and as of right now, I have a zombie, a vampire, and a bumblebee! Hope you all have a wonderful week!

Oh and I’ll be back on Wednesday with my One Room Challenge update for week three…gulp.


one room challenge: week two

Well that was fast! This week FLEW BY. I can’t believe we are already in the second week for the ORC. Last week, I let you in on my exciting plans to update our tiny powder room as a part of the One Room Challenge. Let’s have another looky at ye ol’moodboard:

1. // 2. // 3. // 4. // 5. // 6. //

This week is still slow moving and I am still finalizing all the plans and waiting for items to start arriving. The biggest change this week from last week is that I decided on a style of wainscoting that will go on the bottom half of the wall – underneath the most fabulous wallpaper that has ever existed. I was scrolling for inspiration for a modern style of wainscoting online because I was sure I didn’t want to go with the traditional look when I found this little beauty. I showed my husband and he is game (albeit a tincy bit scared) to give it a try! Wish us ALLLLLLLLL the luck.

Source Unknown – but if you know, let me know and I’d be happy to credit them. 

It will definitely be painted. I’m thinking somewhere in the neighborhood of a charcoal – but I will have to wait and see the wallpaper in person before I can make a final decision. We went toilet shopping this week (I know what you’re thinking…yes, we know how to have a good time) and selected a new toilet which is something that we have been wanting to replace in all of our bathrooms – the current ones are really small and low to the floor. Weird, right?

Our next mission is remove the current sink. We will have to move the plumbing to accommodate a wall mounted faucet because of the sink we chose. We originally found the sink with a navy border from Rejuvenation, but the navy was making things hard to coordinate. After a bit more googling, we ended up finding it in black at a few other spots, and for a bit cheaper, too. Easier to incorporate and less money? Sounds like a win-win to me! Here’s a little refresher in case you forgot what that looks like.

So that’s where we’re at after our first week. I know that’s not too much of an update, but just wait until next week after demo has been completed! That is going to be fun, but we will also be down one bathroom which I hadn’t really thought of until…..well, just now. The wallpaper, and a fun addition to be hung on the wall are both supposed to be arriving in the next week, so those will be fun to share as well. Hit me up with any questions! Until next week!

tiny funky half bath – one room challenge: week one

I’m coming at ya today with some very exciting news! I’m officially taking part in my first One Room Challenge! What’s that, you ask? Well….lemme fill you in. The One Room Challenge is a bi-annual design event where participants completely renovate a room in six weeks. Everyone checks in once a week with a progress report (or lack thereof) and spills the beans about the good, the bad, and the ugly. This event is designed to encourage and inspire, which is totally my cup of tea.

The space that I’m going to focus on is our teeny tiny downstairs half-bath. It’s small and since this is my first go-around with the ORC – I figured it was kinda the perfect fit. So, here’s my vision. And I’m going to give myself permission to change my mind at any point. Mmmmmmkay?

1. // 2. // 3. // 4. // 5. // 6.

This lil’baby of a bathroom is located just off of our front entrway. Soooooo, it makes sense to me that it should be pretty as guests see this room right as they walk into the house. Also, weighing in at just 23 square feet, I feel like I can manage her.

As far as the game plan goes, it’s pretty simple. The floors will stay the same as they are the same wood that carries throughout the entire lower level. I’m thinking about some kind of wainscoting to wrap around the entire room – but modern. Still working out the details on that so we’ll see what I can come up with. And then my crown jewel of the entire room is going to be my ostrich wallpaper from Milton & King. It’s so fun and quirky and I’m in love. I think I’m going to give it a big hug when it’s finally installed.

Alright!!! Here we go! I will be back next week with all the updates!!!!


My art ledge refresh with Art To Frames

This post is sponsored by Art To Frames

Hi everyone! With the kids FINALLY back in school, I’m feeling recharged and ready to make some changes around here before winter comes! I always get the bug to purge all the things in the Fall because I know we are all going to be inside a lot more the next few months. Also, it’s so much easier to get rid of all the old toys and excess stuff when the kids are at school and they aren’t here to try and talk me into keeping said stuff.

I’m excited to share a collaboration with you today that I have been working on the last couple weeks with Art To Frames. If you have been following along for a while or you ever see any of my instagram posts, then you already know I love collecting vintage art. I started going to thrift stores years ago when there wasn’t any room in the budget for art, and slowly but surely, I have accumulated a collection that I love. I even have a few special pieces that I believe to be quite valuable — so YAY to that!

The biggest downfall to collecting old art is the old frames that can sometimes accompany them. Think dirty, fabric frames that are sometimes falling apart or at the very least, in rough shape. So when I find a painting that I love, I buy it with the expectation of having to replace the frame. Kind of like house shopping, if it has good bones and you love it…go for it! It’s much less of a commitment than a house, but you get the idea.

When Shimmy(the most helpful person on the planet), from Art To Frames reached out and asked if I wanted to work together, I thought maybe I had died and gone to frame heaven! I’m. Your. Girl.

The past few months, I have been putting aside a few pieces that I thought would work well on my art ledge for a bit of a winter/autumn vibe so these were the paintings I had in mind when I placed my order.

I knew I wanted a natural wood finish look for most of them and added a few white frames to keep it fresh and modern. The variety of selection at Art To Frames is crazy good, not to mention that they are hand-made out of solid wood. When they arrived, they were packaged perfectly and not even one had a crack, a ding, or any other kind of damage. Also, I think it’s noteworthy to add that every frame comes with the hardware attached to hang them right on the wall! Easy shmeeezy.

Most of my paintings were leaning on the ledge so I simply left the hardware attached to the backs in case I get the urge to move to a new locale. The one painting that I did hang on the wall was this special fellow.

Oh hello, handsome. My husband and I disagree about this guy. He thinks he’s creepy while I think he’s spectacular. What say you?

So here’s my little update for the fall and I’m loving it so much that I just might leave the art ledge as is for the entirety of the winter….maybe. The moral of this little story is if you find yourself in the market for some custom-sized picture frames of gorgeous quality, look no further than Art To Frames. Mmmmmmmmkay?

Alsooooooo…..I haven’t forgotten about the concrete counter post that I promised last month. I’m working on it, but I have these three small humans that have been keeping this mama BUSY. Anyone else making any Fall/Autumn (which do you say?) updates around their house? I’d love to hear!

1 3 4 5 6 7 9