our bathroom makeover reveal

It’s a happy, happy day. The day where we finished our bathroom makeover and I no longer have to hide my face in embarrassment when a guest uses our bathroom. The total span of this project was completed over the course of a week during evenings (hello crazy house with homework, dinner, a newborn, and a bathroom under construction) but we have been making plans and gathering our materials for several weeks now.

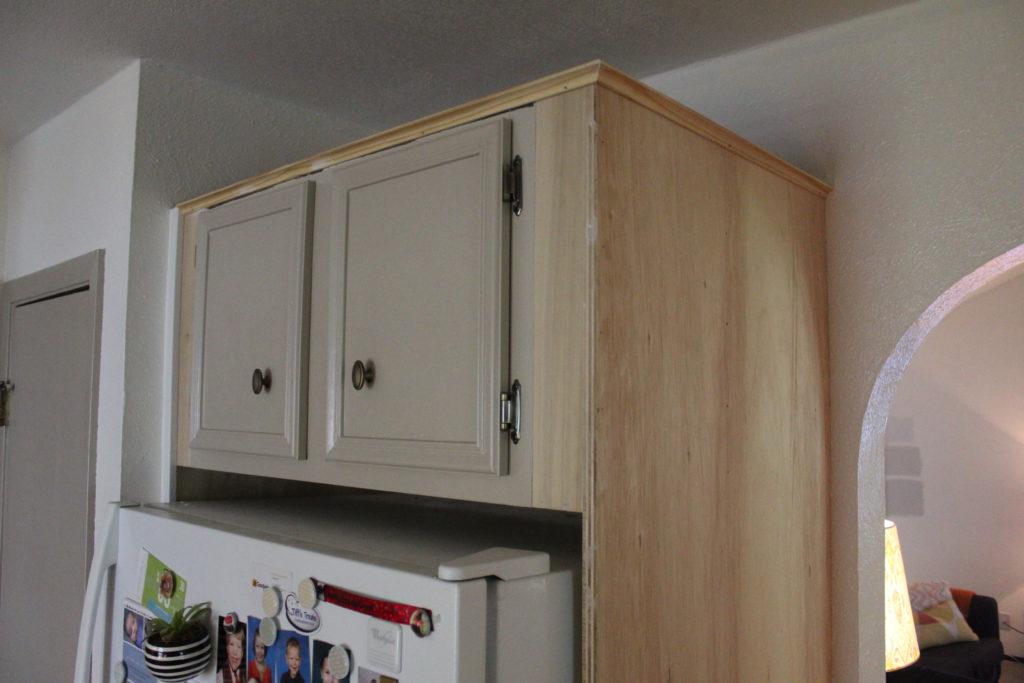
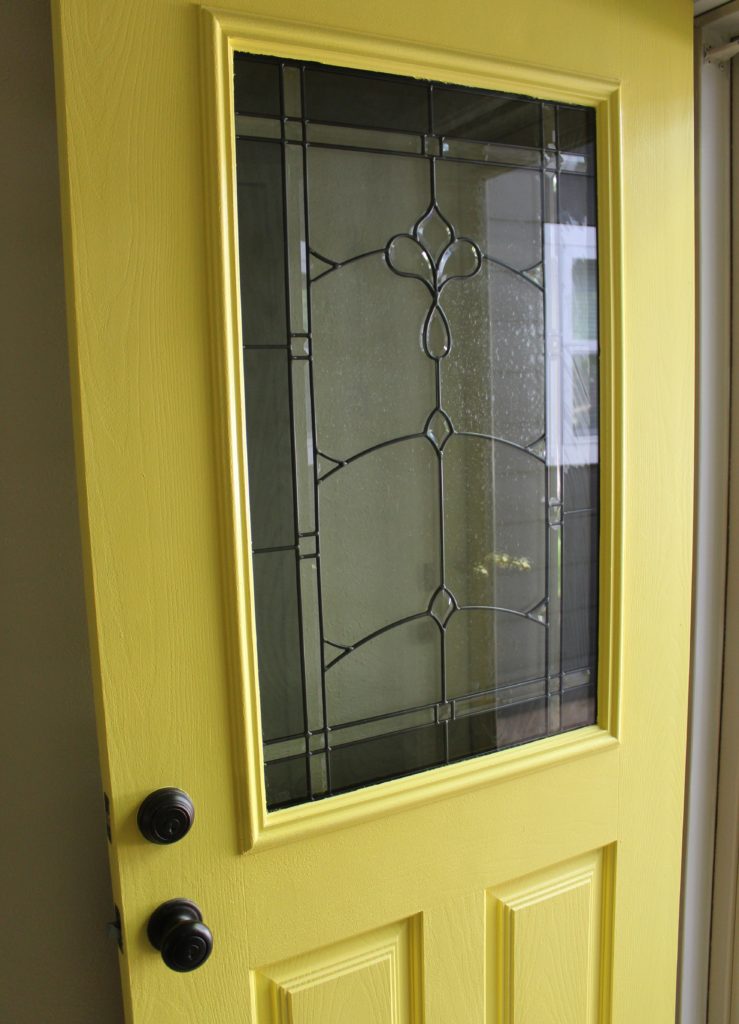
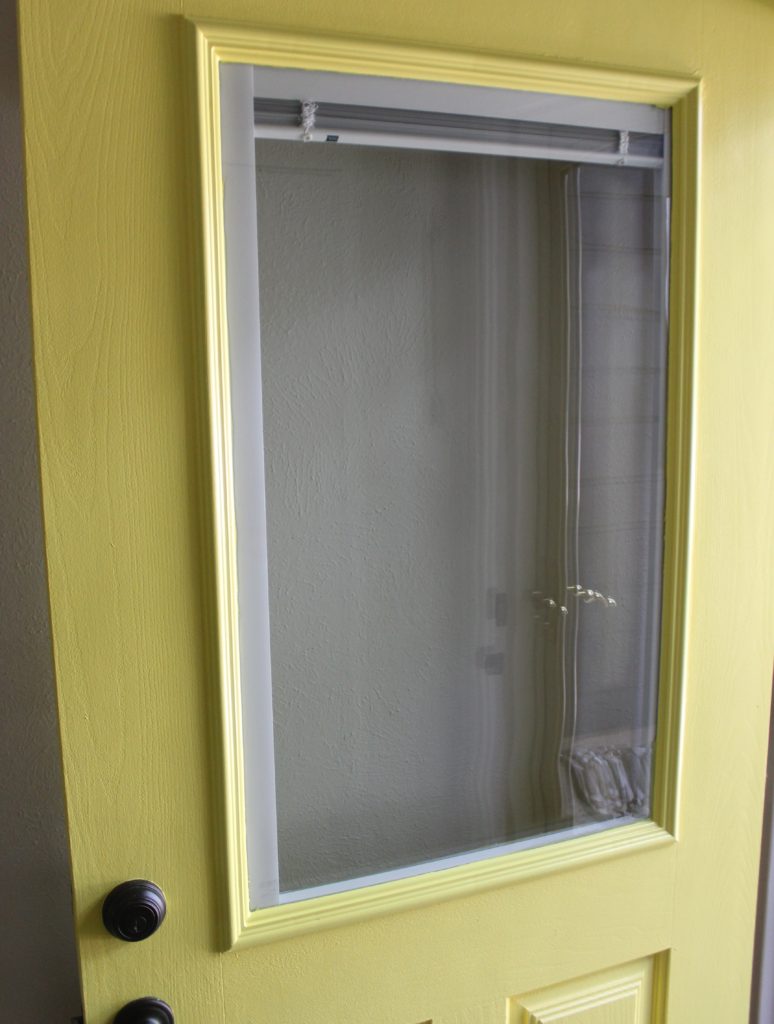
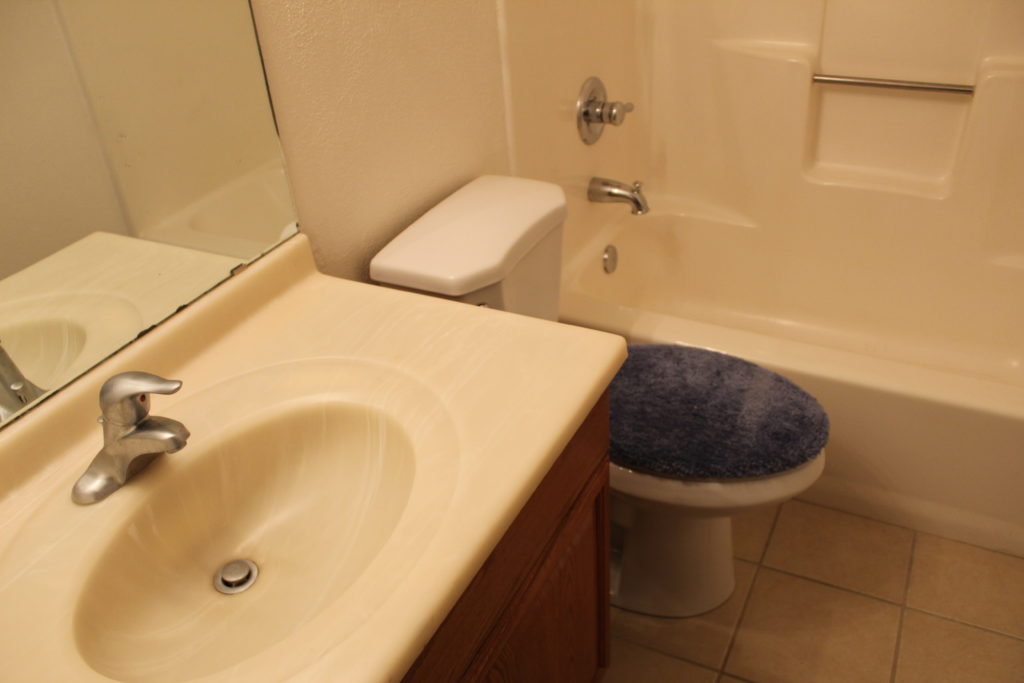
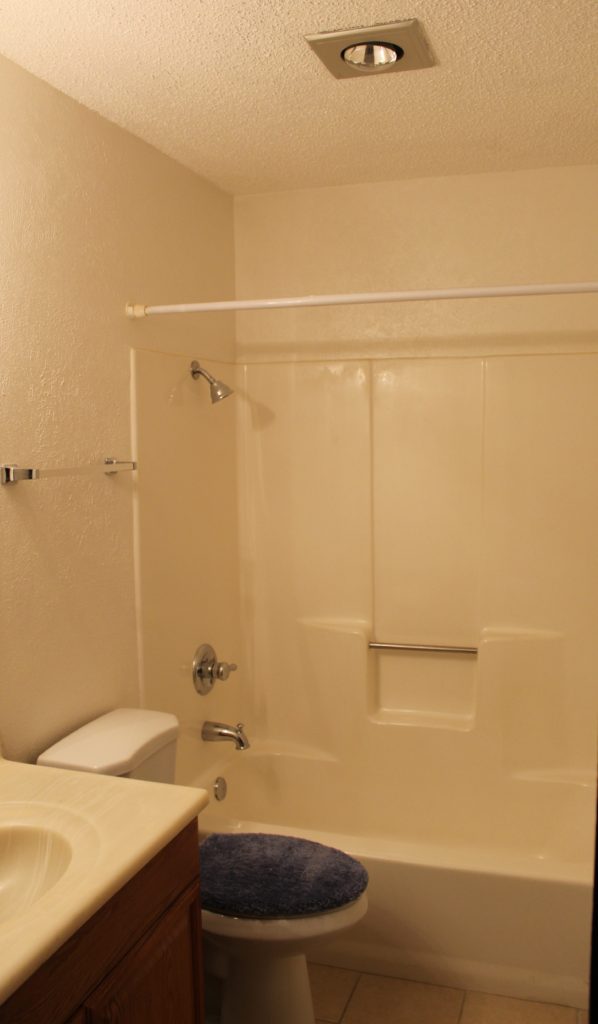
First, we should remind everyone how things looked before we started. I often hear many tales of DIY about how things have to get worse before they get better but I am confident our bathroom looked pretty scary from the get-go.

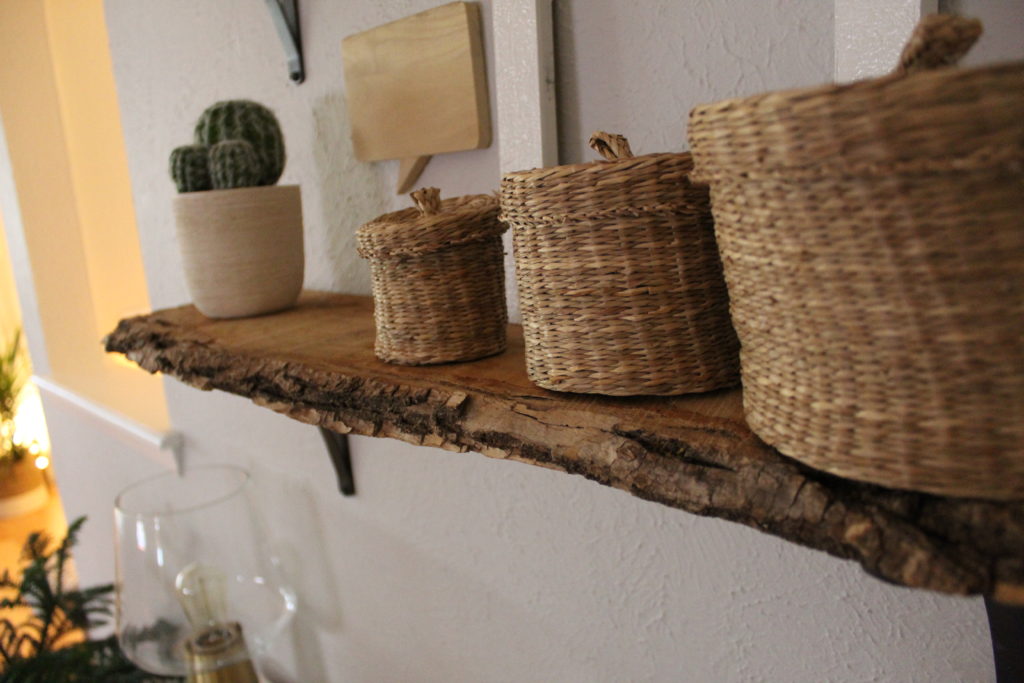
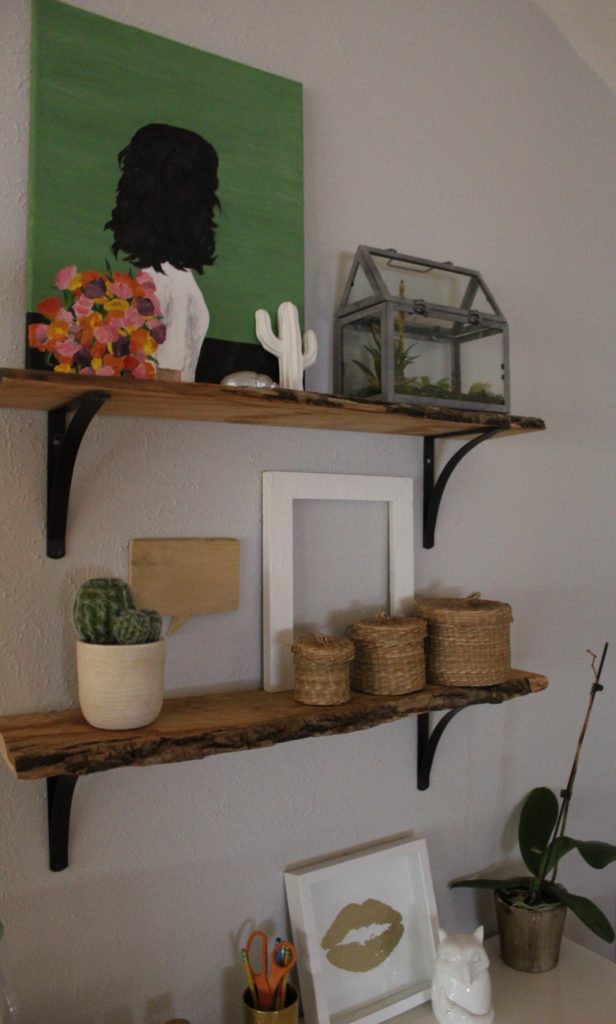
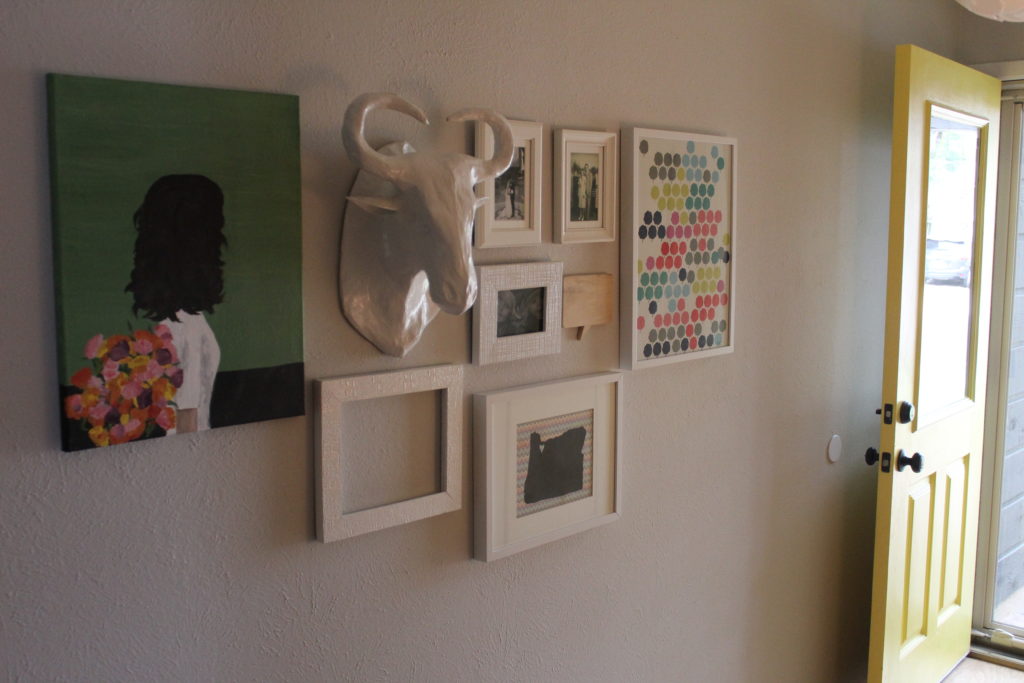
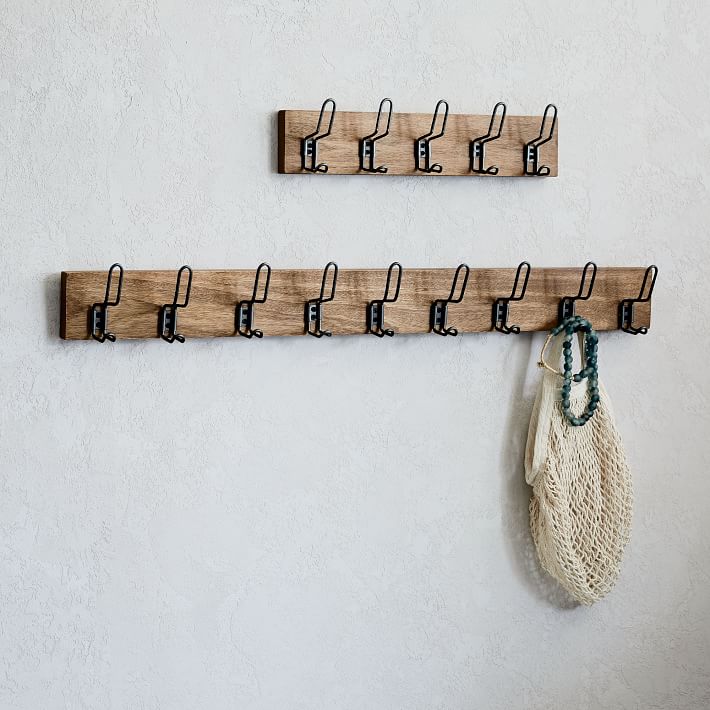
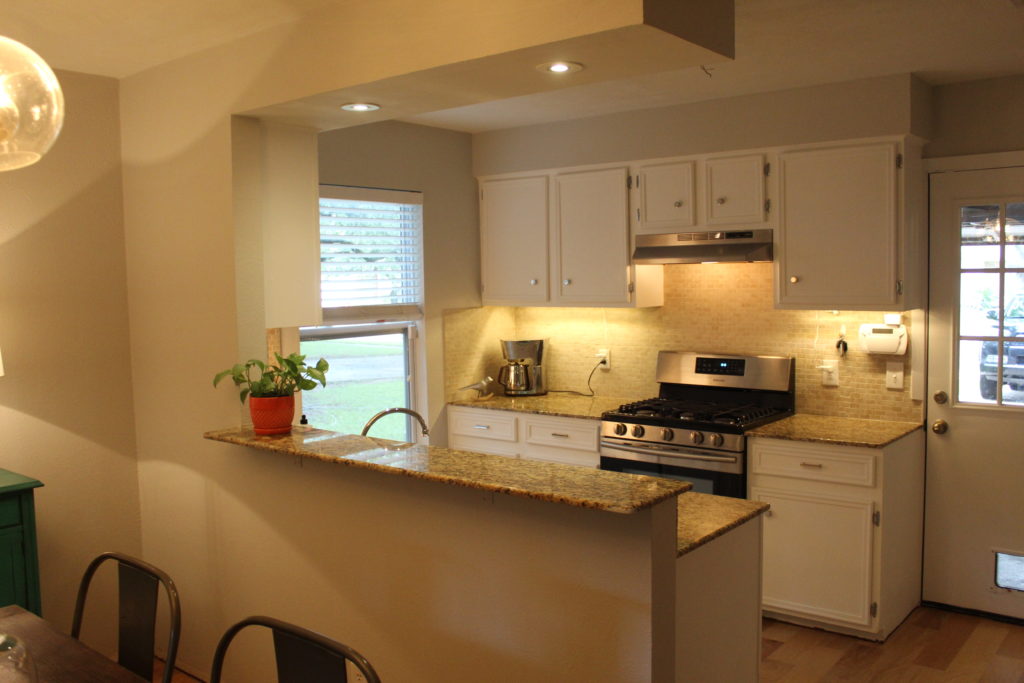
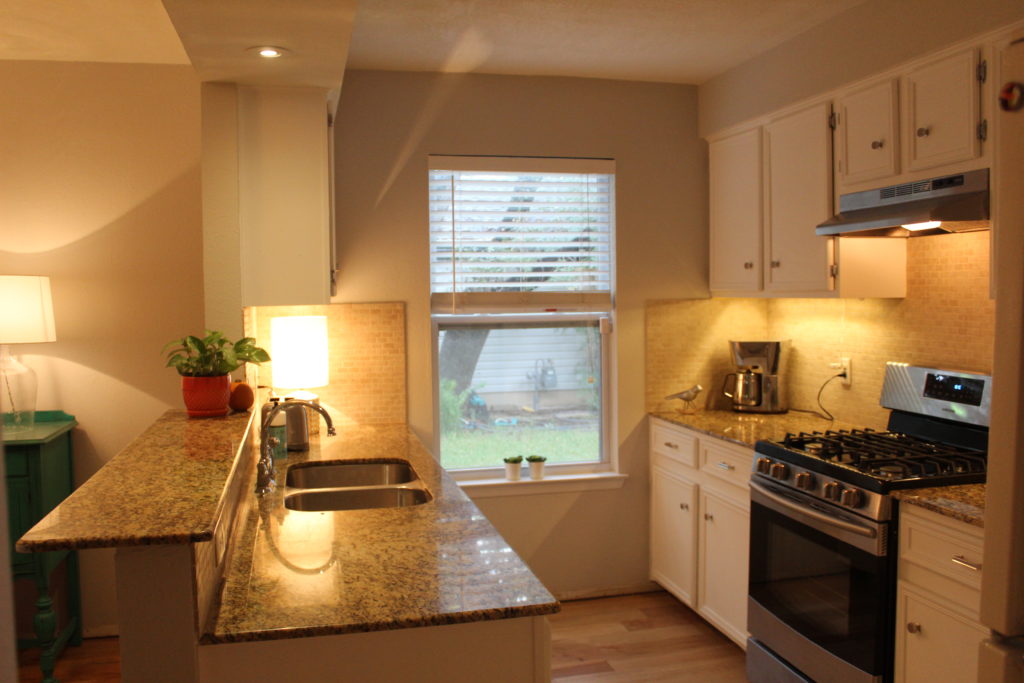
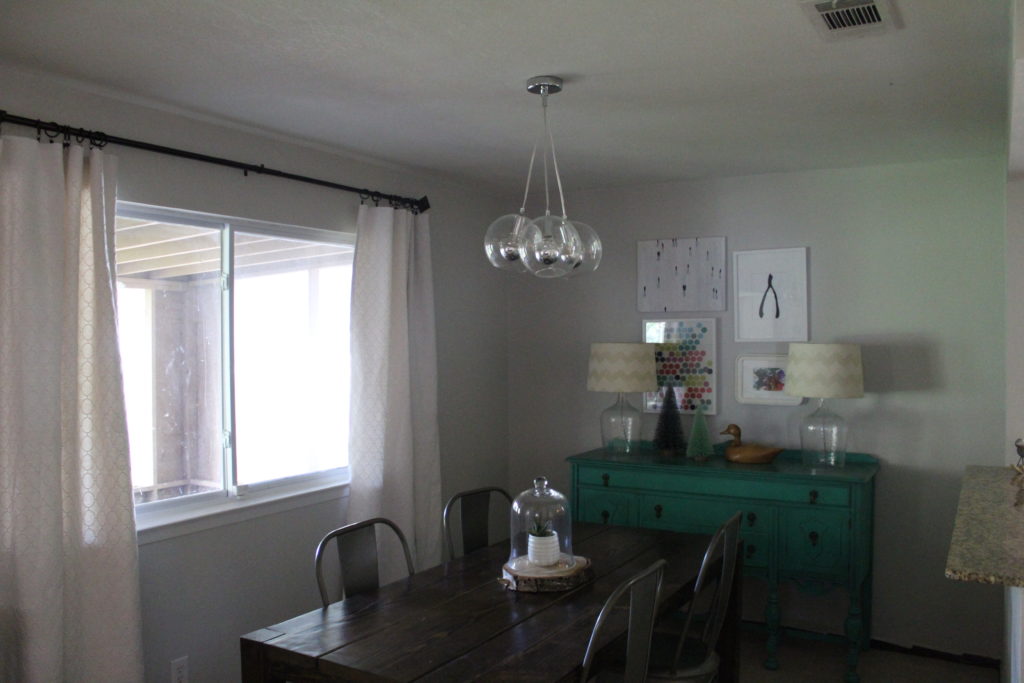
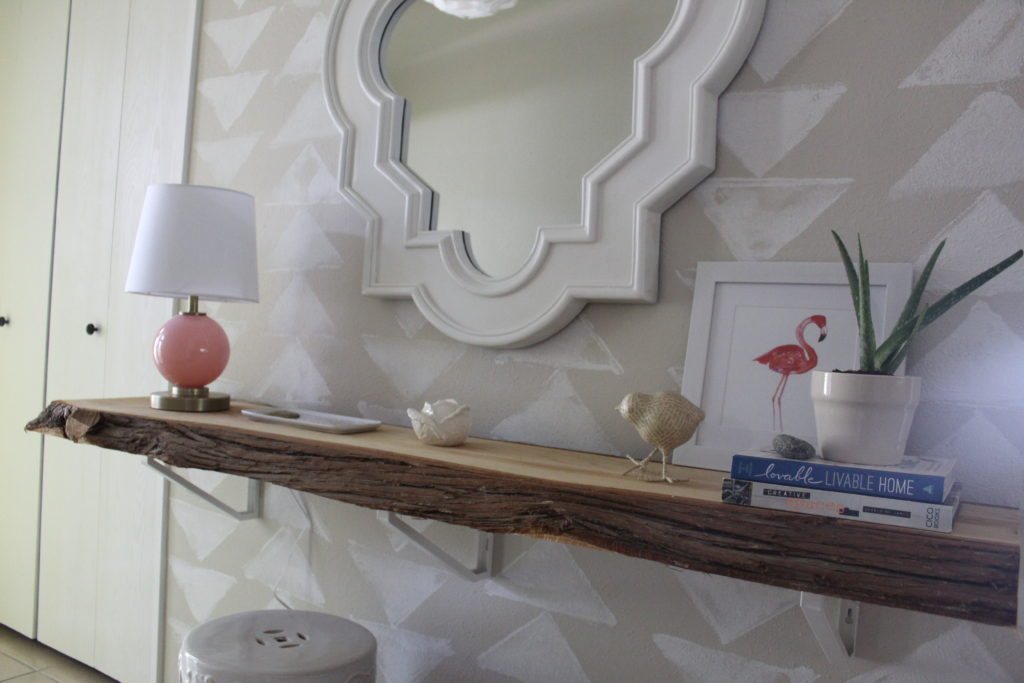
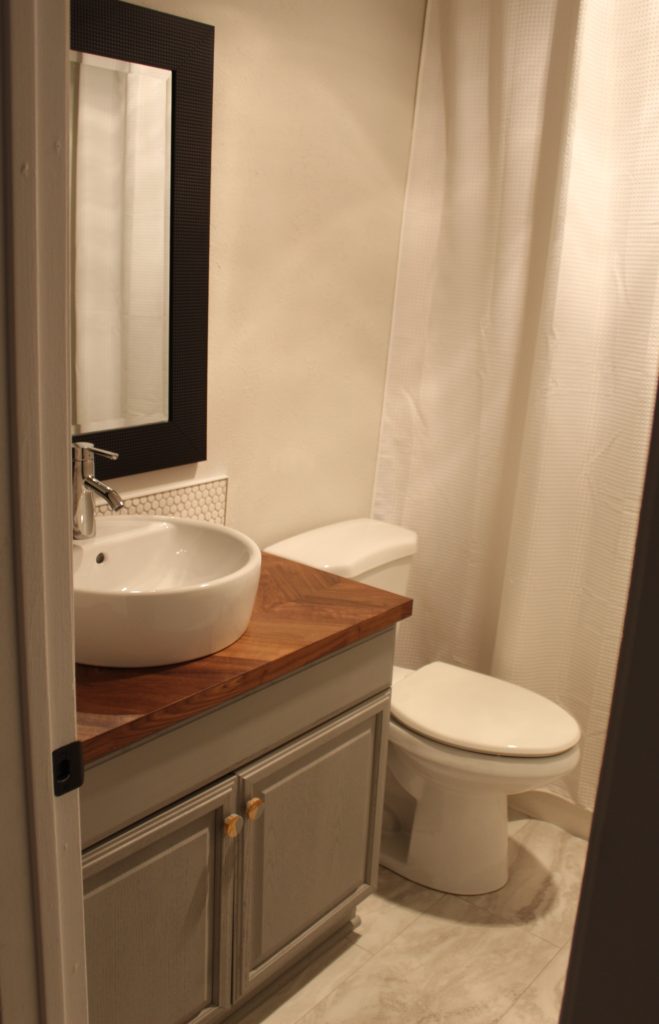
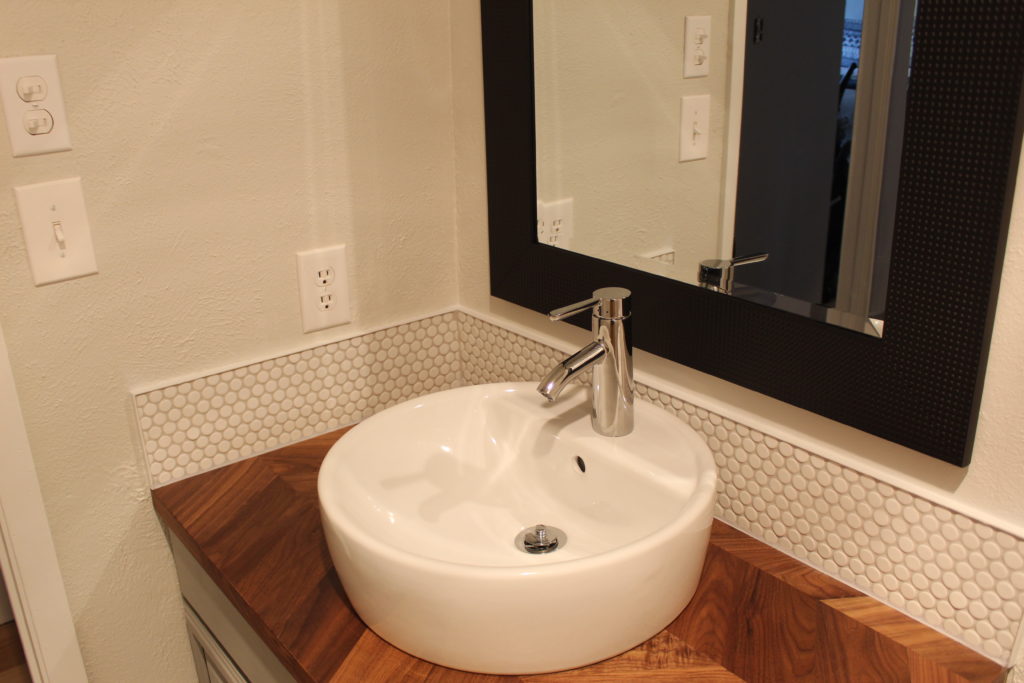
Here’s another shot of the room put back together. Although I still haven’t added any accessories, the room is mostly done. I have been shopping for some towel hooks, a vanity light, and some decor. Maybe a shelf or some art for above the toilet? Next week, I will be back with photos of the finished space with all the accessories and decor. You know, the fun stuff!

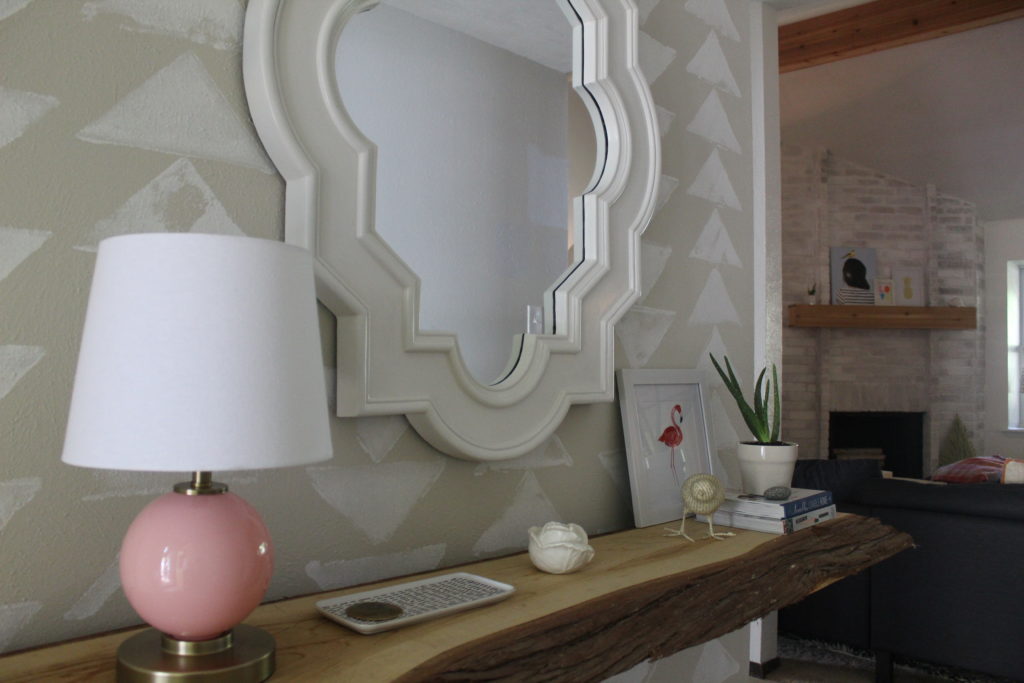
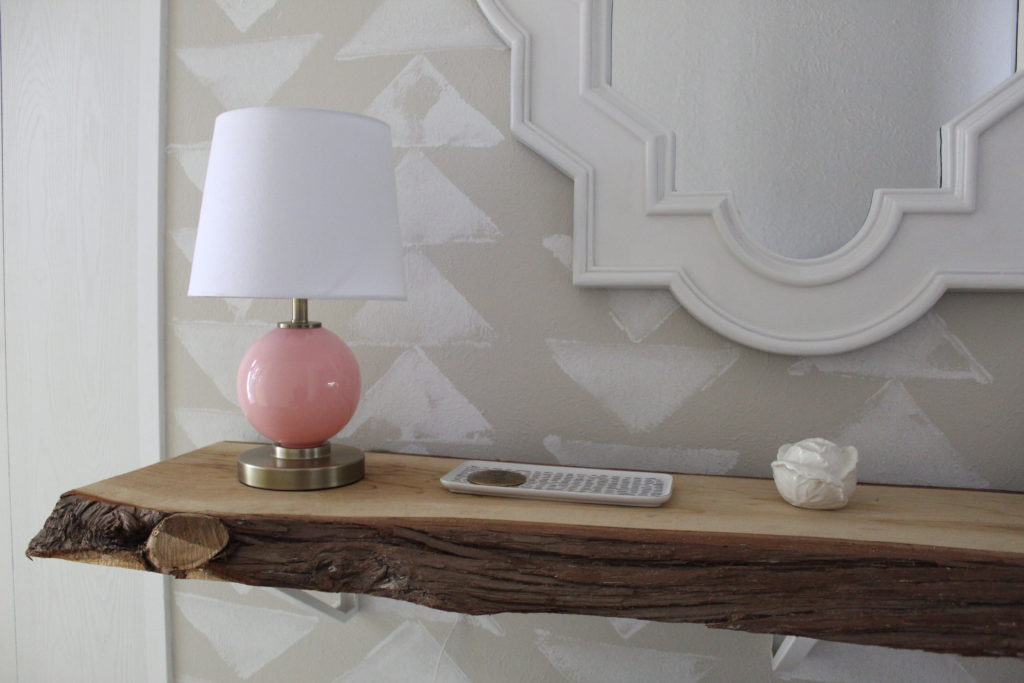
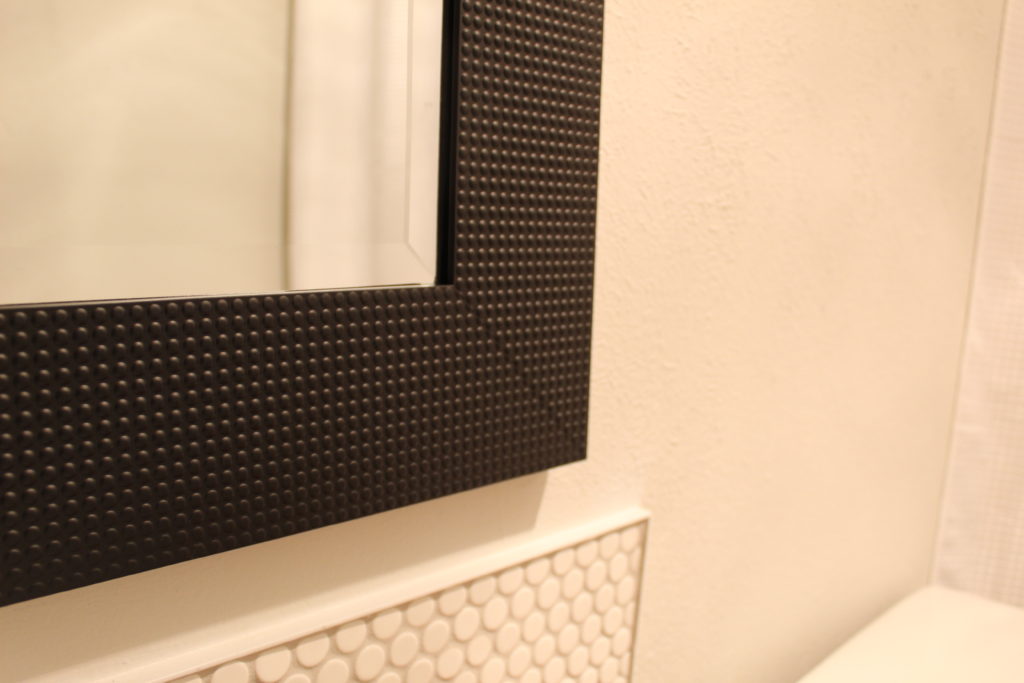
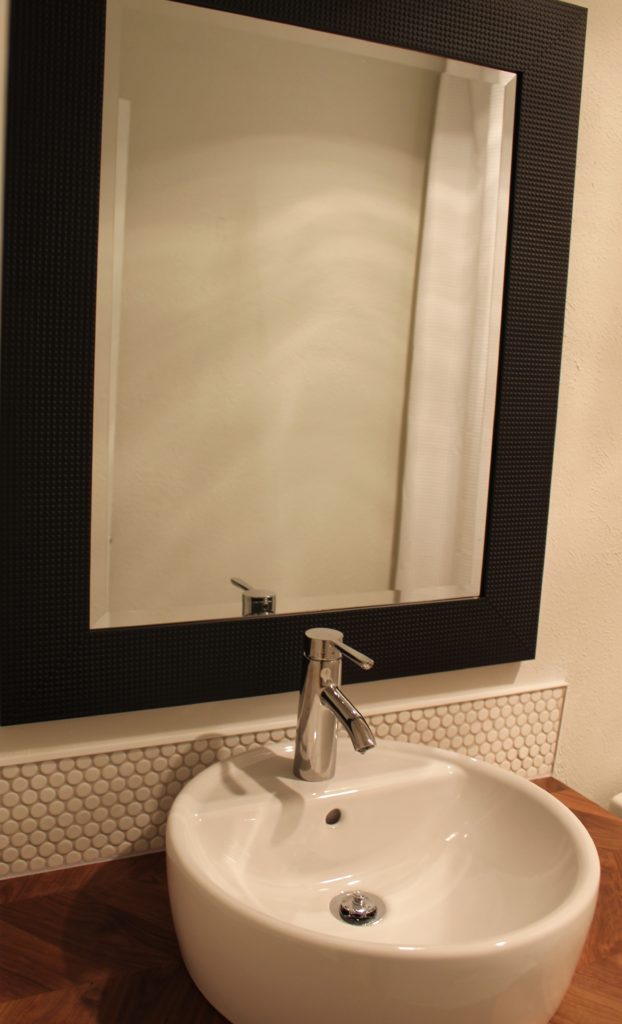
We found the mirror above the vanity for $30 and I painted the frame with a flat black spray paint. I am planning on bringing other black, metal elements in the room with the aforementioned accessories like towel hooks and a hand towel ring. Hopefully, that helps the mirror to not feel so crazy and heavy. But check out the little dot detail around the mirror…we loved how it mimicked the look of our new penny tile backsplash.

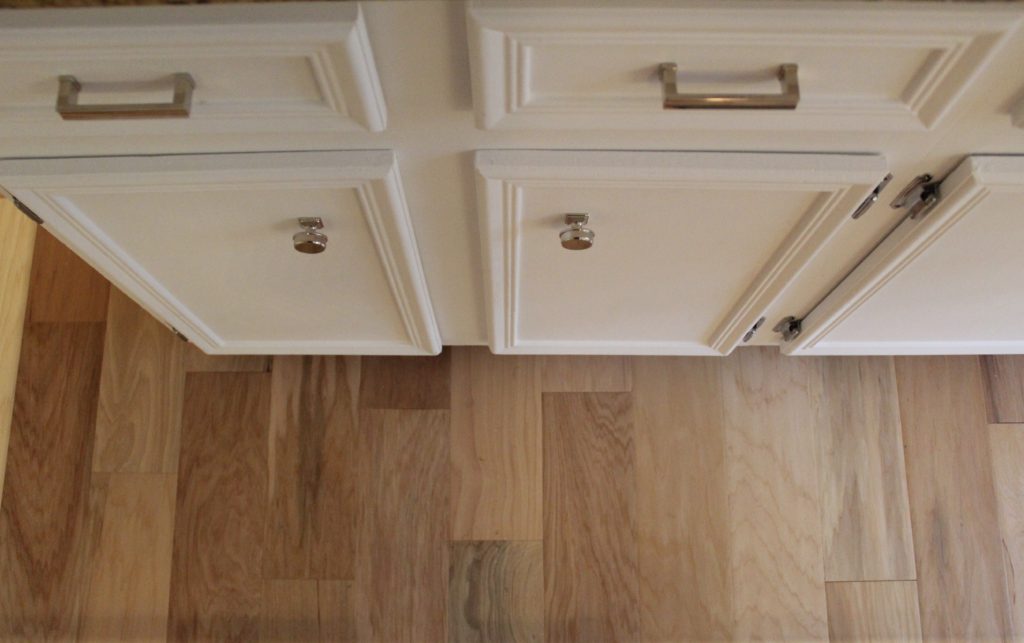
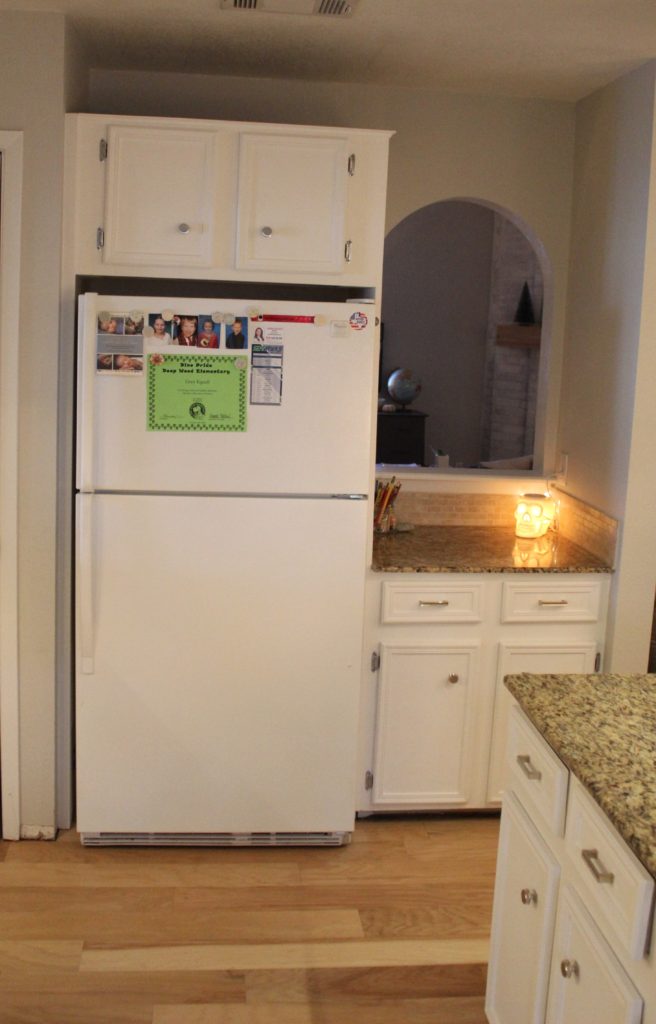
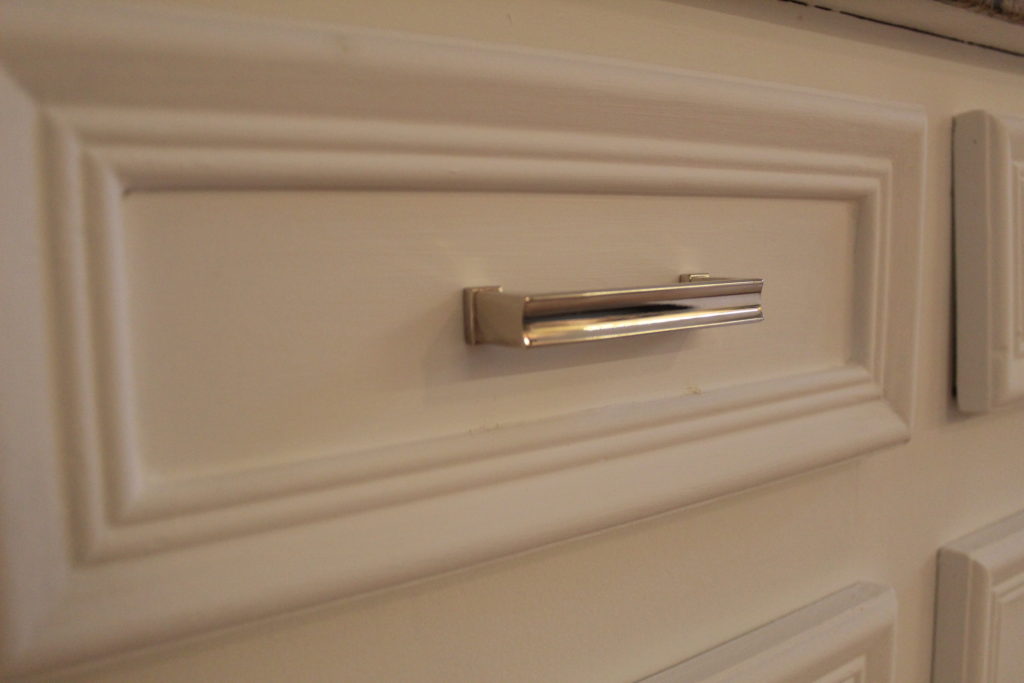
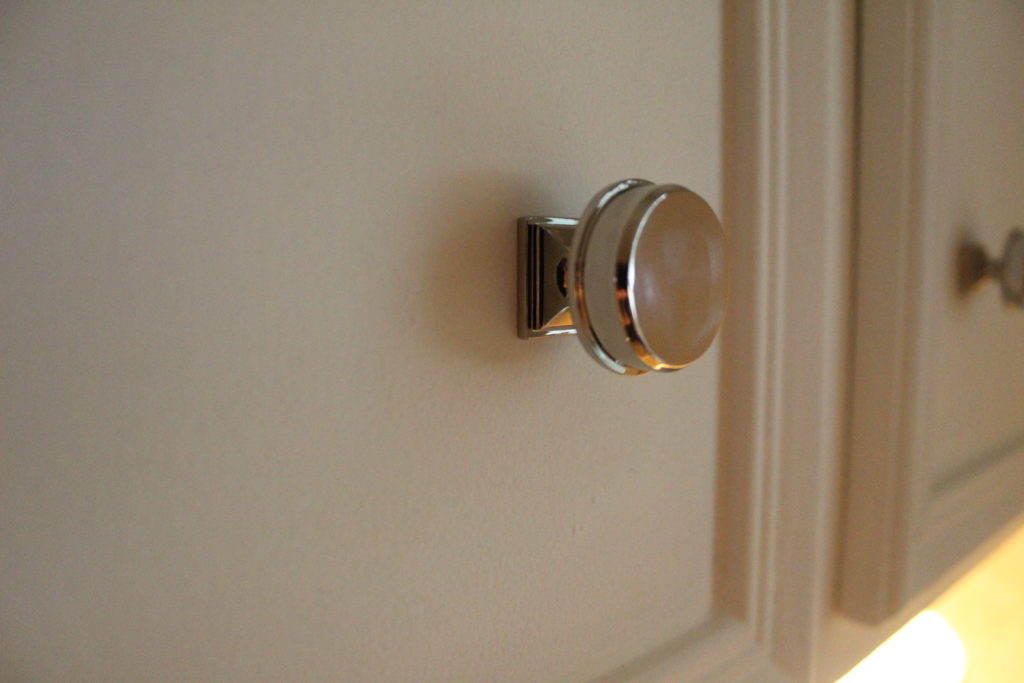
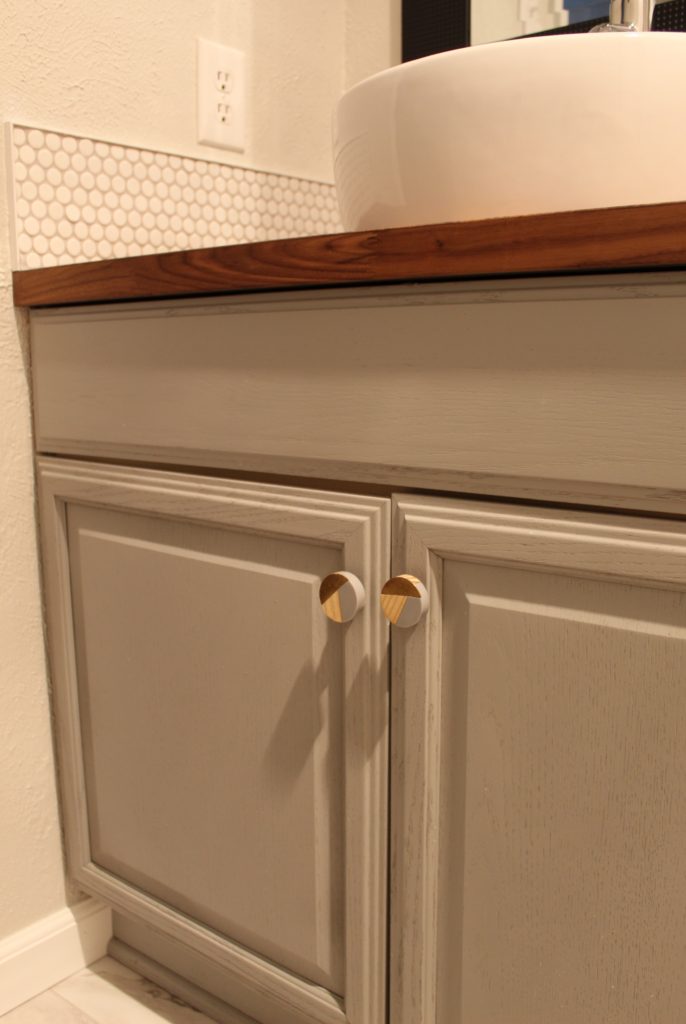
We began the bathroom overhaul with a fresh coat of paint for the vanity. Our vanity isn’t what I would choose if I were doing a bathroom from scratch, but it was installed right before we moved in. So I decided it would stay and we would do our best to freshen it up. After a coat of the new spray chalk paint from Lowe’s in Woolen Stocking and some new knobs from Hobby Lobby, the vanity was done.

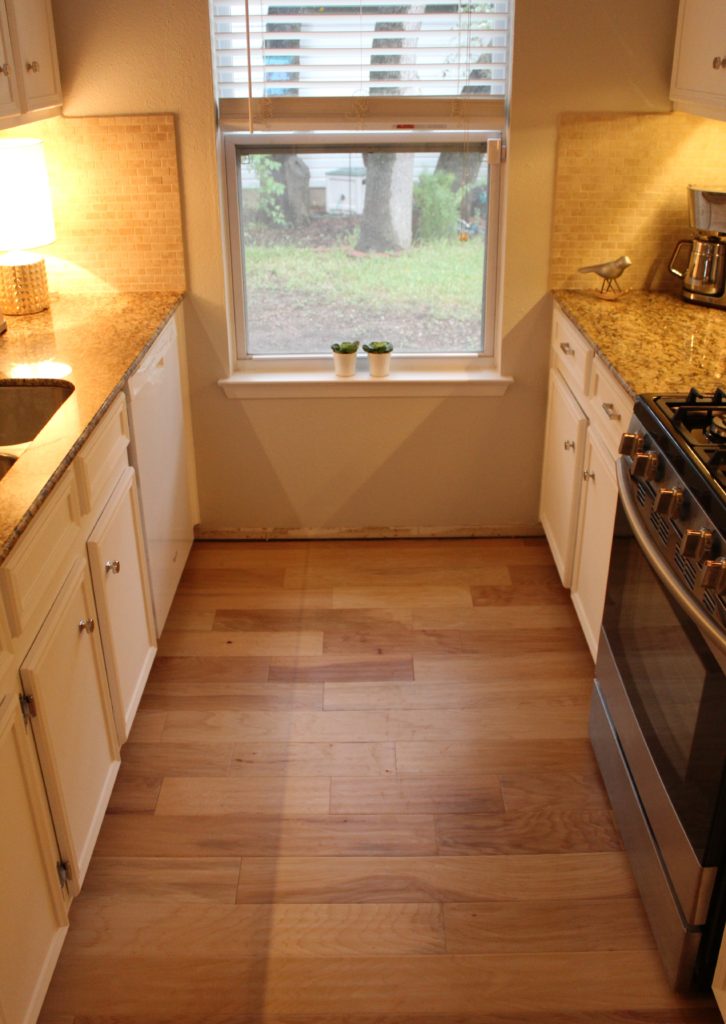
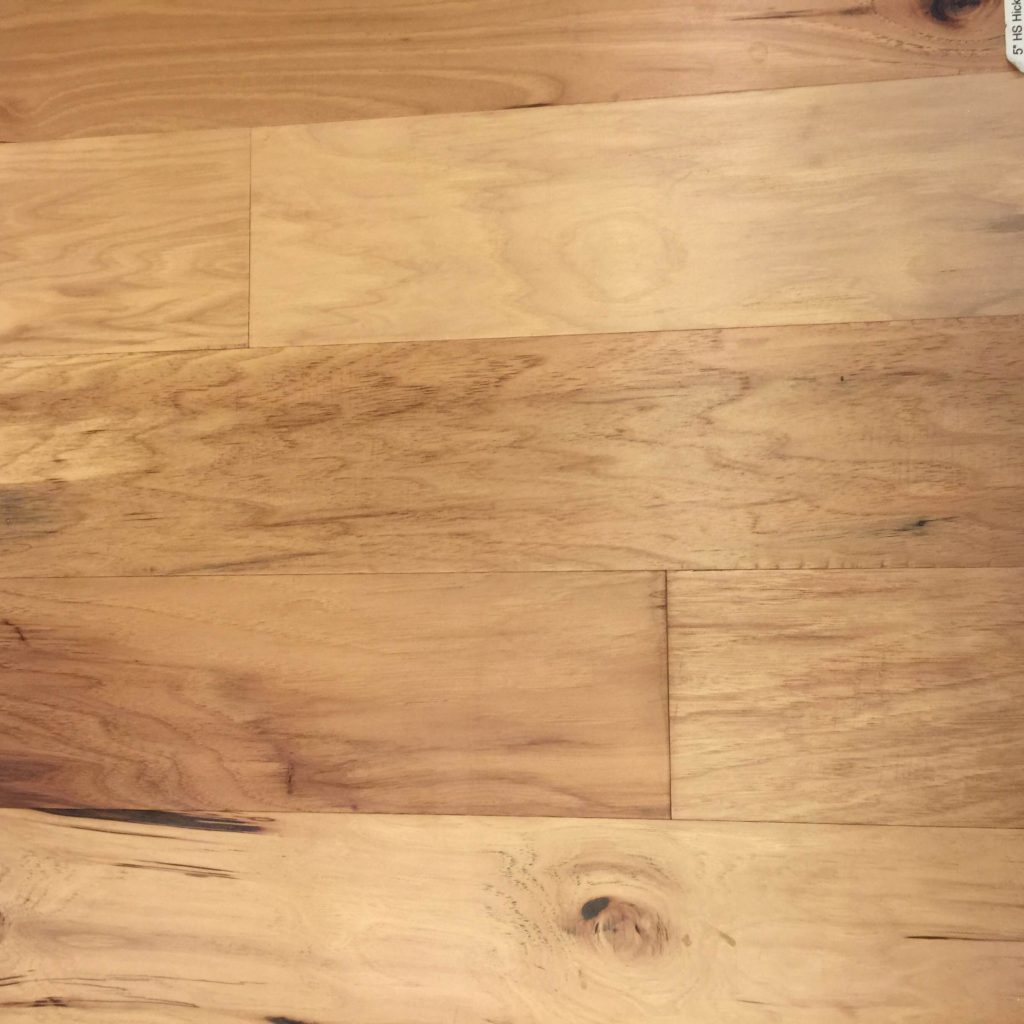
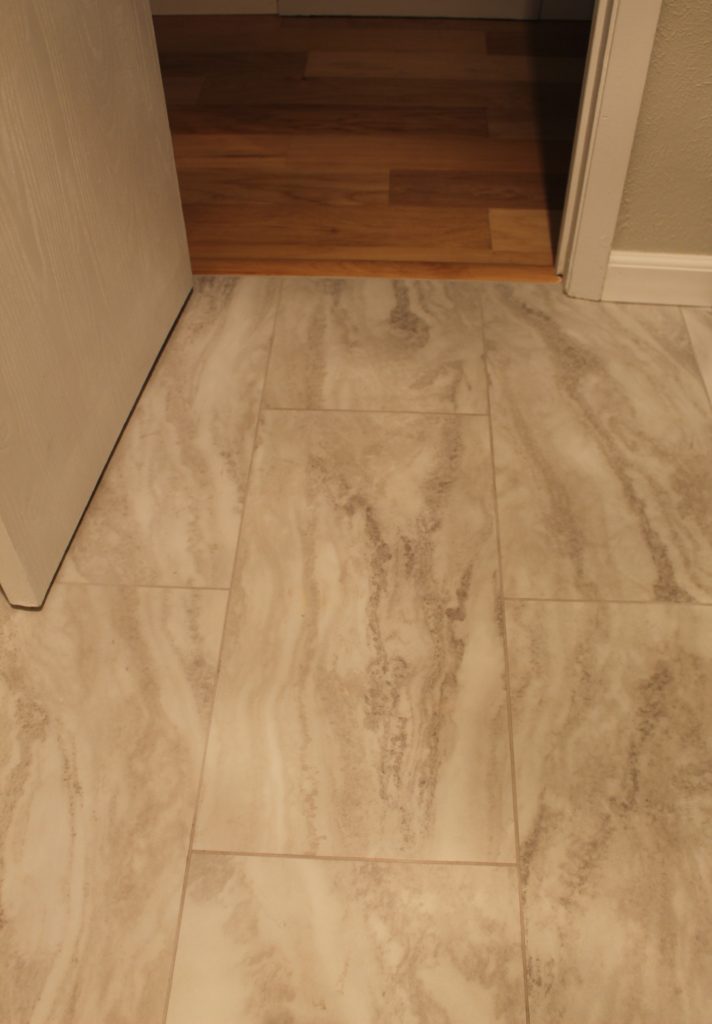
Next up was new flooring. One of my favorite bloggers used this tile a while back in a kitchen that they remodeled for one of their readers and I have been obsessed ever since. Look how lovely it is.

Via

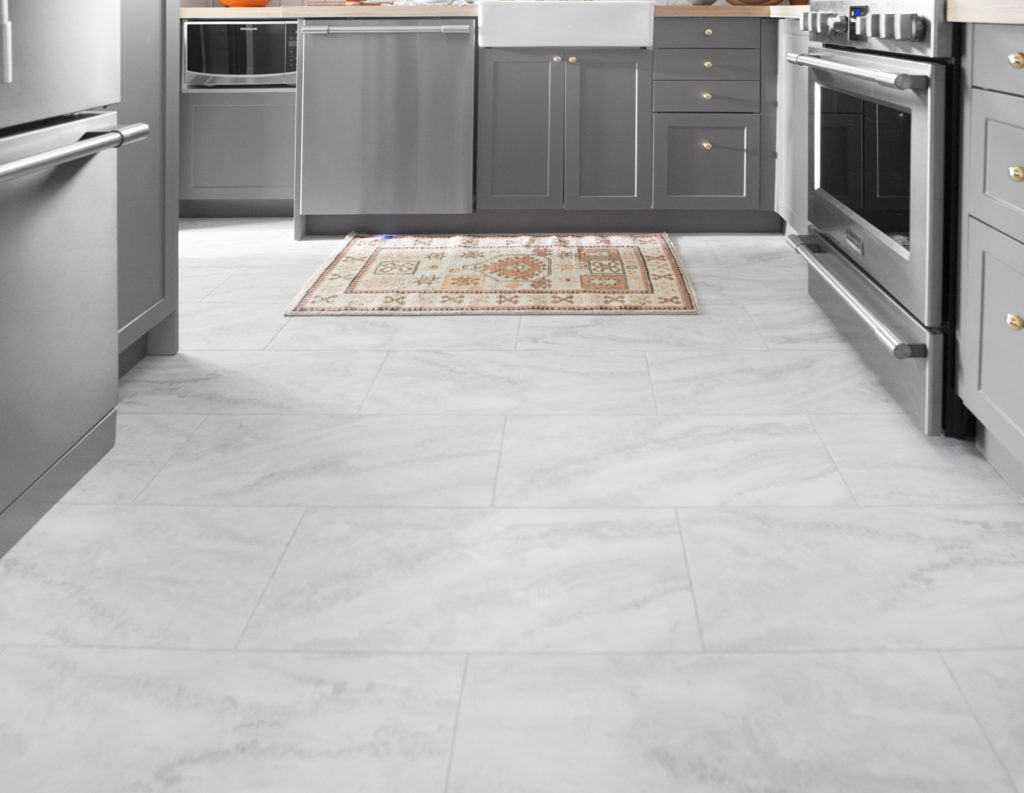
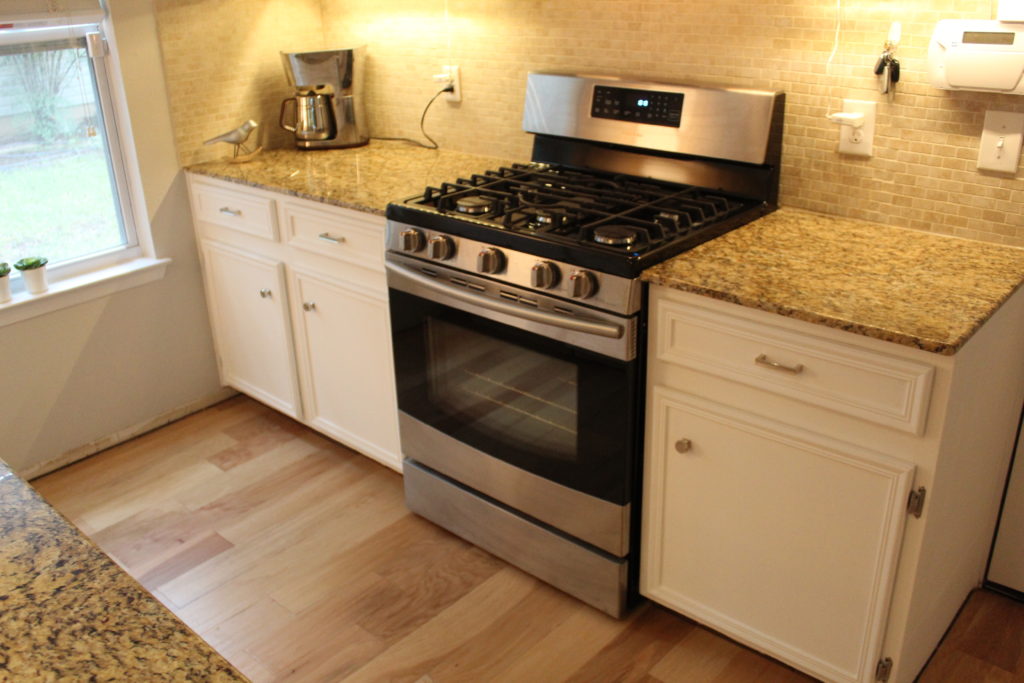
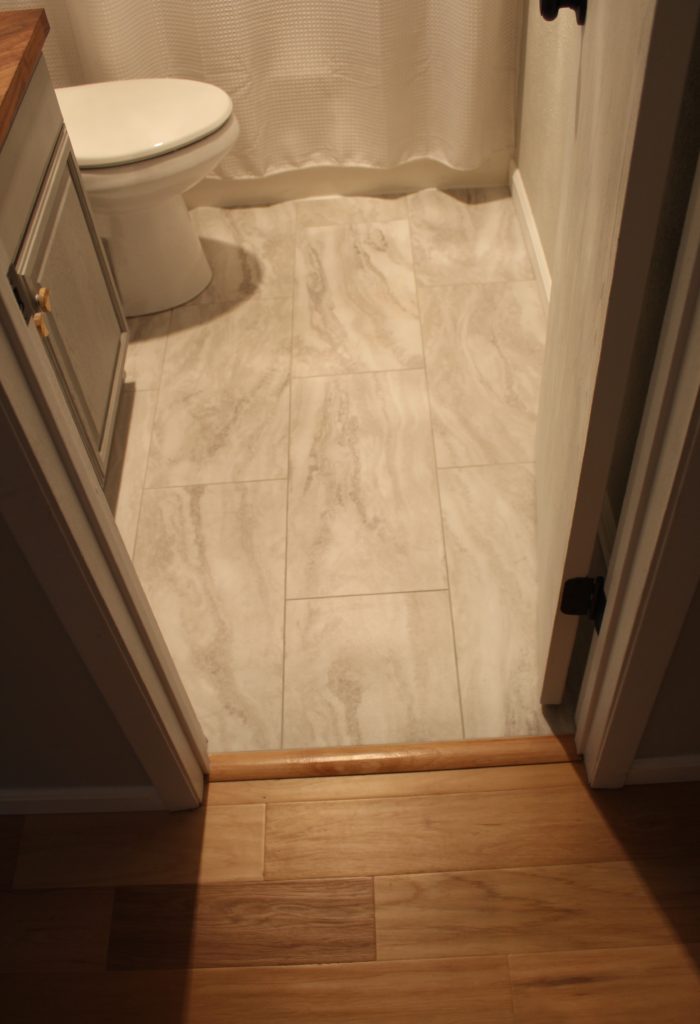
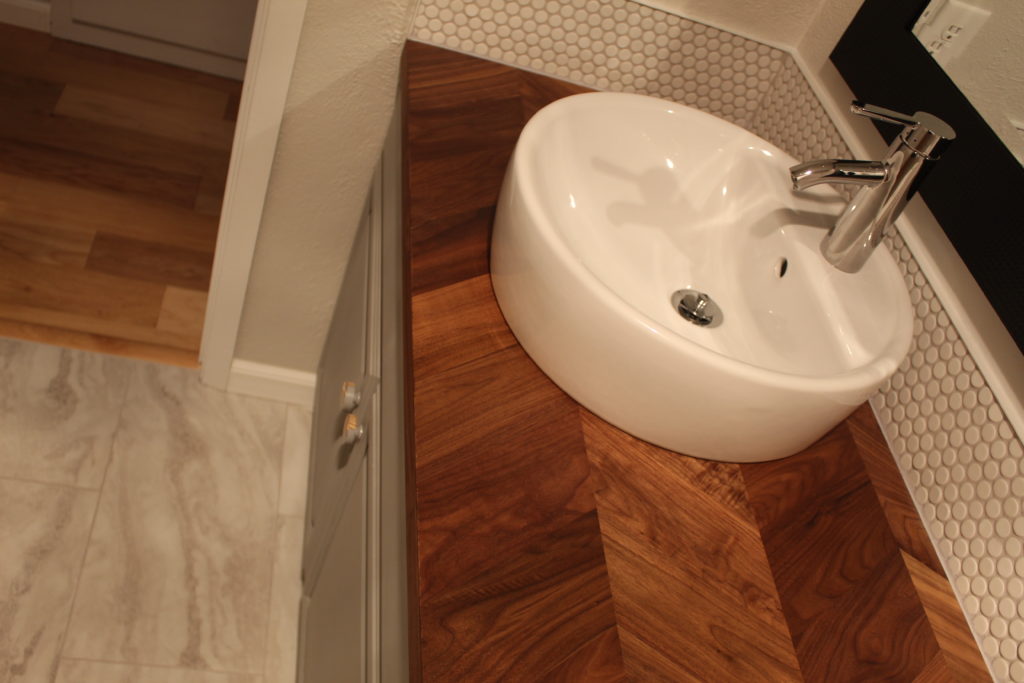
We love this flooring so much. First, it’s a very affordable option with a very high-end feel. Although it’s a vinyl product, it has a marble look and feel and we’ve had neighbors over who thought it was real marble. I feel fancy just typing that. We were surprised to learn that the vinyl was thick enough for us to use grout between each tile much like you would with a real stone. A couple other perks would be that it was easy to install because you don’t need a tile saw and it’s warm underfoot unlike real stone which can be quite cold on bare toes. Also, the tiles have quite a bit of texture so no need to worry about a kiddo slipping on them when they hop out of the bath still covered in soap and bubbles. Try not to judge me for my terrible photography skills. This room is a challenge to take photos in with zero natural light and super tight quarters. Just sayin…

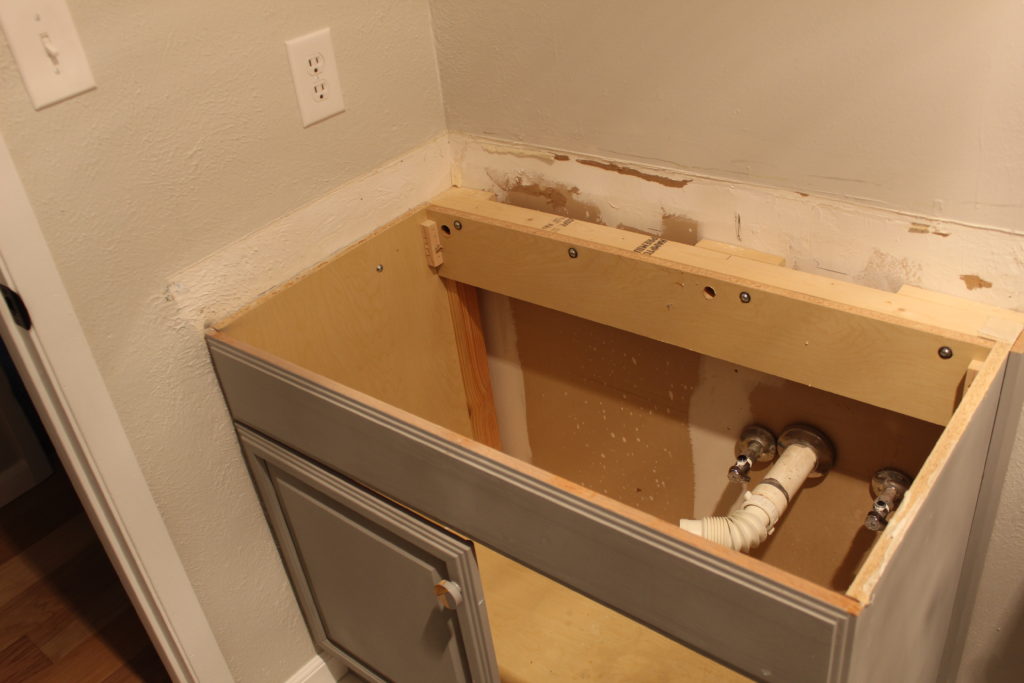
After we removed our old counter and sink, we discovered we were going to have a problem with the texture on the walls. There was no texture behind the old backsplash. Our house has crazy texture on all the walls. When I think of it, it reminds me of the meringue on top of a lemon meringue pie. In the recipe, it always says to whip the topping until you have stiff peaks. Our walls are covered in those stiff peaks. Ugghhhh. This left us with two options; try to recreate the stiff peaks and extend them down to the top of the new counter or cover this problem with a new backsplash. It didn’t take us long to decide we would trying our hands at tiling. #aintnobodygottimeforthat

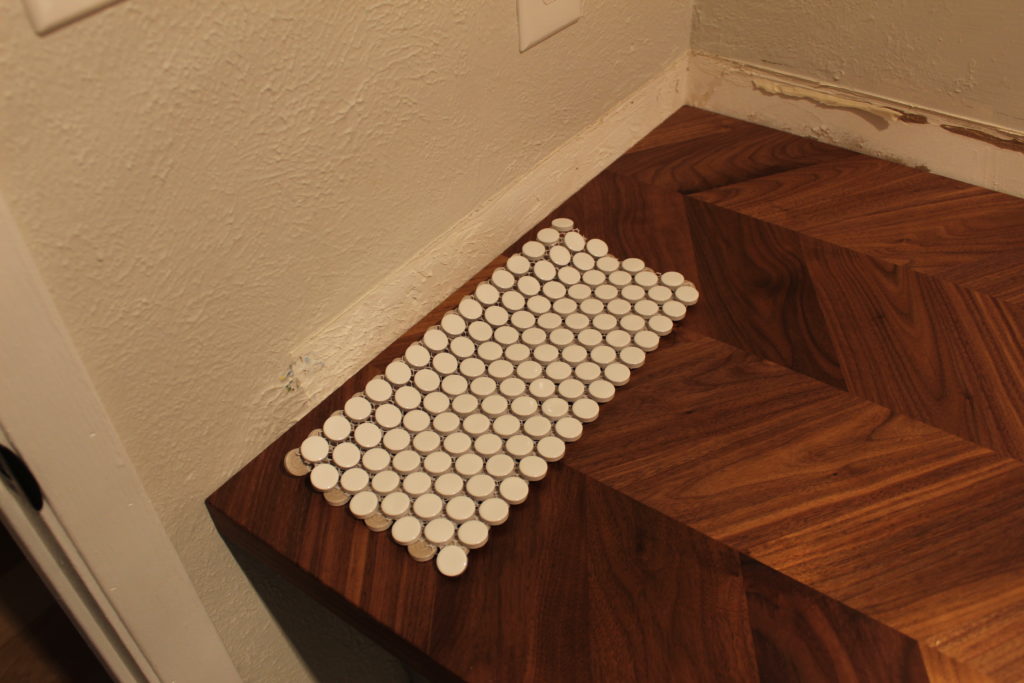
We went shopping for tile at The Tile Shop and had such a good experience. Their sales peeps were so helpful and knowledgeable without being pushy. I found the section with the penny rounds and fell in love. I fell hard and fast. The problem was (if you consider lots of beautiful options to be a problem) going to be deciding on just one! Nate was actually the one who helped me to keep my head out of the clouds and suggested we go with a crisp, white, ceramic style. They quickly set us up with everything we would need to get this project done. We will definitely be shopping there again.

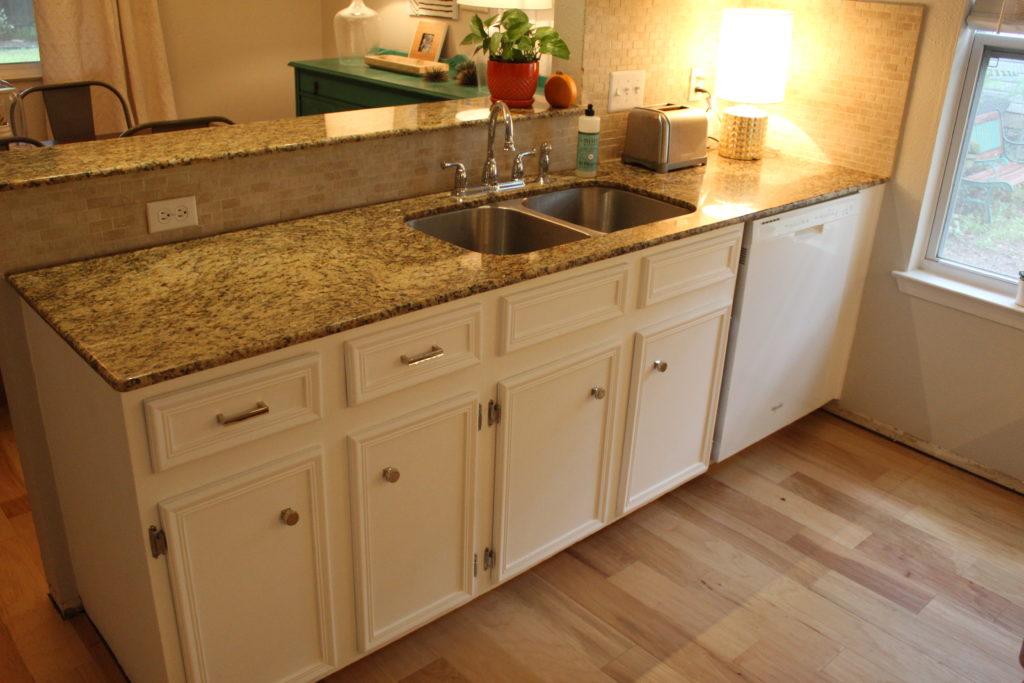
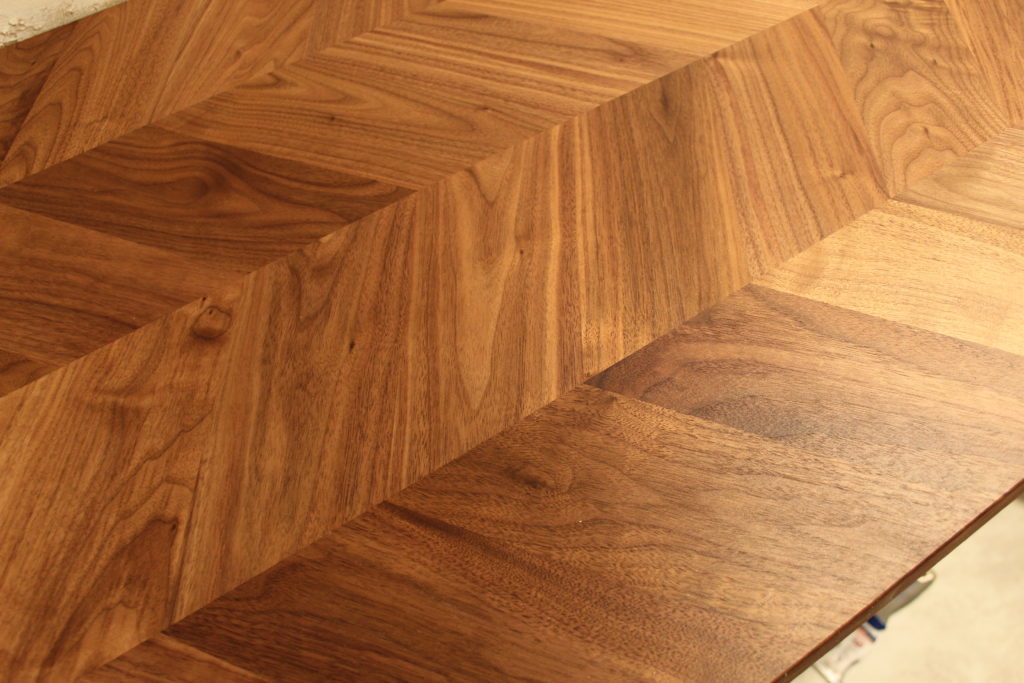
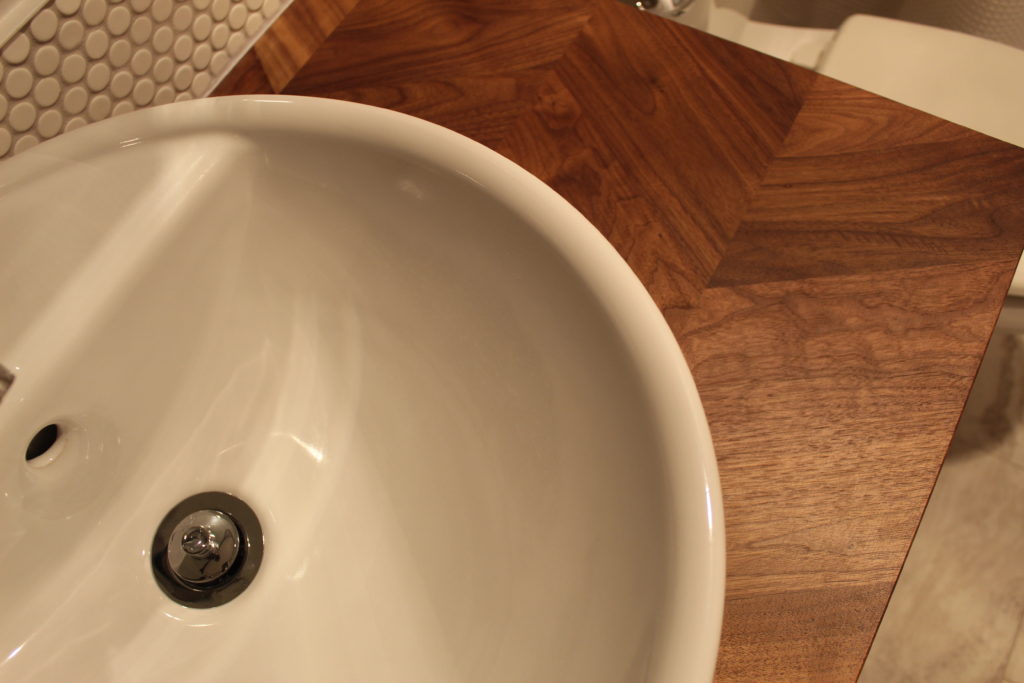
The rest of our materials were all bought at IKEA. We chose a butcher block style countertop, a vessel sink, and one of their faucets. We did a lot of research before we decided on butcher block for the bathroom. Like everyone else, we worried that it might not be a good fit because of the moisture in a bathroom. But as long as we watch for signs of damage or rot, and use a product like polyurethane or waterlox to seal it, then the wood should stay moisture free and beautiful. The butcher block we chose is a new product at IKEA and has a herringbone design in the wood. We love the extra detail.

We were on a tight budget to do this project and decided early on that the tub and shower surround would have to stay. It’s actually in good condition and we knew that replacing it would eat up a good portion of the budget. So we shifted our focus to just the cosmetic updates, and I am so happy we did! Now for all the fun shots of our finished bathroom…

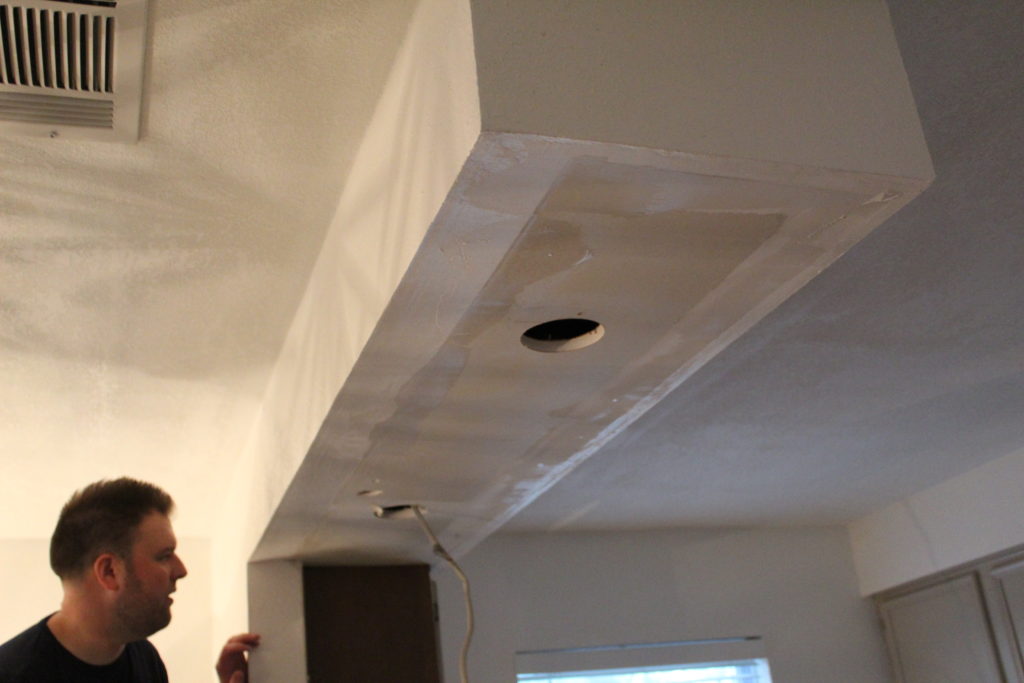
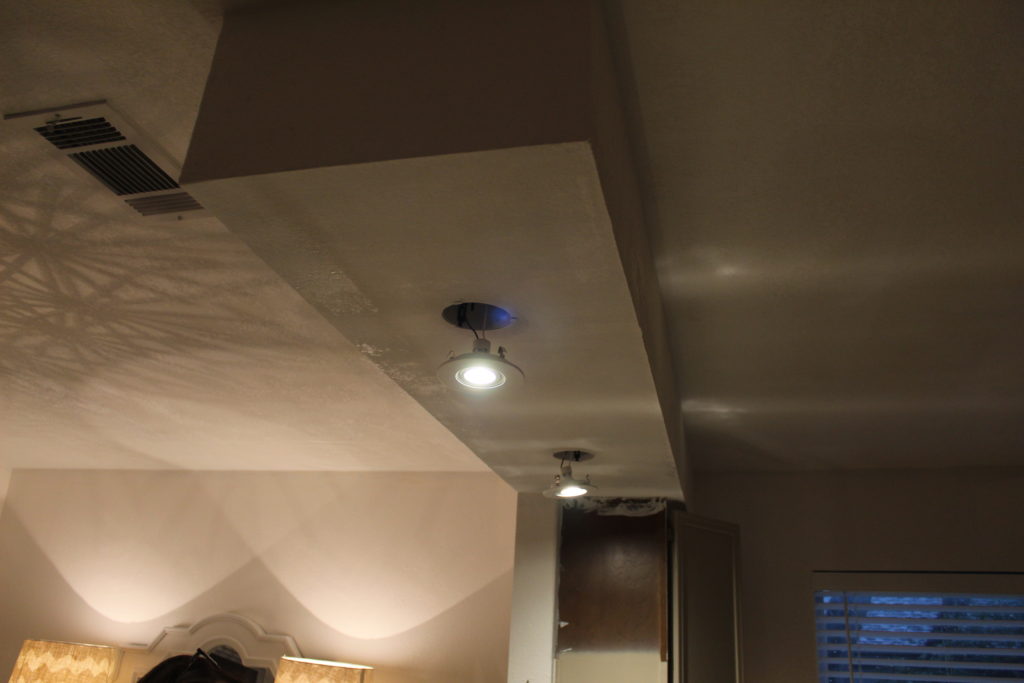
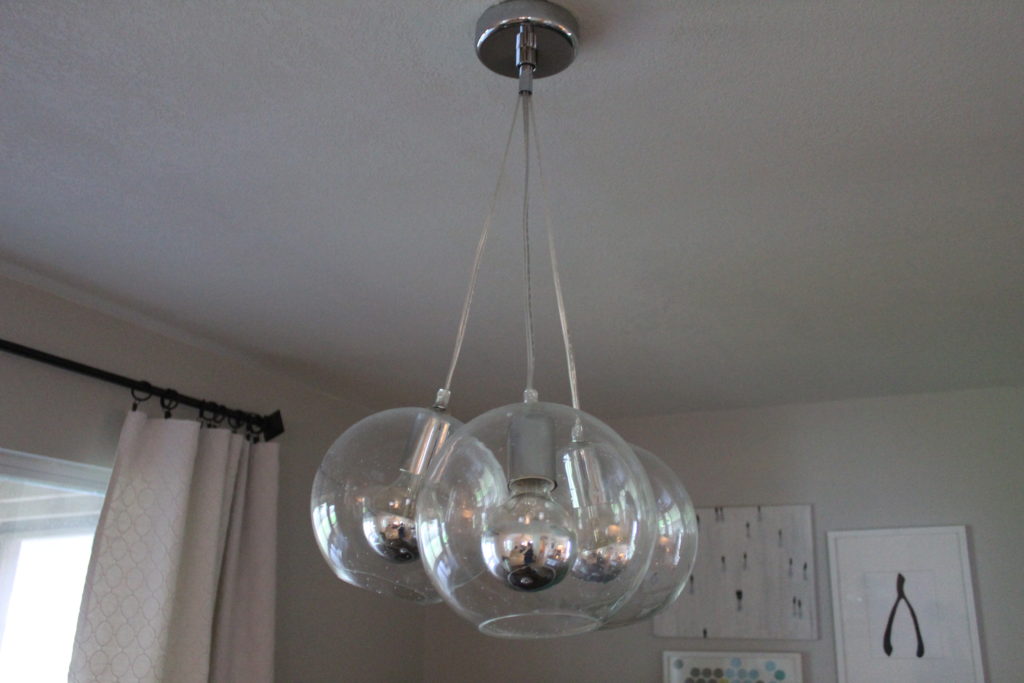
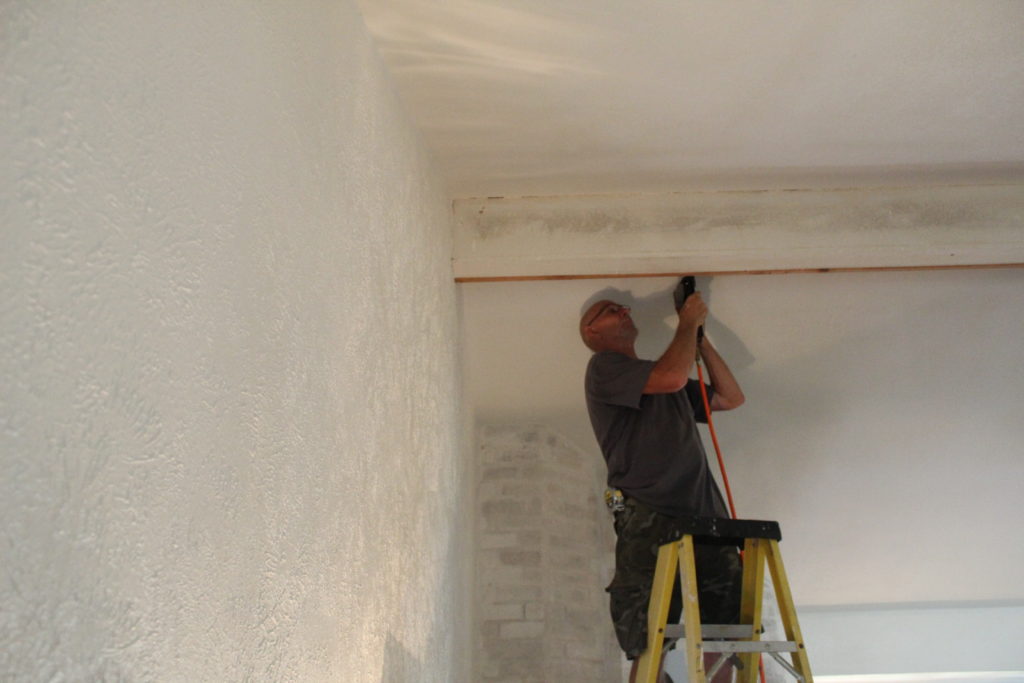
We are feeling pretty proud of ourselves for completing this project all while keeping our kids alive and managing to stay married. Next up, we have been busy FINALLY replacing the overhead lighting that we took down when we scraped the popcorn ceilings. And yes, I realize that was months ago.


Switching things up

Yup, I have already changed up our new office area. I guess I can’t help myself. I am a compulsive tweaker…err or a lady who likes to rearrange things around the house. Does that sound better? Last time we left off, it looked like this.

There wasn’t anything wrong with the office area but then I was cleaning out Nolan and Grey’s closet last week and I came across some old shelves that I had shoved in there when we moved. I remember thinking that I might use them in the kiddos’ room but we ended up going in another direction when we hacked some IKEA shelving. With all that new storage, they didn’t need any more shelves. Maybe these babies could be fun above my new desk? Yes!

I just threw some random decor on them so don’t be surprised if they look different every time these new shelves pop up in pictures. Also, notice the chair? Nate surprised me with this chair after he read the last blog post. What a guy! I guess it was easy to tell which chair was his favorite choice. I love it though. The cushion is surprisingly comfy and the warm wood is just lovely with the modern, bright white desk.

The little cactus is the only new addition and I picked it up at Target. It is FAKE! You would never be able to tell. Seriously. I am a bit of a fake plant snob and this is one of the best ones I have seen. Makes me reconsider everything…not really. But I am definitely going to give some more faux plants a try. Maybe the shelves need some books? Or my mom suggested a chalk board or cork board. That could be cute. Weeeee!

The other project that we did is probably the easiest DIY that anyone could ever attempt. Okay, there is a super long hallway when you walk in our front door opposite of the wall that I stamped with my tribal stamp a few months ago. This naked wall was driving me crazy (not in a good way) and I wasn’t quite sure what to do with it. My solution was to hang some art and call it a day. This is how it turned out.

I liked it just fine but it kinda bugged me because I wanted our entryway to be both pretty and functional, no? Welp, I took down the gallery wall and started looking for some cool coat racks. It didn’t take long before I spotted this beauty.

Via

I love the industrial design but even the extra-large option wouldn’t be long enough for the wall. So, Nate and I decided that we could just make our own and this would allow us to customize the size. We had some old boards in the garage left over from an old headboard project and the rest of the process is as simple as finding the right hooks and affixing them to our board. Done and done.

So simple. So easy. And I love it. Here’s a few more pictures of the updated spaces so you have a point of reference.

We have lots of projects lined up so stay tuned for baseboard trim progress…finally. Also, we are still working on some bathroom updates. Whew. I think we might be on a roll! If you’ve noticed that my posts have become sporadic, you’re right. Here’s why.

New Year, New workspace

Happy New Year friends! It feels so good to be back to normal, well, a new kind of normal for our family of five. Our Christmas break was packed. The baby and I flew to Oregon to be with my sister as she had her baby girl in the middle of the biggest snow storm I have ever seen. She is happy and healthy and I am so grateful that I was able to be there for the special occasion. Nate and the kids drove up to join all the fun when they finished up school for the holiday. Our time in Oregon was spent with all the family we could cram into my sisters’ house and the cousins played in the snow, went ice skating, and ran around like hooligans. This was our best Christmas yet!

Even though my break was full of sleepless nights with the new baby, I feel energized and eager to begin this new year. We have so many projects planned in the next few months, it’s very exciting. Our house has a long ways to go but at the same time, it feels like we have turned a corner and our little place is taking shape! Let’s do this 2017! Thanks for hanging in there as I reflect for a second.

My time off wasn’t just a swirling blur of bottles and diapers. We still managed to get a few things accomplished. First, Nate and I decided that some new appliances for the kitchen would be the perfect Christmas gift to one another. Aren’t we exciting? Some people go on vacation, we buy dishwashers. Although it isn’t a DIY project, it does really improve the overall feel of the kitchen. Is it weird that I want to pet the new refrigerator?

A few months ago, we bought a new range and hood and planned on replacing the refrigerator and dishwasher just as soon as we saved enough for them. Well, that time is here and I couldn’t be happier about it. Appliance shopping is my idea of a good time. So. Much. Pretty. Any big purchases we make, especially when it involves electronics/appliances, Nate does the research and I narrow down the options based on appearance or other practical aspects that I experience with every day use.

The other little project is a shared office of sorts or workspace for Nate and me. Nate often finds himself doing some work from home and it isn’t unusual to find him answering emails or checking his calendar from our home computer. He usually just does this from our dining room table but with our kids spending close to an hour every night doing homework at the same table (that’s a whole different issue…don’t get me started), it made more sense to make a designated space that he could work from, separate from the kids. I also have enjoyed having this space for photo editing, blogging and emailing. It’s a win, win, win.

There is an awkward corner behind our sectional in the living room that I have been scratching my head over since we moved in. Previously, I just shoved a shelf in the corner and I was using it to corral random decor that I didn’t know what to do with. That solution quickly began to feel like a waste of space and with three kids and only 1,648 square feet of living space, why would I waste a single inch of it? Enter workspace idea!

The desk is a parsons desk from West Elm that I scored off of Craigslist. I have always admired this particular desk from West Elm so when I found one for cheap on Craigslist, it felt like it was meant to be. I am still hunting for a chair and have been stealing a chair from the dining table until I find the right one. Here’s a couple of options that I am considering:

Via

I spotted this chair at World Market and was thinking that it might be perfect. I love the rich color of the wood and the upholstered seat is super fun. Since the desk has such modern lines, a wood chair might be a good way to bring in some warmth and texture.

Via

I love these acrylic chairs. I have seen them a million times and they seem to work in just about any kind of design situation. That’s super appealing to me as I could just move it somewhere else if I got sick of it or didn’t like it for an office chair. Hmmmm….oh the choices.

So those are just a few of the things we have been up to around this house. Like I said, I feel so good to be getting back in the swing of things around here. Oh, and we have some exciting progress to share that’s been happening in the bathrooms. If you’ve been following along you may remember our bathrooms were in serious need of attention. You might have blocked those pictures from your memory though and I wouldn’t blame you for that.

P.s. Be sure to check my house tour page because I FINALLY updated it!

an urban nursery

img_1188

Well, we are officially a family of five. Urban Price Equall (Price is my maiden name) was born on November 11, 2016 at 12:24 pm. He weighed in at a whopping 8 lbs. 13.5 oz. and was 20 inches long. I’m feeling ALL the feelings but mostly, I am very grateful.

img_0135-edited

Remember about a month ago, when I put together a list of my five favorite baby items for a nursery? Well, the finished product turned out a bit different from my list. Mostly because I procrastinated for so long that a few of the items were on backorder and I wouldn’t have received them for a few months. So, I improvised and refocused on items that would actually arrive before my baby did.

I finished Urban’s nursery the day before he was born. Nothing like waiting until the last minute, huh?  So, now that we are home and all settled back in, I thought I would share how it turned out. I had so much fun planning his room and am convinced that baby rooms are the most fun to design and put together.

img_1187-edited

img_1202-edited

img_1198-edited

My goal was to keep his space simple without being too babyish. I kept patterns to a minimum and let the rug stand out with all the color and pattern. Speaking of the rug, I ordered it from RUGSUSA and it’s on sale for Black Friday right now. I’m super happy with the quality of the rug and the colors are just as pictured on their website. Lots of times, I have ordered items that arrive and look nothing like their picture did on the website. So frustrating. So NOT the case here. It’s just lovely.

img_1192

img_1208

The crib sheet has little orange arrows that I picked from Land of Nod. It’s very soft and I love the way it plays with the oranges in the rug. When Nolan and Grey were babies, I bought them crib bumpers but in my quest to keep things simple this time around, I decided to skip it and am happy with the way it looks.

img_1207

img_1193

img_1194

I bought the art in a set of two at Target. The frames are a warm wood tone that breaks up the otherwise mostly white pallet. The giraffe head is a hand-me-down from Grey that I bought from Dwell Studio when he was a baby. Whoa – five years ago. Where does the time go?! The closet doors were given a fresh coat of white paint as they were the last of the trim that needed to be painted. When we moved in, the whole house had very dark trim and now every bit of it has been painted white.

img_1199

img_1196

On the wall opposite of the crib, we used an IKEA dresser with a changing pad and framed some printable art from TheCrownPrints. Originally, I thought about doing a gallery wall above his changing station, but Urban’s room is small. The space is only 10’x11′ so I wanted to be careful to not overwhelm the space with a million frames. Also, I have some gallery walls going on in other areas of the house so it was fun to try something new with one larger, simple framed piece.

So, that’s it! In my last post, I over promised when I said I would have a post done with his nursery photos AND an updated house tour. Hopefully, I will be able to get the house tour page updated this week.


Freshening up our drabby old kitchen

img_1128-edited

The last few weeks have been a whirlwind. We have had our spare time filled with football games and house projects galore. My parents’ are coming into town on Wednesday to meet this new baby of ours. With my c-section scheduled for Friday morning (yes, as in three days from now…gulp), we have been rushing to try and squeeze in a few last minute to-do’s. The kitchen finally got some much needed attention as we made a few simple(ish) updates and gave the cabinets a fresh coat of paint. Other than the addition of our new range, and the new floors, not much had changed in this space. Here are a few pics to jog your memory.

img_1035-edited

img_0705

img_0730

The first thing that needed to be done in the kitchen was very obvious to us from the first time we saw the house. Notice in the second photo, the bank of cabinets above the sink that obstruct your view into the dining room? Yes, those had to go. And go they did, way back in August, in fact. While my parents were visiting, my mom and dad helped me tear these suckers out one morning while Nate was at work. It was fun to send him a picture surprising him with our little demolition session. After a lot of debate and going back and forth between leaving the soffit and taking it out all the way to the ceiling, we decided it would be easier to leave it. Taking it completely out felt a bit like opening a can of worms since the rest of the kitchen would be staying as-is. So, our solution was to texture it to match the new ceilings, paint it, and add two can lights.

img_0710

img_0722

img_0748

Our next big kitchen goal was to find a way to dress up the space around the lonely refrigerator. I always thought it looked unfinished and a bit out of place just sitting on this wall all by itself.

img_0730

I have seen quite a few tutorials online about building a simple surround for a refrigerator with a cabinet above, to give it a more permanent, built-in impression. And the best part was, we had a cabinet that we took down from above the sink that was the perfect size for the refrigerator space. So, I ran this idea by my dad (yes, this project was also done back in August during their visit) and Nate who immediately rejected it and told me I was nuts. But, after some online research and some serious convincing (picture me with a power point presentation, pie charts and a pointing stick) they reluctantly gave my idea a whirl. Here is what we came up with.

img_0734

img_0735

img_0751

After the addition of trim, caulking and paint, I’m very pleased that I pushed these guys to help make my built-in refrigerator dreams come true.

The last goal for the kitchen before baby was some paint for the cabinets and add some pretty hardware. I decided early on that white was the direction we were taking because if you follow along, you probably already know that I am on a quest to brighten up this place. So, white cabinets felt like a very natural way to go. We aren’t reinventing the wheel by painting our cabinets. Pretty much everyone who lives on the planet is well aware of the power of paint. Amen. Just look at the difference it has made for our little space.

img_1105

img_1107

img_1111-edited

img_1114-edited

img_1109

img_1123

img_1125

img_1126

Painting the cabinets was a pretty straight forward process. I used Annie Sloan chalk paint and I loved using it. It was perfect for this pregnant lady with virtually no odor and low VOC’s. It’s environmentally friendly and my favorite part was that it’s water soluble. So, if I found myself running low on paint, I could mix it with some water to really make it stretch. Brilliant. With the painting process complete, I sealed the cabinets with the Annie Sloan wax which leaves you with a rich, almost velvet-y finish. I love the finished product.


P.s. Unless I go into labor before Friday, I should be back with a nursery tour! I am putting finishing touches on the sweetest little space for our new guy and I am so excited to share. Stay tuned…

P.s.s. Also, I am going to get our house tour page updated so you can see all the good progress we have made lately.


the floors are in…and they are so good

It’s Tuesday. I have to keep reminding myself that it isn’t Monday because my kiddos were home from school yesterday so Nate and I could attend parent-teacher conferences. Originally, we were kind of dreading this experience but it was actually fun to see what they have been up to in school. Nolan has been writing some very creative stories and Grey is the class story teller. Surprising? Not one bit.

In the last post, I detailed what we did over the weekend while we were kicked out of our house while our old floors were being removed and the new ones laid down. When we got home, the floors were down and this lady felt like it was Christmas. We actually ended up short about 60 feet of material and had to wait a few days for the boards to come in and have the rest installed. So, the dining room has only been complete for a few days as it was the area that was left undone when the crew discovered there was going to be a slight shortage.

We did a lot of research about flooring options before we made our final decision when it came to materials. I decided early on that I wanted a natural material to bring some warmth into the house. If you follow along, you probably have heard me complain about the lack of natural light in our house. Because of this, we were quickly able to rule out all the options on the darker side of the color spectrum. Think light and bright! After looking at tile, bamboo, laminate, and even real wood, we decided that our sweet spot was in the engineered wood group. Once we had that decided on, it was easy. We quickly picked a 5” plank, hickory wood. It was light, it had a ton of texture, and it’s perfect.

Whew! With. All. That. Said. Let’s go in and look at the new floors!

img_1030

Notice the addition of some yellow mums and a few pumpkins to the front entrance? I am trying to force Autumn to arrive (and stay) here in Texas. We are back up in the 90’s but with cooler mornings and evenings. The weather is flirting with the idea of changing seasons but just can’t seem to commit.

img_1031

The variations between each individual plank of wood adds a lot interest. We haven’t installed our baseboard trim yet. Nate is planning on getting this task done in the next few weeks. I considered not sharing photos of the floors until the baseboard was installed but I was just too excited to wait! Our cat, Artie was very curious about the photo taking process this morning so you will see him popping up all over.

Here is a little reminder of what our entryway looked like when we moved in.

IMG_0102

I took this picture on move-in day at the end of May. The best lesson I have learned through keeping this blog is that documenting the process of fixing up our house has been the best way for us to keep our momentum going. Buying a fixer upper and living in the space with kids and real life happening while trying to update the house is tricky. Very tricky. But, looking back at how far we’ve come is so uplifting. Go us! My parents bought a 1916 craftsman style house when I was four and lived there for twenty-six years all while fixing up the house and raising five kids. It would have been so cool to be able to look back at all the projects and work they did on their house in the same way that we will be able to look back on our first fixer upper. But let’s get back to the floors….#pregnancyhoromonesareforreal

img_1033

img_1034

Some of our furniture hasn’t been moved back into the house. We have been relying on neighbors and Nate’s buddy from work (Thank you, Jimmy!) to help us move the heavy pieces back into place. As I am exactly one month away from my scheduled c-section, Nate won’t let me help him move a thing. In the meantime, our furniture is sprinkled around the house, in the garage and even in the screened porch.

img_1037

img_1036-edited

img_1041-edited

This is our empty dining room. Our dining table is still outside on the screened porch but the kids have been having loads of fun eating their meals all over the house in random spots. We’ve even laid blankets on the floor for an “indoor picnic” which was the fan favorite. Kids can somehow turn the inconvenient aspects of life into something fun and exciting.

img_1038

img_1035-edited

Told you Artie would be randomly photo bombing. I picked his food dish up off the floor to take this picture so I think he was sitting there trying to figure out where his dish ran off to.

The kitchen cabinets are next on my to-do list. I think I am going to give them a fresh coat of white paint and then add some new hardware. But what? Polished nickel? Gold? Oil rubbed bronze? I have been seeing the most beautiful photos of kitchens and bathrooms with polished nickel pulls a la Studio McGee. Hmmm…stay tuned.

Here is the last space with new floors. We left the carpet in the bedrooms but plan on replacing it with something newer, cleaner and prettier. Trust me, I wanted all the carpet to go away. But, I think we made the right decision in keeping it because we didn’t feel we would see a return on our investment.

img_1040-edited

And just because you know how I love a good, look-back on where we started. Here ya go. You’re welcome.

img_0118-edited

So those are all the dirty details on our floors. How we picked them, the process of demolition and installation, and the difference it’s made in our house. Also, they seem very durable so far. We haven’t really changed the way we live on our floors since installing them. We did run out and buy some felt footies for the legs of our furniture, but that’s it. Maybe I will write an update on how they are holding up after we have lived with them for a while?

Hope you have a great week!


we went to round top y’all

We were kicked out of our house over the weekend. There was a good reason though; our floors were being installed! This meant that we had to make ourselves scarce and stay out of the way while the crew made fast work of tile demo, taking out carpet, leveling the subfloor and installing our new wood floors. Because we knew we had to stay out of the house for much of the weekend, we planned a busy list of things to do. So, first thing Saturday morning, we got up early and headed to Grey’s football game in Bastrop, TX. Our guy had a couple of good runs, pulled a few flags and our team came out on top and won the game 25-18. After the game, we were off to Round Top to check out the antique fair that is held twice a year.

roundtop

We weren’t sure what to expect but have been told lots of good things from people who have been. I assumed that it was just a few tents where vendors gather to sell antiques but there was so much more! When we arrived in Round Top, we were greeted by the sweetest little town EVER. The shops were cute. Like, postcard cute. We kept saying that Round Top reminded us of the movie, Pleasantville. Let’s just talk about the food for a second, the food that seemed to be around every turn. Good food too. Everything from Texas style BBQ to fair style food with staples like corn dogs and burgers. Food and antique hunting…ummm yeah.

img_1003

img_1004-edited

img_1001

img_0998

These are just a few of the cute shops that make up Round Top. We talked to some of the owners who explained to us that they keep these spaces year around but are only open during certain times like the fair in the spring and fall. We visited as many shops as the kids could stand before we had to break for snacks and water. I am thankful it is cooling off here but it is still quite warm for October and the temps were in the mid 80’s. Our family can’t ever seem to adjust to the humidity. I don’t know if we are more sensitive to it being from the Northwest or if it’s a problem for everyone. This Northwest girl was hot. Maybe it has something to do with this very large baby boy that I am carrying around?

img_0993

img_0994

img_0995

img_0992

There were so many treasures to be found that I didn’t even know where to start. Many people we saw came prepared with carts and wagons that they were filling up. Look at those beautiful cow hides. It felt really inspiring to see all of the random pieces and imagine all of the ways to re-purpose these items. It really got my wheels turning. Especially this next picture…
img_0996-edited

Haha. Not really. But this is a good example of the quirkiness that we saw all over the antique fair. The shirt says, “Raised on Willie.” We decided that we would pick just one treasure to come home with us and it was an easy decision. I spotted an antique rug and Nate was able to barter with the shop owner until they agreed on a price.

img_1026

I was so excited to bring this little guy home with us and am thinking that a bathroom or kitchen could be the perfect spot for him to live. Oh, notice those wood floors?? Those are our new floors!!!!!! I will write a post really soon with all the dirty details just as soon as it doesn’t look like a hurricane went through the middle of our house.

Overall, Round Top was loads of fun. I would love to go again with cooler temps and without a giant pregnant belly. On the way out, we were charmed by some Texas style houses and beautiful scenery.

img_1013

img_1017

img_1021

I will leave you with this image. Because, who doesn’t love a good baby pic?


My 5 current crushes for the nursery

goodbabyroom

Image via

Happy Monday! It is finally cooling off and raining here in Texas and I am thrilled. This has been a very hot, long summer and I am ready for Fall and the cooler temps that come with it. Bring on all the pumpkins! Over the weekend, my seven year old, Nolan, asked me why I haven’t been getting the baby room ready? She is right, it’s time to get busy. I have all things nursery on the brain. Isn’t the one above just dreamy? We have about seven weeks left until my c-section and this very slow moving lady needs to pick up the pace.

Here is the space. Yikes. Since we have moved into the new house, we have used this room as a dumping ground for extra art and frames.

IMG_0574

I want the nursery to be a simple space with just the necessities. The room is small (about 10×11) and I want it to feel modern, open, and without a lot of frills. This is our third baby and we have learned our lesson about buying all the things. We went crazy when Nolan was born and she had every baby item on the market. She had swings, bassinets, strollers (yes, we had more than one), toys, activity mats, and on and on and on. We scaled back when Grey came along and he had much less. This time, the plan is to start with just a few of the basics. If we find that we absolutely cannot survive without a particular item, we will add as needed. So, I started putting together a small list to accomplish this simple, open space. As always, I kept the price points at what I thought to be affordable. Big impact + small budget = my cup of tea.

  1. First, lets start from the floor and work our way up.

rugforbaby

Image via

This rug is fun and its low price tag makes it not too precious. I think this is perfect to inject some pattern and ground the space. I think a 5×7 would be just the right size and allow me to place the other pieces of furniture around it.

2. Obviously, I need a crib for our guy. Nolan and Grey used the same crib and it looked worn out by the time Grey grew out of it. Think teeth marks, dents and a squeaky mattress from jumping.

baby-crib

Image via

This crib has clean lines and with its bright white color is perfect for our small room. My sister bought this very same crib for her daughter, Finley, and has loved it. Finley approved!

3. Crib bedding is hard. I looked and looked for something that was cute for a baby boy but not over the top with monster trucks or fire engines.

baby-bedding

Image via

 It might be hard to tell from the picture, but this pattern has a small feather pattern. Cute, huh? I thought so. I haven’t ordered from Land of Nod before, so I am excited to test them out in the nursery. I want some of these for my bed!

4. This changing pad and cover is another Land of Nod find. There were so many options that I may end up changing my mind again. But I was drawn to this one because of the fun pop of color it would bring to the space.

babychangingcover

Image via

It seems like the baby gear is so much cooler since I was last in the baby game. Like those yummy pouches that I see so many toddlers happily devouring. What?! I’m not even sure if those were around when Grey was transitioning to baby food. Maybe they were, but I wasn’t privy to them.

5. This mobile could be cute in a boy nursery, girl nursery or maybe I plan on stealing this from our baby when he’s done with it and hanging it in our living room.

westelmbaby

Image via

 Nate thinks this mobile is perfect as it pays homage to our time here in Texas. Nolan and Grey were both born in Portland so this is a cute reminder that our new baby is a Texan. I wonder if he’ll have an accent?

So that’s my list of baby finds for the nursery to come! Grey is donating his old dresser to his baby brother that will house his clothes (ahem…that we have yet to buy) and his new changing pad. It is an IKEA dresser we bought a couple years ago that we stained and painted the drawer fronts white.

img_0975

Don’t you love a good list? I sure do. Something about having things laid out in print helps to ease my type-A tendencies. During my whole pregnancy, I kept telling myself that I had plenty of time to get going on the baby’s room. But, as Nolan pointed out, my window is closing.

P.s. Our new floors have come in and are being installed on Saturday, this Saturday! I took lots of horrible before pictures of our current flooring situation so you’ll be able to appreciate my crazy enthusiasm. Take a deep breath….eeek!


Crushed Ice

img_0790

Oh my goodness. It’s been crazy at our house the last few weeks. We have been busy adjusting to our new school schedule. Hello 6:15am! This is not a natural time for anyone in our family to get up in the morning. We fall more into the night owl category, for sure. In addition to our new school schedule, Grey started fall football and Nolan is finishing up her swimming classes and gearing up for tryouts for swim team. Nate has also been recruited as head coach for Grey’s football team…gulp. Nate is competitive. He is so competitive that we have “no board-game” rule in our house for the general well being/happiness for everyone who lives here. But, I’m sure he will be able to keep his competitive nature in check for these cute little football players, right?

Things have been really busy at home as well. We have my C-section officially scheduled for November 11 so I have to get busy and get some projects done around the house before baby boy is here and the holidays soon thereafter. So, in an effort to keep this train moving, I finally chose a paint color for the interior of the house. I knew I wanted something in the greige family, i.e. a warm gray color. I also decided that this color is going to be pretty much everywhere. This means the living room, dining room, kitchen, entryway, hallway, etc. You get the idea. I’m thinking this will bring a nice flowing and cohesive look to the inside of the house.

A few weeks ago, I went and picked quite a few swatches of paint that I brought home to study. I quickly narrowed down my options as so many of these colors looked too dark in our house. The lighting is super tricky in here with the screened porch on the back of the house that blocks a lot of natural light. I quickly had three favorites for which I went and grabbed test pots at Lowe’s.

img_0795

All three colors are Sherwin Williams. The top was Nebulous White, the middle swatch was Crushed Ice and the bottom was On the Rocks. I painted these swatches in several different places around the house all in different lighting situations. Dark, darker, and barely visible to the human eye. In the end, I went with the middle swatch because I felt it brought the most warmth to the game. And that’s what this place needs. A warm and fresh pallet.

img_0796

This is a shot of the hallway with a fresh coat of Crushed Ice. I especially love the way it pops against the trim. I also just finished painting ALL the trim in the whole house. I was able to leave the baseboards because we will be replacing them when we have our new floors installed, but more on that in a minute. Remember what our hall used to look like on move in day? Wow. I feel bad for THAT Courtney. She had a lot of work ahead of her.

Main Hall

The walls were super shiny and it drove me crazy. It made the texture on the wall stand out as well. This particular texture has so much texture with sharp-ish peaks that it looks like it might scratch you if you rubbed against it. So, while I know most people do not recommend painting their walls in a flat sheen, I went ahead and did it anyways. It seems to tone down our crazy texture and doesn’t draw your eye to the texture, the way it did when the walls were a satin sheen. I hear the warnings against flat paint as it isn’t as washable as some of the more shiny sheens and to this I say, if our walls are so dirty that I am constantly needing to wash them, I suppose I will be repainting anyways. Also, I think that the paint formulas have come a long ways. All of the sheens seem to be washable these days. Anyways, that wraps up my mini-rant and now, more pretty pictures!

img_0801

img_0787-edited

img_0797

Did you spot our new light fixture in the dining room? I have been hunting for something for this space for a while now. We have had an IKEA one above our table for several years but I have been wanting something a little more special. The lightbulbs are dipped in silver which is really fun.

img_0790

img_0802

Remember before how I mentioned floors? Well, we finally made a decision and ordered our wood floors! So, they will be coming in over the next few weeks and then demo and installation should be at the end of this month. They will go down everywhere except the bathrooms and bedrooms. I am so excited/nervous. Here is a little sneak peek of what will soon be our new floors.

img_0481-1

So that’s the dish in our house. I can’t believe we are going to have new floors soon! Picture me with a serious case of perma-grin.


I’m Baaack!


IMG_0784

It’s been a while! Last time I updated the blog, I was busy getting ready for my folks to arrive from Oregon for two weeks. In preparation, I painted and made some easy updates to the guest room. Well, I am happy to report that my parents loved the room and were very comfy in there for the duration of their visit. We had such a wonderful two weeks. The weather was terrible and it rained almost every day they were here. Everyone kept joking that they must have brought the rain with them from Oregon because rain in Texas during the month of August just isn’t a thing.

They have been here a handful of times for visits so we weren’t too worried about doing touristy type stuff around the area but instead focused on projects around the house that Nate needed help to complete. Also, my parents had only seen our new house in pictures so they were anxious to finally see it in person. Because of the bad weather, we mostly hung out together, cooked, (oh, how I miss EVERYTHING my mom makes) completed some projects around the house and watched some good TV (Game of Thrones and The Night Of on HBO) But, it was so nice to spend some time with my mom and dad and we actually got a lot accomplished too!

Also, the kids started school. Grey started kindergarten and Nolan started second grade. I was a little (ahem…a lot) sad to see them go because it feels so early this year. Before Labor Day? What? And don’t even get me started on Grey starting school…how did this happen so fast?? Here is the obligatory first day of school picture. Now let’s move on before I start to weep…again.

IMG_0745

But I mentioned projects! It was amazing to have the help of my dad! Nate and I found that it was easier to pull the trigger on some decisions with his help with some things that we previously had been talking to death. Talking with no action to follow. The first couple days they were here, we turned attention toward this eye sore in the middle of our living room.

IMG_0714

IMG_0715

This beam goes across our entire living room and was covered in popcorn texture when we moved in. When we scraped the ceiling, we scraped the beam and never made a plan for what we would do next. My mom and dad loved our fireplace mantel that we made and thought that wrapping the beam in the same cedar planks we used for the mantel would be the easiest way to dress this baby up and would compliment the existing mantel. Here is a reminder of what the finished fireplace mantel looked like back before we had the ceilings done.

IMG_0512 - Edited

After calling around to a couple lumber yards, we found our lumber in stock and had it delivered right to the house. We had to go though an actual lumber yard because the planks that we needed were over 18 feet long and we knew that we didn’t want any seams where we joined more than one piece together. After they were delivered, it was just a matter of CAREFULLY measuring and ripping the boards to size. After a few nails with the nail gun, we were in cedar love. Just call me Joanna Gaines.

IMG_0719

IMG_0720

We had some exposed electrical in the middle of the beam that was used to wire a ceiling fan when we moved in but we had taken it down and decided that we didn’t need a ceiling fan in the middle of the room. We have been pretty comfortable in Texas with the A/C in the summer and heat in the winter, without the help of any ceiling fans. With all that being said, we turned the breaker off and capped the wiring with plastic connectors and used electrical tape to ensure that everybody stayed where they should be when it went back up in the ceiling.

IMG_0785 - Edited

I love the way it breaks up all that white and gives the room some texture. Also, how cute does the mantel and the beam look together? MFEO. Totally.

While we were on a cedar kick, I have had this live edge chunk of cedar that has been sitting in our garage for two years. It’s twelve feet long that I bought from a guy in Oregon who had his own mill for cutting lumber. Why twelve feet? Well, our sectional is twelve feet long and I thought this live edge would be a perfect table top to live behind the sofa for lamps, remotes and books. But, our sectional floats in the middle in the room here at our new house and so there is no need for a table behind the sofa.

Well, my mom had the brilliant idea to make a floating shelf in our entryway. Previously, I had made a DIY tribal stamp for the walls in the entryway but hadn’t given much thought to what furniture should live in that space. I had a little bench in there but in person, it felt much too small for the space so we decided that a shelf with a mirror would be a much more practical use for the space. We used three brackets from IKEA and my dad secured it to the wall one afternoon while Nate was at work.

IMG_0782

IMG_0761

IMG_0784

I love that we finally got to use this piece after all this time. Now, I am thinking that I just need some cute baskets for underneath and a runner for the floor and I will call this space done…for now.

Also, remember how I said I wanted to change the glass out of our front door because the pattern was feeling a little too traditional for our house?

IMG_0738 - Edited

We tracked down a clear window to replace it with and my dad installed it for me. It’s very simple but it has blinds on the inside so with the little flick of a switch, the blinds come down at night for privacy. To say that I love this upgrade would be an understatement.

IMG_0769 - Edited

IMG_0776 - Edited

So, those are just some of the fun things that have been going on around here for the last two weeks. I am already missing my parents but they are coming back to Austin in November just in time for baby boy to arrive. Wait until you see what we did to the kitchen! It’s a good one.