My art ledge refresh with Art To Frames

This post is sponsored by Art To Frames

Hi everyone! With the kids FINALLY back in school, I’m feeling recharged and ready to make some changes around here before winter comes! I always get the bug to purge all the things in the Fall because I know we are all going to be inside a lot more the next few months. Also, it’s so much easier to get rid of all the old toys and excess stuff when the kids are at school and they aren’t here to try and talk me into keeping said stuff.

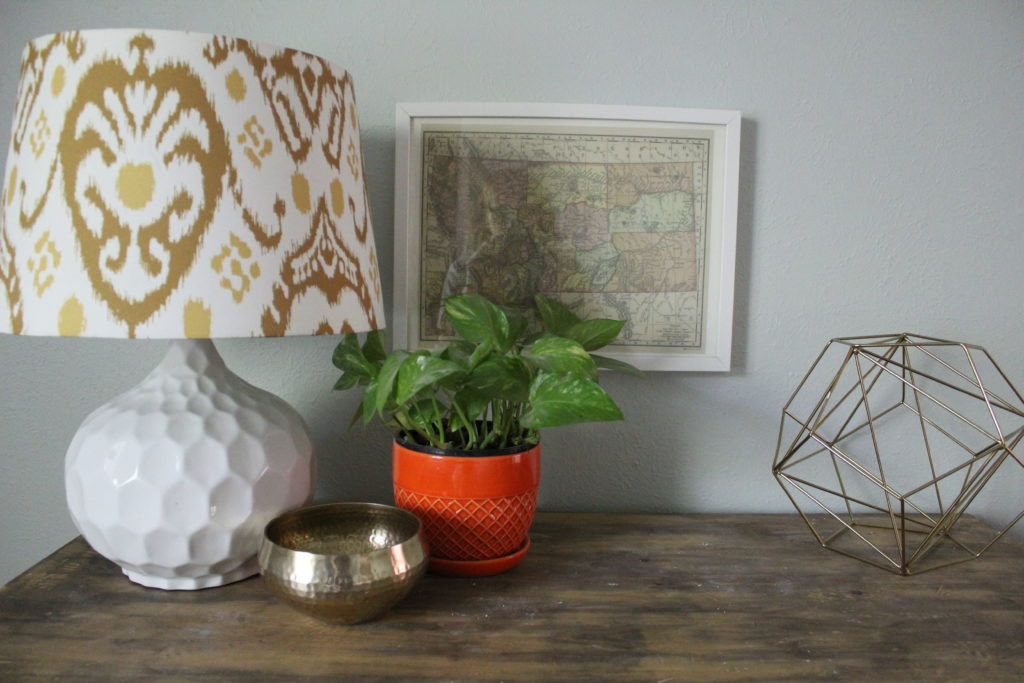
I’m excited to share a collaboration with you today that I have been working on the last couple weeks with Art To Frames. If you have been following along for a while or you ever see any of my instagram posts, then you already know I love collecting vintage art. I started going to thrift stores years ago when there wasn’t any room in the budget for art, and slowly but surely, I have accumulated a collection that I love. I even have a few special pieces that I believe to be quite valuable — so YAY to that!

The biggest downfall to collecting old art is the old frames that can sometimes accompany them. Think dirty, fabric frames that are sometimes falling apart or at the very least, in rough shape. So when I find a painting that I love, I buy it with the expectation of having to replace the frame. Kind of like house shopping, if it has good bones and you love it…go for it! It’s much less of a commitment than a house, but you get the idea.

When Shimmy(the most helpful person on the planet), from Art To Frames reached out and asked if I wanted to work together, I thought maybe I had died and gone to frame heaven! I’m. Your. Girl.

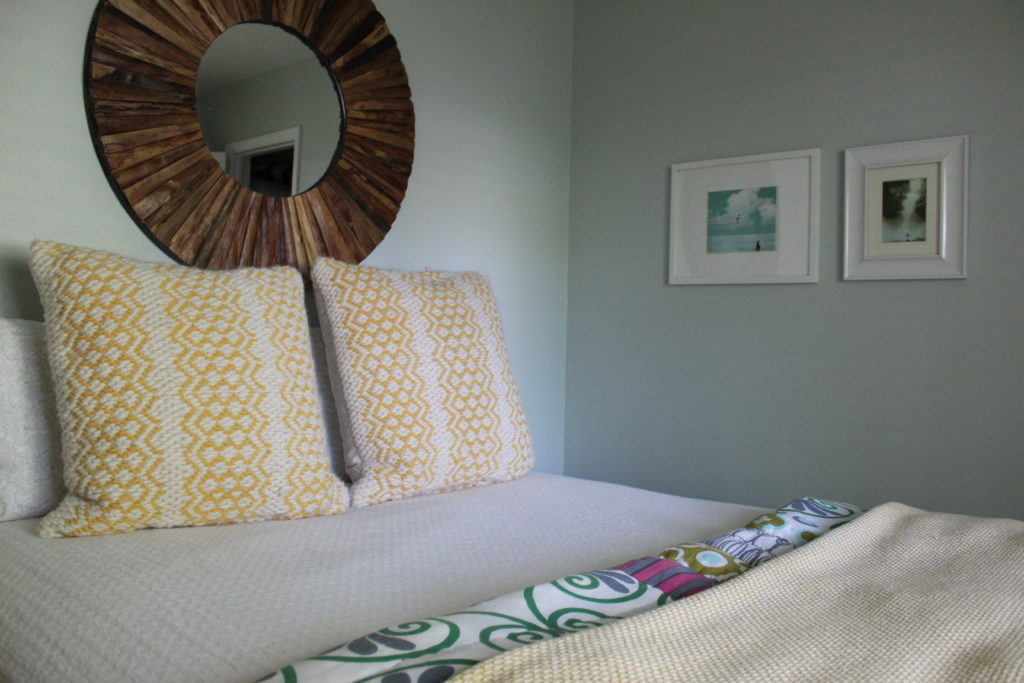
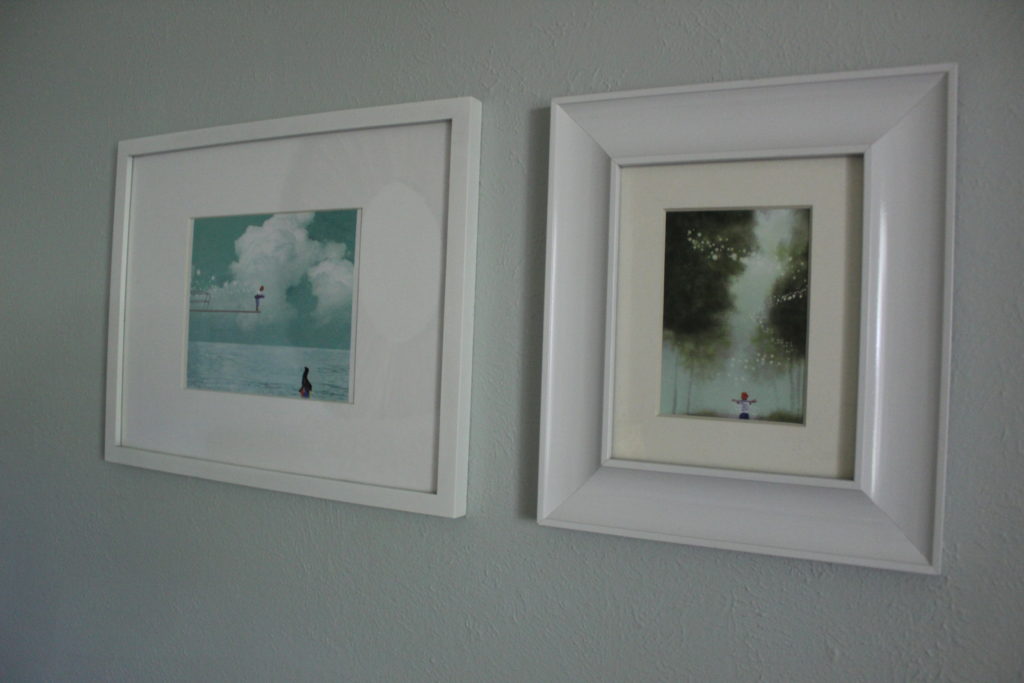
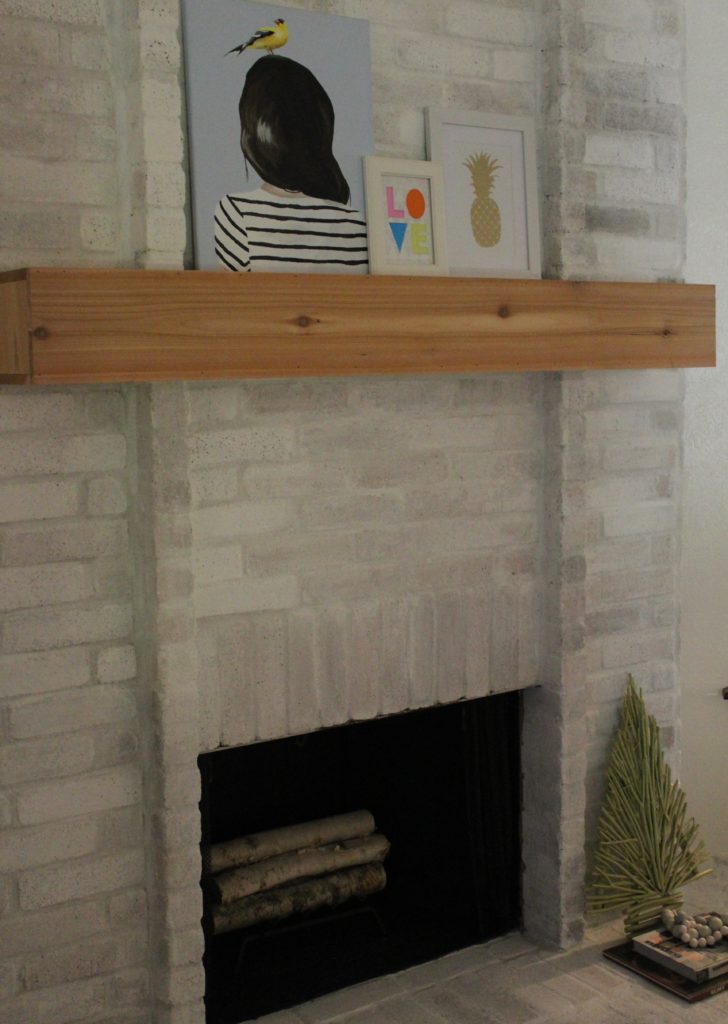
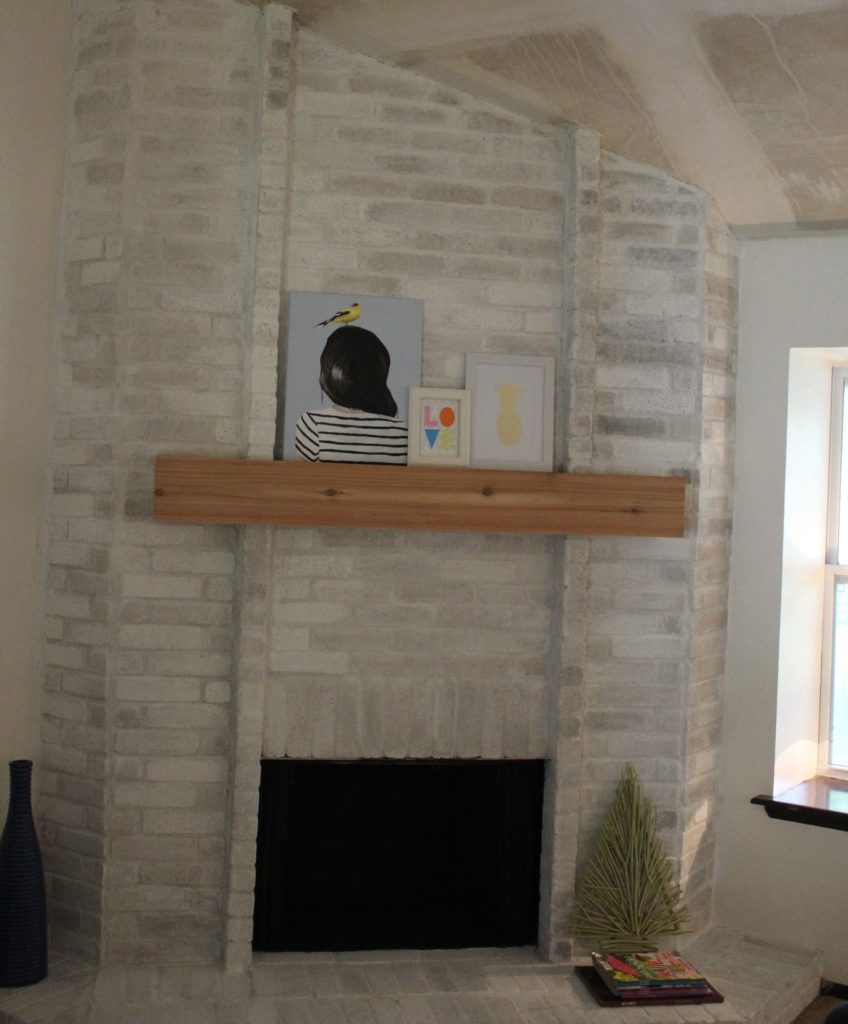
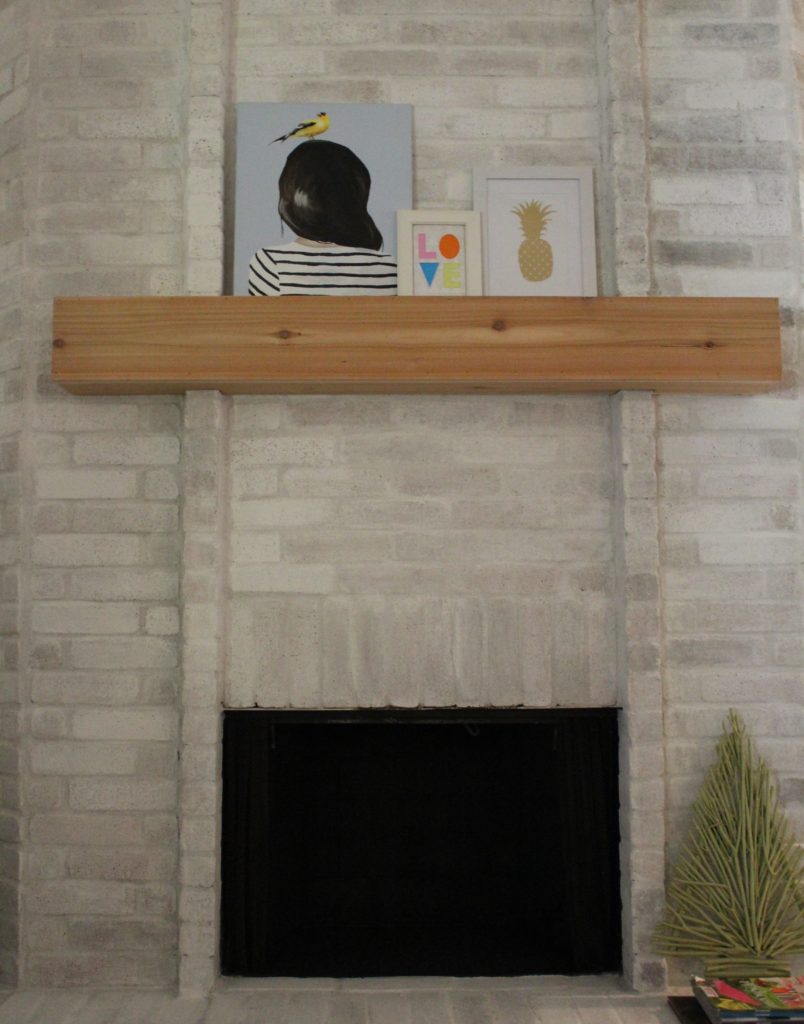
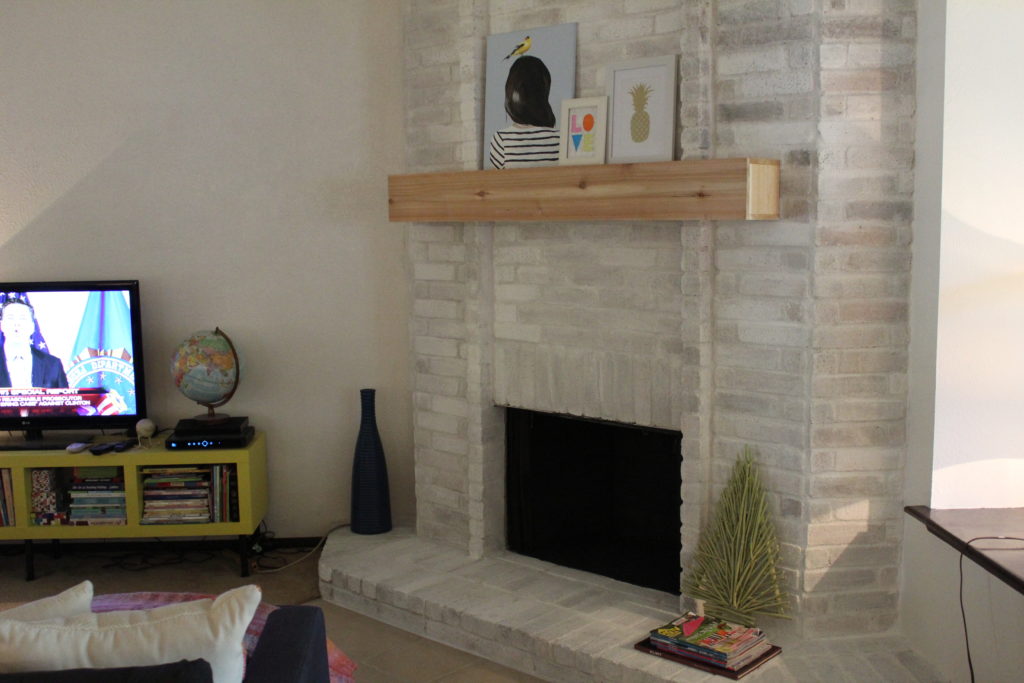
The past few months, I have been putting aside a few pieces that I thought would work well on my art ledge for a bit of a winter/autumn vibe so these were the paintings I had in mind when I placed my order.

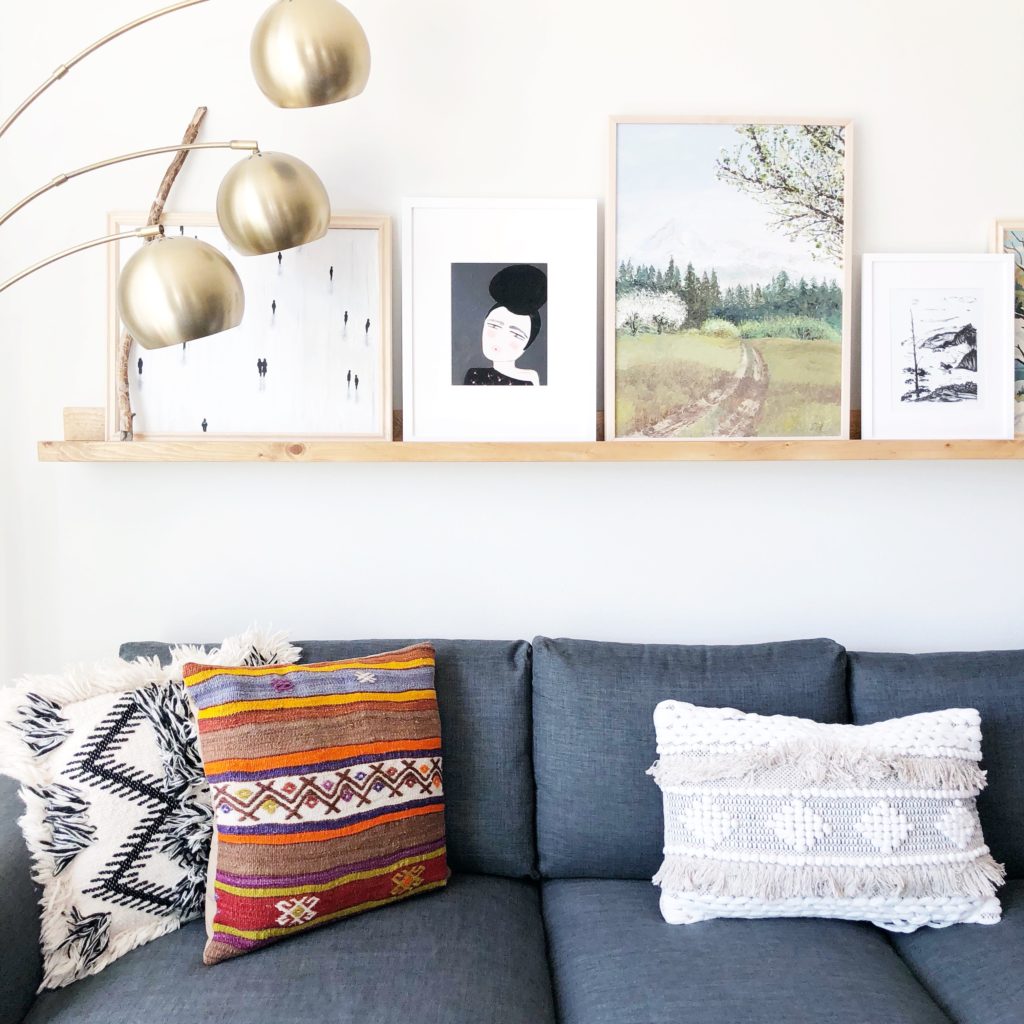
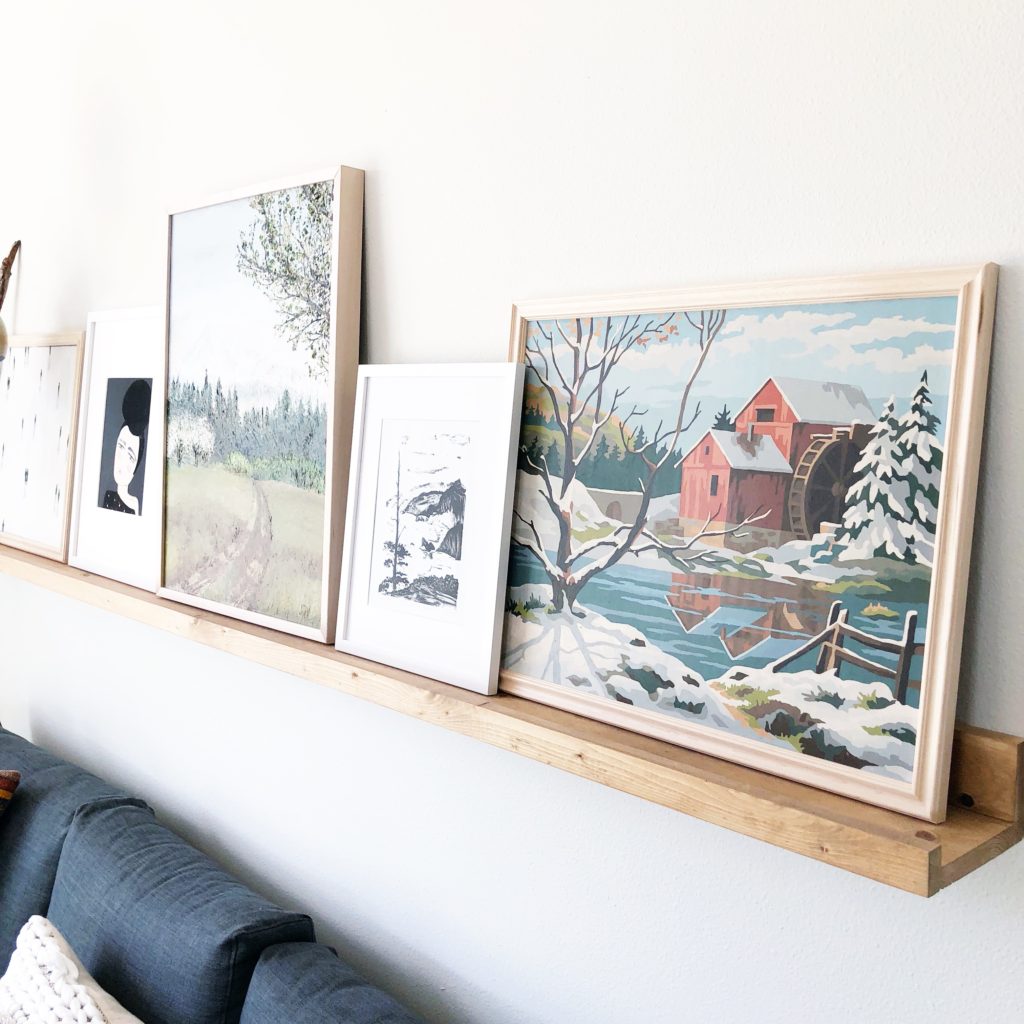
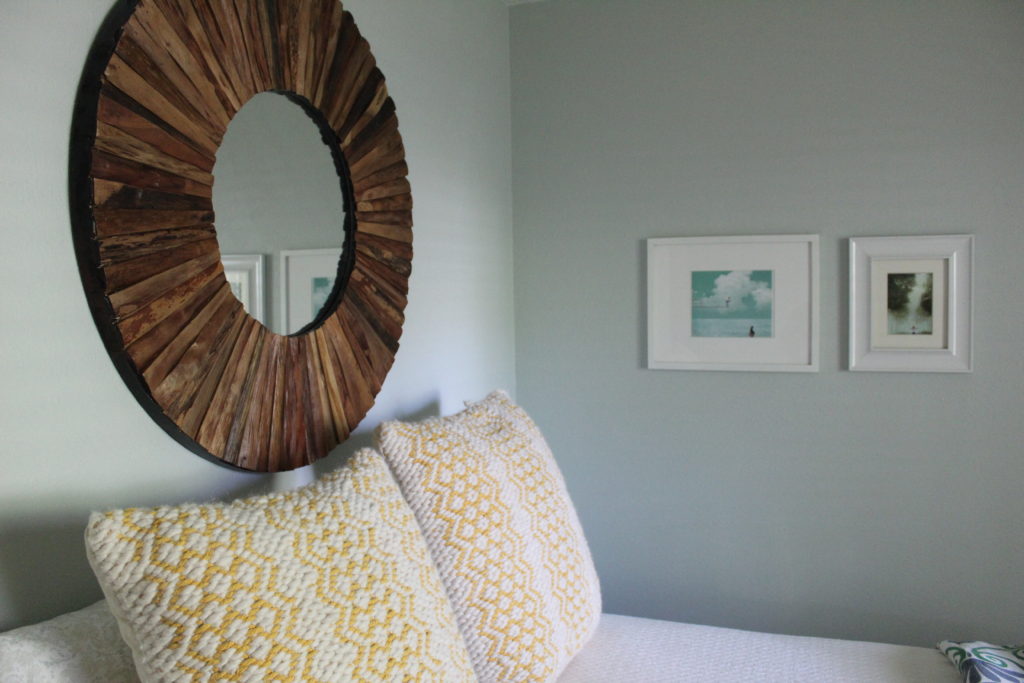
I knew I wanted a natural wood finish look for most of them and added a few white frames to keep it fresh and modern. The variety of selection at Art To Frames is crazy good, not to mention that they are hand-made out of solid wood. When they arrived, they were packaged perfectly and not even one had a crack, a ding, or any other kind of damage. Also, I think it’s noteworthy to add that every frame comes with the hardware attached to hang them right on the wall! Easy shmeeezy.

Most of my paintings were leaning on the ledge so I simply left the hardware attached to the backs in case I get the urge to move to a new locale. The one painting that I did hang on the wall was this special fellow.

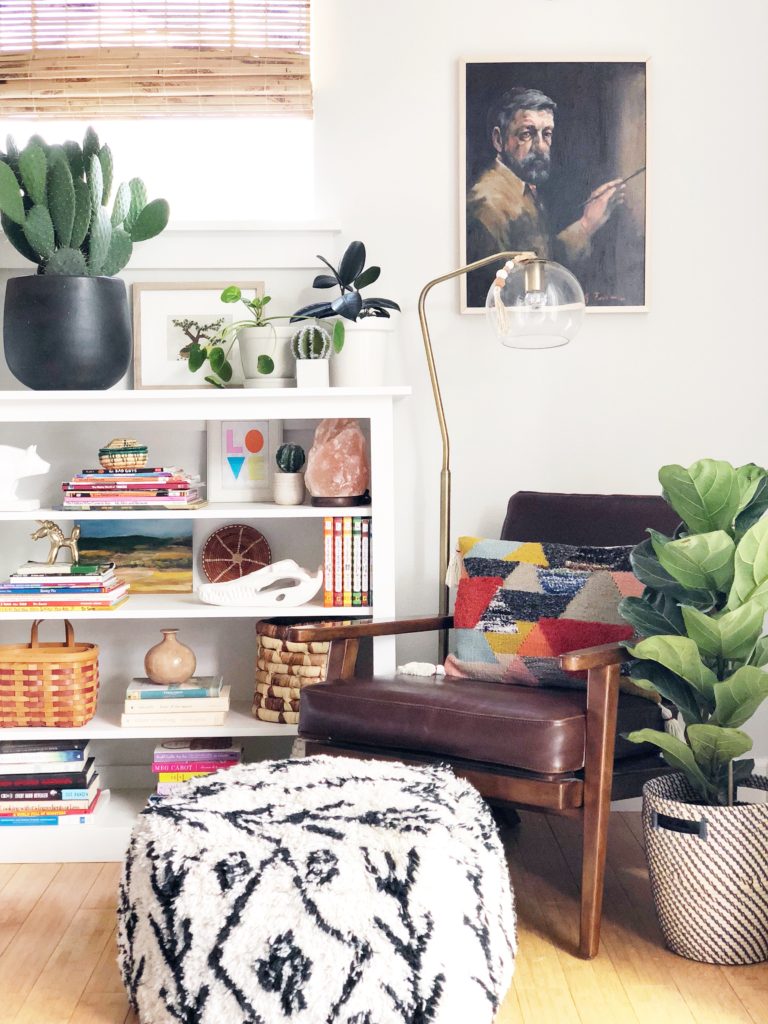
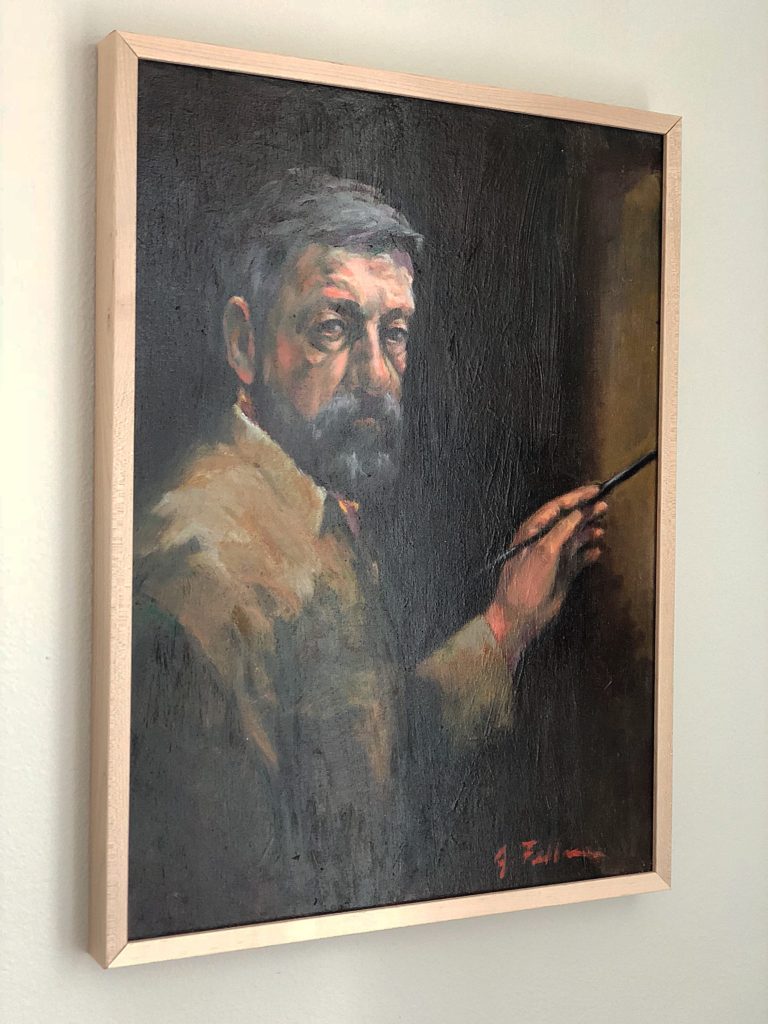
Oh hello, handsome. My husband and I disagree about this guy. He thinks he’s creepy while I think he’s spectacular. What say you?

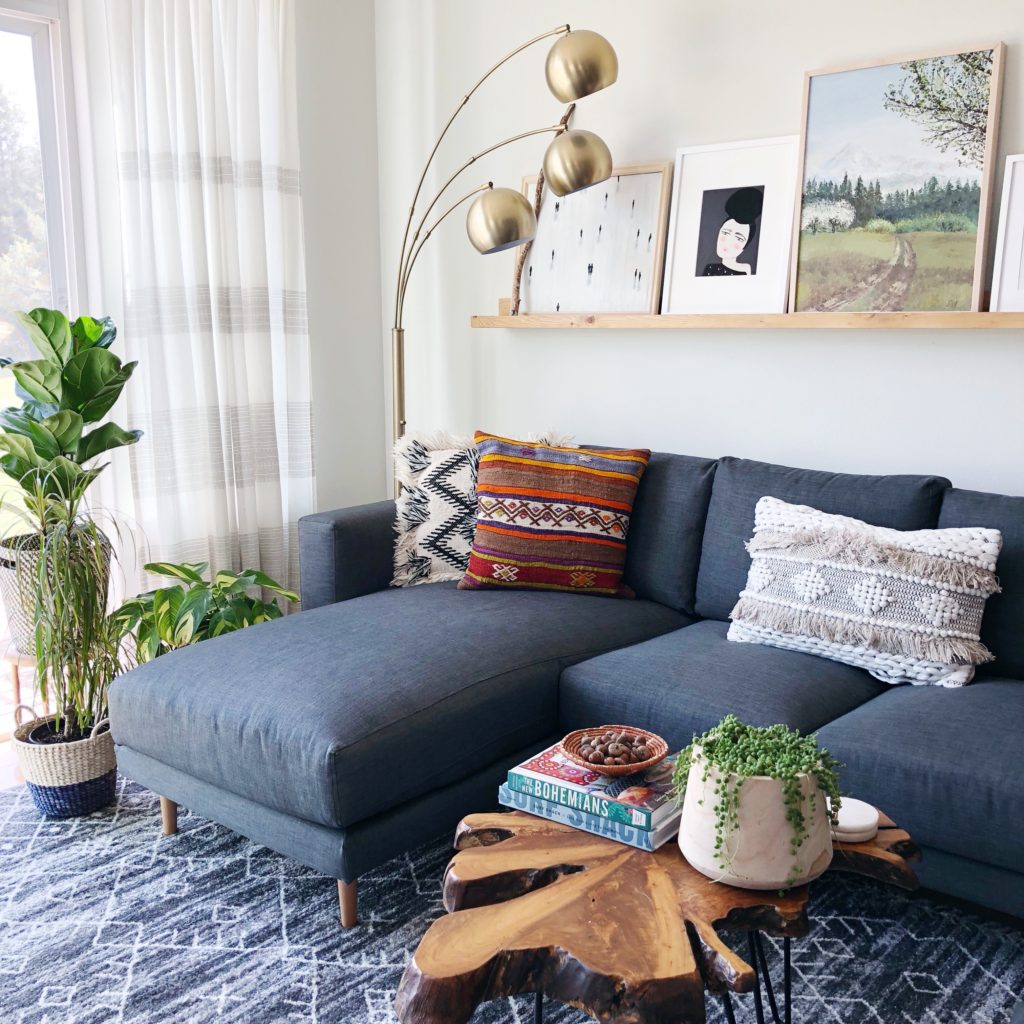
So here’s my little update for the fall and I’m loving it so much that I just might leave the art ledge as is for the entirety of the winter….maybe. The moral of this little story is if you find yourself in the market for some custom-sized picture frames of gorgeous quality, look no further than Art To Frames. Mmmmmmmmkay?

Alsooooooo…..I haven’t forgotten about the concrete counter post that I promised last month. I’m working on it, but I have these three small humans that have been keeping this mama BUSY. Anyone else making any Fall/Autumn (which do you say?) updates around their house? I’d love to hear!

Guest room makeover

IMG_0689

I use the word “makeover” loosely. Mostly because the room was in such bad shape before, I had to get it cleaned up just to get to a decent starting point. Like a clean slate. For those of you who are keeping up, my parents are due in town from Portland today for two weeks. We are all so excited to have them!

Since we had this visit planned for a while, I knew I had to get the guest room in shape. It was gross. When we bought the house, every wall was painted a super shiny, creamy white except for this accent wall in the guest room. I am not really a fan of accent walls in the first place but this color happened to be quite offensive to my senses when I looked at it.

IMG_0676

This is the color. I love me some blue but this one was a dusty, sky blue that was just bad. It actually hurt me physically to look at this color. The walls in the room also had traces of popcorn texture that was scraped when we first moved in and then white ceiling paint after they were painted when we did the new texture. IMG_0677

When we moved in, I moved some spare furniture in there and called it a day. Last week, with my parents visit quickly approaching, I made a plan to get this room a little more cozy and inviting without spending a lot of money. I wanted them to be comfortable during their visit with us. This meant that my plan would be quick and dirty. Hang curtains, paint, change out the bedding for something a little more fresh and hang some art. First order of business, paint the walls. I chose a color called sea salt by Sherwin Williams. This color has been on my radar for years and I haven’t really had a place to use it…until now.

IMG_0687

This paint color is really pretty in real life. It’s one of those fun ones that sometimes looks green, sometimes looks blue, and sometimes looks gray. My poor color blind husband doesn’t have a clue but he did agree that it was a definite upgrade from the white walls and the horrible accent wall.

I hung some Nate Berkus curtains that I bought a few years ago at Target. Lastly, I bought a couple of new pillows from Home Goods that are scratchy and cute. I guess I am becoming known for this because when I brought these home, Nate said that all my favorite pillows are super scratchy and that the kids and him steer clear of them. Perfect…my plan worked.

IMG_0686

IMG_0692

IMG_0691

All of the art I hung, I already had but hadn’t found a home for it since we have been in the new house. As always, my “art” is super cheap. The two prints are stolen from a children’s book called, Wherever you are, My love will find you. If you don’t have it in your collection, get it now. But, be prepared to answer questions about why you are crying when you read it to your kiddos. Consider yourself warned. The map above the dresser is out of an educational book meant to be ripped out for place mats for the dinner table. I chose Montana because my Granny used to live there and I like to think about that when I see it. I guess I am feeling sentimental and sappy today with my parents coming into town. Geesh.

IMG_0681

Overall, this room has undergone a lot of change since we moved in. We scraped the popcorn ceilings and the new texture went up, ceilings were painted, walls were painted, trim and doors were painted white, furniture, accessories, and lastly, art was hung. Whew!

Knock me down…

So, I know that I said that I would be back to update the progress on the ceiling texturing. And nothing…well, the only excuse I can come up is that texturing your ceilings is hard. Hard and time consuming. The good news is, we are done. At this point, I only have a few rooms painted because after the super hard part is done and you have brand new texture, the last step is painting them. That’s your reward for your hard work. You’re welcome.

Right after we moved in, I started scraping the popcorn that covered every inch of our ceilings, even the ceilings in the closets. Oh, I was so enthusiastic about starting this project. I told Nate we could get this done over the course of a couple weekends. Now that we are nearing the actual end of the project with only painting left to do, I underestimated by about a month. Ha! Oops. Here is what we started with.

IMG_0246

IMG_0245

We did a lot of research about which new texture to go with and after asking our realtor what she sees in most houses in our area, we decided we would go with the knock down method. It’s pretty simple but after you spray on the texture with a hopper, you basically take a flat edge and knock down the peaks that leaves you with a smooth surface with little (and some not so little) islands, as we started calling them. After scraping the whole house, patching with joint compound, sanding, patching a second time, sanding a second time, spraying on the new texture with a hopper, and knocking the texture down, this is what we are left with.

IMG_0567

Once it is painted, it basically looks the same, but has a more finished or polished look.

IMG_0564

For all of that work and for such a long process, I wish it was more exciting than that. But, it is making a big difference in the house and I swear everything feels brighter and less dark. I think it will be one of those things that will make a overall big difference once we start updating some of the cosmetics in the house, like wood flooring, painting our trim white, and painting the walls. Popcorn ceilings are no joke people.

There have been lots of other smaller updates going on around here too. Since the ceilings are wrapping up, I have the luxury of focusing on some prettier things. Like lighting! Nate hung the fixture in the kids’ room yesterday and it looks so good. For the last month, there has been a vacant hole in the ceiling with wires hanging out so this is a big improvement.

IMG_0552

I scored this guy at Anthropologie a few years ago when I was wandering through the home section (you mean they actually have clothes???? What?!) and noticed this light fixture that someone had ordered online and returned it to the store so they marked it down like 3000%. It casts a very warm light that feels super cozy and Grey told Nate it was his “party light.” Five year old minds are the best.

IMG_0554

In other parts of the house I have a little experiment with spray paint happening. You see, the hardware on our doors is just ugly. On a scale of 1 to 10 in ugliness, 1 being beautiful, and 10 being the worst of the worst – ours are a 10. So, since it looks like we will making a little investment in door hardware, (which I have come to learn is NOT cheap) I thought I would try and give it a coat of paint to see if it holds up. If it doesn’t, we haven’t lost anything because we are planning on replacing them anyways. I have seen other bloggers use Oil Rubbed Bronze on door hardware before with a top coat with positive results so I thought I would give this a whirl and see how it goes. This is our hardware before paint and top coat.

IMG_0526

Geesh. After a couple of coats of paint and top coat, they are looking more like this. I probably should have also mentioned that I started painting all of the doors and trim around the house too. I know, I have a million things going at the same time. F.O.C.U.S. I have been feeling good lately with lots of energy so I am taking advantage of this momentum before baby boy comes in November. Too much to do, too little time. But the doorknobs are looking better, no? I will keep you posted if the paint holds up through every day use.

IMG_0559

Here are a few more shots of the trim around the house that needs to be painted. I believe they used a very deep chocolate brown and just painted the trim. From far away, it appears to just be a very dark, stained wood. But it is not. It’s shiny too and reminds me of milk chocolate if you melted it on the stove top. Yum. On our trim though, yuck.

IMG_0542

And once again, white paint for the win.

IMG_0558

The last update that we made to the house this last week isn’t diy related but I thought I would mention it because Nate is in love and it is a house update. We bought a new range for the kitchen! This was a fun one because it’s functional and looks so pretty. The range that came with the house worked just fine but we are eventually going to upgrade all of the appliances to stainless steel so we thought the range was as good of a place to start as any. We listed it on Craiglist and it sold the next day so we were even able to recoup some of our investment.

IMG_0529 - Edited

And here is the new one.

IMG_0531 - Edited

So, I think that about wraps up everything going on around our house for the week. Sorry about the brain dump but we’ve been busy. Really busy.

Ps. I updated my house tour with some progress pictures so you can see where we started when we moved in and where we are at today. It’s starting to look better…I hope!

Details, details, details

Happy happy Friday! This week flew by after having Monday off for a holiday. But I wanted to do a quick update on the fireplace since I am loving my new little additions. I have been having too much fun trying out new art and decor on the mantel but I also had some birch logs arrive from Wisconsin that I am loving. They are so pretty I just want to pet them. Some people would call this a problem…I don’t.

IMG_0525 - Edited

On another (less weird) note, I am hoping that I will have pictures on Monday of our ceilings done! Or at least, a good chunk of them done. We are renting a hopper tomorrow morning and getting this project buttoned up once and for all. Also, we are going to sneak in a trip to the movies to see Finding Dory. Should be a fun weekend. Wish us luck! We are going to need it!

Fireplace facelift

IMG_0487 (1) - Edited

Whew! This weekend we celebrated the 4th of July and attended a parade, a fireworks show and two different BBQ’s. It was kind of a whirlwind but we all had fun. The parade was one of the best I have seen and shouldn’t have been surprised that Texans know how to do a parade right. The kiddos scored major in the candy department and we all nearly died in the almost 100 degree heat.

IMG_0505

In between all of the festivities over the weekend, we were able to get a project done at home. Yes! Am I talking about our ceilings that still need texture and paint? No! I swear though, it is happening this weekend. Seriously.

I think I mentioned previously that I was going to try my hand at white washing the brick fireplace. I have been looking at tons of inspo pics of white washed brick and I love the way it looks. My favorite thing about white washing is how it leaves the differences in the individual bricks behind and doesn’t completely cover them in an opaque finish the way a latex paint would. So the overall impression is a much less polished look which I think is appropriate for brick because it’s not meant to be perfect. Here is our fireplace.

IMG_0462

Usually, I love unpainted brick because I am always partial to rustic finishes, but this particular brick was related to the brick that was used on the outside of the house and most definitely had some pink undertones. Pink brick = not a good look. So, let the white washing begin already!

IMG_0469

IMG_0472

In addition to white washing the brick, I knew the existing mantel needed to be altered. Some ideas included starting a fire in our fireplace, ripping it off with sledge hammers and throwing the mantel in the fire. But, instead of going down this road, I found some pictures online of some simple chunky mantels that people built themselves. I showed these pictures to Nate and asked him if he thought he could do the same. After quite the pep talk, he reluctantly agreed and was nice enough to give it a try to see what he could come up with.

IMG_0466

IMG_0467

The white washing part of the project was FUN! I already had some white, flat paint and just mixed equal parts water and paint and painted it on with a brush. It went much faster than traditional painting and the bricks do all the work for you. After you apply the wash, the bricks soak up the water and paint that leaves the uneven, white washed effect.

IMG_0479

Please ignore my sun burnt arms, I went outside for three minutes and only used a sun block with spf 1000. Also, please ignore our ceilings. Seriously, we are going to get them done this weekend.

After Nate had taken down the old mantel, only the supports were left. Nolan and I decided that it would be fun to write a message in a bottle and hide in the frame before Nate attached the new mantel. We had so much fun dreaming up scenarios where/when someone would find our letter. Her ideas were too cute.

IMG_0482

IMG_0486

After our letter was hidden away, there were a few, last minute jobs that needed to be done in order to check this project off our list. There were some very visible cracks that became even more visible once the bricks were white washed. It was a pretty simple task but I had to mix some mortar cement and patch all the gaps and cracks. We also used some black, high-heat spray paint and sprayed the inside of the fireplace so the brick inside looked new again with a fresh coat of black paint. And, finally, Nate finished the mantel and attached it to the existing frame. I am so proud of him. Not too shabby for his first try at building something, right?

IMG_0512 - Edited

IMG_0507 - Edited

IMG_0511

IMG_0510

IMG_0516

IMG_0515

He made the mantel out of cedar planks and I haven’t decided if I should seal and/or stain it. This was a really fun project and being able to include Nate and Nolan made it even more fun. And because I already had the paint for the white washing, the grand total for lumber, mortar mix and a can of spray paint only made a $32 dent in our pockets. Big impact for a small amount of cash! Everybody wins.

Kings and Queens

I just googled how long you are supposed to sleep on the same mattress and it sounds like you should be replacing your mattress every five to seven years. Uh oh. Our mattress is old. Like, really old. I bought this mattress from one of those horrible mattress stores when my sister and I got our first apartment together and I was in my third year of college. That was in 2004. When Nate and I got married in 2007 (I totally just texted him at work to confirm that date too – I’m blaming baby brain), we started sleeping on this same bed and never stopped. I’ll let you do the math…

IMG_0194

I’m embarrassed to say that this is that SAME bed while we were moving into our current house last month. The mattress had begun to sag and every night I would spend a good amount of time trying to climb out of the hole that was the middle of the bed. As this baby gets bigger and so do I, I finally convinced Nate to consider a new mattress. After some shopping, we found a super good deal on a king size set at Costco. Done and Done!

IMG_0432

It’s so nice sleeping on a king size bed. I think the few times I slept on a king was when we stayed at hotels on vacation. Nate is 6’3″ and I am 5’10” so this extra space is so much sweeter for two tall people and the occasional cute five year old boy who sneaks in for snuggles with us at 3am.

Finding pretty bedding for a king bed at a good price though, proved challenging. I have been so inspired by the African mud cloth throw blankets and I wanted to score one for the new bed. But, all the ones that I loved were in the $120 range. I could already hear Nate asking me why I spent $120 on a blanket for the end of the bed. So, I passed and decided I would come up with a different look. Okay, I guess I could spend some more time hunting for beautiful bedding online…sigh.

africanmudcloth

Image via

Beautiful, no? The good news is, I ended up finding some shams at Target for $15 a piece that almost mimicked the over-dyed blue look of the mud cloth. Paired with a Turkish pillow that I found on Etsy, ummm, yes, please.

IMG_0434

IMG_0435

IMG_0436

IMG_0438

Our room still has a long way to go but a bed seems like a good place to start. I have yet to hang curtains, paint the walls, and add some art. Also, we still have a gold ceiling fan above our heads that desperately needs to go. Until those things are done, at least we’ll be sleeping soundly!

Mellow Yellow

I painted the front door over the course of the weekend. What a difference such a small change can make! I’ve said this before, like when we painted our mailbox a few weeks ago. It’s fun to complete some smaller scale projects when there are such big ones looming…ahem…texturing the ceilings. I’m starting to think that we might be living with naked drywall above our heads forever! Nate and I were supposed to be working on said ceilings this weekend but instead, we found ourselves doing other things like playing Foot Golf (Nate, not me) and painting the front door yellow (Me, not Nate).

Back to the front door though. Here is what we were working with before paint.

IMG_0445

IMG_0440

The door is actually new and looks as if it was installed in the last few years. Other than the fact it makes me want to take a nap every time I look at it, it’s a nice front door. Even the way I describe it is boring, “nice front door.” We have definitely decided that the window in the front door has to go. It’s not our style. I’m thinking about something a little less ornate and a little more modern. Or maybe even just a plain, glass window would do the trick. My parents are coming down for a visit in August and my dad is going to help us make this change. He is our resident window expert:-)

When I started looking for inspo pictures for ideas for this project, I immediately ruled out any colors on the darker side of the spectrum. Our house itself is very dark so the front door needed to serve as a pop of color. There are so many cute options though, I liked everything. And I was really drawn to the pinks and lavenders because it seemed like such an unusual option, I mean, who would be brave enough to paint their front door pink!? Well, not me because I ended up going with a cheery yellow. But, I am going to file this away for a possibility for the future. I do like to change things up. I kept going back to this one particular image.

54c1566dad361_-_06-hbx-yellow-front-door-0611-s2

Image via

I loved the way the yellow looked against the navy exterior. Our house isn’t navy but it is dark and even has the white trim that this color pallet is paired with. Sold!

IMG_0453

It was a relatively easy process except this yellow paint surprised me with just how many coats the door took to get the proper coverage. 27 coats! I’m exaggerating but it did feel like that when I was painting. I suppose it was mostly because I was covering a dark door with such a light color. So now you are warned, if you want to paint something yellow, be prepared for multiple coats.

Ta da!

IMG_0459 - Edited

I moved my lemon tree from our screened porch in the back of the house to the front entrance because I couldn’t resist putting our lemon tree next to our new yellow front door. I have also been worried he isn’t getting enough sunlight. So, I fertilized him and gave him a new spot. Maybe the yellow door and his new yellow pot will inspire him to produce lots of lemons?

IMG_0461

I am so happy with the color. It’s so happy and welcoming. If our door could talk, it might say, “come on in! Happy people are inside!”

#housegoals

Have you ever watched an episode of House Hunters? Well, I have. More times than not, a couple goes through a property and they start saying things like, “we would need all new floors, the bathrooms need to be gutted and everything in the kitchen needs to go.” Nate and I were just as guilty as these folks when we looked at our house. We actually said those things! These “simple cosmetic swaps” mean major work which also means major money.

So Nate and I have been discussing which projects are realistic for us as we plan on doing most of these ourselves. We also flip flop back and forth as to which improvements would make the most impact for resale value and which ones we have to get done for our own sanity (like our beautiful pink exterior before we painted last weekend). Ideally, we are hoping that most of our updating will fall into both categories. But, I think we have come up with a list. Not a to-do list because I don’t even like to read my own to-do lists but more of a list of goals we want to accomplish during our time here. Here we go!

  • New floors – this is going to be the biggest and most expensive project that we tackle here. Currently, our house has brownish, beige, gray carpet in the bedrooms and living room while the entry, kitchen, dining room and hallway has cream colored tile. Tile seems to be very popular here in Texas and I can understand why. It is a very durable, hard surface that also stays very cool to the foot which is a bonus with the warm climate. For us, tile doesn’t seem to be a very livable surface with little kids and clumsy adults. Everything that is dropped on tile, undoubtedly breaks. Toys, dishes, phones, iPads and dog dishes don’t stand a chance if they are dropped on tile. Also, I have to close my eyes and hold my breath if I see a dripping wet kiddo hop out of the bath and run down the hallway. Yes, we have had quite a few slips and head bumps. But I have big dreams of wood floors and wood floors that span everywhere in the house. Kitchen, dining room, living room, bedrooms…basically everywhere except the two bathrooms. Since Nate and I both have zero experience installing floors of any kind, we will hire this job out and leave it to the pros. So let the saving begin! And while we squirrel away our pennies to get these floors done, I’ll be daydreaming about oak…hickory…engineered wood…bamboo. Wouldn’t something like this just be a game changer? I think so…

floors

  • Painting the Exterior – we are mostly done with this baby! Some touching up and trim work still needs to be done but I think we can call this one done.
  • Landscaping front and back yards – the house is kind of a blank slate as far as landscaping goes. The flower beds around the house need to be filled with…something. I’m just not sure what yet. One of our neighbors has this whole landscaping thing figured out. I am hoping our flower beds can be as beautiful as this house.

IMG_0431

  • Adding a patio to the backyard – I would like to put some kind of material down in the screened porch on the floors and extend this flooring out onto some kind of a patio so there is a place to spend time in the backyard outside of the screened porch.
  • Scraping the popcorn ceilings and texturing/painting – the scraping part is done. The texturing and painting of the ceiling still has to be done. This job actually might kill me…the jury is still out. I’ll keep updating as I go.
  • Painting trim and doors inside house – the trim is currently stained an almost black color. I want to lighten this place up and paint everything white.
  • Whitewash the fireplace brick – in my quest to lighten and brighten, the fireplace needs a dose of white paint too. I’m going to try my hand at whitewashing.
  • New appliances for the kitchen – our current appliances are old and white but are functioning fine, for now.
  • New counter tops for the bathrooms – the plan is to keep the current vanities with some updating with paint and hardware. But, counters are a must.
  • Paint the front door – I can’t decide if it needs to be replaced or if paint will be enough. I’m debating between these two colors right now. Thoughts?

Valspar-Full-Sun-EB1-1 Valspar-Wasabi-W35010A

So these are our goals as of right now. I’m sure we will change our minds about some of these but for right now, this is what we are planning. There’s definitely no shortage of things to do but I love a good challenge and these projects are definitely going to challenge us.

Fjalkinge to the rescue!

When I decided that the kids would be sharing a room at this new house, I didn’t give much thought about the combining of the toys and books that each of them would be bringing from their respective bedrooms. Even though we have a “less is more” theory with toys, there still seem to be quite a lot of them floating around. If a kiddo hasn’t played with something in a while, out it goes. Nolan just started collecting Shopkins which I think is perfect because they are so small. Nate and I had to Google what Shopkins were…and we still have no idea. Grey likes cars, trucks, trains and just about anything with wheels. But I do try very hard to make sure that the toys don’t take over the whole house. Nate and I definitely don’t want to be living in a big play room.

I have been hunting for some toy storage solutions and found lots of ideas that I liked, but sadly, were not in the budget. I was especially in love with some open shelving from Serena and Lily. I am loving the wood+white look and always find myself attracted to the rustic/modern look in homes and furniture. The space in their room would have called for two of the taller shelves to take up the better portion of a wall. So this little purchase would have set me back $2,390 before taxes and shipping charges. Ummm…yikes.lark_white

Somehow, I ended up at Ikea…again. But found the perfect shelf! I could buy two of them and they would easily fit into the space I had in mind. A couple of ideas popped into my head to modify them to satisfy my wood+white obsession. Meet Ikea’s Fjalkinge shelving unit.

fjalkinge-shelf-unit-white__0194033_PE359398_S4

Nate and I ran to Lowe’s and grabbed two pieces of plywood and some dark walnut stain. We had a friendly fellow cut our pieces down to the size of each individual shelf right in the store for us so we didn’t have to rip any of the boards ourselves, which Nate loved. So all that was left to do was stain the wood and let it dry outside for a couple days. As far as Ikea assembly goes, (and we have had a lot of practice) these shelves were super simple. Once the plywood pieces were all dry and no longer smelly, we just slid right into place on top of the white shelf insert. My dad always says, measure twice, cut once. Well, we might have measured seven times, but no mistakes were made and the boards were just the right size.

IMG_0417

IMG_0419

 I also scored a little night stand and a rug too! Notice the wood and white theme? Points for consistency, no?

IMG_0411

IMG_0413

The best part is the kids toys look so super cute out on display on their new shelves. I kind of did a Grey side and a Nolan side, although there was no way his cars and trucks weren’t going to spill over onto her side. I will probably tweak the arrangement of everything as I add some better looking baskets and move everything around. I can’t help myself. Nate always laughs at me because objects are always moved, furniture is rearranged and nothing really stays the same in our house for very long.

IMG_0416

The room is starting to really come together in such a fun way. I thought it was going to be really tough to decorate for a boy and a girl in the same space but as it turns out, I’m kind of a neutral kinda lady. Who knew?

The house is painted!

Well, we did it! The house is painted and we are so happy with how it looks. The weather was kind of tricky here to plan this project around because we knew we wanted to paint before it was too hot but also didn’t want to have to combat the rain that we have been getting here in Central Texas. So, finding that sweet spot right in between the two was tricky, but I think we did it. It was still pretty hot for a couple of Northwest peeps but we just kept reminding ourselves that this is just the beginning of the heat that is to come! Sounds like the name of a really bad movie about the apocolypse, The Heat that is to Come. I’d probably go and see it. Anyways, we are hoping that, in August, we’ll be glad that we did it in June.

We rented a paint sprayer from Home Depot and Nate picked it up first thing in the morning. He has used this same sprayer a couple of times before so it was helpful that he was familiar with how it worked. But, it’s pretty simple to figure out even if you haven’t used one. A little trial and error and you should be good to go. The biggest problem you can run into with using these sprayers is spraying on your coats too thick. Think light coverage with multiple coats and you should avoid those pesky drips. Here is yet another reminder of what our house looked like when we moved in.

IMG_0087

Here’s where we are at today.

IMG_0395

Love this. There is actually still a lot of work to do and touch ups all over the house. The open beams in the entrance still need to be painted to match the body of the house and close up, there are many spots that still need some attention.

We also went ahead and updated our exterior lights, doorbell and house numbers. When Nate was hanging these for me, I kept thinking about how these details are like accessories. Like a good pair of earrings, but for the house. The house numbers used to look like this.

IMG_0370

 Now, look like this!

IMG_0389 - Edited

IMG_0392

We couldn’t be happier with how it turned out! Even some friendly folks from down the street have stopped by to tell us how much they like our colors.

IMG_0393

I love the contrast. It feels so fresh and with the new paint and accessories, the whole house is taking on a much more modern feel. Before we painted, the house didn’t really have any particular style or category that it fit into besides 80’s ranch style. Now, it has some much needed personality.

IMG_0390

IMG_0391

IMG_0387

IMG_0397

IMG_0388

While we still have some touching up to do, we can check this off our list of to-do’s. And this was a biggie. But, it feels really good that we did this ourselves. Back inside I go to get back to mudding and texturing the ceilings. No more excuses!