Mellow Yellow

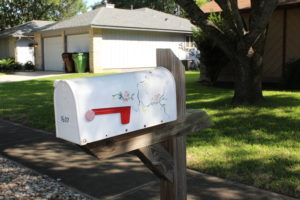
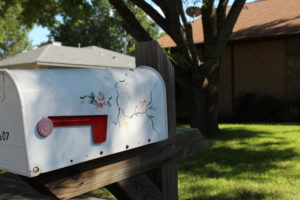
I painted the front door over the course of the weekend. What a difference such a small change can make! I’ve said this before, like when we painted our mailbox a few weeks ago. It’s fun to complete some smaller scale projects when there are such big ones looming…ahem…texturing the ceilings. I’m starting to think that we might be living with naked drywall above our heads forever! Nate and I were supposed to be working on said ceilings this weekend but instead, we found ourselves doing other things like playing Foot Golf (Nate, not me) and painting the front door yellow (Me, not Nate).

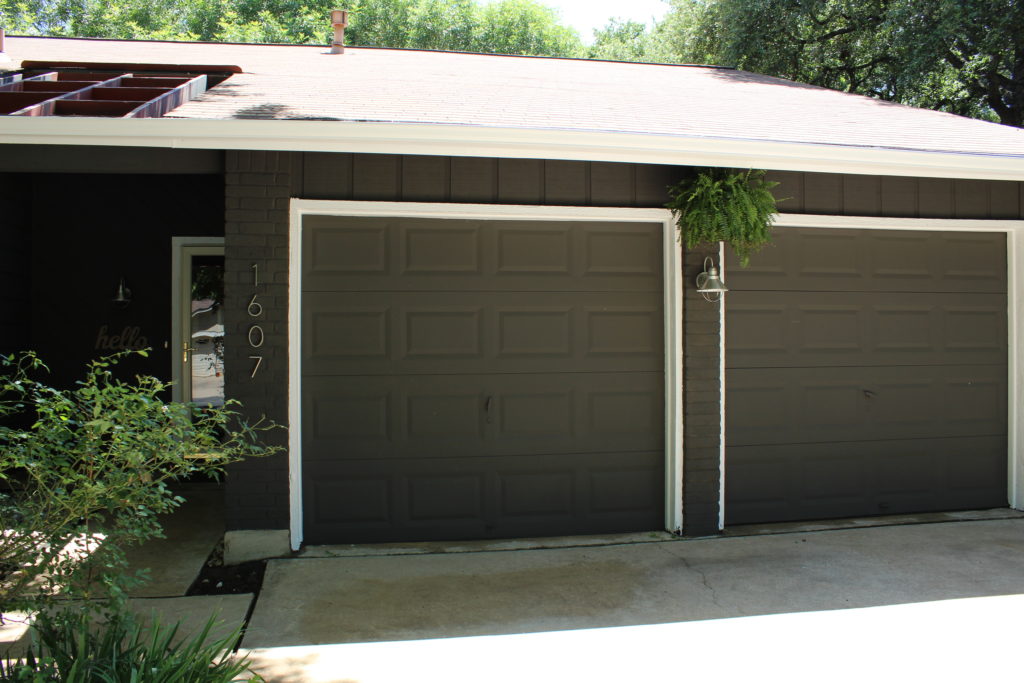
Back to the front door though. Here is what we were working with before paint.

IMG_0445

IMG_0440

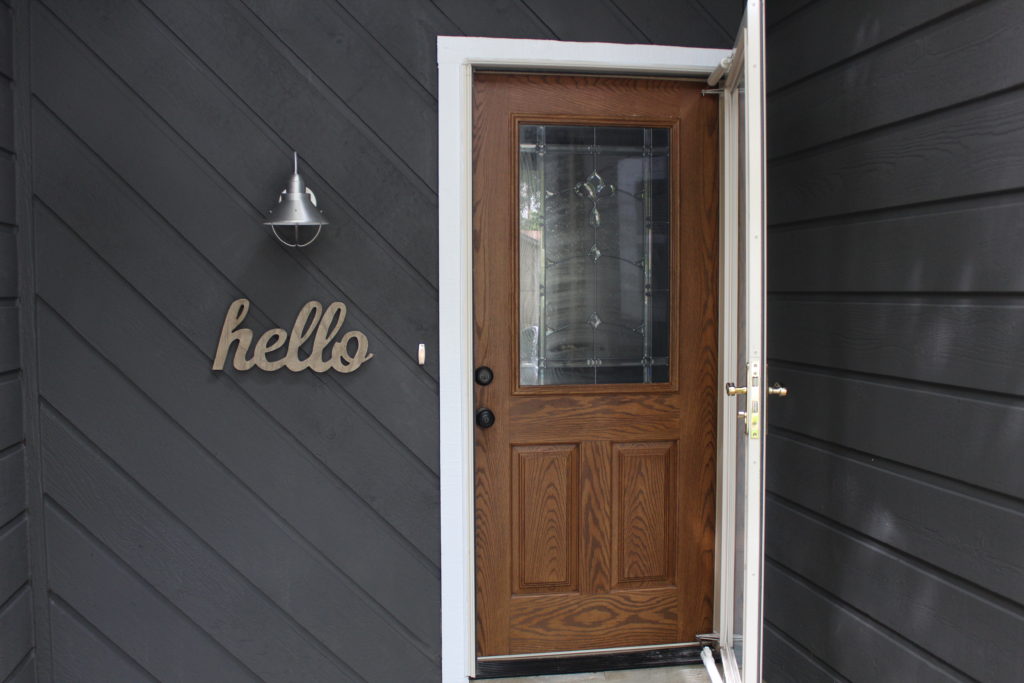
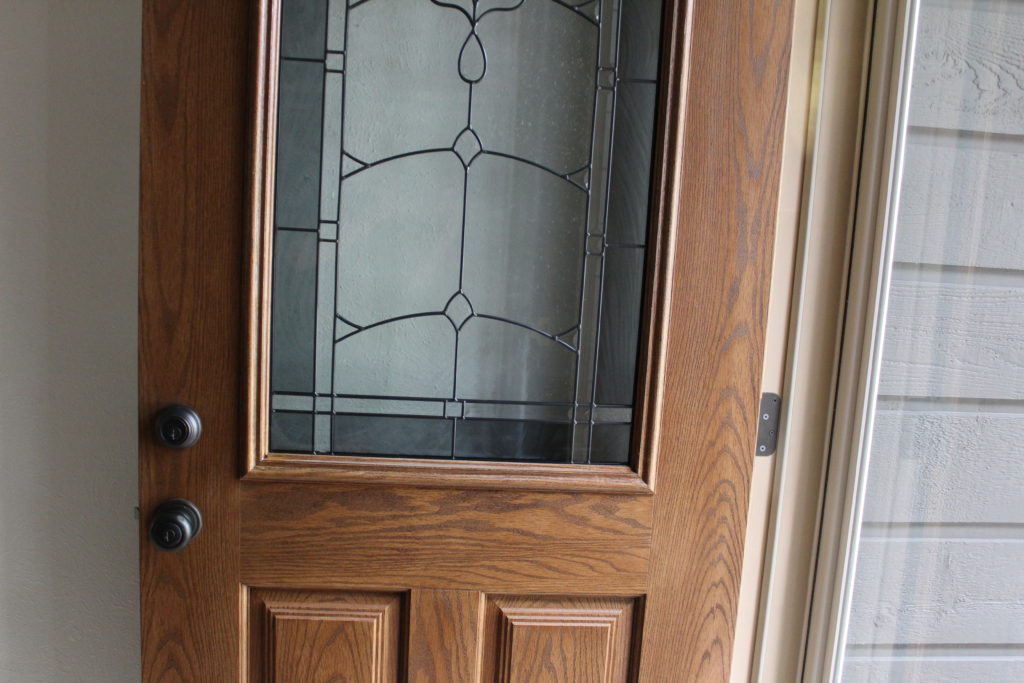
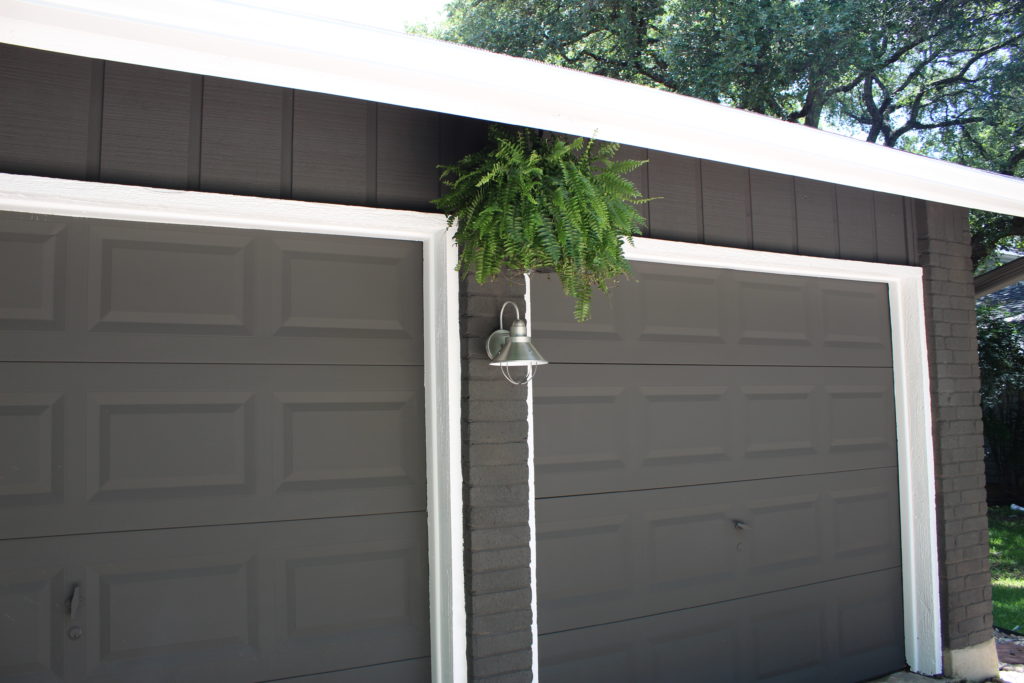
The door is actually new and looks as if it was installed in the last few years. Other than the fact it makes me want to take a nap every time I look at it, it’s a nice front door. Even the way I describe it is boring, “nice front door.” We have definitely decided that the window in the front door has to go. It’s not our style. I’m thinking about something a little less ornate and a little more modern. Or maybe even just a plain, glass window would do the trick. My parents are coming down for a visit in August and my dad is going to help us make this change. He is our resident window expert:-)

When I started looking for inspo pictures for ideas for this project, I immediately ruled out any colors on the darker side of the spectrum. Our house itself is very dark so the front door needed to serve as a pop of color. There are so many cute options though, I liked everything. And I was really drawn to the pinks and lavenders because it seemed like such an unusual option, I mean, who would be brave enough to paint their front door pink!? Well, not me because I ended up going with a cheery yellow. But, I am going to file this away for a possibility for the future. I do like to change things up. I kept going back to this one particular image.
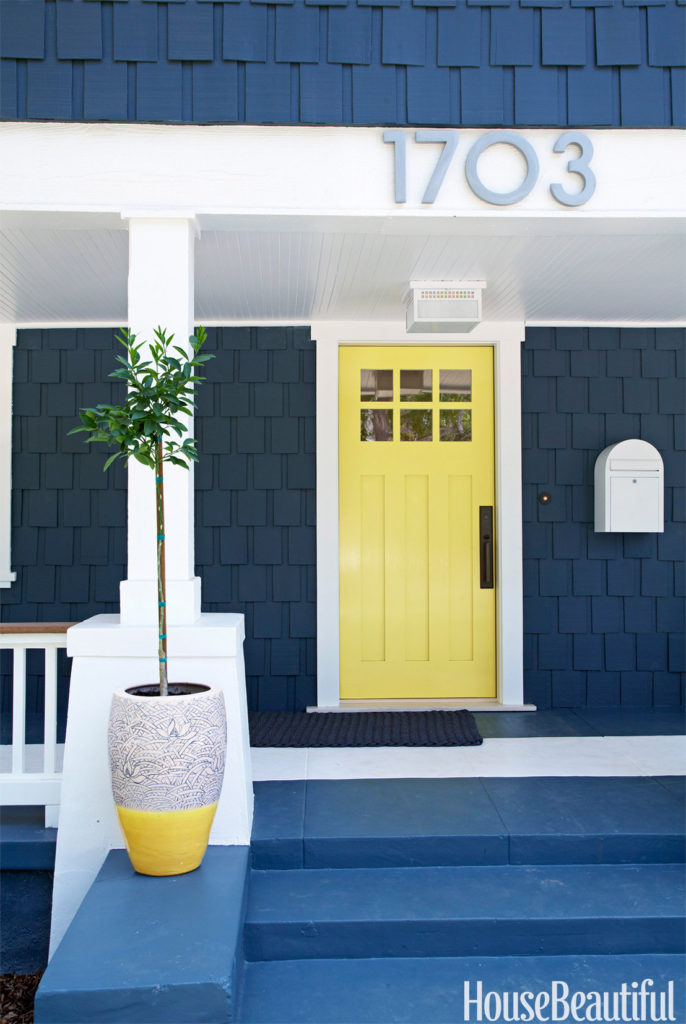
54c1566dad361_-_06-hbx-yellow-front-door-0611-s2

Image via

I loved the way the yellow looked against the navy exterior. Our house isn’t navy but it is dark and even has the white trim that this color pallet is paired with. Sold!

IMG_0453

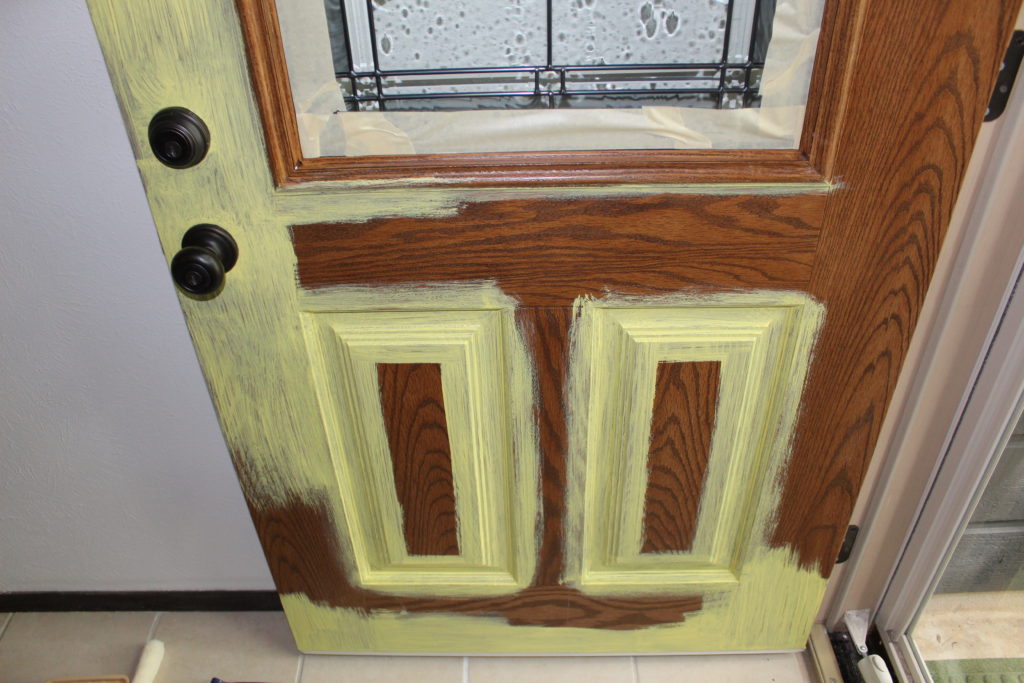
It was a relatively easy process except this yellow paint surprised me with just how many coats the door took to get the proper coverage. 27 coats! I’m exaggerating but it did feel like that when I was painting. I suppose it was mostly because I was covering a dark door with such a light color. So now you are warned, if you want to paint something yellow, be prepared for multiple coats.

Ta da!

IMG_0459 - Edited

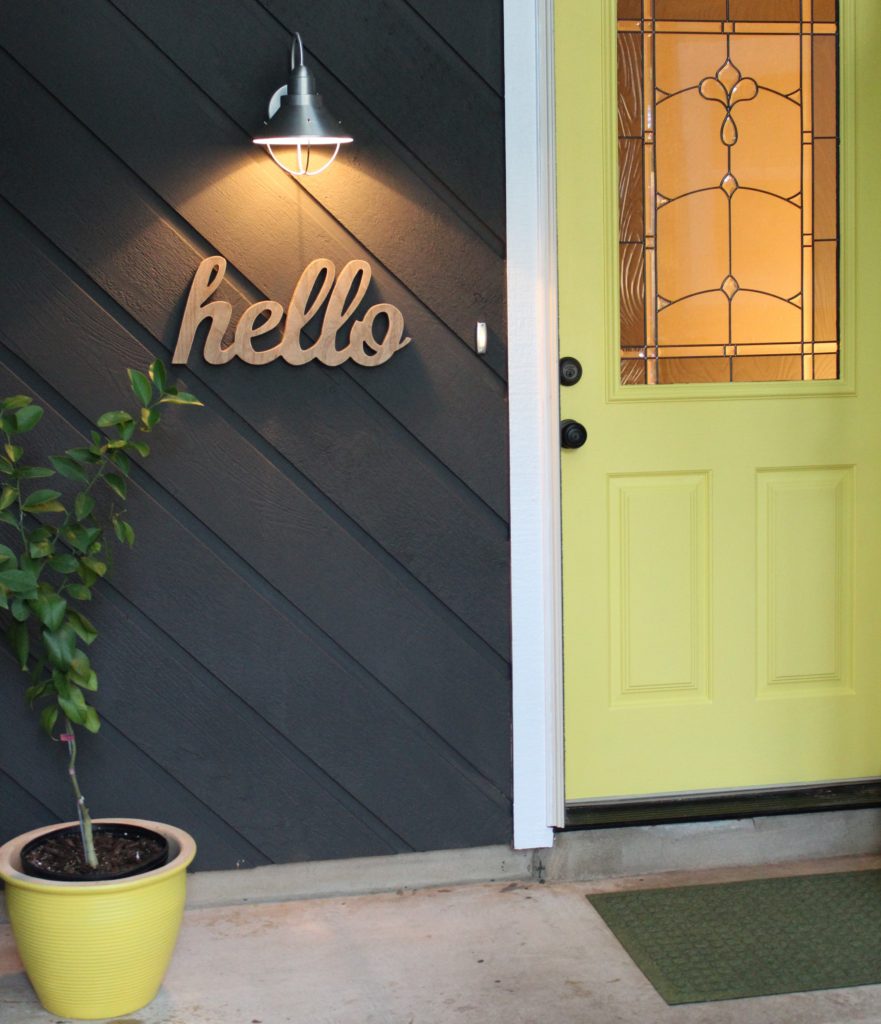
I moved my lemon tree from our screened porch in the back of the house to the front entrance because I couldn’t resist putting our lemon tree next to our new yellow front door. I have also been worried he isn’t getting enough sunlight. So, I fertilized him and gave him a new spot. Maybe the yellow door and his new yellow pot will inspire him to produce lots of lemons?

IMG_0461

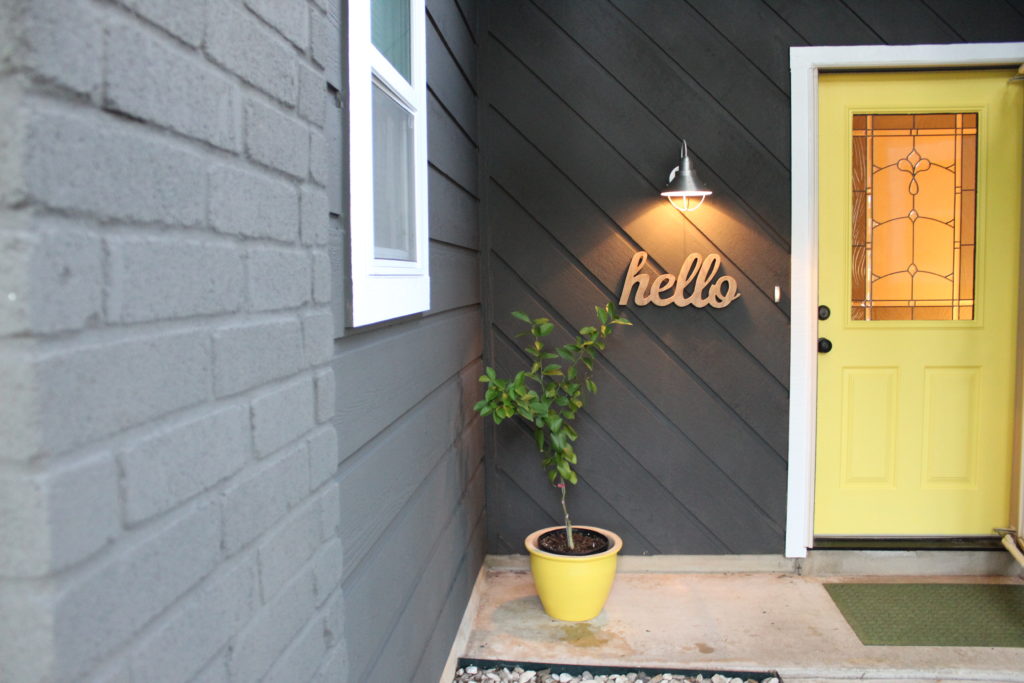
I am so happy with the color. It’s so happy and welcoming. If our door could talk, it might say, “come on in! Happy people are inside!”

#housegoals

Have you ever watched an episode of House Hunters? Well, I have. More times than not, a couple goes through a property and they start saying things like, “we would need all new floors, the bathrooms need to be gutted and everything in the kitchen needs to go.” Nate and I were just as guilty as these folks when we looked at our house. We actually said those things! These “simple cosmetic swaps” mean major work which also means major money.

So Nate and I have been discussing which projects are realistic for us as we plan on doing most of these ourselves. We also flip flop back and forth as to which improvements would make the most impact for resale value and which ones we have to get done for our own sanity (like our beautiful pink exterior before we painted last weekend). Ideally, we are hoping that most of our updating will fall into both categories. But, I think we have come up with a list. Not a to-do list because I don’t even like to read my own to-do lists but more of a list of goals we want to accomplish during our time here. Here we go!

  • New floors – this is going to be the biggest and most expensive project that we tackle here. Currently, our house has brownish, beige, gray carpet in the bedrooms and living room while the entry, kitchen, dining room and hallway has cream colored tile. Tile seems to be very popular here in Texas and I can understand why. It is a very durable, hard surface that also stays very cool to the foot which is a bonus with the warm climate. For us, tile doesn’t seem to be a very livable surface with little kids and clumsy adults. Everything that is dropped on tile, undoubtedly breaks. Toys, dishes, phones, iPads and dog dishes don’t stand a chance if they are dropped on tile. Also, I have to close my eyes and hold my breath if I see a dripping wet kiddo hop out of the bath and run down the hallway. Yes, we have had quite a few slips and head bumps. But I have big dreams of wood floors and wood floors that span everywhere in the house. Kitchen, dining room, living room, bedrooms…basically everywhere except the two bathrooms. Since Nate and I both have zero experience installing floors of any kind, we will hire this job out and leave it to the pros. So let the saving begin! And while we squirrel away our pennies to get these floors done, I’ll be daydreaming about oak…hickory…engineered wood…bamboo. Wouldn’t something like this just be a game changer? I think so…

floors

  • Painting the Exterior – we are mostly done with this baby! Some touching up and trim work still needs to be done but I think we can call this one done.
  • Landscaping front and back yards – the house is kind of a blank slate as far as landscaping goes. The flower beds around the house need to be filled with…something. I’m just not sure what yet. One of our neighbors has this whole landscaping thing figured out. I am hoping our flower beds can be as beautiful as this house.

IMG_0431

  • Adding a patio to the backyard – I would like to put some kind of material down in the screened porch on the floors and extend this flooring out onto some kind of a patio so there is a place to spend time in the backyard outside of the screened porch.
  • Scraping the popcorn ceilings and texturing/painting – the scraping part is done. The texturing and painting of the ceiling still has to be done. This job actually might kill me…the jury is still out. I’ll keep updating as I go.
  • Painting trim and doors inside house – the trim is currently stained an almost black color. I want to lighten this place up and paint everything white.
  • Whitewash the fireplace brick – in my quest to lighten and brighten, the fireplace needs a dose of white paint too. I’m going to try my hand at whitewashing.
  • New appliances for the kitchen – our current appliances are old and white but are functioning fine, for now.
  • New counter tops for the bathrooms – the plan is to keep the current vanities with some updating with paint and hardware. But, counters are a must.
  • Paint the front door – I can’t decide if it needs to be replaced or if paint will be enough. I’m debating between these two colors right now. Thoughts?

Valspar-Full-Sun-EB1-1 Valspar-Wasabi-W35010A

So these are our goals as of right now. I’m sure we will change our minds about some of these but for right now, this is what we are planning. There’s definitely no shortage of things to do but I love a good challenge and these projects are definitely going to challenge us.

Fjalkinge to the rescue!

When I decided that the kids would be sharing a room at this new house, I didn’t give much thought about the combining of the toys and books that each of them would be bringing from their respective bedrooms. Even though we have a “less is more” theory with toys, there still seem to be quite a lot of them floating around. If a kiddo hasn’t played with something in a while, out it goes. Nolan just started collecting Shopkins which I think is perfect because they are so small. Nate and I had to Google what Shopkins were…and we still have no idea. Grey likes cars, trucks, trains and just about anything with wheels. But I do try very hard to make sure that the toys don’t take over the whole house. Nate and I definitely don’t want to be living in a big play room.

I have been hunting for some toy storage solutions and found lots of ideas that I liked, but sadly, were not in the budget. I was especially in love with some open shelving from Serena and Lily. I am loving the wood+white look and always find myself attracted to the rustic/modern look in homes and furniture. The space in their room would have called for two of the taller shelves to take up the better portion of a wall. So this little purchase would have set me back $2,390 before taxes and shipping charges. Ummm…yikes.lark_white

Somehow, I ended up at Ikea…again. But found the perfect shelf! I could buy two of them and they would easily fit into the space I had in mind. A couple of ideas popped into my head to modify them to satisfy my wood+white obsession. Meet Ikea’s Fjalkinge shelving unit.

fjalkinge-shelf-unit-white__0194033_PE359398_S4

Nate and I ran to Lowe’s and grabbed two pieces of plywood and some dark walnut stain. We had a friendly fellow cut our pieces down to the size of each individual shelf right in the store for us so we didn’t have to rip any of the boards ourselves, which Nate loved. So all that was left to do was stain the wood and let it dry outside for a couple days. As far as Ikea assembly goes, (and we have had a lot of practice) these shelves were super simple. Once the plywood pieces were all dry and no longer smelly, we just slid right into place on top of the white shelf insert. My dad always says, measure twice, cut once. Well, we might have measured seven times, but no mistakes were made and the boards were just the right size.

IMG_0417

IMG_0419

 I also scored a little night stand and a rug too! Notice the wood and white theme? Points for consistency, no?

IMG_0411

IMG_0413

The best part is the kids toys look so super cute out on display on their new shelves. I kind of did a Grey side and a Nolan side, although there was no way his cars and trucks weren’t going to spill over onto her side. I will probably tweak the arrangement of everything as I add some better looking baskets and move everything around. I can’t help myself. Nate always laughs at me because objects are always moved, furniture is rearranged and nothing really stays the same in our house for very long.

IMG_0416

The room is starting to really come together in such a fun way. I thought it was going to be really tough to decorate for a boy and a girl in the same space but as it turns out, I’m kind of a neutral kinda lady. Who knew?

The house is painted!

Well, we did it! The house is painted and we are so happy with how it looks. The weather was kind of tricky here to plan this project around because we knew we wanted to paint before it was too hot but also didn’t want to have to combat the rain that we have been getting here in Central Texas. So, finding that sweet spot right in between the two was tricky, but I think we did it. It was still pretty hot for a couple of Northwest peeps but we just kept reminding ourselves that this is just the beginning of the heat that is to come! Sounds like the name of a really bad movie about the apocolypse, The Heat that is to Come. I’d probably go and see it. Anyways, we are hoping that, in August, we’ll be glad that we did it in June.

We rented a paint sprayer from Home Depot and Nate picked it up first thing in the morning. He has used this same sprayer a couple of times before so it was helpful that he was familiar with how it worked. But, it’s pretty simple to figure out even if you haven’t used one. A little trial and error and you should be good to go. The biggest problem you can run into with using these sprayers is spraying on your coats too thick. Think light coverage with multiple coats and you should avoid those pesky drips. Here is yet another reminder of what our house looked like when we moved in.

IMG_0087

Here’s where we are at today.

IMG_0395

Love this. There is actually still a lot of work to do and touch ups all over the house. The open beams in the entrance still need to be painted to match the body of the house and close up, there are many spots that still need some attention.

We also went ahead and updated our exterior lights, doorbell and house numbers. When Nate was hanging these for me, I kept thinking about how these details are like accessories. Like a good pair of earrings, but for the house. The house numbers used to look like this.

IMG_0370

 Now, look like this!

IMG_0389 - Edited

IMG_0392

We couldn’t be happier with how it turned out! Even some friendly folks from down the street have stopped by to tell us how much they like our colors.

IMG_0393

I love the contrast. It feels so fresh and with the new paint and accessories, the whole house is taking on a much more modern feel. Before we painted, the house didn’t really have any particular style or category that it fit into besides 80’s ranch style. Now, it has some much needed personality.

IMG_0390

IMG_0391

IMG_0387

IMG_0397

IMG_0388

While we still have some touching up to do, we can check this off our list of to-do’s. And this was a biggie. But, it feels really good that we did this ourselves. Back inside I go to get back to mudding and texturing the ceilings. No more excuses!

Prep, paint, and power washing

When Nate and I saw the house for the first time, we decided this house needed to be painted before we even got out of the car. Seriously. The house is pink. The trim is maroon. Help me. This is what it looked like when we moved in.

IMG_0081

But, before we can paint, we have some work to do. There are sheets of plastic covering the entrance to the house that needed to be taken down. I am not sure if we will need something else to go in its place to protect the entry from rain, but we are going to try and live without it to see how we do. It is laying on top of some exposed beams that I think would look really interesting to the eye uncovered and exposed to the world.

PlasticRoof - Edited

Because these plastic sheets filter the light trying to peek through, I’m hoping that taking these down will let more natural light flow into the front entrance. While Nate was taking them down, he uncovered four wasp nests! I kept reminding him to be careful and he only ended up getting stung once. Which I thought was sort of hilarious…sorry Nate.

IMG_0386

So. Much. Better. I will not miss you plastic sheets (I’m sure there is an actual name for these plastic sheets, I just don’t know what it is). Now that they are gone, the entrance reminds me of one of those mid-century modern houses that have an atrium with plants or trees growing out of them.

Now that the plastic is down, the next thing we needed to do to get ready to paint was pressure washing the house. Our neighbor, Chuck (thank you, Chuck!), was nice enough to let us borrow his pressure washer so we didn’t have to rent one. I was very surprised to see the amount of dirt that is just sitting on the surface of the house. I guess it makes sense but still surprising. We also went ahead and took this opportunity to clean up our driveway and sidewalks. What? Sidewalks aren’t supposed to be black? This was news to us because our driveway and sidewalks were all totally scuzzy and black.

IMG_0368

IMG_0350

IMG_0358

IMG_0352

My next task was choosing a pallet for the house. I thought this would be easy because I have always loved picking paint colors. There aren’t any colors that scare me and I don’t find myself nervous and agonizing over choosing a paint color because if I don’t love a color, I will just paint over it. We have lived in a lot of rental houses over the years and I have done a lot of painting. Trying to cover dirty walls and trim and trying to add some interest in blah spaces with beige carpet is nothing new to me. But, choosing paint colors for the exterior of your house is serious business. It is loads of work (and loads of prep work, i.e. taping off foundation and windows) and I couldn’t have Nate spraying the house a second time because I wasn’t happy with the colors that I chose. So, for the first time, I found myself stressing over these colors. I read every article online about exterior color choices, scoured pinterest for inspo, and even went to the library to find books on the topic! I couldn’t come up colors. I was driving myself and Nate crazy.

So I decided that I would email a few of my fave bloggers and see if any of them would have the time to get back to me. I sent them pics of our house and told them about my dilemma. Sherry, from Young House Love, was nice enough to email me back her thoughts. I couldn’t believe she emailed me back! She is practically a celebrity to me and I have been a big fan for years! Their newest book, Lovable, Livable, Home, lives on my coffee table this very minute. She suggested a color that I have seen a lot on pinterest, but never considered it as a color for the body of the house. The color is Urbane Bronze, a deep charcoal, with some brown, gray, and metallic undertones. She said she has seen it on some houses in her area and paired with a crisp, white, trim is stunning! So, off to grab a tester pot!

IMG_0360

IMG_0367

IMG_0363

I tested it in a few different spots for light comparisons. After a day of walking outside and staring at it during different times of the day, I was sold! I love its richness and I think it’s going to bring some life back to the house! Here we go! Hope we don’t shock everyone on the street!

It’s the small things

With all these big projects that need to happen around our house, it’s easy to feel overwhelmed sometimes. Big projects + Big money = Nervous Nate. Haha…just kidding. Well, sort of. Anyways, tackling these little projects feels really good too. Enter our mailbox.

IMG_0330

Nice, huh? I think at some point this little painting on the side of the mailbox was cute. But, after years of sitting outside in the elements, the paint had begun to chip and wear off. So, this baby either needed to be replaced or given a fresh coat of paint.

 IMG_0329

IMG_0334

IMG_0331

Since the box seemed to be in fine shape without any dents or any other major probs, I decided I would just spray paint it. I went over a bunch of color options with my sister, Collin and she had some good suggestions. How about matching the mailbox to the color you are going to paint the front door? Or, what about a handsome navy blue? Both good ideas but we are getting ready to paint the exterior of the house and I am fairly sure we are going with a very bold color so in an effort not to scare the neighbors and send them running for the hills (and they would have to run quite a distance to reach any kind of hills here in Central Texas), I went with a safe option.

IMG_0343

Nate took the mailbox off the stand for me easy peasy besides the fight he started with a few stripped screws for a minute or two that were securely holding the box to its stand. We gave it a quick wipe down with a damp cloth and sanded down the painting on the sides to ensure a smooth finish.

IMG_0335

After a few coats of spray paint, the mailbox looks brand new! This is my first before and after…I love reading blogs and am a huge sucker for a good before and after.

IMG_0341

 The cool thing about oil rubbed bronze spray paint and probably why it’s used so much is from far away, it looks almost black, but upon closer inspection, its brown, gray and sparkly all over.

IMG_0340

IMG_0338

IMG_0337

This is a small feat but it feels good and is a good reminder that projects will get done, one by one.

Weekend updates and a few little tweaks

Happy Monday! This weekend was another rainy weekend here in Texas with some pretty impressive thunderstorms. Friday night we actually lost our electricity for a little bit late in the evening and I was sorry the kids were already in bed because they would have loved all the lights being out. Nate and I were in the middle of our Bloodline marathon so we were happy when the power came back on.

We are finally done scraping the ceilings! We finished up Saturday afternoon and I was so tired after this project that I convinced Nate to have a couple contractors come and give us quotes to have the ceilings finished up by a pro. After scraping all these ceilings, the thought of patching, texturing and painting the ceilings sounded very daunting. But, after the quotes came in much higher than I thought, we will be finishing this job on our own. Nate tried to warn me but I kept thinking about the long hours we spent scraping the ceilings and how the hard part of this job is already done. Wrong! These contractors were quick to remind us that there is quite a lot of hard work still to go. We can do this! Or at least, that’s what I keep telling myself…

The sun came out for a while yesterday afternoon and I was able to snap some photos of the backyard and the screened porch. The weather here has been so bad since we moved in that we haven’t been able to spend much time outside or on the porch. I think it has rained almost every single day in May. And…with all this rain the mosquitoes have been really bad so I have been hiding out and covering the whole fam in bug spray. Hello Zika!

IMG_0296

IMG_0300

 IMG_0299

IMG_0297

IMG_0292

IMG_0303

IMG_0301

My plants are all loving the screened porch and I added a lemon tree to the mix so I’m hoping to have some lemons by Thanksgiving. Cross your fingers for me.

We also headed to IKEA this weekend because I had a dresser picked out for the kids room but sadly, it was out of stock. So, I’m either going to wait for it to come back in or I’ll find something else. Haven’t decided yet but I was so disappointed that my dresser wasn’t there. In an effort to cheer myself up, I did find some other goodies for the kids room. I also have a rug and a night stand coming this week. I still need some serious toy storage solutions and a dresser though.

weekend update3

weekend update5

weekend update4

weekend update2

Nolan and Grey love their new little reading corners. They each went and picked out some of their favorite books to load up their new shelves. Grey refers to his bed as his cave. It does feel pretty cozy under there. Nolan has even been caught reading in Grey’s bed a few times.

So those are our weekend tweaks. This week marks our first full week of summer and we have lots on agenda with orthodontist and dentist appointments, swimming lessons, play dates, and football camp. And those ceilings are still taunting me…

Once you pop, we can’t stop…..scraping

Once upon a time there was a girl who bought a 1648 sq. foot house. Every ceiling in this house had that famous popcorn texture that we all know and love. Every. Single. Inch. It’s even on the ceilings of the closets! This same girl thought she would be able to scrape this popcorn texture from these ceilings and it was no big deal. Boy, was she wrong.

IMG_0245

IMG_0246

Here’s how all the ceilings looked before we started scraping. We have told several of our new neighbors about our project and how we are going to start scraping and their reactions have been pretty funny. We have heard things like, “yuck,” and “what a mess.” We soon found out that those are just a few of the ways you could describe this job…among other, less blog-appropriate words.

The process itself is simple. First, spray the area you plan on scraping with water and let it soak so it saturates the surface. We found that magic number was around 15 minutes but it definitely didn’t hurt anything to let it soak for longer stretches of time. While it soaked, we used this time to prep for the mess. Although, I’m not sure there is any amount of prepping that a human being can do to prepare for the mess that is about to ensue. Then, the scraping begins…and never ends. Okay, it does end at some point. We just haven’t found that point yet.

IMG_0143

Lovely, isn’t it? It was a little shocking to see the drywall for the first time all dark and soaking wet. But, it quickly dries and looks lighter and more like drywall is supposed to look.

IMG_0144

The plastic tarp was a life saver for us as the dust that comes with this job is very fine and goes just about everywhere. Your hair, your ears, and even manages to make its way through your clothes. In the kitchen, I was able to tuck the plastic right under the doors of the cabinets. Originally, I was going to use painters tape to secure it to the top of the cabinets but when I went in the the garage to find the tape, I was greeted by a very large wasp. Nate wasn’t due home from work for another 45 minutes so I decided I would work with what I had and tuck that plastic right under the doors. It worked like a charm.

Preparation is really the key to this job. We quickly learned that the more you prep – the less time you spend cleaning up. A shop vac would have been very helpful. We don’t have one but would definitely buy one if we were doing it over because our regular vacuum for the house isn’t speaking to us anymore after all this extra work we have put it through.

IMG_0148            IMG_0160

That fluorescent light used to live in the kitchen but we took it down so we could scrape under it. It definitely won’t be returning. I am going to start hunting for a flush mount fixture for the kitchen. This was sort of a theme as we finished each room. I had Nate take down the light fixtures for scraping ease but am thinking that none of them should go back up so we can take this opportunity to replace them with something more our style. Either that, or we will be living in the dark.

IMG_0164

IMG_0203

IMG_0205

Nate was a good sport and climbed all the way to the top of the vaulted ceilings for me because I was too scared to get up there.

IMG_0211

After the long weekend of scraping, we finished up the kitchen, dining and living rooms, entryway, hallways and one bedroom. We have three bedrooms with their closets and the bathrooms to go…and we will finish it! Next up, figure out how we are going to get these naked ceilings textured and painted.

Week 1 Progress Report

Wow. I can’t believe we have already been in the house for a whole week. And what a week this has been!

Not only have we been moving and unpacking, the kids are finishing up their last weeks of school. Grey had his preschool graduation and it was off the charts cute. His teacher took the time to give character awards and she picked out what she thought was the best characteristic of each student. Grey was given the, “gives the best hugs” award and we couldn’t be more proud of him. This fits him perfectly.

greypic

Nolan had Field Day at her school this week and came home soaking wet with a smile on her face. They had a water slide and snow cones. I think it’s safe to say that fun was had by all.

Back at home, organizing and unloading boxes was the name of the game. This house is more square footage than we have ever lived in before and our furniture/stuff is looking a bit sparse as we spread it out throughout the house. I guess this means that I will need to start filling this place up. Challenge accepted.

Here are some pics of the house after our first week. Lots to do but I’m excited about all the possibilities and am swimming in ideas to turn this place into something special.

IMG_0215

IMG_0220

IMG_0221

Some of my pictures are a bit dark. I have a new camera and am still learning how to use it. The screened porch extends across the back portion of the house and it blocks some light from the living and dining rooms also.

IMG_0182

Our new neighbor, Laura, brought us over some pretty blooms. Just what our table needed!

IMG_0174

IMG_0223

IMG_0194

I’m loving all this natural light in the master bedroom. Artie is a big fan.

IMG_0196

I’m also happy to report that week one with the kids sharing a bedroom went smoothly. They are loving the bunk beds and have been spending a lot of time playing, reading, and using their tablets on them. One issue that I didn’t think about when we decided they would be sharing a room was the combining of the clothes and toys. We are overflowing in both departments. I am brainstorming ideas for some toy/book storage and am thinking about a new long dresser that could be divided between the two of them. Each kiddo has their own dresser from their old rooms at our rental house but two different dressers would be weird for this small space so I am thinking that I will use Grey’s old dresser and move it into the nursery and Nolan’s dresser will be posted on Craigslist.

So that’s week one. I left out pics of some spaces only because they have been relatively untouched and there is nothing interesting to report. But the house is starting to feel very homey. Now, I think I need a nap.

Nolan and Grey’s Shared Room

So I have been going back and forth on this topic for weeks and finally just decided we are going to pull the trigger. Yep, you heard right, my kiddos, Nolan (who is a 7 year old girl) and Grey (our 5 year old son) are going to share a bedroom. But, why? How could I do this to them, you ask? I have a few reasons.

IMG_0180

First, when we found out we got this house we were in real estate heaven realizing that we were going to have four bedrooms. This was the ONLY house we looked at that had four bedrooms. We weren’t actually looking for a four bedroom house because we thought it would be out of reach for us. We were more concerned about the neighborhood and schools for the kiddos. My head started spinning with all the possibilities for all these bedrooms…guest rooms, kid rooms, nurseries for babes to come. Anyways, when we told the kids we got the house, the first thing they asked was if we could get bunk beds and they could share a bedroom. Hmmm…could they? Is this even allowed?

IMG_0212

I grew up in a family with five kids and everyone always shared a room. I shared with my sister, Collin, and our three older brothers also bunked together. Collin and I never had any serious issues sharing a space (besides the normal sibling fighting from time to time) and as for the brothers, I never hear any stories about how terrible it was for them to share a room. So my point is, sharing a bedroom isn’t an unfamiliar concept to me. But when I brought this up to friends over the last few weeks, I got some sideways glances and comments like, “good luck with that”.

Secondly, Nate and I just found out we are having another baby! Baby Boy will be joining us in November, just before Thanksgiving. Exciting, yes! But again, this news also made my head spin thinking about the bedroom situation at this new house of ours.

Lastly, I wanted to have a guest room. All of our family lives in Oregon so when we have visitors from the Northwest, it’s much nicer for them to be comfortable in their own space and not on an air mattress in the middle of the living room. Having a designated space for guests feels so grown up.

So after mulling this over for weeks, I have made a firm decision. Firm = I reserve the right to change the plan at any time if the current set-up isn’t working for everyone. For now, Nolan and Grey got their bunk beds and are going to share a room. Baby Boy will have the smallest bedroom (next to the master) as his nursery. Finally, the guest room will be at the end of the hall. Feels good to make a decision! Lets just see if this works…

 IMG_0196