My Bedroom Makeover with Miller Paint

This post is sponsored by Miller Paint but all thoughts and opinions are my own

Hi guys! I am sooooooooooooooo (too many o’s? maybe…but I’m so enthusiastic about sharing this project!) dang excited to share this makeover with you today! Behind the scenes, it’s been almost 21 months in the making! So, I owe you a little backstory before we get into all those juicy details and all the photos.

Back in the summer of 2022, we were well underway with our new primary bedroom/bathroom addition that we had been planning on adding to our home since we bought this old fixer upper. Construction was moving right along and all signs were pointing to an end of summer completion date. Pinch me!!! It was around this same time that the wonderful (and I do mean WONDERFUL) folks at Miller Paint reached out to introduce me to their brand new Northwest Collection of colors and asked if I would like to use these new colors for a potential room makeover. I didn’t even have to think about this one. It was an immediate YES YES YES! This curated collection of colors is rooted and inspired by the Pacific Northwest and is chocked full of colors that you find here in the NW…picture rocky coastlines, snowy peaks, and mossy trails. Did you know that Miller Paint is local to the Northwest and is also an employee-owned company? Their paints have been manufactured in Portland, Oregon since 1890 and was originally founded by a local artist. Pretty neat, huh?

And because your girl has DEEP NW roots and a (almost) completed brand new bedroom that needed decorating, this felt like the most perfect partnership! Well, construction gonna construction and timelines kept getting pushed and our completion date got moved back until NOW. All the delays were tough to swallow, but I am so happy to finally have this project behind us. We’re ready to start enjoying this new primary bedroom that we’ve poured so much sweat, tears, and money into! And the best part, Miller Paint didn’t get sick of me with all the constant construction delays, and agreed to let me still pull together this long overdue makeover to show you guys!

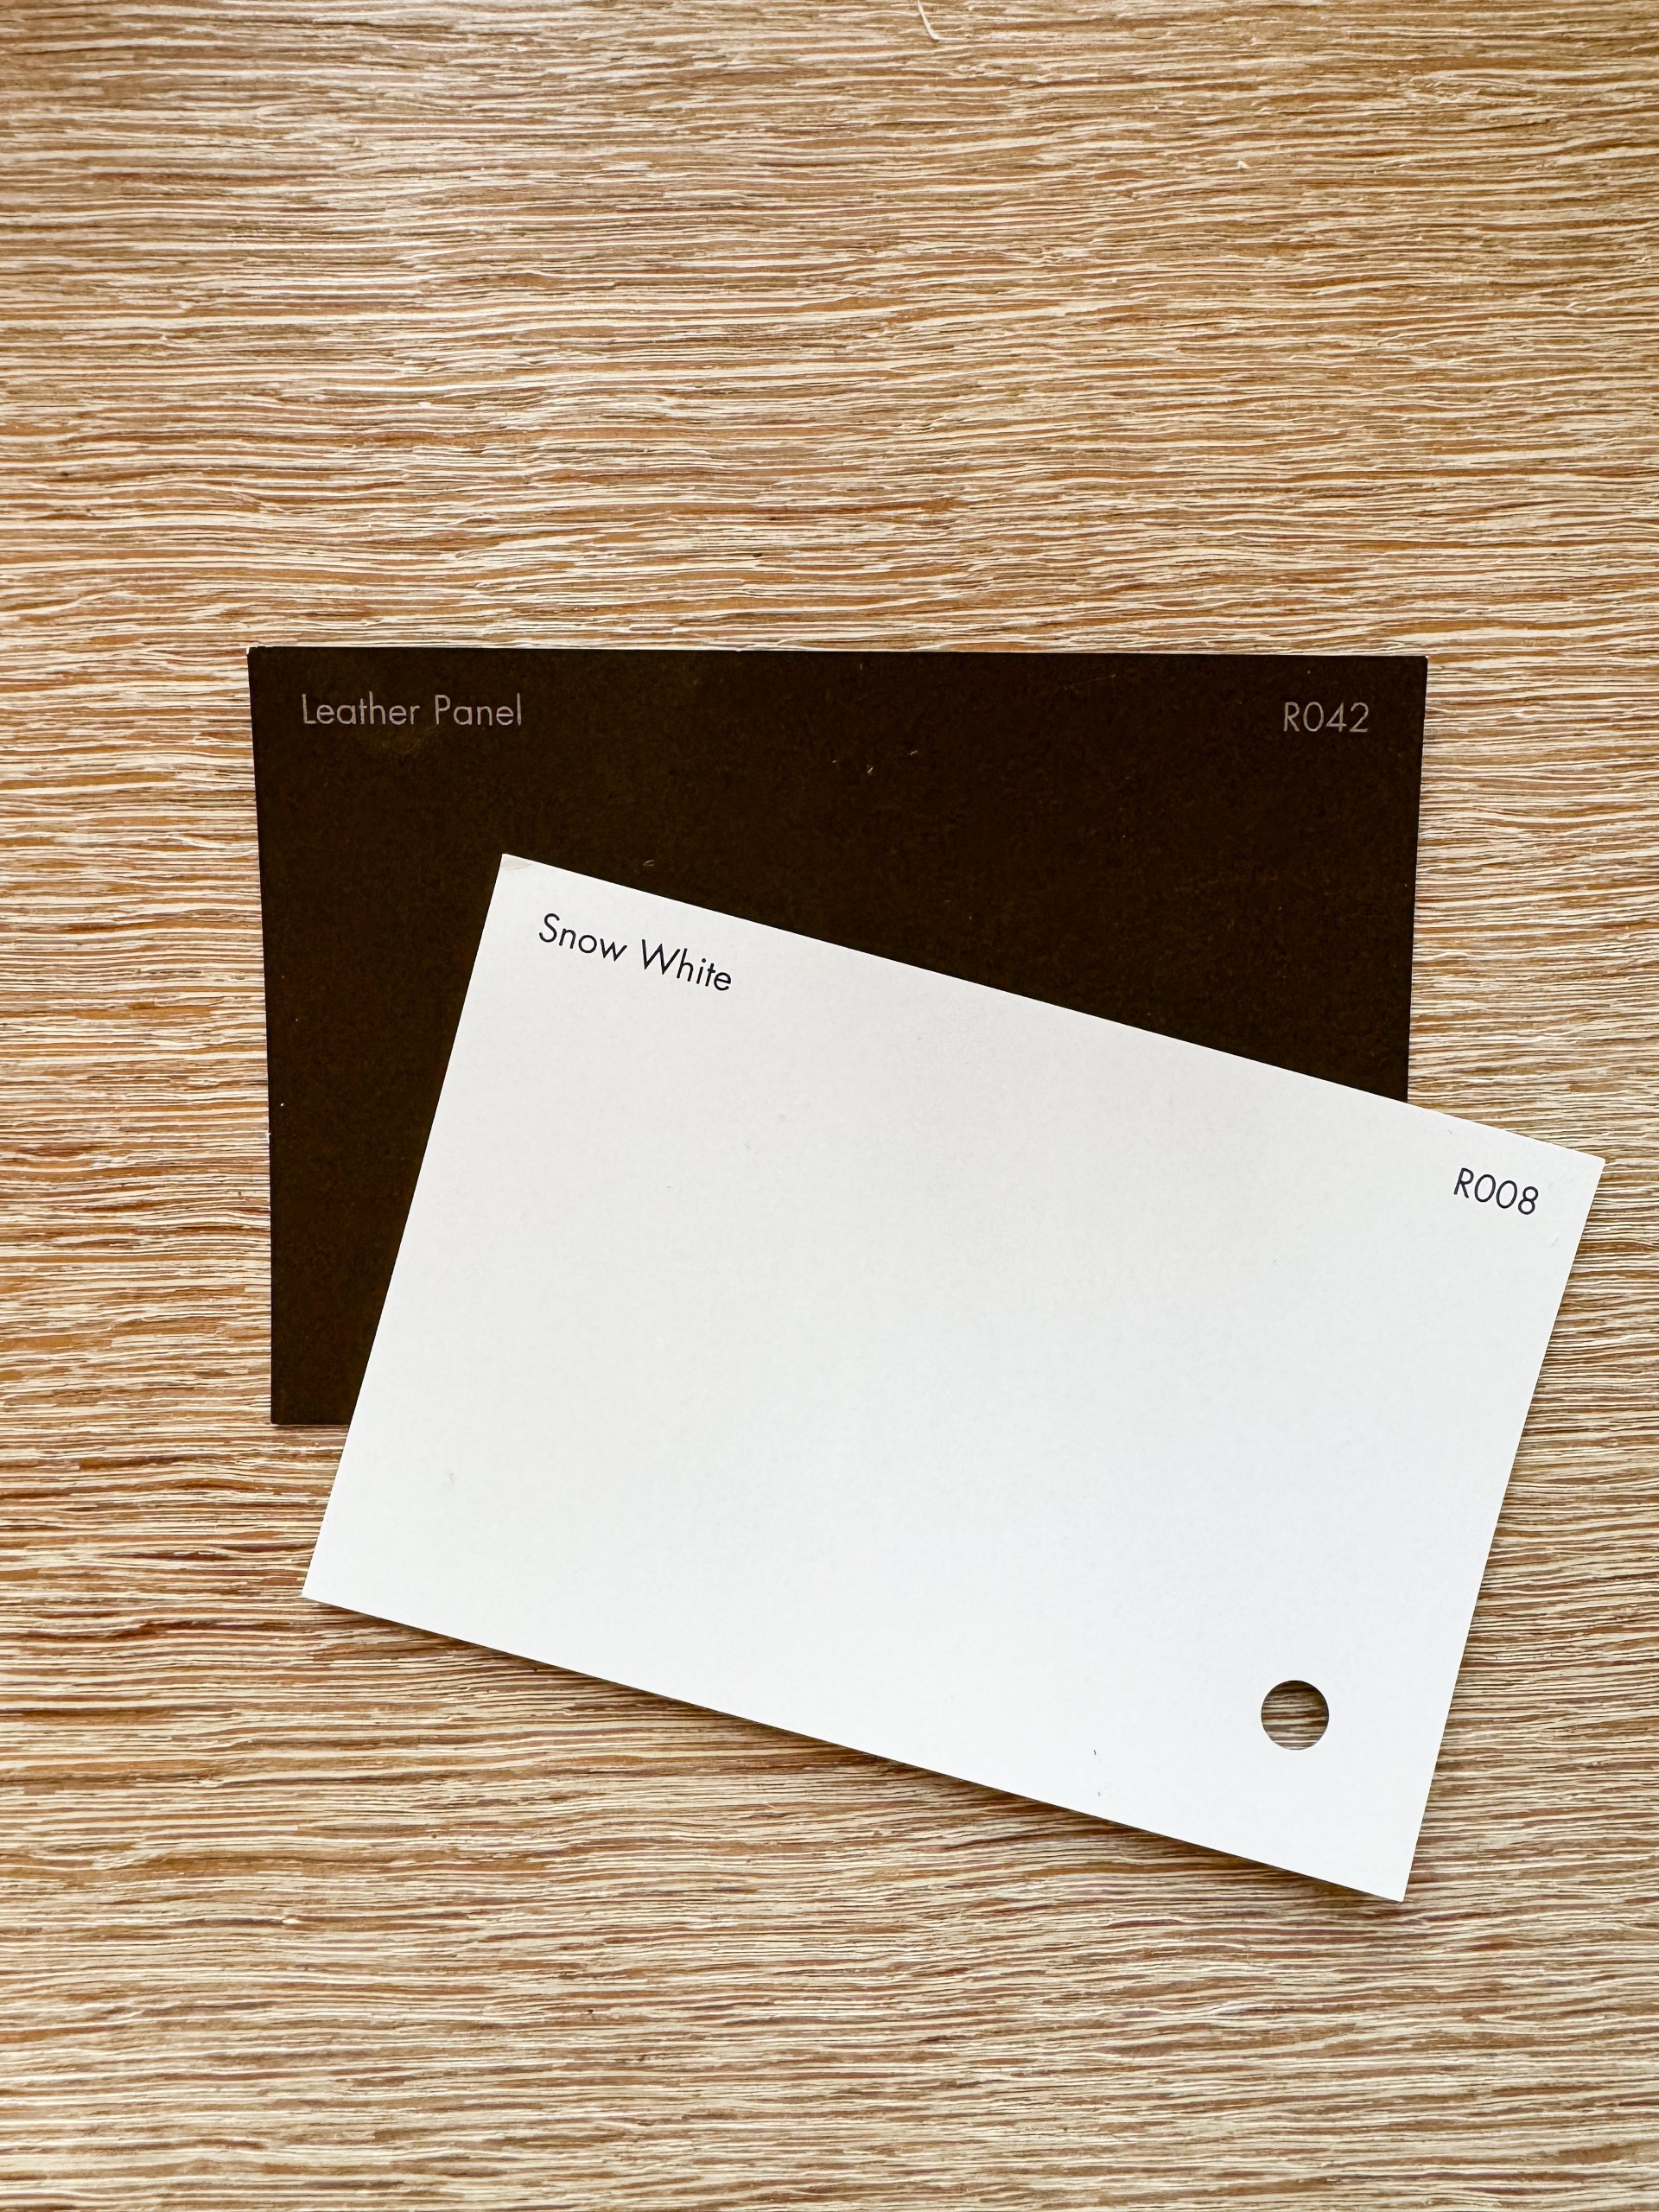
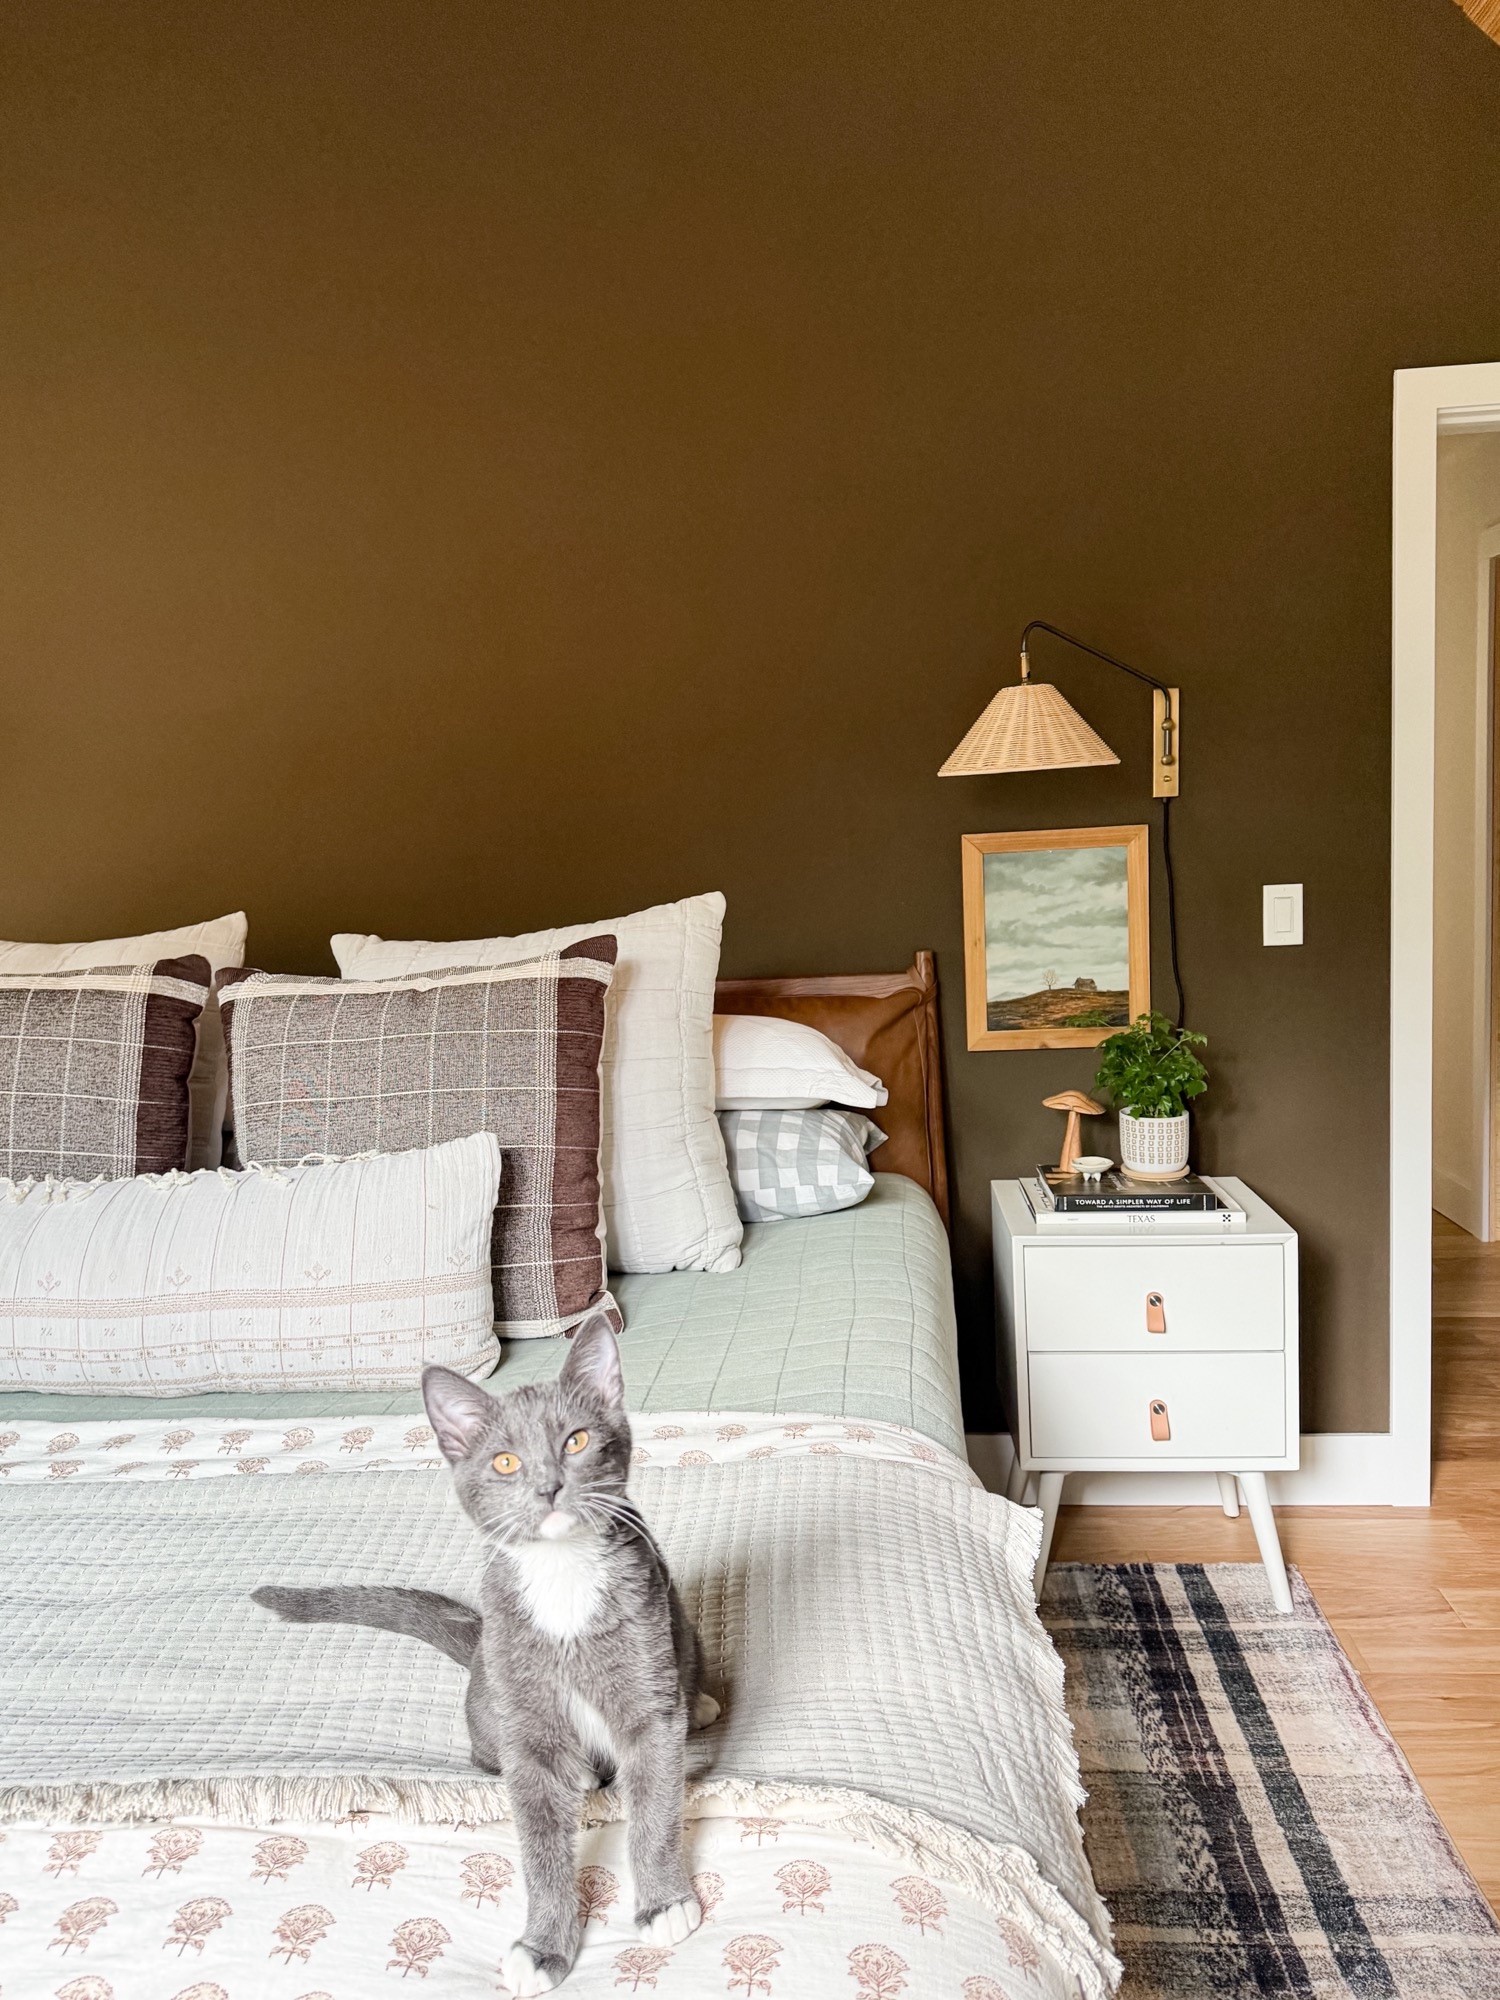
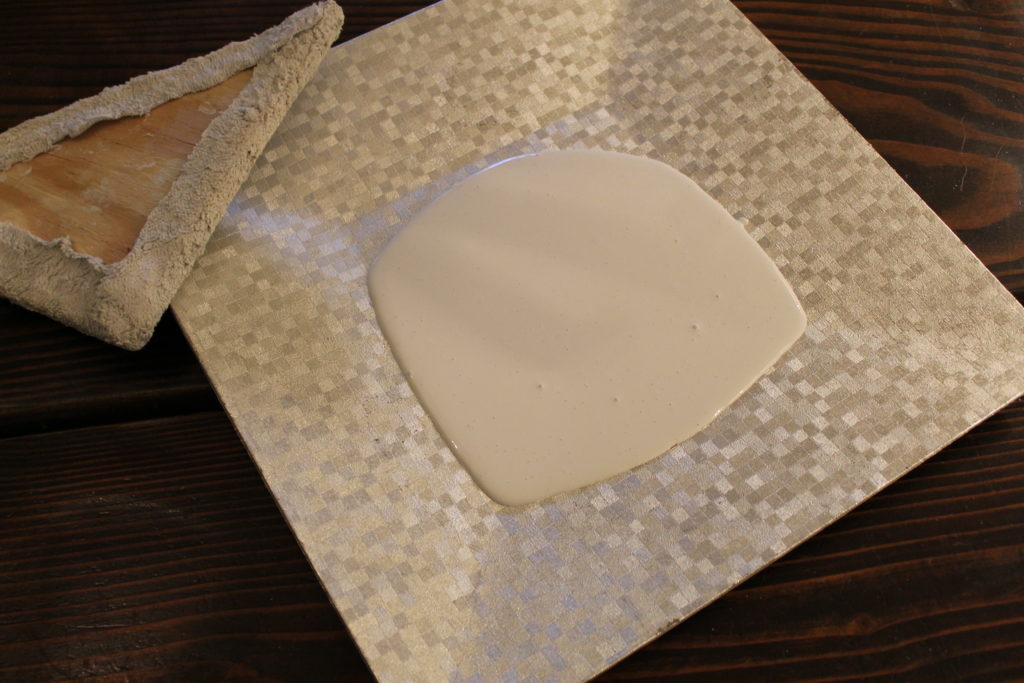
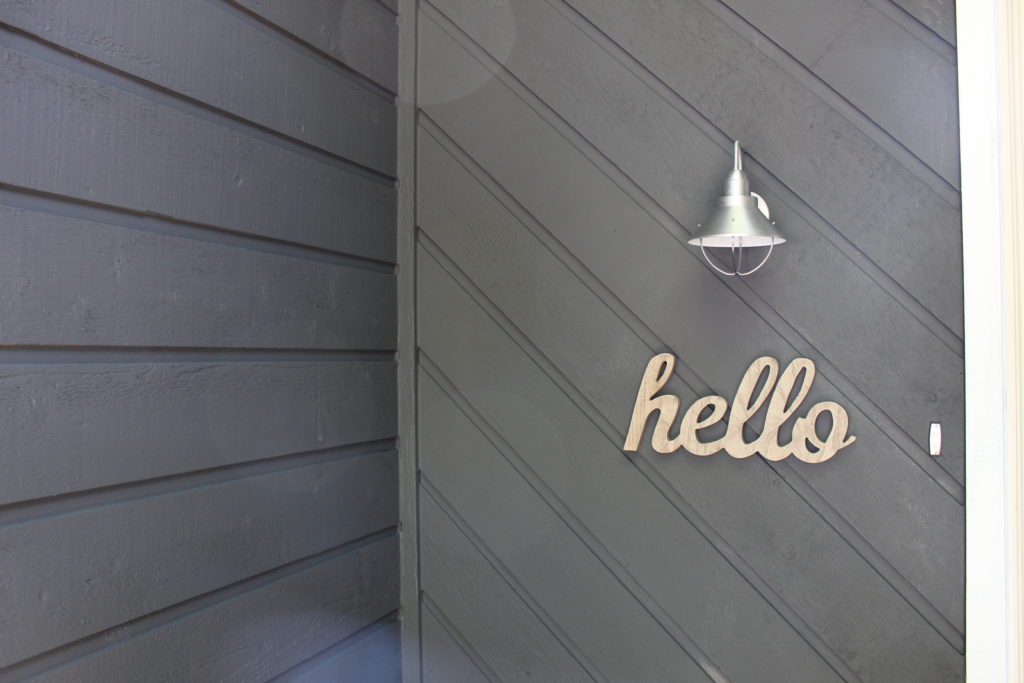
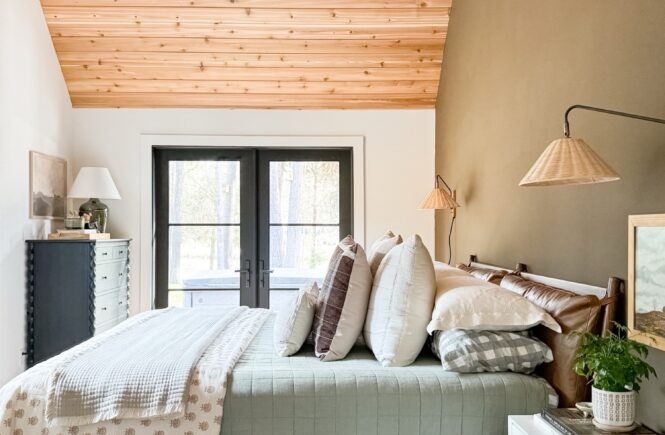
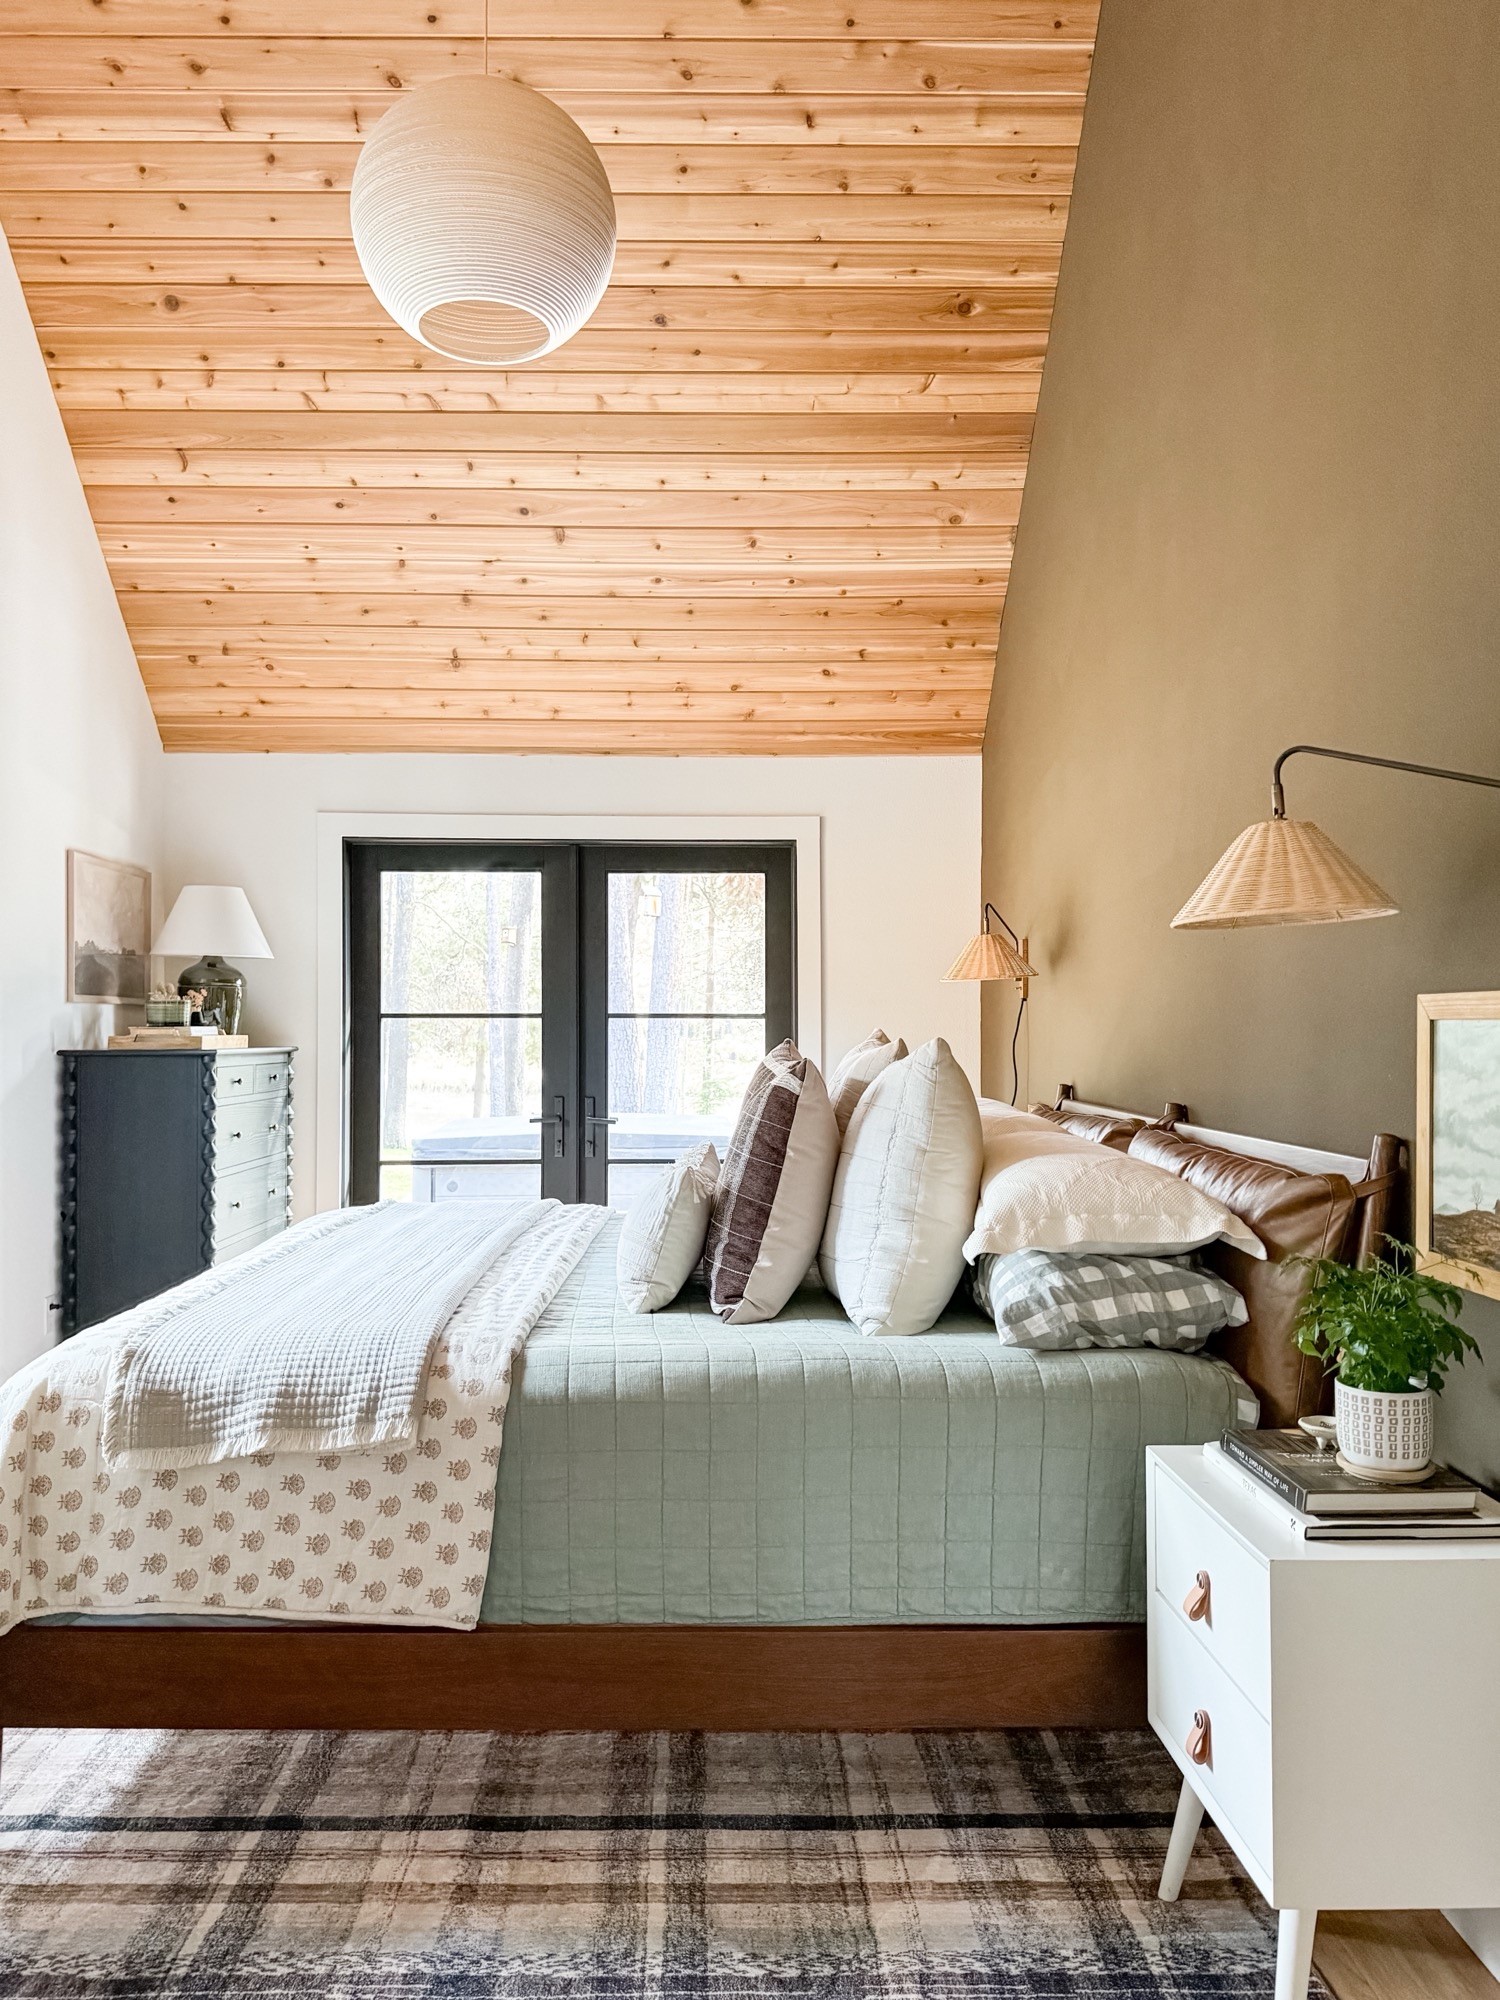
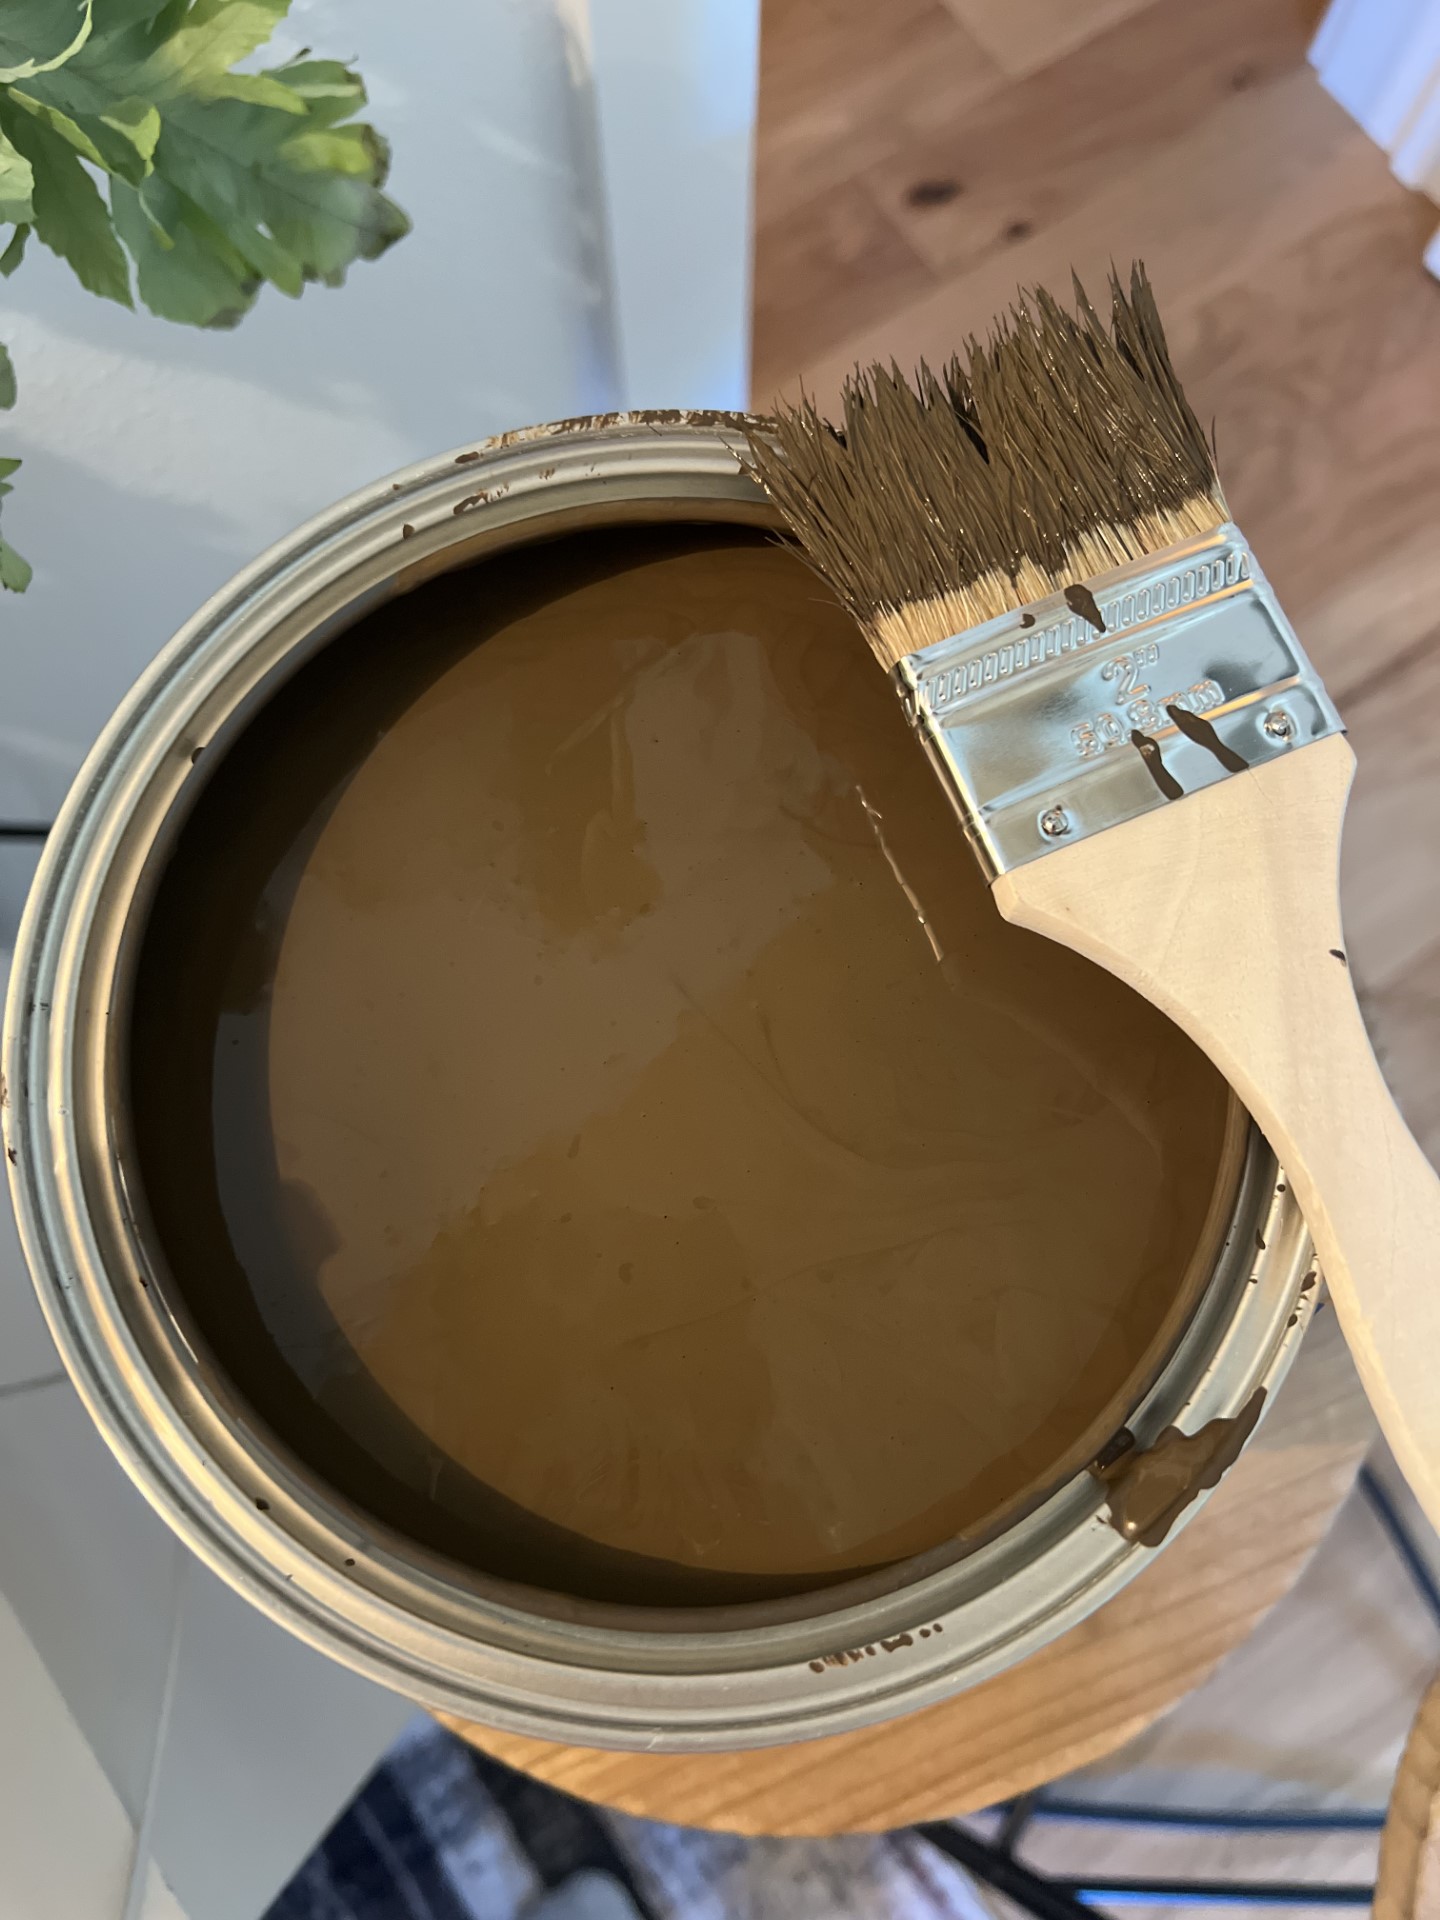
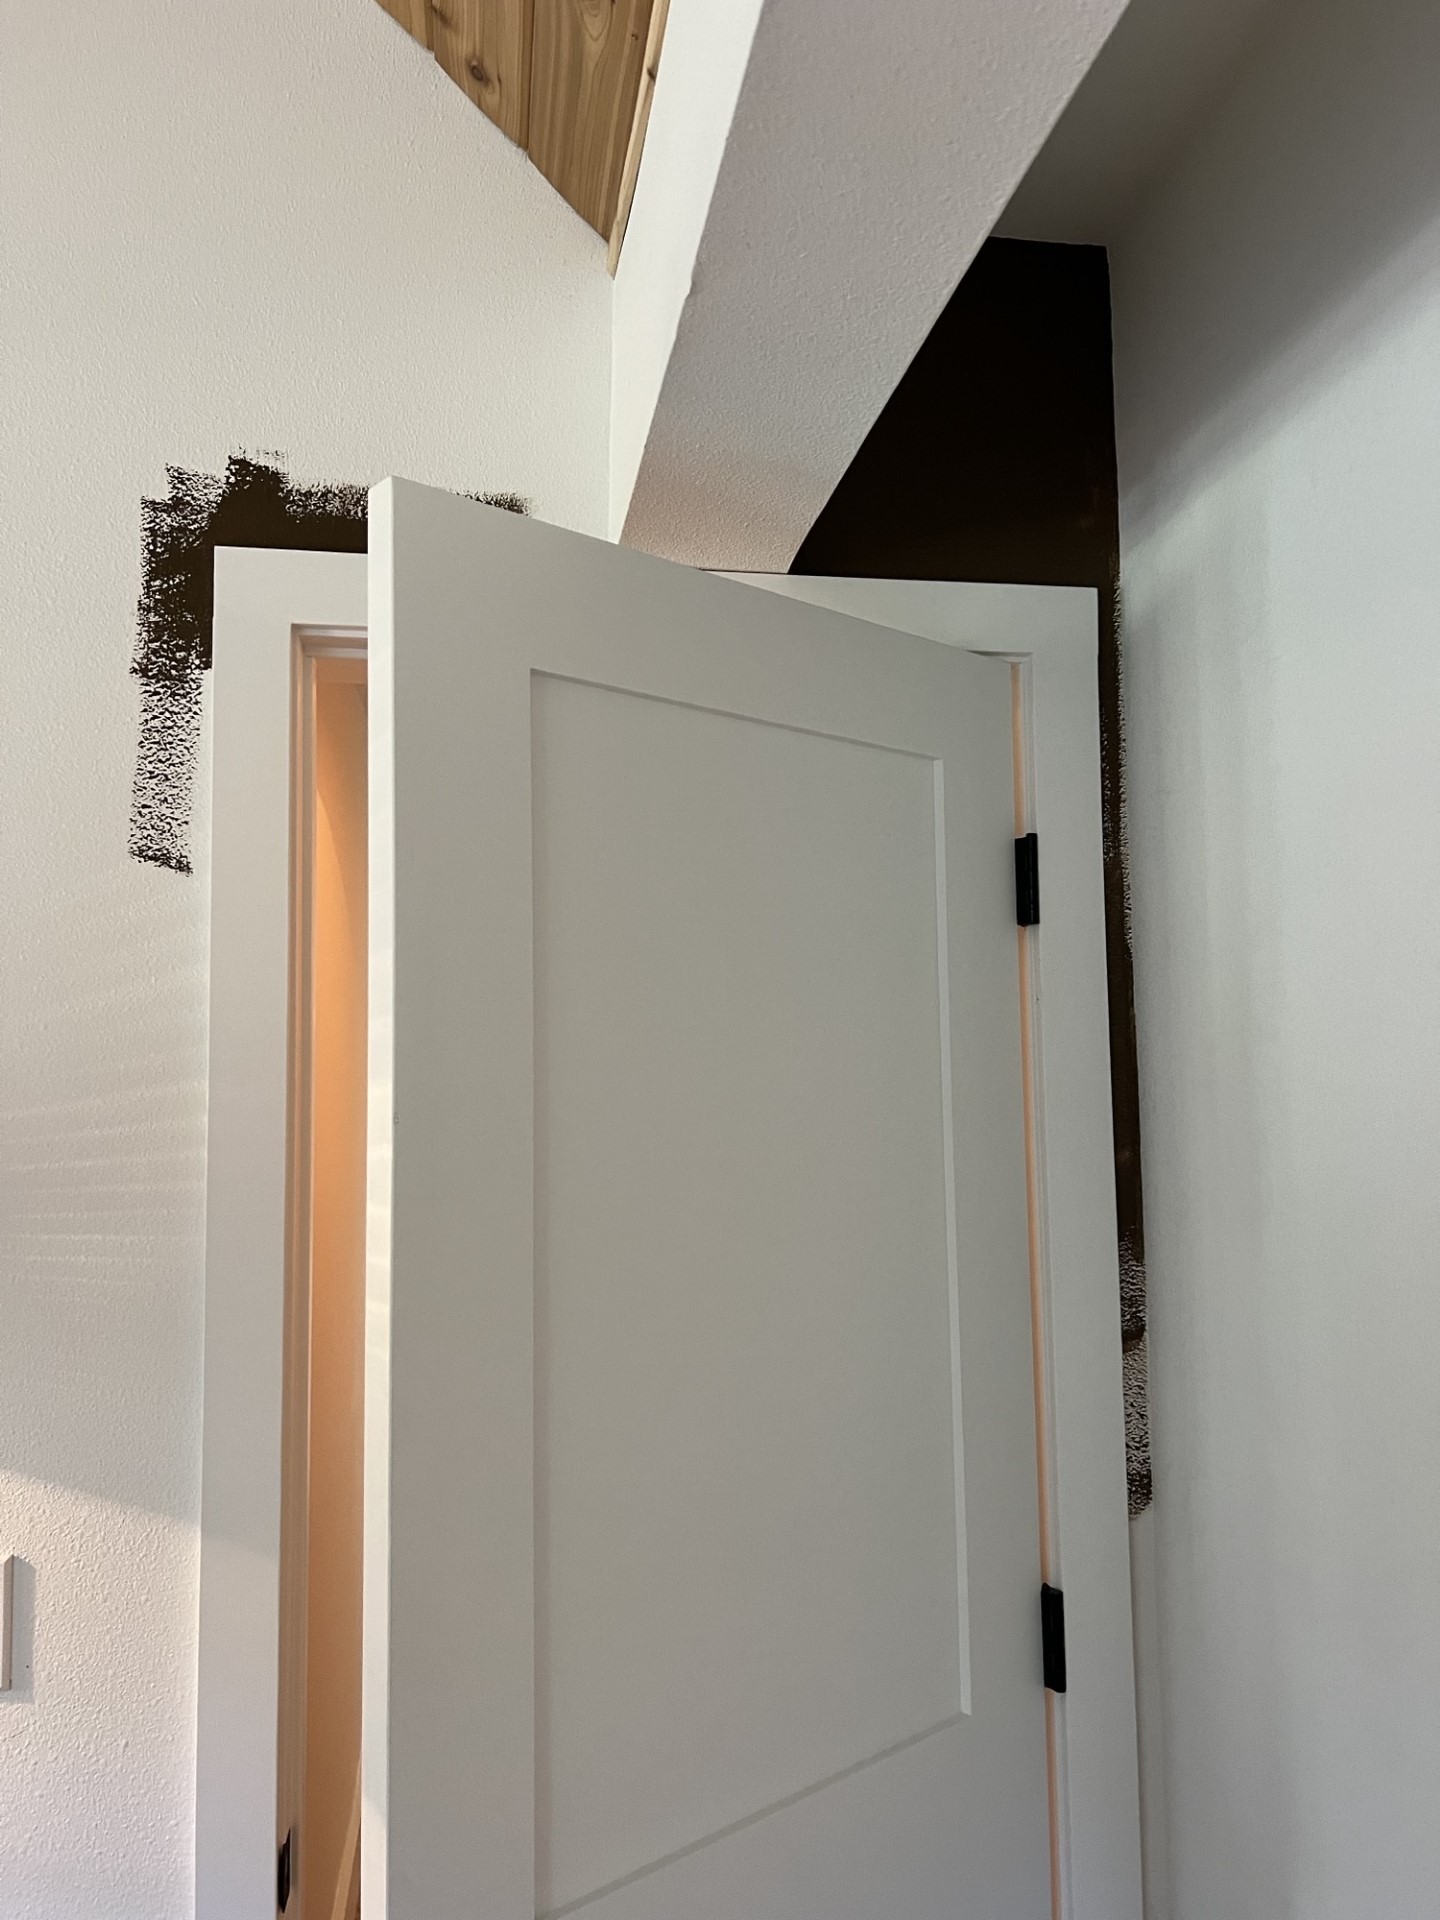
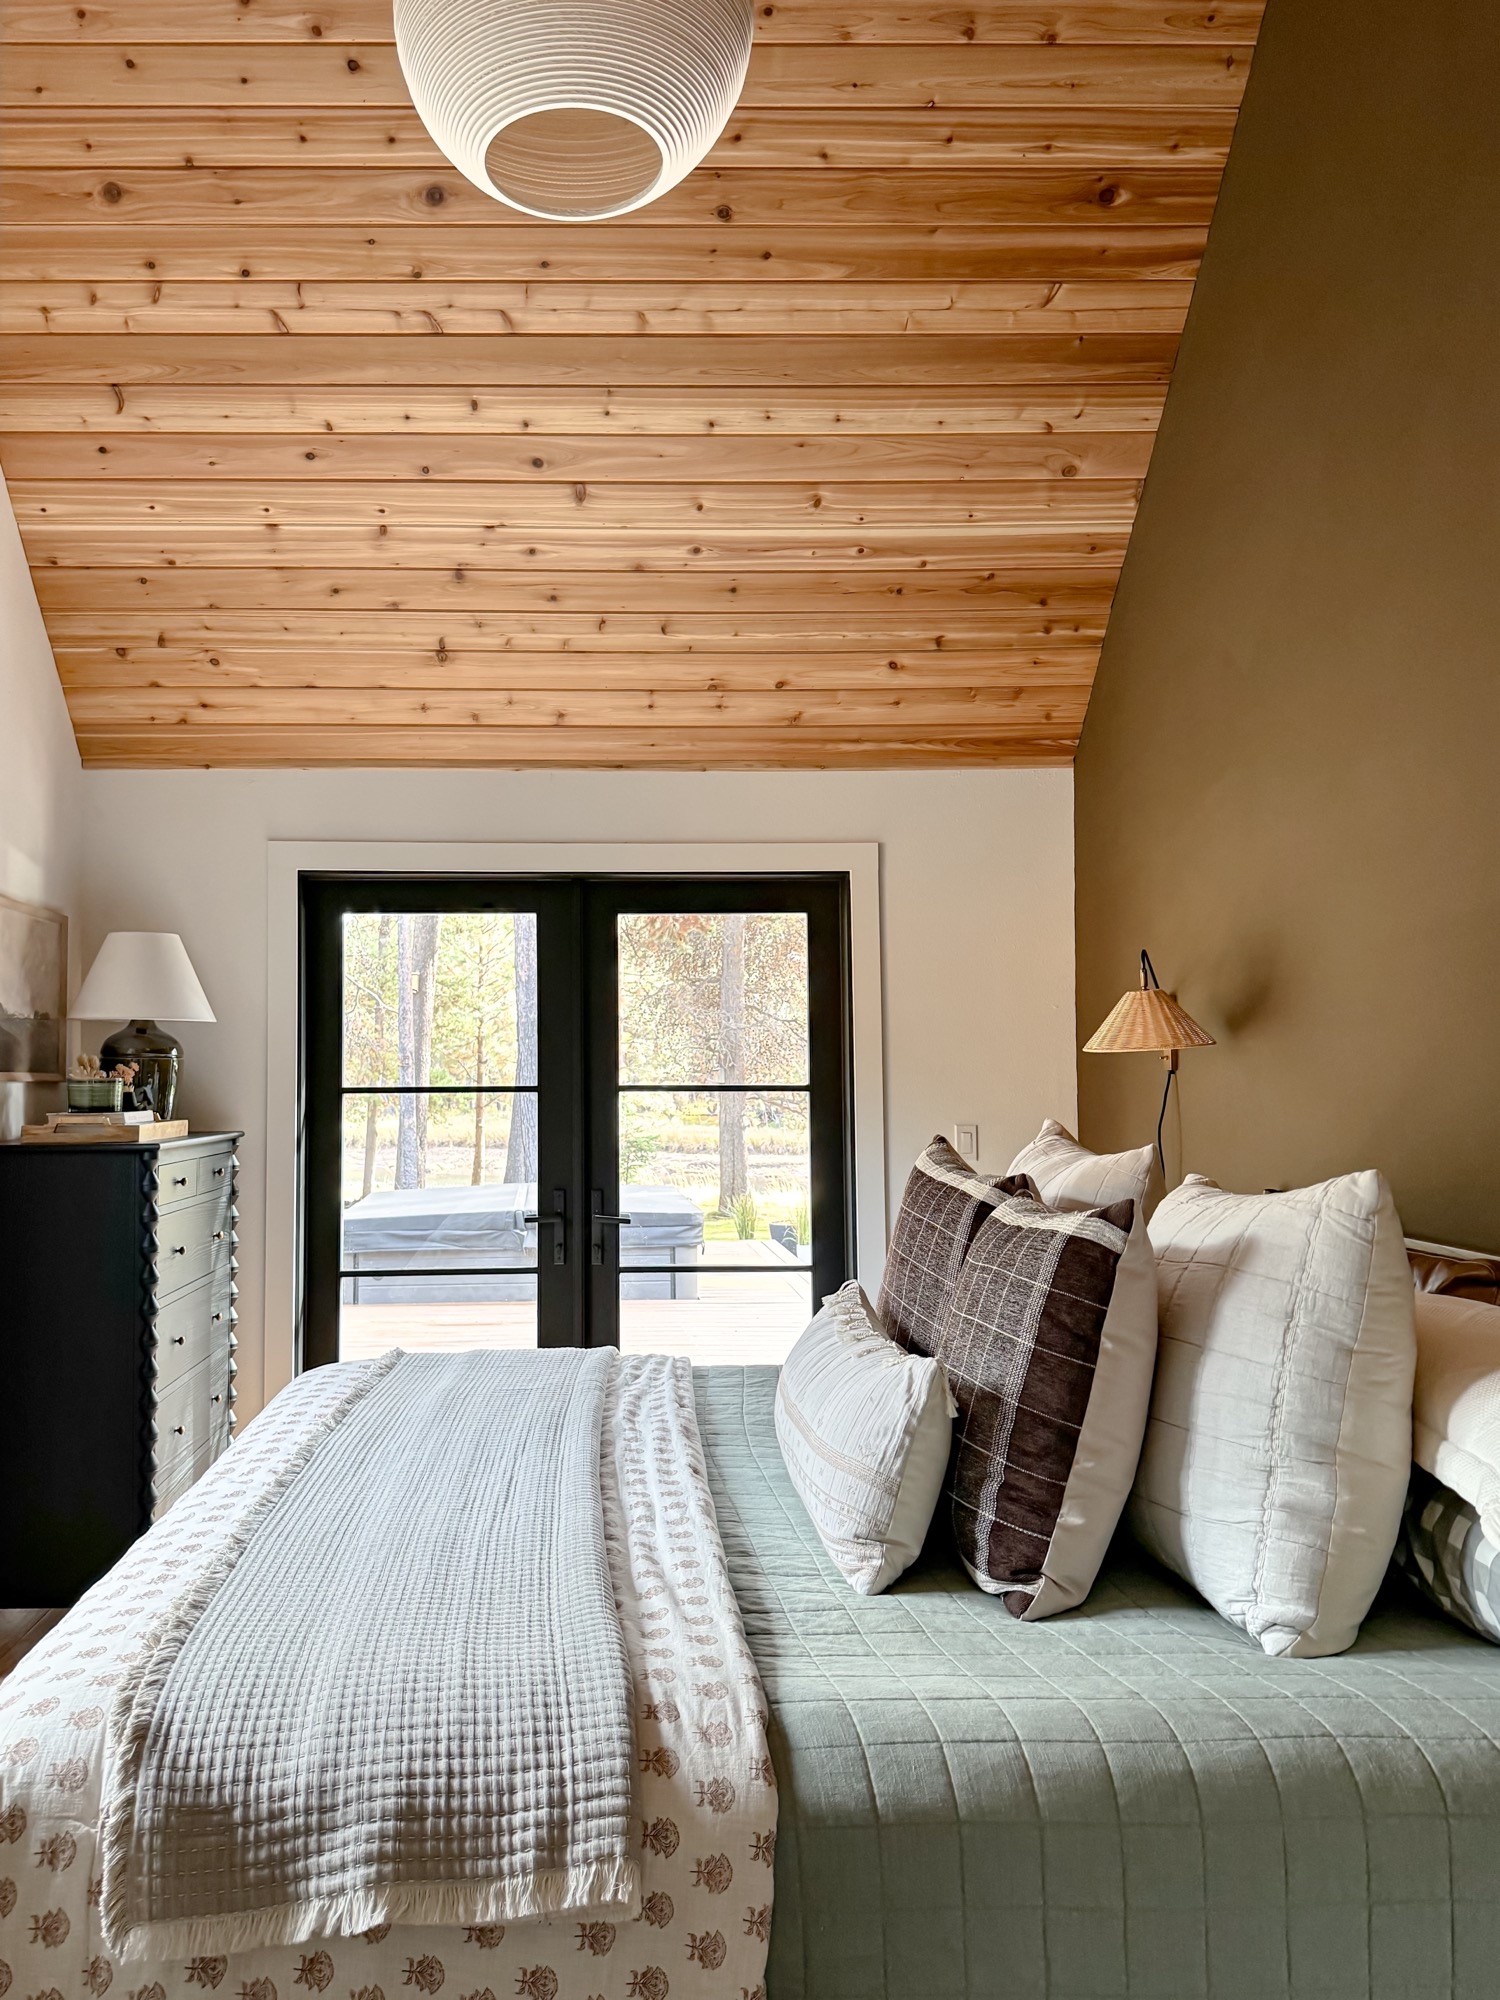
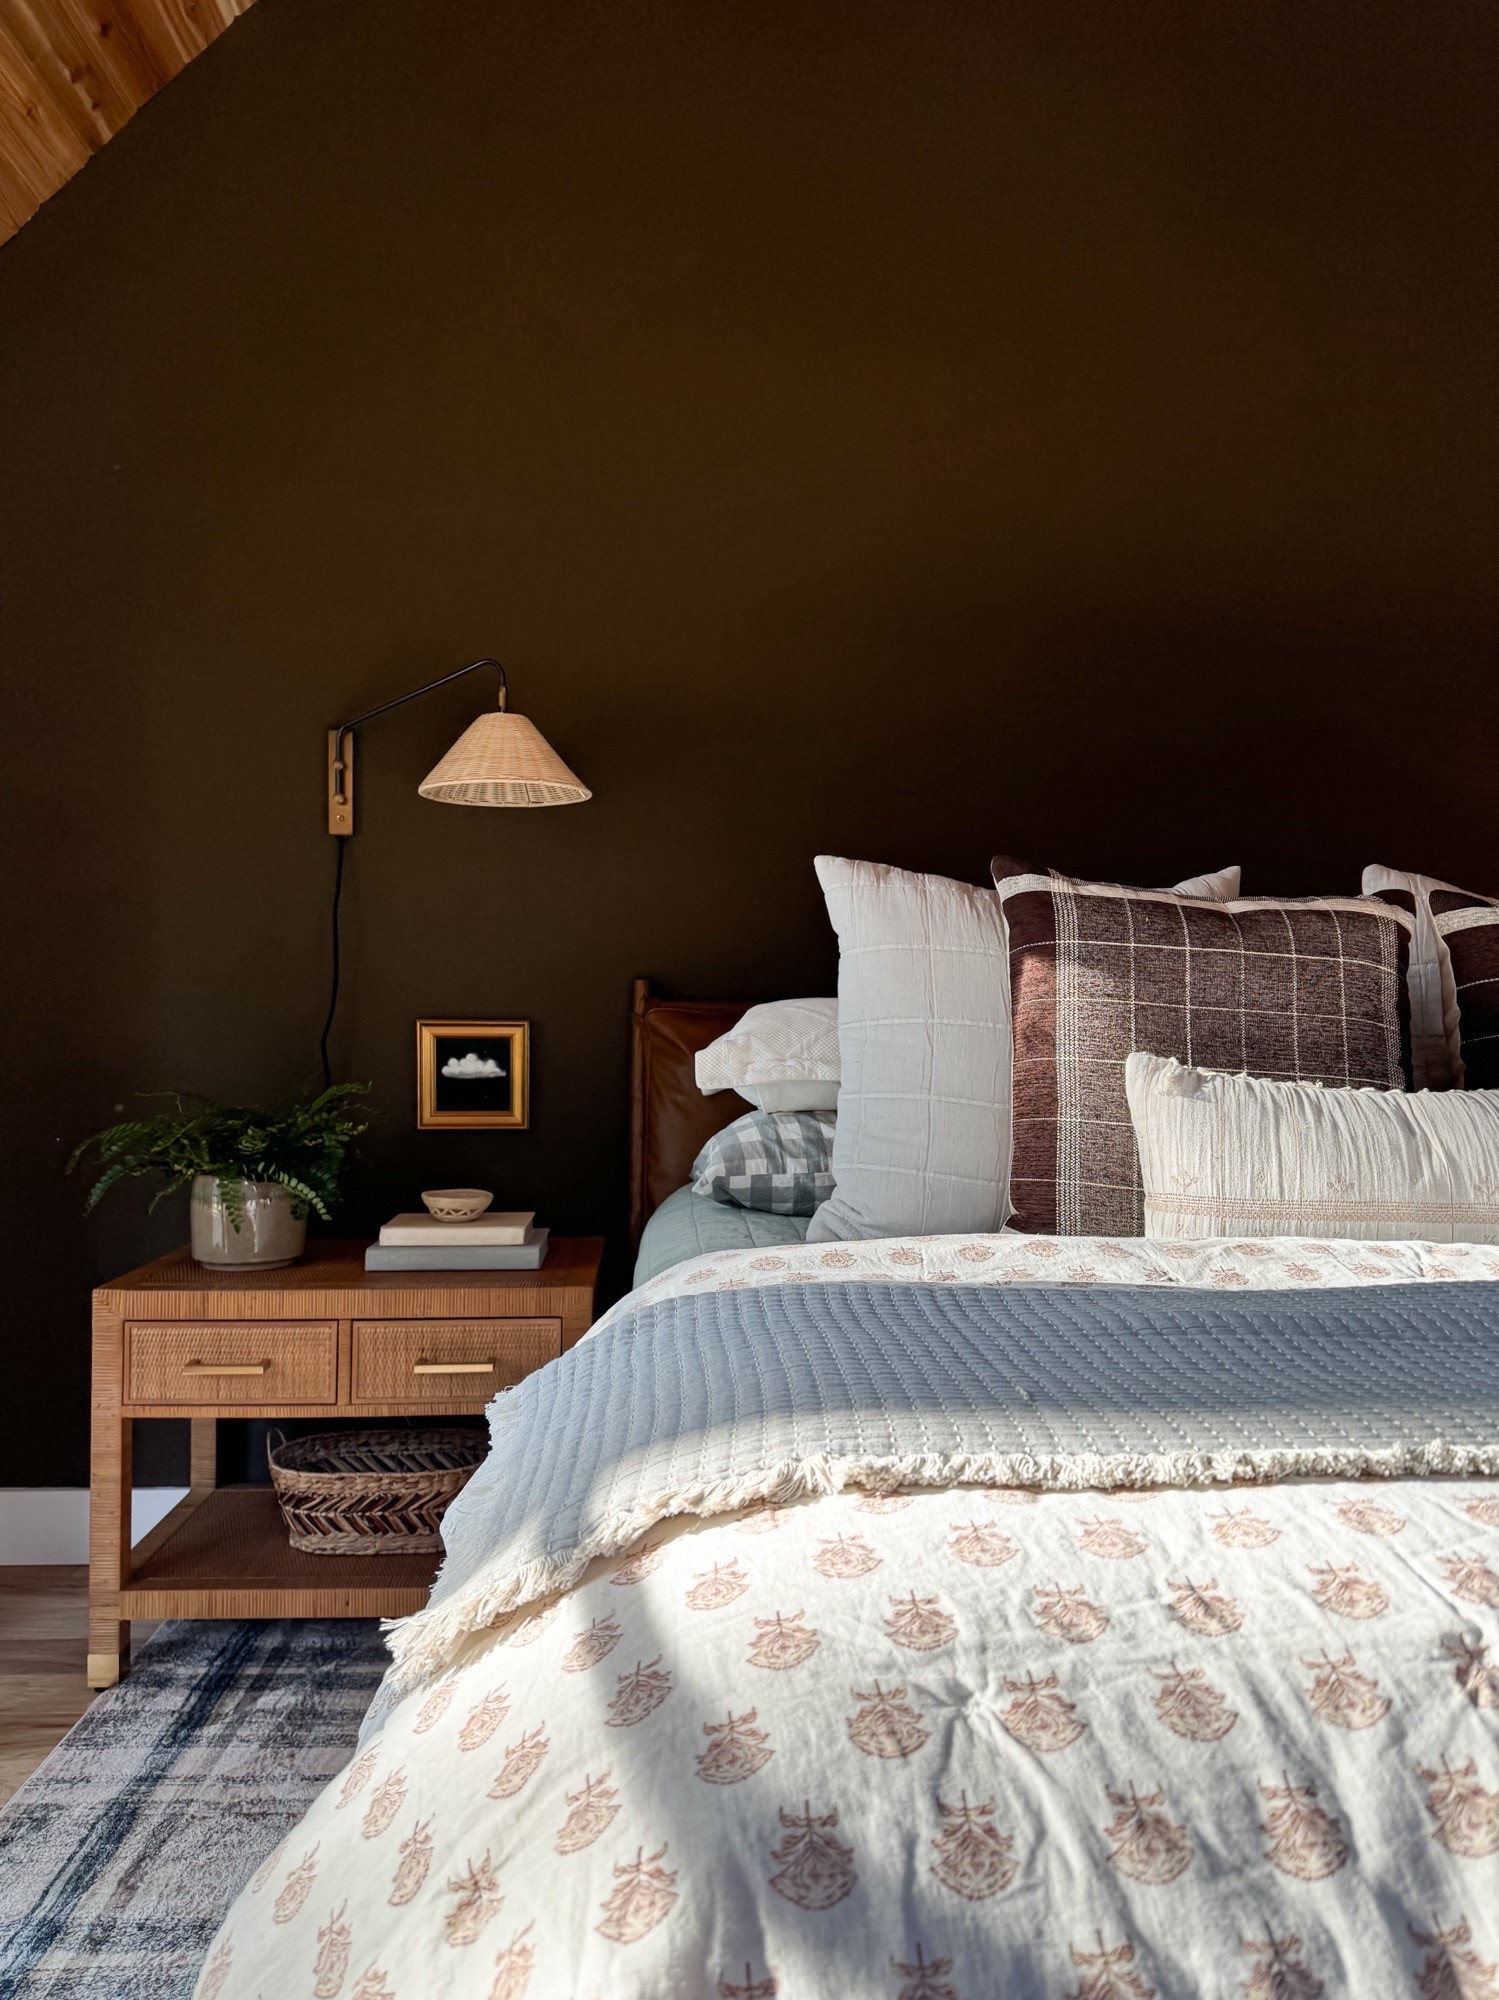
Choosing colors from this collection was no easy task, as they are all so beautiful! Fun fact: if you find yourself stuck and just can’t decide on a color, you can schedule an in-person or virtual consultation on Miller Paint. Isn’t that a cool service? But, I finally decided on Snow White | ROO8; a cool, crisp, white for the walls and trim. I like that it doesn’t have any undertones and feels bright without feeling stark white. We used a flat sheen for the walls, and a satin sheen for all the trim. Then, for some much needed drama, we went with Leather Panel | RO42 for an accent wall behind the bed. It’s a very saturated, dark brown that’s kind of a chameleon. Depending on the light and time of day, it can appear anywhere from a deep green, to a chocolate brown, to an almost black. I love that about this color. Now, I don’t mean to brag, but I have painted many a walls in my time as a blogger and an avid DIY’er, and I don’t know if I have ever been so impressed with the quality of a paint until using Miller Paint. It paints on so smoothly, I wasn’t even sure I’d need a second coat. In the end, I did opt for that second coat, just for good measure. But the coverage was amazing and it went on like BUTTAH!

As soon as I started cutting in around trim, I knew I had made the right choice. This hue of brown is moody, and adds so much coziness to the space. Perfect for a bedroom. It immediately started to transform the space. Don’t you just love that about paint? It can change the mood and feel of a space almost instantly. And can we talk about the contrast against that Snow White | RO42 trim? AHHH it’s just so good!!!

Now, let’s get to those AFTER shots, shall we?

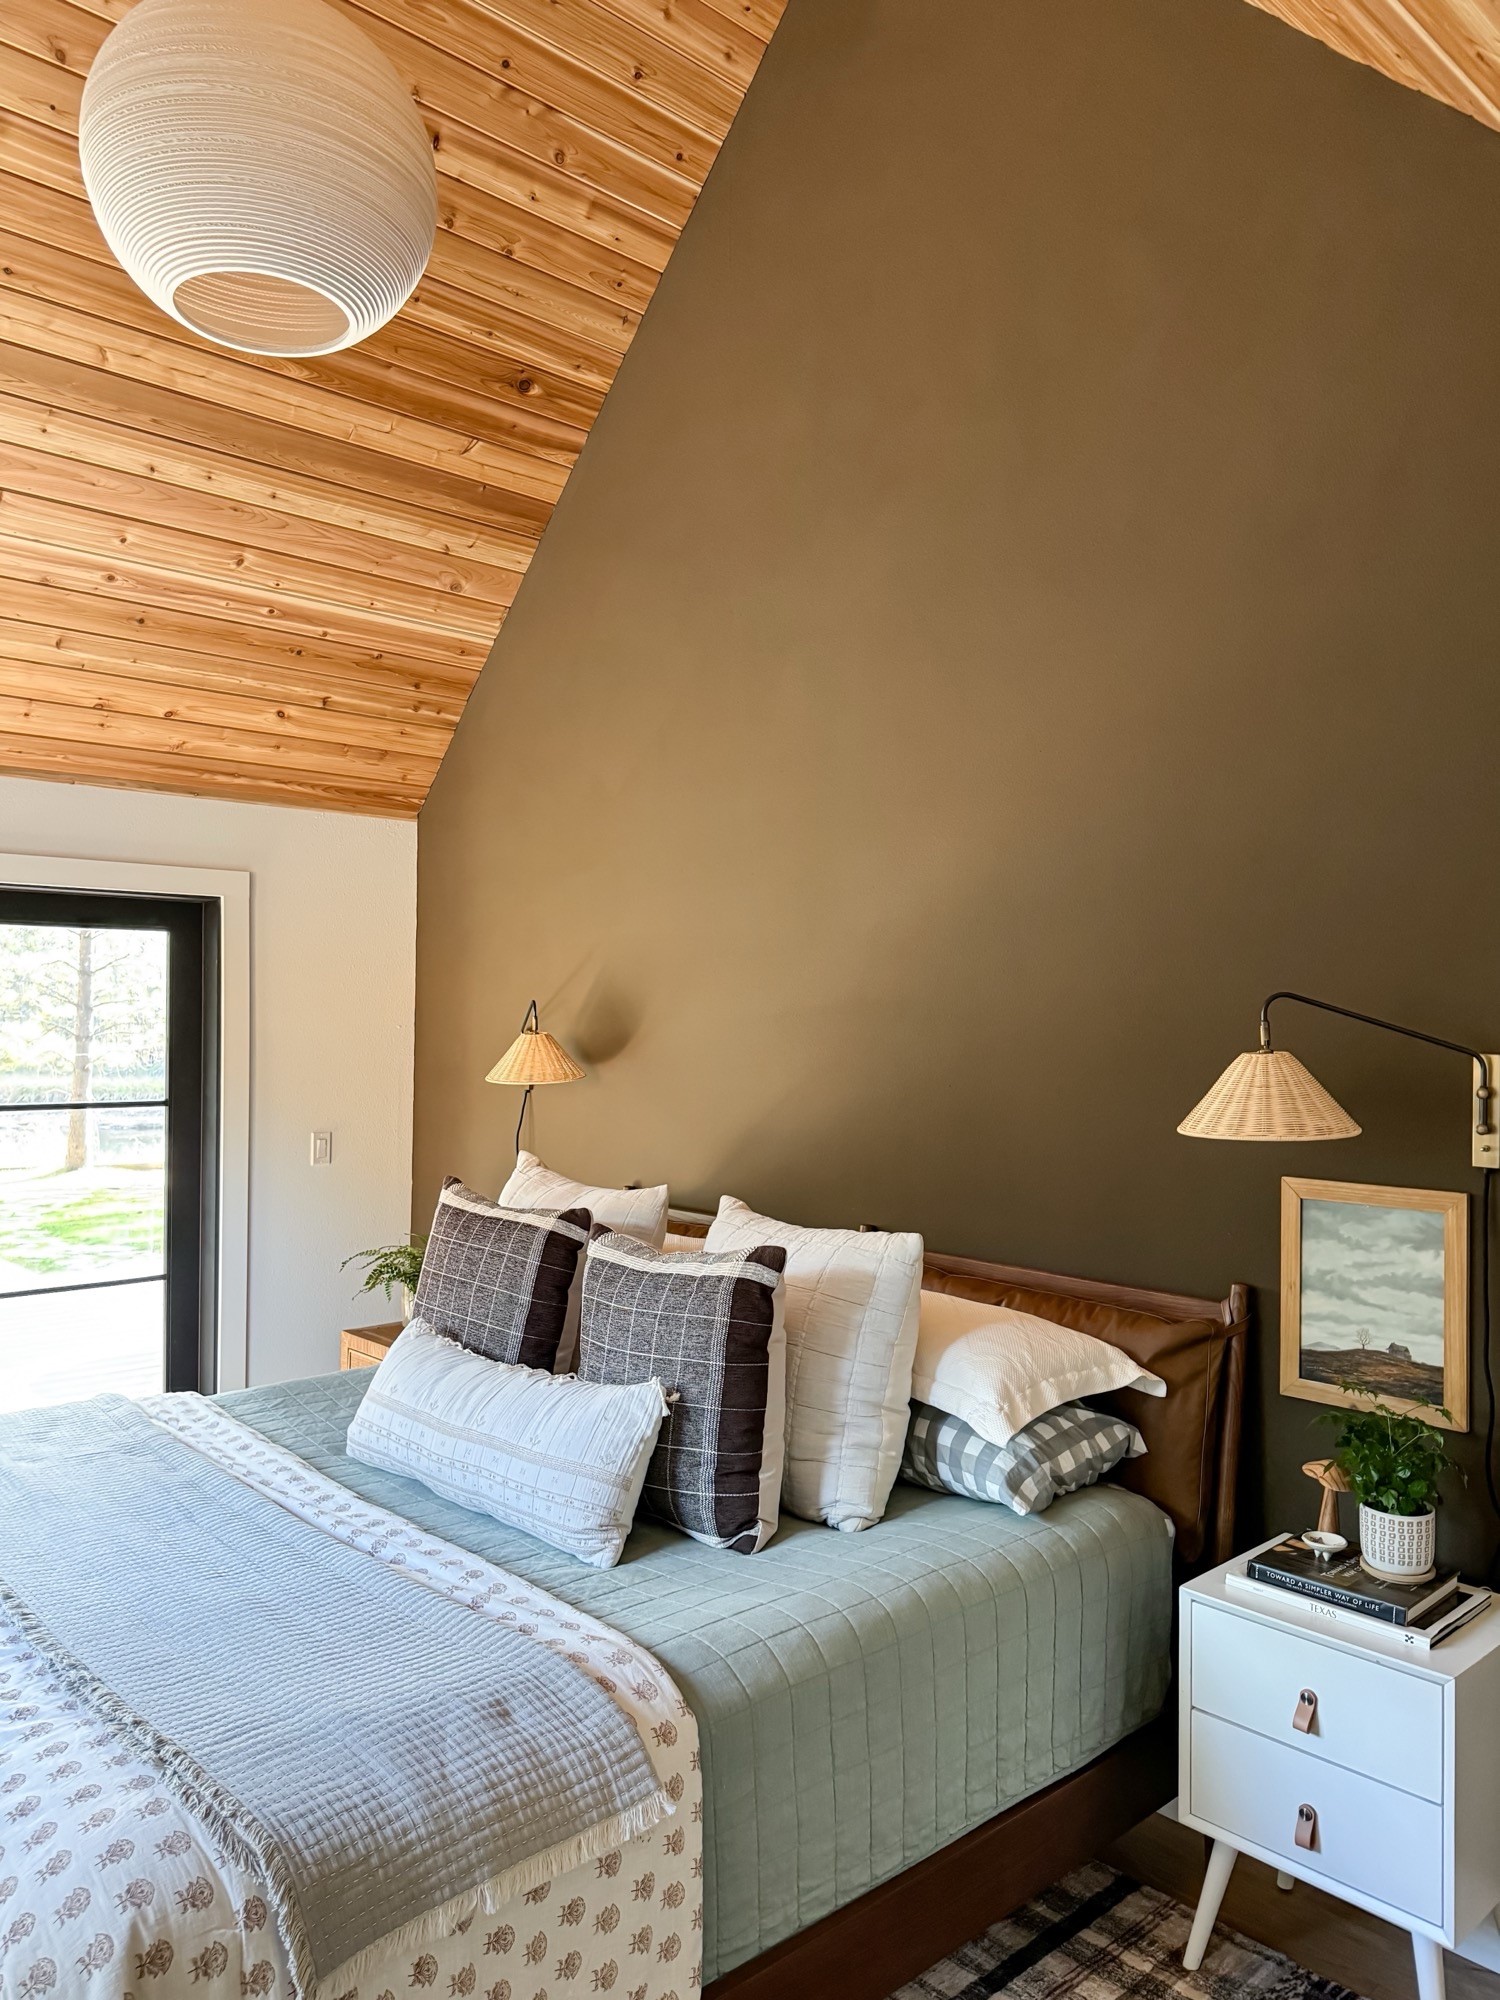
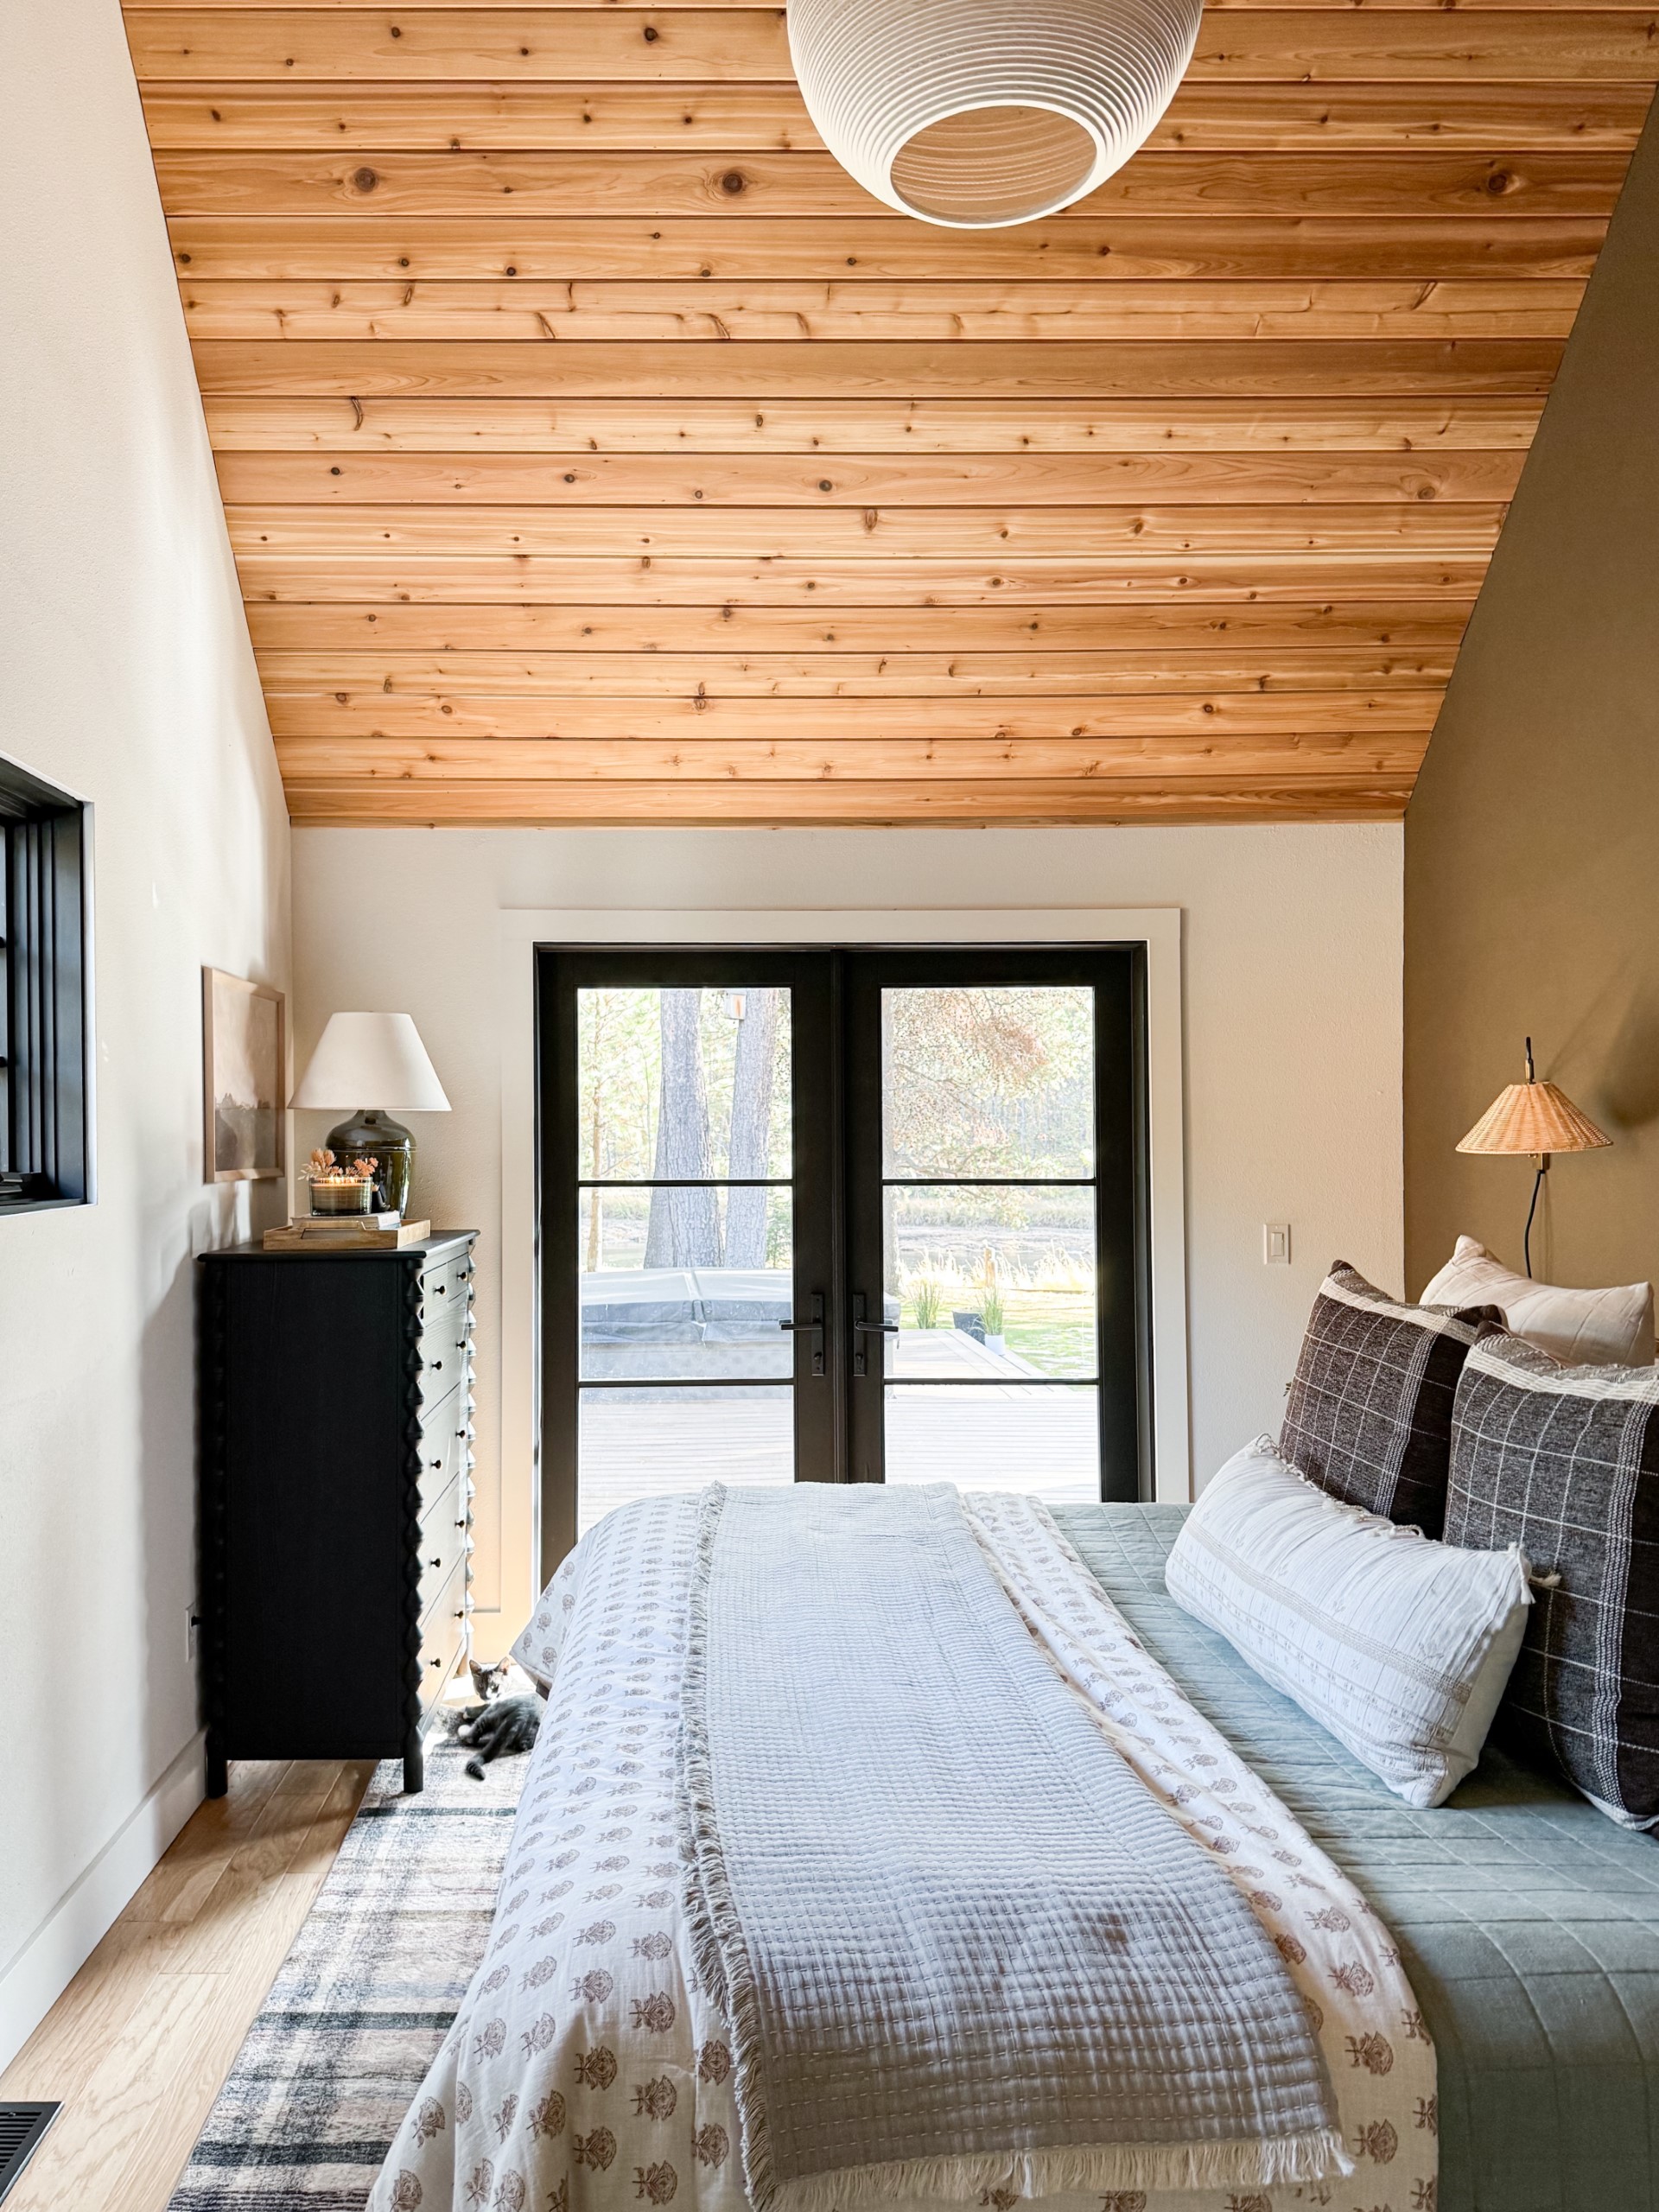
For this space, because it’s relatively small, I wanted it to be clean and simple. With no extras and definitely no clutter. With the vaulted ceilings and the pop of color that is the accent wall, I think it’s visually interesting, without feeling too busy. I haven’t even hung any art above the bed because I haven’t found anything yet that feels right. The hunt continues on that front…

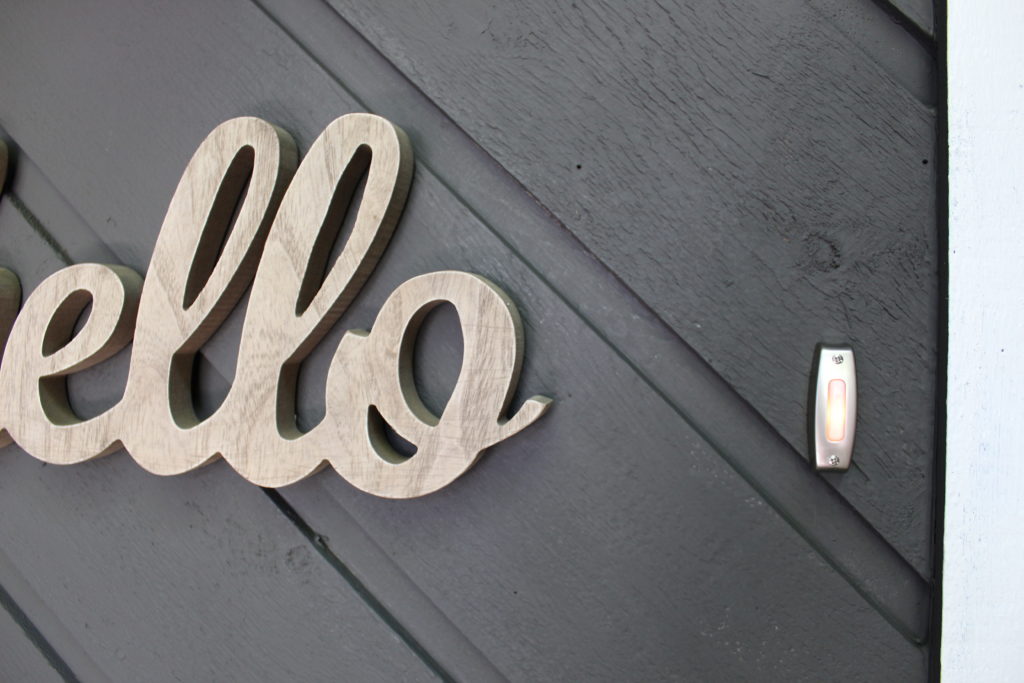
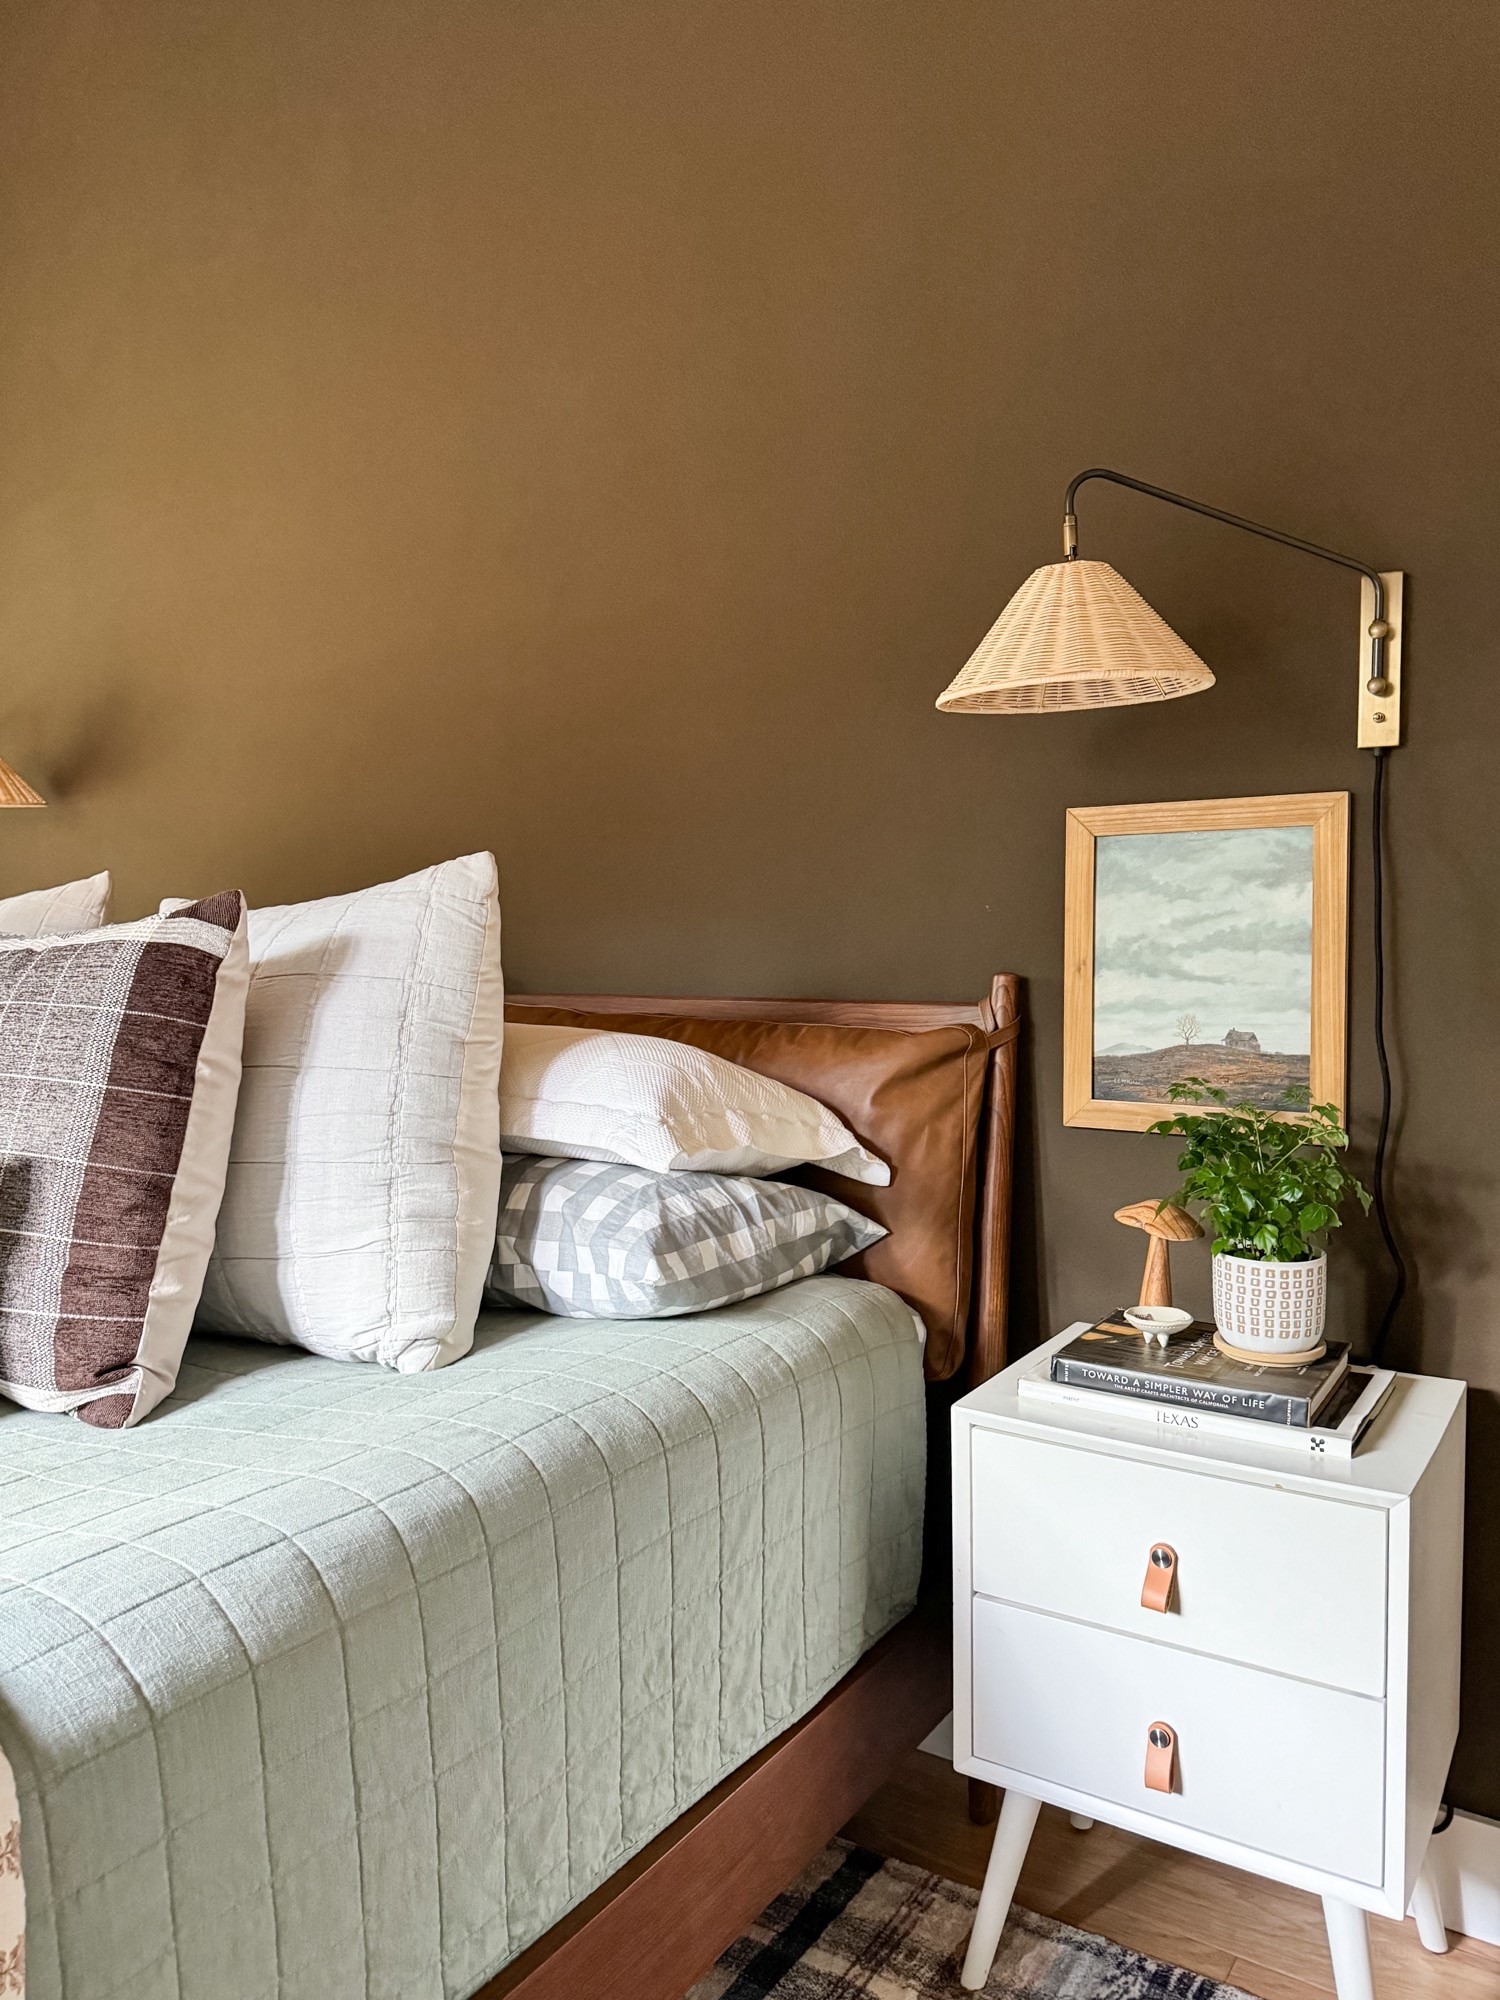
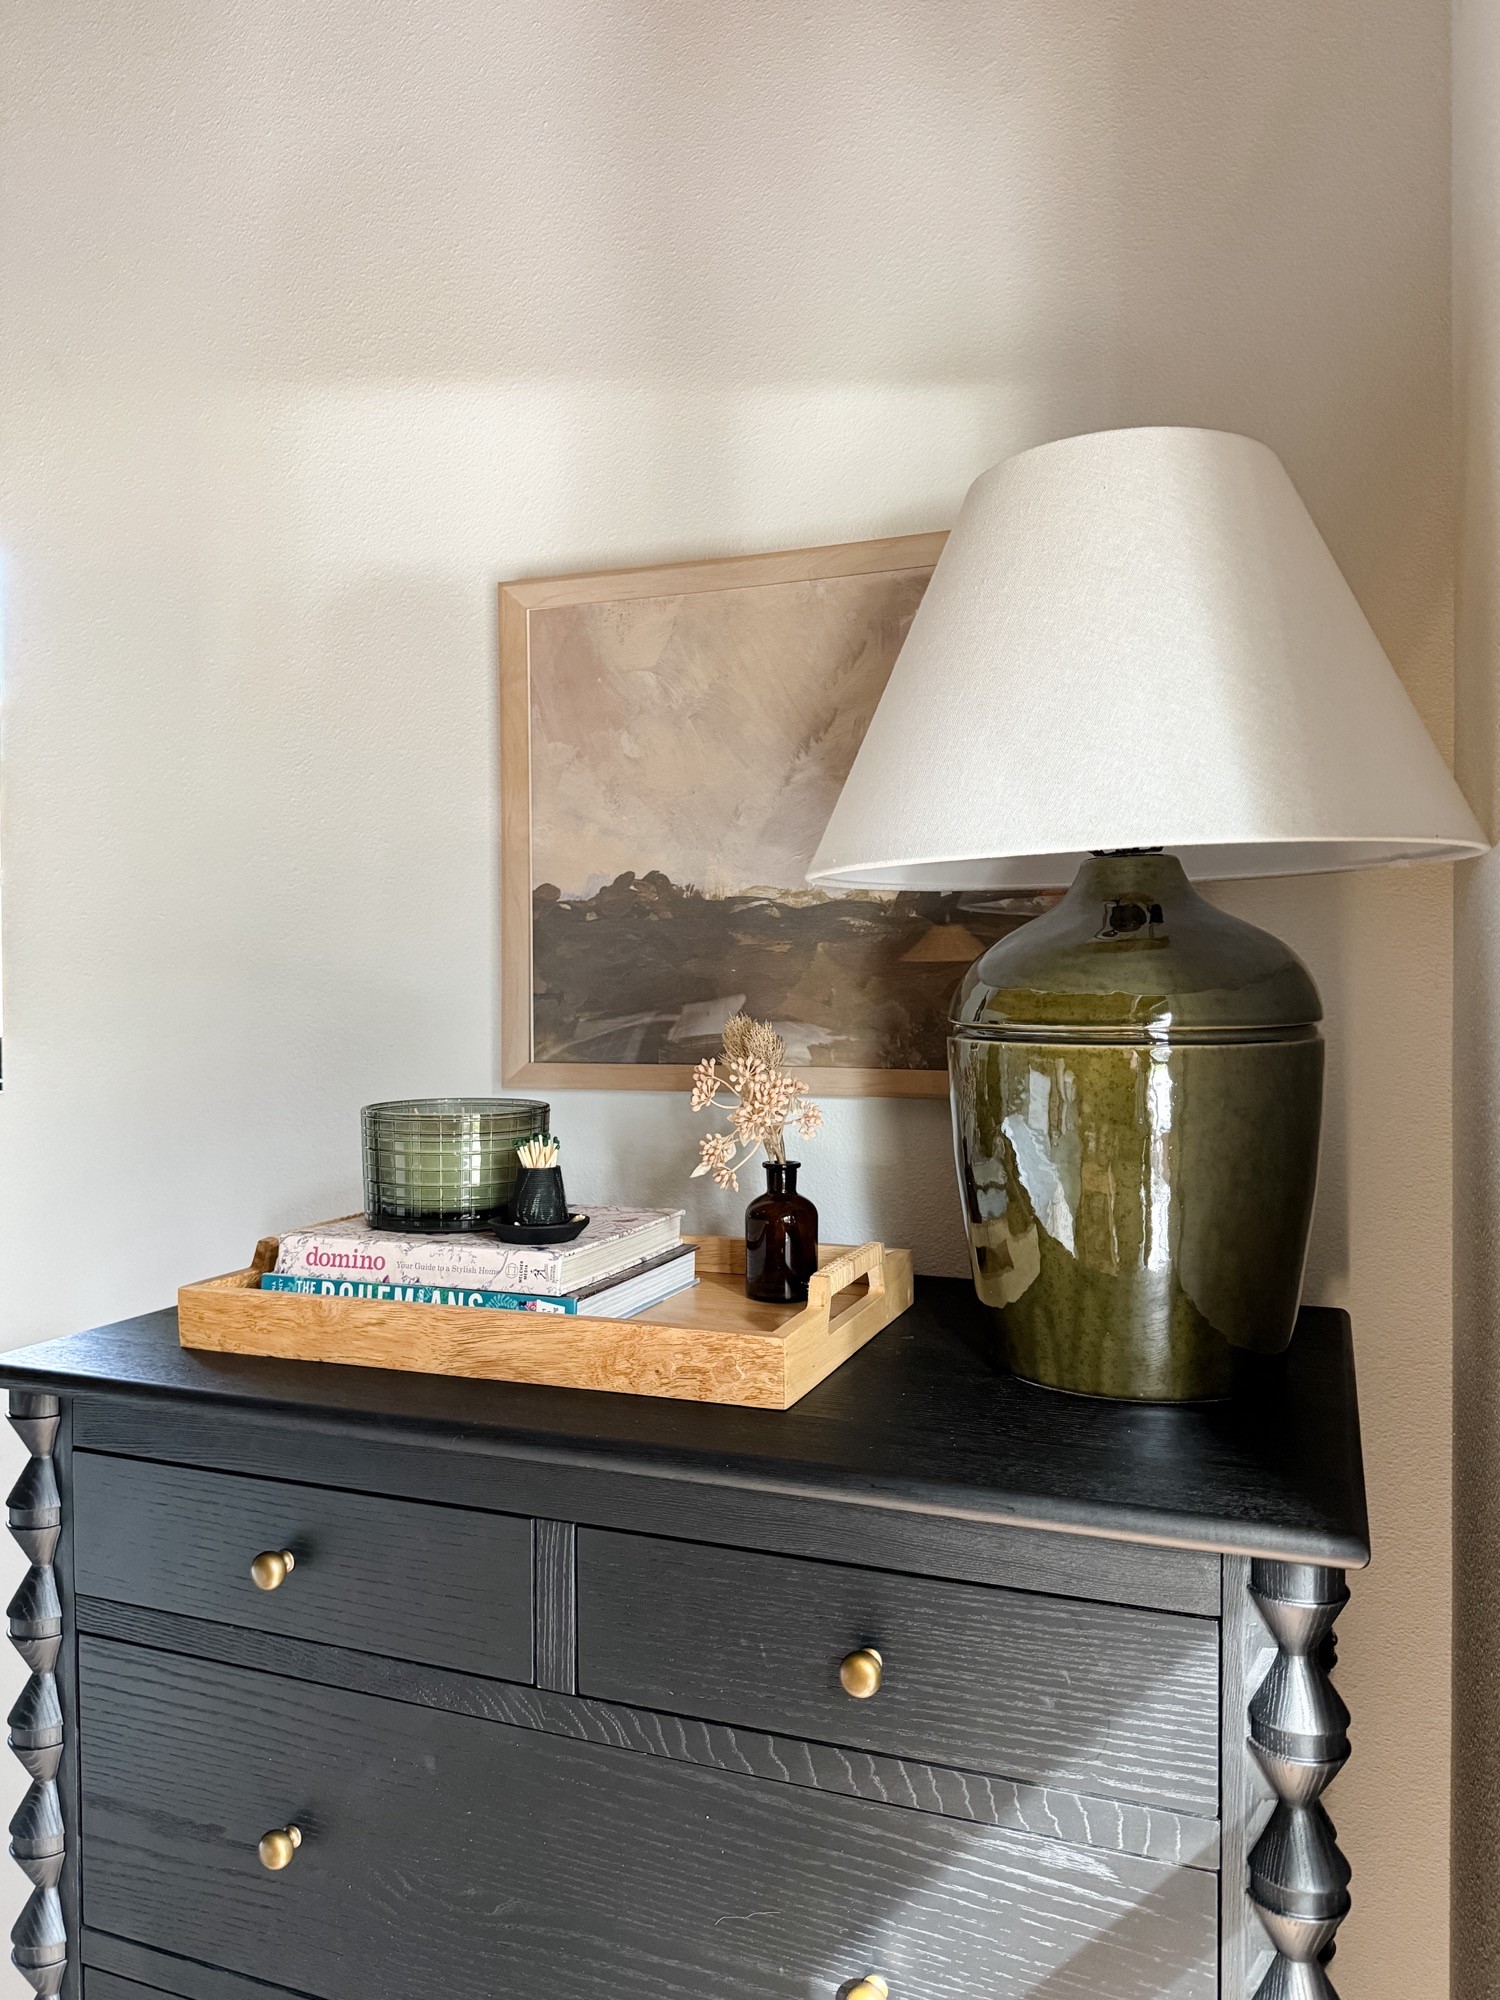
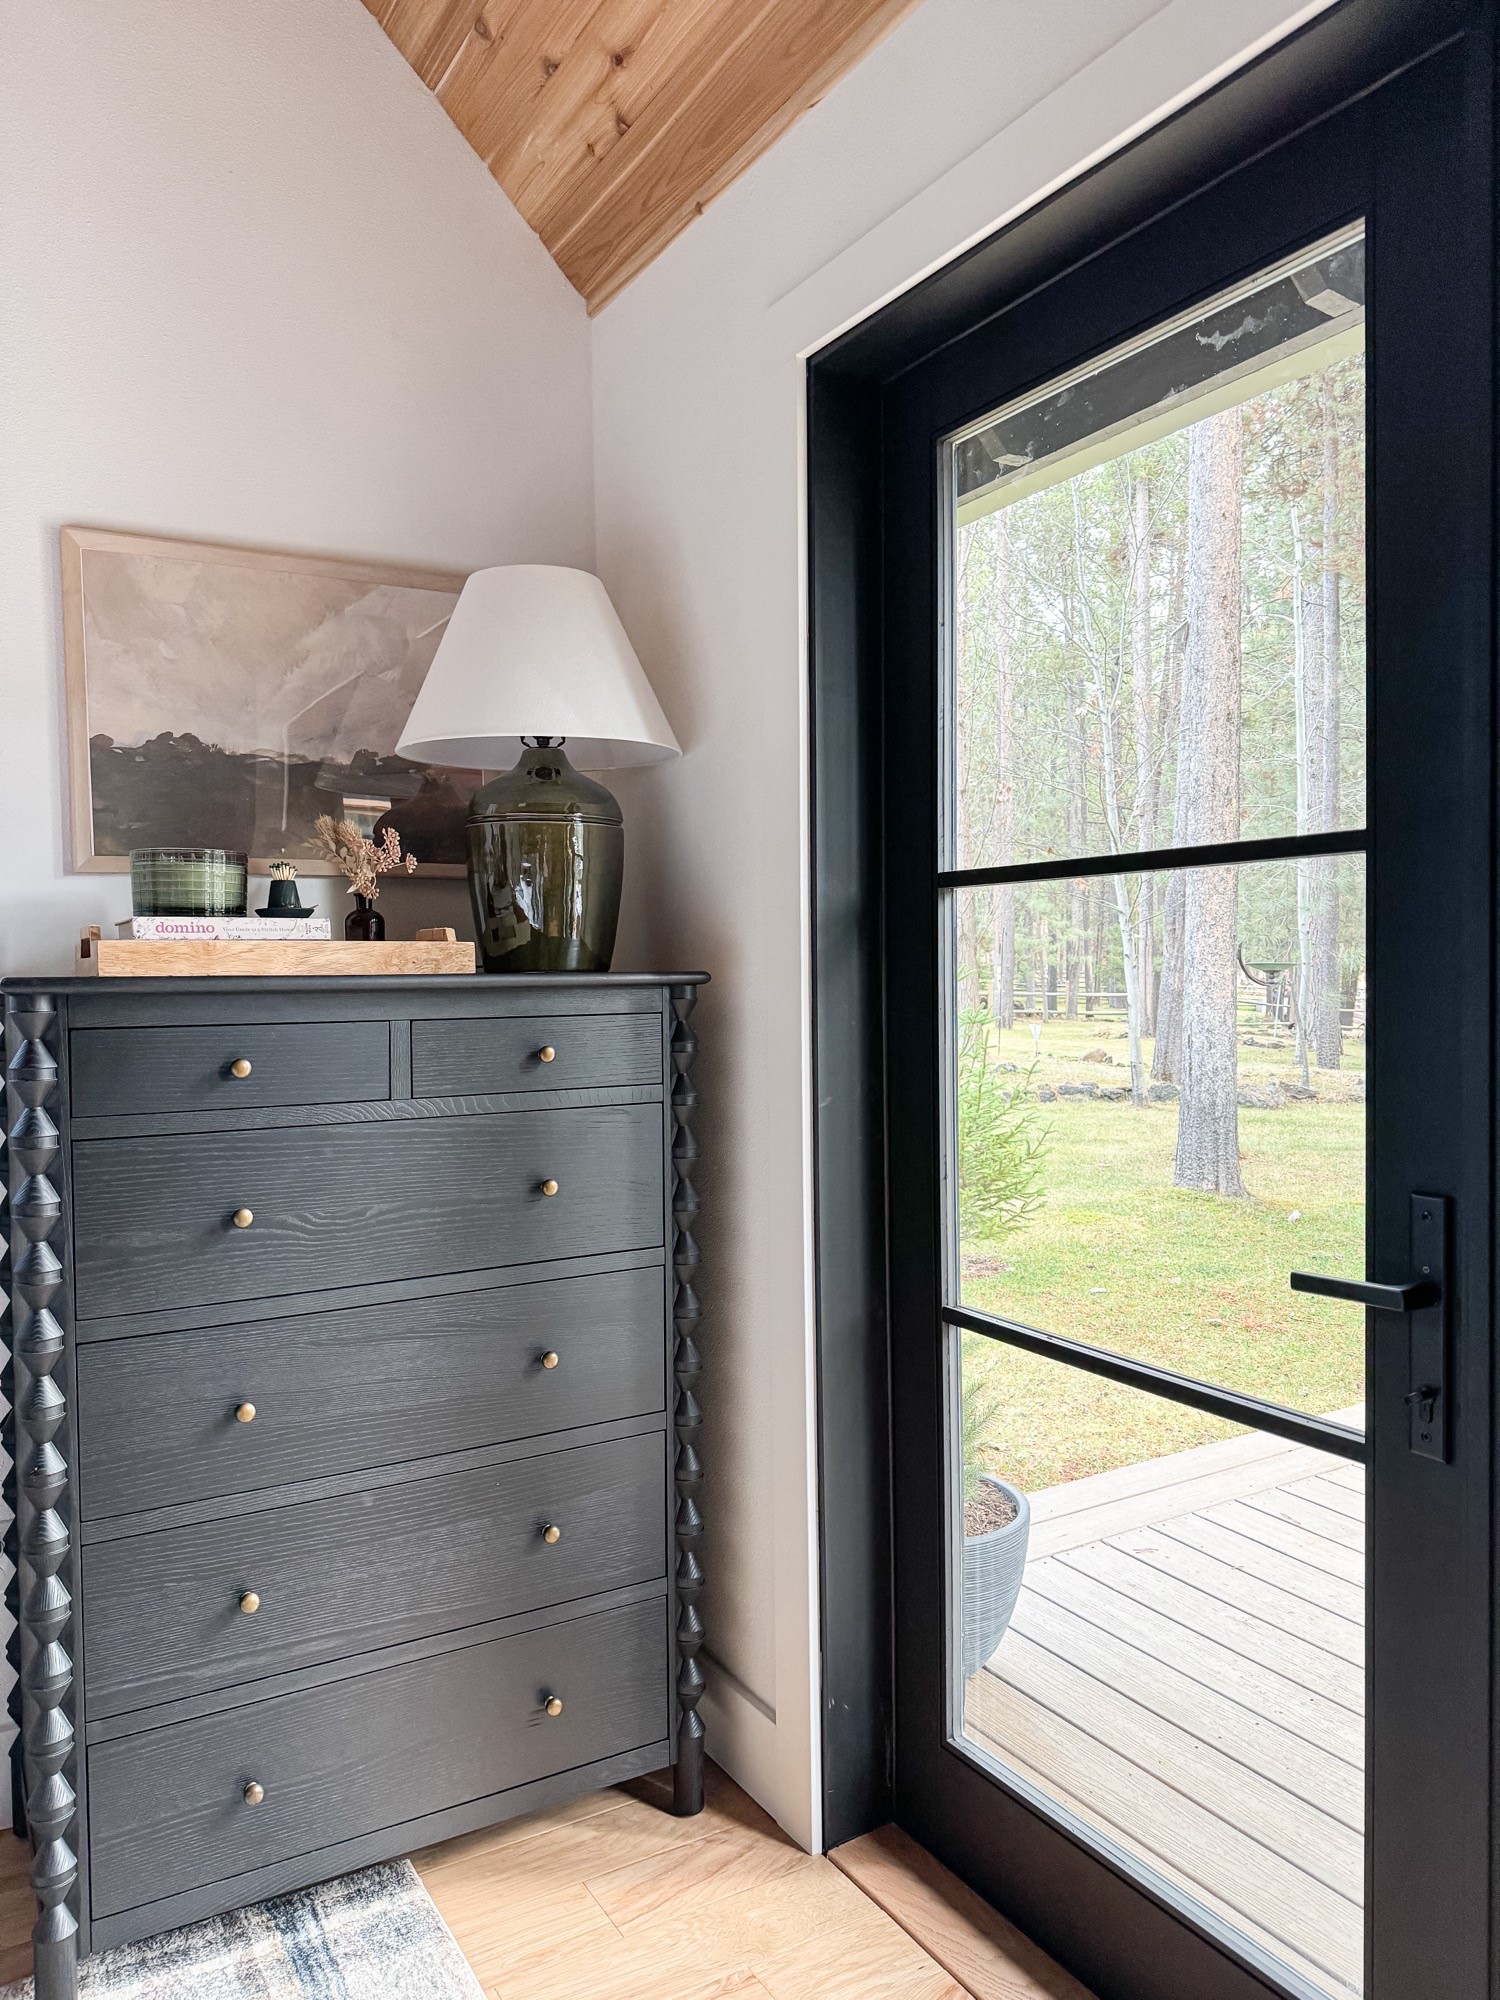
I chose this dresser because I loved how it complemented the black windows and french doors, and also because space was a factor. It was tough to find one that fit our small space and this one was not only beautiful, but actually fits in the spot that I had in mind for it! The bed has leather cushions that attach to the headboard, and I love how it has an monochromic effect against the rich accent wall. It seems to be discontinued now, but this one is quite similar. The plaid rug felt like the perfect nod to the Pacific Northwest, and I also loved the way it looked with the cedar ceiling. These sconces are my favorite – they add some nice texture and they plug-in versus being a traditional hard-wire fixture. Installing them is a breeze, and you won’t even need to call an electrician! This nightstand is such a classic piece, and I have been considering adding a second one to the other side of the bed, so they will match. Finally, this pendant is airy and bright and I love the round shape against the tongue and groove on the ceiling.

You can really see below how the color changes depending on the light. This photo was taken late in the afternoon as the sun was getting close to setting. That’s when this hue is the most moody, almost black. It’s very calming.

I love our new primary bedroom so much! Originally, I worried about how this new space would blend in with the original part of the house, but now it kinda feels like it was always here. I feel so grateful, and am even more grateful to the wonderful folks at Miller Paint who were so patient with me during this loooong process. A very special thanks go to Steph and Puji. We are so happy, and even Milton (our new kitten) approves! What do you guys think? Tell me everything in the comments below! XOXO

DIY tribal stamp

IMG_0600

Last week I shared a photo of my newly stamped entryway because I was trying to decide how I felt about the finished product. This week, I am feeling exactly the same! I STILL can’t decide if I am loving it or hating it. The good news is that this project cost $0 in materials and used just a little bit of paint that we already had so we aren’t talking about life altering issues here.

It is so much more fun to complete some “fluff” projects around here since we have finished the ceilings and can finally move on with our lives. This is a really fun one and I think with just a few tools, anyone could do this.

We had some scrap wood laying around the garage and I asked Nate if he wouldn’t mind using some of those spare pieces to make an isosceles triangle for me (whoa…isosceles…haven’t used that term in a while). After a strange look, he agreed and it took him less than five minutes. I grabbed an old terry cloth dish towel, wrapped it around the edges of the triangle and secured it with hot glue. HOT GLUE, what?!!! I know, I couldn’t find my staple gun. Simply stapling the cloth to the wood would make way more sense. But, if you’re like me and your garage is a black hole where you can’t find anything, go ahead and use hot glue. It stayed in place throughout the whole process so it actually didn’t turn out to be a problem. Except, I still don’t have any idea where my staple gun might be…

IMG_0617

IMG_0618

For the paint, I just used some of our flat, white ceiling paint for this job. I poured just a little bit onto a tray that was wide enough to press the stamp down into the paint. I found an old plastic charger from Christmas a few years back. Fancy shmancy, right?

IMG_0620

As for applying the pattern to the wall, it was pretty simple and I mostly just eyeballed where I wanted everything to fit. I didn’t want the pattern to look too perfect or planned out. I think that would take away from the “tribal” effect. I set up a laser level to help me keep my triangles in straight lines, vertically. However, I just used my fingers to measure how far apart each row went horizontally. Totally easy. Just make sure to not use too much paint so you start looking gloppy and runny.

IMG_0622 - Edited

IMG_0621

Notice the trim and closet doors?? They are white! Beautiful. Clean. White. I can’t get enough of it. Soon, I will have all the trim and doors painted white. I will post on that soon! Here is an after shot with the entry looking all pretty again.

IMG_0600

I will live with it for a while before I make up my mind. Originally, I was going to do all four walls with the stamp but after I finished the first wall, I thought maybe less was more. Well, we will see.

#housegoals

Have you ever watched an episode of House Hunters? Well, I have. More times than not, a couple goes through a property and they start saying things like, “we would need all new floors, the bathrooms need to be gutted and everything in the kitchen needs to go.” Nate and I were just as guilty as these folks when we looked at our house. We actually said those things! These “simple cosmetic swaps” mean major work which also means major money.

So Nate and I have been discussing which projects are realistic for us as we plan on doing most of these ourselves. We also flip flop back and forth as to which improvements would make the most impact for resale value and which ones we have to get done for our own sanity (like our beautiful pink exterior before we painted last weekend). Ideally, we are hoping that most of our updating will fall into both categories. But, I think we have come up with a list. Not a to-do list because I don’t even like to read my own to-do lists but more of a list of goals we want to accomplish during our time here. Here we go!

  • New floors – this is going to be the biggest and most expensive project that we tackle here. Currently, our house has brownish, beige, gray carpet in the bedrooms and living room while the entry, kitchen, dining room and hallway has cream colored tile. Tile seems to be very popular here in Texas and I can understand why. It is a very durable, hard surface that also stays very cool to the foot which is a bonus with the warm climate. For us, tile doesn’t seem to be a very livable surface with little kids and clumsy adults. Everything that is dropped on tile, undoubtedly breaks. Toys, dishes, phones, iPads and dog dishes don’t stand a chance if they are dropped on tile. Also, I have to close my eyes and hold my breath if I see a dripping wet kiddo hop out of the bath and run down the hallway. Yes, we have had quite a few slips and head bumps. But I have big dreams of wood floors and wood floors that span everywhere in the house. Kitchen, dining room, living room, bedrooms…basically everywhere except the two bathrooms. Since Nate and I both have zero experience installing floors of any kind, we will hire this job out and leave it to the pros. So let the saving begin! And while we squirrel away our pennies to get these floors done, I’ll be daydreaming about oak…hickory…engineered wood…bamboo. Wouldn’t something like this just be a game changer? I think so…

floors

  • Painting the Exterior – we are mostly done with this baby! Some touching up and trim work still needs to be done but I think we can call this one done.
  • Landscaping front and back yards – the house is kind of a blank slate as far as landscaping goes. The flower beds around the house need to be filled with…something. I’m just not sure what yet. One of our neighbors has this whole landscaping thing figured out. I am hoping our flower beds can be as beautiful as this house.

IMG_0431

  • Adding a patio to the backyard – I would like to put some kind of material down in the screened porch on the floors and extend this flooring out onto some kind of a patio so there is a place to spend time in the backyard outside of the screened porch.
  • Scraping the popcorn ceilings and texturing/painting – the scraping part is done. The texturing and painting of the ceiling still has to be done. This job actually might kill me…the jury is still out. I’ll keep updating as I go.
  • Painting trim and doors inside house – the trim is currently stained an almost black color. I want to lighten this place up and paint everything white.
  • Whitewash the fireplace brick – in my quest to lighten and brighten, the fireplace needs a dose of white paint too. I’m going to try my hand at whitewashing.
  • New appliances for the kitchen – our current appliances are old and white but are functioning fine, for now.
  • New counter tops for the bathrooms – the plan is to keep the current vanities with some updating with paint and hardware. But, counters are a must.
  • Paint the front door – I can’t decide if it needs to be replaced or if paint will be enough. I’m debating between these two colors right now. Thoughts?

Valspar-Full-Sun-EB1-1 Valspar-Wasabi-W35010A

So these are our goals as of right now. I’m sure we will change our minds about some of these but for right now, this is what we are planning. There’s definitely no shortage of things to do but I love a good challenge and these projects are definitely going to challenge us.

The house is painted!

Well, we did it! The house is painted and we are so happy with how it looks. The weather was kind of tricky here to plan this project around because we knew we wanted to paint before it was too hot but also didn’t want to have to combat the rain that we have been getting here in Central Texas. So, finding that sweet spot right in between the two was tricky, but I think we did it. It was still pretty hot for a couple of Northwest peeps but we just kept reminding ourselves that this is just the beginning of the heat that is to come! Sounds like the name of a really bad movie about the apocolypse, The Heat that is to Come. I’d probably go and see it. Anyways, we are hoping that, in August, we’ll be glad that we did it in June.

We rented a paint sprayer from Home Depot and Nate picked it up first thing in the morning. He has used this same sprayer a couple of times before so it was helpful that he was familiar with how it worked. But, it’s pretty simple to figure out even if you haven’t used one. A little trial and error and you should be good to go. The biggest problem you can run into with using these sprayers is spraying on your coats too thick. Think light coverage with multiple coats and you should avoid those pesky drips. Here is yet another reminder of what our house looked like when we moved in.

IMG_0087

Here’s where we are at today.

IMG_0395

Love this. There is actually still a lot of work to do and touch ups all over the house. The open beams in the entrance still need to be painted to match the body of the house and close up, there are many spots that still need some attention.

We also went ahead and updated our exterior lights, doorbell and house numbers. When Nate was hanging these for me, I kept thinking about how these details are like accessories. Like a good pair of earrings, but for the house. The house numbers used to look like this.

IMG_0370

 Now, look like this!

IMG_0389 - Edited

IMG_0392

We couldn’t be happier with how it turned out! Even some friendly folks from down the street have stopped by to tell us how much they like our colors.

IMG_0393

I love the contrast. It feels so fresh and with the new paint and accessories, the whole house is taking on a much more modern feel. Before we painted, the house didn’t really have any particular style or category that it fit into besides 80’s ranch style. Now, it has some much needed personality.

IMG_0390

IMG_0391

IMG_0387

IMG_0397

IMG_0388

While we still have some touching up to do, we can check this off our list of to-do’s. And this was a biggie. But, it feels really good that we did this ourselves. Back inside I go to get back to mudding and texturing the ceilings. No more excuses!