I Can See Clearly Now: My New Kitchen Windows

This post is sponsored by Sierra Pacific Windows. All opinions are my own.

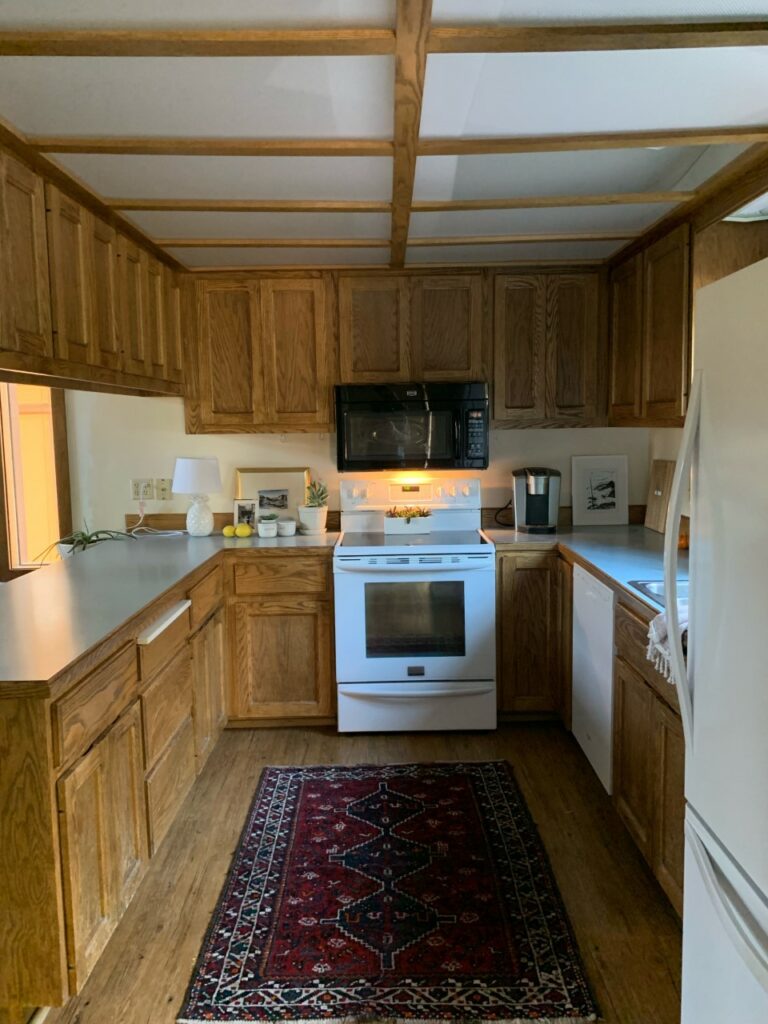
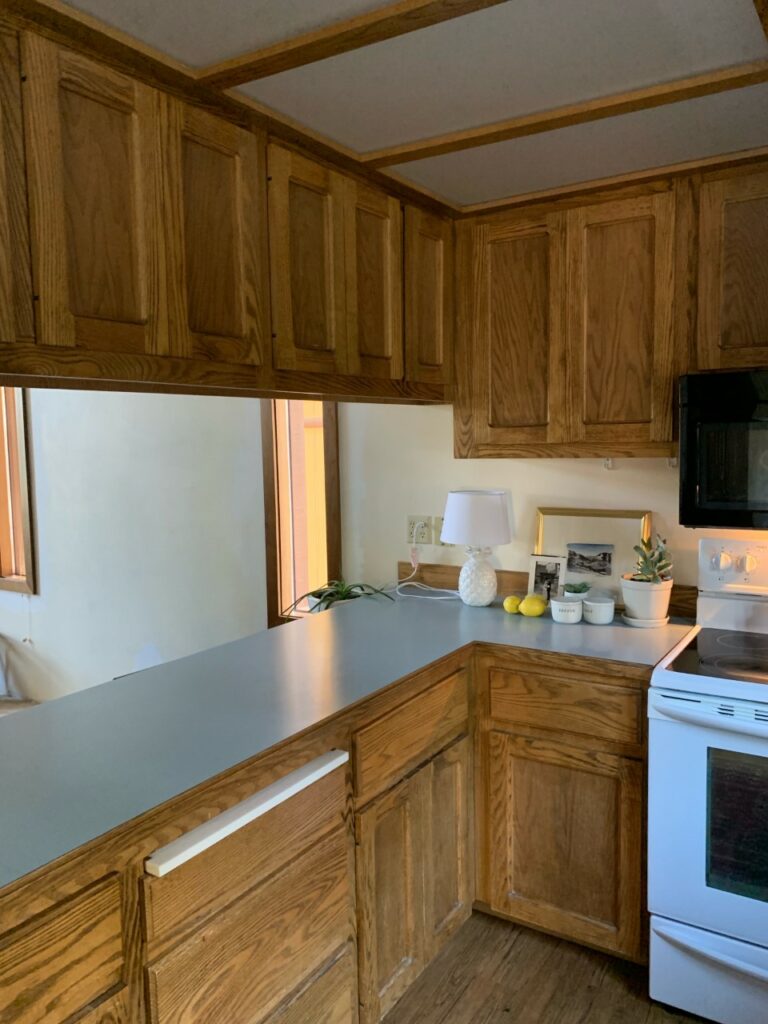
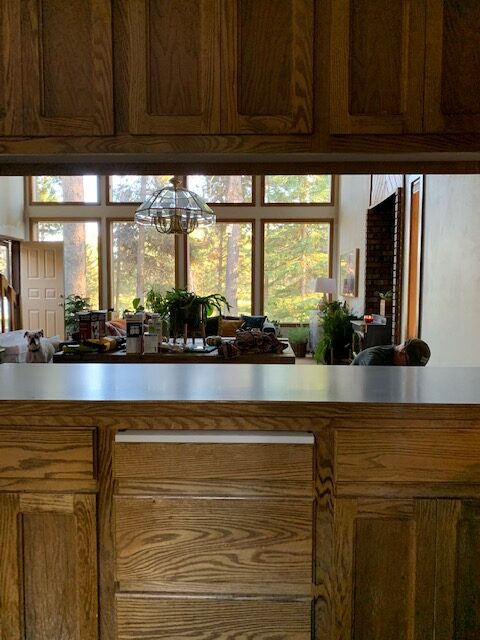
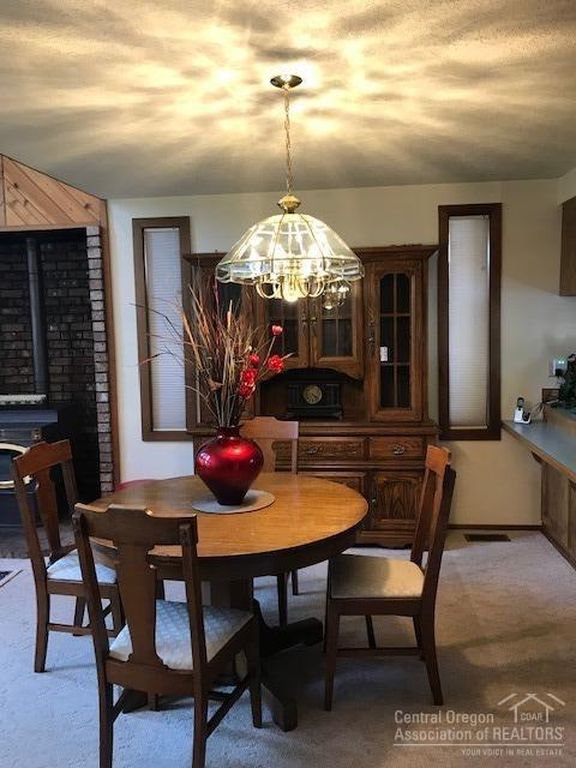
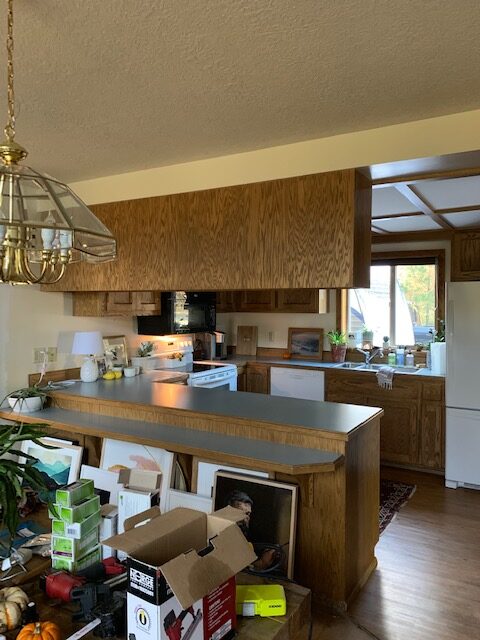
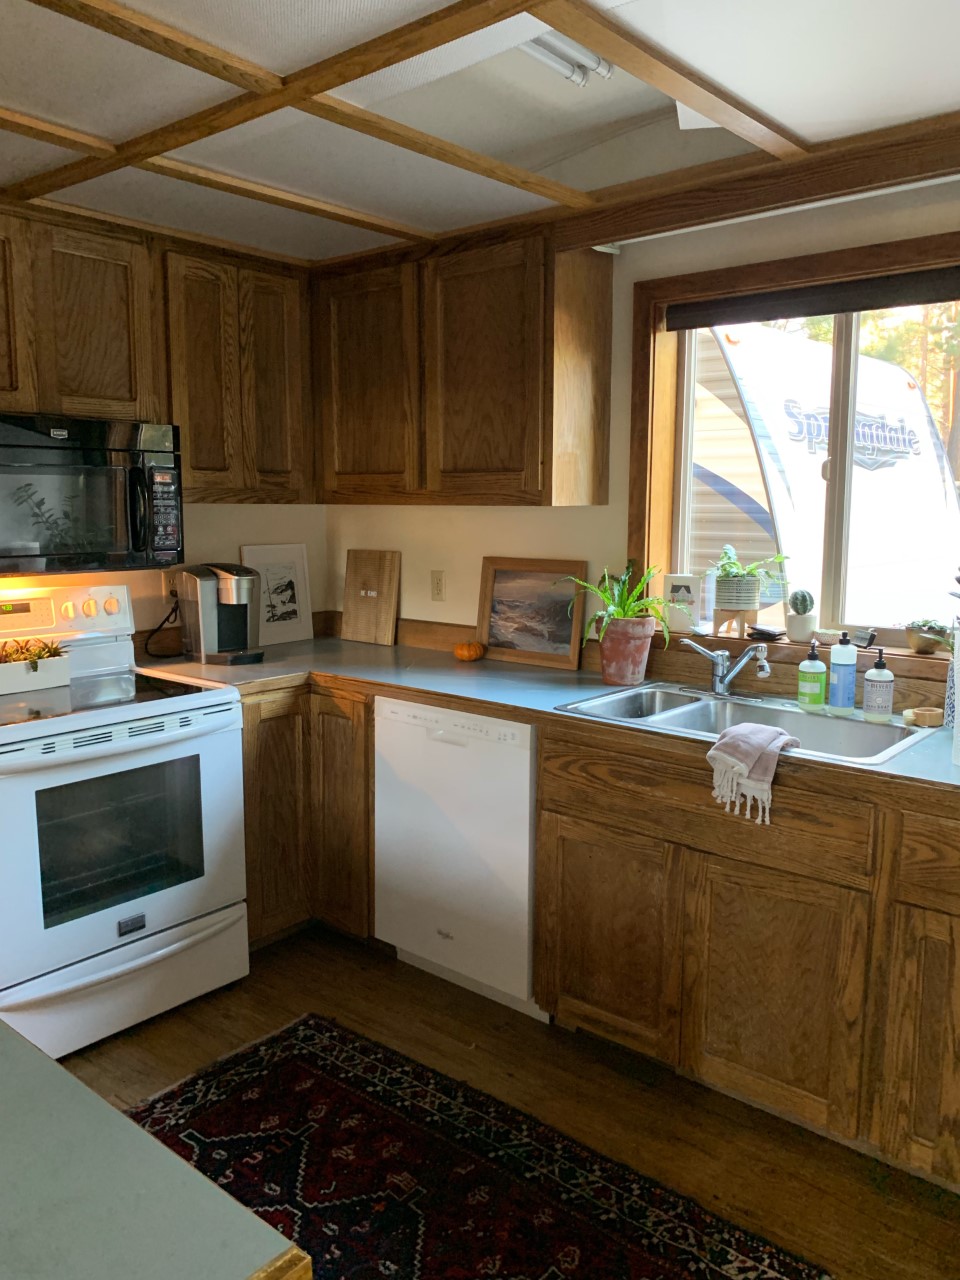
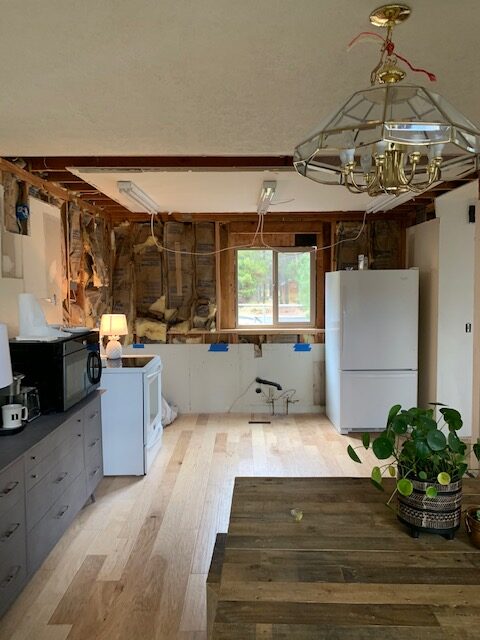
Hi guys! I’m back today to fill you in on some more kitchen details! We recently remodeled our kitchen in our new house, as part of the One Room Challenge, and we added the most beautiful windows to the space. I’m not sure if I’ve ever shared before, but my Dad(who can almost always be seen in all of my insta stories, working along side Nate) worked as a Commercial Glazier AKA he installed windows, for more than forty years before retiring six years ago. And on one of our many walk-throughs of the new house during the purchasing process, pointed out how he thought that the old kitchen window was feeling a little “skimpy.” When he said this, I looked at it and instantly knew he was right. We actually have a lovely view from the front of our house, we just needed to showcase it!

See what I mean?

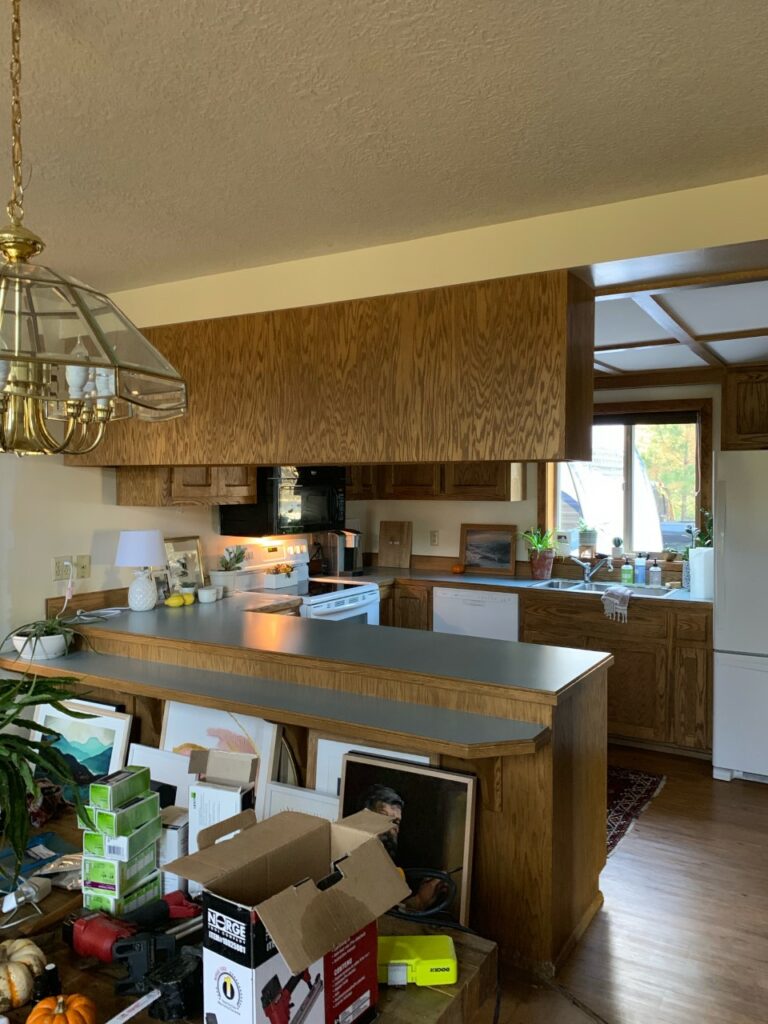
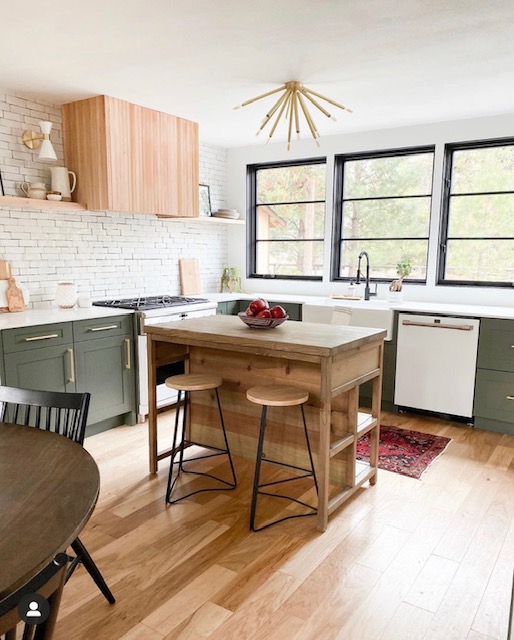
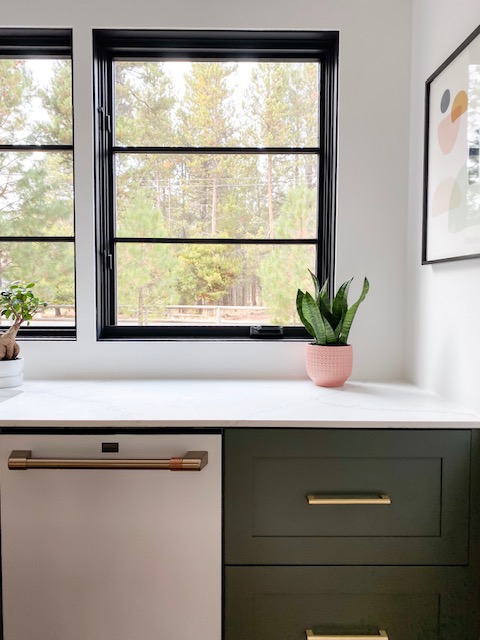
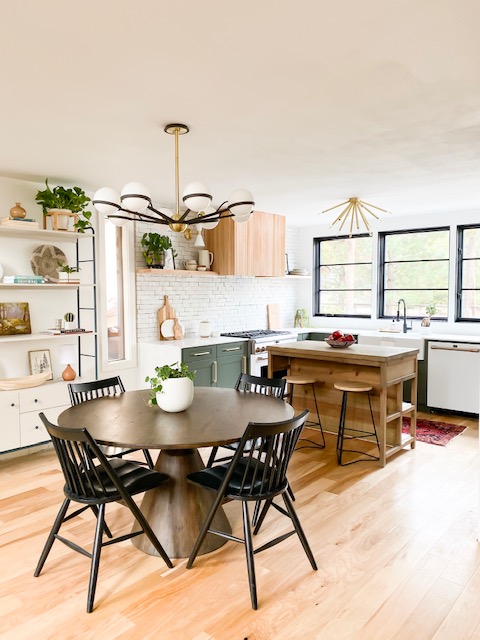
And wouldya just take a look at the difference! Here’s how the kitchen looks now!

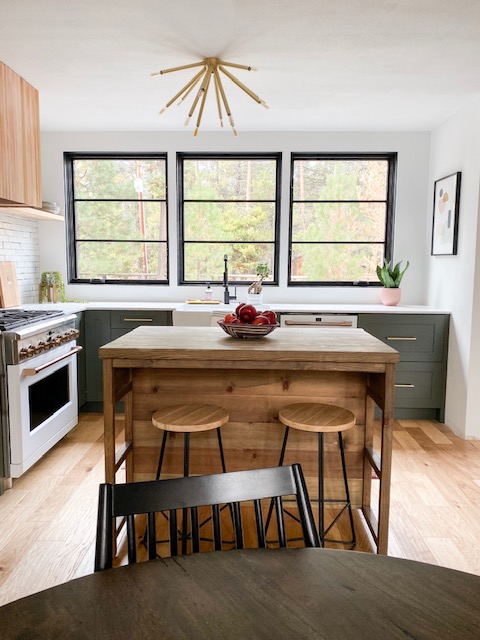
Isn’t it just amazing how transformative windows can be? There’s a lot of buzz around furniture, art, and decor…you know, all the pretty things. But, adding an architectural element, like windows, is a game changer. I read a blog post by Emily Henderson where she said, “a small odd vinyl window can ruin a perfectly good room, but a large pretty window that is rightly appointed can literally make a room.” Well, I used to have that small odd vinyl window and replaced it with three (imho) rightly appointed windows…and woweee, was she ever right?! I’m still shocked sometimes when I look into that kitchen and see those beautiful windows staring back at me. I LOVE them.

Like any good fairy tale with a happy ending, I found my knight in shining armor, with Sierra Pacific Windows. When they agreed to partner with me for the One Room Challenge, I was over the moon! But, even with all of my Dad’s window expertise, I was still a little hesitant about replacing windows. It just seems so intimidating! Even the ordering process seemed like it might be tough. What if my measurements are off? There are so many styles of windows; how do you decide which one is best? Well, Sierra Pacific Windows made it SO easy! Allow me to break down their ordering process for you in case you’re intimidated, like I was.

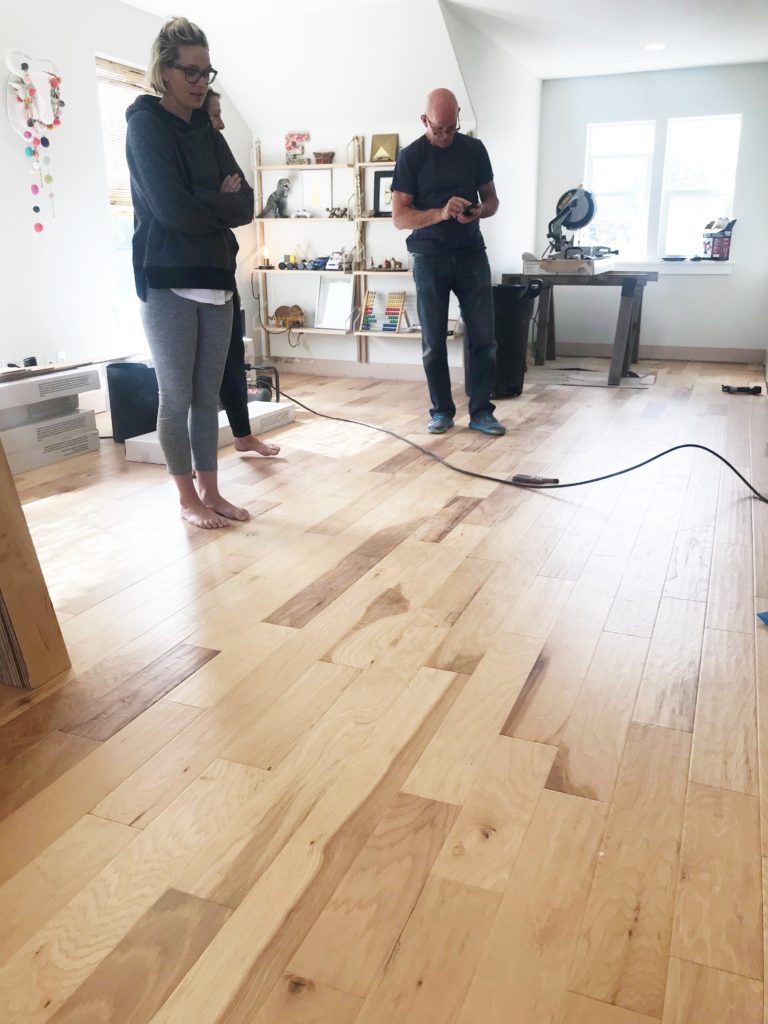
They put me in touch with their local territory manager, Ted, who let me know that he would be happy to come and meet me on-site to talk through details and measurements. We agreed on a date and Ted met Nate and I at the new house where I filled him on all the details about the (massive) project and described the look I wanted. I had been dreaming of a more modern look for the kitchen and adjoining living space and most importantly, allowing some more light to flow throughout the house. Ted was so knowledgeable and educated me on all the options that were available, and also did all the measuring for me…whew! I was so worried that I might flub a number and then my windows would arrive, only to not fit properly. A MAJOR mistake. But after he left, I knew I was in good hands. The next day, he emailed the quote for the windows with all of their specs for me to review. When I was satisfied with how everything looked on paper, I signed off and he finalized the order. Seriously…so easy. Ted was so patient with me as I had a thousand questions along the way and even tweaked the measurements, and added the three lites at the last minute. A few weeks later, they arrived at our door. Easy peasy.

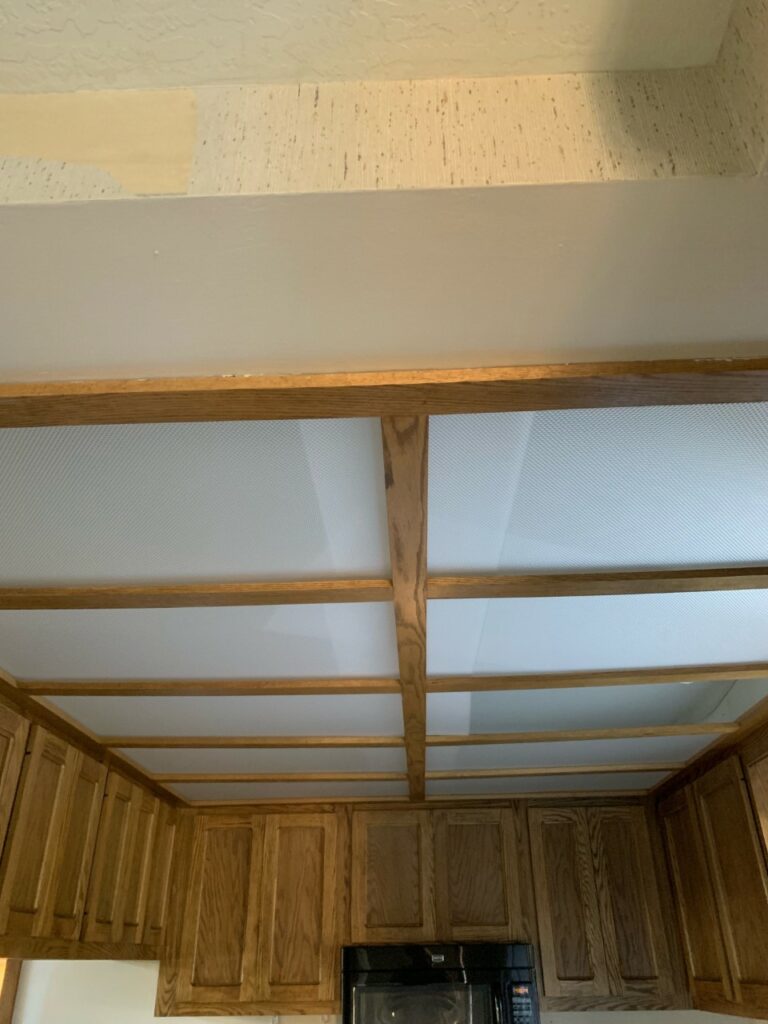
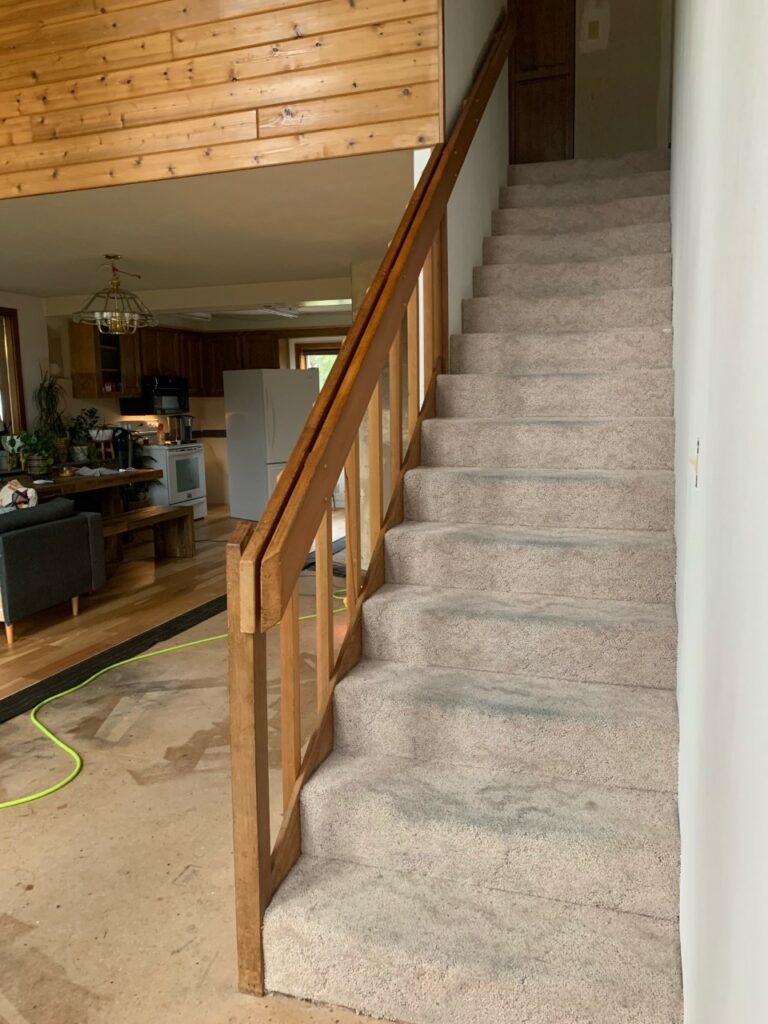
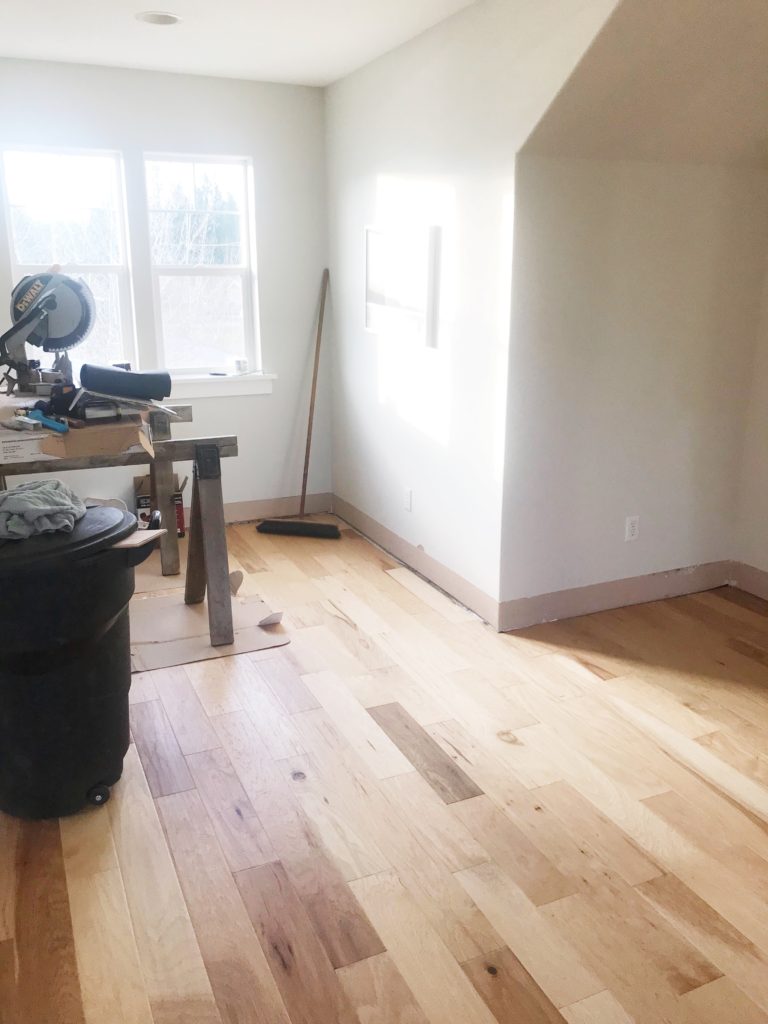
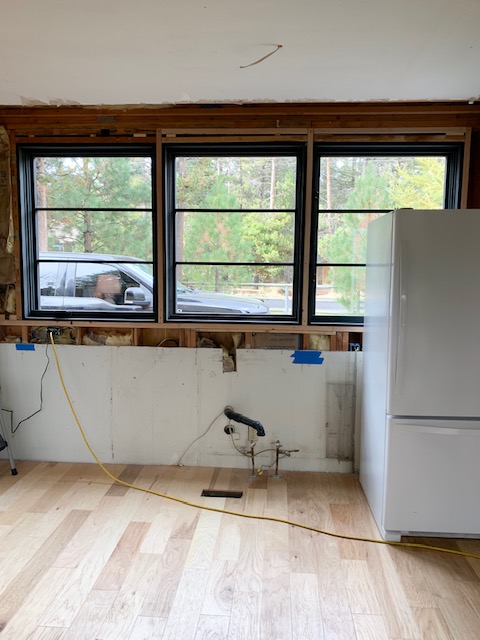
Here’s a progress shot of the kitchen after demolition but before the new windows were installed.
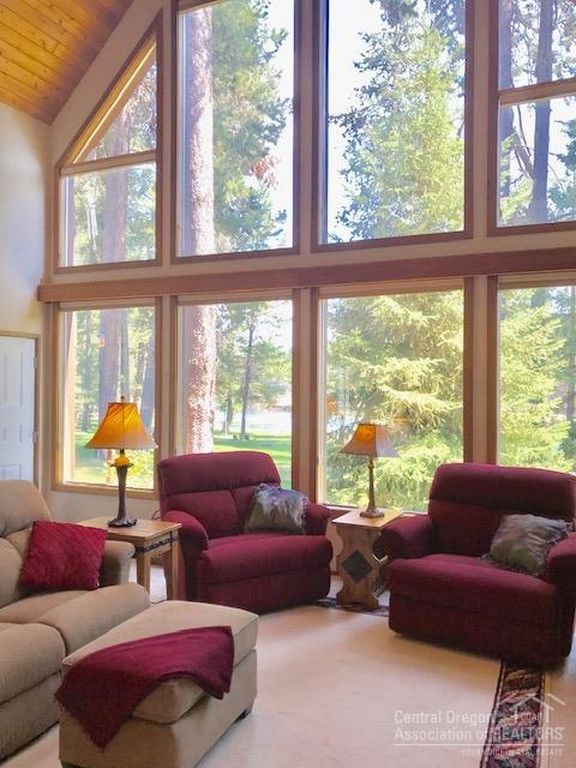
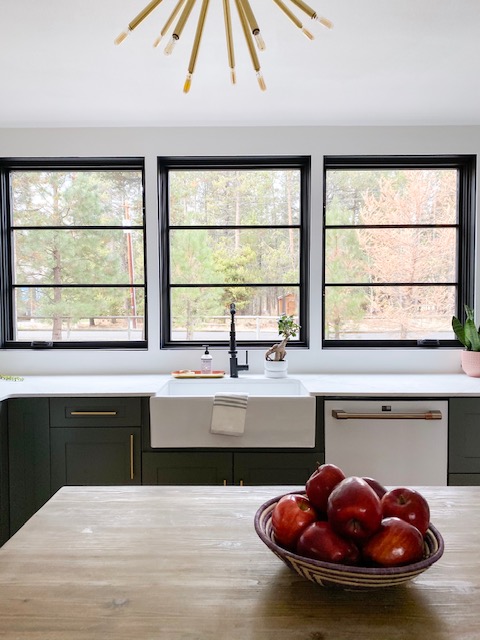
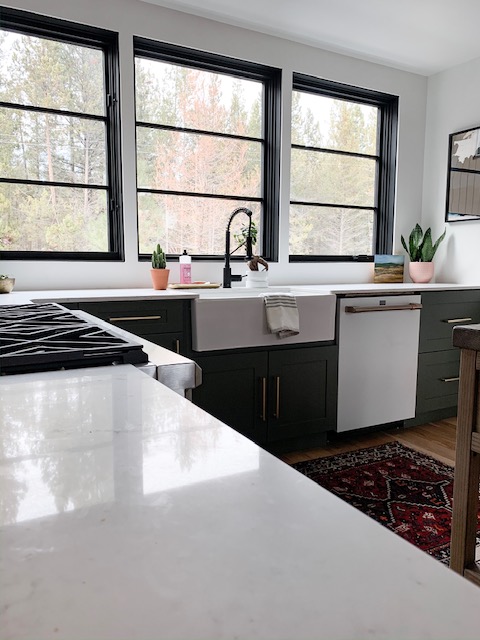
And after install…

We went with their Urban casement style and it’s so sleek and beautiful. With their powder-coated aluminum on the exterior and solid wood on the interior, they are low maintenance, but HIGH impact(in the best way possible). They give our home more of a Modern Pacific Northwest feel that I am hoping to achieve. Eventually, the plan is to change all of our windows in the entire house to these black beauties…we already have another one on order for the entryway! Can’t wait to show you all!

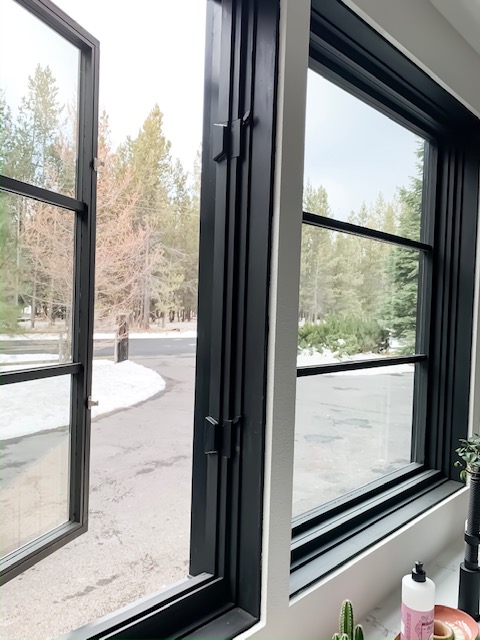
The middle window is a picture window, which is code for, doesn’t open, or is fixed.

The two windows on the left and right both have screens and crank all the way open to a full 90 degrees, if you’d like. They also came with screens so you can open them on a cool summer evening without having to worry about pesky bugs/mosquitoes.

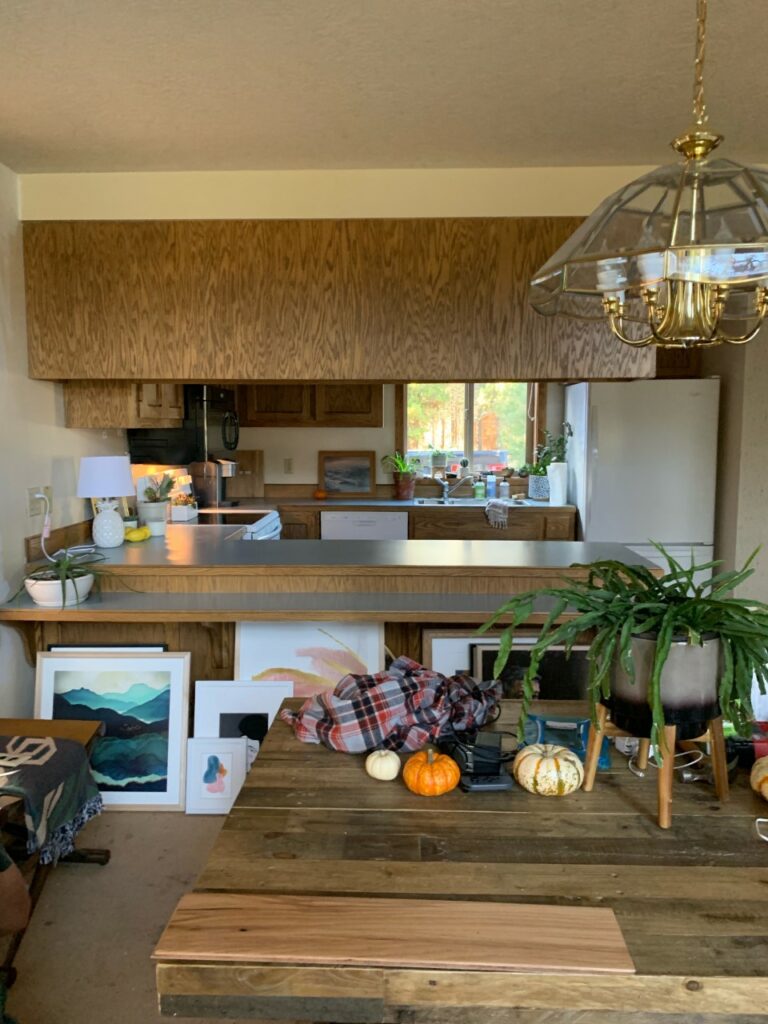
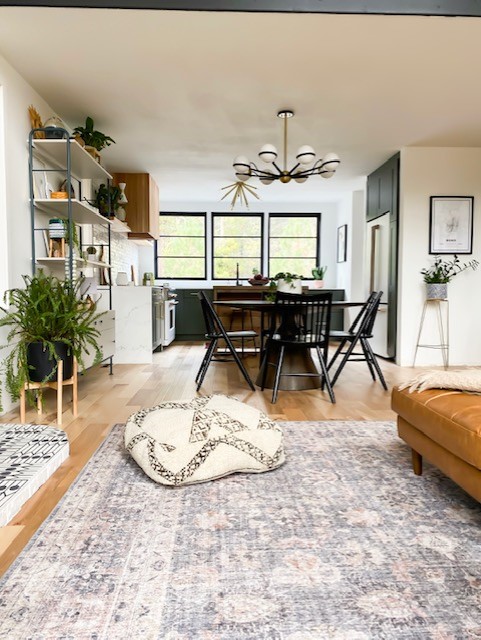
These new windows have been such an impactful addition to our home and now I’m wondering, where else can I add a window?! If you’re considering replacing windows, then look no further than Sierra Pacific Windows. I am forever a fan! They have an amazing assortment of styles, options and colors…something to suit everyone, I’m sure of it! A BIG thank you to Jennifer and Ted for being so awesome to work with…you both made the entire process so seamless! Here’s a few more shots of how these windows have changed the entire look of our home.

And one more before and after because you guys know I can’t resist…

Thanks for reading! XOXO


One Room Challenge – Modern Mountain Kitchen and Family Room – Week One

OMG TODAY IS THE DAY! It’s the first day of the first week of the One Room Challenge! I’m back at it, but this time, as a Featured Designer (still pinching myself that my name is among the list of amazing designers) and I couldn’t be more excited about it! I have been planning this space for months now, and it’s been nearly impossible to keep all of this a secret from you guys! This is my third crack at the challenge, and if you’ve been following along for a while now then you might have seen my powder room transformation from Fall of 2018, or my shack turned office project from the Spring of 2019. If you don’t know what I’m talking about…then go and check them out! Now lets get down to biz. Here’s a visual of what I’m thinking!


1./2./3./4./5./6./7.

Many of you already know that the hubs and I sold our house over the summer and moved into a fixer upper. And when I say fixer upper…I mean it. For reals, guys. This new house of ours is in serious need of some love. When I was trying to decide which room I would be tackling for the ORC, I thought about doing a smaller project like a bathroom or a bedroom because it felt like a safer choice. But, my hubs gave me the pep talk of all pep talks and convinced me to “go big, or go home.” So, that’s been my motto as I’ve been planning and we are def going BIG with a complete kitchen remodel as well as the attached family room. Am I crazy? Have I lost it? Maybe. But I’ve had three cups of coffee and full of nervous energy so I’m gonna do my best to pull this thing off!

THE BEFORE

Here’s how the kitchen looked last month on move in day.

What do you guys think? Are you scared for me? You can see we have a lot of work ahead of us! The goal is to transform this sad space into a living/dining/and kitchen that we love. This house needs to be brought back to life again and I am up to the task! That’s all for now!

See ya next week!

Ps…don’t forget to check out the other fabulous featured designers! I’m just giddy about all the inspo that’s going to be floating around over the next six weeks!

At Charlotte’s House | Design Addict Mom | Erika Ward Interiors | Erin Kestenbaum | Girl & Grey

Gray Malin | Hommeboys | I Spy DIY | Jewel Marlowe | The Learner Observer | Making it Lovely

 Nicole White Designs | Old Brand New | Oscar Bravo Home | Place of My Taste | The Rath Project

Room for Tuesday | SG Style | Undecorated Home | Veronica Solomon Media BH&G | TM by ORC

Carpet’s out, wood’s in

Hi guys! It’s been a million years since I’ve posted on here! Lately, it just seems more convenient to keep everybody updated with all of our house projects on Instagram versus writing out a long blog post. But I’ve been feeling guilty about ignoring my blog because it’s such a great, creative outlet for me and I love documenting our house projects. So I’m going to do a better job. The good news is that we have endless amounts of projects going on around the house which equals tons of content. House projects have been plentiful, blog posts not so much.

It would make sense for me to start with giving you guys a full house tour so you can see where we are at in terms of progress. And I will do that, but for now, we are just gonna skip ahead to the most exciting project ever! Wood floors! If you follow me on Instagram, then you already know that we started installing our new floors. We started upstairs, and the plan is to divide the house into three sections because we are doing the install ourselves and tackling one section at a time feels less daunting. So upstairs goes first, next is the stairs and its two landings, and lastly, the main level.

In our last house, we had our wood floors installed and that was great. But there is something to be said for doing the work yourselves and the most obvious bonus of all is that you don’t have to shell out the extra money to pay for the labor, which we learned was the most expensive part of replacing flooring. If you have been following along since we did our Texas renovation, we loved our wood floors from that house so much that we went ahead and ordered the same ones for this house. I know, I know, we like to live on the edge.

Even though this is a big project and tons of work, the work itself isn’t terribly complicated. So I’m confident saying that, if we can figure this out, anybody can do this! Isn’t that so exciting?

My brother and his family came to help for the weekend along with my mom and dad. We were so grateful for the help and are all set to return the favor and spend a weekend at my brothers house when his wood floors are ready to go down. Thank you Aaron and Audra! Thank you mom and dad! Like I said above, we started upstairs and first thing we did was remove the baseboards and then out came the old, nasty, dirty, shag carpet. YUCK. I got the heebeejeebee’s when we started rolling up the old carpet and I could see just how dirty it was. I won’t go into details but there were some suspect looking stains that I would like to never think about again. K – moving on.


We ordered the flooring way back in November and had moved it upstairs in March so we didn’t have to worry about it acclimating but I think the rule is that the boxes of flooring should live in the space prior to installation for three to five days. Next up was rolling out some underlayment, which acts as a vapor barrier and prevents the squeaking of wood flooring against the plywood subfloor under it.

The first row is the most crucial row as it will ensure that you have a straight line going forward. Also, the wood needed to start with a 1/2” gap from the wall since that is the thickness of our wood planks. This gap allows the wood to expand and contract with changes in temperature and humidity. But once those two things were done and right, we picked up the pace and even started to find a rhythm.

This is the biggest room upstairs so I’m so happy to have this beast of a room checked off the list. Moving forward, Nate and I will be doing piece by piece(see what I did there?) as time allows so we are hoping to be done with the upstairs sometime in the year 2021…just kidding…kind of.

Now that the new floors are going down, I started thinking about rug pads for my area rugs. I’m bad about choosing the pretty and forgoing the things that are practical, but aren’t seen. In the past, I tried those cheap waffle-like pads with a chemical smell and my rugs still slide around. So when RugPadUSA asked if I wanted to partner up, I was so excited! If my new floors could thank them, I think they would.

I chose their Contour Lock style because it’s well-suited to flat-woven rugs and my vintage rugs with a low pile. If you love vintage rugs like I do, then you know that they almost always come in an unusual, wonky size. RugPadUSA cuts their pads to fit any rug size, so no size is too weird!

I love how they make our rugs feel so cushy and comfortable now. The pads are thick and feel soft underfoot. As a mom with a baby who just learned how to walk, I appreciate the extra cushion.

RugPadUSA uses recycled felt and a natural rubber to make their pads so there is no toxic smell and that makes me feel good about bringing it into our home with our kids. On the reverse side is a natural rubber bottom that keep your rugs in place and they seriously do not budge, even with rowdy kids and toddling babies. I love these pads and am going to need more in the future! A big thanks to RugPadUSA for introducing me to these. I’m hooked.

This post is sponsored by RugPadUSA Opinions expressed are 100% my own