You asked: I answered. What we learned from our first year as new hot tub owners

This post is sponsored by Master Spas but all thoughts and opinions are my own

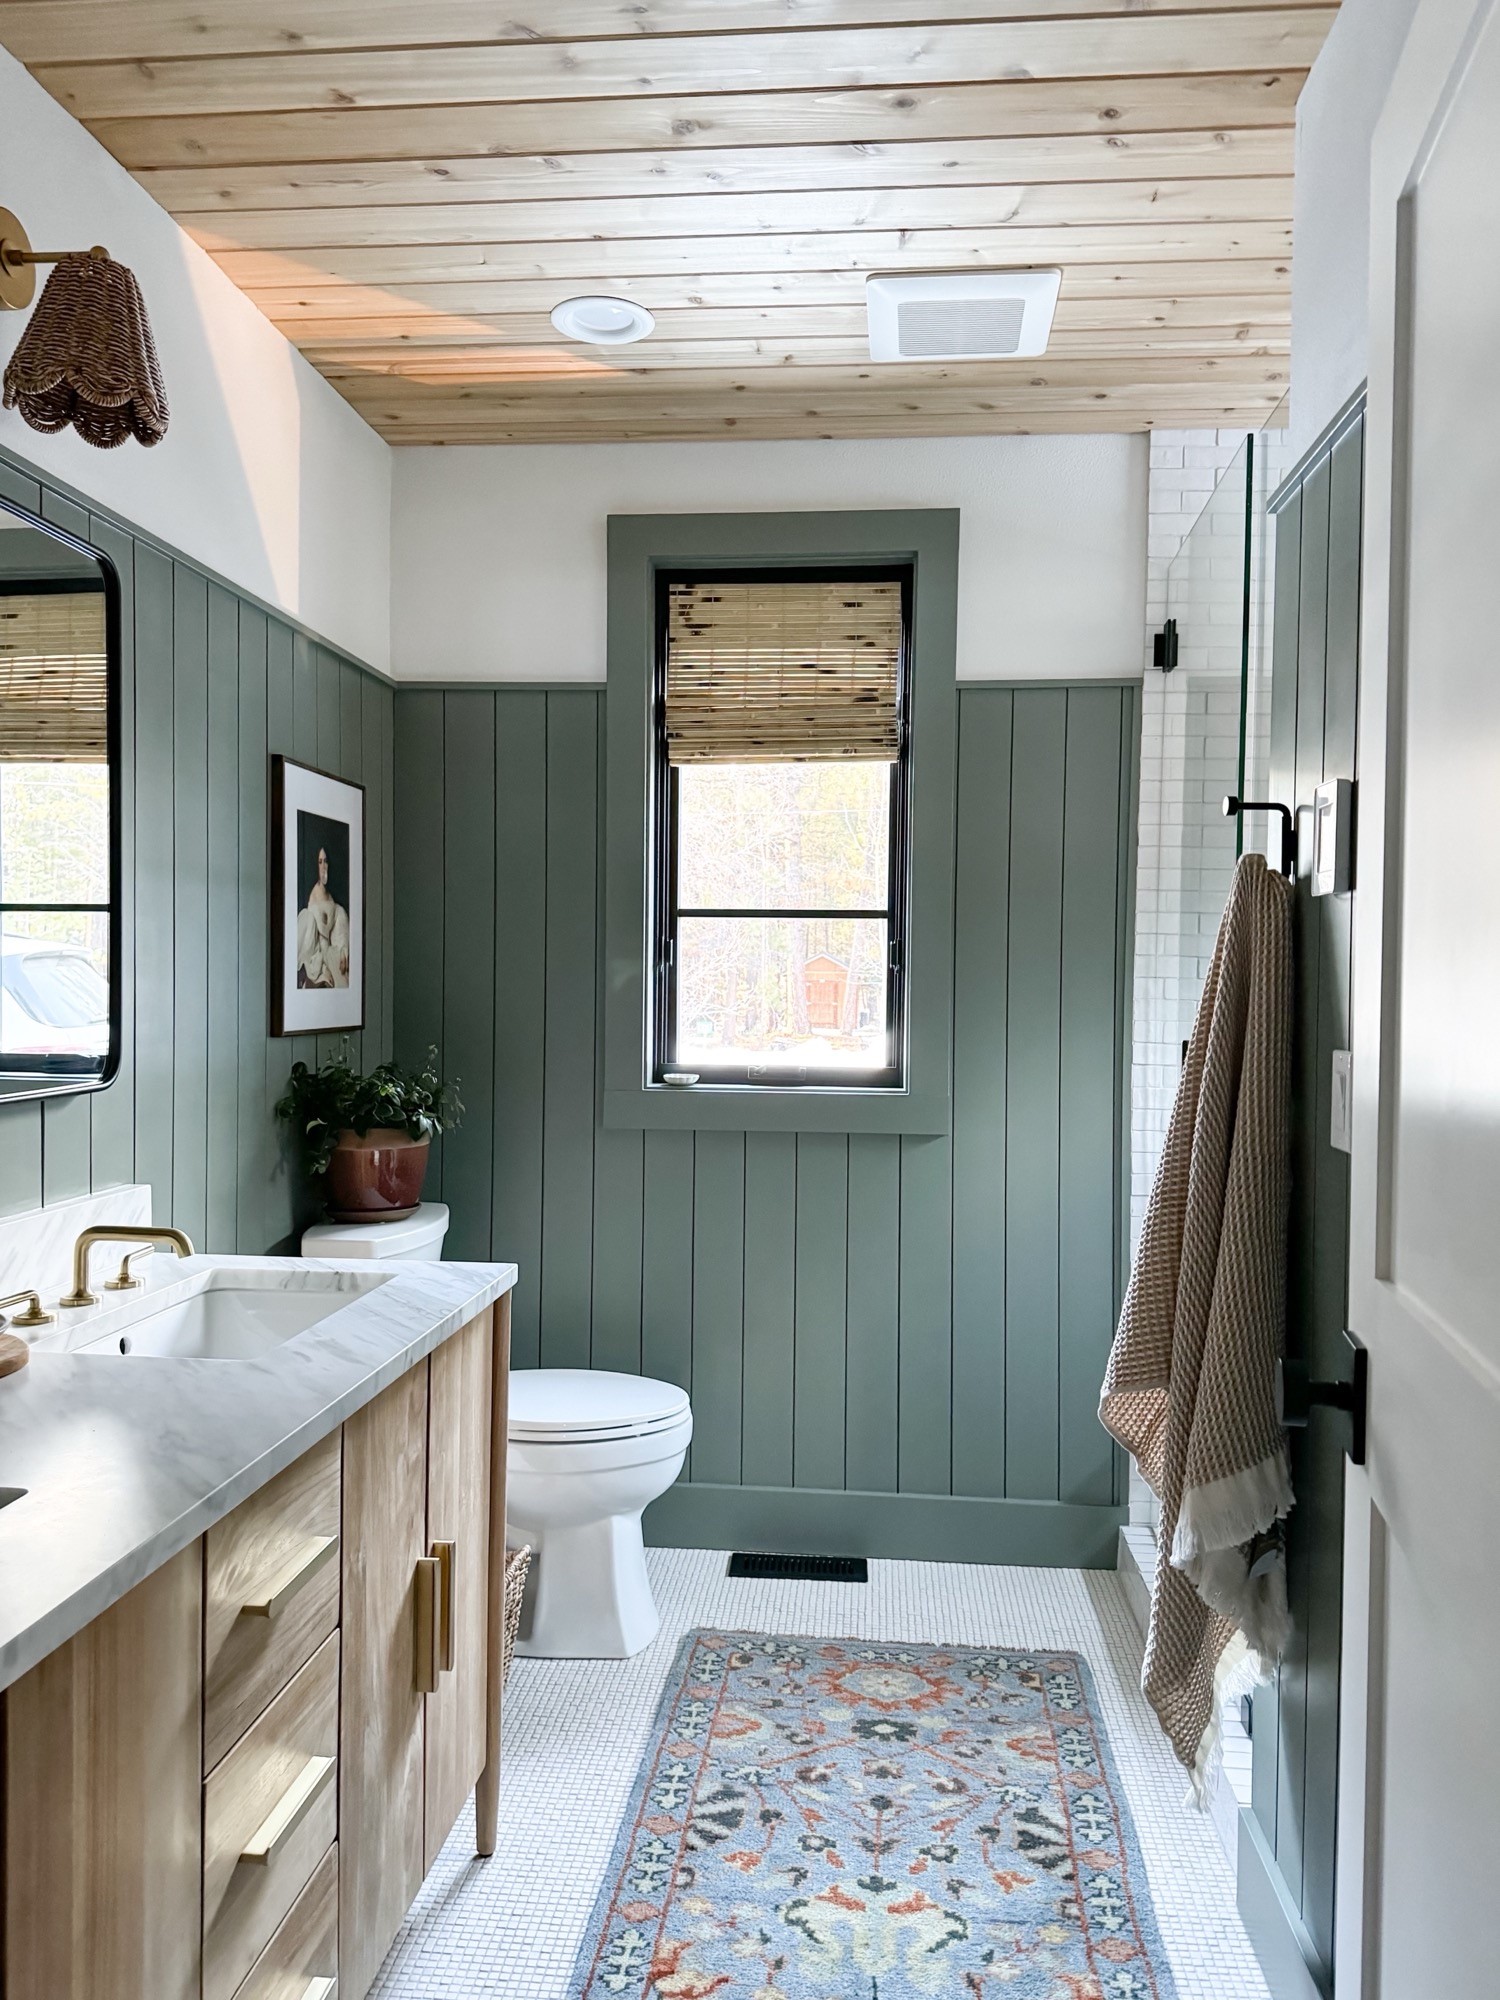
Can you believe it’s been a full year since we got our new Master Spas hot tub? When I first posted about it, I received SO many questions from you guys! One of the hottest topics to date – even more than the new bedroom\bathroom addition! And in honor of our first anniversary as hot tub owners, I thought it would be fun to answer the most popular questions that came in from you guys. Sound good? Let’s goooooo!

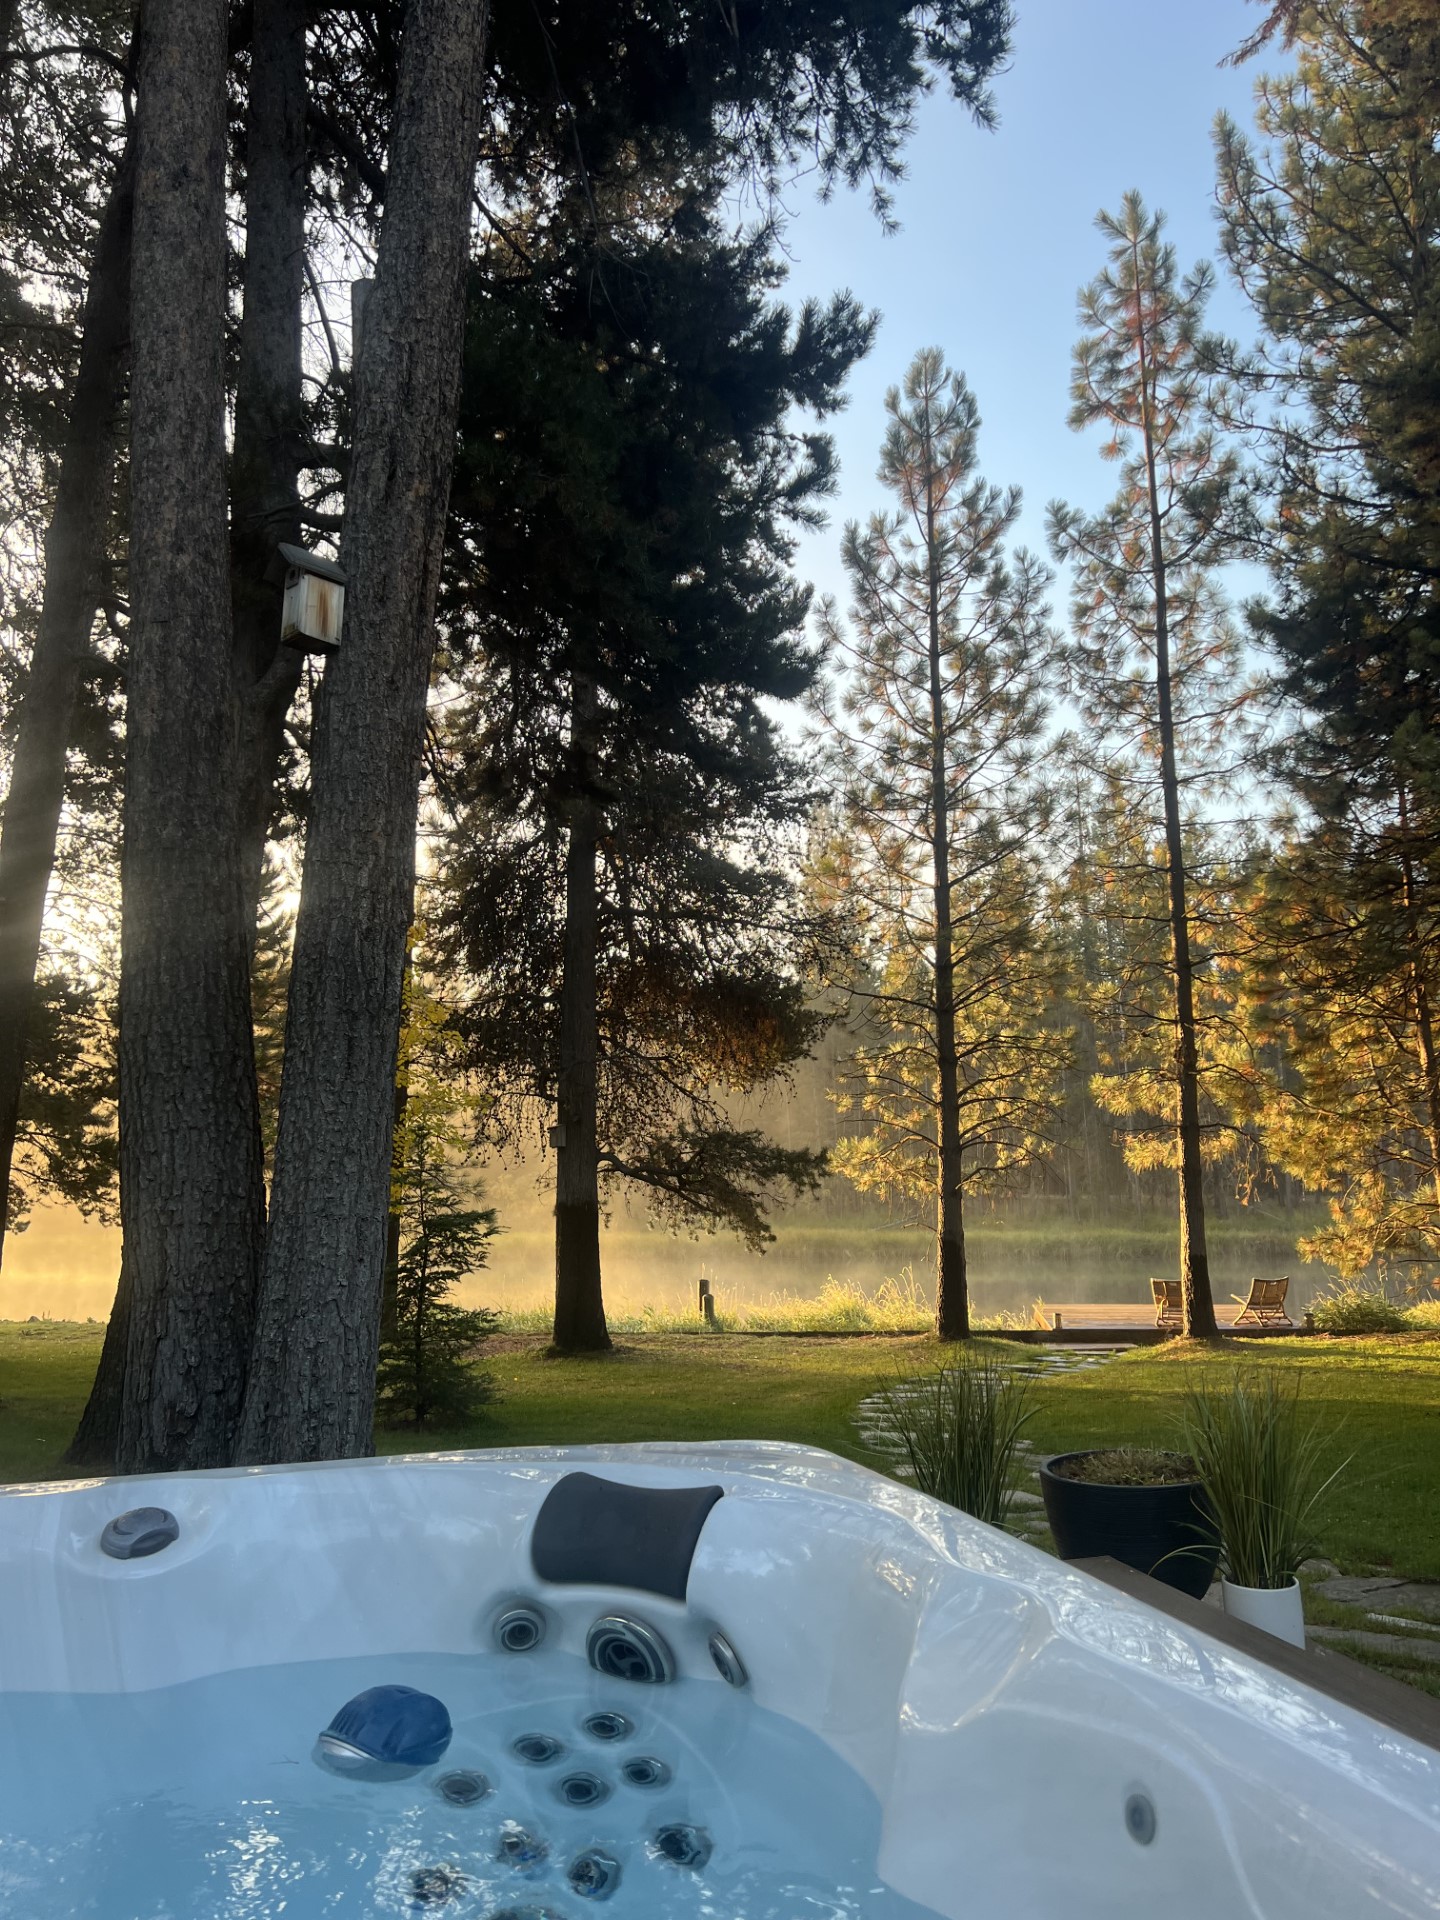
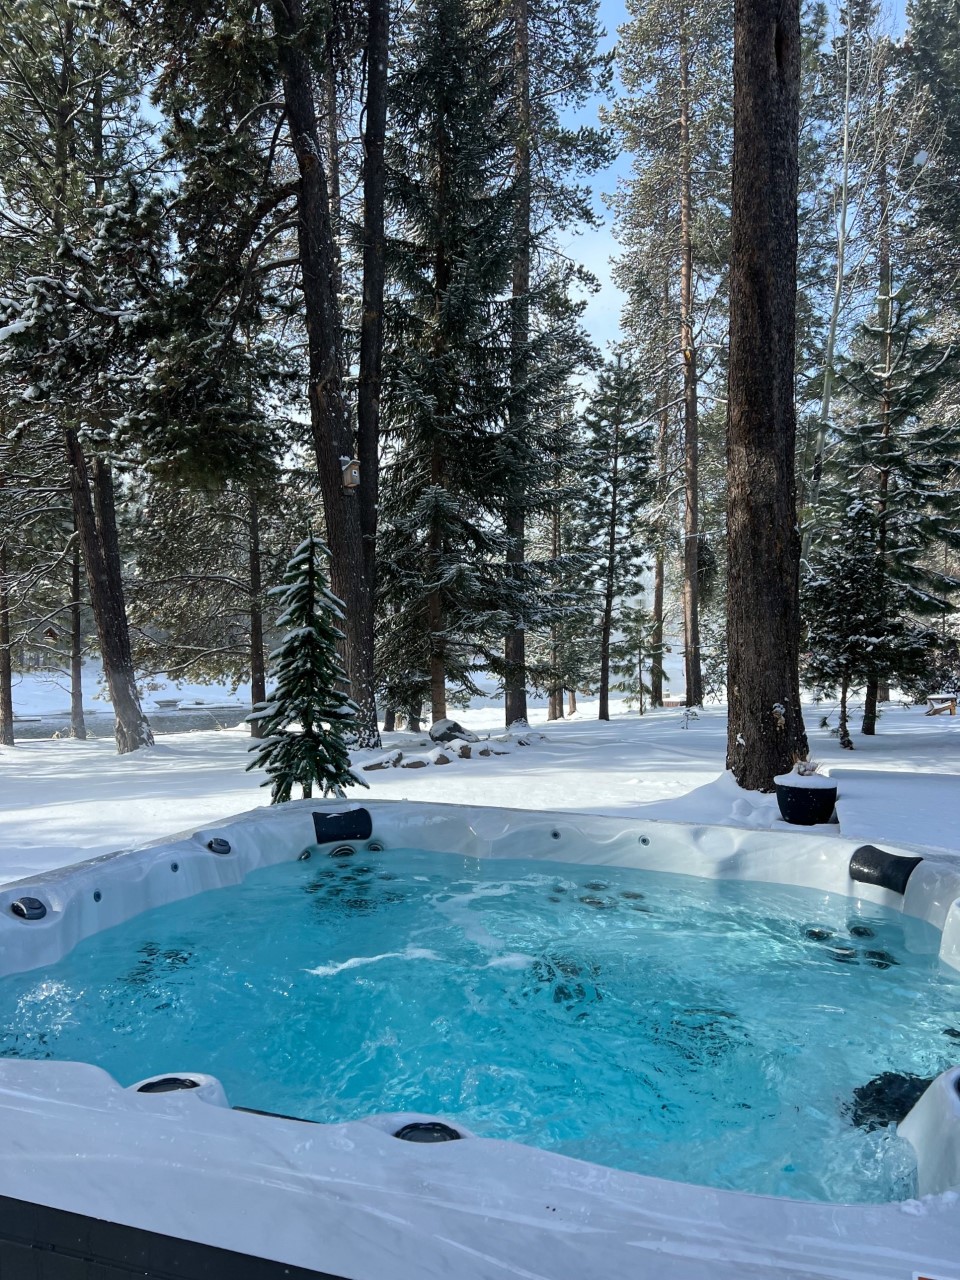
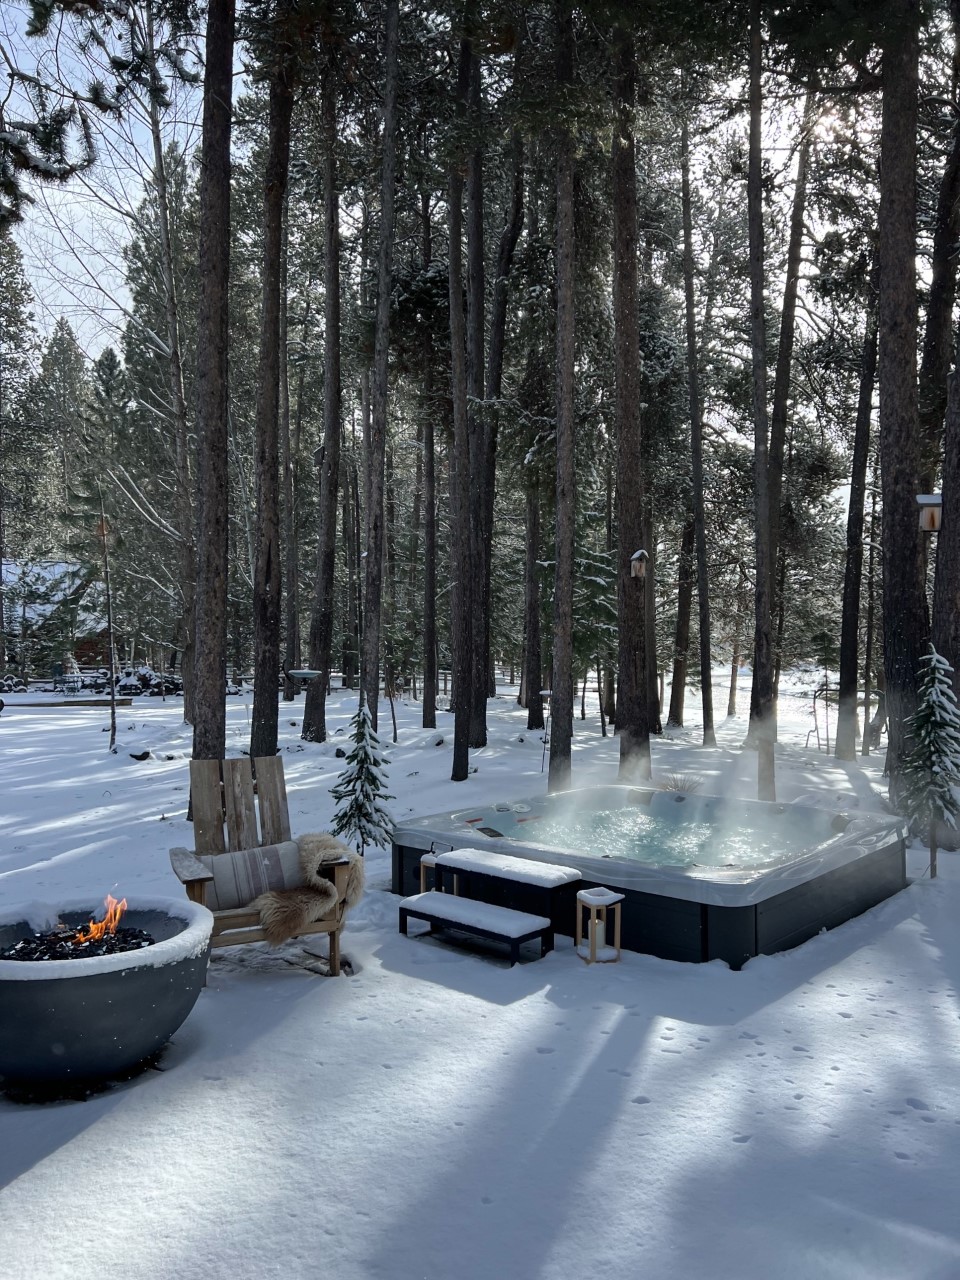
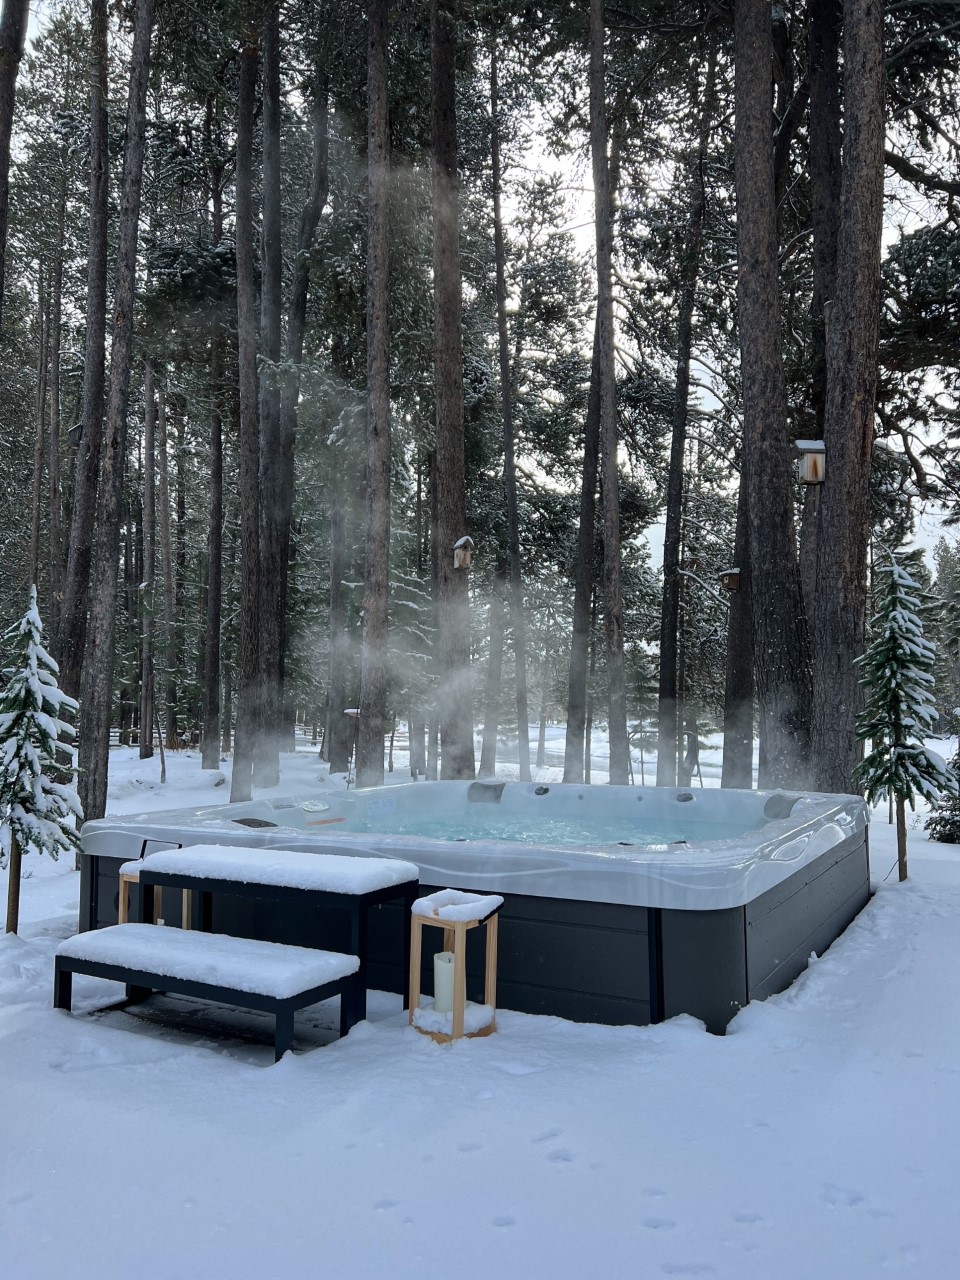
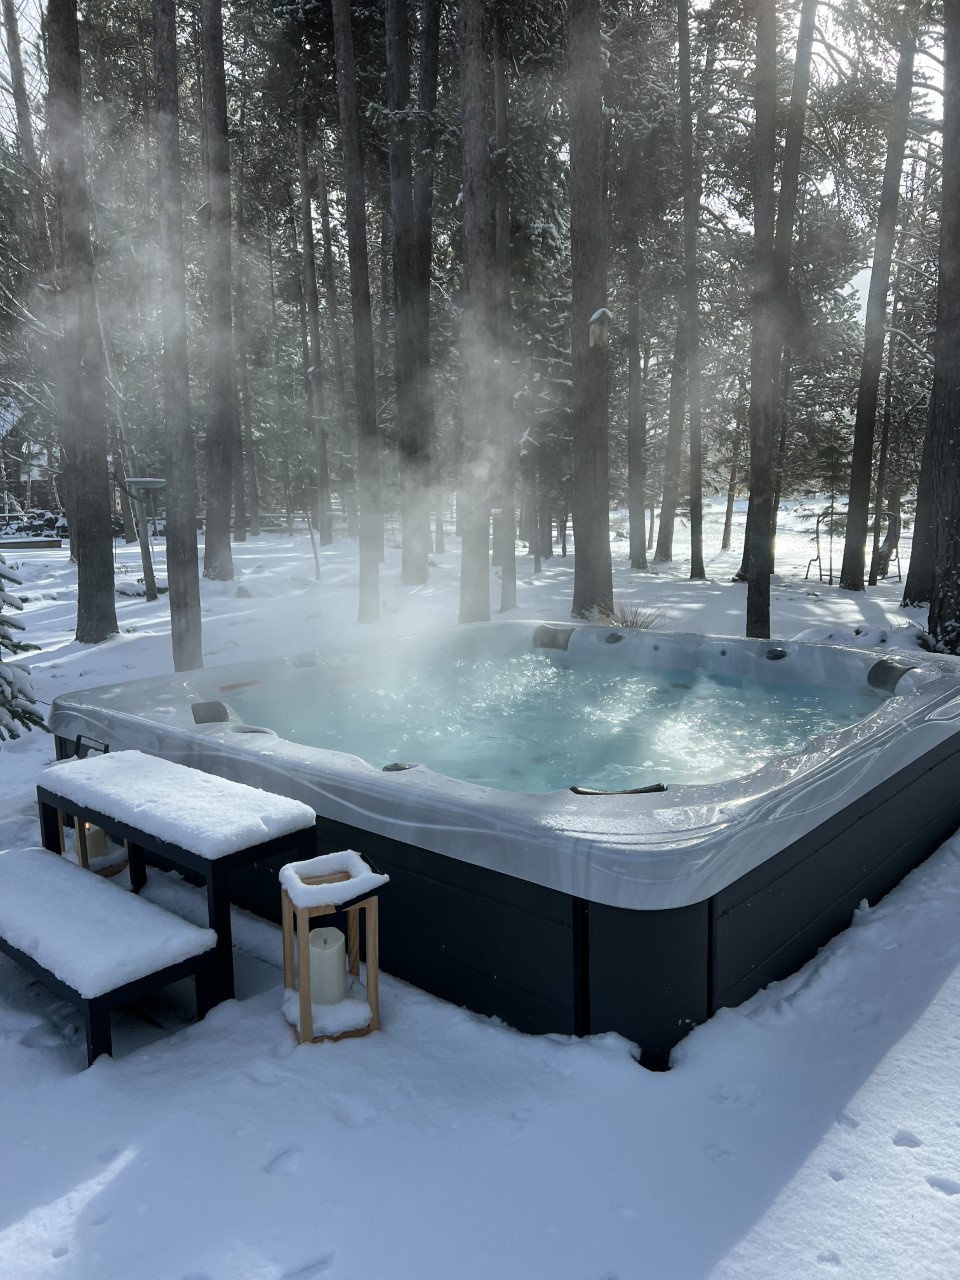
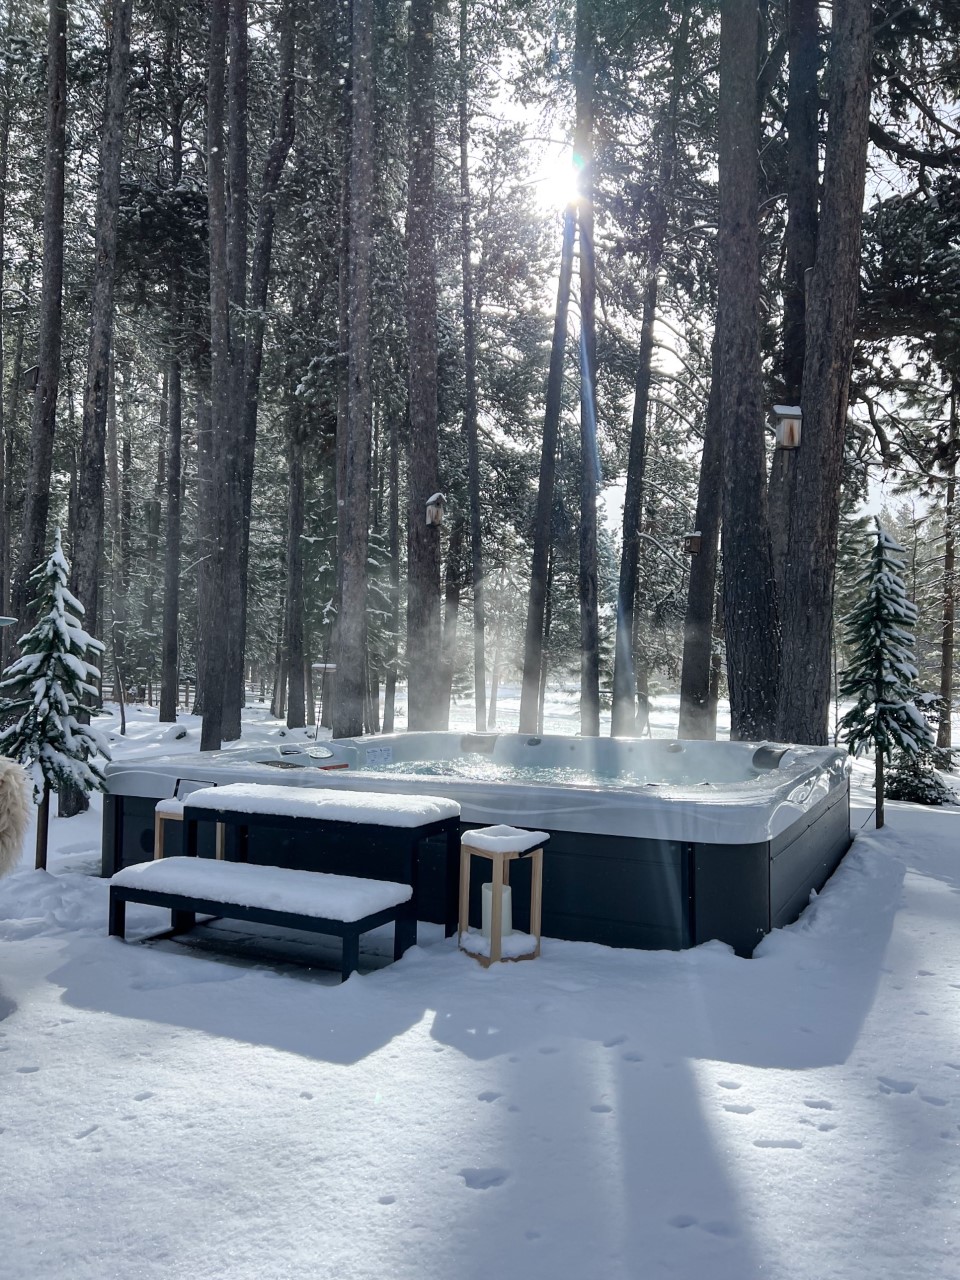
As a refresher, we went with their Clarity Balance 8 model, which is big enough to seat 6 with plenty of elbow room. My favorite spot is the lounger, where you can really relax and enjoy a full body massage. Puuuurfect for relaxing after a tough workout, or a hard day of work. Also, the wonderful folks at Master Spas are still offering all of you $500 off any of their hot tubs, or $1,000 off of any of their swim spas. All you have to do is click on my link here!

Now, lets get into those questions;

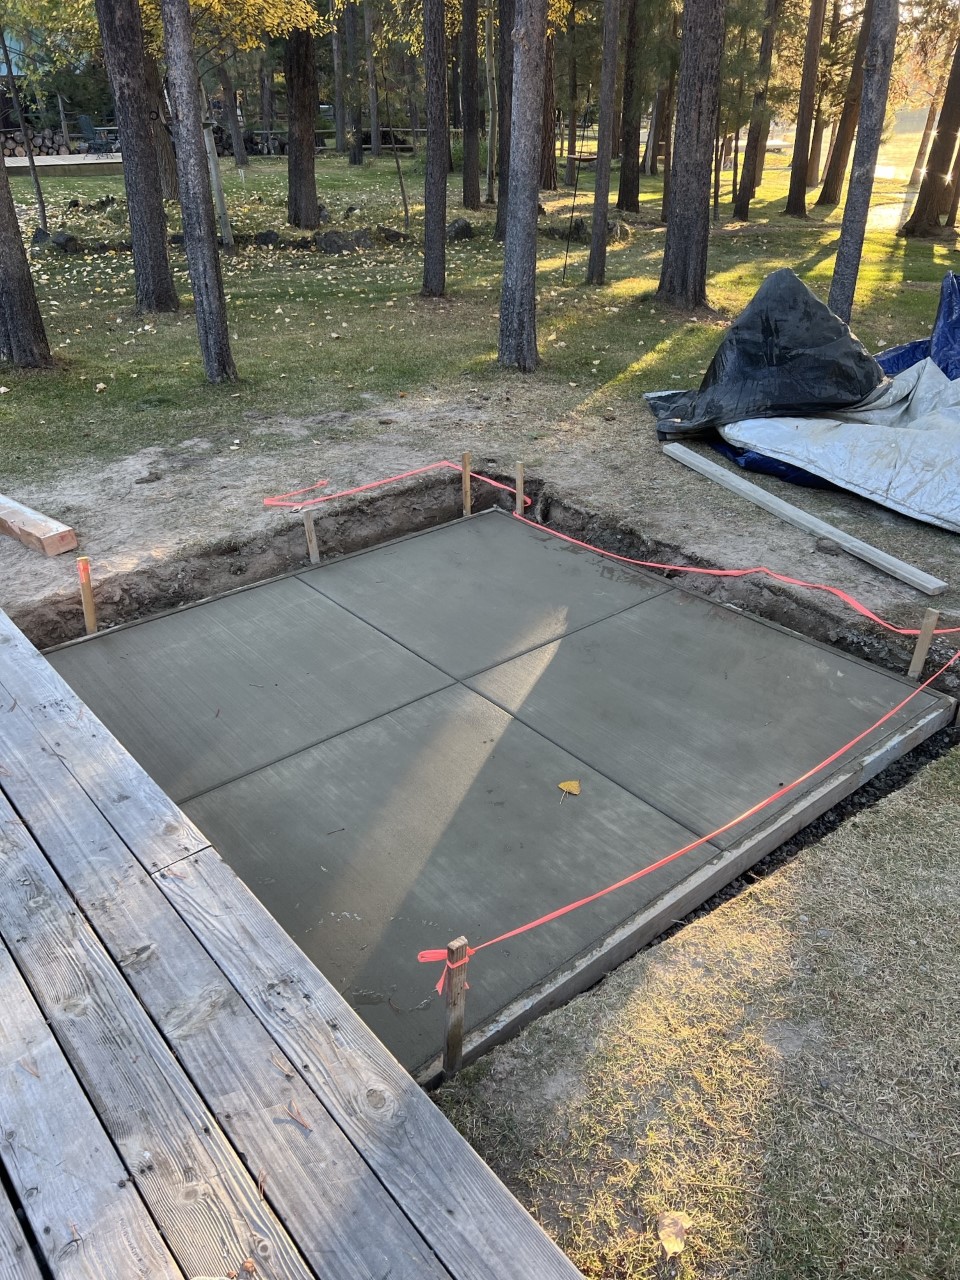
1. Do you have to have a concrete pad poured before the hot tub is installed?

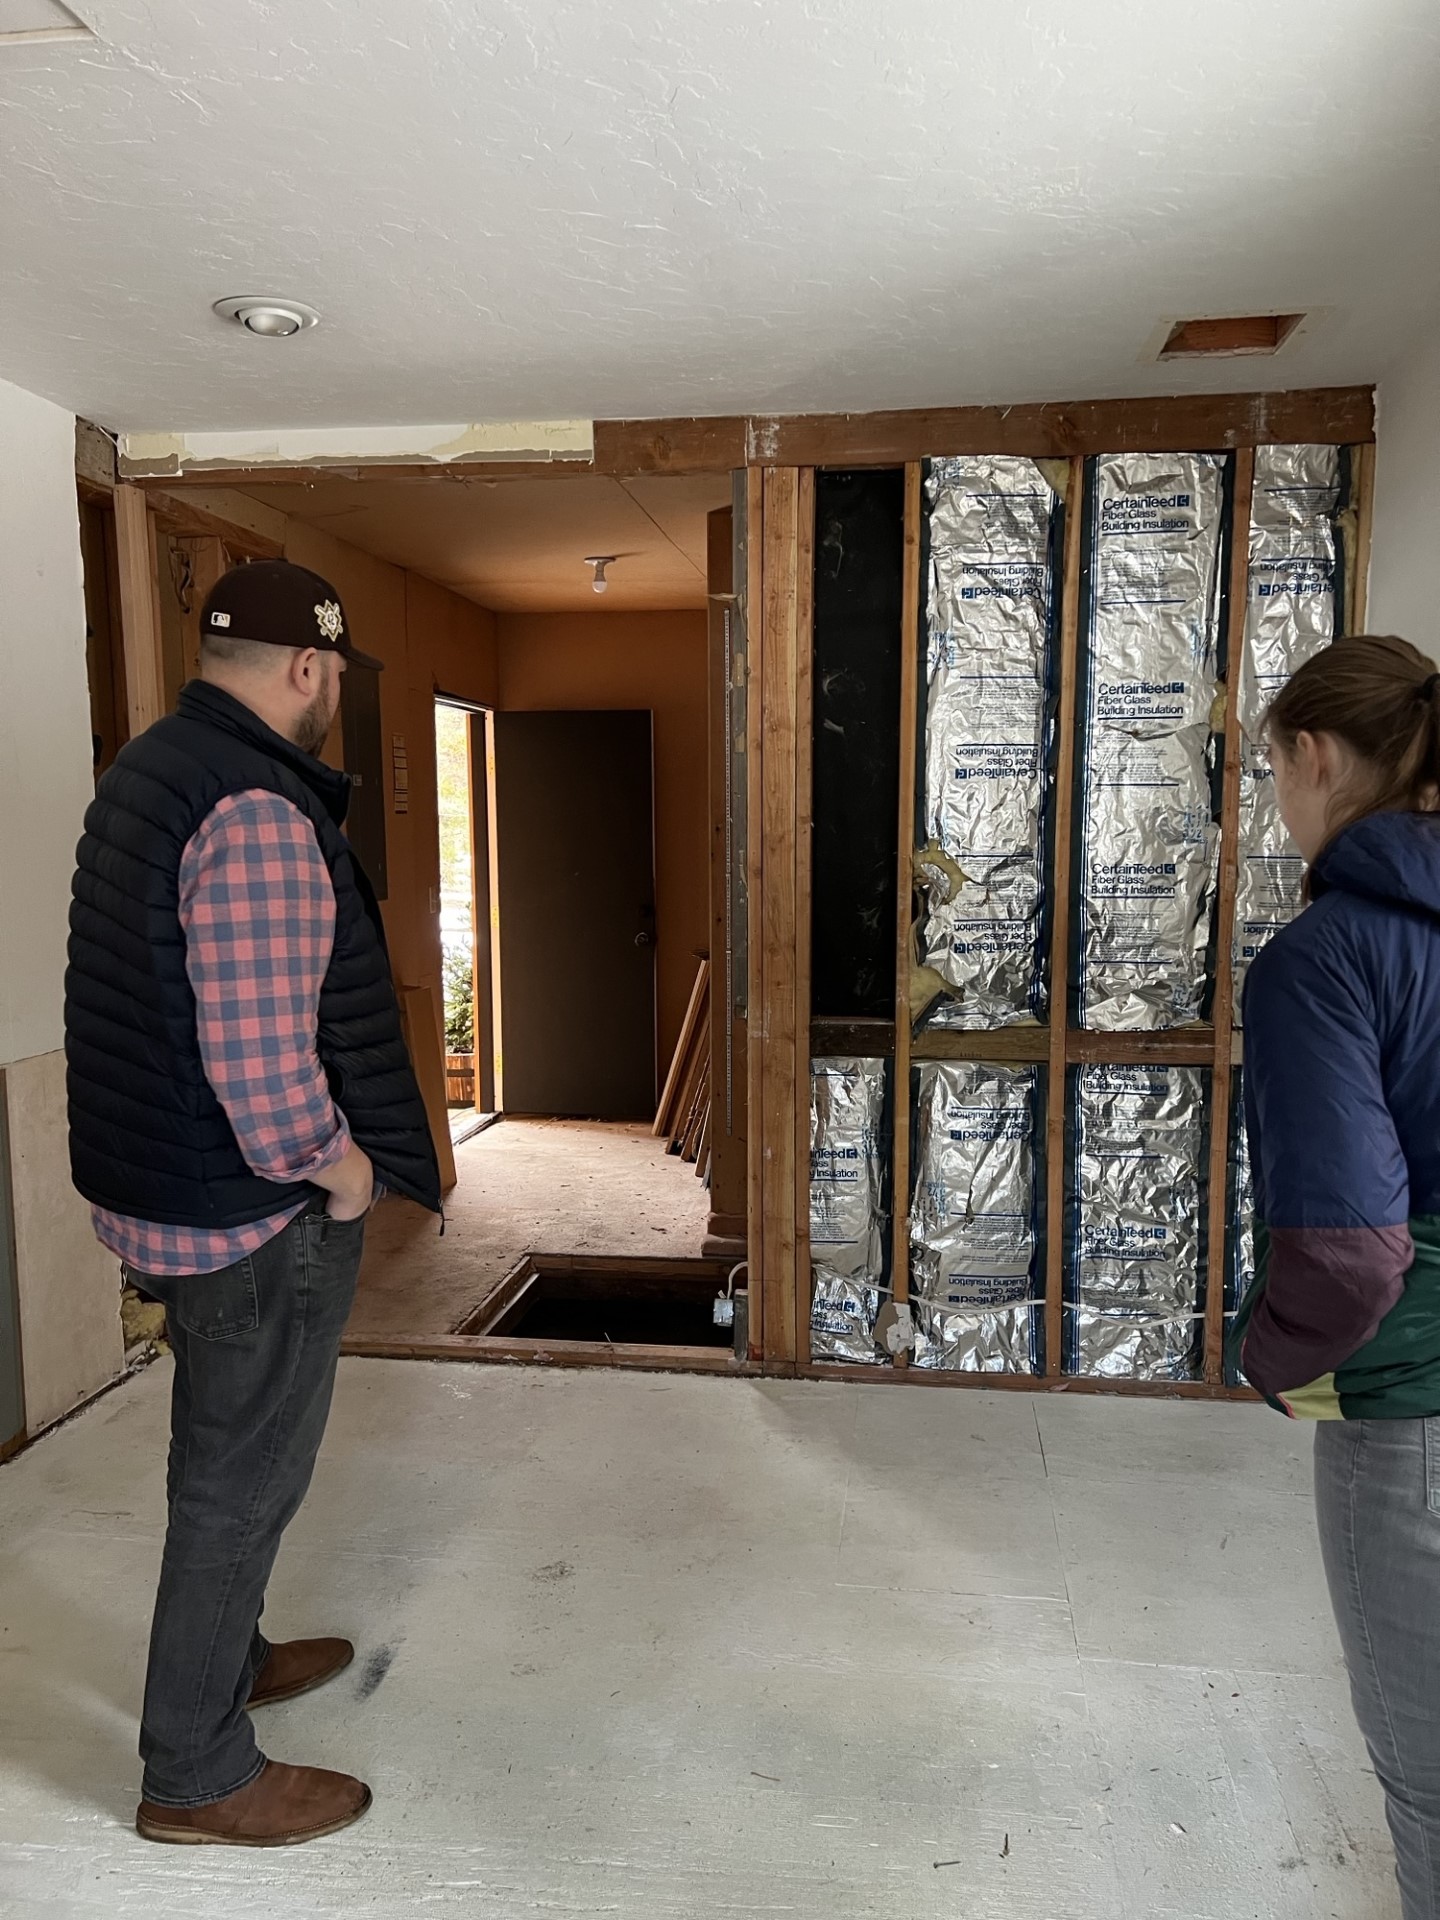
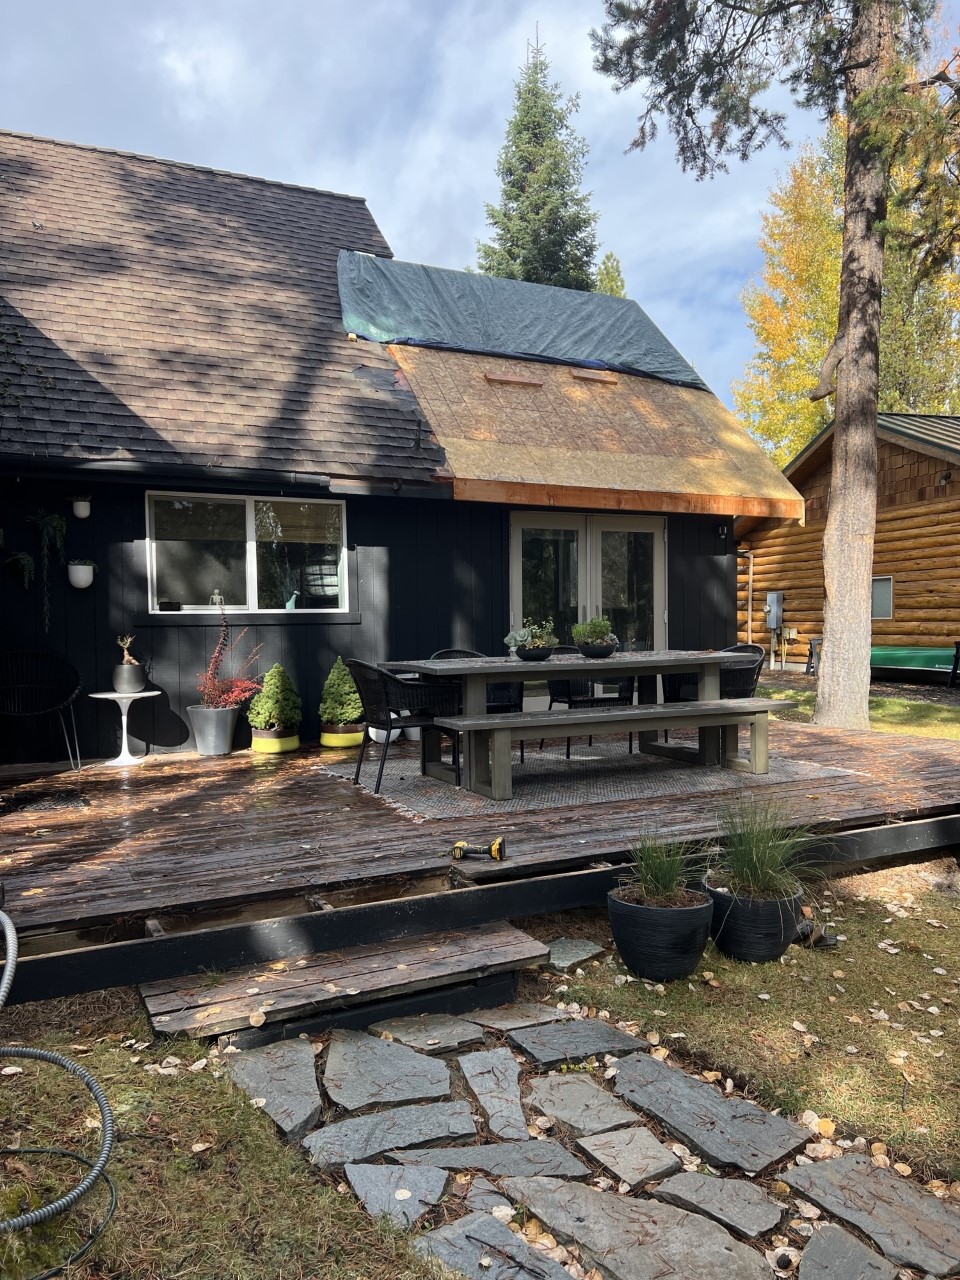
Yup. We had several concrete contractors come out to give quotes for a pad that would be big enough to accommodate our new hot tub. A hot tub can’t be installed directly on the grass or ground. Because our yards aren’t totally level or even, (unless you are some kind of wizard with magical powers) water will inevitably get underneath which will cause an array of problems, and could potentially sink from the weight of a hot tub full of water and humans. And that would be bad. Very bad.

2. How did you figure out the chlorine/chemicals for the water?

We worried about this too! But, it only took a few weeks of trial and error and we found our groove. First, I should mention that every Master Spas hot tub has their patented, time-saving EcoPur Water Purification System. This is a mineral filtration system that reduces the time and amount of maintenance needed on your hot tub. I won’t pretend I understand the “how’s”, but it uses natural elements, like copper and zinc, in the filtration process that leaves the water crystal clear. It even smells good too! We also ordered test strips to frequently check the water, which alert you to any adjustments you need to make regarding the pH, alkalinity, and chlorine levels. It might sound intimidating, but I promise, it’s very straightforward. If we can do it, so can you!

3. How much did your energy bill increase?

We didn’t know what to expect when it came to energy costs, but were surprised to learn that it was pretty minimal. All of Master Spas hot tubs are fully insulated with an environmentally friendly foam, which never loses its insulating value over the life of your hot tub, and makes it one of the most energy efficient hot tubs on the market today. Master Spas also offers a handy hot tub energy calculator that will help you figure out how much it will cost to heat your new hot tub. Such a great idea, huh? Ours added about $20.00/month. And most of their hot tubs average under $30. Ummmmmmmm….#worthit

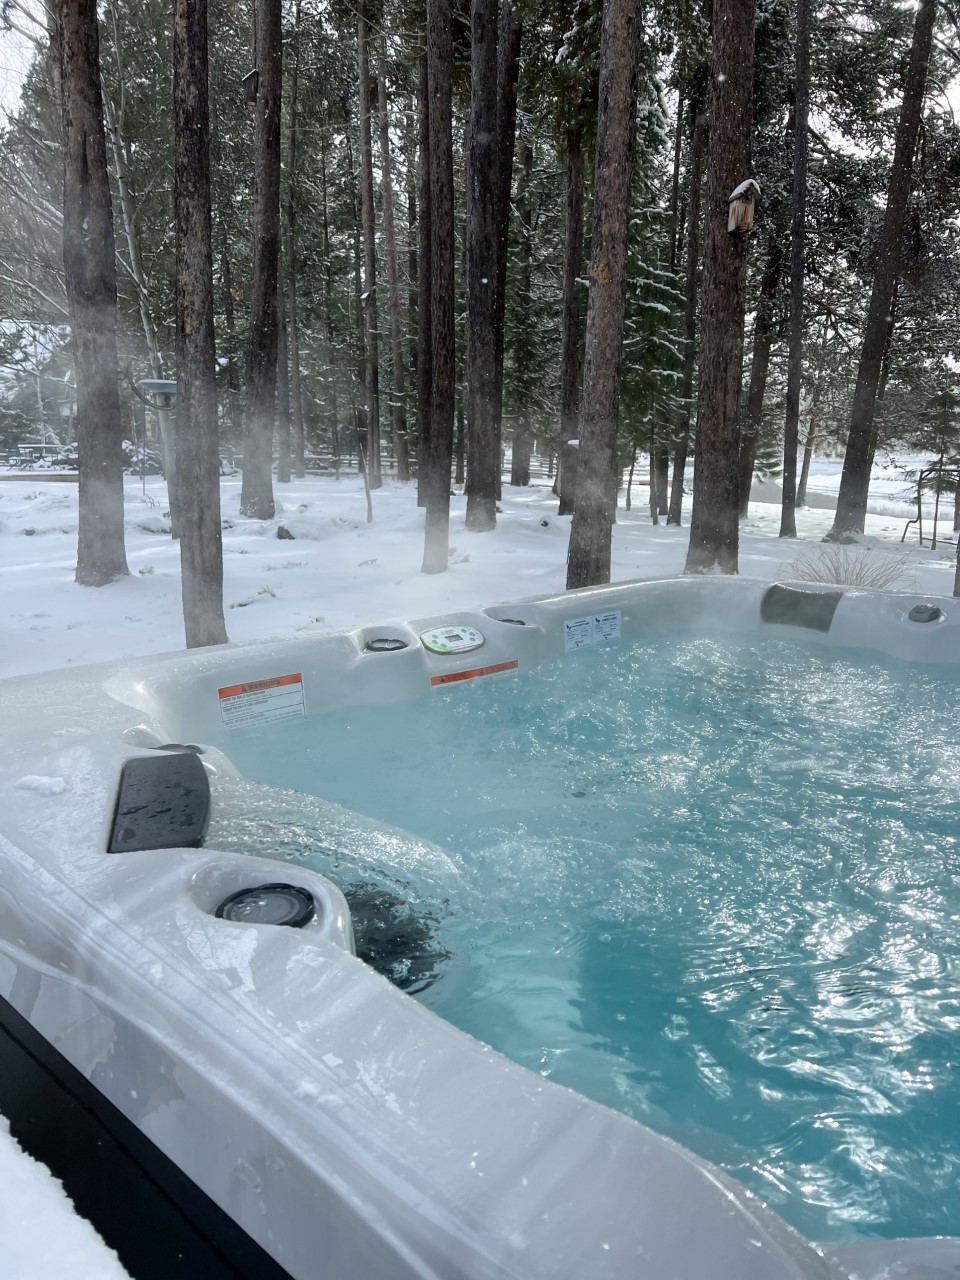
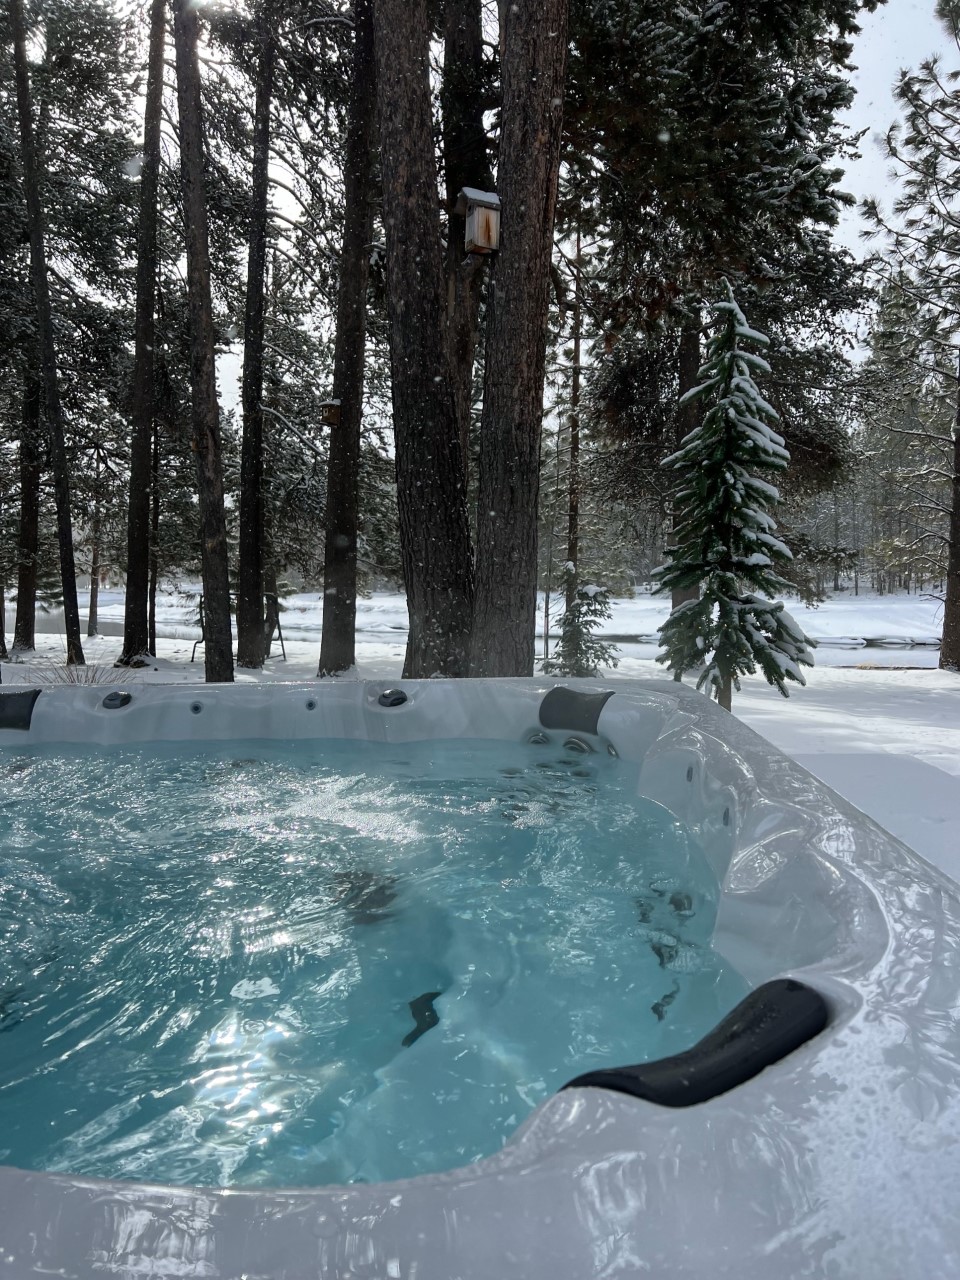
4. Be honest. How much do you guys actually use it?

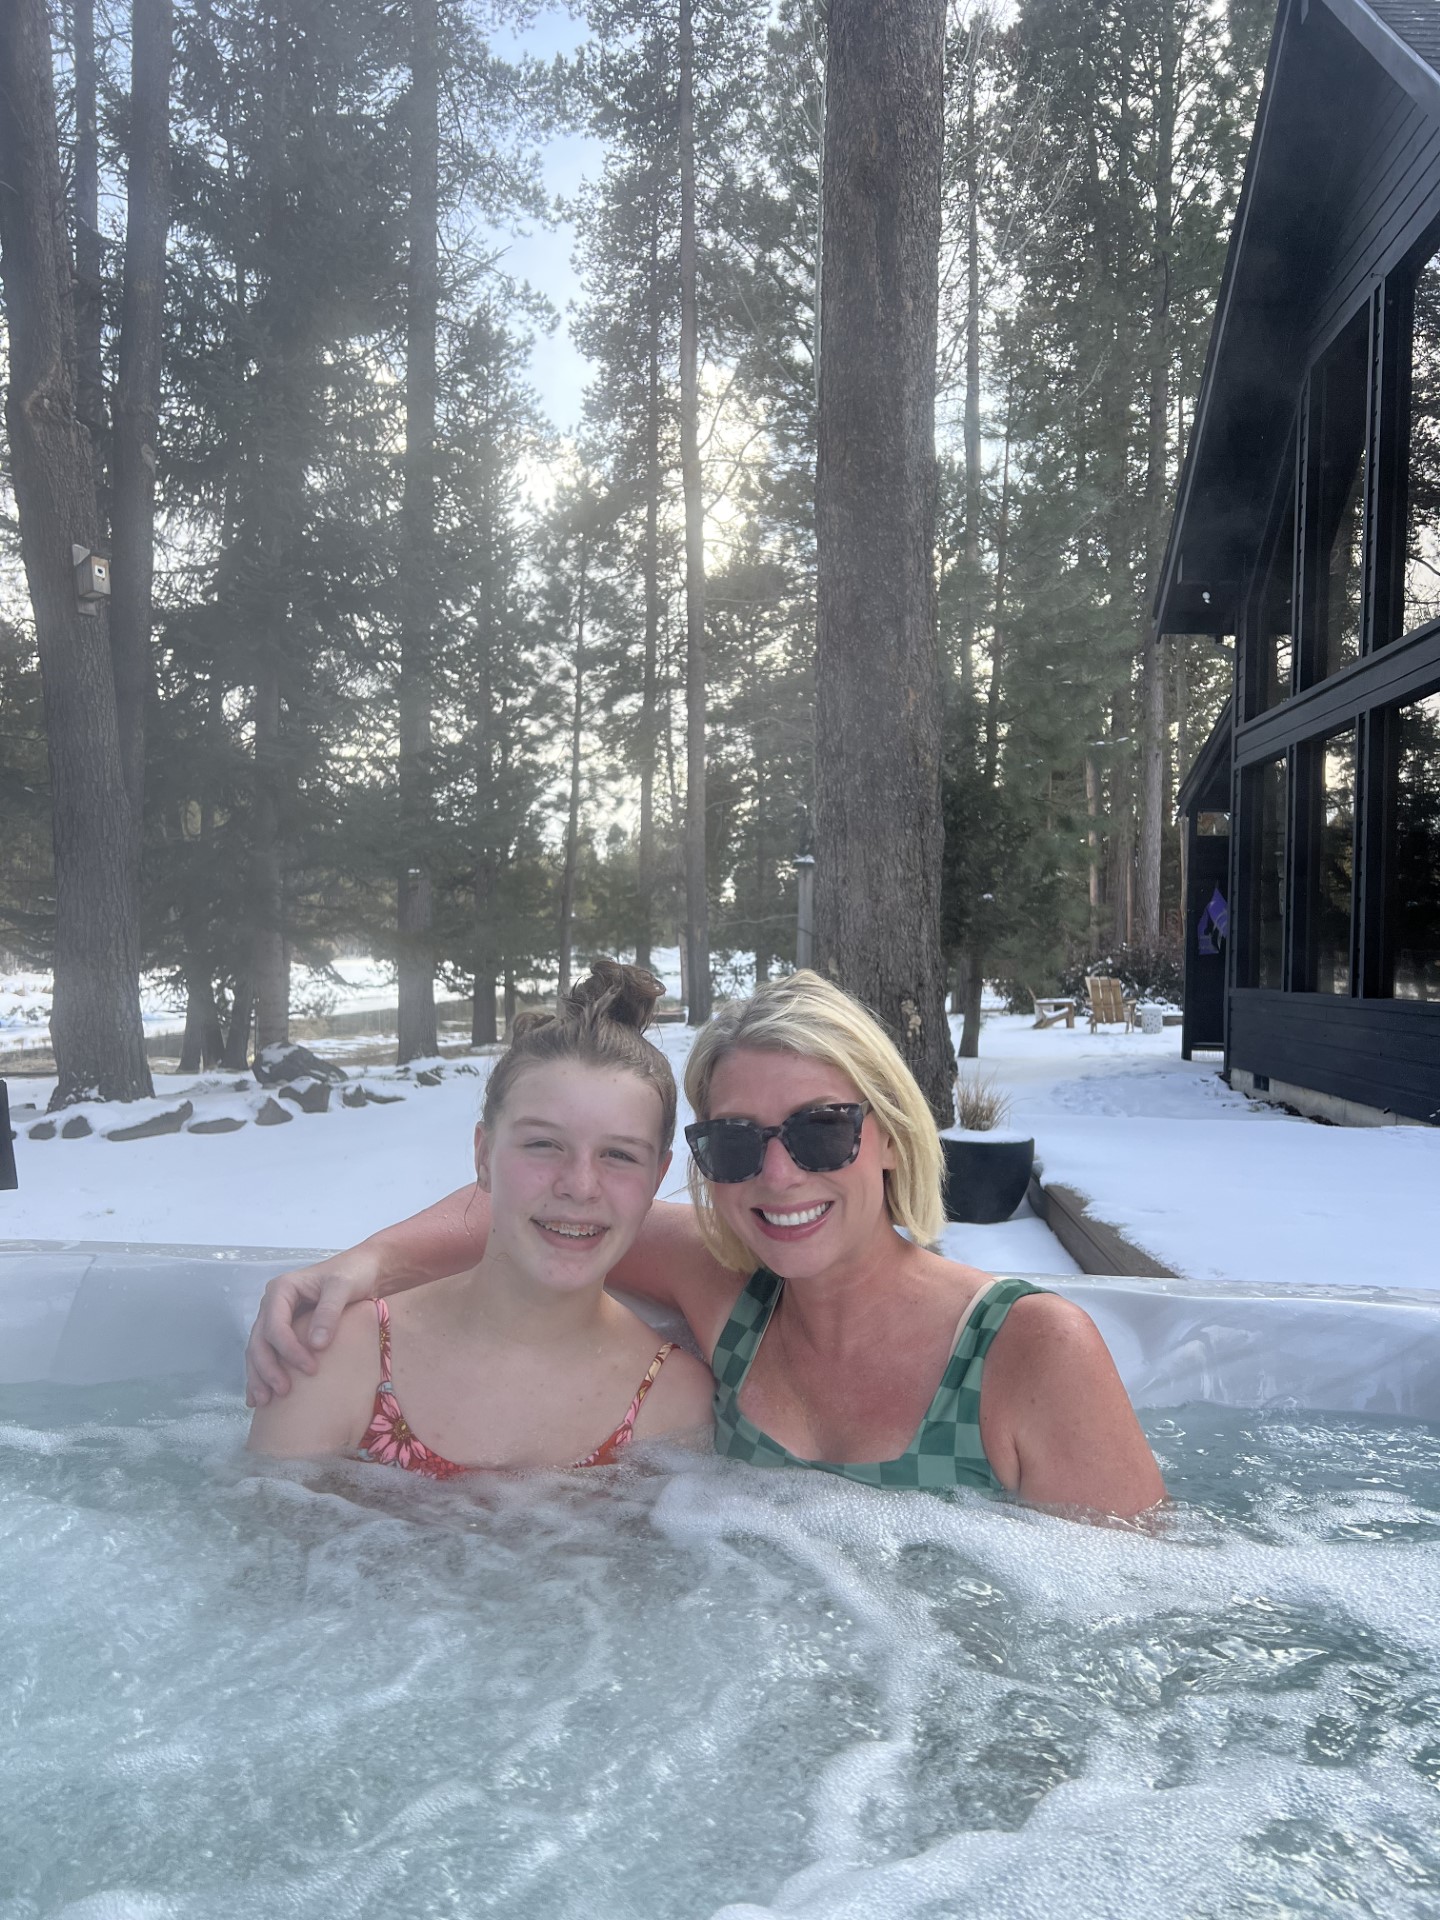
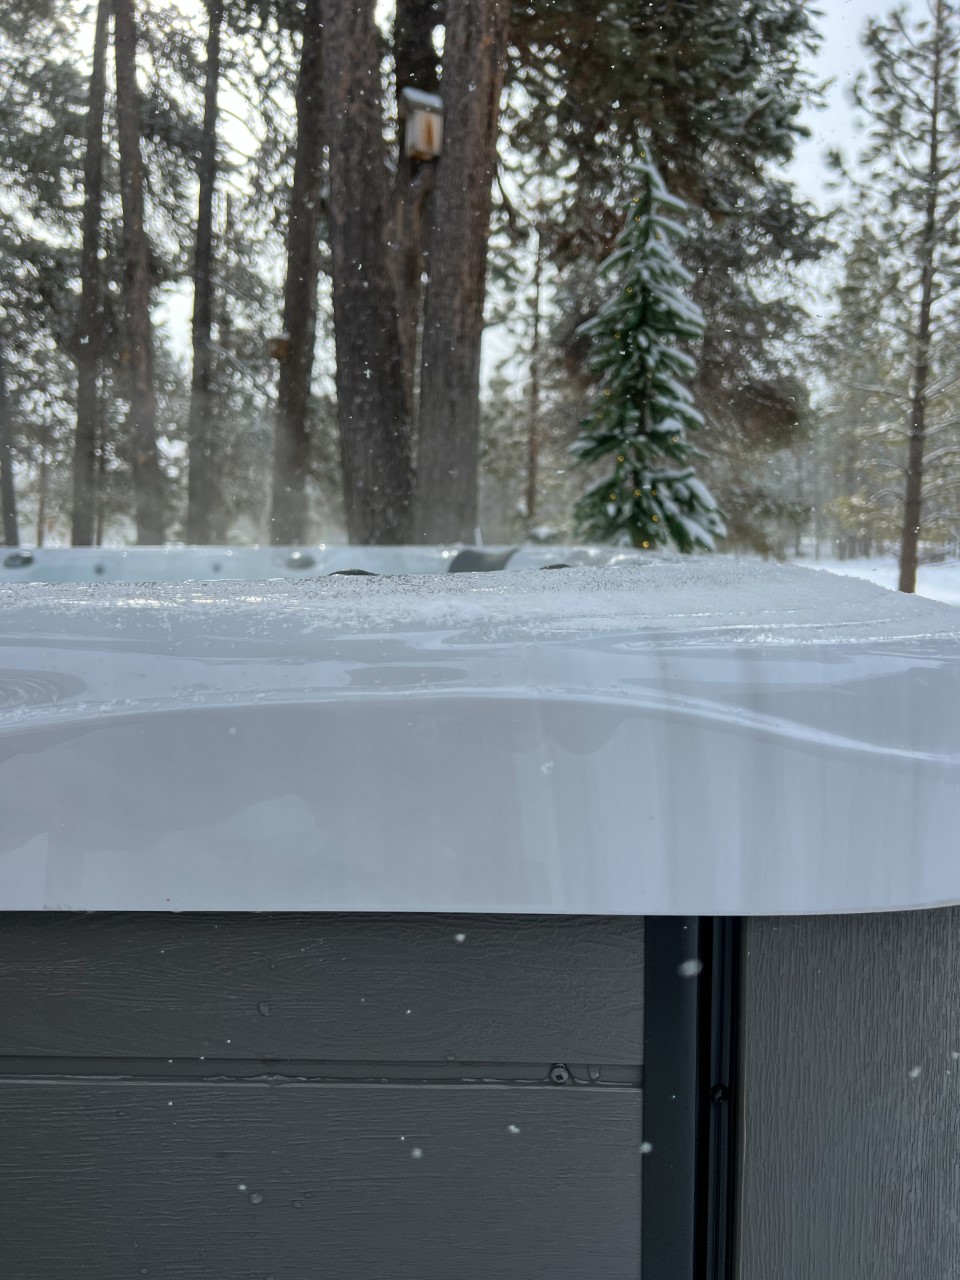
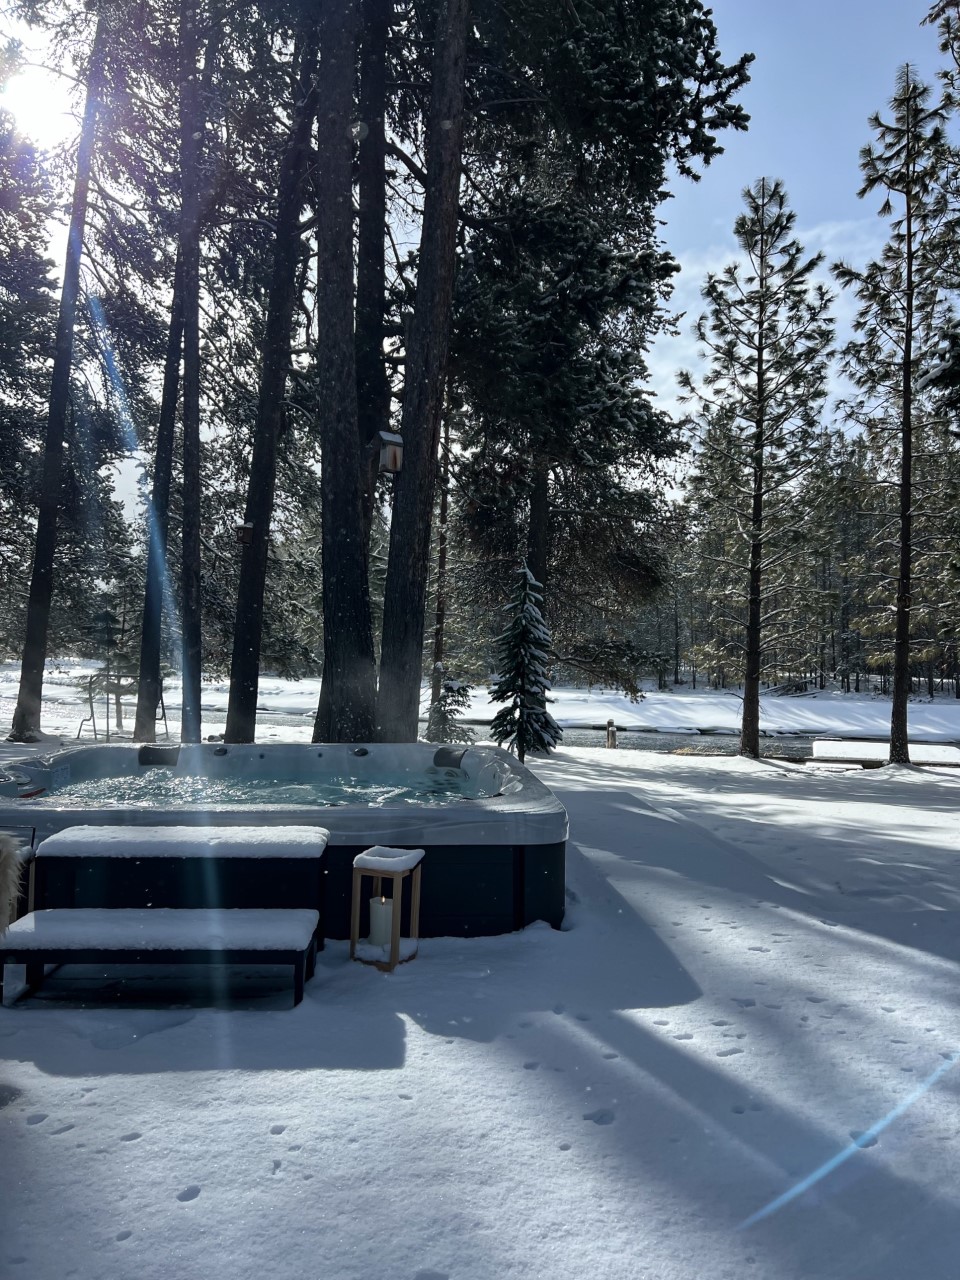
Every day. Seriously. Now that we have had the hot tub for all four of our seasons, (and we do have four distinctive seasons here in Bend)  there hasn’t been a day that goes by where at least one of us, or all of us, enjoy a good soak in hot tub. In the summer, we used it more often during the mornings and evenings. And the fall and winter months, its even more frequent! There is something really kind of magical about being in the nice, hot water while watching the snow fall all around. Kind of like being in your own personal snow globe.

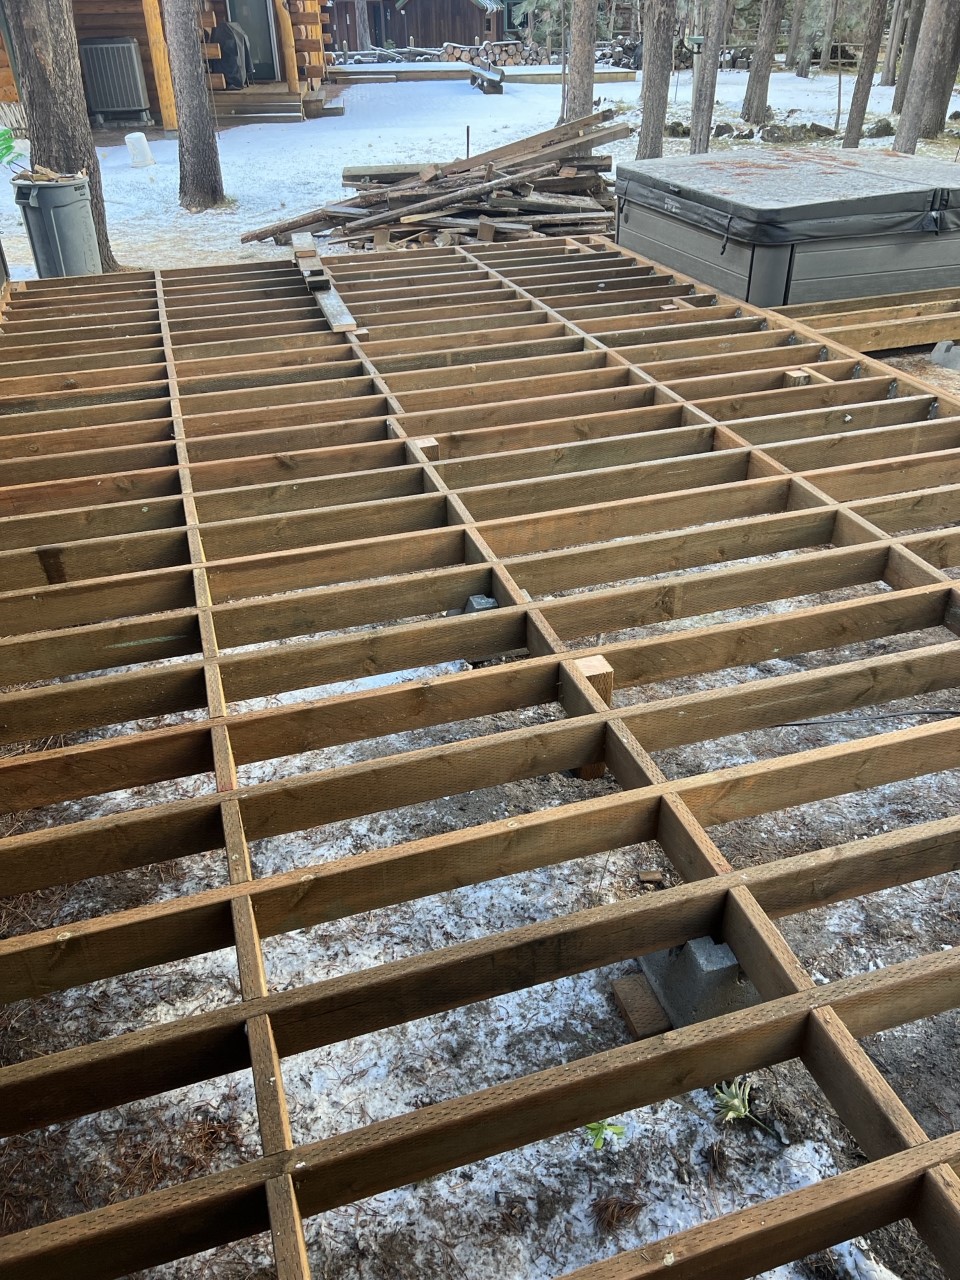
5. What type of plumbing and power is necessary for a hot tub?

We had an electrician come out to help us determine what we needed for the hot tub. We learned that most hot tubs will need a dedicated 220V system for the installation. As far as plumbing goes, you don’t need to do a thing! All you’ll need is your garden hose for filling it, and then your hot tub will have a drain underneath that allows you to drain your water every few months for cleaning and to start your water over again. Easy peasy!

6. NOT ACTUALLY A QUESTION FROM YOU GUYS BUT I WANTED TO MENTION…

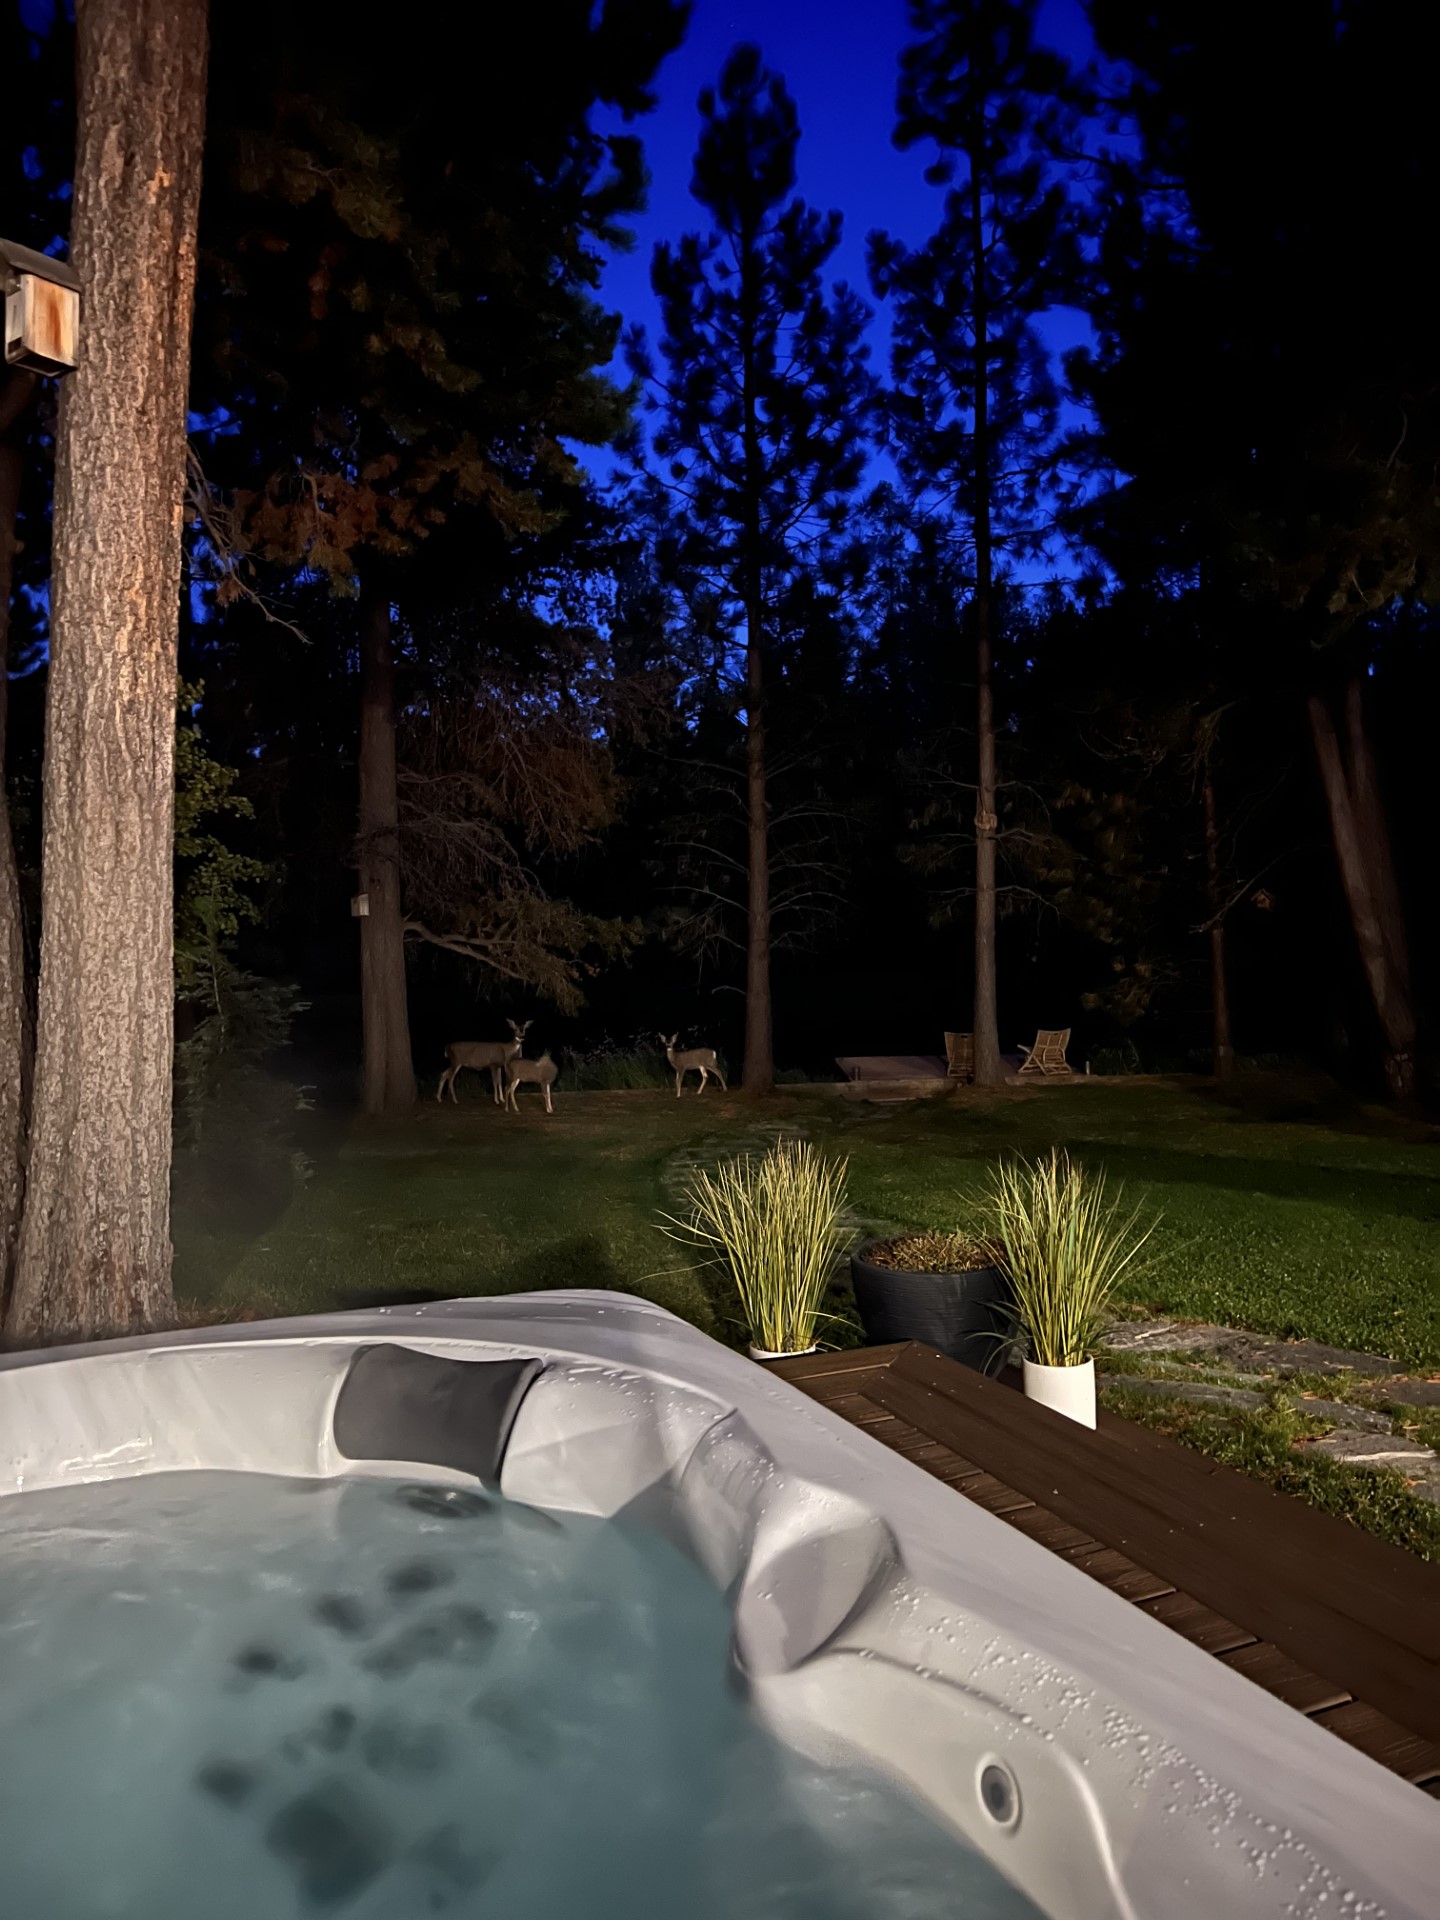
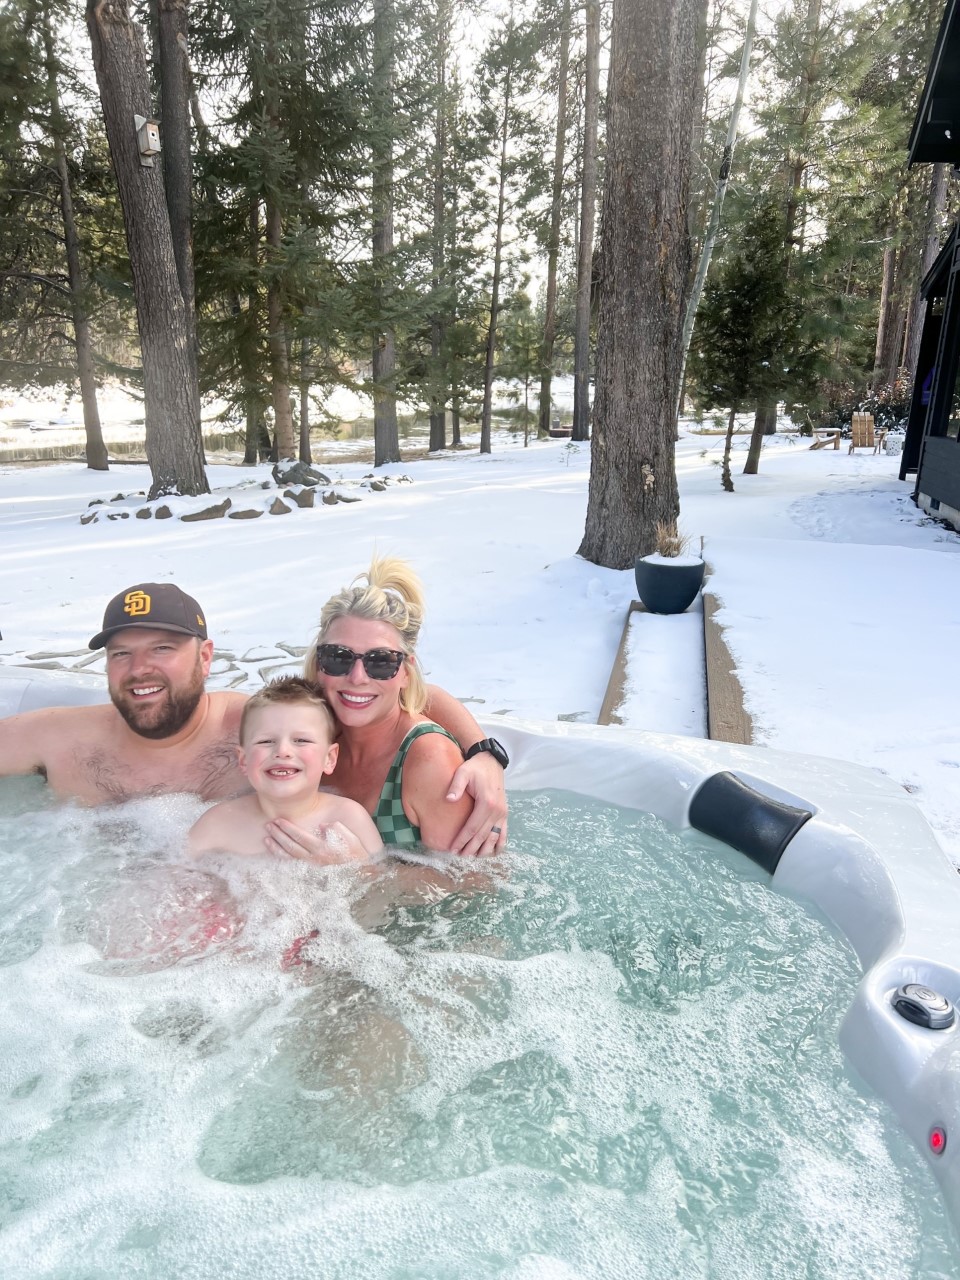
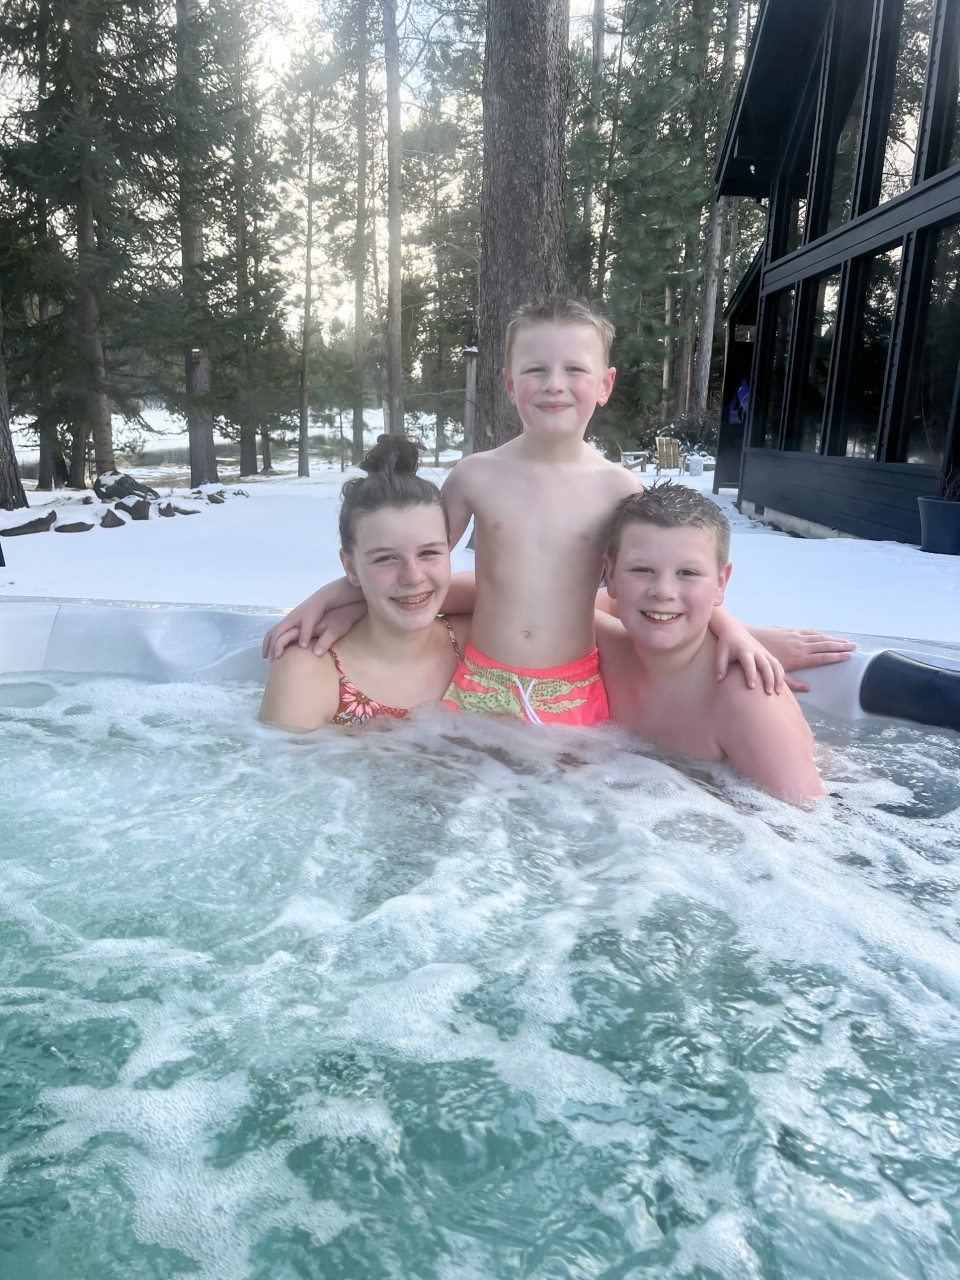
We have been pleasantly surprised at the amount of quality time that the hot tub has created for our family. Obviously, there aren’t any phones or screens of any kind in the hot tub, so the kids are alert and engaged, and as a result, we’ve had so many quality conversations and discussions together. Our littlest likes to tell us spooky stories when we’re all soaking after dark. It’s just the cutest and I should write them down, so I never forget these sweet memories.

One thing is for sure, we love our Master Spas hot tub! I hope this helped answer your questions about our experience as newbies to the hot tub club, but as always, if I missed yours, feel free to leave a question in the comments below. I’ll write ya back! XOXO

Our En Suite Bathroom Reveal!

Hi guys! We’re starting this year off with a bang with a brand new bathroom reveal! This project is a first for us, because this bathroom project wasn’t our typical remodel. It actually didn’t even exist when we bought our house. Confused? Let me explain.

Back in the fall of 2019, we purchased this old fixer upper, knowing that there had been a bedroom addition that was added onto the original floor plan some time during the 1990’s. It was in rough shape though; we’re talking no HVAC, no insulation, and no foundation. The other BIG issue with the space was that there was no way to access it, unless you went through the second bedroom. As a family of five, we desperately needed this bedroom and the extra square footage that it added to our modest size home. So….after meeting with an architect, several engineers, and five different builders, we had plans drawn up to fix this addition and slightly modify our floor plan to accommodate a new bedroom, a new bathroom (EEK!), and a closet.

This photo was taken right after we started construction and eventually would be the site of the new bathroom and closet.

The framing was next up in the construction process, and this is when I started to really get excited about having our very own en suite bathroom. A space solely designed for Nate and me. No kids…just for us. Sounds like a dream, right?! I thought so too!

The floor plan for the space was a simple L-shape, with enough room for a double vanity, the toilet, and a walk-in style shower. My vision for the new bathroom was pretty straightforward. Not a lot of frills. Nothing fancy. So, we began the design process with tile selection. Enter Ann Sacks. Ann Sacks is my absolute favorite source for all things tile. They carry all of the latest tile trends, as well as the classics. I’m probably their biggest fan!

For the shower walls, we went with their Idris by Ait Manos field tile in the 2×6 size option. The color is called White Cararre and it’s the prettiest snowy white, while still having some variation from one tile to the next. This tile is special. It’s glossy, it’s glamorous, and yet, somehow still feels casual and organic. When the sun shines in the bathroom, the tiles really show off with an almost sparkly effect. I love it. For the grout, we went with a simple white.

For the shower floors, we fell in love with their Salluto line. And for just a touch of drama, I went dark with their Nero color option. These tiles are tiny, but pack a punch! When you first glance at them, they almost look like a pebble you would find in nature. But, when you look closer, you’ll see that each tile is an imperfect square, and some have rounded edges that trick your eye into seeing some squares and some circles. They also have a matte finish that I love, but still reflect light. For the grout, I went with a complimentary black.

As for the rest of the floors in the bathroom, we used the Salluto line again, but this time, we switched out the Nero color for a creamy beige, called Bianco. I love the texture that it adds to the space and I especially love the way this tile feels underfoot. Almost like a little foot massage.

When the bathroom was finished, we immediately realized that the space was missing something. And after thinking on it for a few weeks, we decided that the bathroom needed some shiplap. We found this material at Lowe’s and I couldn’t love it more. I think it adds so much visual interest to the small space, and I love the pop of green that we used on the shiplap. The color is called Retreat by HGSW. It’s a moody green that looks different all the time, depending on the lighting.

We selected this vanity that was really an easy choice for us. It’s made from solid teak – perfect for the bathroom and feels so well-made! Also, don’t ya just looooove that chunky hardware? Hubba hubba

For the plumbing fixtures, we went with everything from the Tenet line from Pfister Faucets. I adore their brushed gold color option and the clean lines. It’s functional and beautiful. A winning combo, I think!

I especially love the handheld shower option, and is so nice for giving your hair that extra rinse. It also makes scrubbing up kids and/or pets a breeze!

These sconces were quite the controversial topic over on my Instagram page, and lots of you had big opinions about them. I originally went with a different pair, but ultimately swapped them out for these ones. In the end, I couldn’t pass on that wicker shade or the scalloped detail. They cast the most lovely, filtered light at night that I’m kind of obsessed with, tbh. The mirror we selected is simple and adds a little pop of black, which I wanted to incorporate.

I know this bathroom build was a long process, and thank you guys for all of your support, and for always being our biggest cheerleaders. I’d love to hear what you guys think! Have a question for me? Leave me a comment below! I promise to write you back.

Sources

Paint colors:

White walls– Extra White by Sherwin Williams

Shiplap walls– Retreat by HGSW

Additional Sources:

Vanity

Rug

Shiplap

Floor Tile

Shower Tile

Wall Sconces

Mirror

Robe Hook

TP Holder

Bamboo Window Blind

Scalloped Towel Basket

Lady with a Bubble Print

Waffle Bath Towels

Windows

My favorite deals from the Serena & Lily Sale of the Year

Balboa Nightstand | Flynn Wall Sconce

Have you heard the news? Serena & Lily is having their Sale of the Year and with only a few days left, I thought I’d do a round-up of all my current faves from the sale! You guys know I love me some Serena & Lily, and you KNOW I love a good sale, so this feels like a match made in heaven. Let’s start with some of the pieces that I currently own and love. Ready? Let’s goooooooo!

First things first, this nightstand (pictured above) has been MAJORLY marked down and is such a beaut. I love how casual the rattan feels, while adding a touch of glamour with it’s brass feet and hardware. I’m considering taking advantage of the sale and adding a second one to Nate’s side of the bed. It’s such a classic piece and complements so many different styles/pieces of furniture. Their Flynn wall sconce is such a charmer with it’s wicker shade. It offers the option of a brass or white base and casts the coziest light at night. It’s over 30% off right now!

Venice Rattan Chair

Venice Rattan Chair | Truro Side Table

These rattan chairs are oh so versatile and a favorite of mine! Over the years, I’ve used them in my living room to provide additional seating, on the front porch during the summer months, and even in a bedroom tucked in the corner for a cozy spot to put your shoes on. This cushion is an optional add-on but makes for a nice and plush spot to sit. Their Truro side table, pictured above, is such a unique piece that I always find our guests commenting on when they come to visit. The top of this table is so special and is made from polished fossilized clam shells. The attention to detail here is top notch and almost feels like a work of art!

Pretty neat, huh? They also have this piece in a coffee table version and would be beautiful as the center piece to any living room.

Downing Dining Table | Carson Dining Chair | Headlands Rattan Ring Pendant | Alona Rattan Tray | South Seas Rattan Console Table

South Seas Rattan Console Table

Told ya I love Serena & Lily! My entire dining room is made up of their pieces and I think it makes for a relaxed, but still beautiful vibe. The dining table is bright white with a see-through base, which I think works beautifully in a small dining space, like mine. The woven chairs are so comfortable with their generous seat size and woven seat/back. They also come in black, white, and natural color options.

La Jolla Baskets

I’ve had the La Jolla baskets for years and this is another one of those ultra-versatile pieces that can be used in a thousand different places around the house. I have them in my entryway to gather up those loose shoes, socks, hats, scarves, etc etc etc. They also would make for the cutest toy baskets in a kids room!

Finally, because Christmas is right around the corner, here’s a few other items that I wouldn’t mind seeing under the Christmas tree for me this year! And ALL on sale too! Nate, are you reading this?! Hint…hint…Ahem.

Hanging Rattan Chair | La Jolla Basket in Natural | Riviera Rattan Bar and Counter Stool | Dip-Dyed Stools | Leighton Pillow Cover | Capiz Honeycomb Pendant | South Seas Rattan Bar Cart | Larkspur Petite Table Lamp | Border Frame Sateen Sheet Set

The hanging rattan chair would be so fun in a teen room. My daughter has been eyeing this one for a while now. I have the La Jolla baskets in white, but am thinking the natural ones would be great for our boys’ bathroom to collect all the dirty laundry. So. Much. Laundry. Like, how? These counter stools would be a fun addition to any kitchen and I love that they have a back – makes island roosting so comfy. These dip-dyed stools is another piece that you could use in so many places. I like them in the bathroom! This pillow would be beautiful on a bed or sofa, and comes in a few different sizes! I’ve had a crush on this pendant ever since Chris Loves Julia used it in their entryway a few houses ago. I always thought it was the perfect choice! This bar cart would be so fun, especially for the holidays. I love how it makes the ritual of mixing a cocktail a little more special. The sweet little scalloped detail on this lamp would make for a beautiful bed-side lamp. Finally, these sheets are just so lovley. And sateen? Yes, please.

Happy Shopping, you guys!! Let me know below in the comments if you scored anything from the sale!


My Bedroom Makeover with Miller Paint

This post is sponsored by Miller Paint but all thoughts and opinions are my own

Hi guys! I am sooooooooooooooo (too many o’s? maybe…but I’m so enthusiastic about sharing this project!) dang excited to share this makeover with you today! Behind the scenes, it’s been almost 21 months in the making! So, I owe you a little backstory before we get into all those juicy details and all the photos.

Back in the summer of 2022, we were well underway with our new primary bedroom/bathroom addition that we had been planning on adding to our home since we bought this old fixer upper. Construction was moving right along and all signs were pointing to an end of summer completion date. Pinch me!!! It was around this same time that the wonderful (and I do mean WONDERFUL) folks at Miller Paint reached out to introduce me to their brand new Northwest Collection of colors and asked if I would like to use these new colors for a potential room makeover. I didn’t even have to think about this one. It was an immediate YES YES YES! This curated collection of colors is rooted and inspired by the Pacific Northwest and is chocked full of colors that you find here in the NW…picture rocky coastlines, snowy peaks, and mossy trails. Did you know that Miller Paint is local to the Northwest and is also an employee-owned company? Their paints have been manufactured in Portland, Oregon since 1890 and was originally founded by a local artist. Pretty neat, huh?

And because your girl has DEEP NW roots and a (almost) completed brand new bedroom that needed decorating, this felt like the most perfect partnership! Well, construction gonna construction and timelines kept getting pushed and our completion date got moved back until NOW. All the delays were tough to swallow, but I am so happy to finally have this project behind us. We’re ready to start enjoying this new primary bedroom that we’ve poured so much sweat, tears, and money into! And the best part, Miller Paint didn’t get sick of me with all the constant construction delays, and agreed to let me still pull together this long overdue makeover to show you guys!

Choosing colors from this collection was no easy task, as they are all so beautiful! Fun fact: if you find yourself stuck and just can’t decide on a color, you can schedule an in-person or virtual consultation on Miller Paint. Isn’t that a cool service? But, I finally decided on Snow White | ROO8; a cool, crisp, white for the walls and trim. I like that it doesn’t have any undertones and feels bright without feeling stark white. We used a flat sheen for the walls, and a satin sheen for all the trim. Then, for some much needed drama, we went with Leather Panel | RO42 for an accent wall behind the bed. It’s a very saturated, dark brown that’s kind of a chameleon. Depending on the light and time of day, it can appear anywhere from a deep green, to a chocolate brown, to an almost black. I love that about this color. Now, I don’t mean to brag, but I have painted many a walls in my time as a blogger and an avid DIY’er, and I don’t know if I have ever been so impressed with the quality of a paint until using Miller Paint. It paints on so smoothly, I wasn’t even sure I’d need a second coat. In the end, I did opt for that second coat, just for good measure. But the coverage was amazing and it went on like BUTTAH!

As soon as I started cutting in around trim, I knew I had made the right choice. This hue of brown is moody, and adds so much coziness to the space. Perfect for a bedroom. It immediately started to transform the space. Don’t you just love that about paint? It can change the mood and feel of a space almost instantly. And can we talk about the contrast against that Snow White | RO42 trim? AHHH it’s just so good!!!

Now, let’s get to those AFTER shots, shall we?

For this space, because it’s relatively small, I wanted it to be clean and simple. With no extras and definitely no clutter. With the vaulted ceilings and the pop of color that is the accent wall, I think it’s visually interesting, without feeling too busy. I haven’t even hung any art above the bed because I haven’t found anything yet that feels right. The hunt continues on that front…

I chose this dresser because I loved how it complemented the black windows and french doors, and also because space was a factor. It was tough to find one that fit our small space and this one was not only beautiful, but actually fits in the spot that I had in mind for it! The bed has leather cushions that attach to the headboard, and I love how it has an monochromic effect against the rich accent wall. It seems to be discontinued now, but this one is quite similar. The plaid rug felt like the perfect nod to the Pacific Northwest, and I also loved the way it looked with the cedar ceiling. These sconces are my favorite – they add some nice texture and they plug-in versus being a traditional hard-wire fixture. Installing them is a breeze, and you won’t even need to call an electrician! This nightstand is such a classic piece, and I have been considering adding a second one to the other side of the bed, so they will match. Finally, this pendant is airy and bright and I love the round shape against the tongue and groove on the ceiling.

You can really see below how the color changes depending on the light. This photo was taken late in the afternoon as the sun was getting close to setting. That’s when this hue is the most moody, almost black. It’s very calming.

I love our new primary bedroom so much! Originally, I worried about how this new space would blend in with the original part of the house, but now it kinda feels like it was always here. I feel so grateful, and am even more grateful to the wonderful folks at Miller Paint who were so patient with me during this loooong process. A very special thanks go to Steph and Puji. We are so happy, and even Milton (our new kitten) approves! What do you guys think? Tell me everything in the comments below! XOXO

Before And After: Our Upstairs Bathroom is Finished!

2023 has been such an incredibly busy year for us…and August is only getting started. With our bedroom/bathroom addition finally wrapping up after 18 looooong months, the last thing we wanted to do was to take on another renovation. Then, in early Spring, we noticed a pretty sizable crack in the shower surround in our upstairs bathroom. Instead of pouring money into repair costs, and in a bathroom that DESPERATELY needed renovating, we decided it was best to bump it up on the ol’ project to-do list. This began our five month renovation adventure!

I am so happy with how this bathroom came out, and I’m excited to finally be able to share it with you all today!

We kept the original footprint of the bathroom, which helped keep costs down. It also didn’t really make sense to change it, as we weren’t prepared to start removing walls or stealing space from the upstairs bedroom, that this bathroom is attached to.

This is what that same view looked like before!!

We are getting ready to do some bedroom switcheroo’s around here and once our bedroom/bathroom addition is complete, this upstairs bedroom and this en suite bathroom will belong to our teenage daughter. So, I wanted the space to feel kind of fun and whimsical, while still feeling like it belongs in our rustic, chalet-style home here in the Pacific Northwest.

Now, let’s get into all the details and take a closer look at everything, shall well?

The Vanity

Tile | Vanity | Drawer Pull | Mirror | Wallpaper |Runner | Faucet | Sconce | Hand Soap | Mushrooms || Scrub Brush | Tray | Horse Painting

Landscape Painting | Nude Lady Sketch

Finding a vanity for this space was tricky. It’s not a standard size…not even kinda close. And there was no room to fudge with a wall on one side and the opening for the toilet, on the other. I finally found this one and not only was it the right size, but it’s GORGEOUS. I mean, just peep those legs! It’s solid teak and has a good amount of storage, probably due to the fact that all the drawers are functional and open. They have cut-outs to accommodate the plumbing that’s behind the vanity on the wall. The vanity was the starting point for the entire bathroom, and once I selected that, everything else just, sorta, fell into place. Even the tile!

The Tile

Shower Door | Teak Stool | Shower Faucet | Wiggle Hook

Bathroom Floor Tile | Shower Floor Tile | Shower Wall Tile

After living with an old fiberglass shower surround for nearly four years, I was so excited to start fresh with all new tile everywhere. All of the tile in the bathroom is from Ann Sacks, my absolute favorite tile source! We went with this tile for the bathroom floor, which we had laid in a herringbone pattern. The color is called metallic black, and has lots of depth to it. It’s one of those neat colors that changes depending on the lighting, and I love that about it! I think it’s cool and sophisticated, while still feeling like a classic choice. For the shower walls, I fell hard for these Swiss Cross Mosaics, from their Savoy line.  This is the paperwhite color option, and it’s a lovely and warm shade of white. Perfect, IMHO. The swiss cross shape felt just right for a teen girls’ bathroom, and we went with a light gray grout to accentuate the playful design. The shower floor is also from their Savoy line, but in the herringbone pattern. I thought it was a cute nod to the flooring in the main part of the bathroom, but on a smaller scale. The color is called Lantern, a blueish gray hue that I LOVE.

Just check out these Before shots!

Can you even believe that this is the same space?!

The Walls and Ceiling

Seated Woman Painting | Wiggle Outlet Cover | Wood Blind

Originally, in this bathroom, there was a small section of ceiling that was clad with a five inch cedar tongue and groove. We always loved that about the space, probably the only thing we loved, in fact. Ha! But we thought, what if we continued this cedar throughout the entire ceiling? Yes, please! I love the warmth that it adds and the cedar gives it kind of a spa type vibe. We sealed the boards before install for extra protection from moisture. The walls are also a five inch tongue and groove, but in pine. We went with the pine for the walls because I knew they would be painted Extra White by Sherwin Williams. This is the same white that I’ve used throughout the house. It’s a true white without any undertones. At least, any undertones that I can detect with my ultra-sensitive undertone detecting eyes.

| Wiggle Toilet Paper Holder |

And that’s a wrap! It feels so good to finish this project up, I mentioned earlier this week how this is my new favorite space in the house and I meant it! I LOOOOOVE every square inch of this little bathroom, and I cannot help but smile when I walk in.

XOXO

PS…I tried to source everything for you guys. But, if I missed something, let me know in the comments below, and I’ll do my best to track it down for ya!


Our New Master Spas Hot Tub

This post is sponsored by Master Spas but all thoughts and opinions are my own

Today is a BIG DAY!  It’s been months in the making, but our back yard makeover is complete! This has been one of our slower projects to finish (think construction delays and snow storms galore), but it’s been soooo worth the wait! As a little refresh, many of you already know that we have been adding a new bedroom, bathroom and closet onto the existing footprint (as well as tweaking the floorplan) of our house for the last year. It’s been quite the slippery slope and has forced us to address a few other projects that we didn’t expect to tackle quite yet…looking at you, new roof, and you too, new deck. Does anyone remember when the deck looked like this?

Our old deck was ugly, worn out, and in rough shape. After we talked it over with our contractor, we quickly decided that the entire thing had to go, and the best course of action would be to start over. I LOVED the idea of starting over because it would enable us to change the overall footprint of the deck too, if we wanted. WE WANTED! I’ve always dreamed of a hot tub for our family to enjoy together, and have an obscene number of inspiration pics with decks built around hot tubs pinned on my pinterest page. Then, the wonderful folks at Master Spas said they could help make that dream come true, and I cried tears of happiness. No…really, I did.

We designed the entire deck with the Master Spas hot tub in mind. First, we arranged to have a concrete pad poured where the hot tub would go, then the deck framing began.

The design was simple, and the goal was to wrap the new deck around (literally around) the hot tub with a low, wide step around the entire perimeter where you could step down into the grass. Mission accomplished!

Deciding on the right hot tub for our family, that fit all of our criteria, was simple! Master Spas gives you so many helpful tips, and even has a tool that will help you calculate monthly maintenance and energy costs, so that you can be sure it fits into your budget! We ultimately went with their Clarity Balance 8 model, which comfortably seats 6. It was important for us to be able to fit our entire family at once, because we’ve noticed that once one of us announces they are getting in the hot tub, everyone joins in on the fun! We have a family of 5, and the Clarity Balance 8, has enough room for us all to spread out and relax, even when the whole family is in at the same time. There are 48 jets total, so every seat has a number of jet combinations, and they adjust in pressure, depending on what you prefer. The kids loooooove the waterfall option and it makes such a lovely sound when it’s turned on. Nate swears that he sleeps better after being in the hot tub, and I love it for soaking sore muscles after a good workout. It’s amazing! Oh and I almost forgot to mention that it has a foot massager! They really thought of everything when they designed these hot tubs!

Master Spas offers lots of beautiful color options that you can customize so that your hot tub fits in with your design aesthetic. We went with their Sterling Silver shell, which has a classic carrara marble look, complemented with their Duramaster Graphite skirting. I never realized a hot tub could be so pretty, but pretty she is!

In typical Bend fashion, we are still having quite a few spring snow storms, so I owe you another post on the deck details and cannot wait to share all that with you guys. The temps need to go up and the snow needs to melt first.

This is such a dream come true for us! It’s so wonderful to utilize this outdoor space of ours, especially during the LONG winter months. I am so grateful! Oh, and did I forget to mention just how great the folks are at Master Spas? Just when I thought they couldn’t get any more wonderful, they agreed to share a coupon code especially for my readers that will give you $500 off any hot tub of your choosing! SERIOUSLY!! Just click HERE.

Happy Shopping, my friends! And thank you all so much for reading XOXO


A New Way to Order Furniture Online…and actually receive it ON TIME

This post is sponsored by Serena & Lily

Happy Thursday friends! You guys know my love for Serena & Lily runs deep…well, it’s about to get even deeper! Let me explain why. If you’re like me, and love to shop for furniture online; it’s seriously my favorite past time. Ok…maybe only second to shelf styling, and you guys know how much I love to style a pretty shelf! IYKYK. But, lets get back to my explanation, our current supply chains are a mess here in the US, and I hear things will get a lot worse before they get better. Ordering goods online used to be easy and fast, but now I’m constantly hearing stories about waiting up to twelve months (really! A YEAR!) for a refrigerator or a new treadmill, or six months for your new sofa to arrive. Well, the brilliant folks over at Serena & Lily just introduced a new feature on their site to combat these issues, and it’s so smart!

Now, you can search Serena & Lily using their new availability feature that allows you only shop for things that are in stock and available – ranging from four weeks to 2Day shipping! Such great timing for such a useful feature with the Holiday Season right around the corner! Thinking about a new dining table for Thanksgiving? Or maybe a new sofa for your Christmas guests? Serena & Lily has got you covered. And the best part is, you won’t be left guessing when your order will arrive! Peace of mind for the win!

I just used this new feature to shop for a new nightstand for my bedroom and it arrived in just two weeks from the date that I made the order.

This is their Balboa Wide Nightstand and I think it might be the prettiest piece of furniture I’ve ever owned. It’s handwoven and has that casual and warm feeling. In contrast, the brass drawer pulls and brass detail on the feet really dress it up. Really the perfect combo between casual and formal IMHO. This nightstand is the new star of our bedroom!

The drawers are generous in size and allow you to store all of those nighttime essentials, like chap stick and your phone charger.  The shelf on the bottom is a fun spot to display your fave decor pieces or stash your collection of bedside books. Anyone else love a cozy reading session before bed? Me too!

So, in honor of my new nightstand and Serena & Lily introducing their new avalability feature on their site, I thought it would be fun to round up a few of my favorite nightstands for you guys! All of these pieces will arrive on your doorstep within four weeks! So, let’s GOOOOOO!!!

First up, is the other Balboa Nightstand, a close relative to my Balboa, but smaller (for those tight spaces) and with the white drawer. I love the pop of white on this one. Feels so bright and fresh!

Next, is the Atelier Wide Nightstand with its clean and modern lines. This nightstand would pair beautifully with a wood or rattan bed to make for an eclectic, yet timeless look. Ample storage is another big bonus for this babe.

Meet the Harbour Cane Wide Nightstand. I was so drawn to this one with it’s fluted legs and the perfect wood tone. It feels traditional in style and has a cane shelf. It has an antique quality to it, which I love. Also, it comes in three different color options, and who doesn’t love options?!

Allow me to introduce, Reese, who is made from oak and has the prettiest cerused finish. I’m all about this sturdy frame and the little turned feet. So cute!

And finally, we have their Caledonia Woven Nightstand. I love that this one could fit right into so many different styles of homes. The seagrass detail on the drawer adds a touch of coastal style, while the oak gives it that classic feel. And how good are those leather pulls?! #ILYSM

Well, is anyone getting the shopping itch after all that cuteness? Leave me a comment below and tell me which one is your fave! It’s kinda hard to pick just one! Happy Shopping, friends and as always, thank you for reading!


Dining Room Makeover with Serena & Lily

This post is sponsored by Serena & Lily

A few months ago, I shared with y’all that I was on a mission; to give our teeny weeny dining room a new look, that also functioned well for our family. This lil’dining room is a challenging space that has had me scratching my head since we bought our home back in the fall of 2019. Our floorplan is an open concept (which is great, but can make furniture placement tricky!) and the dining space sits right in the middle of the kitchen and our living room. Here’s a look back at what this space looked like when we bought this old fixer.

Can you believe this is the same house?! Gives me all those warm and fuzzy feelings. Anyways, let’s get into the details of this fresh new look!

After taking one look at Serena & Lily’s Downing Dining Table, I knew it was perfect. I had been on the hunt for a dining table with a white finish as I thought it would be a nice way to break up the many wood tones I have in my house. This is one of the challenging parts of an open floor plan; all of the tones/finishes have to work together to form a nice cohesive look. I also love the airiness of the table. You can see through the legs and it doesn’t obstruct your view from either room. Such a beautiful and classic look, IMHO.

Chairs came next! I went with their Carson Side Chair. I love the woven seat/back that offers a casual vibe, that you guys know I’m a sucker for. The dyed pieces add a beautiful detail, and the black accent helps to tie together other elements from around the room. Arms are optional on this chair, but I opted to go without arms, that way it would easily tuck under the table. If I had a larger dining room, I would have definitely considered going with arms. The seat is wide and comfy, and wipes right up when my kiddos spill…which may or may not happen just about on the daily around here.

This rattan tray is perfect for displaying your favorite decorative pieces, plants, or could round up more practical items, like napkins and silverware. It also has leather-wrapped handles that gives it a certain something special.

While the pendant light isn’t brand new to the space (we added it last summer), it completes the look! It’s entirely made by hand, and I love the shape! It’s modern, but not too modern, if ya know what I mean. My mom loves it so much, she’s considering this same pendant for their new house too. My sister, mom, and I are always copying each other when it comes to home design!

Lastly, I chose the South Seas Console to add storage, and for the opportunity to style it up! Every dining room needs a cool console table. They are so versatile, and can be used to store your fancy china – if you are a fancy china kinda person, or just use them to display your favorite things!  I love that it has two levels, and can definitely see myself switching out decor whenever the mood strikes. If you’ve been following along for a while, then you know that decor swapping happens to be one of my favorite past times.

So that’s it! I am so happy with how our little dining has transformed into a beautiful, casual, and functional space for our family! Thank you to the kind folks at Serena & Lily, who are always a joy to work with. So, what do you guys think? Let me know in the comments below! My hope is that it will inspire some of you that are dreaming up new looks for your spaces! XOXO

New Beams for the Guest House

This post is sponsored by Ornamental Decorative Millwork

When we started this guest house remodel, I decided early on that I wanted a casual, cozy, and comfortable (my favorite three C’s) space for our guests to enjoy when they come to stay with us for a visit! And because design with lots of wood accents is my love language, I started brainstorming ways to add warm wood tones wherever I could! We got right to work replacing the old carpet with wood floors, covered the walls with pine tongue and groove planks, and started researching ways to update the old beams. This is what they looked like before…

The old beams were constructed of pine 1×3’s that had been stained a very dark tone. If I’m being blunt, they were just plain ugly! We considered building our own version of the beams, until I happened upon these beauties from Ornamental Decorative Millwork. I love the idea of adding beams to a room, it adds so much interest! These decorative beams checked all the boxes for me; they were beautiful, easy to install (more on that in a sec!), and they came with everything we needed for installation. Right down to the screws! We also went with these black brackets that are used to cover the seams that are between each beam. Another bonus – you can buy them at Lowe’s or Home Depot too!

As far as the installation process goes, I would give it an enthusiastic A+! Easy peasy! Pictured above, is the backer board that Ornamental Decorative Millwork is kind enough to include when you purchase these beams. They thought of everything, I tell ya. These are installed first, and act as sort of a map so that you can visually see where your beams will go. Once the backer boards are all up, next goes the beams!

The beams are U-shaped which makes them light in weight and makes them relatively easy to lift. Nate and I put them all up without any help from anyone.

Nate raved about the pre-drilled holes that indicate where the screws should go, so you didn’t have any extra or unnecessary holes. Also, check out that wood grain and texture. It gives the beams an old world, rustic vibe that I am digging big time.

After the beams are secure, the brackets are the final step. They simply slide right over the beam and cover the seam between each piece. The brackets come with their own matching screws, that help to complete the look. I love how the black complements the other black accents in the room, like the windows.

That’s about it! I am just so thrilled with this update and can’t believe how far this lil’ guest house of ours has come. If this guest house was my baby, I’d def be having a proud mom moment right about now. A big thank you goes out to the team at Ornamental Decorative Millwork, for sponsoring this project. I am so grateful! Now, who wants to come and stay with us for a long weekend??? Any takers?

The Guest House Kitchenette is Done!

Today is an exciting day around our house! Our kitchenette in the guest house is finally complete and I am so dang excited about how it came out that I could shout it from the roof tops! I think we should just get right into it, because I just can’t wait to show you guys! Sorry in advance for the amount of !!!!! that you will see in this post…please forgive me in advance.

Ahhhhhh are you screaming yet??? Cause I am! My goal was to create a fun and collected space that didn’t feel too serious. I also wanted it to feel like it was related to the main house. Think cousins, but not twins, ya know? We had so much fun putting this little kitchen baby together, and I couldn’t be happier with this new look! Check out how this same space looked a few months ago…

The cabinetry was problematic, and like everything else in this old place, was in very poor working order. Saggy cabinet doors and drawers that were completely stuck in place! The biggest problem with the cabinetry before, aside from its ugliness, was that it wasn’t a well thought out use of space. Nothing about this sad space made sense. So, we decided early on that we would gut the entire thing, and start over fresh!

The started from the bottom and replaced a linoleum and carpet situation from the 80’s with the most beautiful engineered wood from Provenza Floors. These are from their Affinity Collection in the Couture Color option. I could write an entire post on how deep my love runs for these wood floors, so I think I will do just that! I will be back next week to give a play-by-play on everything about these beauties; like how the install process went for us and how they are holding up. Guys, seriously, these floors MAKE THE SPACE. But, more on that later!

The appliances are from Cafe and they are AMAZING. Our kitchen in the main house has appliances from Cafe, so I can attest to their quality. Cafe is really on the forefront of mixing beauty with functionality IMHO. They look great and function even better…it’s a win win. We went with this range for its double oven option. I’m thinking about all of the desserts that could go in the top tier while dinner is in the lower tier. Ummmm…..yes yes yes. Instead of going with a full-sized refrigerator, which would remain mostly empty, most of the time, we opted for this beverage center which offers up a surprising amount of  storage but with all spots for storing wine/water bottles. It’s been really fun to stock the beverage center with drinks for our guests. When my Mom and Dad come over to stay, I fill it up with sparkling waters for my Mom and some bottles of Pinot for my Dad.

For the countertops, we enlisted the help of our friends at Nelson Tile & Stone, who also did our countertops in the main house. We decided on their Calcatta Quartz, in the Valentin color. It’s soft and subtle, with veining in both gray and gold tones. It’s STUNNING! And just as an FYI, they keep this particular stone in stock! We love everyone at Nelson Tile & Stone, and Jennifer, was instrumental in the design process of the space. She helped me decide on the stone itself,  then found the perfect faucet, (it was exactly what I was picturing) and even a drain to match!

The tile is from Ann Sacks and I smile every time I see it. Seriously, it’s that good! This is their Idris by Ait Manos in the 4×4 size. I went with the White Carrare color, but Ann Sacks carries this tile in six other colors. I have been drooling over the powder pink color for our next bathroom remodel and think I even have Nate talked into the idea of a pink shower! The cool thing about these tiles is that they are all hand-made and offer up an earthy, organic vibe to any space, which works in just about any style of home. Each piece is a little different from the next and I just love that!

This showpiece of a light is from Sazerac Stitches. This is their Cancer Flushmount and can be used as a flushmount fixture or a sconce! Cool, right? This hand-made brass work of art is designed to look like the cancer astrological constellation. The combos of socket and disc sizes, as well as arms with brass balls mimic the look of the small and large stars in the constellation. This piece in particular, saved the day for me and solved the issue of the lighting placement not being centered above the window/sink. The assymetrical design creates the illusion that the light is centered in the space. And the brass complements the cabinet hardware and faucet just perfectly! Sazerac Stitches has a variety of styles, and their designs are unique and offer something unexpected, if you are wanting to add some serious pizzazz to your home. I have another cutie from Sazerac Stitches that’s going up soon when work on the rest of this space! I can’t wait to show you that one!

The cabinet hardware is also brass and I am digging the simplicity of it! With just a few cabinets in our small space, I wanted the cabinet hardware to not steal the show from the other elements in the space. I think these little round beauties, do just that! They are also surprisingly substantial, and are quite heavy!

Ok guys! I think that’s about it…did I miss anything? So what do ya think? As always, a big thank you goes out to all of you for cheering us on throughout this project! Your questions, comments, and support really mean the world to me and make big projects like this one, so much more fun! Leave me a comment below and tell me what you think of the new space! I’d love to hear your thoughts!


1 2 3 9