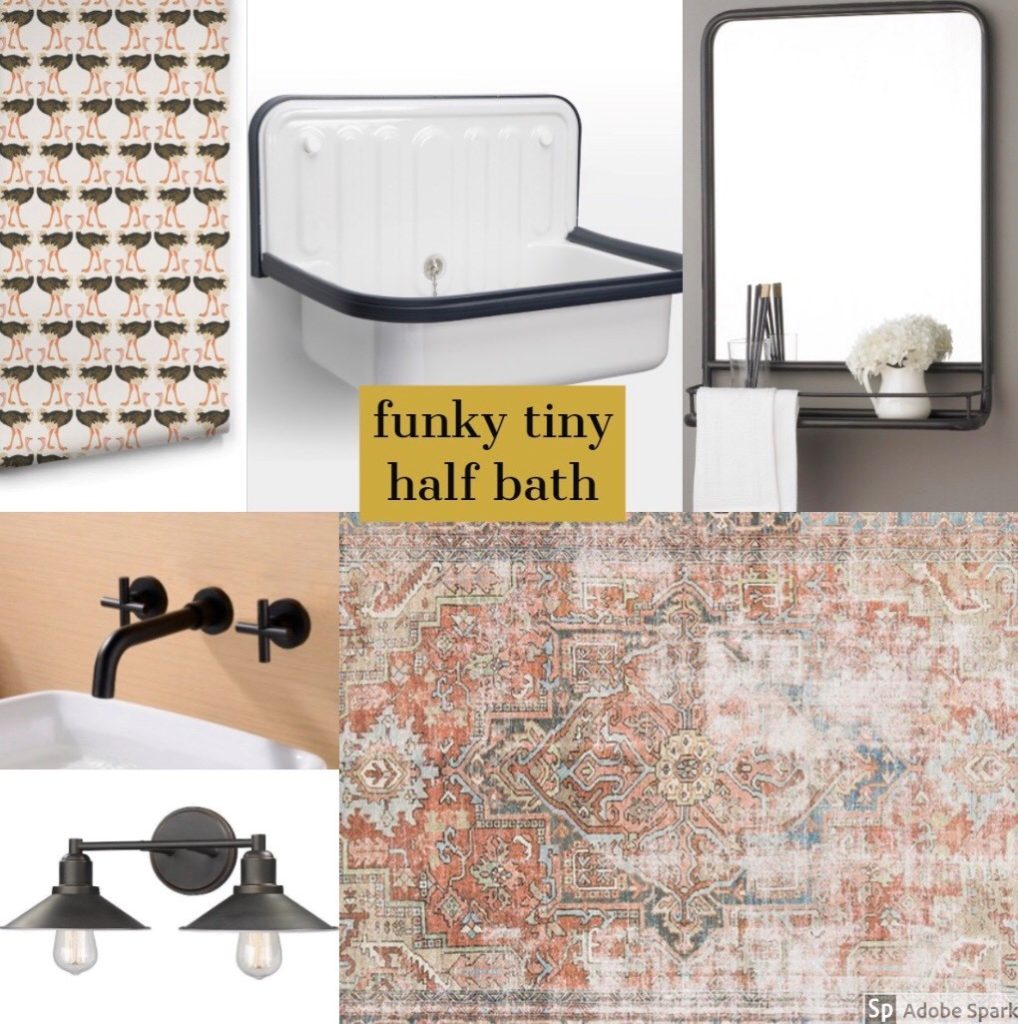
It’s week Five of the One Room Challenge! This is also the week where I realize there is only one week left to finish up – everything! Well, you know what they say, time really does fly when you’re having fun…errrrrr renovating a bathroom. Last week, for Week Four, we finished the wallpaper but we still don’t have ya know, a toilet, a sink or anything else that makes this space a proper bathroom. And just in case you need to do some catching up, here are links to Week Three, Week Two, and Week One. Also, here is my mood board that has been serving as a blue print and as sort of my inspiration for the space.

And now that we’re on the subject of the moodboard, I have made a few modifications since we are so close to finishing this thing up! The first change is small but the light that I originally had picked was actually more of a bronze in color and after I saw the black, black faucet and some other finishes in person, I knew it needed to be black. So the new one is black and just a single light, instead of the double that is pictured above. The other change is the rug. I had been eyeing a vintage rug for weeks and I finally went ahead and pulled the trigger. I am so excited to show you guys but I think I am going to save it for the reveal. Gotta have a couple surprises, right? And the third and final change is the mirror. I started feeling like the space needed some warmth in all that matte black so I changed my mind and went with a wood mirror. Again, you’re gonna have to wait to see that until next week!
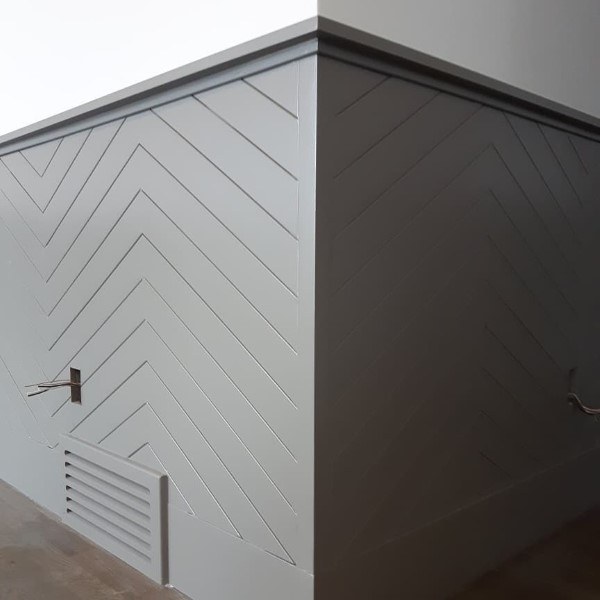
Ok – now back to business. This week we focused on the wainscoting! Remember the inspiration photo I showed you all a couple weeks ago?

We’ve made a few modifications to the design, mostly just with the angles of the wood and a few pieces of trim that we added. I’m really proud of this wainscoting and really think it’s going to give the space some serious pizzazz.


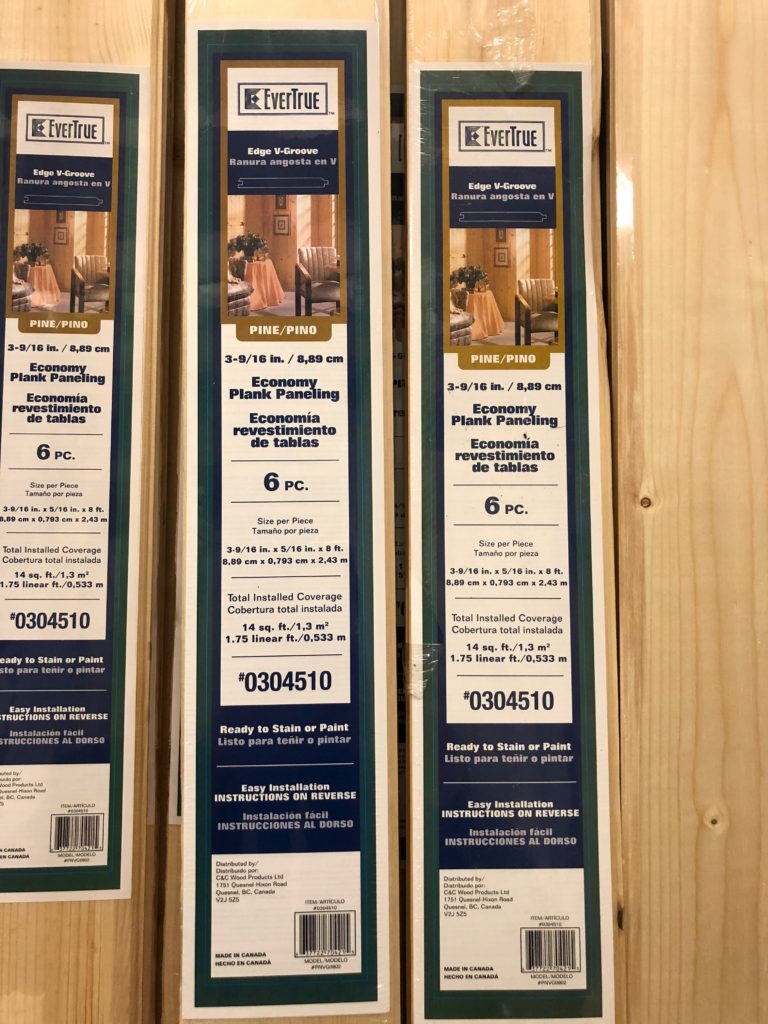
My husband and I both thought that this process was going to be a lot more difficult than it actually was. We found this material at Lowe’s and we love it! We are going to be using it for another project in the future, I’m just not sure what, yet.

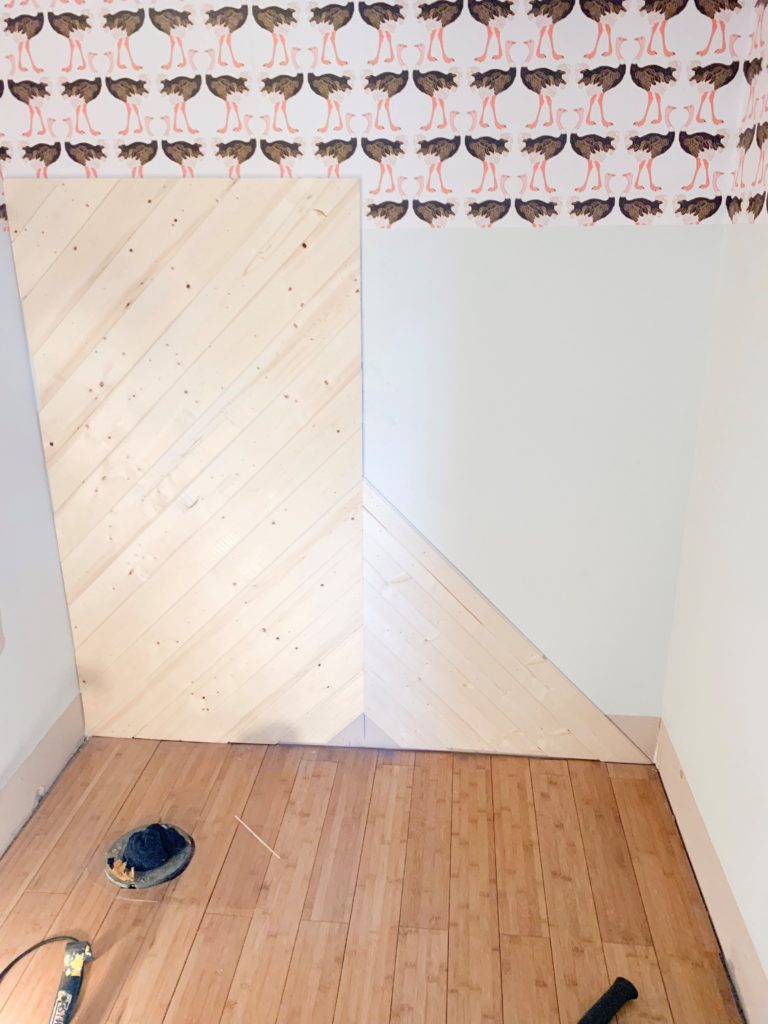
The first thing we decided on was how high we wanted the wainscoting to go up the wall. For us, we wanted it a bit higher than traditional wainscoting and opted for 54″ from the floor. We snapped a horizontal chalk line around the room at that 54″ mark. Next, we snapped a vertical chalk line at the mid-point of each wall. This would mark where we wanted the planking to meet. After those two things were done, we had another decision to make: at what angle do we want the planks? Once we held a few pieces up on the wall so that I could visually see the angles (cause I’m a visual person and that’s what makes it easiest for me to make decisions) we pretty quickly landed on a good ol’45 degree angle for the win! And then it’s slow and steady progress from there…plank by plank and cut by cut.
Since the wainscoting was going up, this meant that it was time for us to make the plumbing modifications for our new wall mount faucet. But, we are the luckiest people around because our neighbor happens to be a plumber! I know, I know, don’t be jealous. So, he was nice enough to donate his time and showed my husband the ropes and they got that new faucet installed and looking GOOD. Thank you, Phil!!


The wainscoting is almost completely done and that means that I’m going to be filling ALL those nail holes and then painting it. I can’t wait to see this all painted! Here’s a progress shot so you can see exactly just how many nail holes are in the planks. Holy moly…there’s a lot.

Also, I found a paint color and here’s a sneak peak for ya!

So that’s our progress report for this week! Can you believe we only have one week left??? I’m so excited to finish this project and I’m also giddy to see some of the other makeovers. I’ve been poking around on some other blogs to see how the progress is coming along and it’s looking like some pretty fabulous projects are in the works. Can’t wait!
Oh and here’s my final to-do list so I can finish this baby up:
- trim out wainscoting
- fill all nail holes and caulk and sand wainscoting
- paint wainscoting
- install toilet
- install sink
- clean the whole space – all that construction dust and mess
- accessory time – install mirror, toilet paper holder, and towel hook. Hang art!
So much to do in so little time! Think I can do it???


17 comments
The paneling looks so great! You guys are doing an awesome job. I wish I knew a plumber! hahaha!
Right?! There’s def a few perks to having a plumber next door! And thank you so much! XX
Love the wall mounted hardware along with everything else! I’m looking forward to the reveal.
Thank you Libbie! I can’t wait for you to see it! XX
That’s amazing! I love that you made the wainscoting angled! Genius! I love small spaces, you can have so much fun filling them.
I totally agree, Erin! Small spaces can def pack a punch! And thank you! XX
Wow, that wall mount faucet looks great on the wainscoting! I like the tip about the planking you found at Lowe’s. Can’t wait to see the vintage rug you chose!
Thank you Kylie! I can’t wait to show you! Almost time!!
Girl, you got this!! And your wainscoting is nothing short of extraordinary!! Knocked it outta the park. I cannot wait to see the finished product!! ???
Oh thank you Jessica! We are on the home stretch now! Can’t wait to see your entryway!
Love the sink you’re using. And the wallpaper is so whimsical!
Thank you so much! Isn’t the wallpaper so fun?!
Thanks for writing this awesome article. I’m a long time reader
but I’ve never been compelled to leave a comment. I subscribed to your blog and shared this on my Twitter.
Thanks again for a great post!
Thank you so much for subscribing and for the feedback! I really appreciate it!
Hi there! Such a nice article, thank you!
Well thanks so much!