Search results
40 results found.

diy'ing our way through house number two
40 results found.
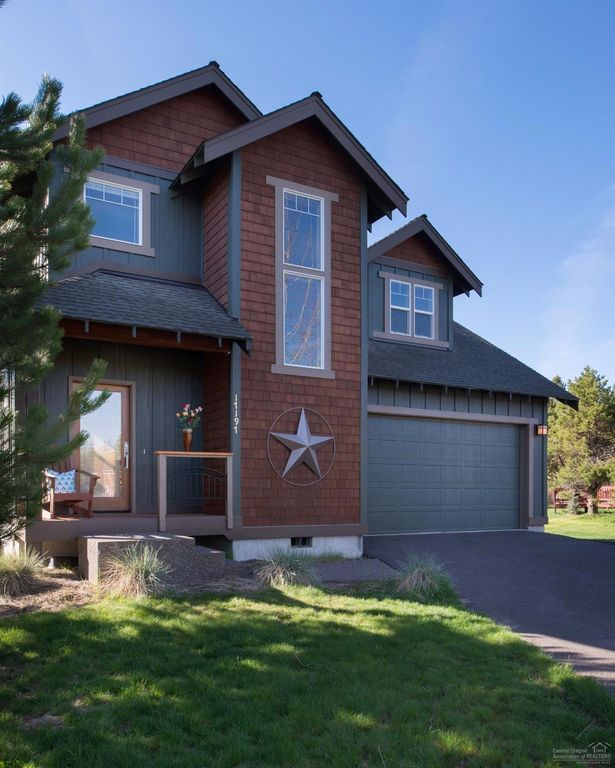
– Exterior –
This is the house the day after we moved in. Zero landscaping has been done as it’s been a vacation home for a family since it was built in 2006.
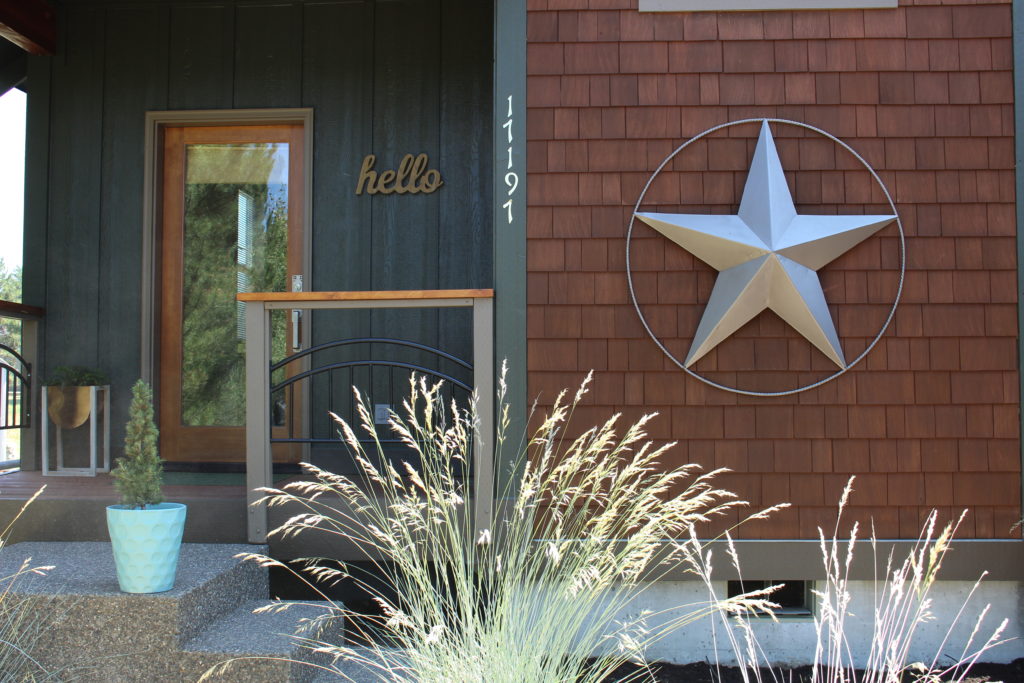
– Progress –
Here’s where we’re at after updating our house numbers, rebuilding our porch railing, wrapping our post in cedar and adding a few accessories.
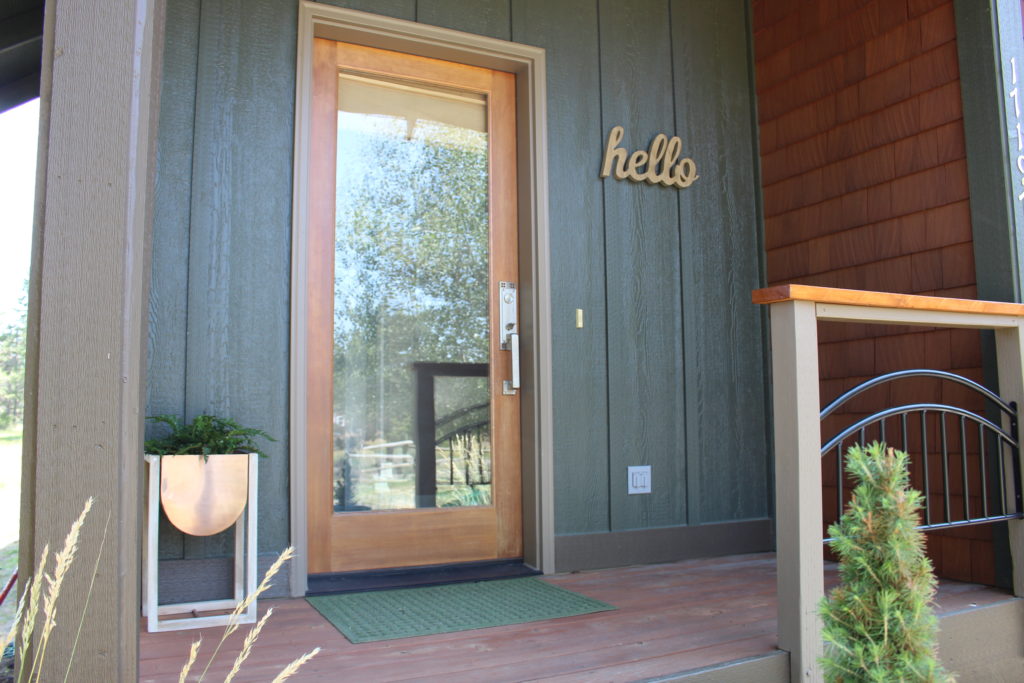
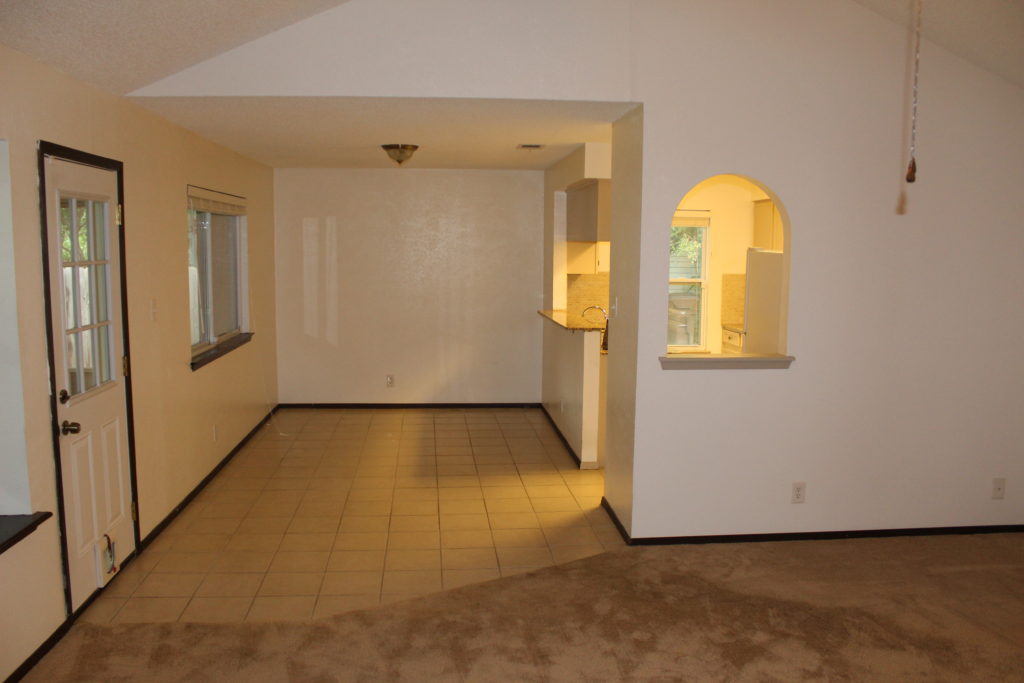
– Entryway –
There is a long hall when you walk in the front of the house with stairs on your right so you can either head upstairs or continue straight through to the kitchen, dining room/family room and the master bedroom.
– Progress –
Things are looking much brighter after new paint, a diy entryway bench, and some decor updates.
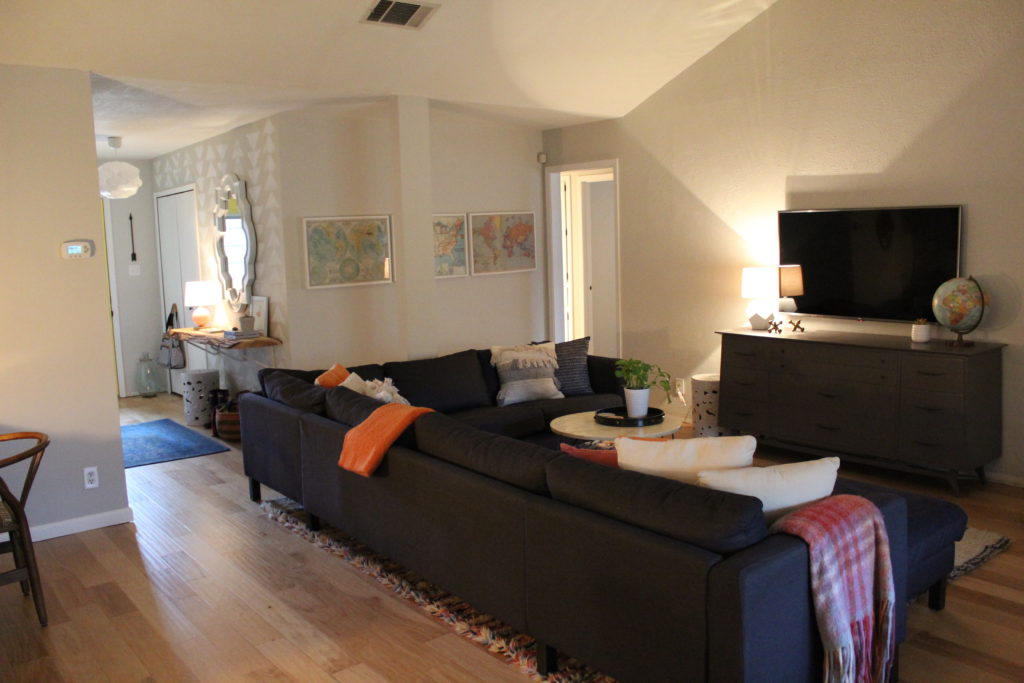
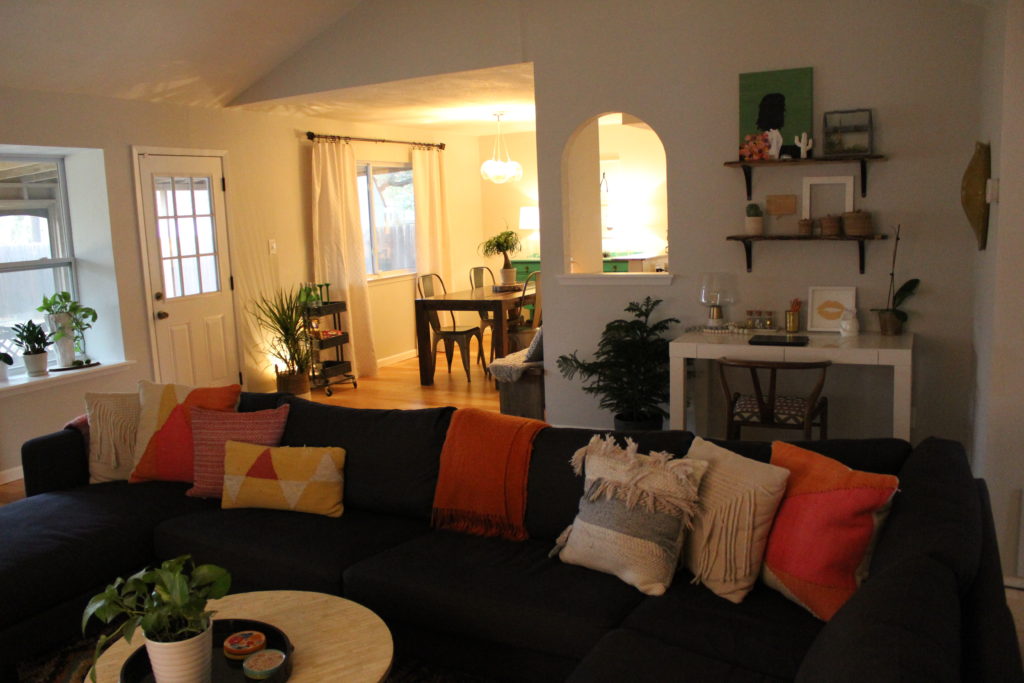
– Dining Room/Family Room –
Here’s the living room shortly after move in day.
– Progress –
Here’s where we’re at these days. I’ve been playing around with the furniture configuration since day one, but we are getting closer.
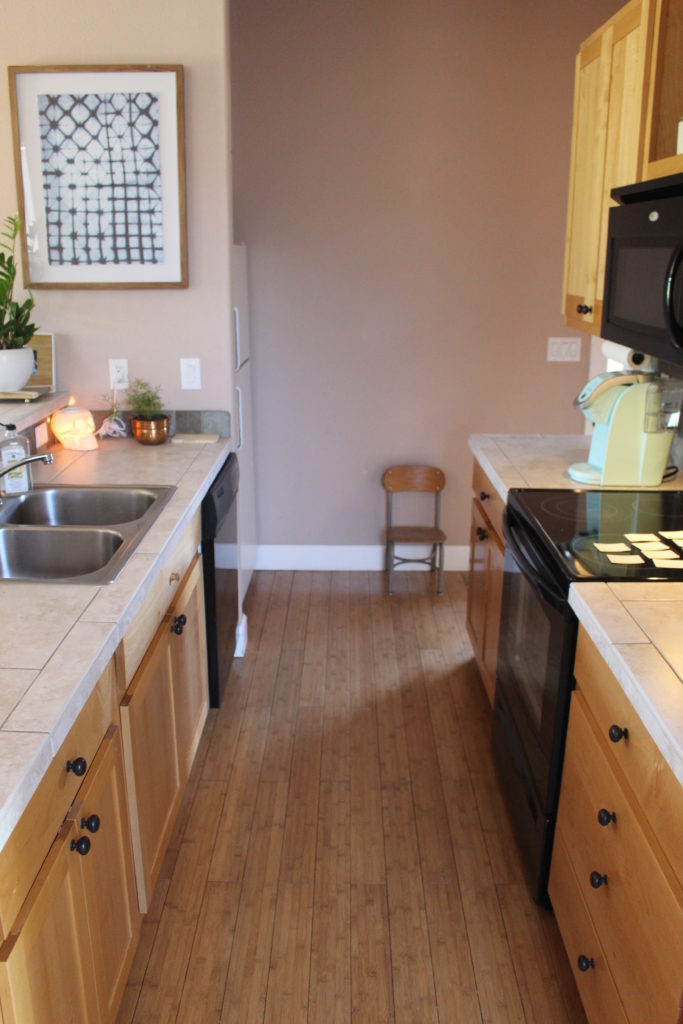
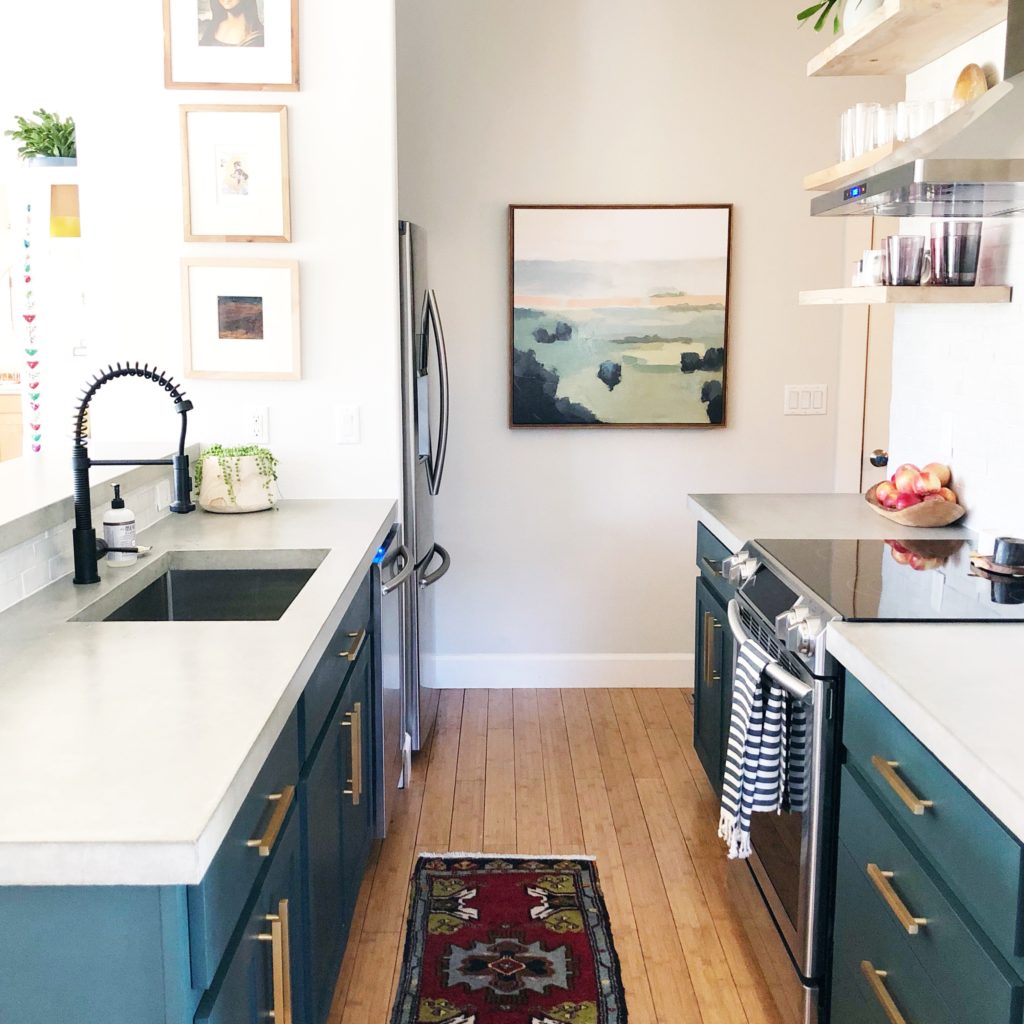
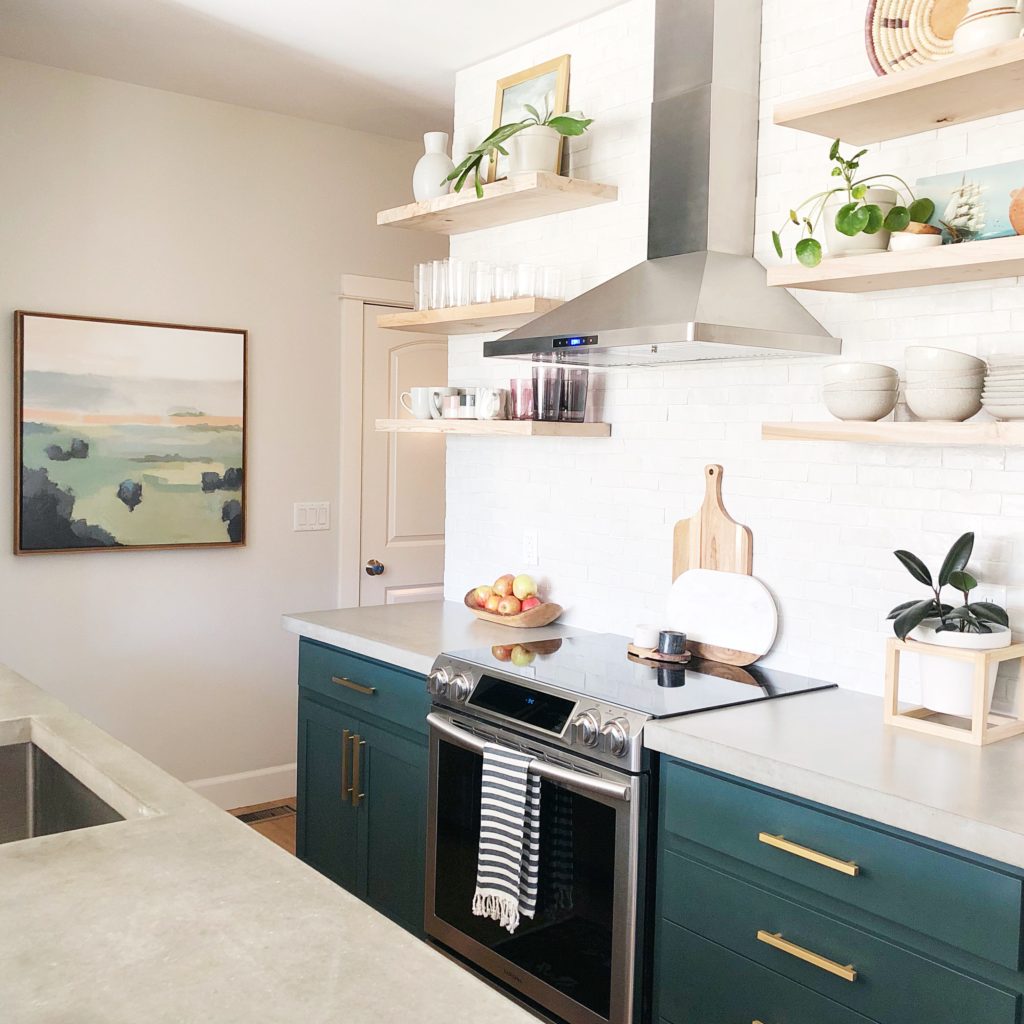
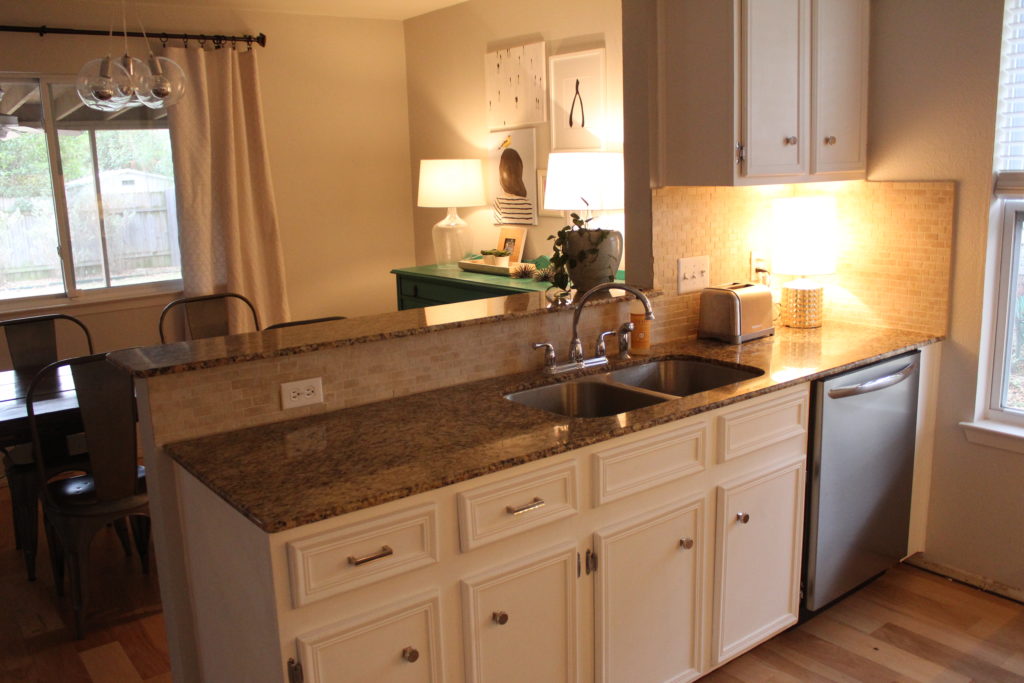
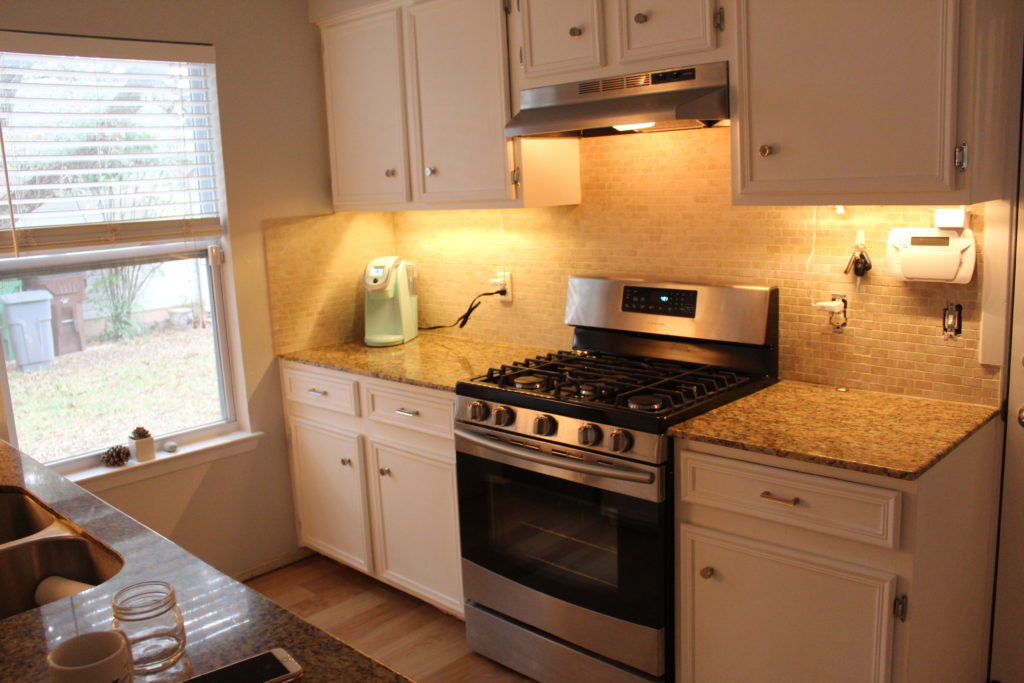
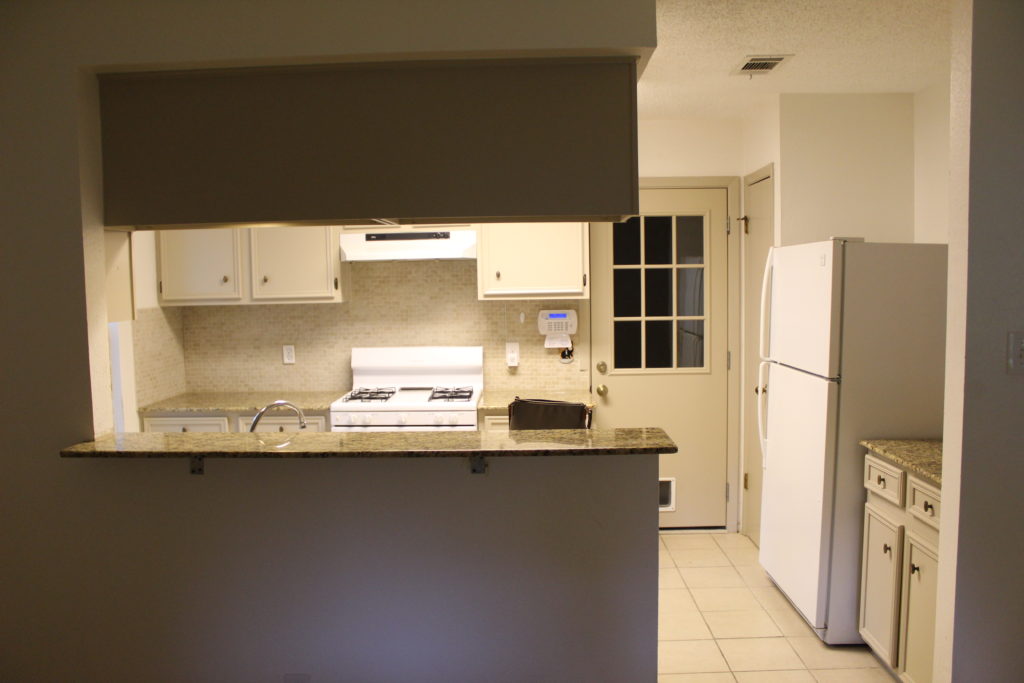
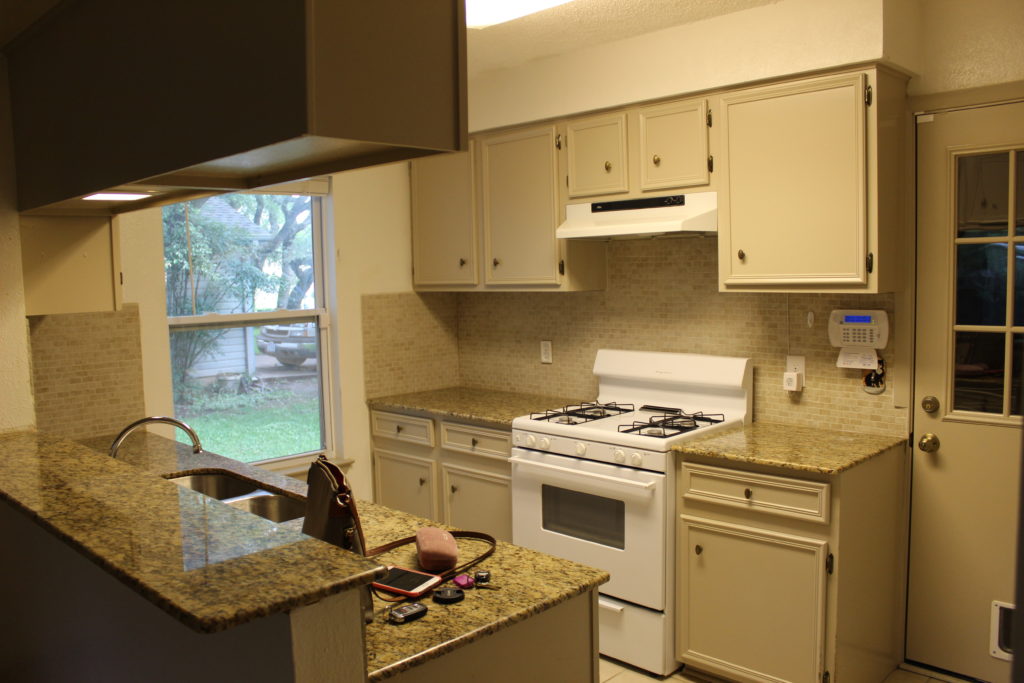
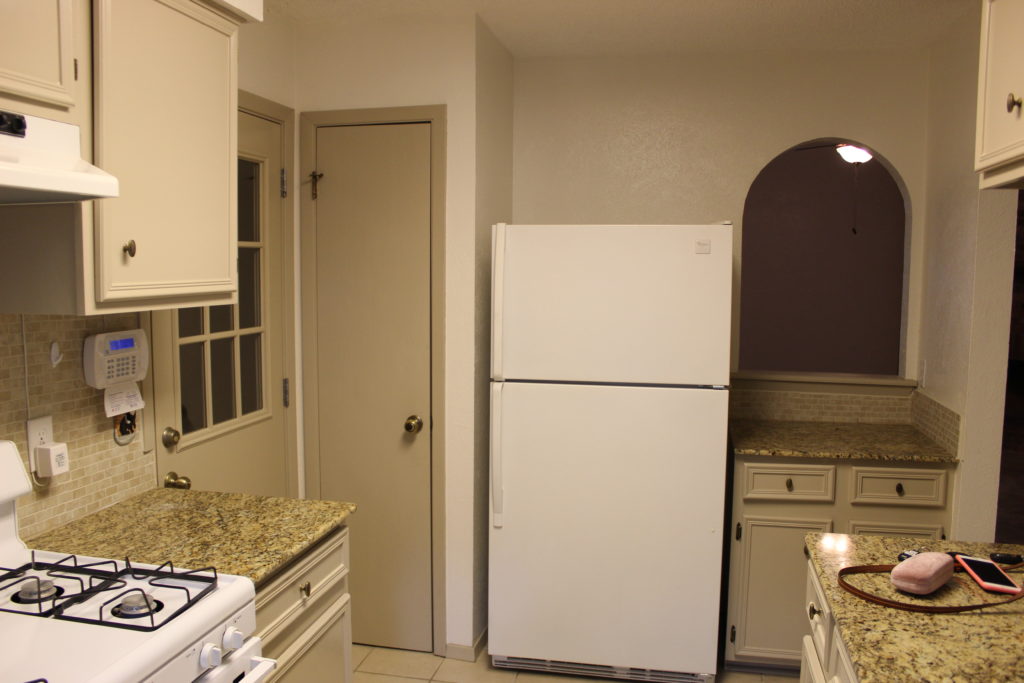
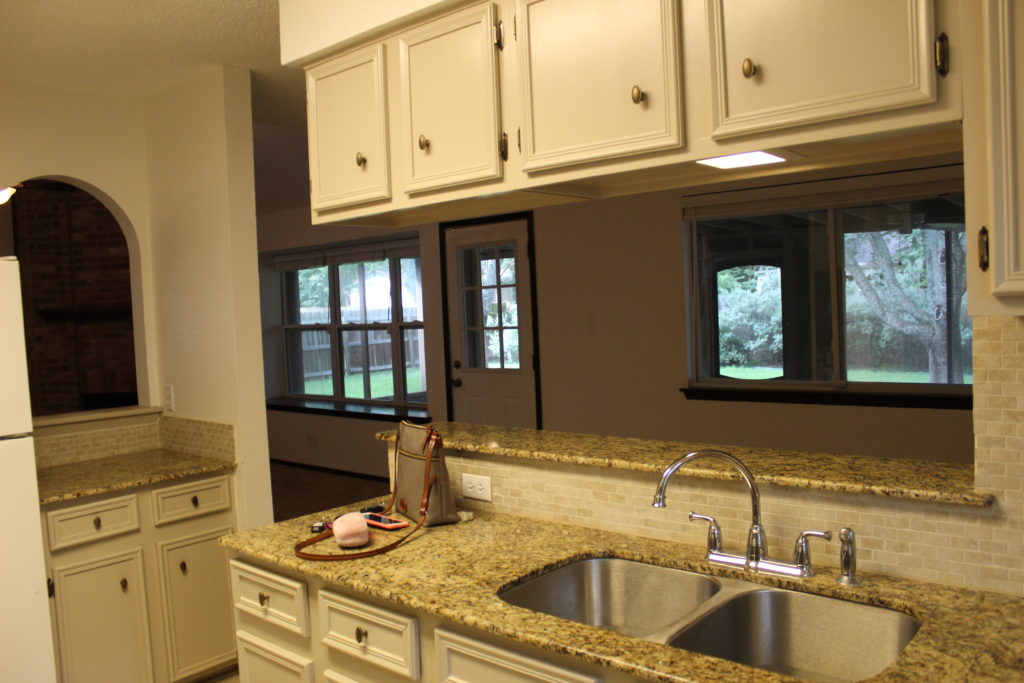
– Kitchen –
This is how the kitchen looked when we moved in.
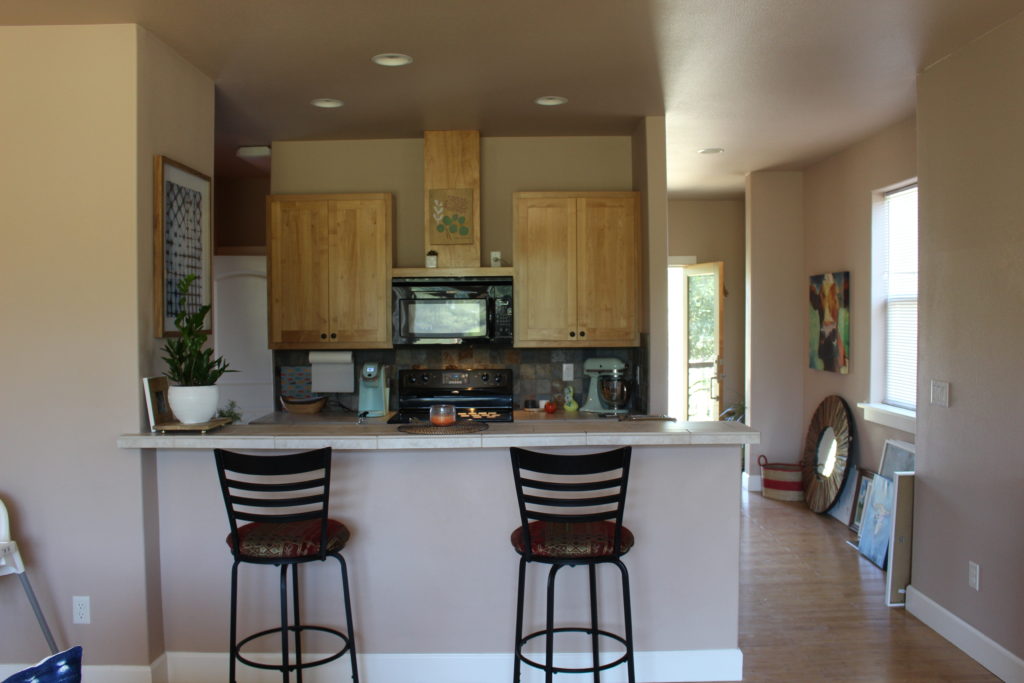
– Progress –
This is how the kitchen looks after we updated practically everything. We poured our own concrete countertops, installed tile and painted the cabinets a deep moody green.

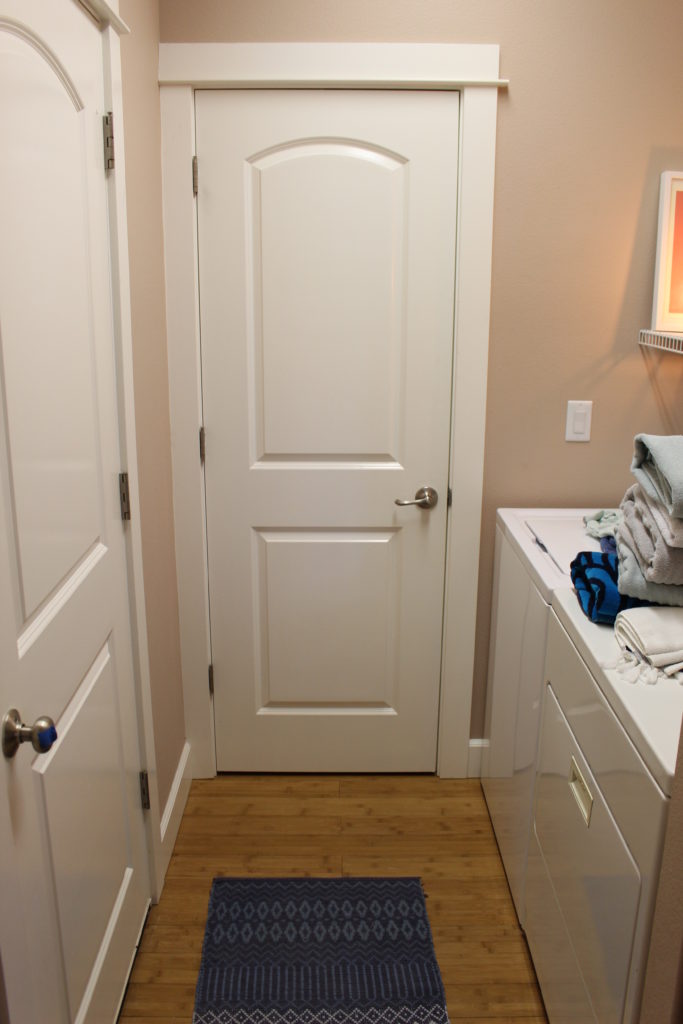
– Laundry Room –
There is a small laundry room right around the corner in the kitchen with a door that leads to the garage. I love small spaces though. Less materials to buy and they always seem to pack more of a punch.
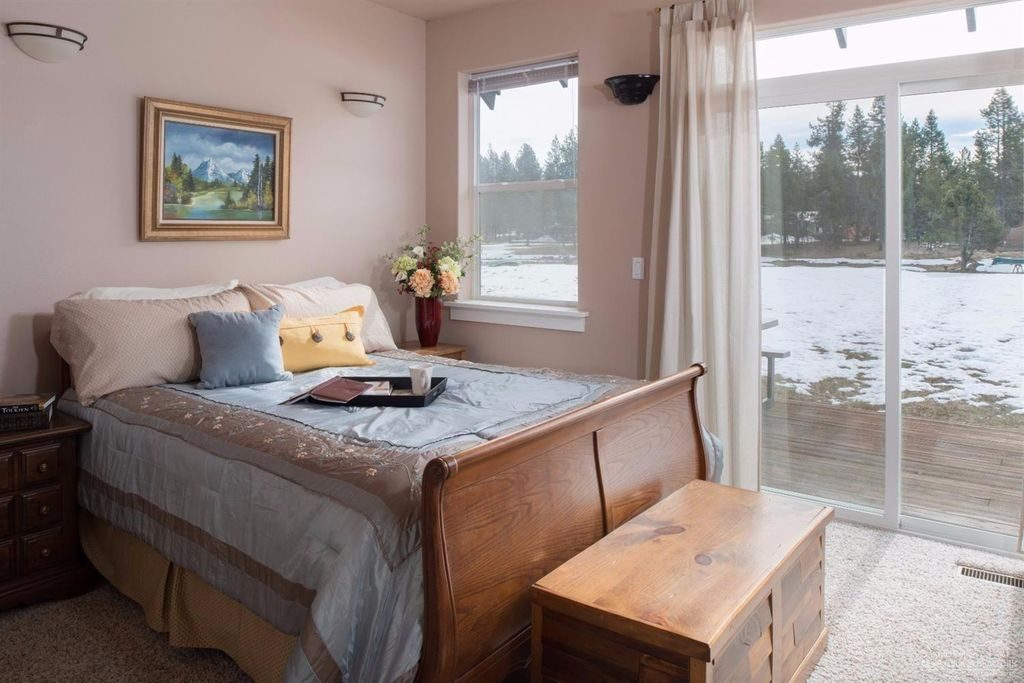
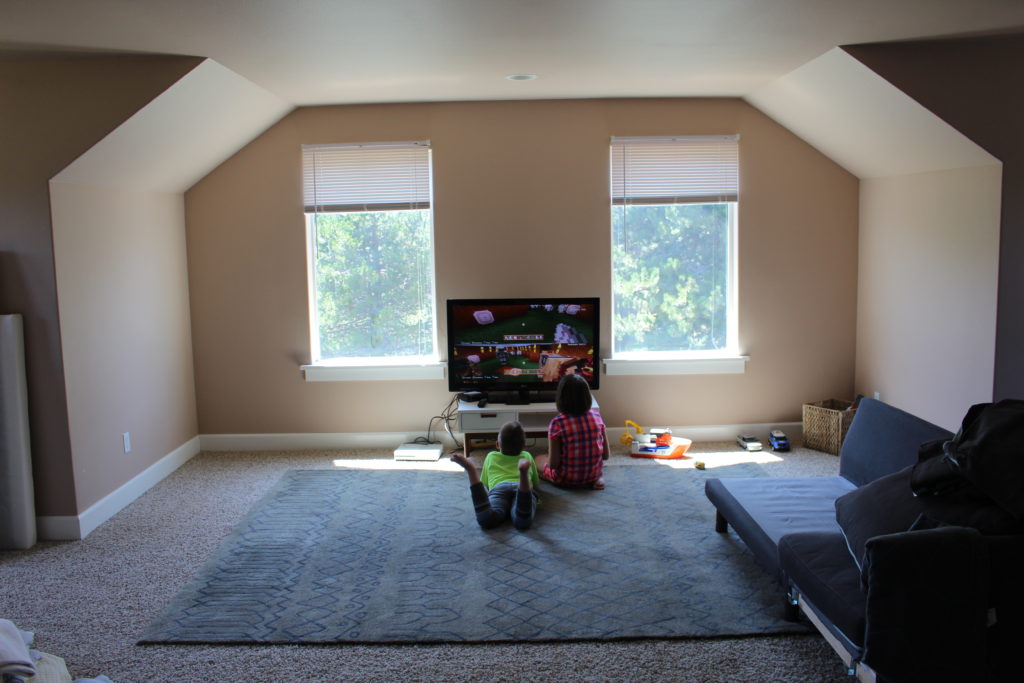
– Master Bedroom –
These are the listing photos from before we bought the place. Currently, this room is being used as the kids TV room.
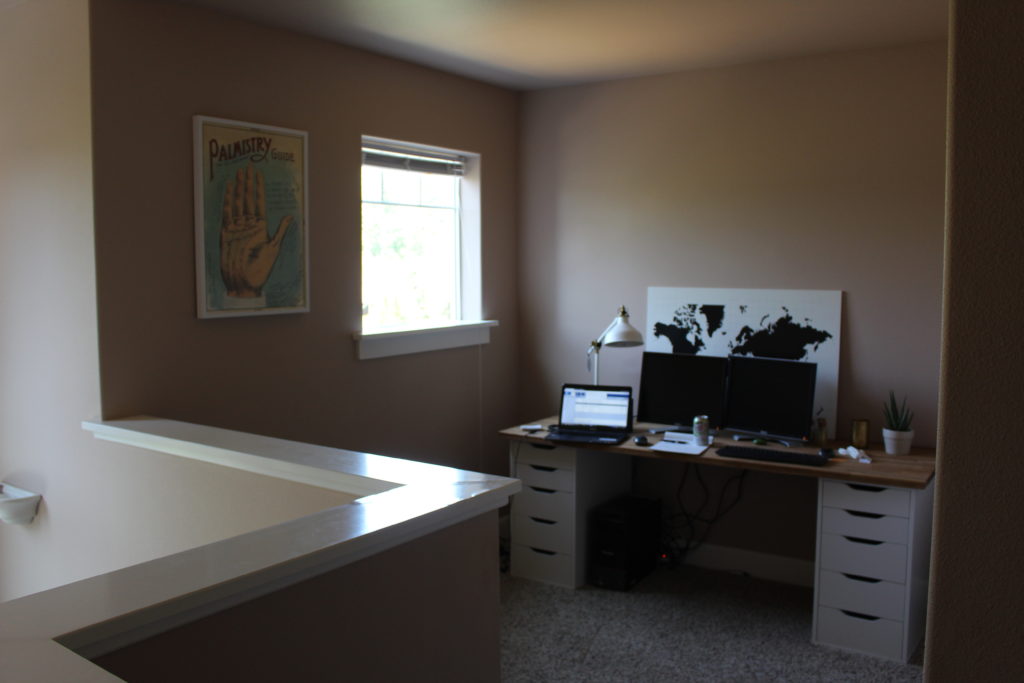
– Nate’s Office –
Nate’s office is an open area directly on your left at the top of the stairs.
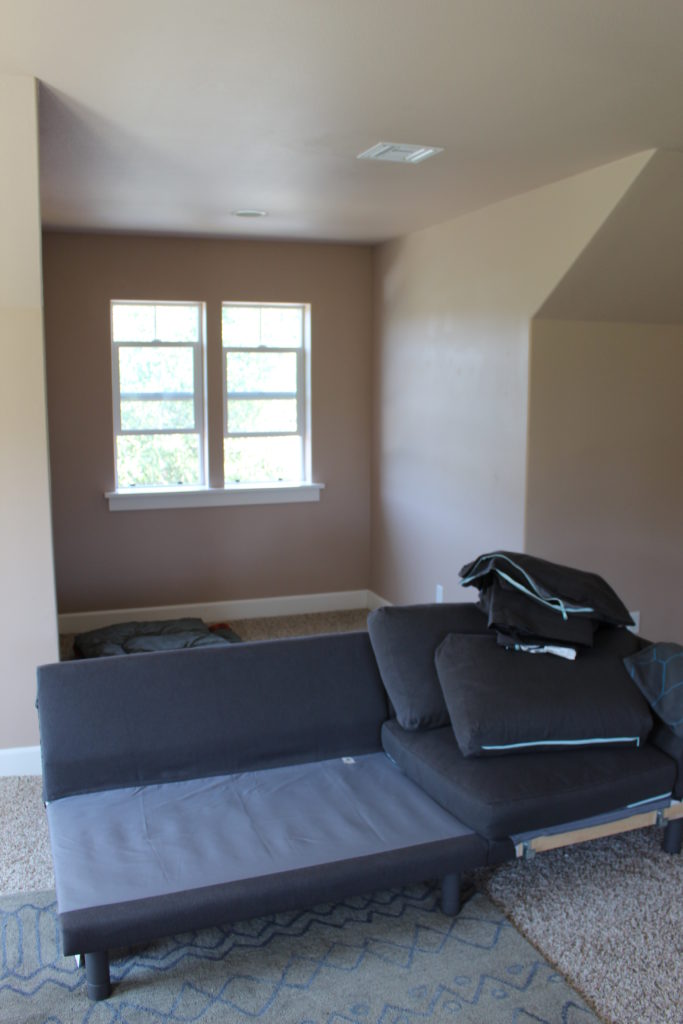
– Bonus Room –
This is the bonus room on the day we moved in. We didn’t know how we were going to use this space. And it started out as an extra TV room.
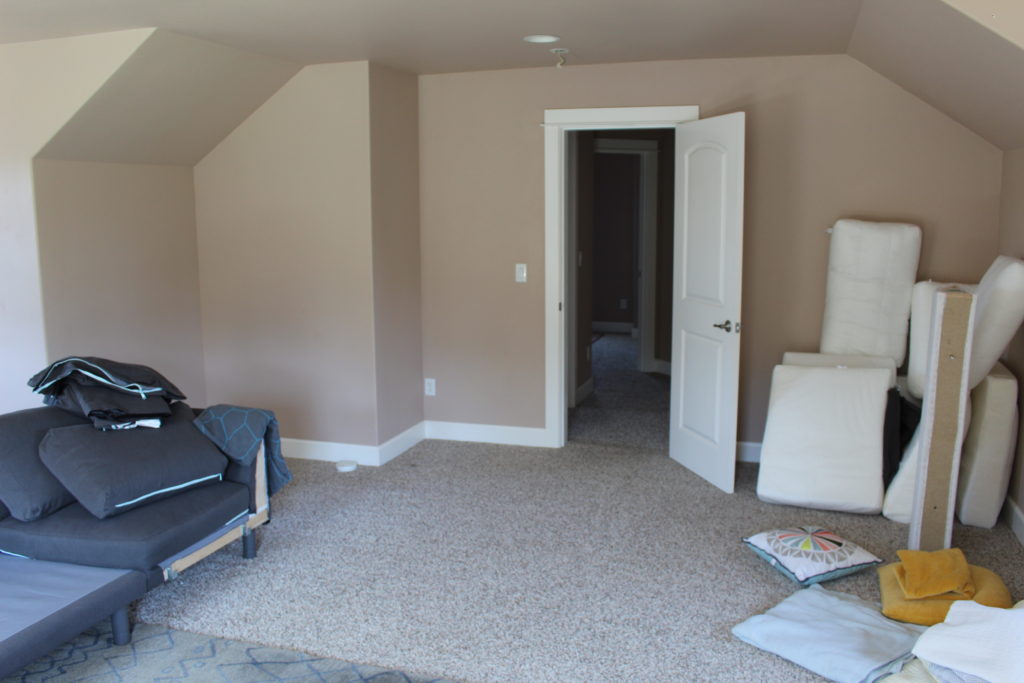
– Progress –
We decided that this room would make a better master bedroom. The kids rooms are upstairs and having the master bedroom downstairs just wasn’t working for our family. So…up we went after installing some wood that will eventually be carried throughout the entire house.
– Upstairs Bathroom –
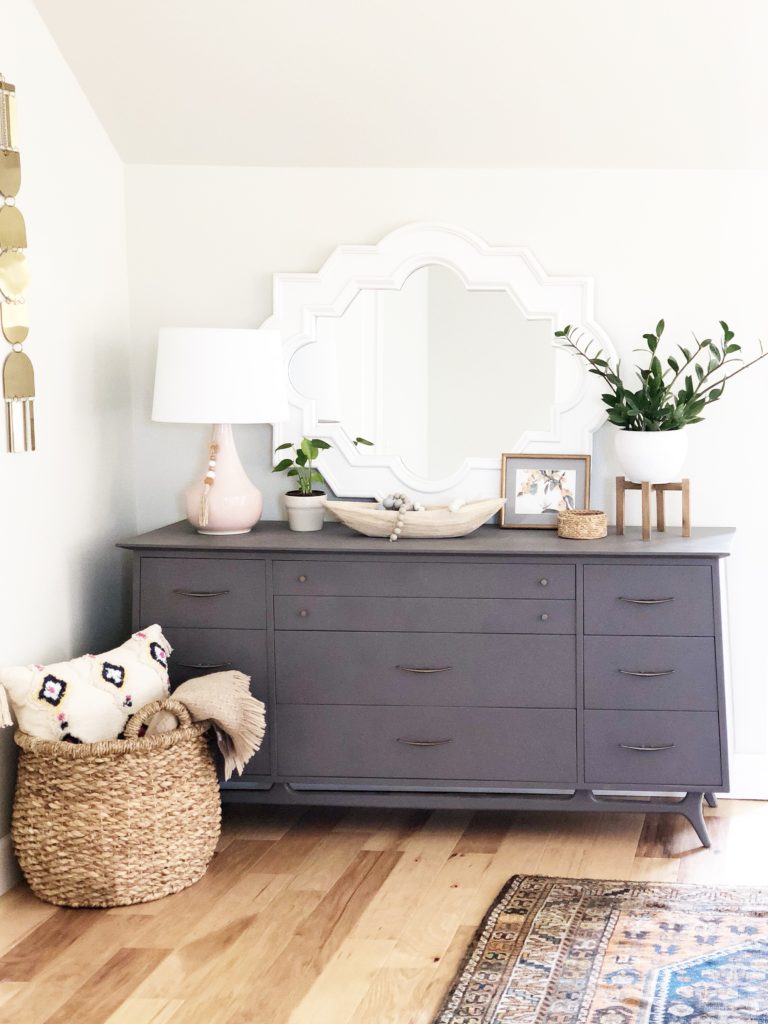
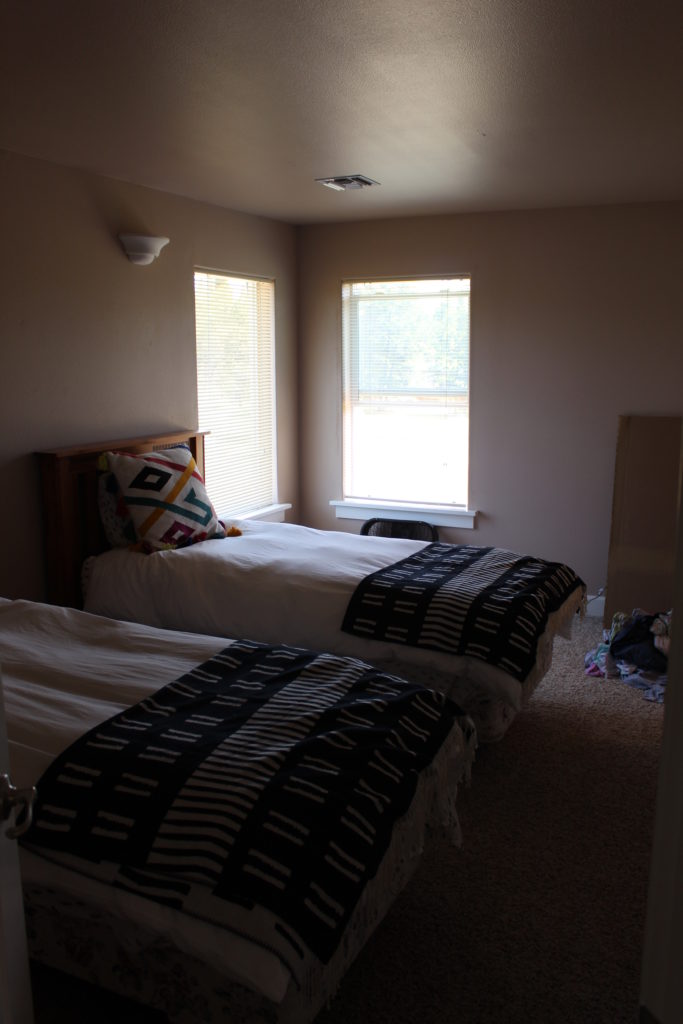
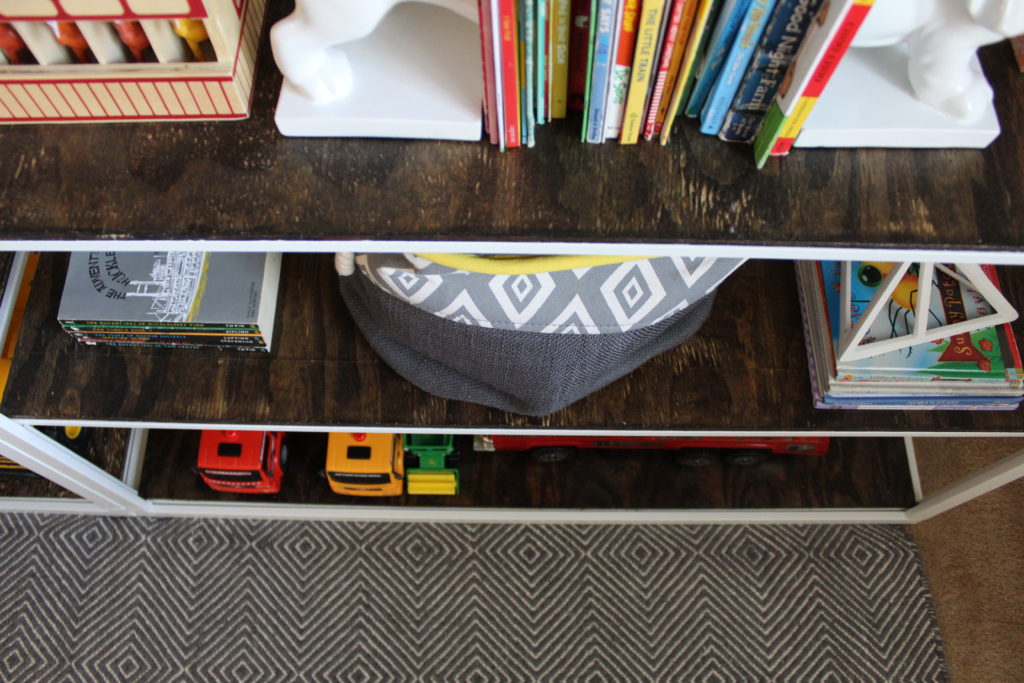
– Kid Room #1 –
I am not sure how the kids will be split up. Maybe Nolan will have the smaller bedroom and the boys will share the bigger bedroom? But for right now, Nolan and Grey are bunking together in the bigger room until Urban is sleeping on a more consistent schedule.
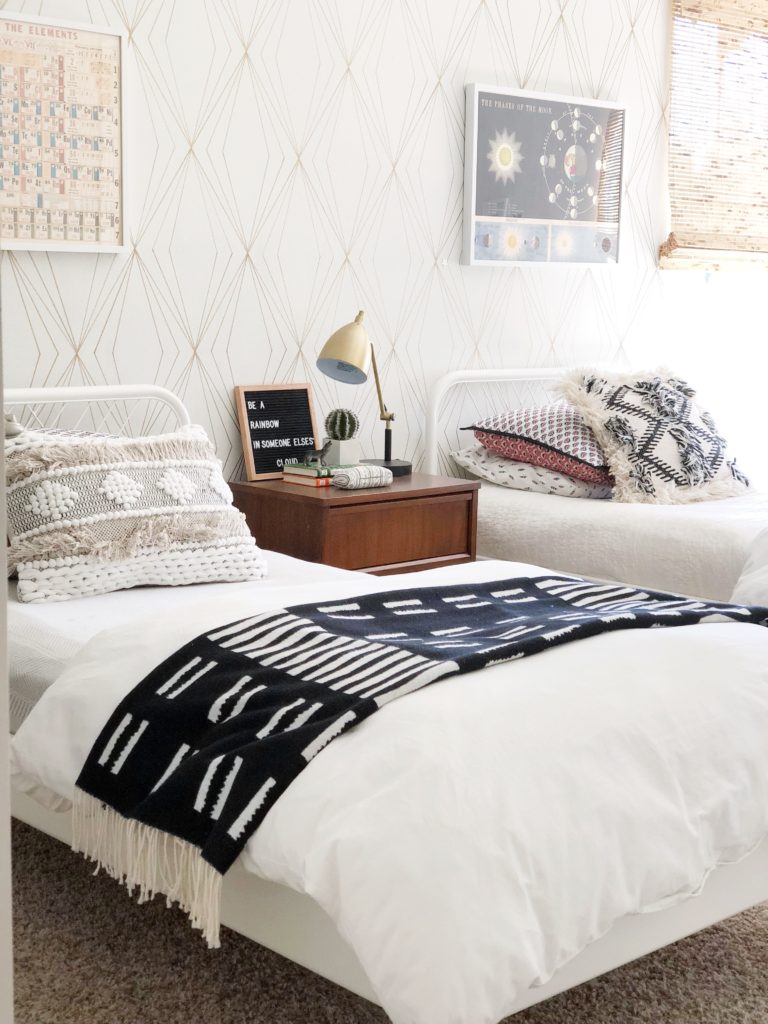
– Progress –
Nolan and Grey are still happily bunking together these days and this is how the room is looking after some much needed paint and adding a diy wall stencil with a sharpie.
– Kid Room #2 –
– Exterior –
The back of the house has a deck that desperately needs some sort of structure for shade and is located on a little piece of canal off of the Deschutes River.
That’s it! In some ways it feels like we have more to do here than our last house because the last house was correcting all the old but this house is more of a blank slate. It’s going to be fun though to see where this new place takes us!
I was thiiiis close to entitling this post, “The Great Light Switch-Out” or “Switching Up our Lights,” but I decided to spare you of my clever puns. This past weekend was President’s Day and with the extra day off we were able to start work on the second bathroom and update some lighting around the house. So let’s start today with a photo of my new favorite view:
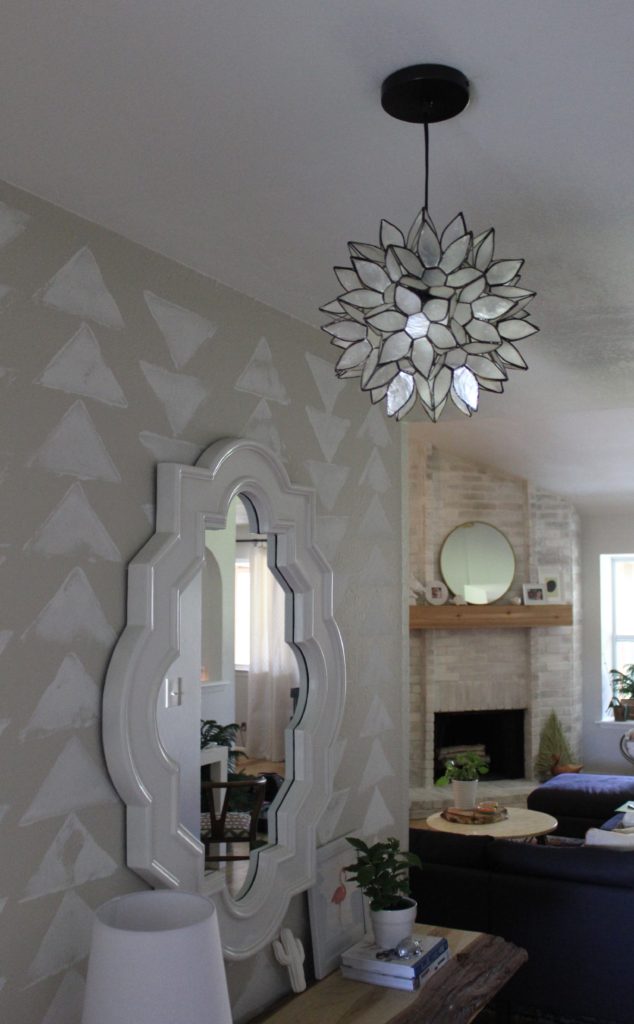
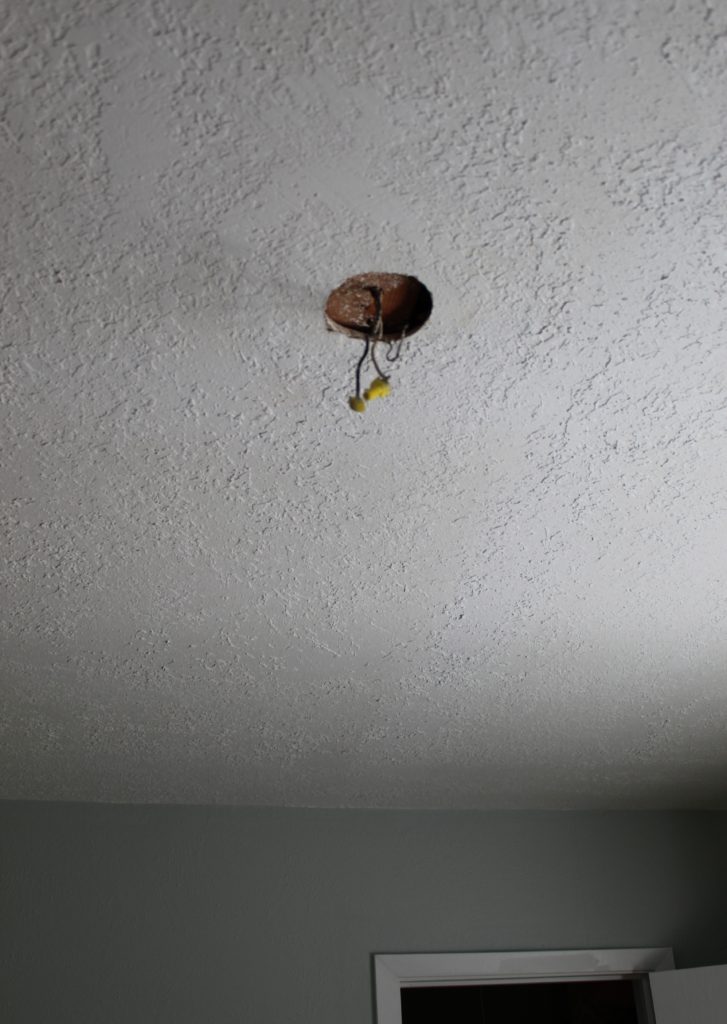
Since we moved in and got busy scraping our popcorn ceilings, we took down all of the existing overhead lighting (boob lights galore). Nearly every room was left with the remnants of this problem that I have been conveniently cropping out of all house photos.
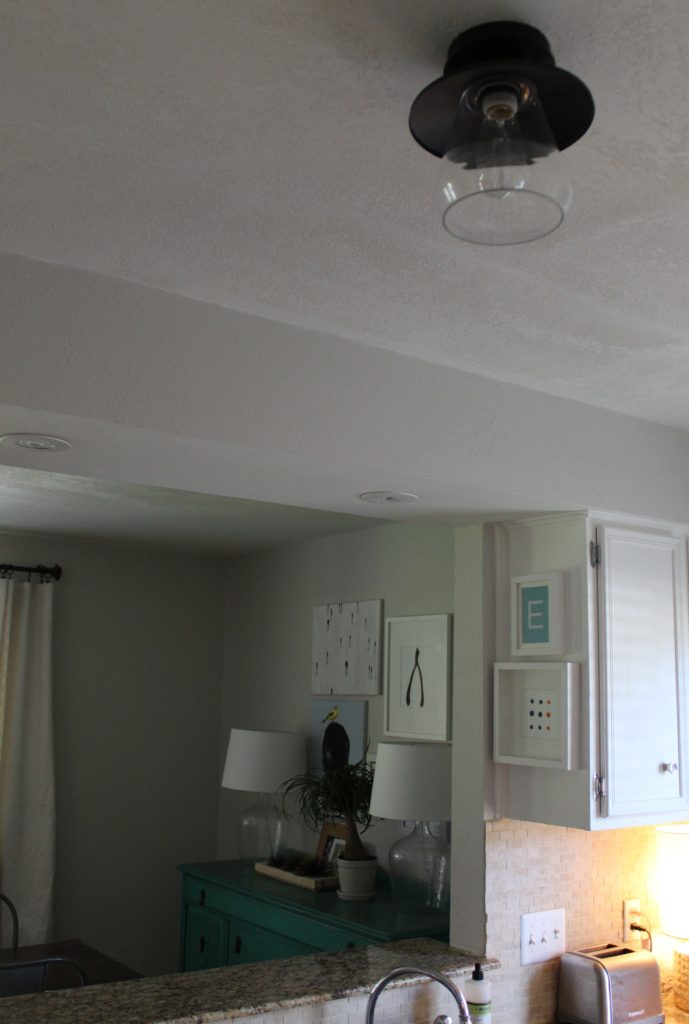
I felt a little stumped about what to pick since we would essentially be choosing lighting for the entire house. If I made the wrong choice, it would be on such a large scale that I was scared to pull the proverbial trigger. I liked this light and when it finally went on sale, Nate convinced me to order them up. So order we did, and when they arrived, we were impressed with the quality and the size. The only worry that we had about these guys was that they wouldn’t be big enough and look skimpy or cheap. However, they look lovely and really compliment the black door hardware.
![]()
Since we were on a lighting roll, I decided that I was going to play a sort of musical chairs with some lighting choices that we previously made. When we moved in, the dining room looked like this:
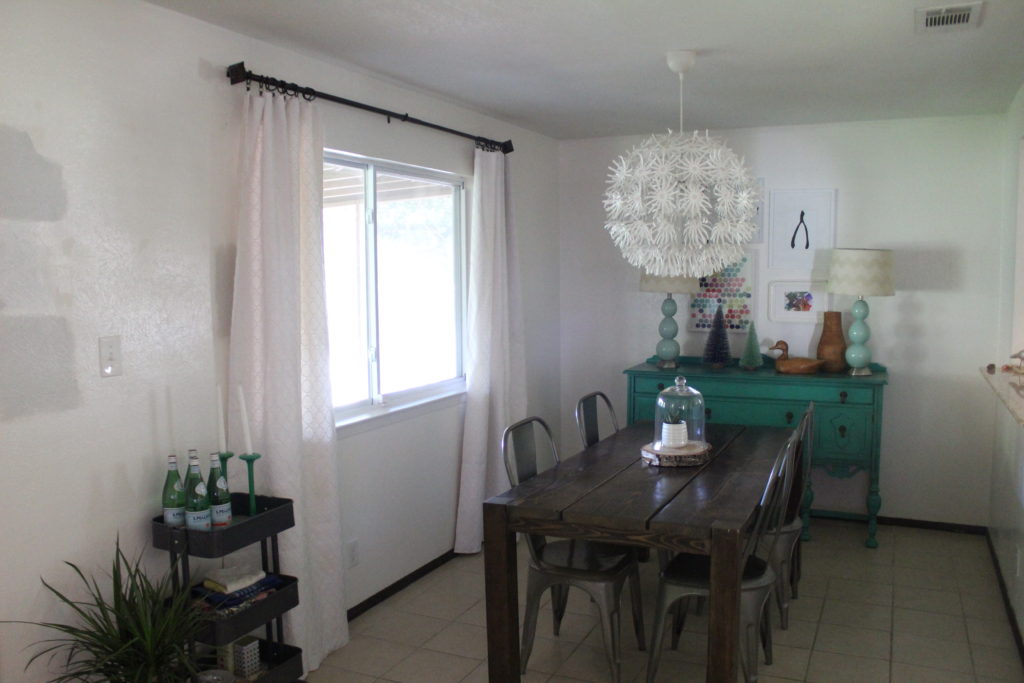
Then, I found a cool fixture on sale and the space was transformed to this:
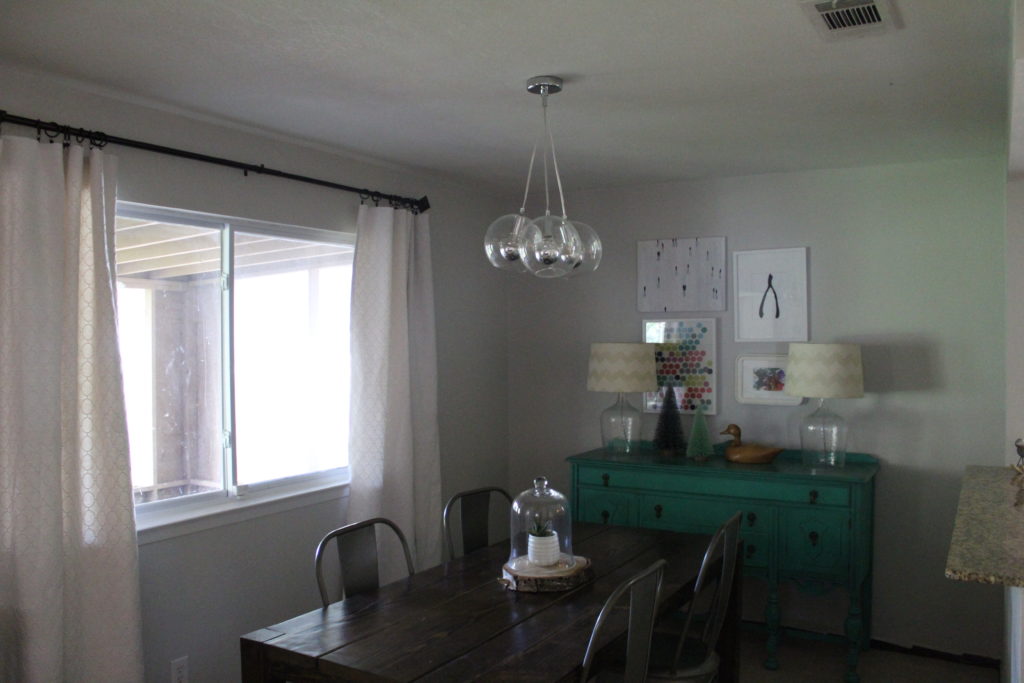
I like this fixture very much but after a while I started feeling like it wasn’t really “us.” Maybe it was too small for the dining room? Maybe it felt a little “fancy” for our house? Still not sure but when I saw this light, I knew we had to make another change. Nate was not exactly thrilled to be changing our dining room light again but I have assured him that this new light is here to stay.
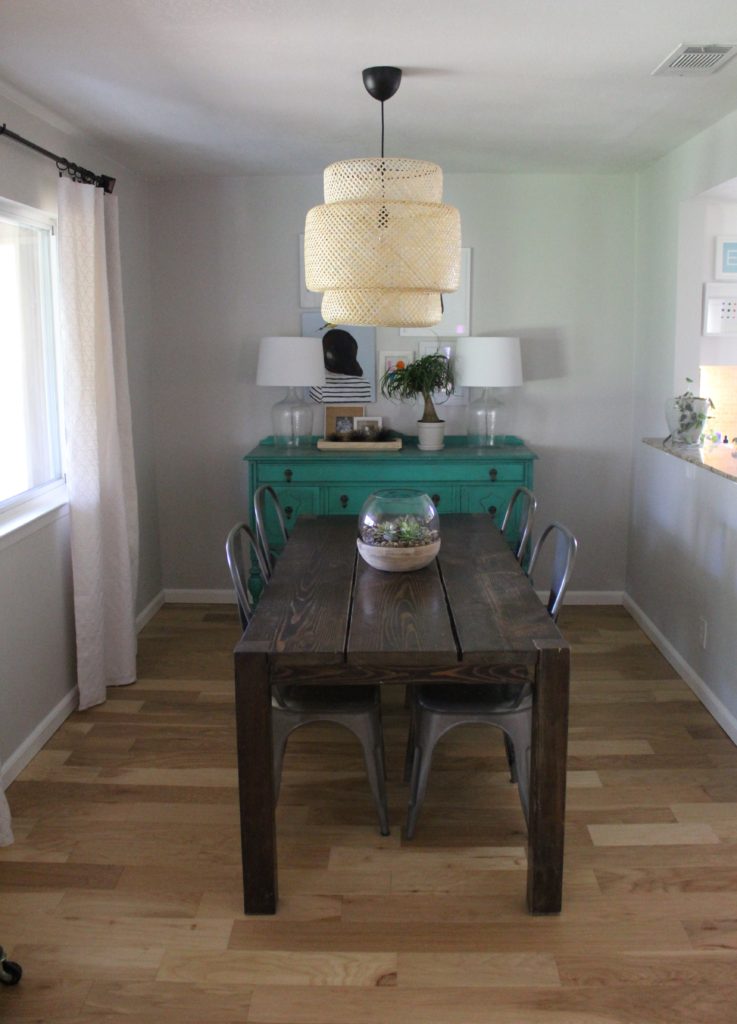
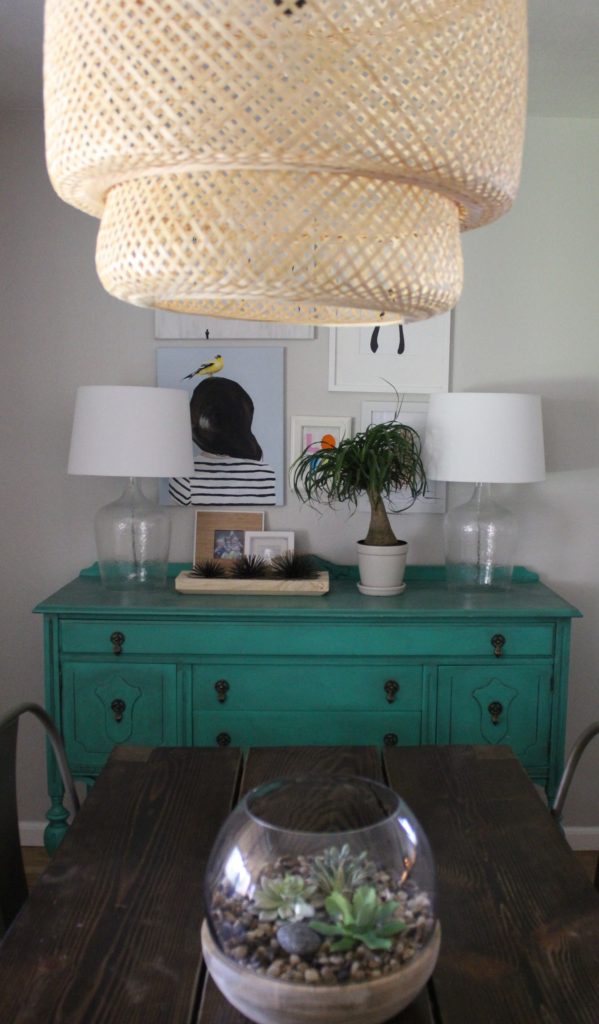
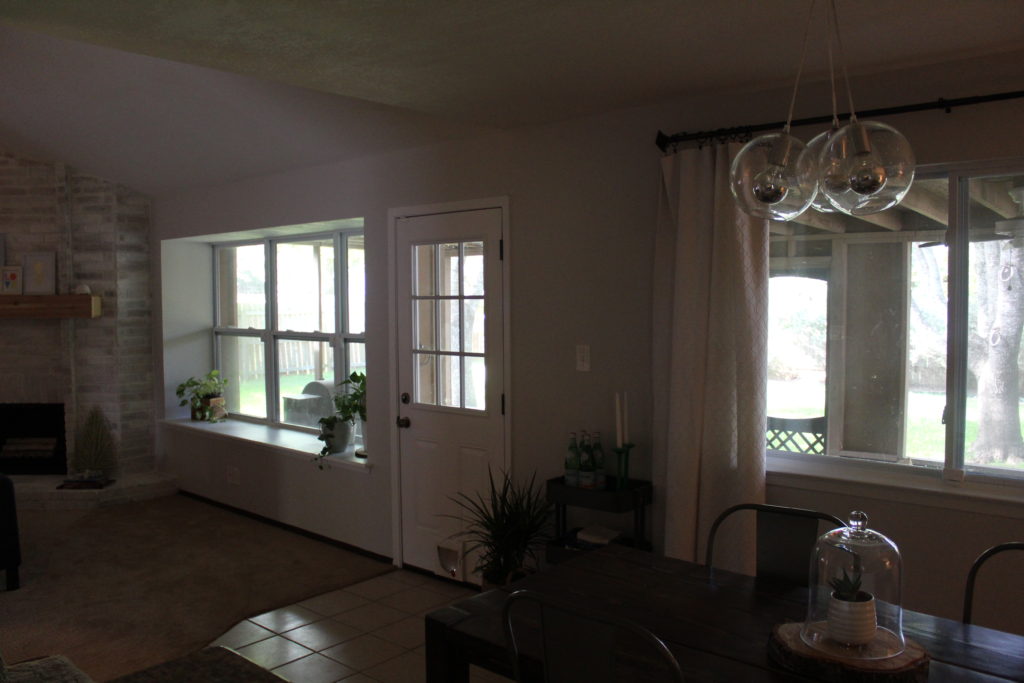
It feels just the right size for the dining room and with the natural bamboo, it feels warm and adds some texture. I don’t have a rug in our dining room because my OCD doesn’t afford me such a luxury with our kids eating there on a daily basis. The number of gold fish crackers, crumbs and spaghetti noodles that I sweep/clean off our wood floors is crazy.
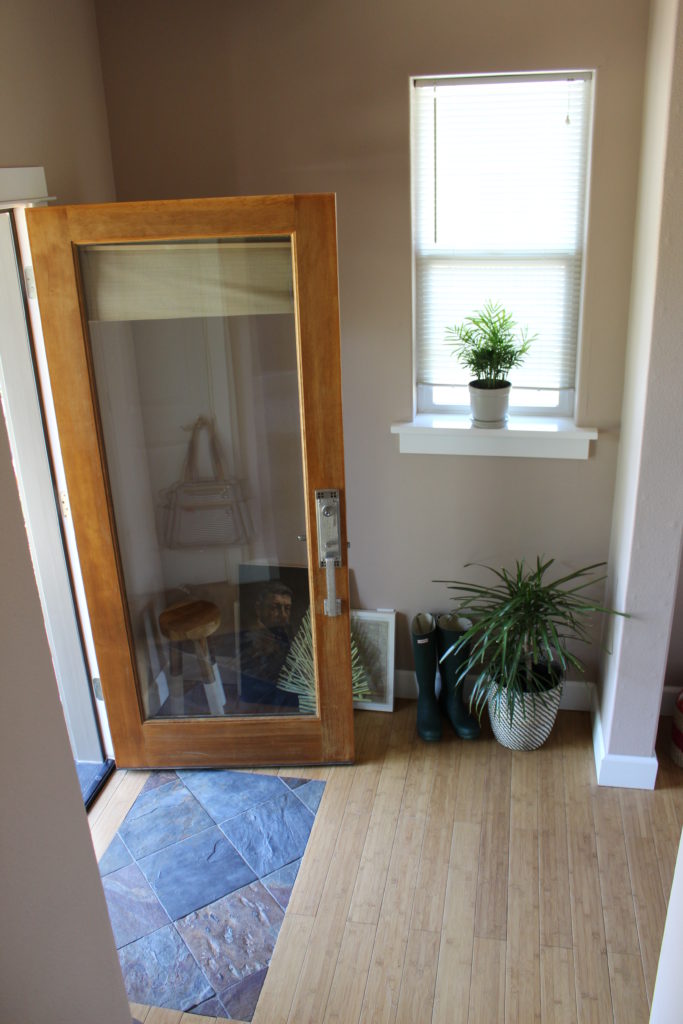
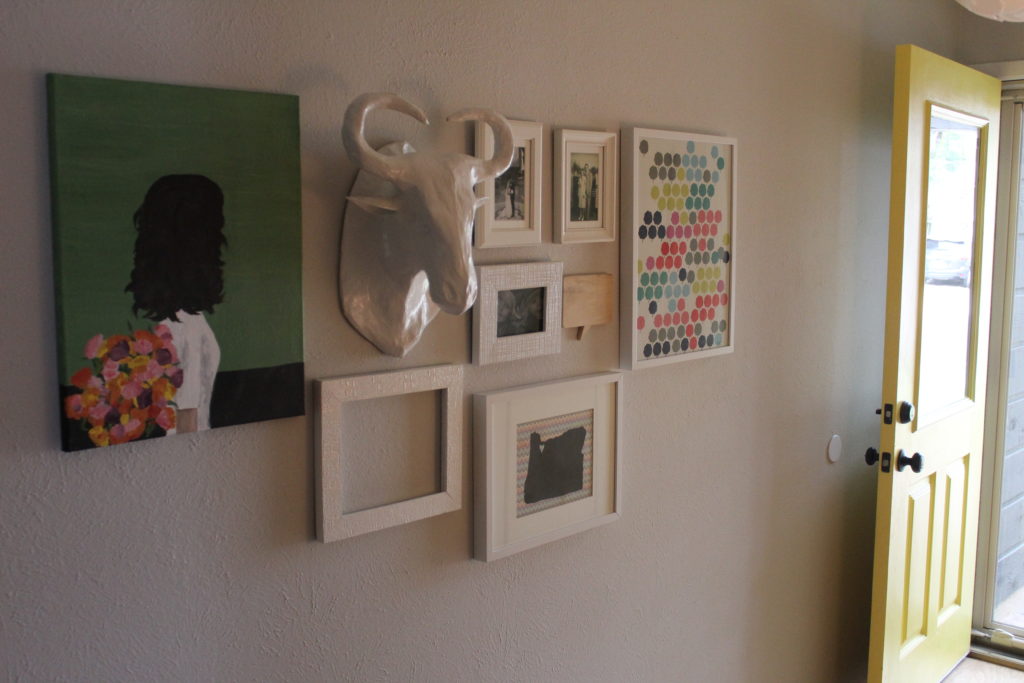
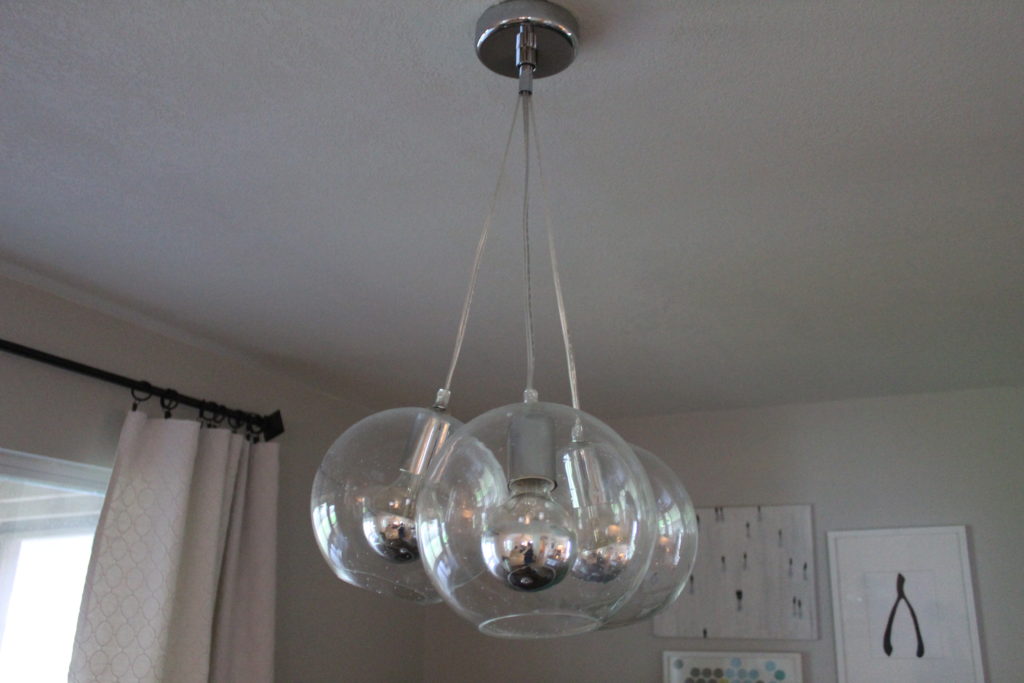
But I didn’t stop there. The entry lighting situation went from this (sorry about the dark photo):
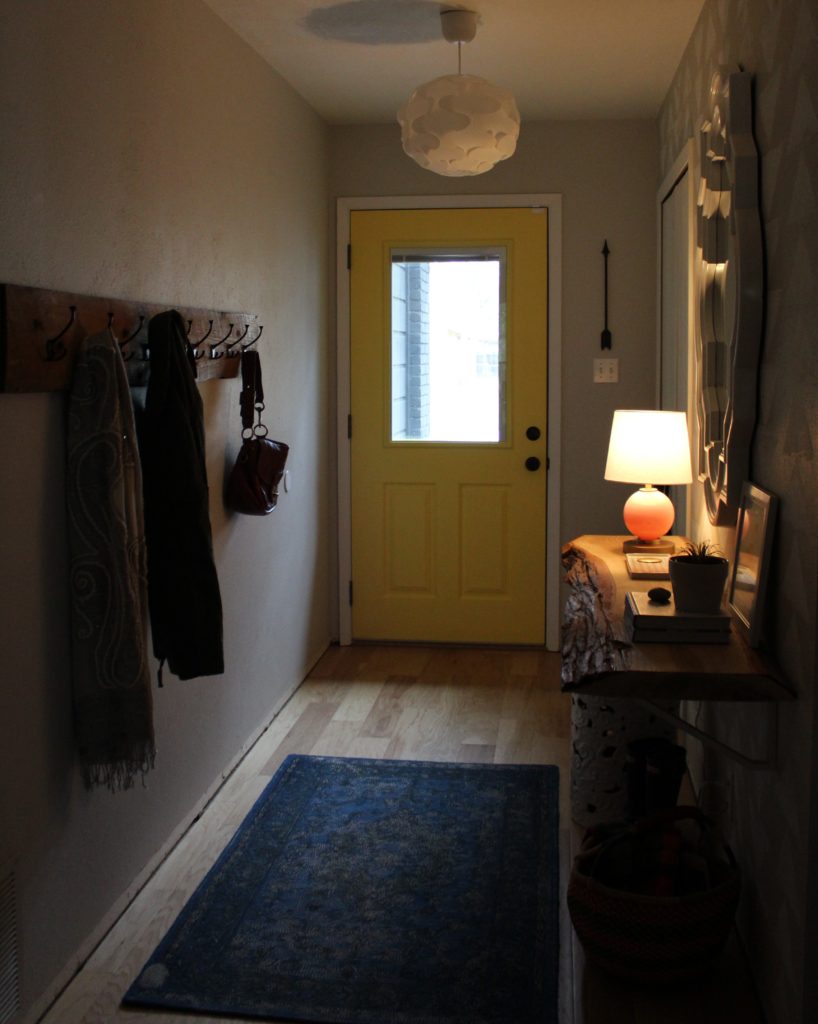
To this:
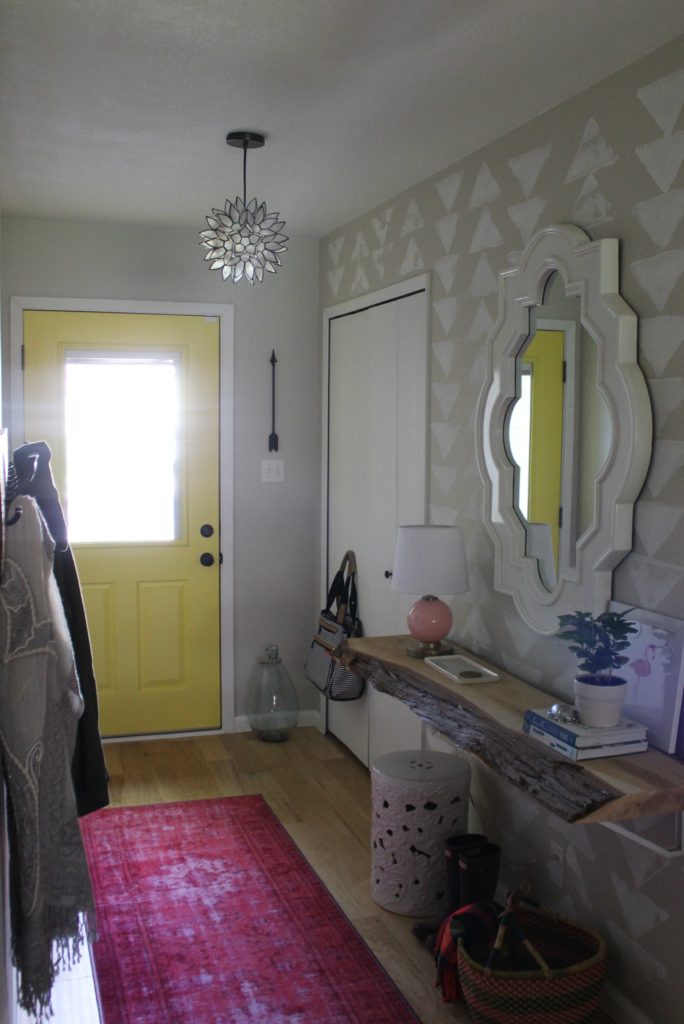
I can officially put a fork in it and call the entryway finished. It’s one of the smallest spaces in the house but I am still calling this a victory. It’s funny how many revisions a space has before it starts to feel right and I can move on to something else. Sometimes it’s hard to put your finger on what’s working and what isn’t.
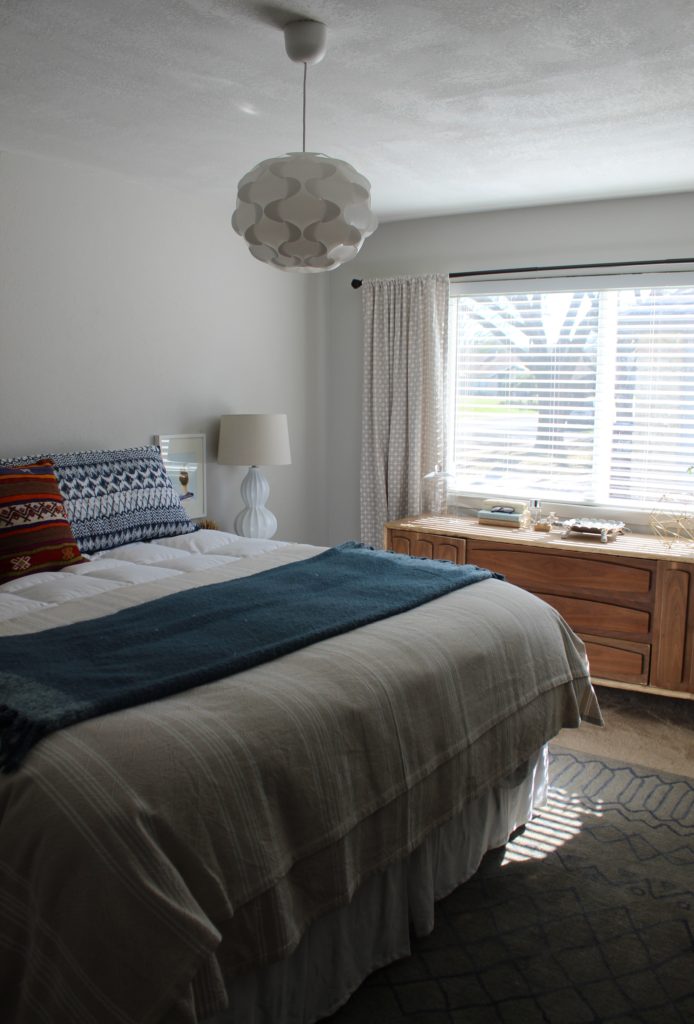
The pendant that lived in the entryway has now found a new home in the master bedroom. Told ya this was musical chairs for lights.

So that’s the jist of what we have been working on around the house. I am down to just a few final touches in the bathroom and we are just waiting on a sconce to arrive (I know, I know. More lighting?). I will update the blog accordingly as soon as that comes. As a little bonus, I have some photos to share of Urban. He is already three months and has been busy terrorizing me all night and looking adorable all the time. Look at that bald head…it smells as good as it looks.

![]()
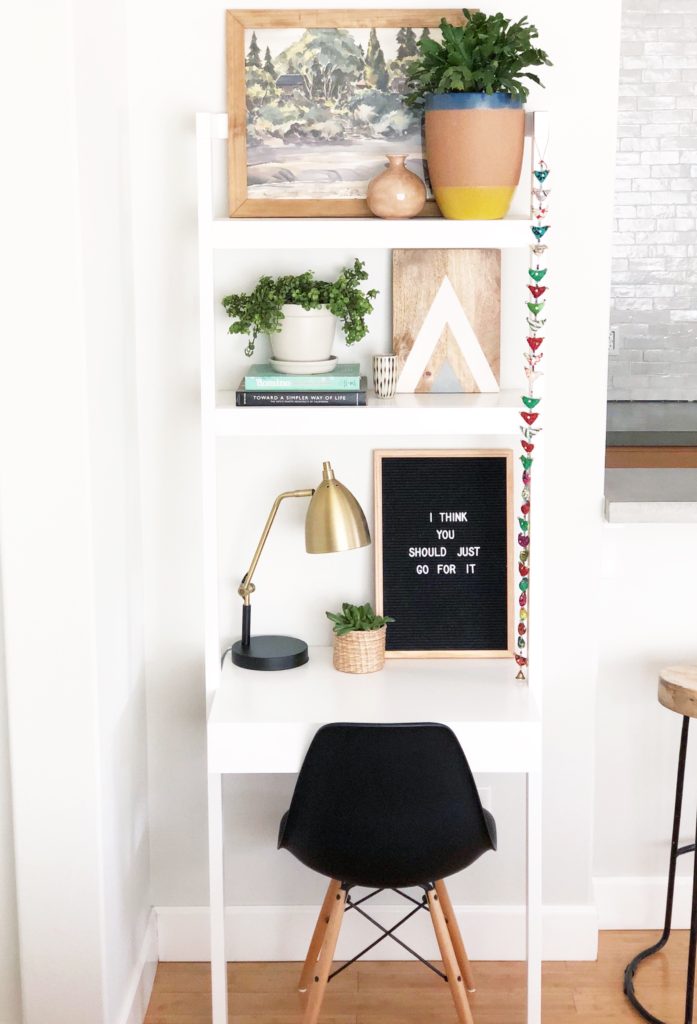
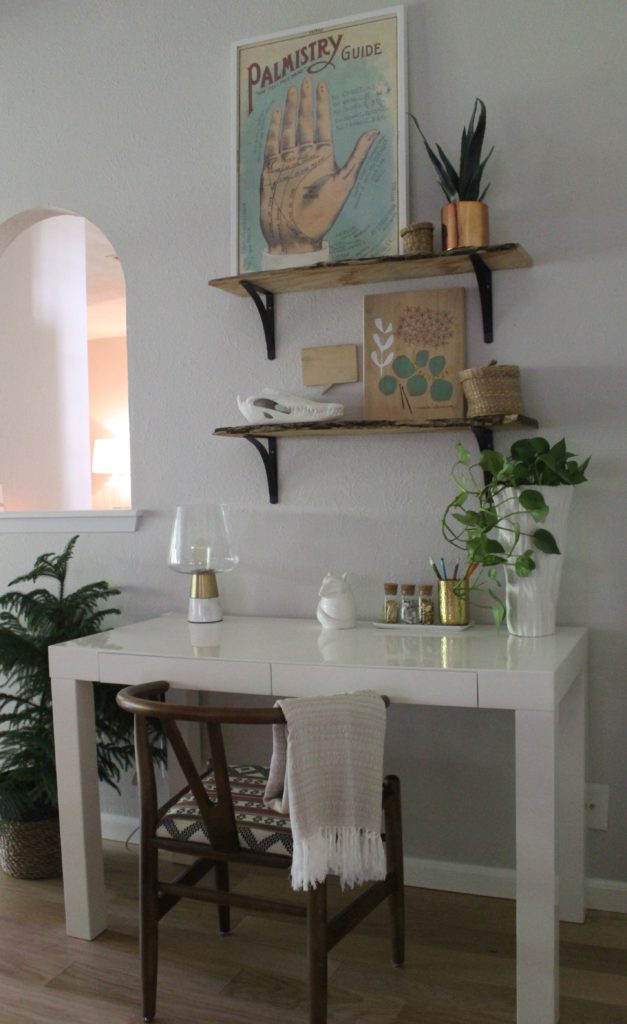
Yup, I have already changed up our new office area. I guess I can’t help myself. I am a compulsive tweaker…err or a lady who likes to rearrange things around the house. Does that sound better? Last time we left off, it looked like this.
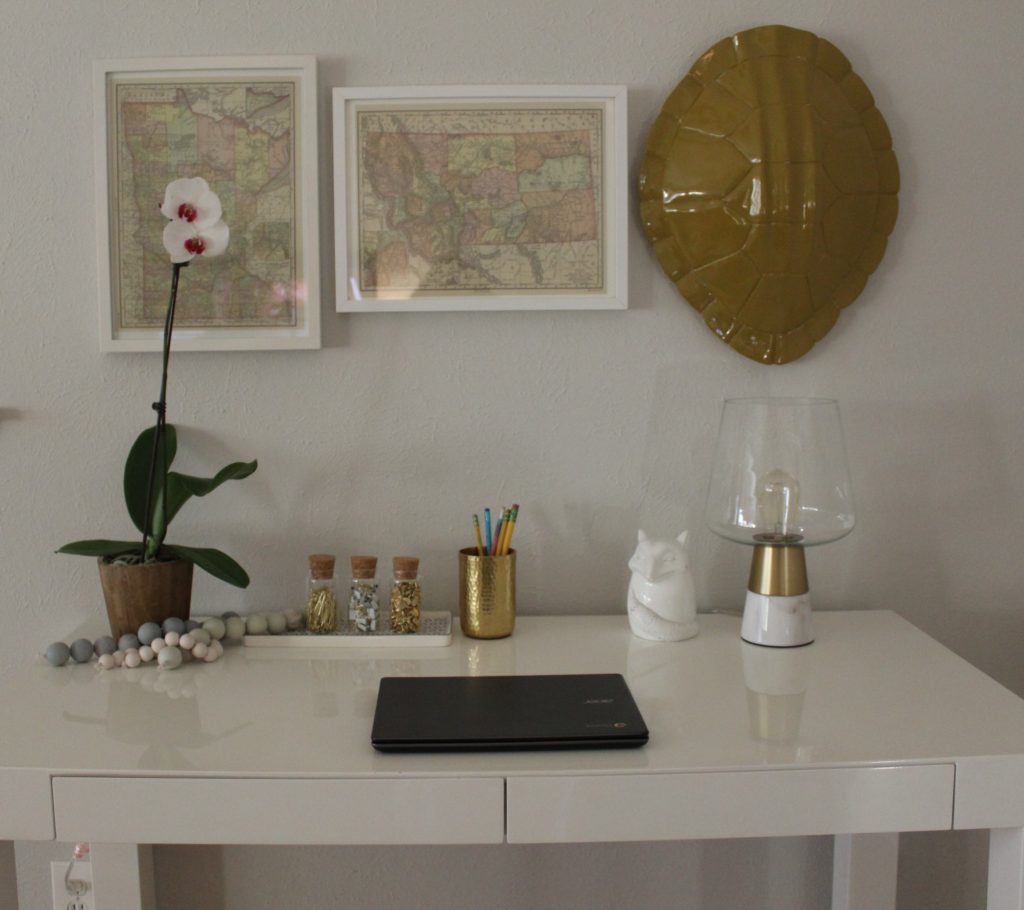
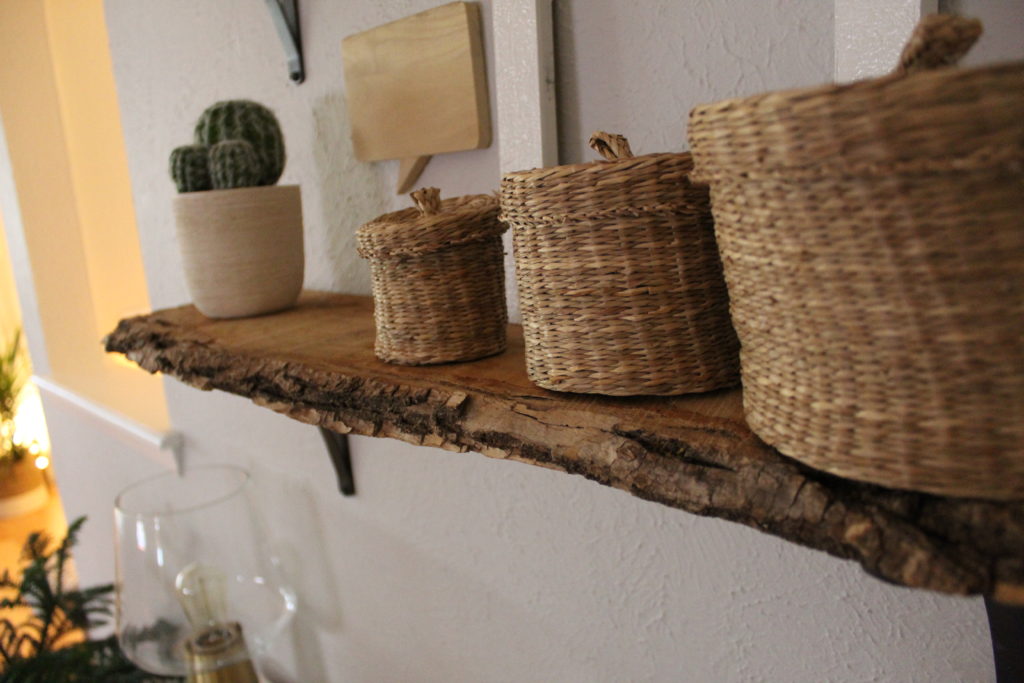
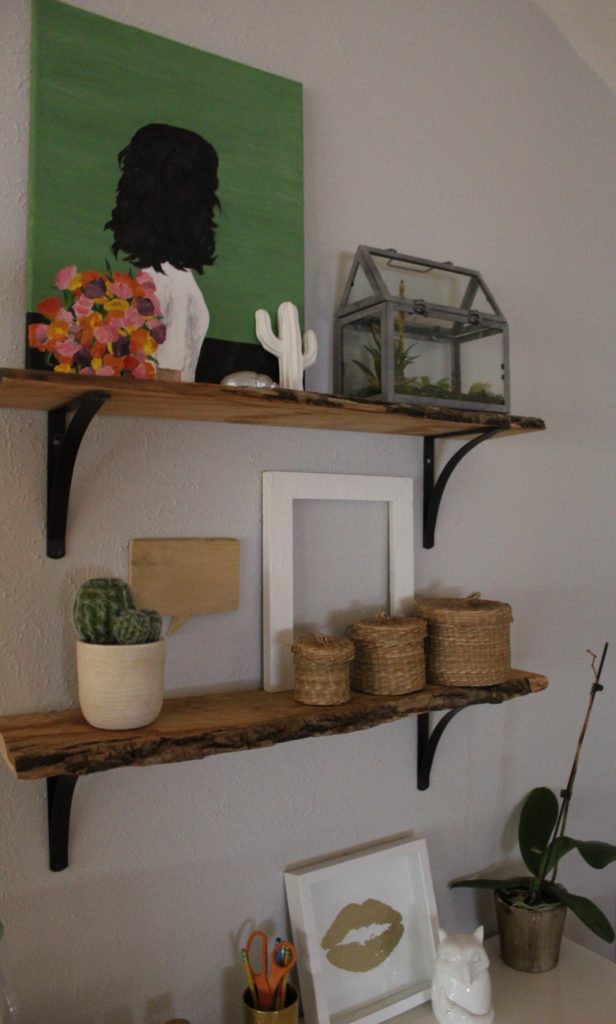
There wasn’t anything wrong with the office area but then I was cleaning out Nolan and Grey’s closet last week and I came across some old shelves that I had shoved in there when we moved. I remember thinking that I might use them in the kiddos’ room but we ended up going in another direction when we hacked some IKEA shelving. With all that new storage, they didn’t need any more shelves. Maybe these babies could be fun above my new desk? Yes!
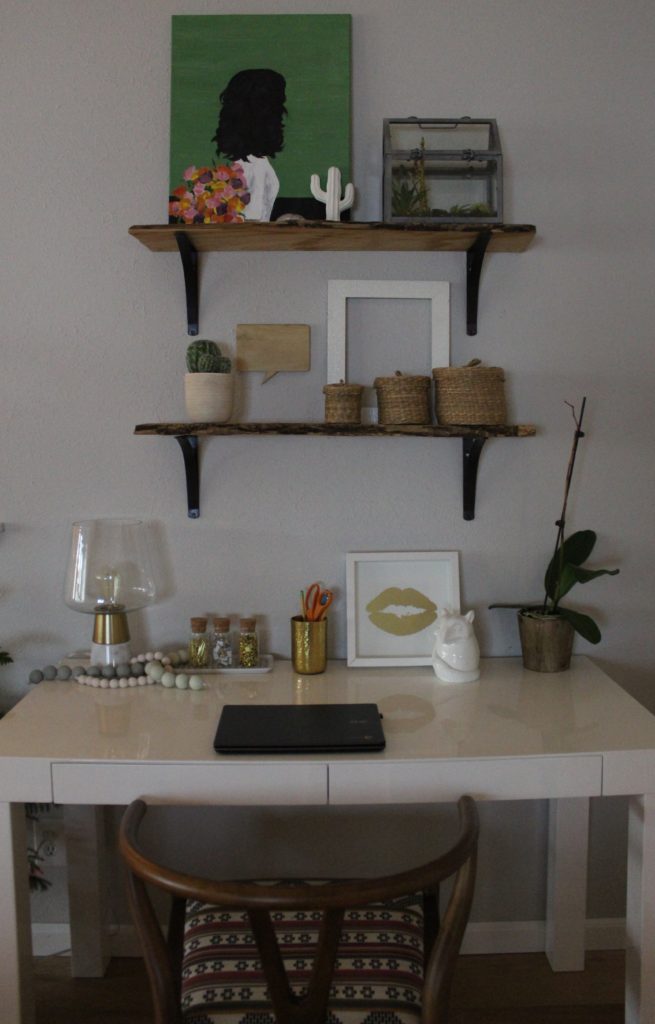
I just threw some random decor on them so don’t be surprised if they look different every time these new shelves pop up in pictures. Also, notice the chair? Nate surprised me with this chair after he read the last blog post. What a guy! I guess it was easy to tell which chair was his favorite choice. I love it though. The cushion is surprisingly comfy and the warm wood is just lovely with the modern, bright white desk.
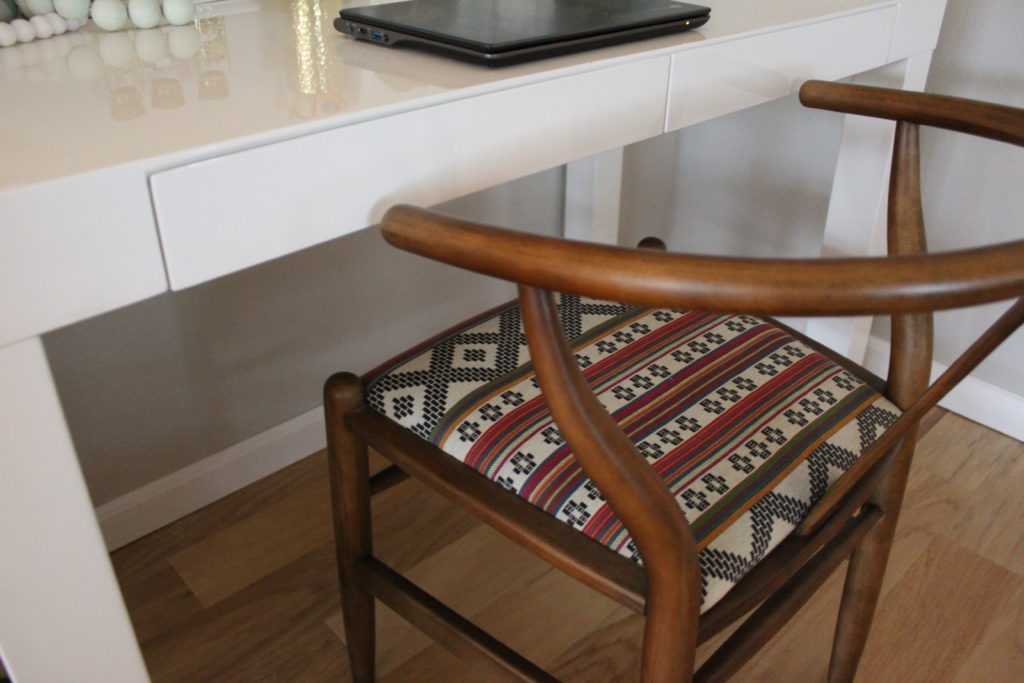
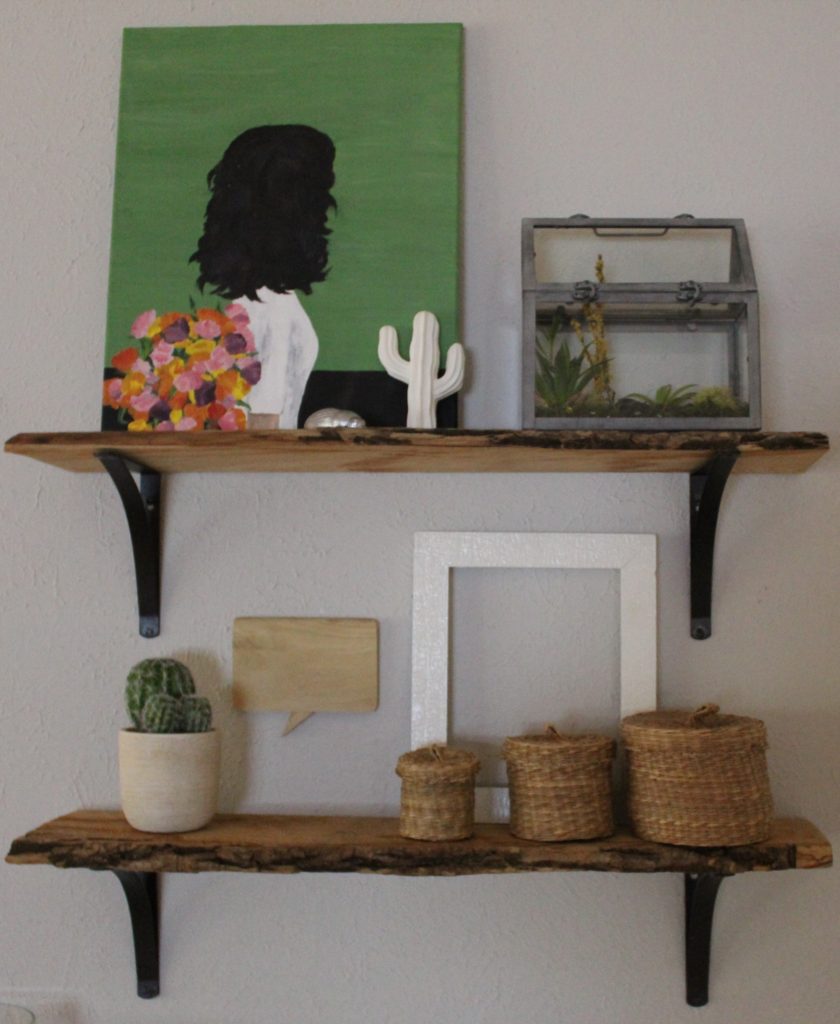
The little cactus is the only new addition and I picked it up at Target. It is FAKE! You would never be able to tell. Seriously. I am a bit of a fake plant snob and this is one of the best ones I have seen. Makes me reconsider everything…not really. But I am definitely going to give some more faux plants a try. Maybe the shelves need some books? Or my mom suggested a chalk board or cork board. That could be cute. Weeeee!
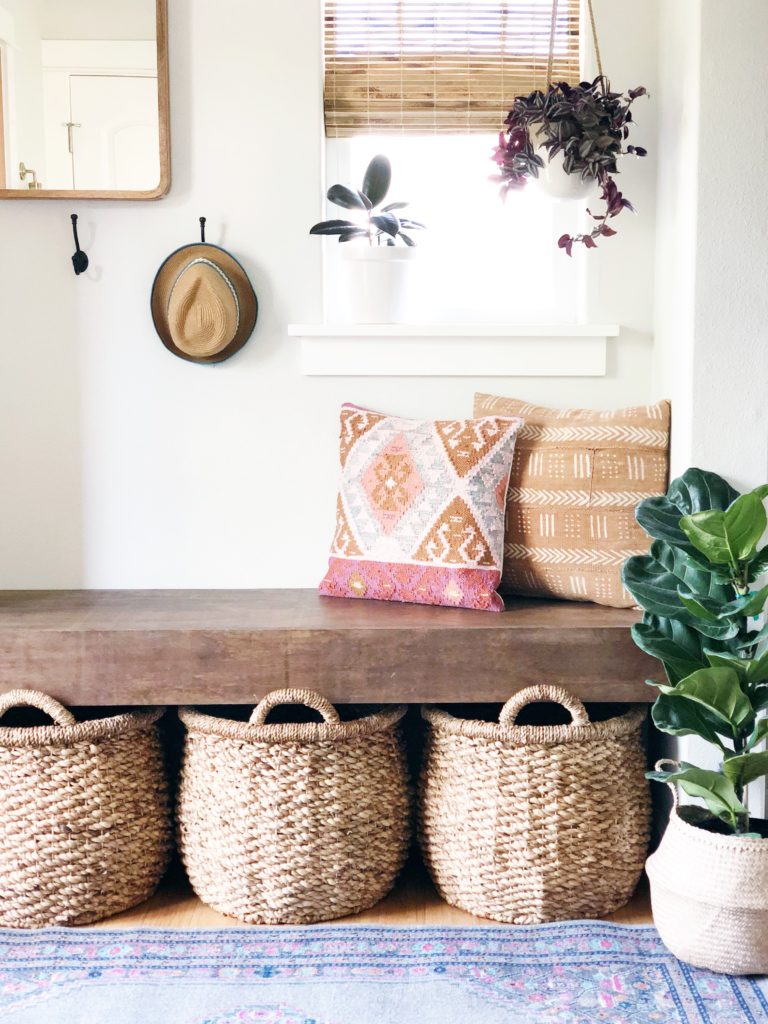
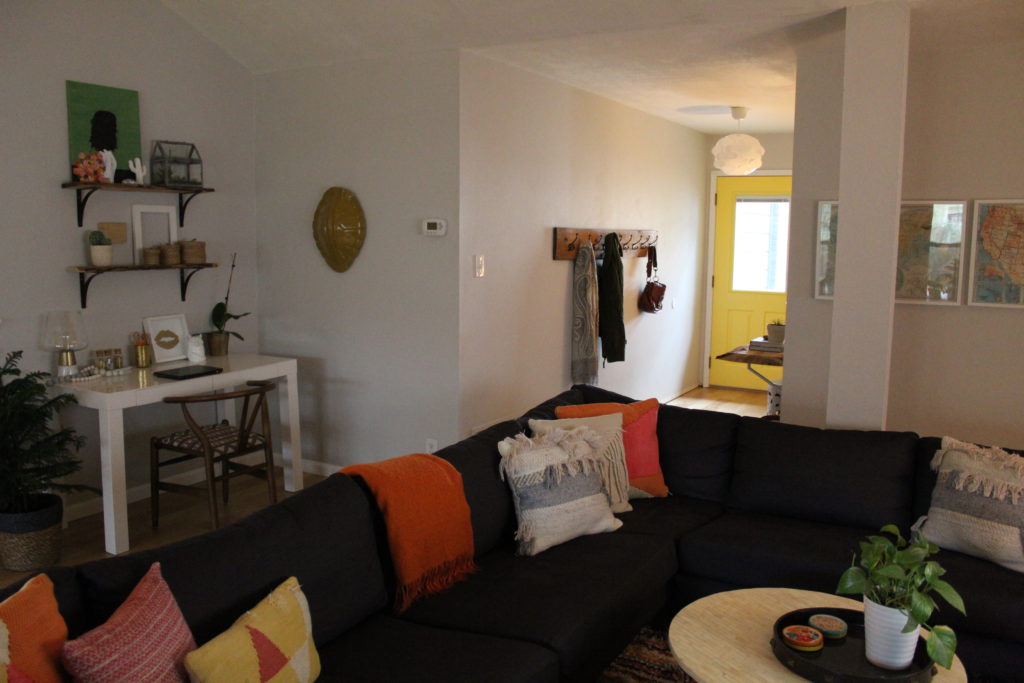
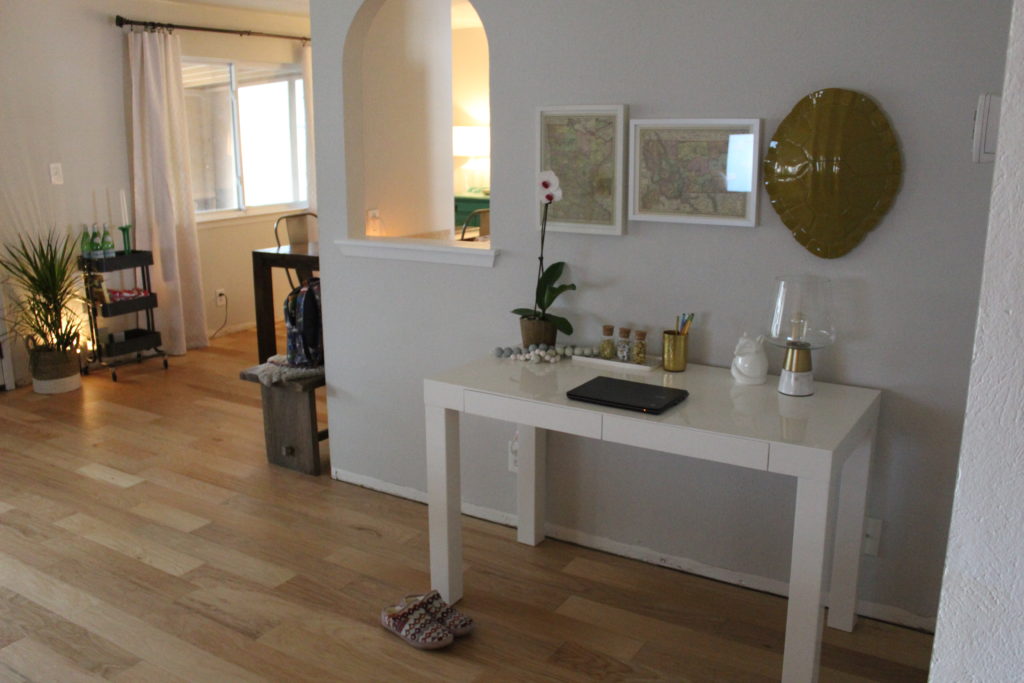
The other project that we did is probably the easiest DIY that anyone could ever attempt. Okay, there is a super long hallway when you walk in our front door opposite of the wall that I stamped with my tribal stamp a few months ago. This naked wall was driving me crazy (not in a good way) and I wasn’t quite sure what to do with it. My solution was to hang some art and call it a day. This is how it turned out.
I liked it just fine but it kinda bugged me because I wanted our entryway to be both pretty and functional, no? Welp, I took down the gallery wall and started looking for some cool coat racks. It didn’t take long before I spotted this beauty.
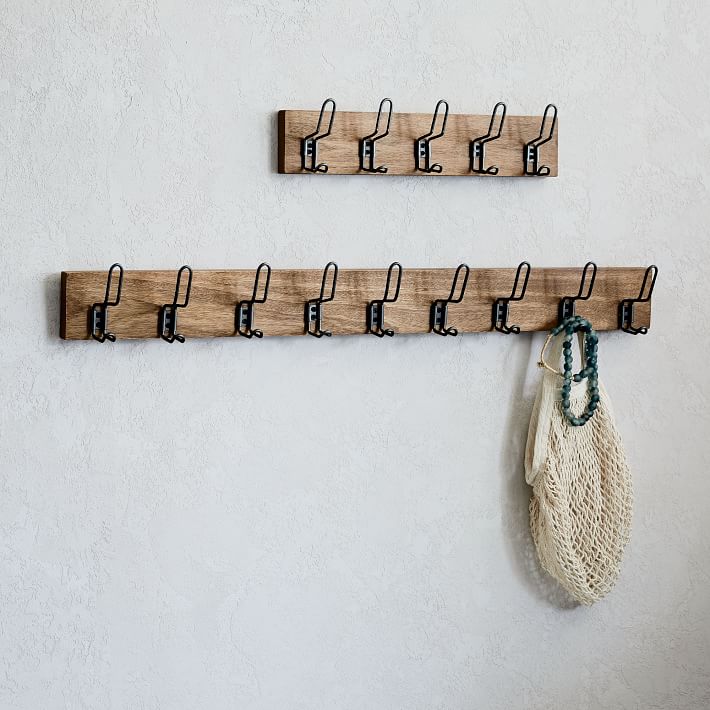
I love the industrial design but even the extra-large option wouldn’t be long enough for the wall. So, Nate and I decided that we could just make our own and this would allow us to customize the size. We had some old boards in the garage left over from an old headboard project and the rest of the process is as simple as finding the right hooks and affixing them to our board. Done and done.
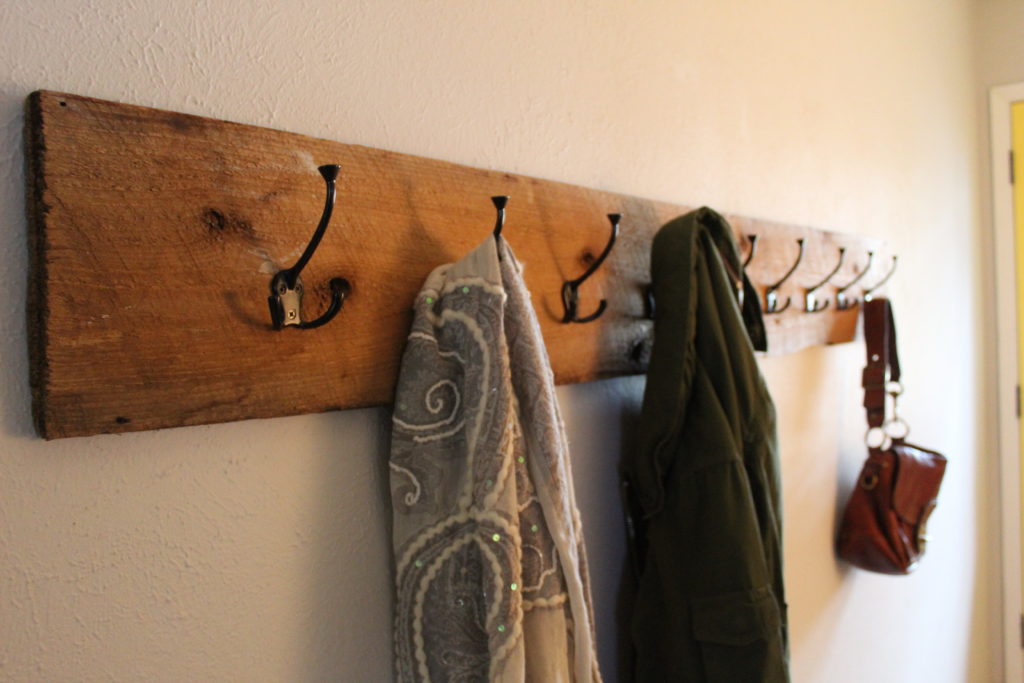
So simple. So easy. And I love it. Here’s a few more pictures of the updated spaces so you have a point of reference.
We have lots of projects lined up so stay tuned for baseboard trim progress…finally. Also, we are still working on some bathroom updates. Whew. I think we might be on a roll! If you’ve noticed that my posts have become sporadic, you’re right. Here’s why.

Happy New Year friends! It feels so good to be back to normal, well, a new kind of normal for our family of five. Our Christmas break was packed. The baby and I flew to Oregon to be with my sister as she had her baby girl in the middle of the biggest snow storm I have ever seen. She is happy and healthy and I am so grateful that I was able to be there for the special occasion. Nate and the kids drove up to join all the fun when they finished up school for the holiday. Our time in Oregon was spent with all the family we could cram into my sisters’ house and the cousins played in the snow, went ice skating, and ran around like hooligans. This was our best Christmas yet!
Even though my break was full of sleepless nights with the new baby, I feel energized and eager to begin this new year. We have so many projects planned in the next few months, it’s very exciting. Our house has a long ways to go but at the same time, it feels like we have turned a corner and our little place is taking shape! Let’s do this 2017! Thanks for hanging in there as I reflect for a second.
My time off wasn’t just a swirling blur of bottles and diapers. We still managed to get a few things accomplished. First, Nate and I decided that some new appliances for the kitchen would be the perfect Christmas gift to one another. Aren’t we exciting? Some people go on vacation, we buy dishwashers. Although it isn’t a DIY project, it does really improve the overall feel of the kitchen. Is it weird that I want to pet the new refrigerator?
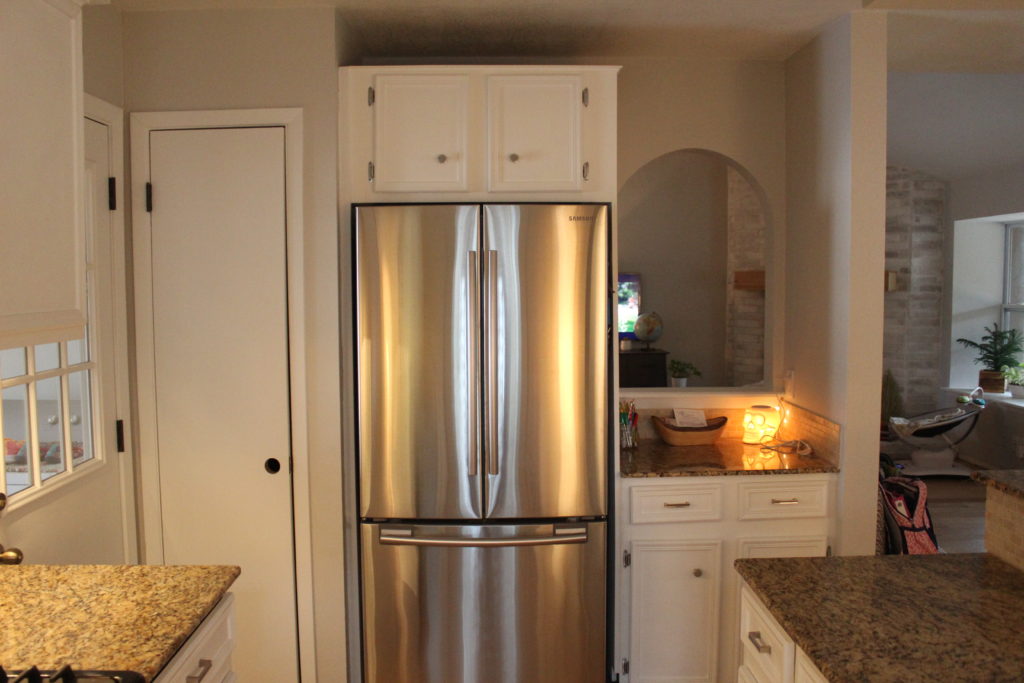
A few months ago, we bought a new range and hood and planned on replacing the refrigerator and dishwasher just as soon as we saved enough for them. Well, that time is here and I couldn’t be happier about it. Appliance shopping is my idea of a good time. So. Much. Pretty. Any big purchases we make, especially when it involves electronics/appliances, Nate does the research and I narrow down the options based on appearance or other practical aspects that I experience with every day use.
The other little project is a shared office of sorts or workspace for Nate and me. Nate often finds himself doing some work from home and it isn’t unusual to find him answering emails or checking his calendar from our home computer. He usually just does this from our dining room table but with our kids spending close to an hour every night doing homework at the same table (that’s a whole different issue…don’t get me started), it made more sense to make a designated space that he could work from, separate from the kids. I also have enjoyed having this space for photo editing, blogging and emailing. It’s a win, win, win.
There is an awkward corner behind our sectional in the living room that I have been scratching my head over since we moved in. Previously, I just shoved a shelf in the corner and I was using it to corral random decor that I didn’t know what to do with. That solution quickly began to feel like a waste of space and with three kids and only 1,648 square feet of living space, why would I waste a single inch of it? Enter workspace idea!
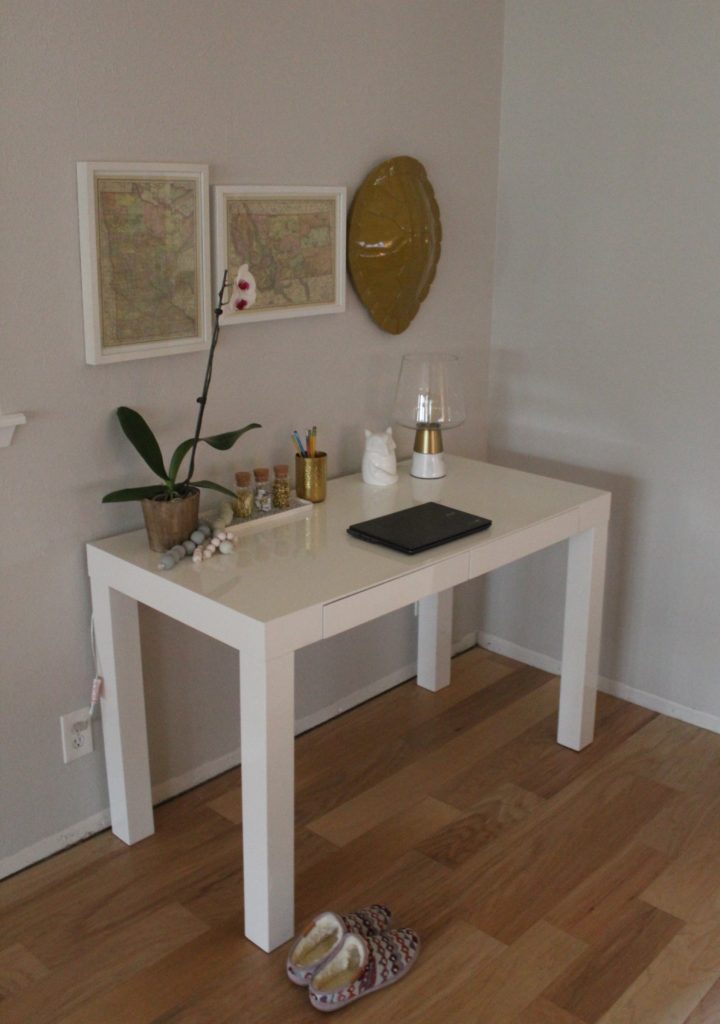
The desk is a parsons desk from West Elm that I scored off of Craigslist. I have always admired this particular desk from West Elm so when I found one for cheap on Craigslist, it felt like it was meant to be. I am still hunting for a chair and have been stealing a chair from the dining table until I find the right one. Here’s a couple of options that I am considering:
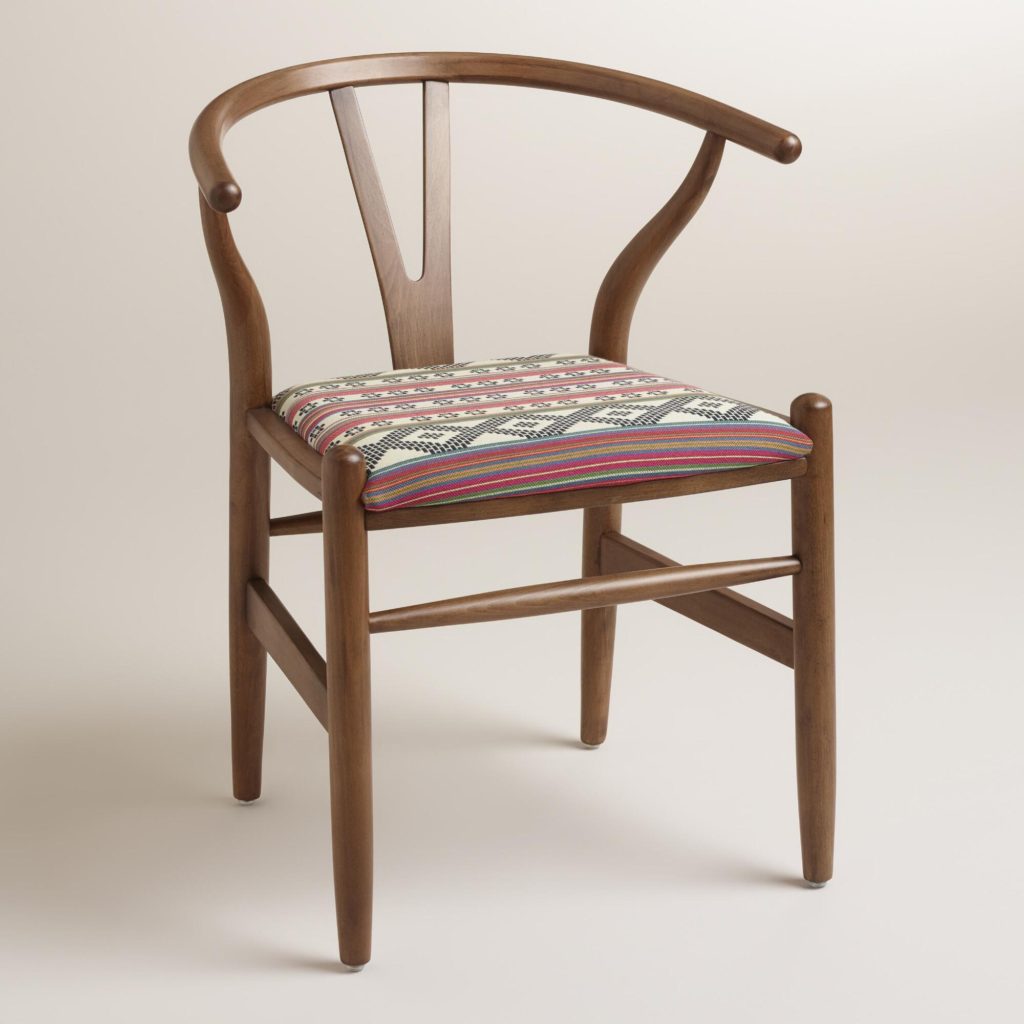
I spotted this chair at World Market and was thinking that it might be perfect. I love the rich color of the wood and the upholstered seat is super fun. Since the desk has such modern lines, a wood chair might be a good way to bring in some warmth and texture.
![]()
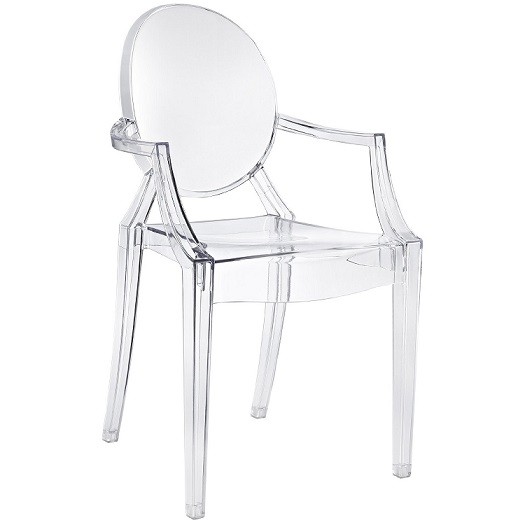
I love these acrylic chairs. I have seen them a million times and they seem to work in just about any kind of design situation. That’s super appealing to me as I could just move it somewhere else if I got sick of it or didn’t like it for an office chair. Hmmmm….oh the choices.
So those are just a few of the things we have been up to around this house. Like I said, I feel so good to be getting back in the swing of things around here. Oh, and we have some exciting progress to share that’s been happening in the bathrooms. If you’ve been following along you may remember our bathrooms were in serious need of attention. You might have blocked those pictures from your memory though and I wouldn’t blame you for that.
P.s. Be sure to check my house tour page because I FINALLY updated it!
It’s Tuesday. I have to keep reminding myself that it isn’t Monday because my kiddos were home from school yesterday so Nate and I could attend parent-teacher conferences. Originally, we were kind of dreading this experience but it was actually fun to see what they have been up to in school. Nolan has been writing some very creative stories and Grey is the class story teller. Surprising? Not one bit.
In the last post, I detailed what we did over the weekend while we were kicked out of our house while our old floors were being removed and the new ones laid down. When we got home, the floors were down and this lady felt like it was Christmas. We actually ended up short about 60 feet of material and had to wait a few days for the boards to come in and have the rest installed. So, the dining room has only been complete for a few days as it was the area that was left undone when the crew discovered there was going to be a slight shortage.
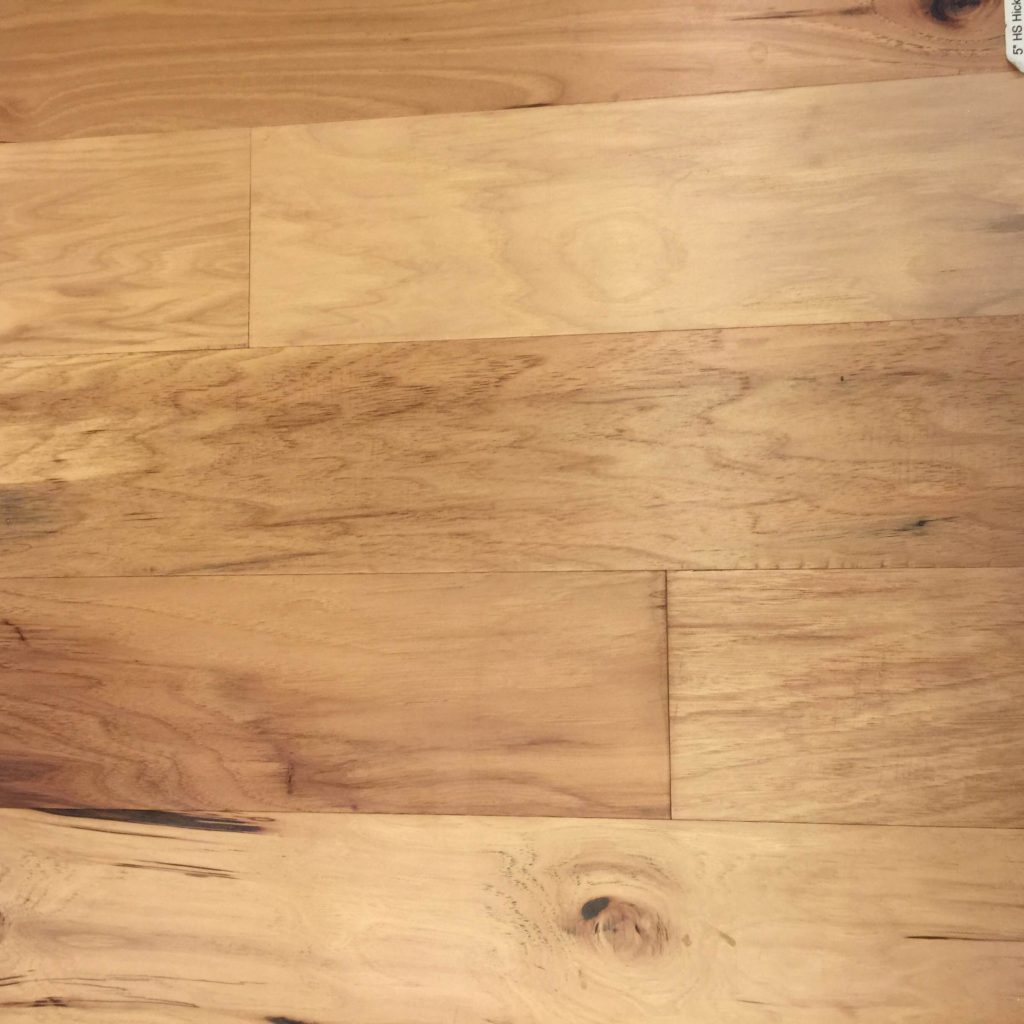
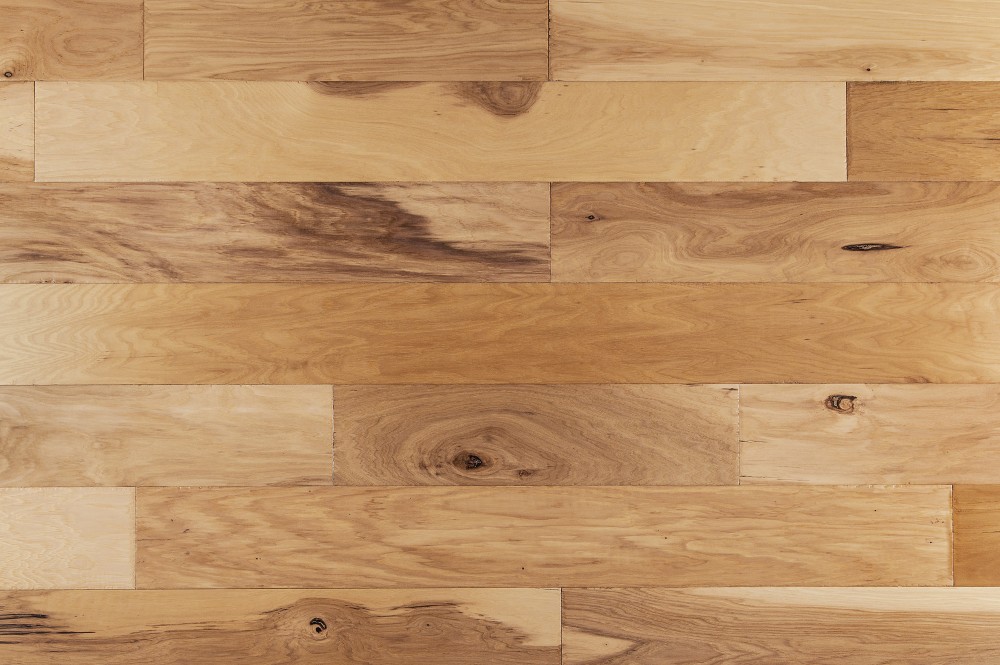
We did a lot of research about flooring options before we made our final decision when it came to materials. I decided early on that I wanted a natural material to bring some warmth into the house. If you follow along, you probably have heard me complain about the lack of natural light in our house. Because of this, we were quickly able to rule out all the options on the darker side of the color spectrum. Think light and bright! After looking at tile, bamboo, laminate, and even real wood, we decided that our sweet spot was in the engineered wood group. Once we had that decided on, it was easy. We quickly picked a 5” plank, hickory wood. It was light, it had a ton of texture, and it’s perfect.
Whew! With. All. That. Said. Let’s go in and look at the new floors!
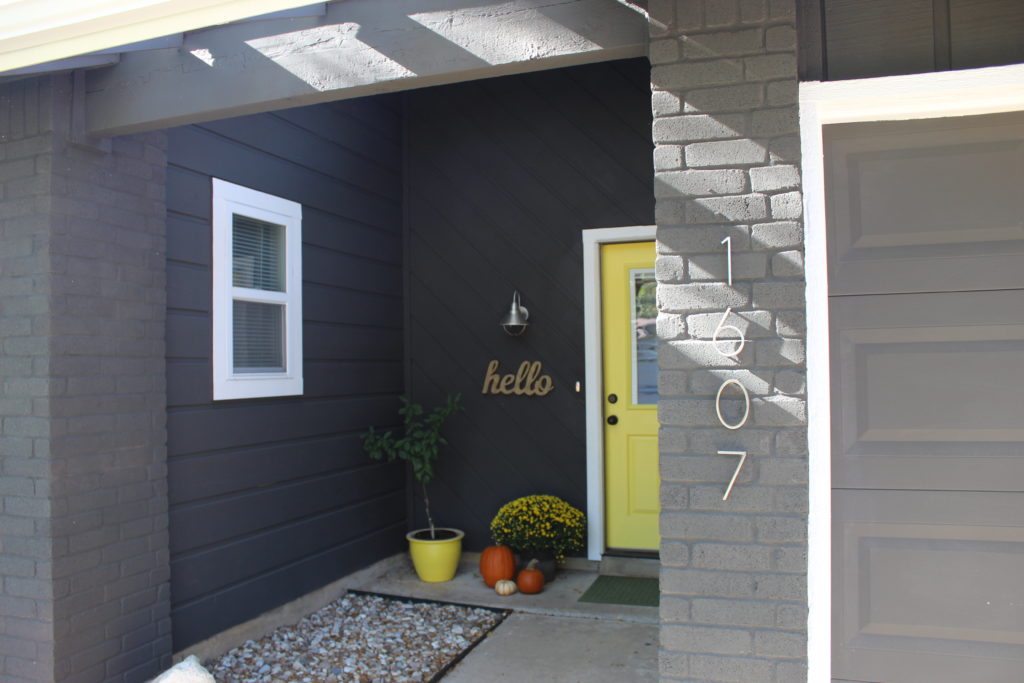
Notice the addition of some yellow mums and a few pumpkins to the front entrance? I am trying to force Autumn to arrive (and stay) here in Texas. We are back up in the 90’s but with cooler mornings and evenings. The weather is flirting with the idea of changing seasons but just can’t seem to commit.
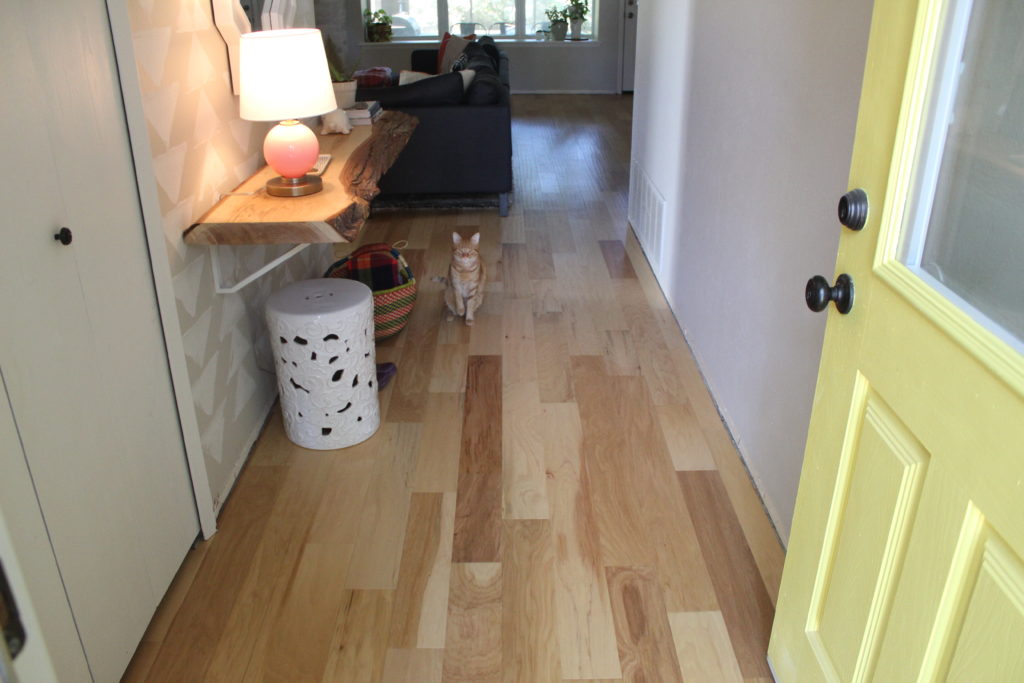
The variations between each individual plank of wood adds a lot interest. We haven’t installed our baseboard trim yet. Nate is planning on getting this task done in the next few weeks. I considered not sharing photos of the floors until the baseboard was installed but I was just too excited to wait! Our cat, Artie was very curious about the photo taking process this morning so you will see him popping up all over.
Here is a little reminder of what our entryway looked like when we moved in.
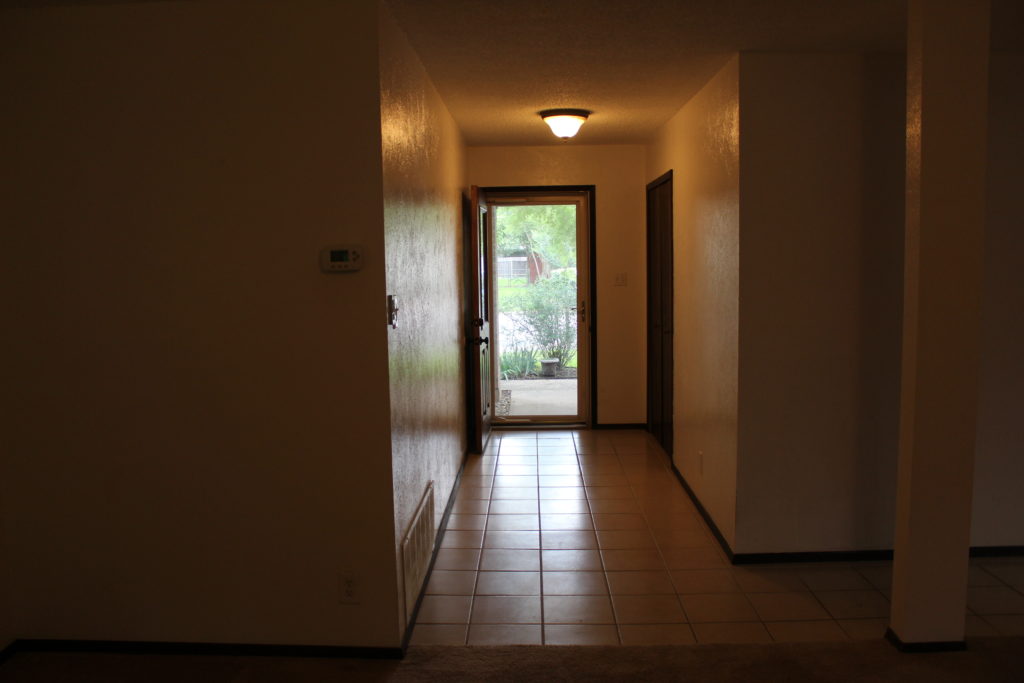
I took this picture on move-in day at the end of May. The best lesson I have learned through keeping this blog is that documenting the process of fixing up our house has been the best way for us to keep our momentum going. Buying a fixer upper and living in the space with kids and real life happening while trying to update the house is tricky. Very tricky. But, looking back at how far we’ve come is so uplifting. Go us! My parents bought a 1916 craftsman style house when I was four and lived there for twenty-six years all while fixing up the house and raising five kids. It would have been so cool to be able to look back at all the projects and work they did on their house in the same way that we will be able to look back on our first fixer upper. But let’s get back to the floors….#pregnancyhoromonesareforreal
Some of our furniture hasn’t been moved back into the house. We have been relying on neighbors and Nate’s buddy from work (Thank you, Jimmy!) to help us move the heavy pieces back into place. As I am exactly one month away from my scheduled c-section, Nate won’t let me help him move a thing. In the meantime, our furniture is sprinkled around the house, in the garage and even in the screened porch.
This is our empty dining room. Our dining table is still outside on the screened porch but the kids have been having loads of fun eating their meals all over the house in random spots. We’ve even laid blankets on the floor for an “indoor picnic” which was the fan favorite. Kids can somehow turn the inconvenient aspects of life into something fun and exciting.
Told you Artie would be randomly photo bombing. I picked his food dish up off the floor to take this picture so I think he was sitting there trying to figure out where his dish ran off to.
The kitchen cabinets are next on my to-do list. I think I am going to give them a fresh coat of white paint and then add some new hardware. But what? Polished nickel? Gold? Oil rubbed bronze? I have been seeing the most beautiful photos of kitchens and bathrooms with polished nickel pulls a la Studio McGee. Hmmm…stay tuned.
Here is the last space with new floors. We left the carpet in the bedrooms but plan on replacing it with something newer, cleaner and prettier. Trust me, I wanted all the carpet to go away. But, I think we made the right decision in keeping it because we didn’t feel we would see a return on our investment.
And just because you know how I love a good, look-back on where we started. Here ya go. You’re welcome.
So those are all the dirty details on our floors. How we picked them, the process of demolition and installation, and the difference it’s made in our house. Also, they seem very durable so far. We haven’t really changed the way we live on our floors since installing them. We did run out and buy some felt footies for the legs of our furniture, but that’s it. Maybe I will write an update on how they are holding up after we have lived with them for a while?
Hope you have a great week!
We were kicked out of our house over the weekend. There was a good reason though; our floors were being installed! This meant that we had to make ourselves scarce and stay out of the way while the crew made fast work of tile demo, taking out carpet, leveling the subfloor and installing our new wood floors. Because we knew we had to stay out of the house for much of the weekend, we planned a busy list of things to do. So, first thing Saturday morning, we got up early and headed to Grey’s football game in Bastrop, TX. Our guy had a couple of good runs, pulled a few flags and our team came out on top and won the game 25-18. After the game, we were off to Round Top to check out the antique fair that is held twice a year.

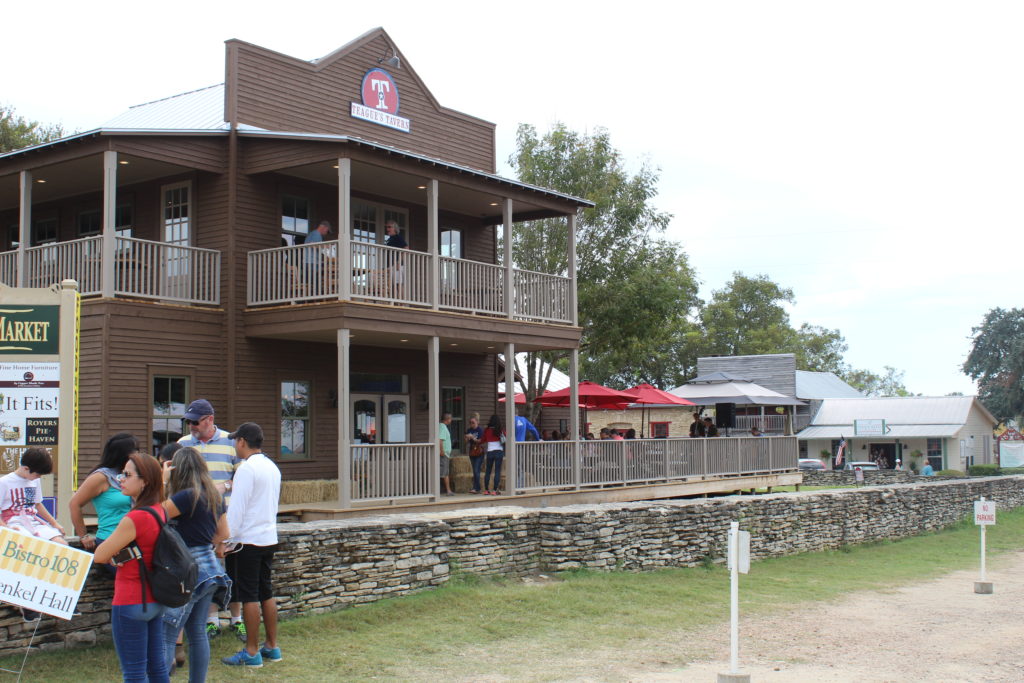
We weren’t sure what to expect but have been told lots of good things from people who have been. I assumed that it was just a few tents where vendors gather to sell antiques but there was so much more! When we arrived in Round Top, we were greeted by the sweetest little town EVER. The shops were cute. Like, postcard cute. We kept saying that Round Top reminded us of the movie, Pleasantville. Let’s just talk about the food for a second, the food that seemed to be around every turn. Good food too. Everything from Texas style BBQ to fair style food with staples like corn dogs and burgers. Food and antique hunting…ummm yeah.


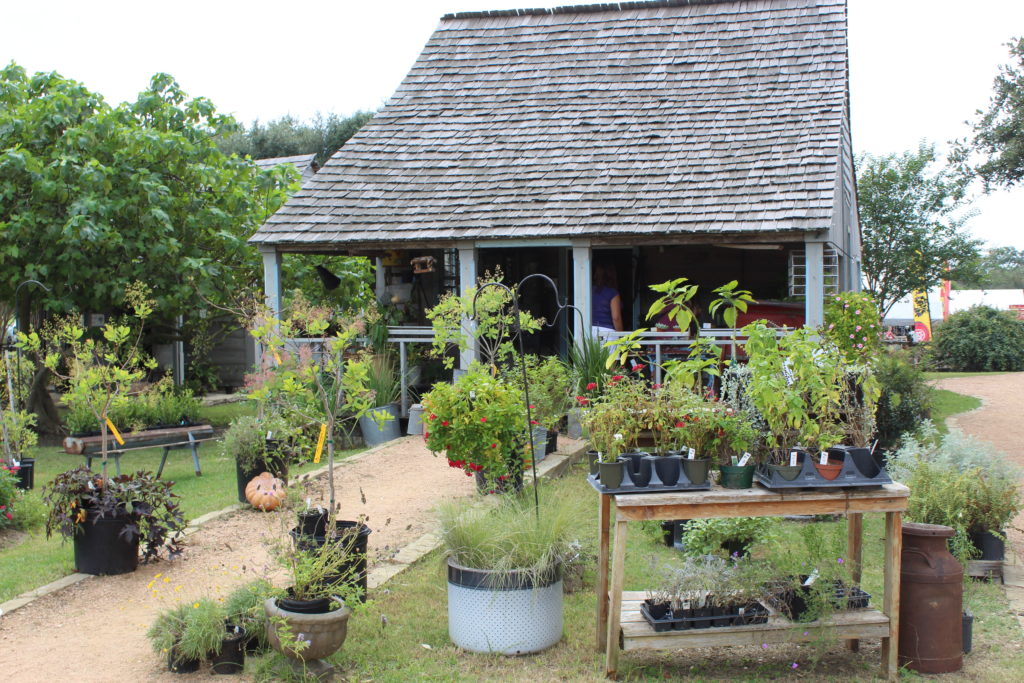
These are just a few of the cute shops that make up Round Top. We talked to some of the owners who explained to us that they keep these spaces year around but are only open during certain times like the fair in the spring and fall. We visited as many shops as the kids could stand before we had to break for snacks and water. I am thankful it is cooling off here but it is still quite warm for October and the temps were in the mid 80’s. Our family can’t ever seem to adjust to the humidity. I don’t know if we are more sensitive to it being from the Northwest or if it’s a problem for everyone. This Northwest girl was hot. Maybe it has something to do with this very large baby boy that I am carrying around?

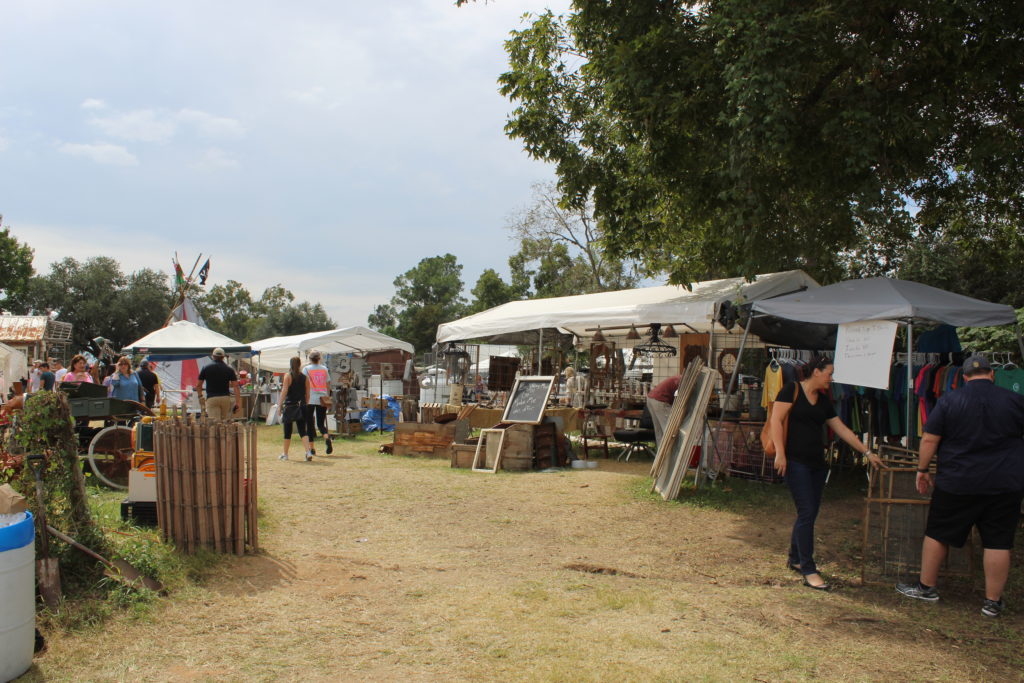

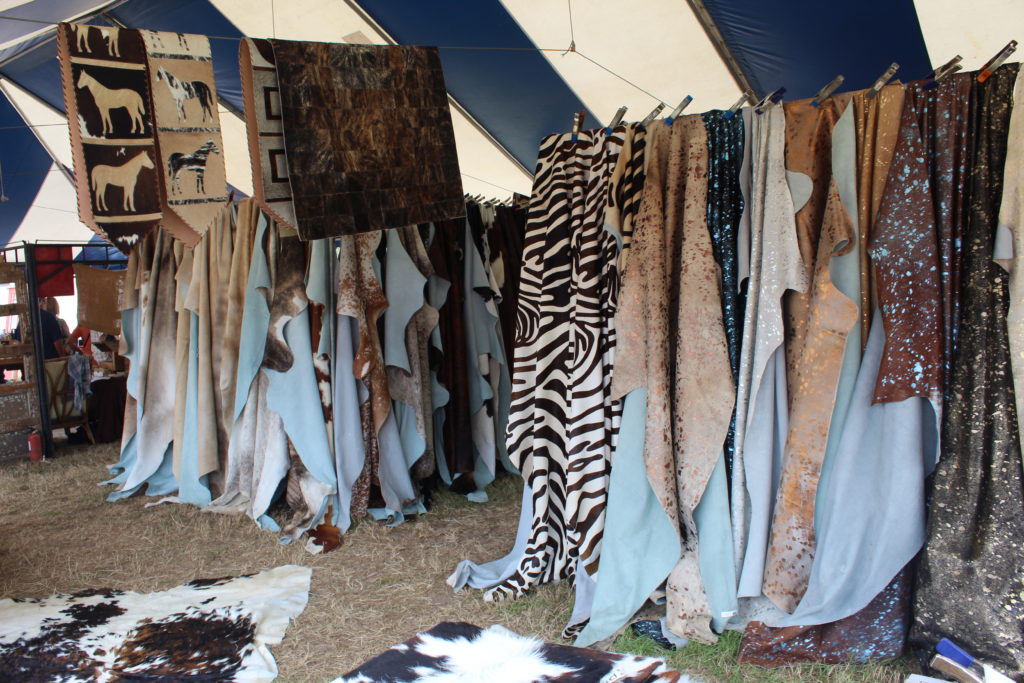
There were so many treasures to be found that I didn’t even know where to start. Many people we saw came prepared with carts and wagons that they were filling up. Look at those beautiful cow hides. It felt really inspiring to see all of the random pieces and imagine all of the ways to re-purpose these items. It really got my wheels turning. Especially this next picture…

Haha. Not really. But this is a good example of the quirkiness that we saw all over the antique fair. The shirt says, “Raised on Willie.” We decided that we would pick just one treasure to come home with us and it was an easy decision. I spotted an antique rug and Nate was able to barter with the shop owner until they agreed on a price.

I was so excited to bring this little guy home with us and am thinking that a bathroom or kitchen could be the perfect spot for him to live. Oh, notice those wood floors?? Those are our new floors!!!!!! I will write a post really soon with all the dirty details just as soon as it doesn’t look like a hurricane went through the middle of our house.
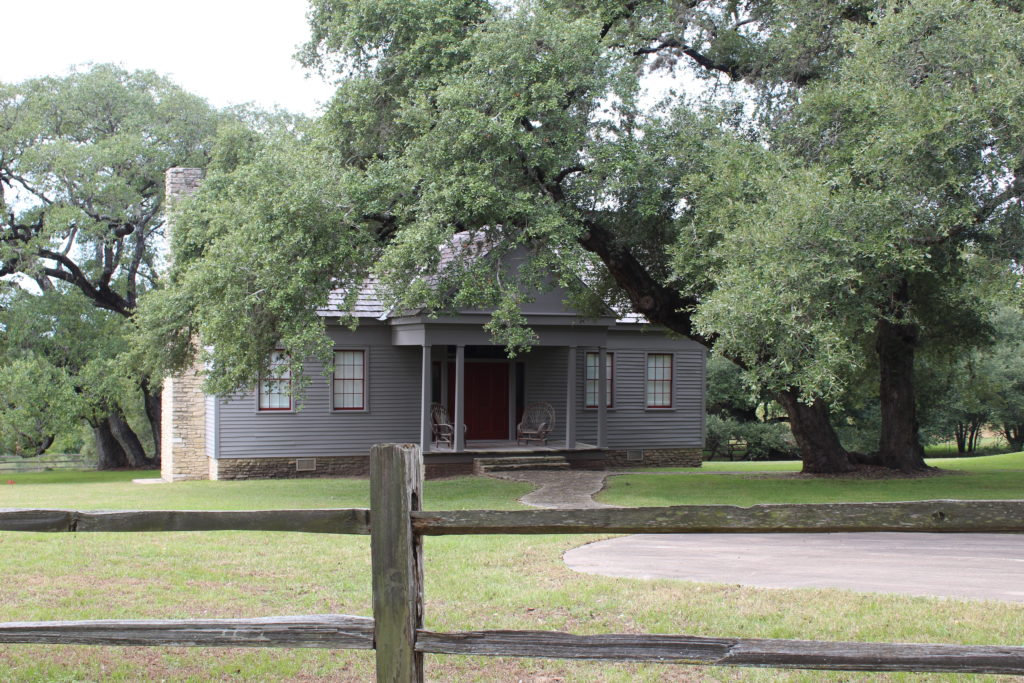
Overall, Round Top was loads of fun. I would love to go again with cooler temps and without a giant pregnant belly. On the way out, we were charmed by some Texas style houses and beautiful scenery.

I will leave you with this image. Because, who doesn’t love a good baby pic?
Oh my goodness. It’s been crazy at our house the last few weeks. We have been busy adjusting to our new school schedule. Hello 6:15am! This is not a natural time for anyone in our family to get up in the morning. We fall more into the night owl category, for sure. In addition to our new school schedule, Grey started fall football and Nolan is finishing up her swimming classes and gearing up for tryouts for swim team. Nate has also been recruited as head coach for Grey’s football team…gulp. Nate is competitive. He is so competitive that we have “no board-game” rule in our house for the general well being/happiness for everyone who lives here. But, I’m sure he will be able to keep his competitive nature in check for these cute little football players, right?
Things have been really busy at home as well. We have my C-section officially scheduled for November 11 so I have to get busy and get some projects done around the house before baby boy is here and the holidays soon thereafter. So, in an effort to keep this train moving, I finally chose a paint color for the interior of the house. I knew I wanted something in the greige family, i.e. a warm gray color. I also decided that this color is going to be pretty much everywhere. This means the living room, dining room, kitchen, entryway, hallway, etc. You get the idea. I’m thinking this will bring a nice flowing and cohesive look to the inside of the house.
A few weeks ago, I went and picked quite a few swatches of paint that I brought home to study. I quickly narrowed down my options as so many of these colors looked too dark in our house. The lighting is super tricky in here with the screened porch on the back of the house that blocks a lot of natural light. I quickly had three favorites for which I went and grabbed test pots at Lowe’s.
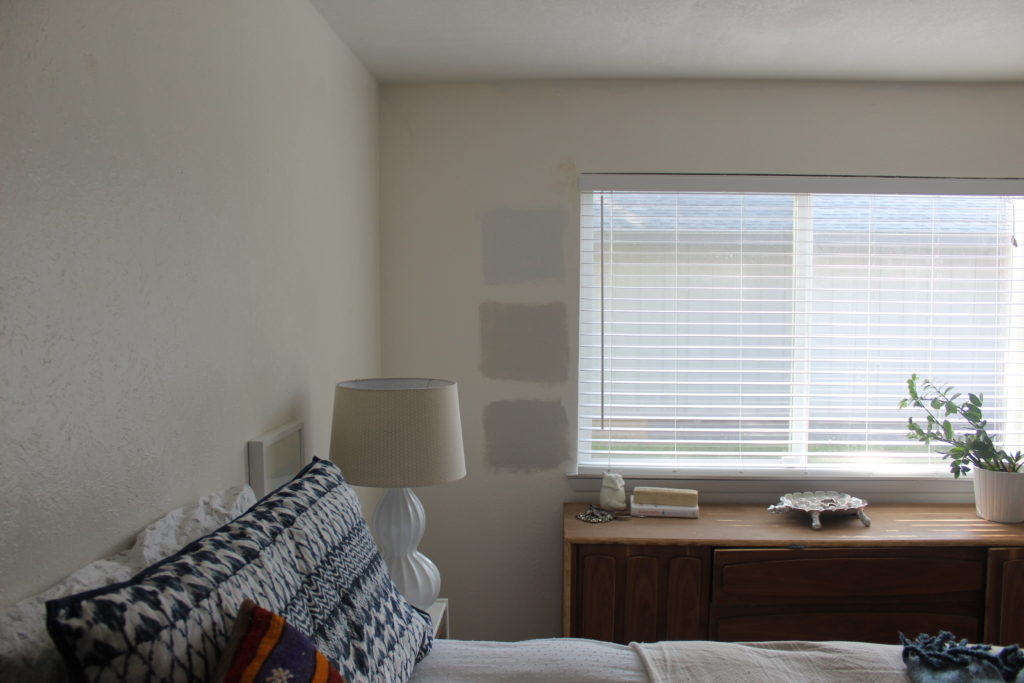
All three colors are Sherwin Williams. The top was Nebulous White, the middle swatch was Crushed Ice and the bottom was On the Rocks. I painted these swatches in several different places around the house all in different lighting situations. Dark, darker, and barely visible to the human eye. In the end, I went with the middle swatch because I felt it brought the most warmth to the game. And that’s what this place needs. A warm and fresh pallet.
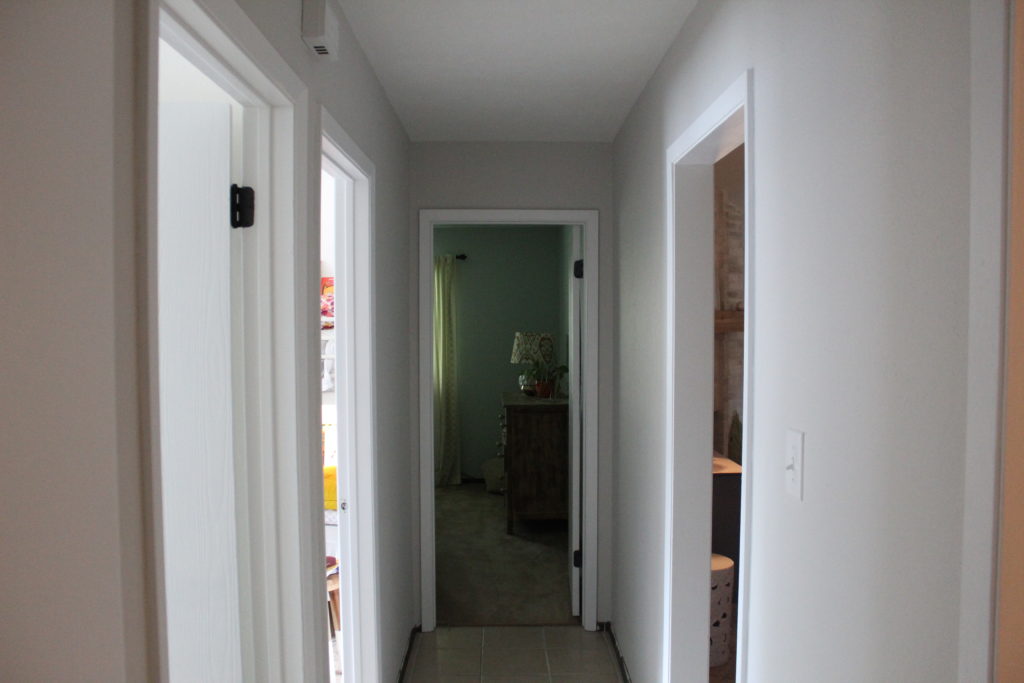
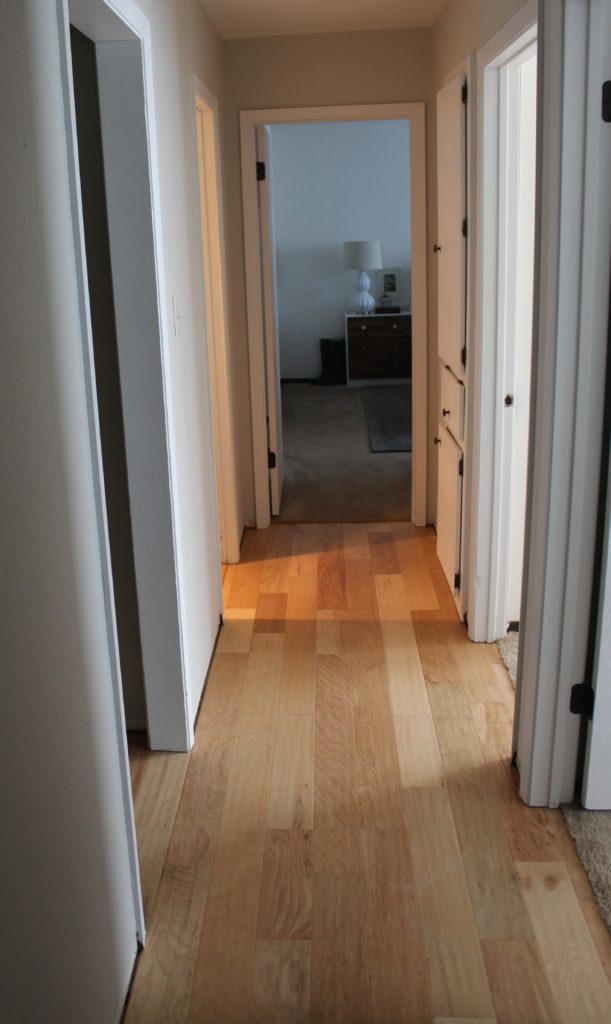
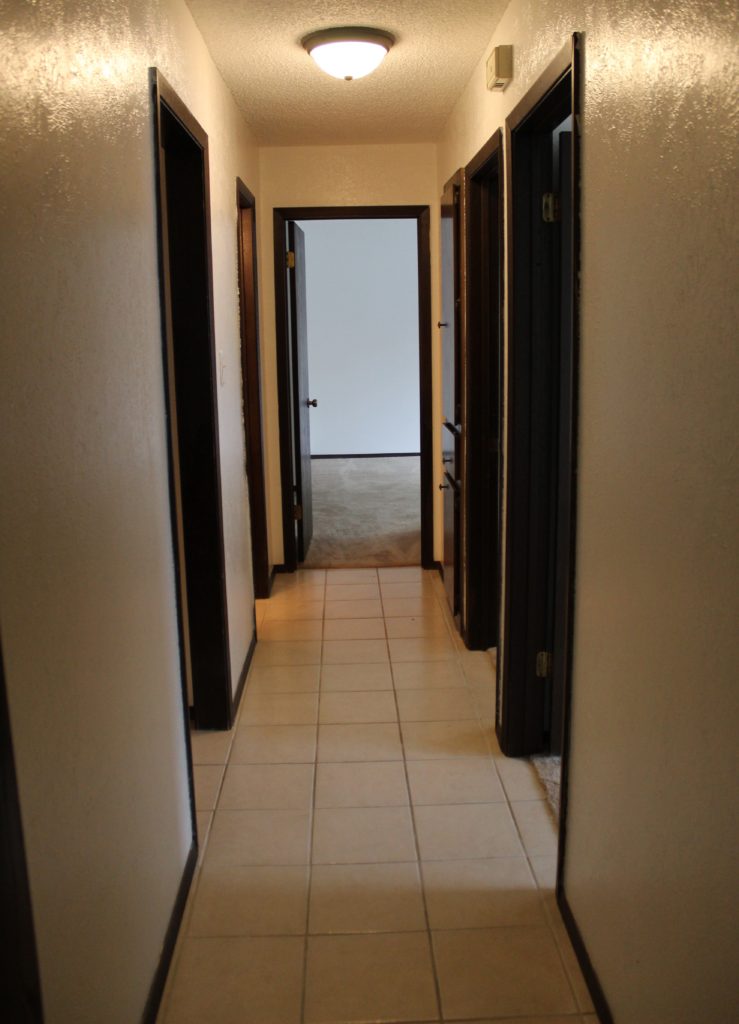
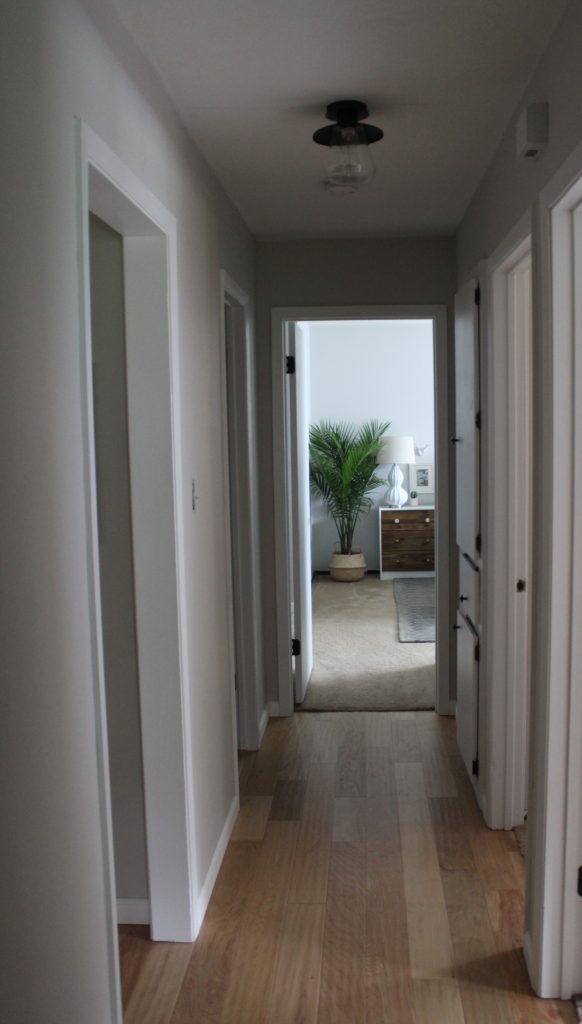
This is a shot of the hallway with a fresh coat of Crushed Ice. I especially love the way it pops against the trim. I also just finished painting ALL the trim in the whole house. I was able to leave the baseboards because we will be replacing them when we have our new floors installed, but more on that in a minute. Remember what our hall used to look like on move in day? Wow. I feel bad for THAT Courtney. She had a lot of work ahead of her.
The walls were super shiny and it drove me crazy. It made the texture on the wall stand out as well. This particular texture has so much texture with sharp-ish peaks that it looks like it might scratch you if you rubbed against it. So, while I know most people do not recommend painting their walls in a flat sheen, I went ahead and did it anyways. It seems to tone down our crazy texture and doesn’t draw your eye to the texture, the way it did when the walls were a satin sheen. I hear the warnings against flat paint as it isn’t as washable as some of the more shiny sheens and to this I say, if our walls are so dirty that I am constantly needing to wash them, I suppose I will be repainting anyways. Also, I think that the paint formulas have come a long ways. All of the sheens seem to be washable these days. Anyways, that wraps up my mini-rant and now, more pretty pictures!

Did you spot our new light fixture in the dining room? I have been hunting for something for this space for a while now. We have had an IKEA one above our table for several years but I have been wanting something a little more special. The lightbulbs are dipped in silver which is really fun.
Remember before how I mentioned floors? Well, we finally made a decision and ordered our wood floors! So, they will be coming in over the next few weeks and then demo and installation should be at the end of this month. They will go down everywhere except the bathrooms and bedrooms. I am so excited/nervous. Here is a little sneak peek of what will soon be our new floors.
So that’s the dish in our house. I can’t believe we are going to have new floors soon! Picture me with a serious case of perma-grin.
Have you ever watched an episode of House Hunters? Well, I have. More times than not, a couple goes through a property and they start saying things like, “we would need all new floors, the bathrooms need to be gutted and everything in the kitchen needs to go.” Nate and I were just as guilty as these folks when we looked at our house. We actually said those things! These “simple cosmetic swaps” mean major work which also means major money.
So Nate and I have been discussing which projects are realistic for us as we plan on doing most of these ourselves. We also flip flop back and forth as to which improvements would make the most impact for resale value and which ones we have to get done for our own sanity (like our beautiful pink exterior before we painted last weekend). Ideally, we are hoping that most of our updating will fall into both categories. But, I think we have come up with a list. Not a to-do list because I don’t even like to read my own to-do lists but more of a list of goals we want to accomplish during our time here. Here we go!


So these are our goals as of right now. I’m sure we will change our minds about some of these but for right now, this is what we are planning. There’s definitely no shortage of things to do but I love a good challenge and these projects are definitely going to challenge us.
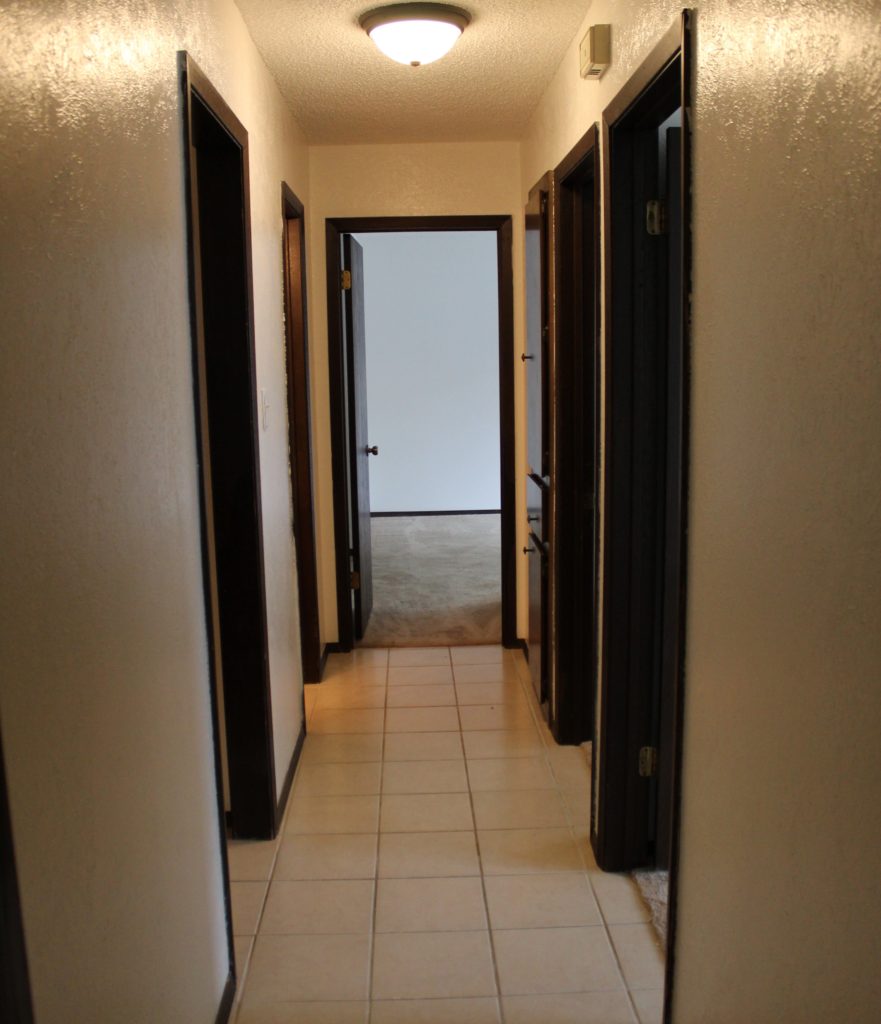
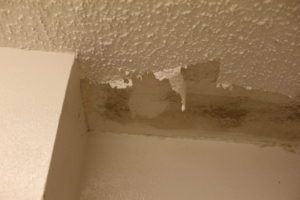
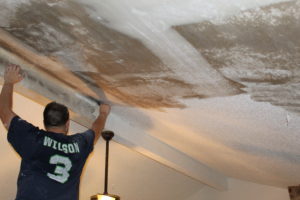
Once upon a time there was a girl who bought a 1648 sq. foot house. Every ceiling in this house had that famous popcorn texture that we all know and love. Every. Single. Inch. It’s even on the ceilings of the closets! This same girl thought she would be able to scrape this popcorn texture from these ceilings and it was no big deal. Boy, was she wrong.


Here’s how all the ceilings looked before we started scraping. We have told several of our new neighbors about our project and how we are going to start scraping and their reactions have been pretty funny. We have heard things like, “yuck,” and “what a mess.” We soon found out that those are just a few of the ways you could describe this job…among other, less blog-appropriate words.
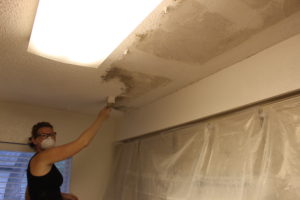
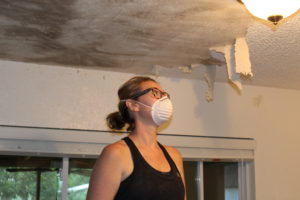
The process itself is simple. First, spray the area you plan on scraping with water and let it soak so it saturates the surface. We found that magic number was around 15 minutes but it definitely didn’t hurt anything to let it soak for longer stretches of time. While it soaked, we used this time to prep for the mess. Although, I’m not sure there is any amount of prepping that a human being can do to prepare for the mess that is about to ensue. Then, the scraping begins…and never ends. Okay, it does end at some point. We just haven’t found that point yet.
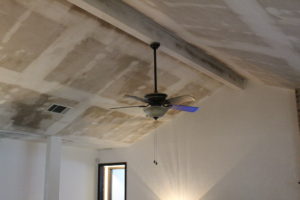
Lovely, isn’t it? It was a little shocking to see the drywall for the first time all dark and soaking wet. But, it quickly dries and looks lighter and more like drywall is supposed to look.

The plastic tarp was a life saver for us as the dust that comes with this job is very fine and goes just about everywhere. Your hair, your ears, and even manages to make its way through your clothes. In the kitchen, I was able to tuck the plastic right under the doors of the cabinets. Originally, I was going to use painters tape to secure it to the top of the cabinets but when I went in the the garage to find the tape, I was greeted by a very large wasp. Nate wasn’t due home from work for another 45 minutes so I decided I would work with what I had and tuck that plastic right under the doors. It worked like a charm.
Preparation is really the key to this job. We quickly learned that the more you prep – the less time you spend cleaning up. A shop vac would have been very helpful. We don’t have one but would definitely buy one if we were doing it over because our regular vacuum for the house isn’t speaking to us anymore after all this extra work we have put it through.

That fluorescent light used to live in the kitchen but we took it down so we could scrape under it. It definitely won’t be returning. I am going to start hunting for a flush mount fixture for the kitchen. This was sort of a theme as we finished each room. I had Nate take down the light fixtures for scraping ease but am thinking that none of them should go back up so we can take this opportunity to replace them with something more our style. Either that, or we will be living in the dark.
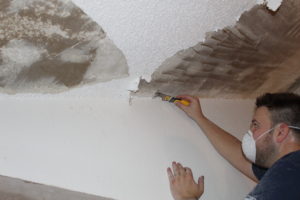
Nate was a good sport and climbed all the way to the top of the vaulted ceilings for me because I was too scared to get up there.
After the long weekend of scraping, we finished up the kitchen, dining and living rooms, entryway, hallways and one bedroom. We have three bedrooms with their closets and the bathrooms to go…and we will finish it! Next up, figure out how we are going to get these naked ceilings textured and painted.
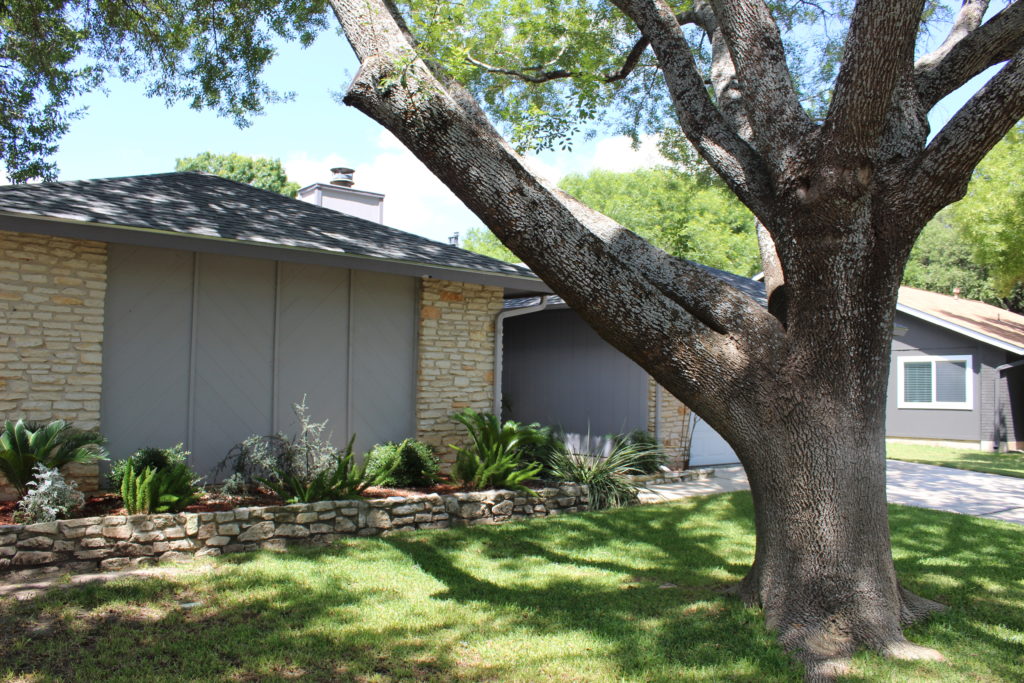
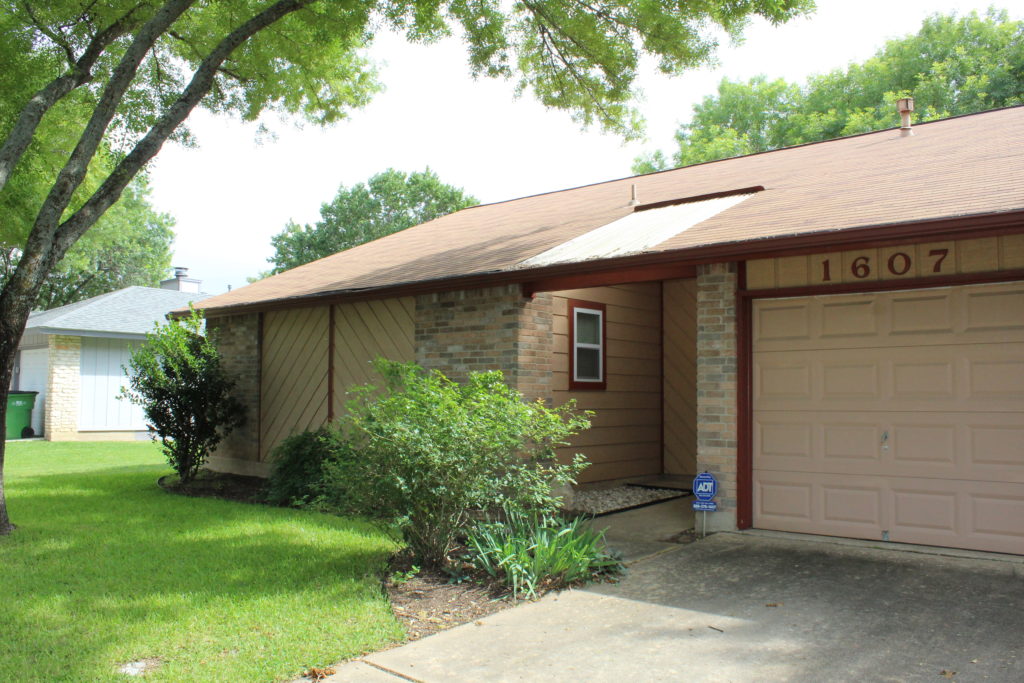
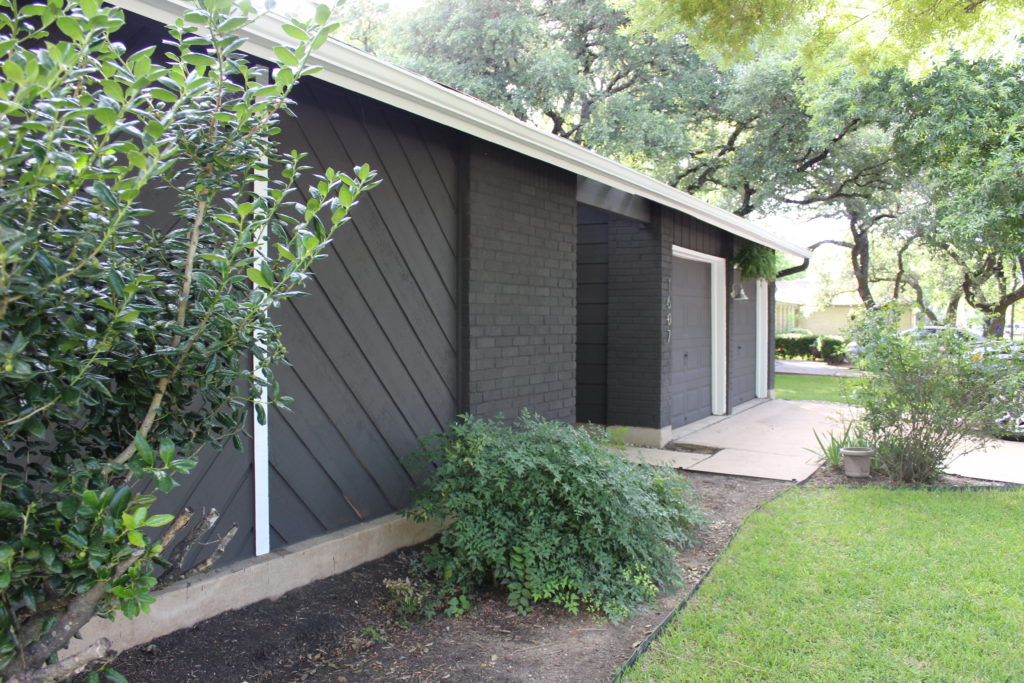
– Exterior –
Here was the place on the day we moved in.

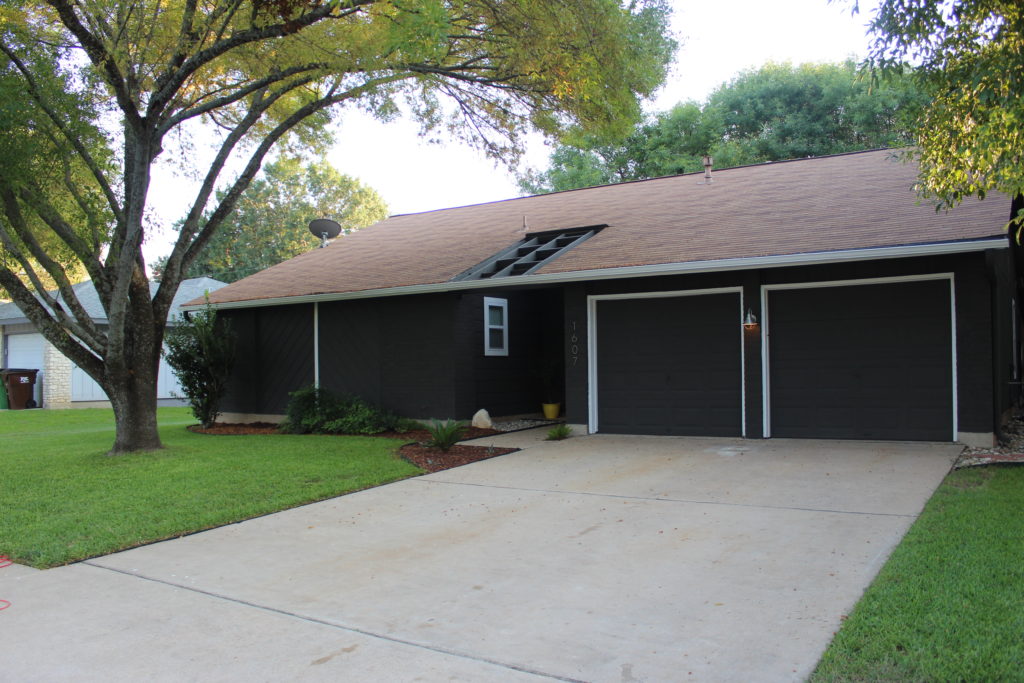
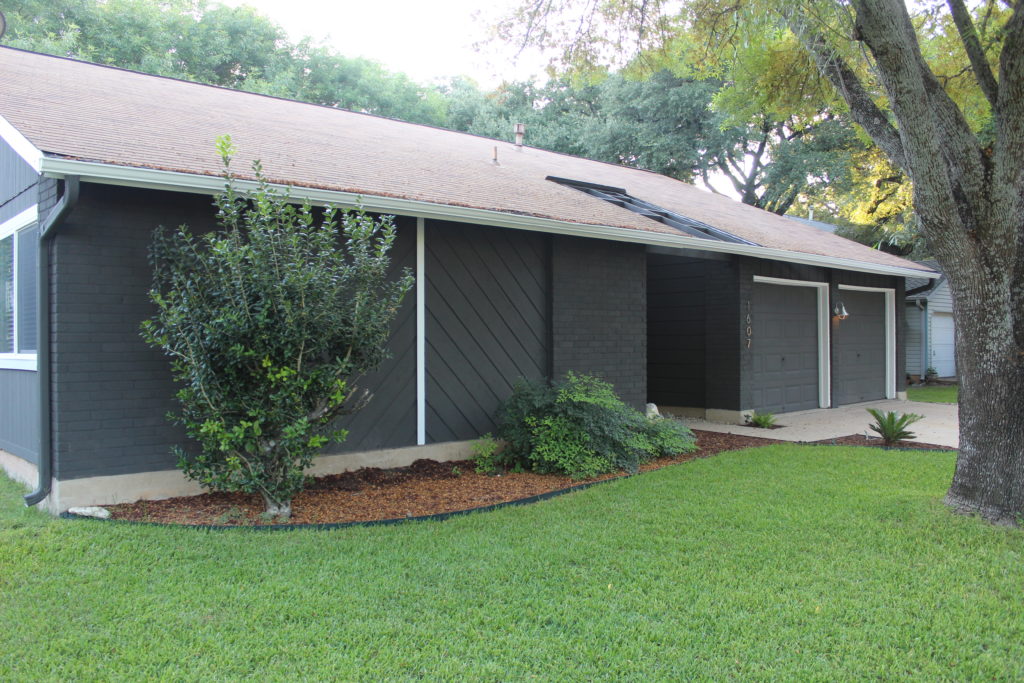
– Progress –
We made lots of upgrades out here and painted the exterior, took down the plastic sheets that covered the entrance and updated the lighting and house numbers.
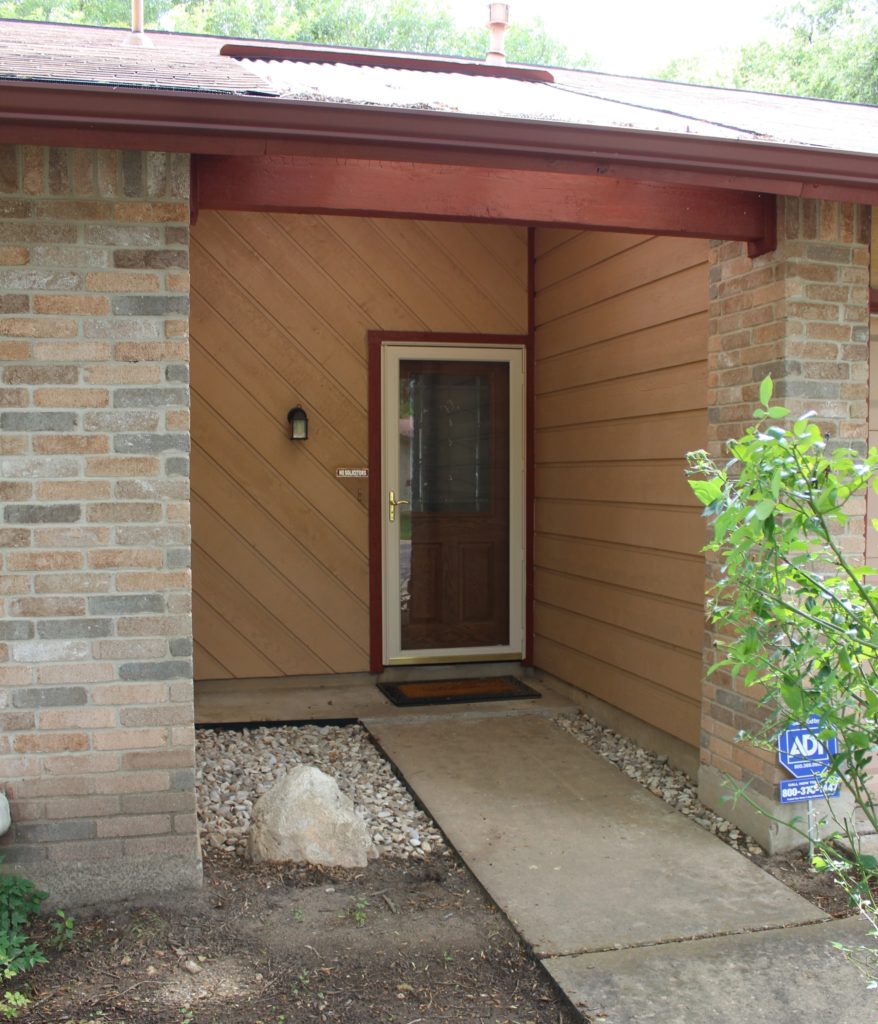
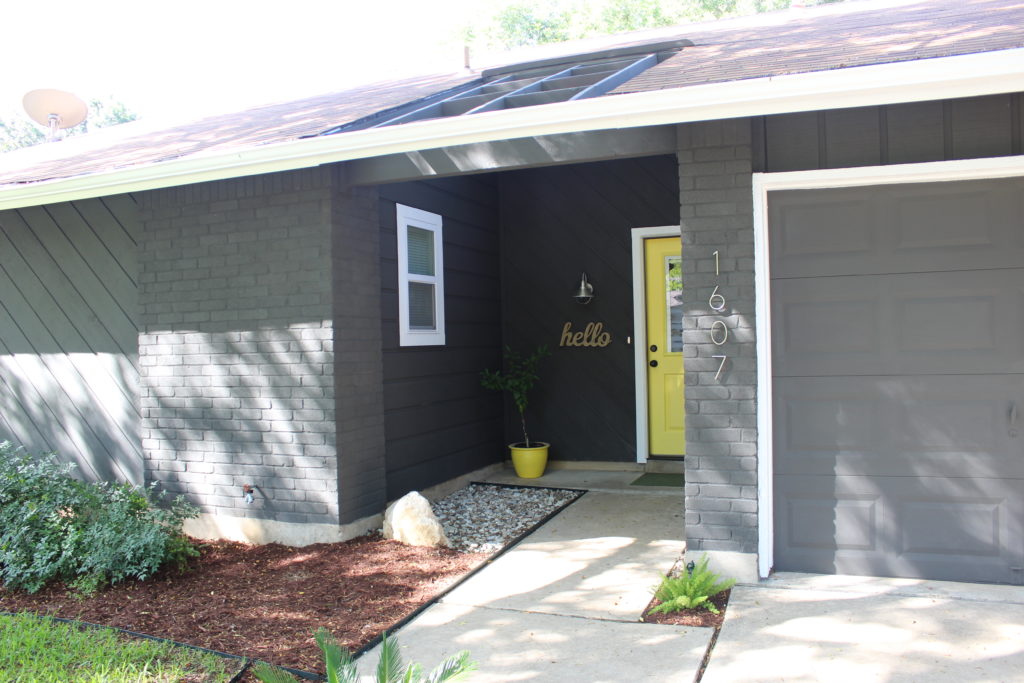
– Front Entrance –
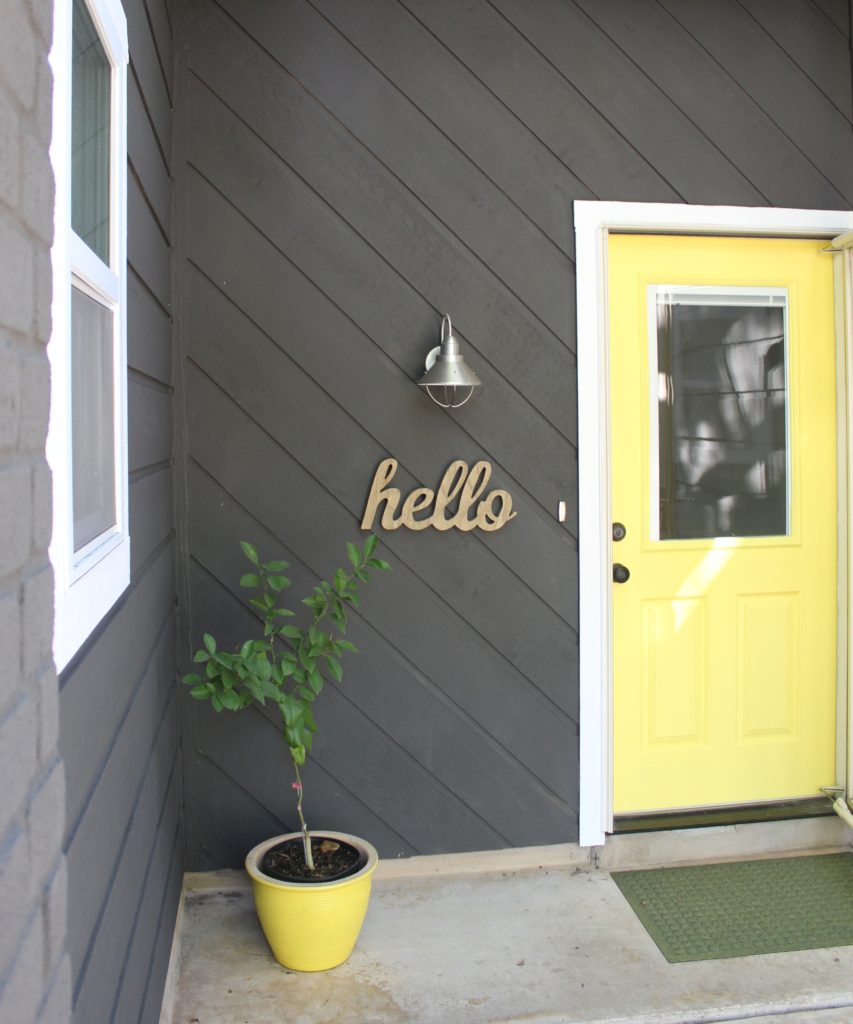
– Progress –
This little space got a fresh coat of happy yellow paint for the front door, we changed out the traditional glass for something more simple, and finally added a few accessories.
– Entryway –
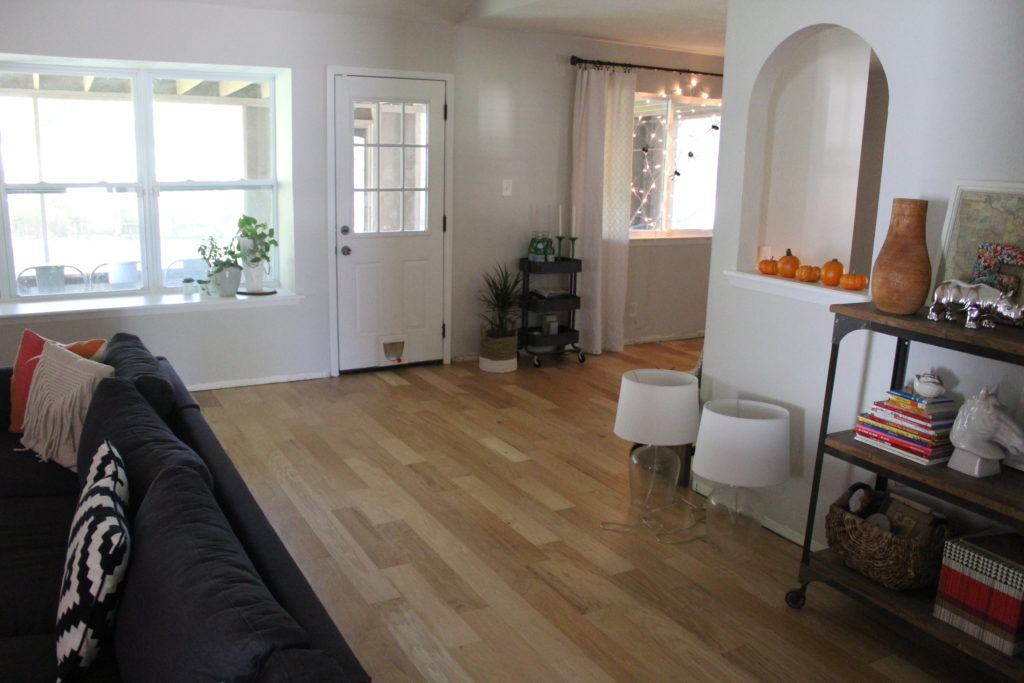
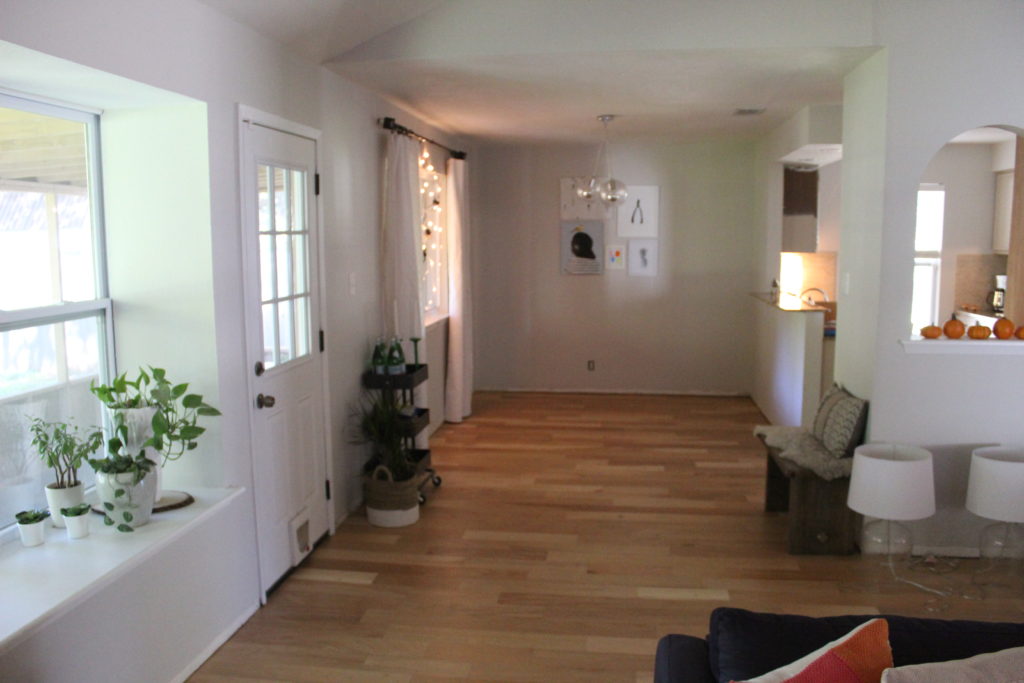
The long hall from the front door lead directly into the living room, dining room, kitchen, basically, the whole house.

– Progress –
Here is the entryway after the new floors. Then I painted the walls and DIY’ed a tribal stamp and added a live edge console table.
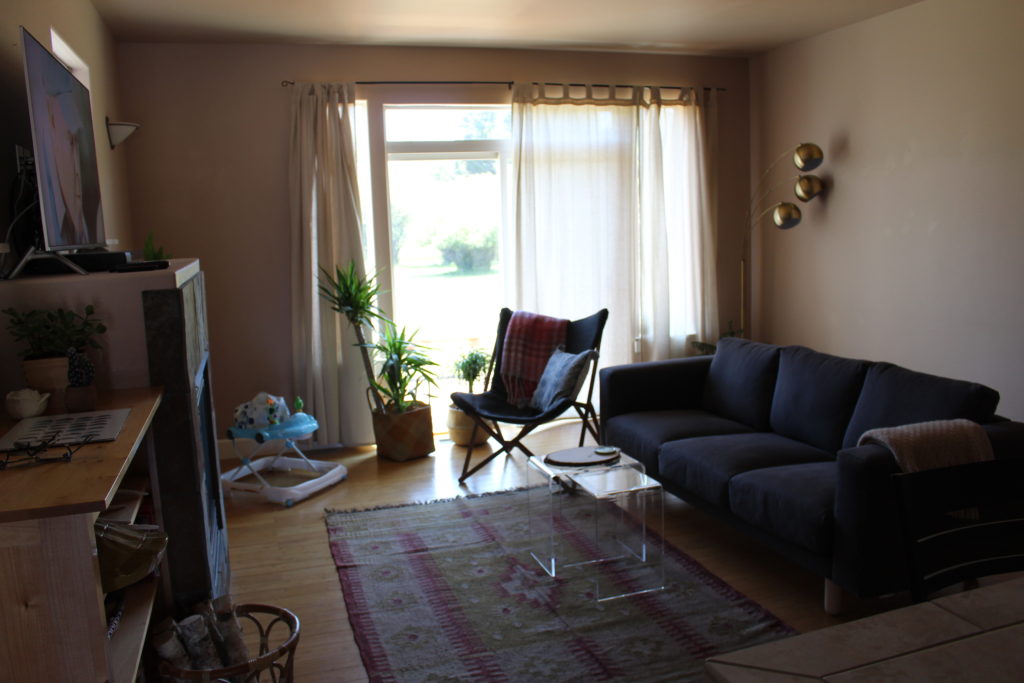
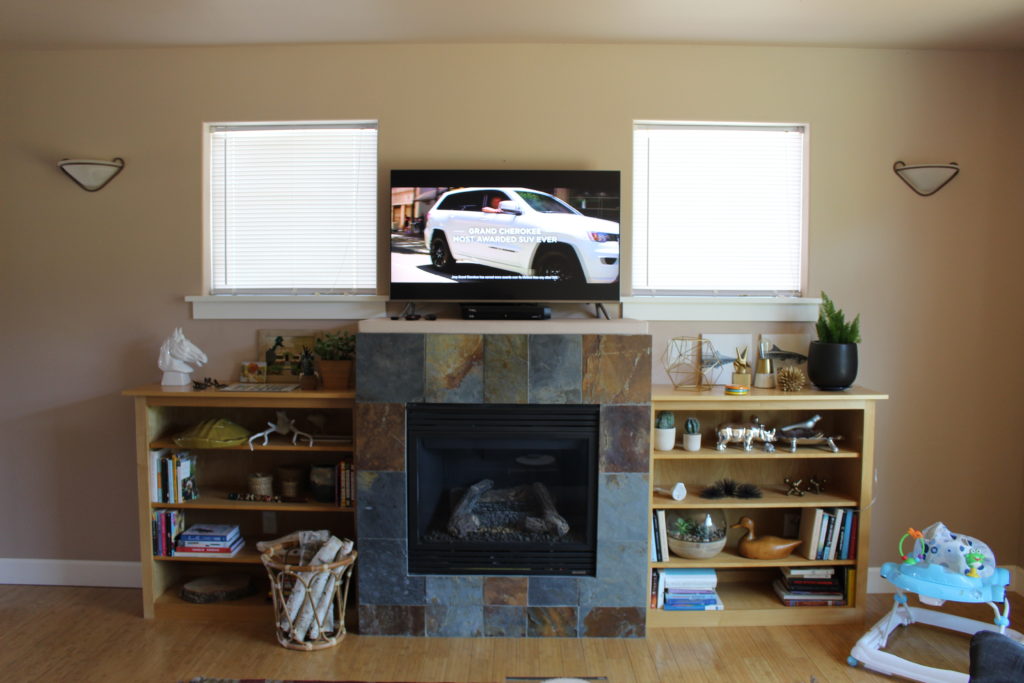
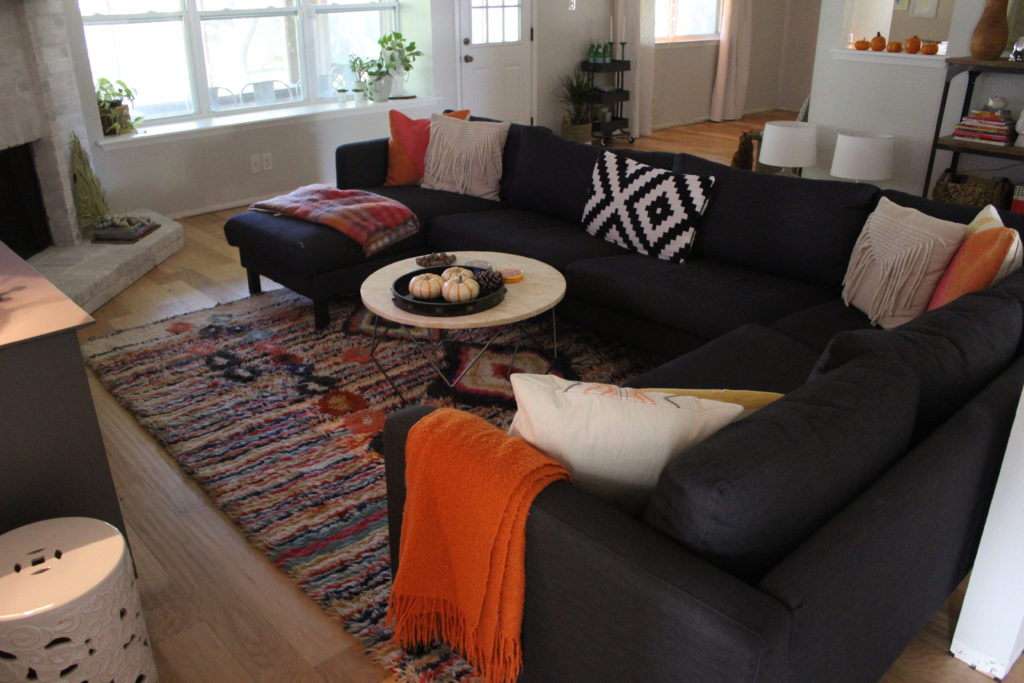
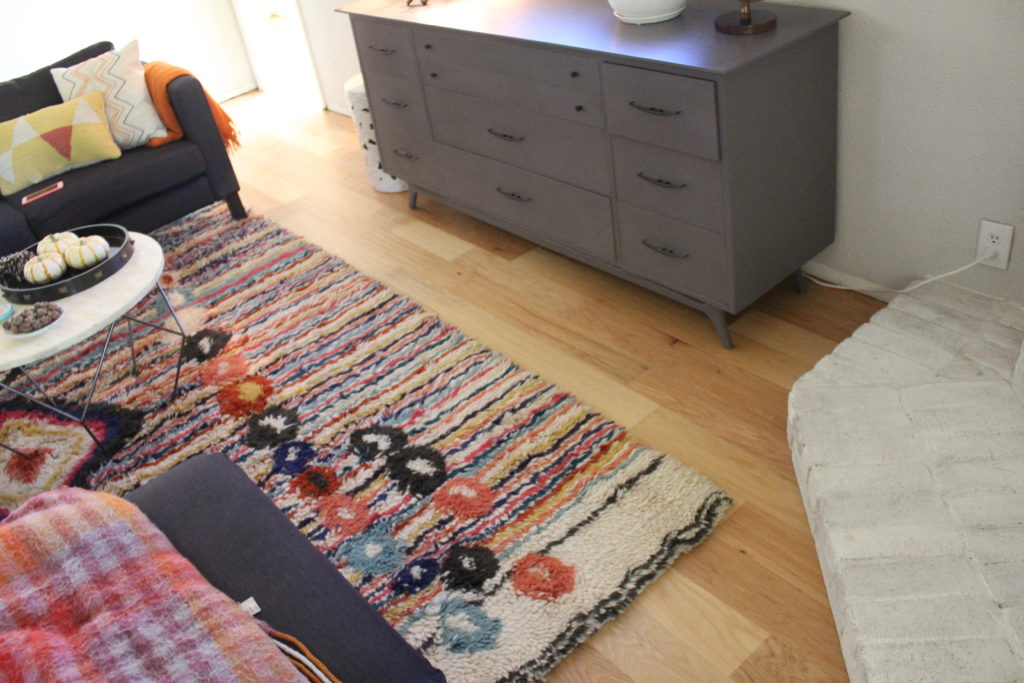
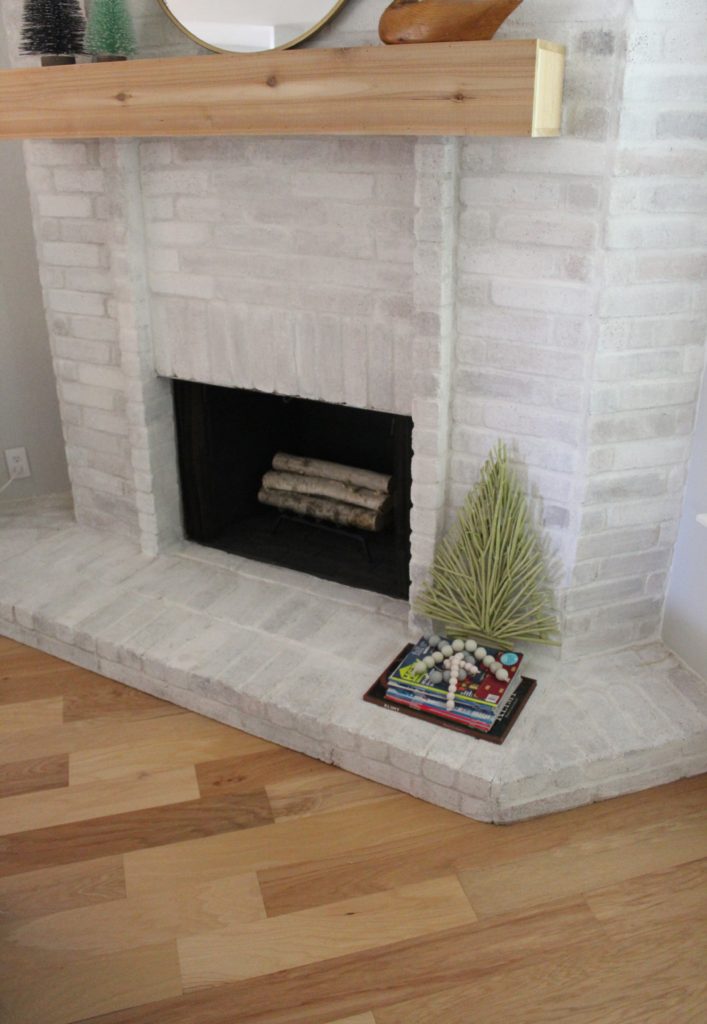
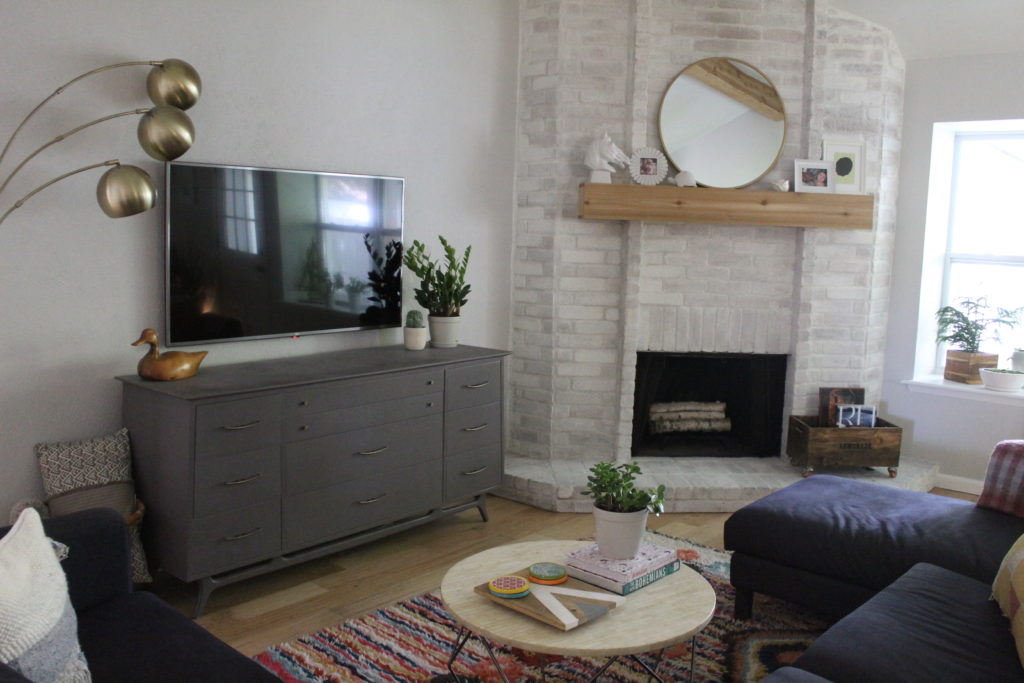
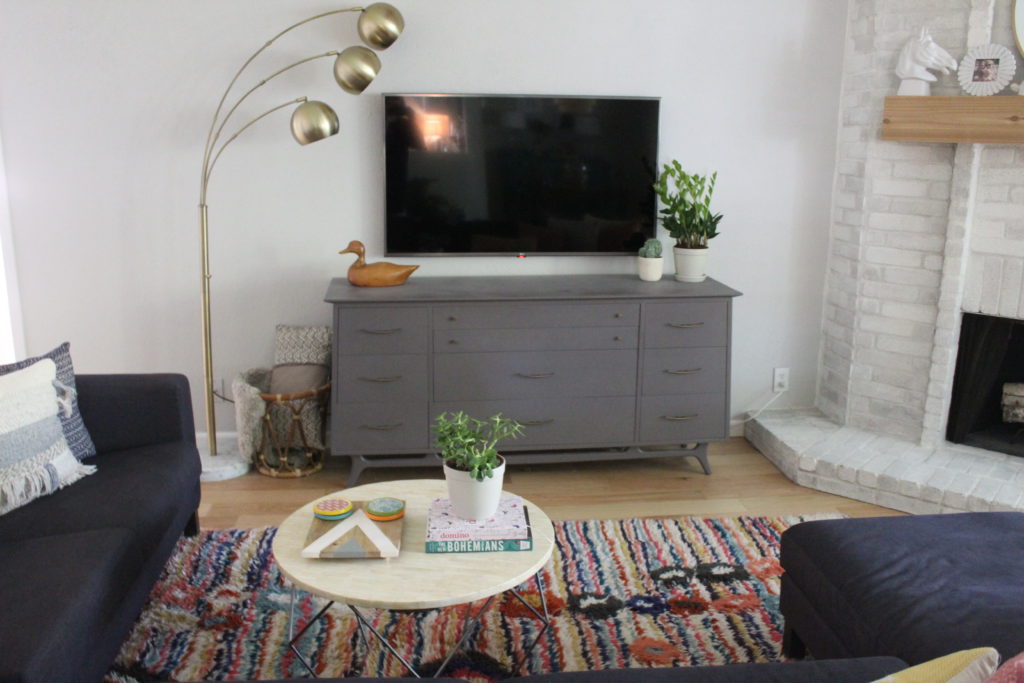
– Living Room –
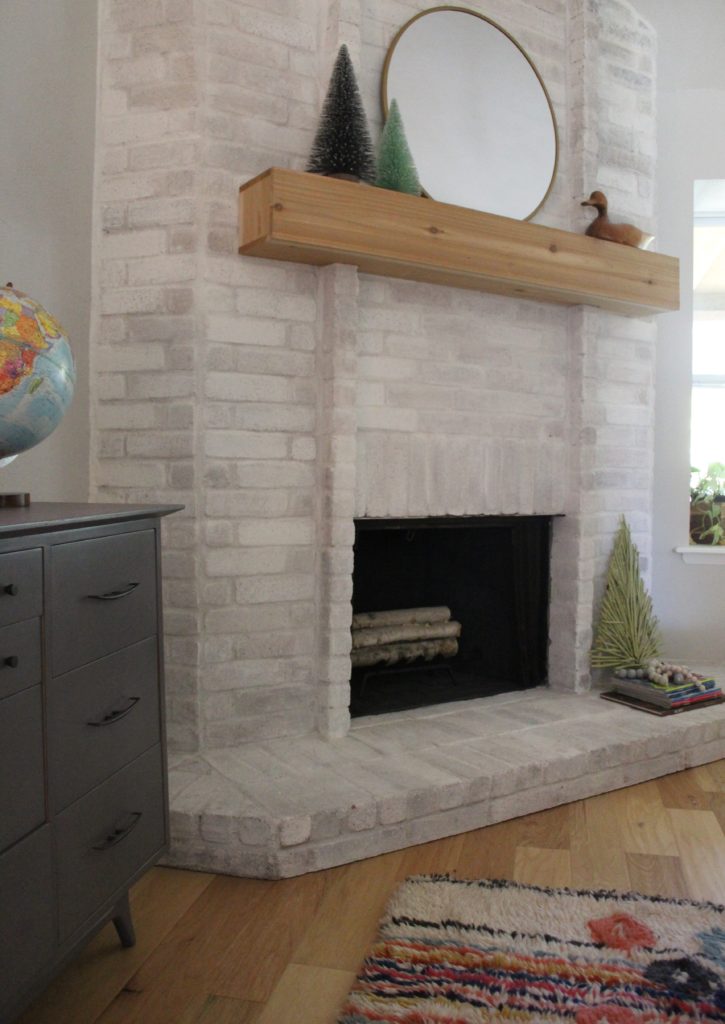
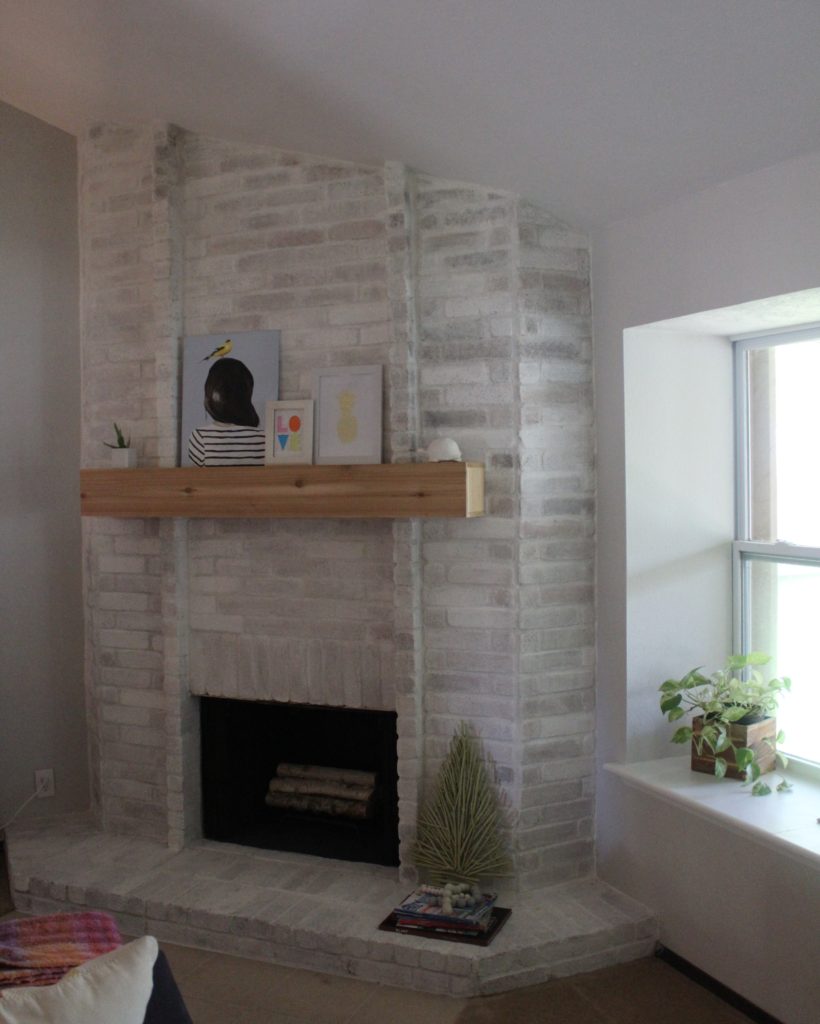
The living room had vaulted ceilings and a brick fireplace. Yes, you can still have a cozy fire in Texas. Or at least, I did.

– Progress –
The living room also had new wood floors and we whitewashed the fireplace, Nate built a new mantel to replace the existing one and we scored a mid-century dresser that we gave a new coat of paint. Finally, we added a little office area with a desk.
– Dining Room –
The dining room was actually quite big with plenty of room for a large table and a sideboard.
– Progress –
Here is the dining room after we added our furniture, changed the chandelier twice, and hung some curtains.
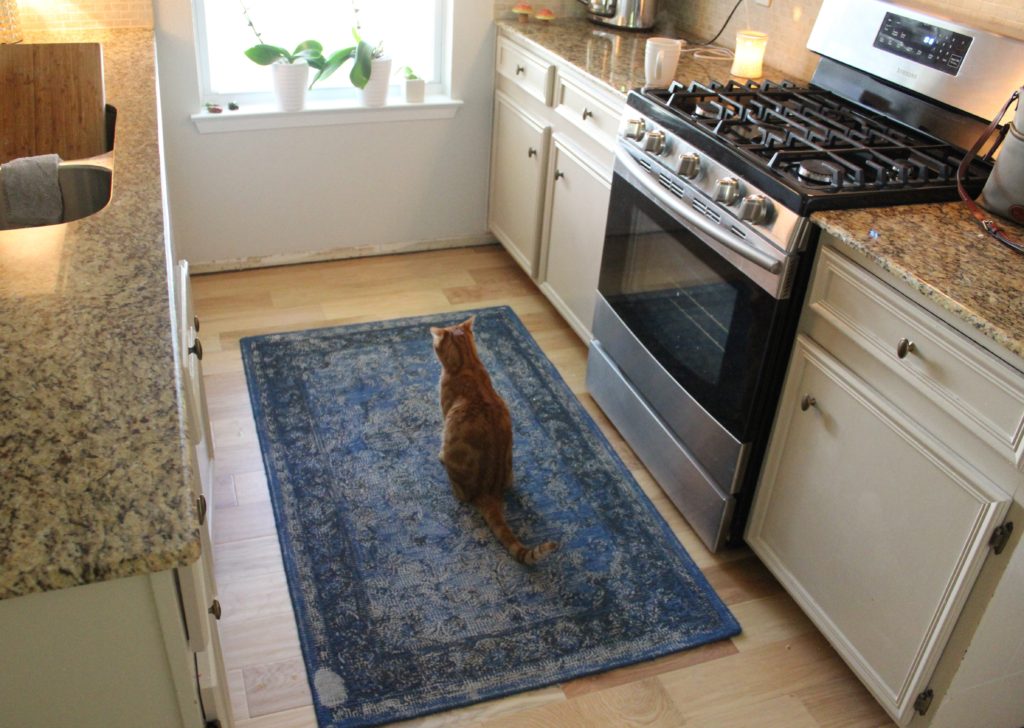
– Kitchen –
The kitchen is the center of the house and opens up to the dining and living room.
– Progress –
Lots changed in the kitchen. I painted the cabinets with chalk paint. We also removed a bank of cabinets and built a surround to house the refrigerator. We also bought all new appliances.
– Main Hall –
– Progress –
The hallway is looked more like this after the new floors, all the dark trim was given a fresh coat of white paint, the popcorn was scraped, and the walls were painted.
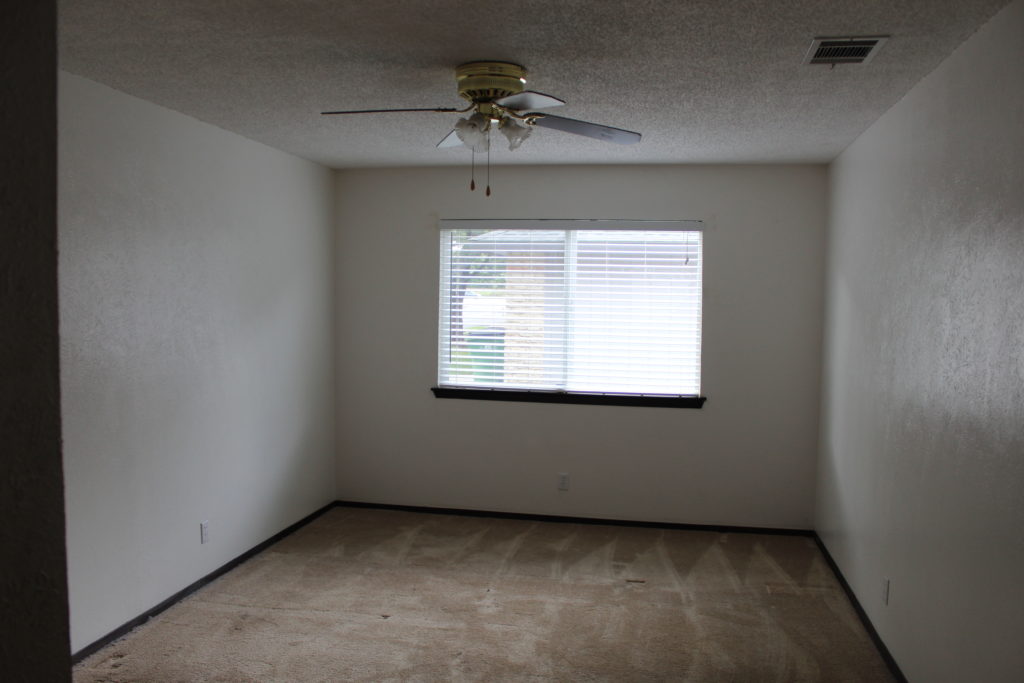
– Guest Bedroom –
– Progress –
The guest bedroom was always guest ready now after we painted the walls, added some new bedding and hung curtains and art.

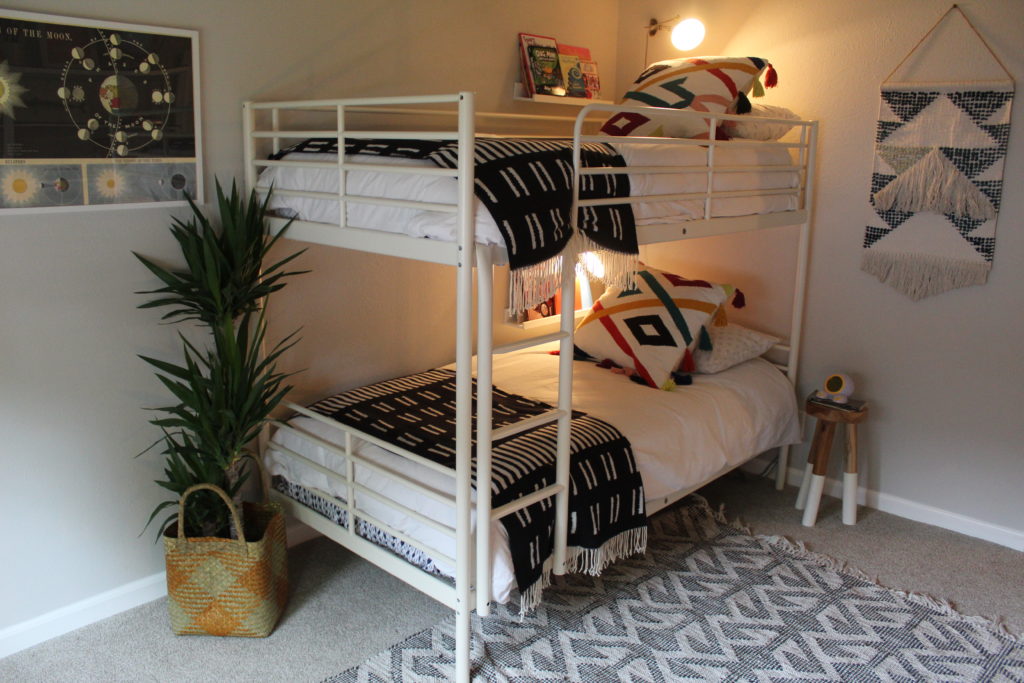
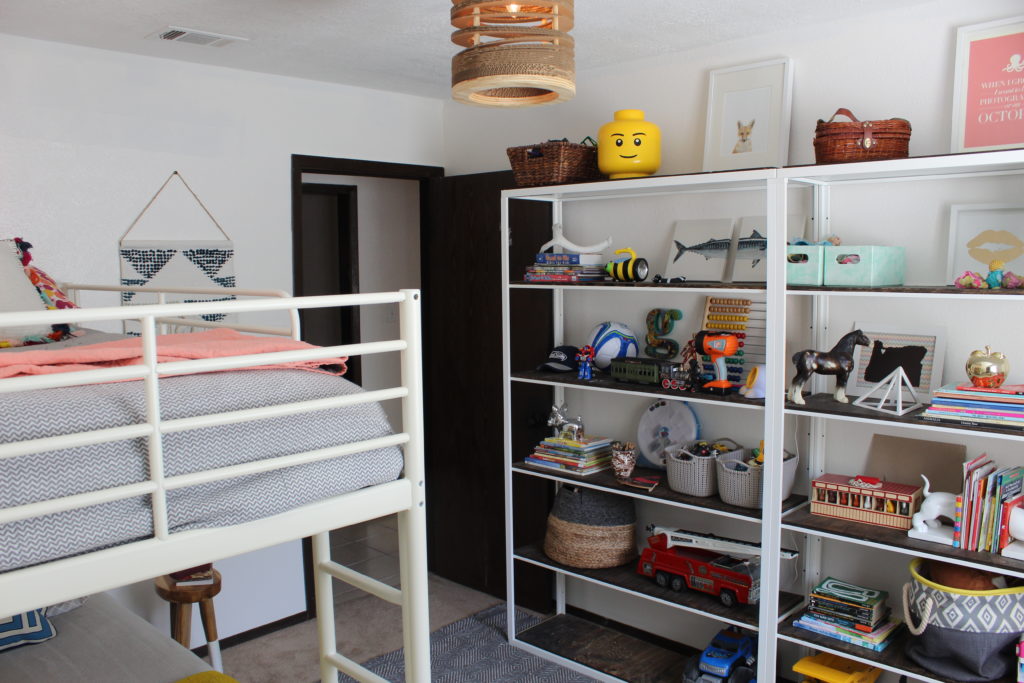
– Kids Room –
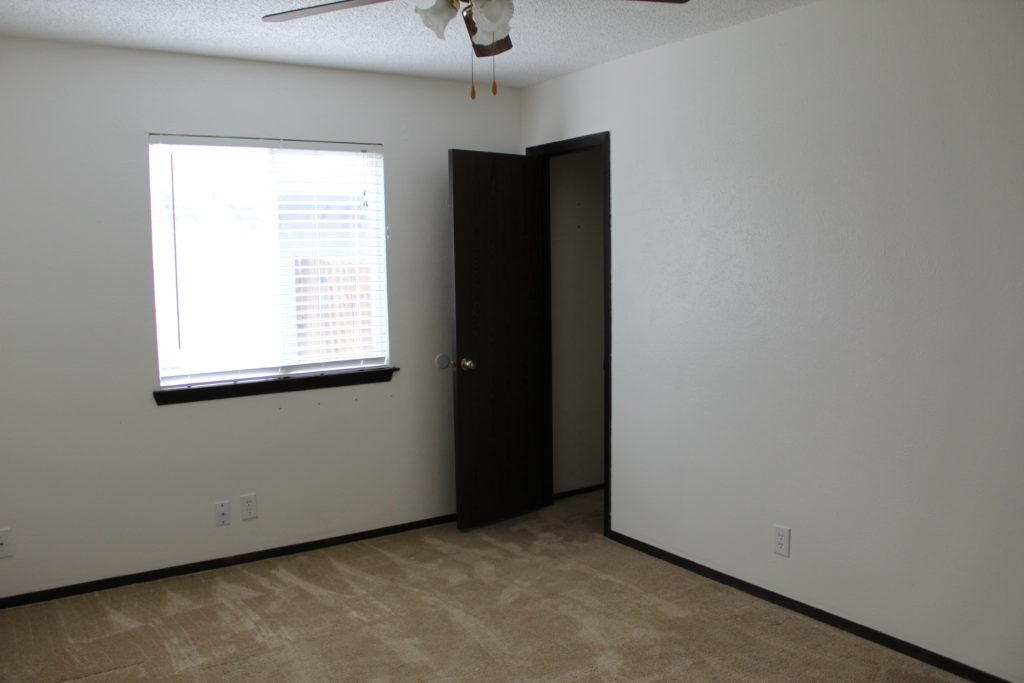
– Progress –
Here is what the kids’ room looked like after we decided the kids would share a room, bought bunk beds, and hacked some IKEA shelves. We also added some accessories and a few decor items as well.
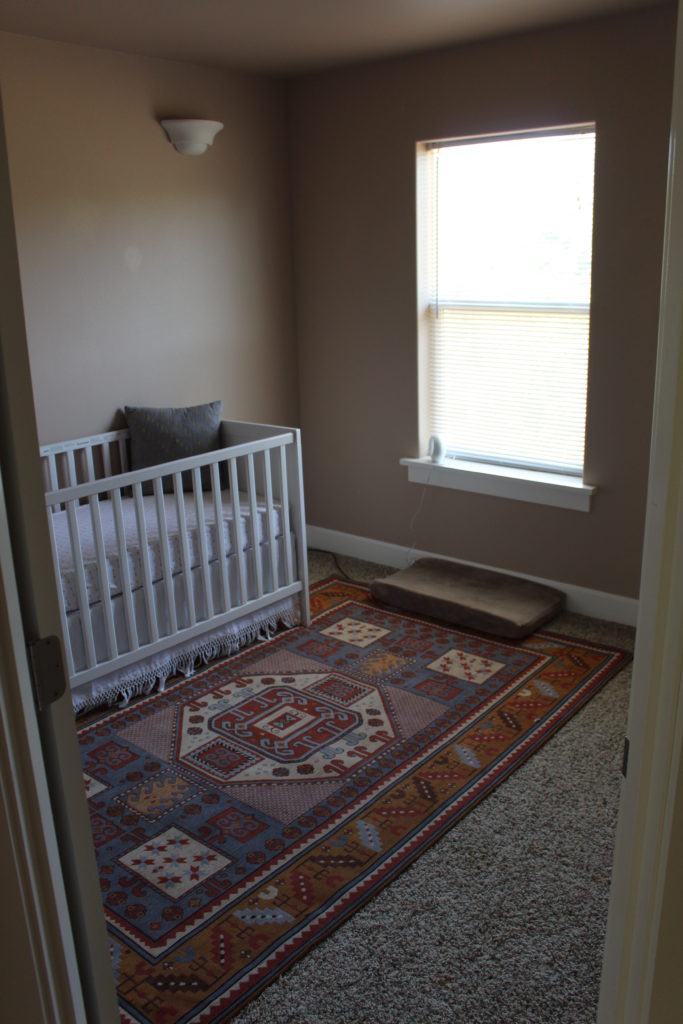
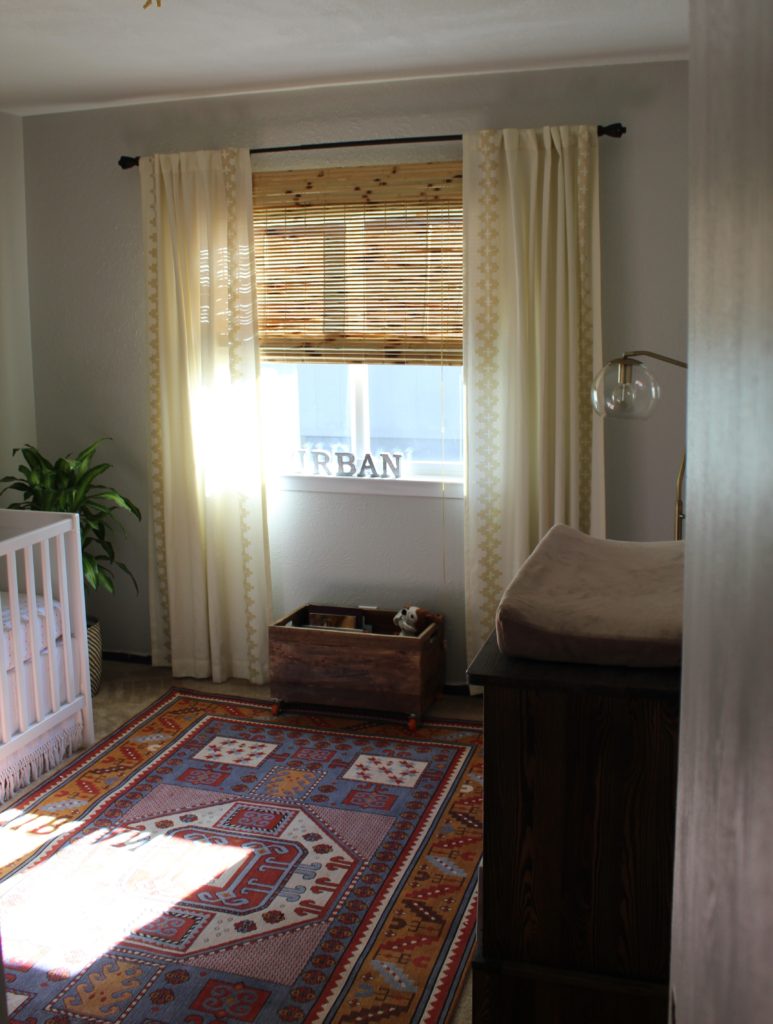
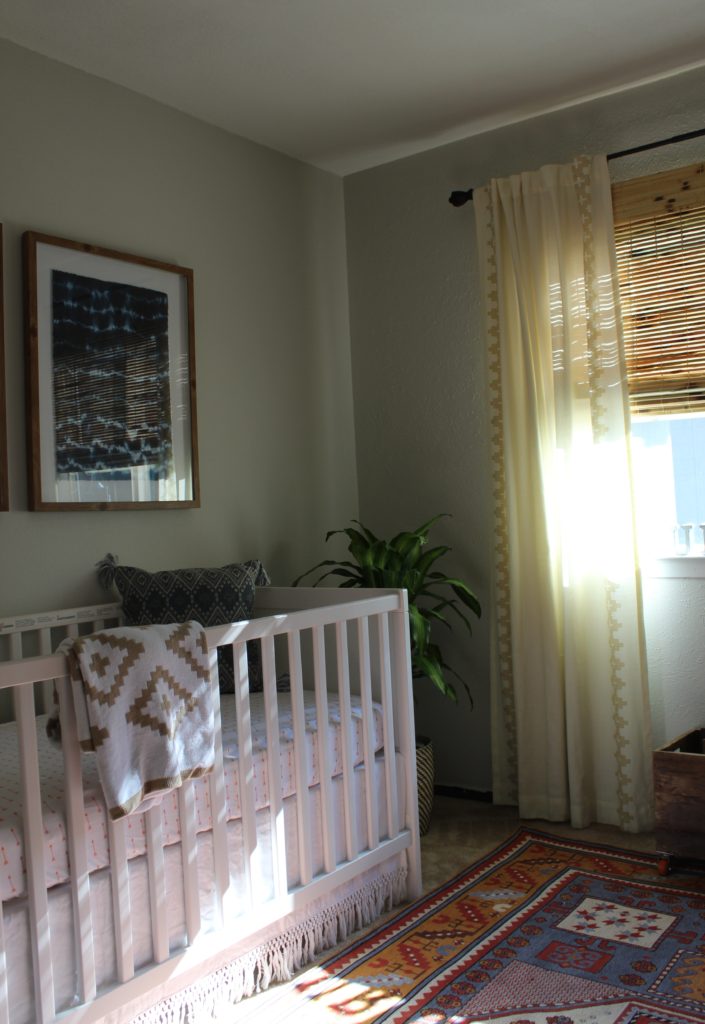
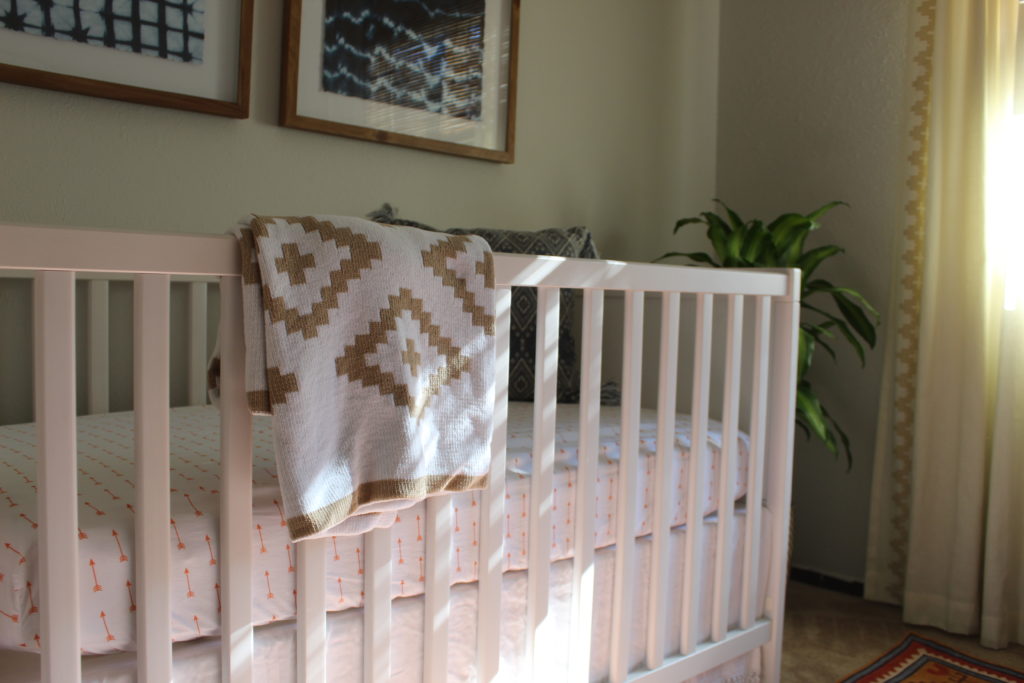
– Nursery –
– Progress –
Urban’s nursery was finished the day before he was born but I am really happy with how it turned out. We furnished the room with things we already had with the exception of the crib and the rug.
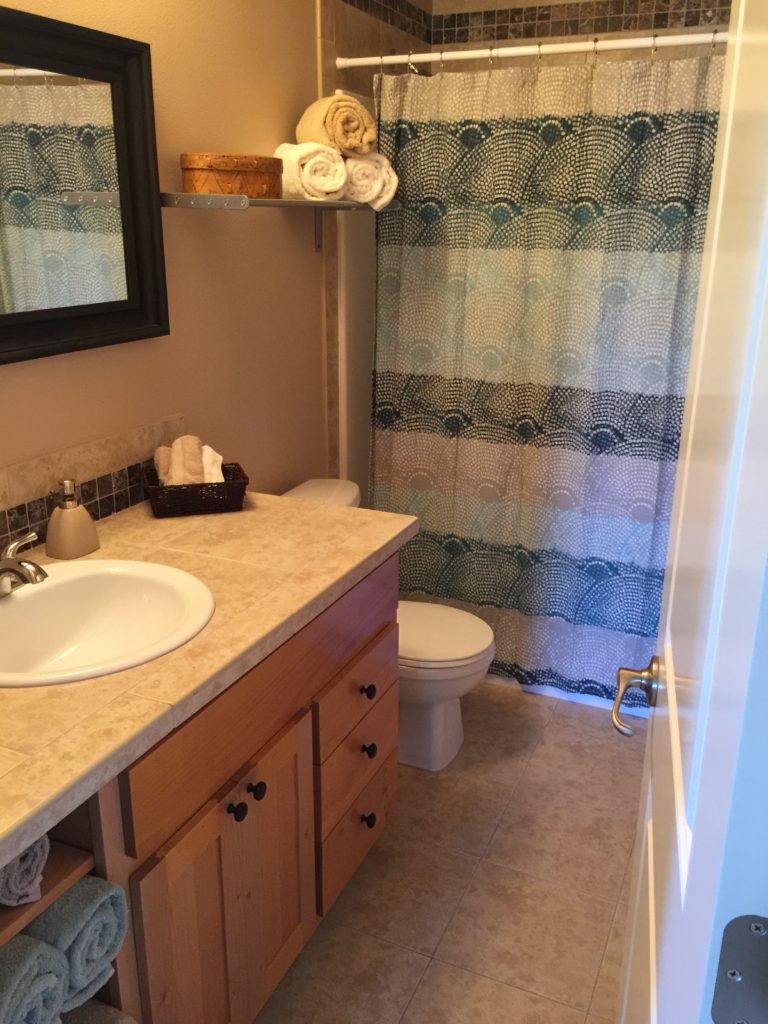
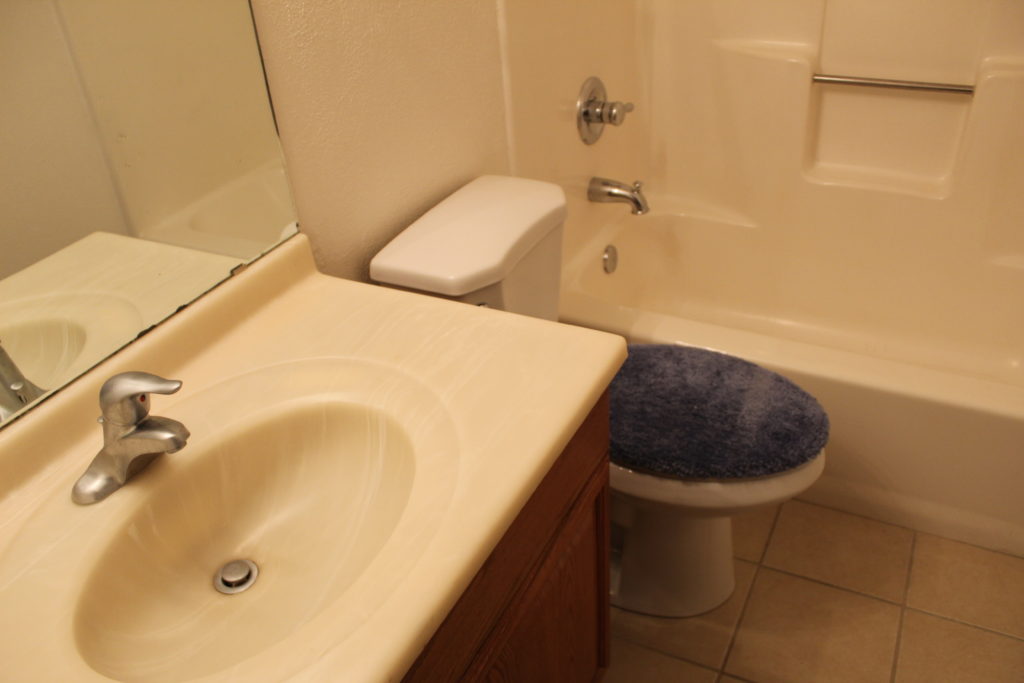
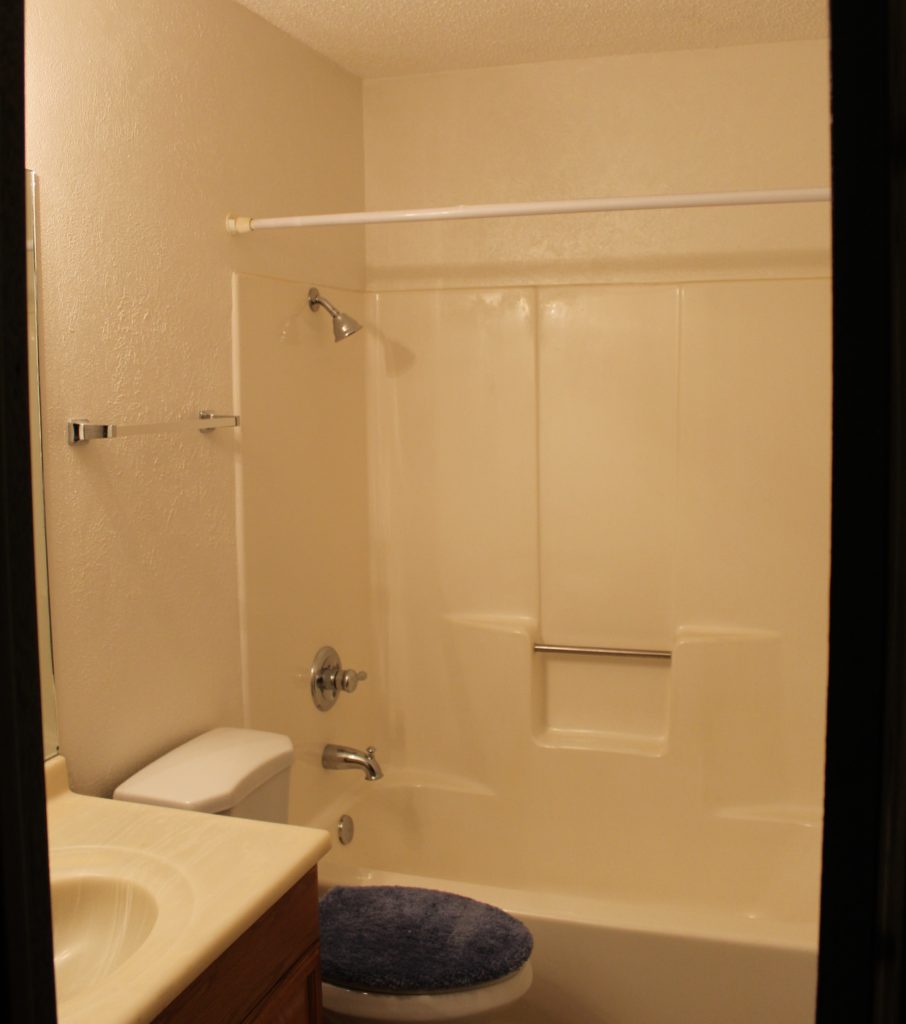
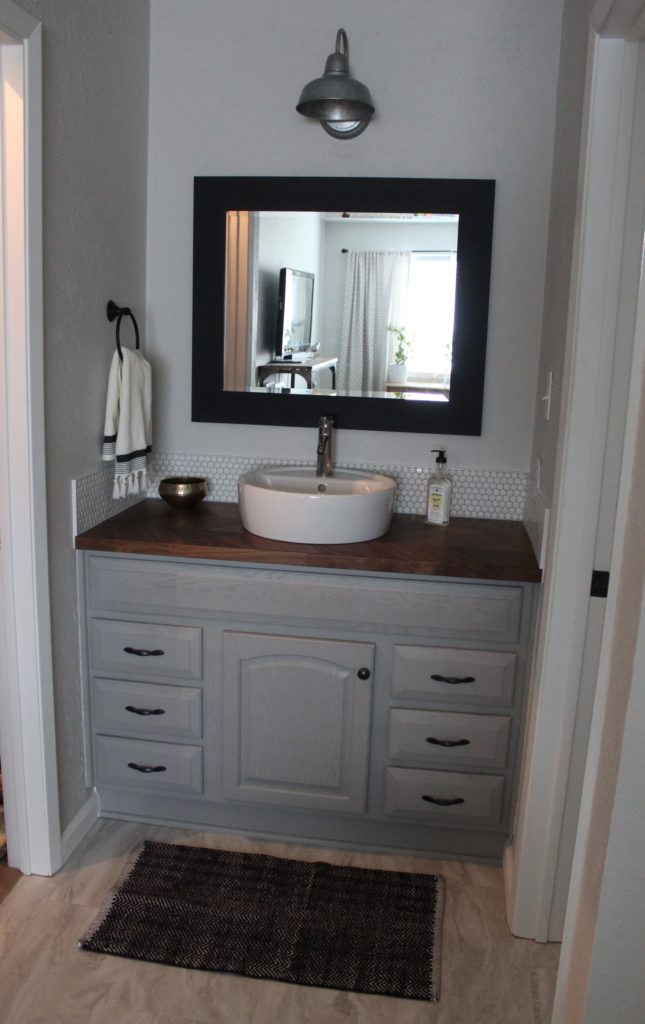
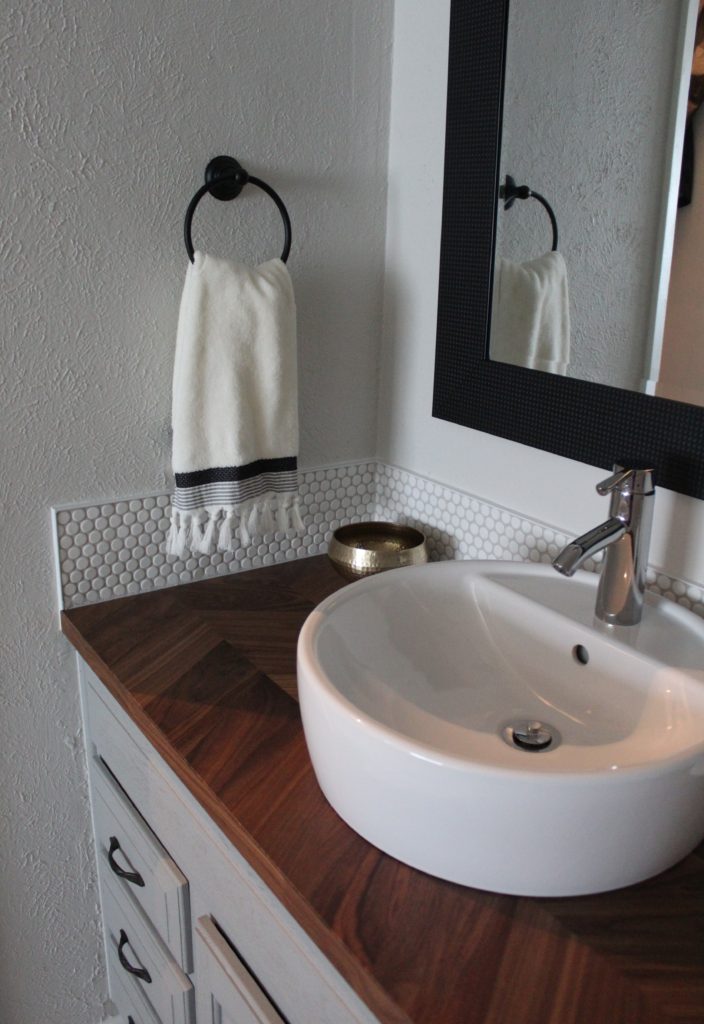
– Main Bathroom –
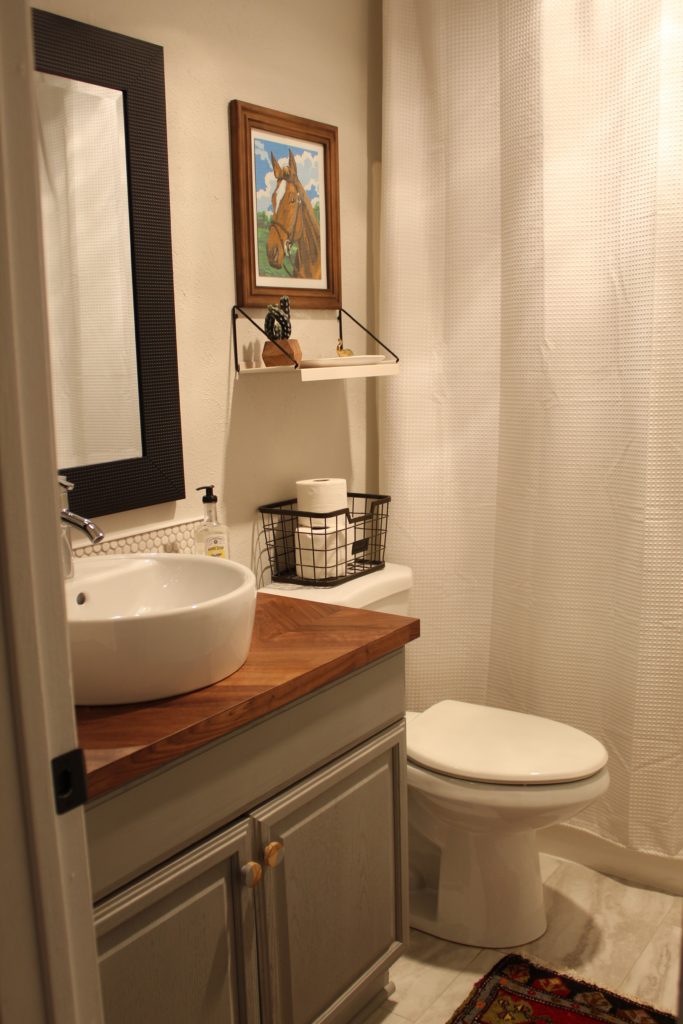
– Progress –
Here’s the main bathroom after our DIY bathroom remodel and added some fun accessories.
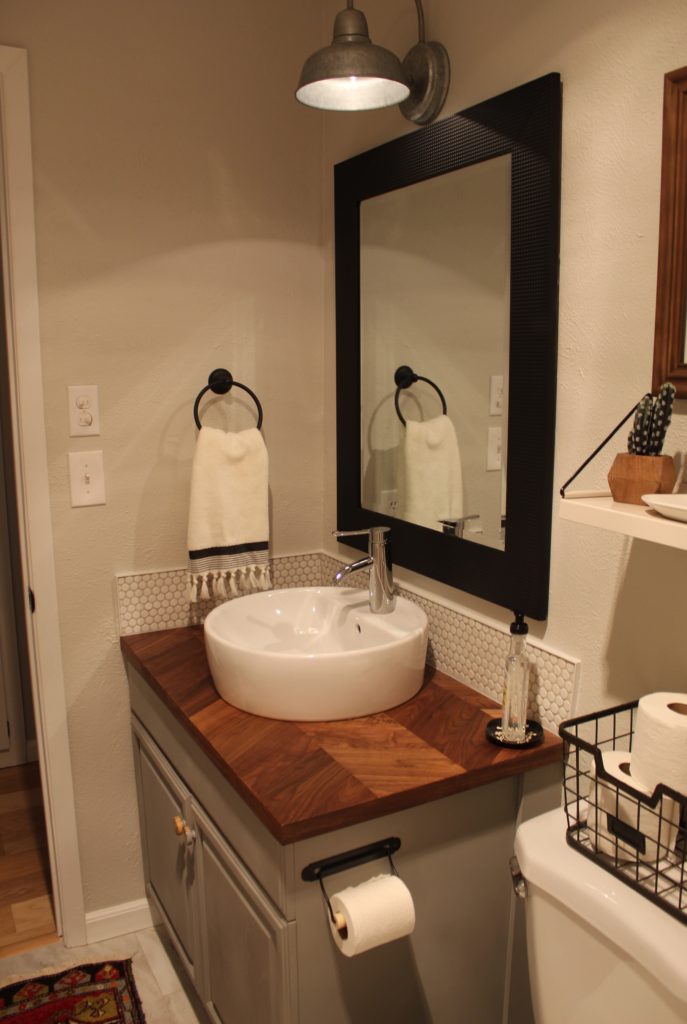
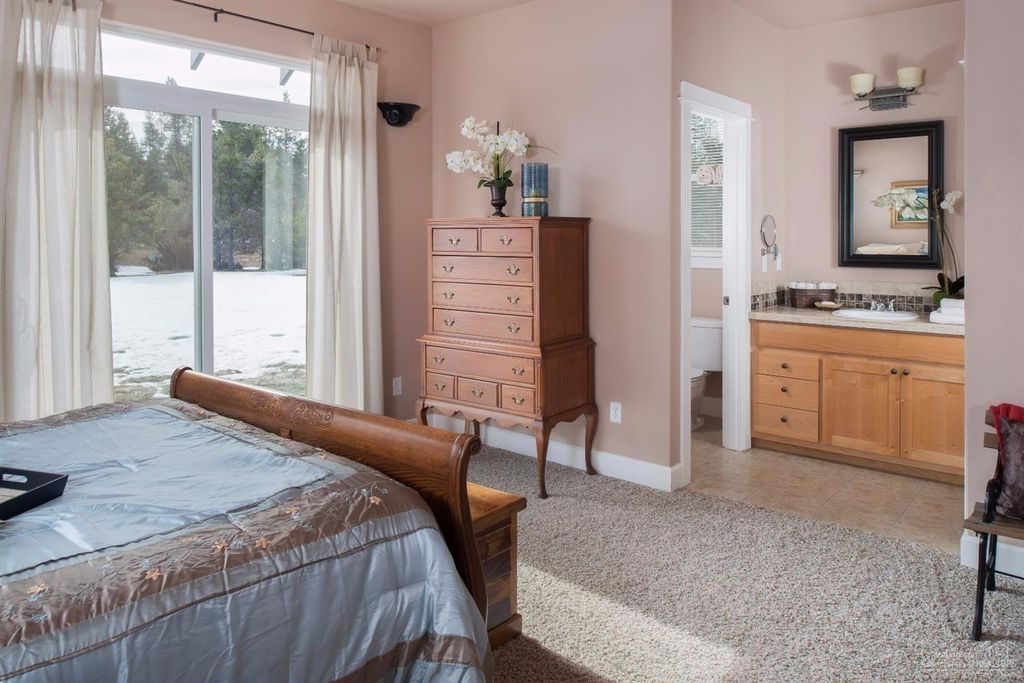
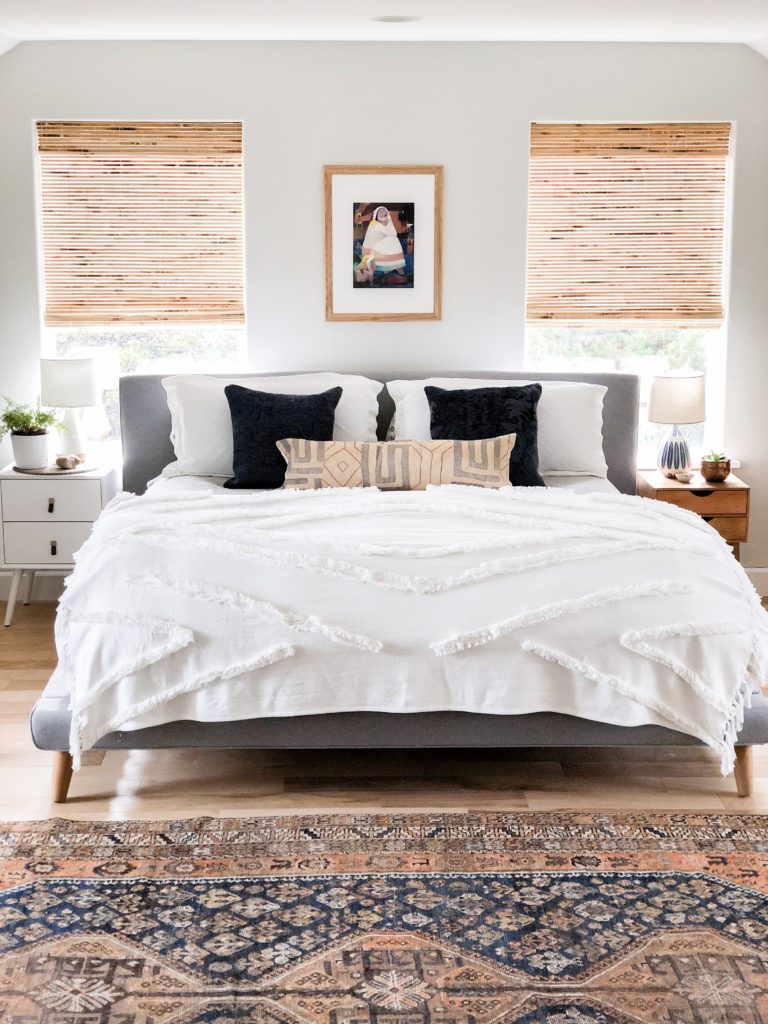
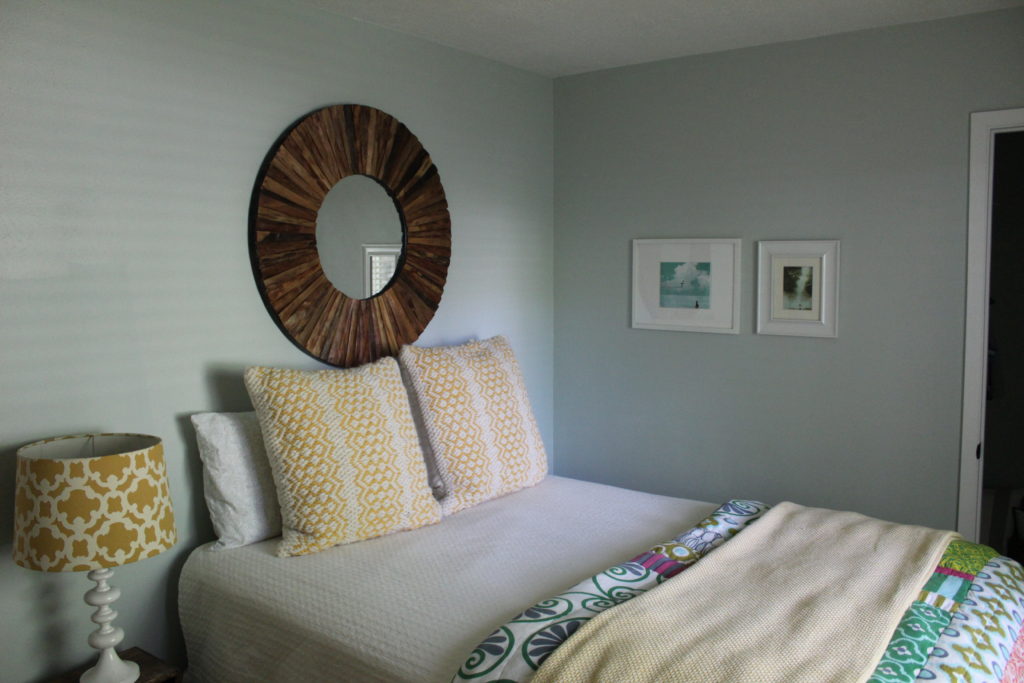
– Master Bedroom –
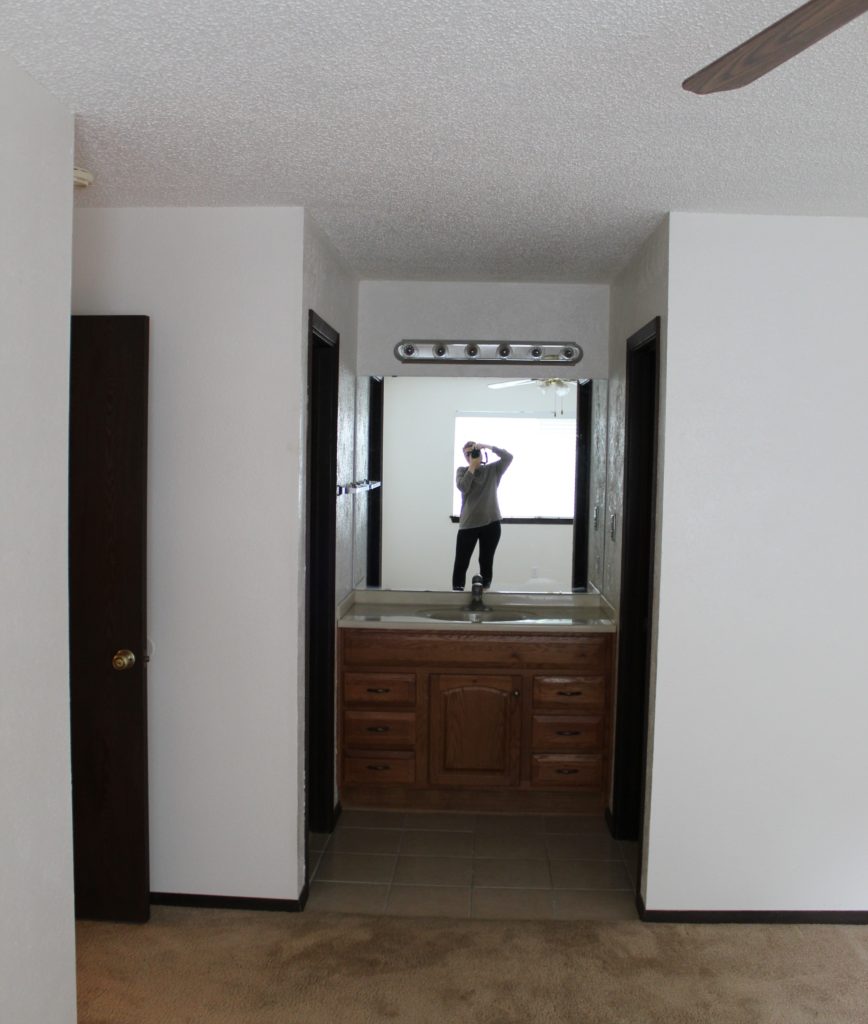
– Progress –
We bought a new king sized bed and bought some new bedding. We also updated our master bathroom and vanity area.
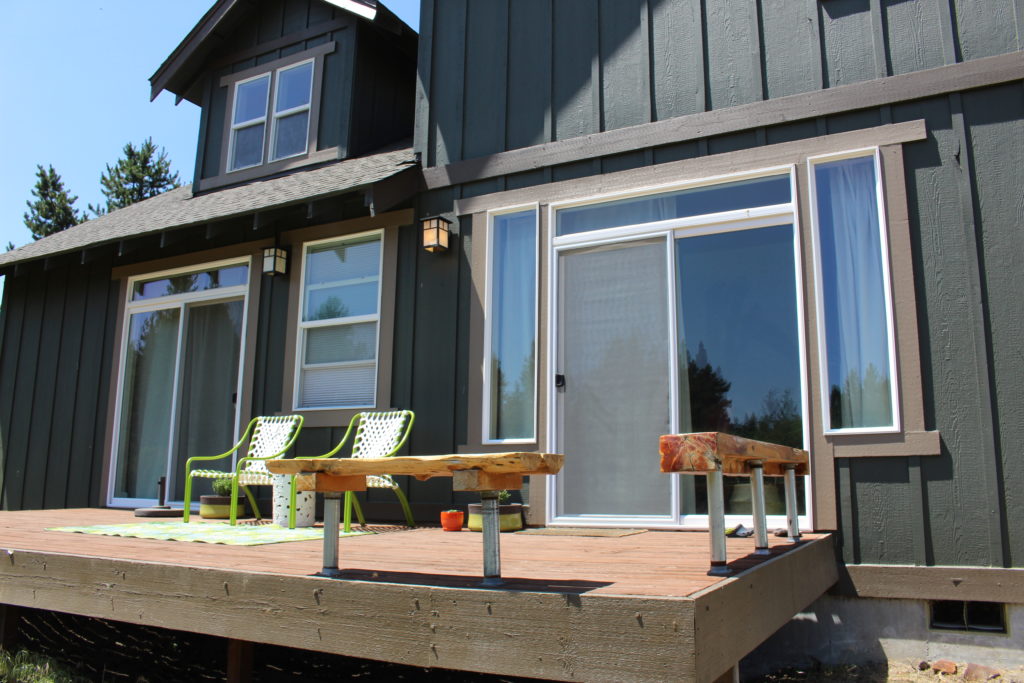
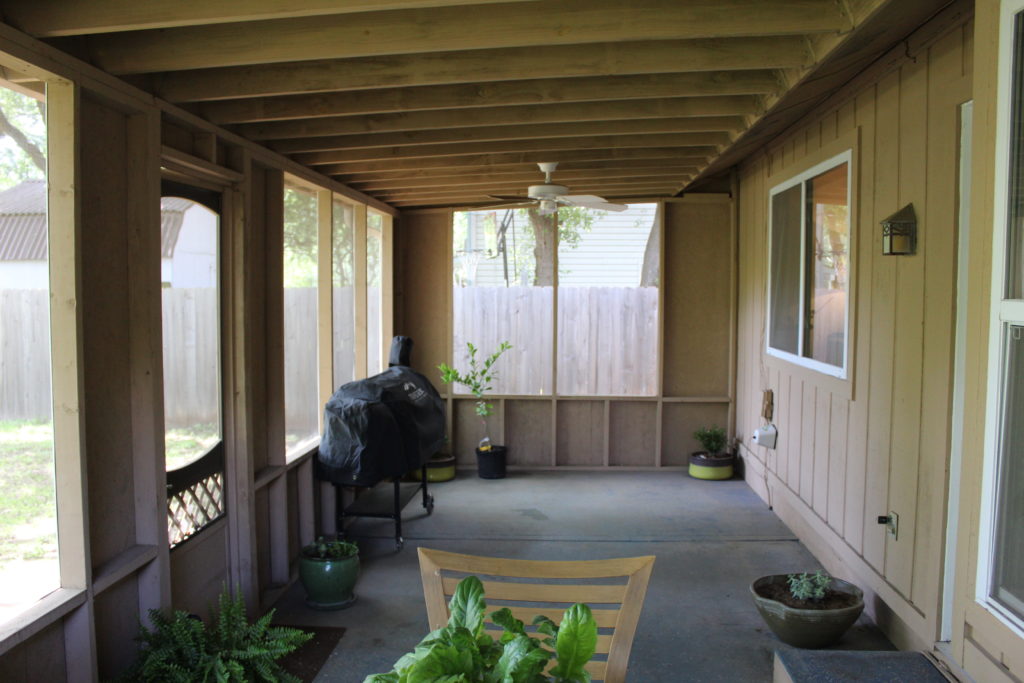
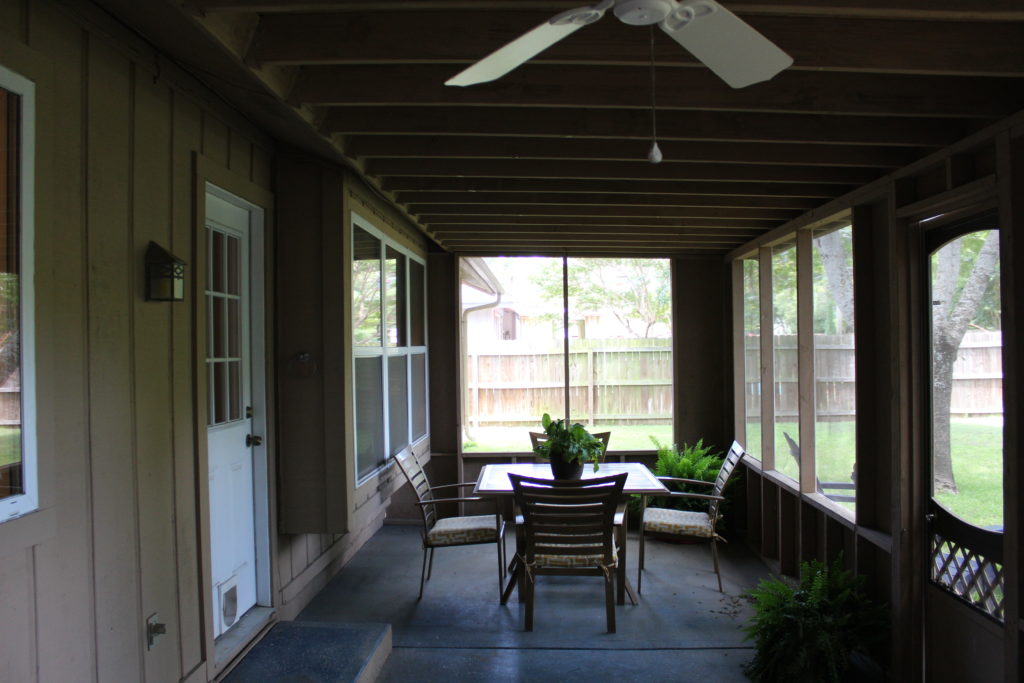
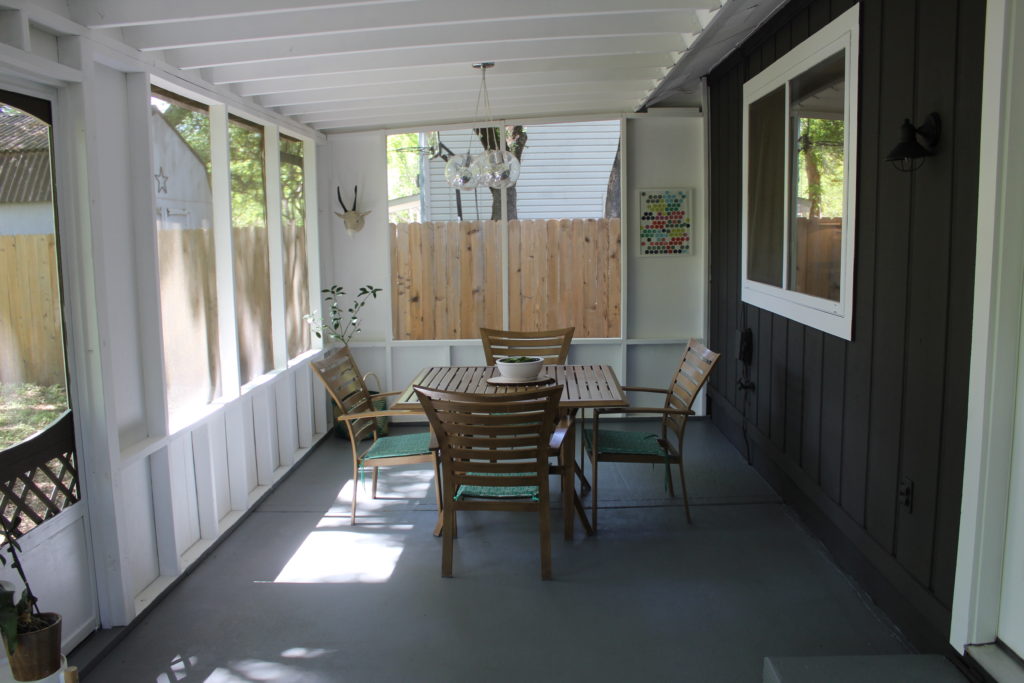
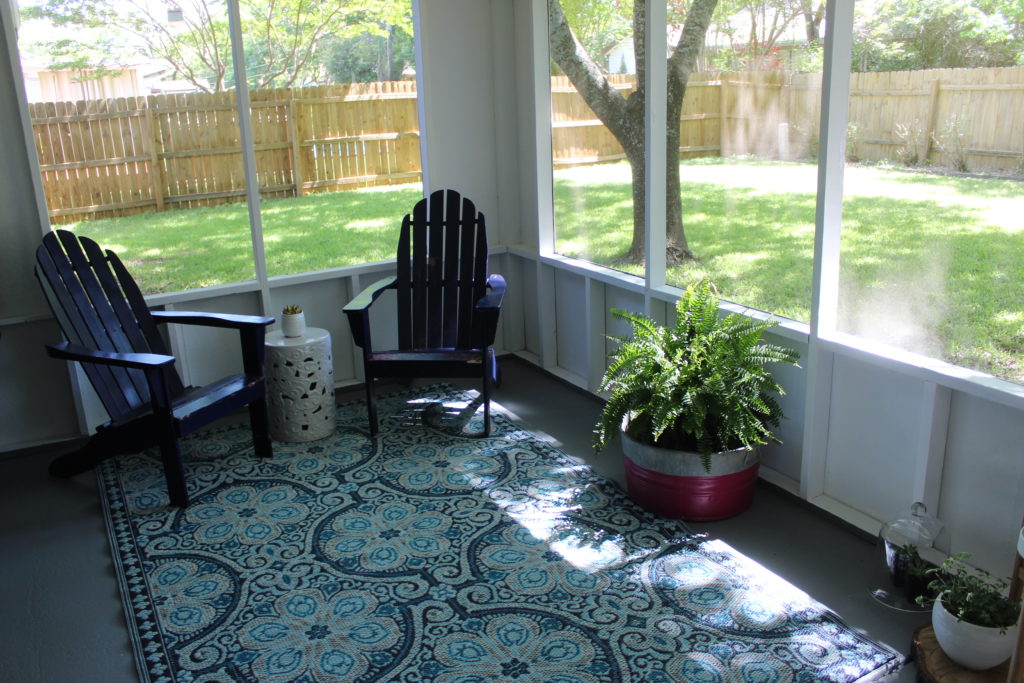
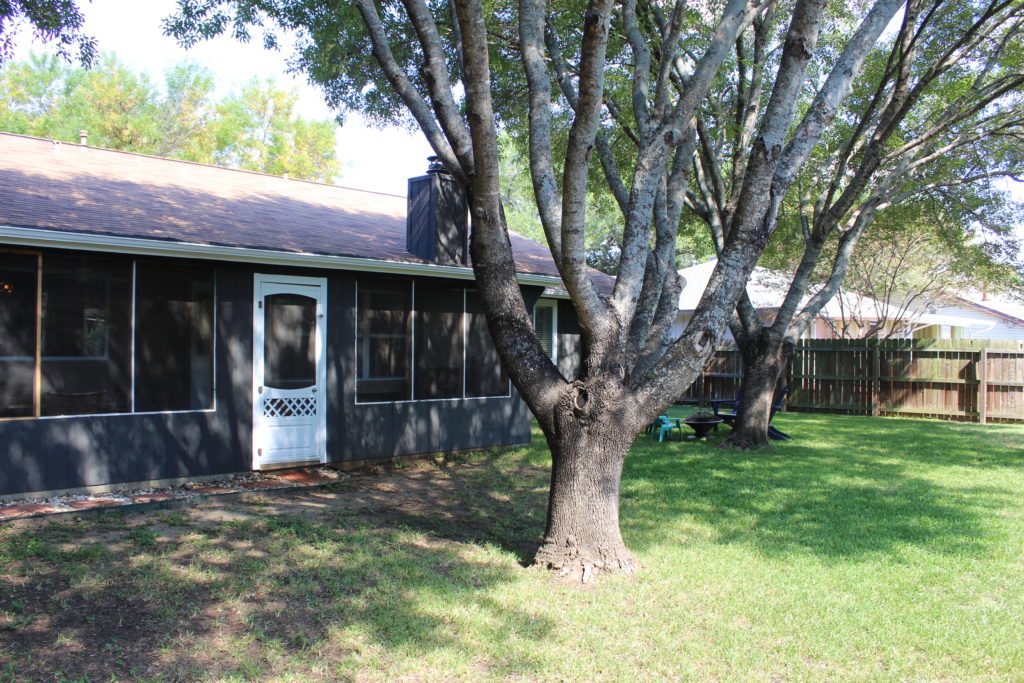
– Porch –
On the back of the house, there was a screened-in porch which felt very southern to us and a green backyard with a couple of big Ash trees.
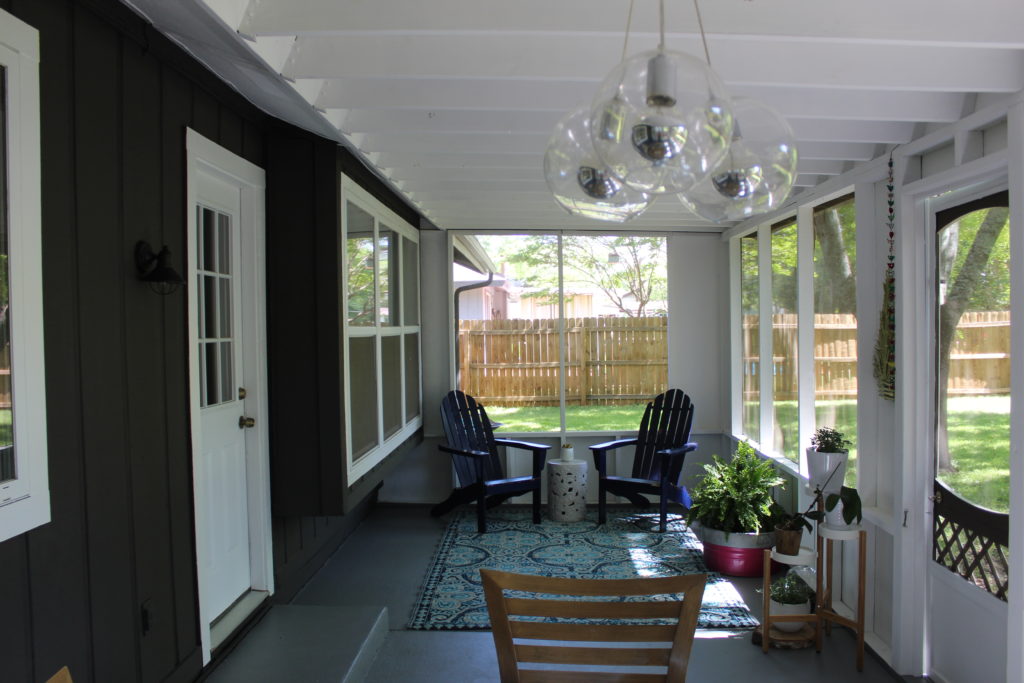
– Progress –
Here’s how the porch looked after some fresh paint, and added a few plants and furniture.
![]()
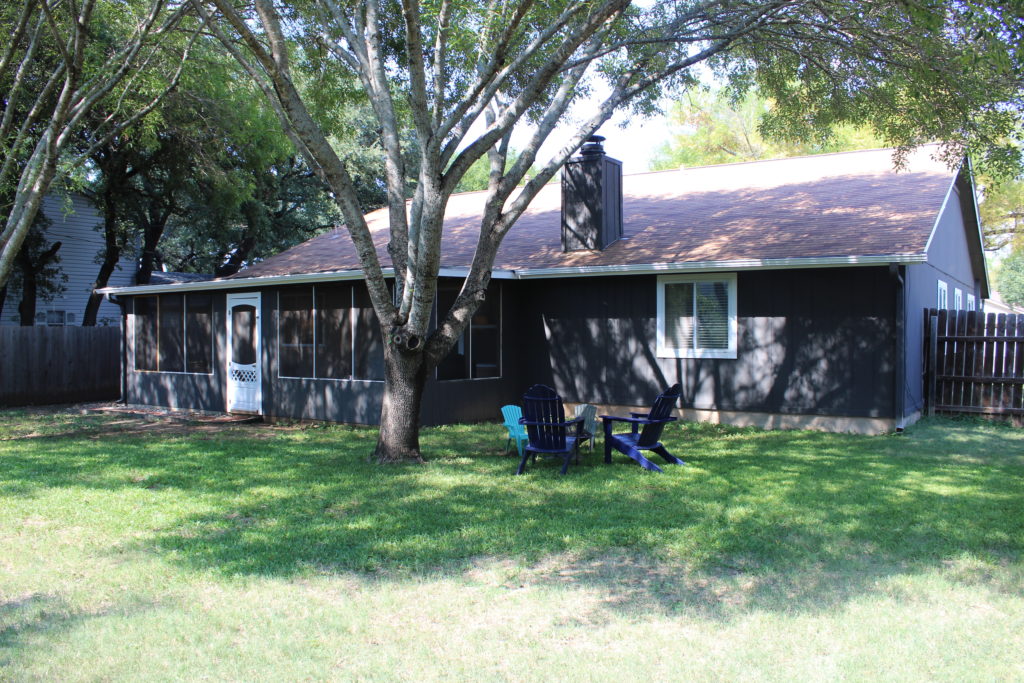
– Backyard –

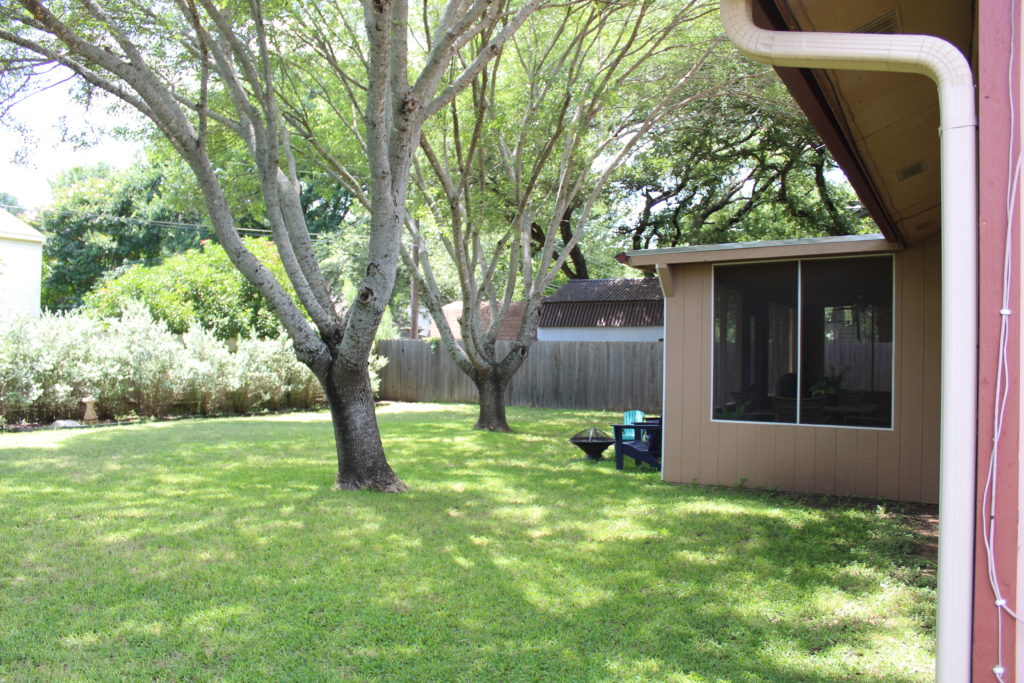
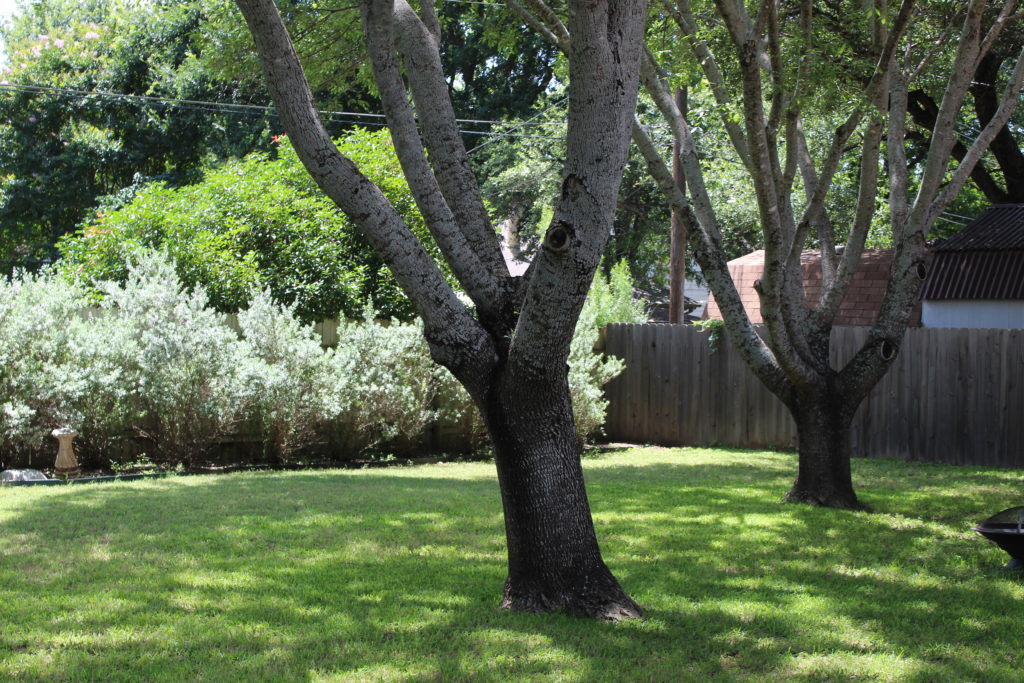
– Progress –
The only real changes in the back yard we made were in the form of new paint and yard maintenance.
So, that’s the whole house! We loved this little place and hope that the next owners love it as much as we did!