Painting the exterior of our home with Sherwin-Williams

This post is sponsored by Sherwin-Williams 

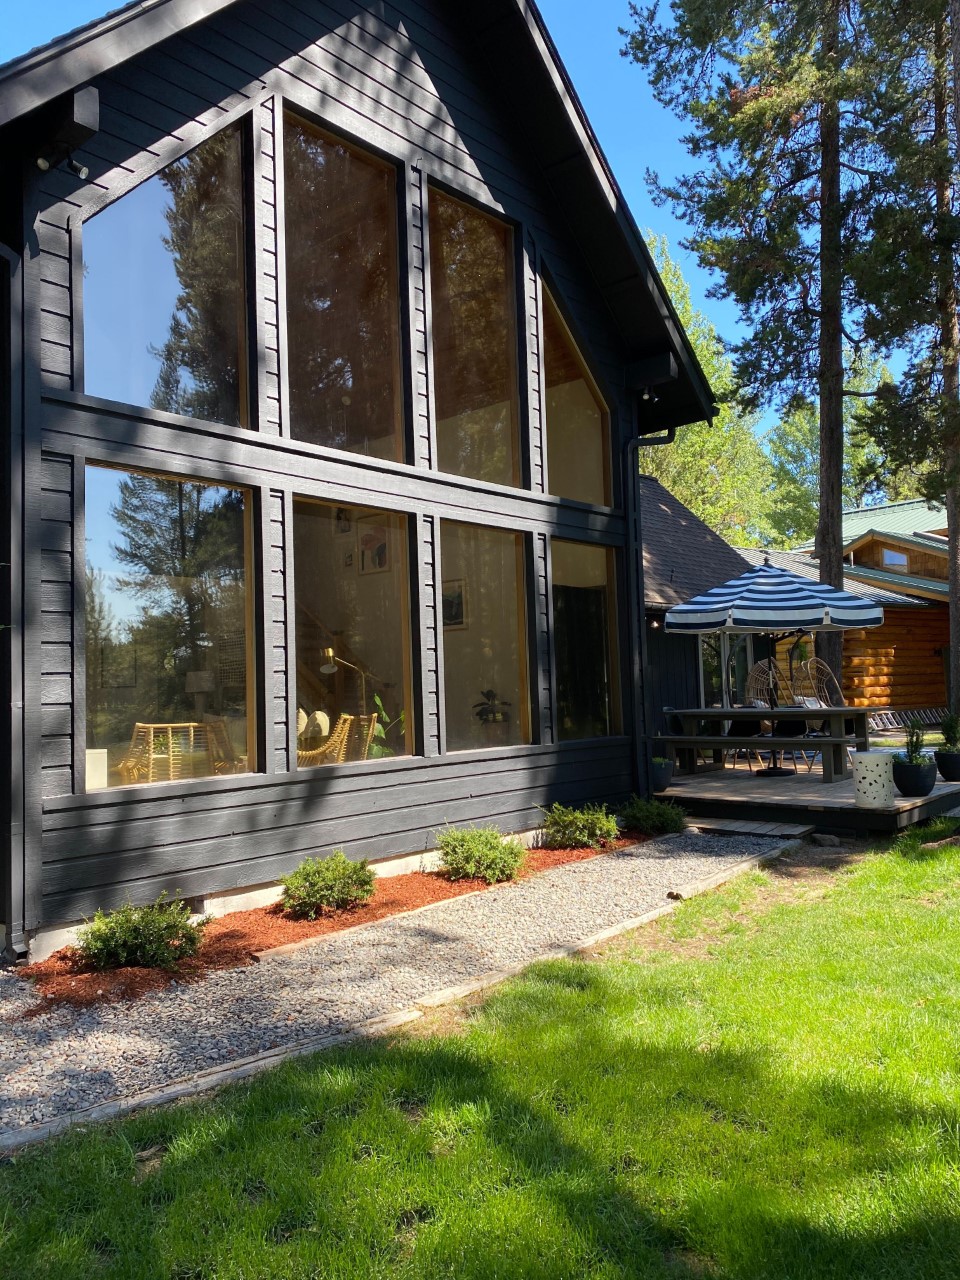
I am beeeeyond excited to share our freshly painted home with you guys today! When we bought this house last summer, we knew it needed paint and it needed paint BADLY! But, we had too many other projects going on (ummm talking to you kitchen remodel) and there wasn’t enough time before winter hit, which was when we decided that exterior paint would have to wait until spring. All winter, I dreamt of paint colors and I kept coming back to this inspiration photo.

Source unknown (if you know, send me a message and I’d be happy to credit them)

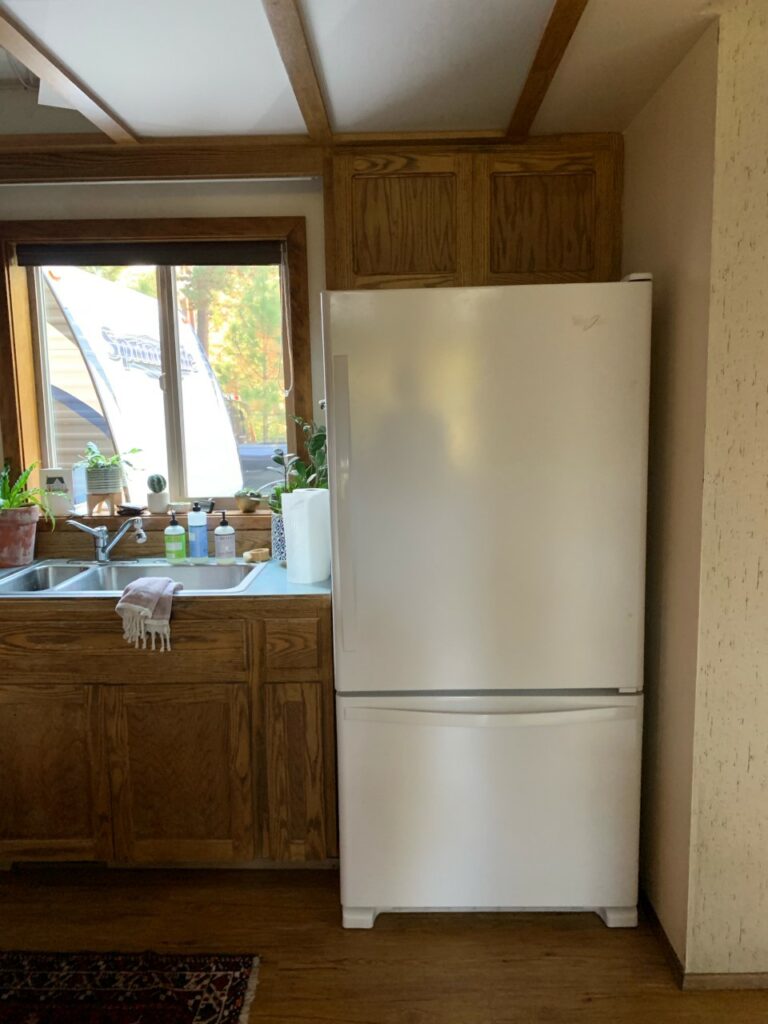
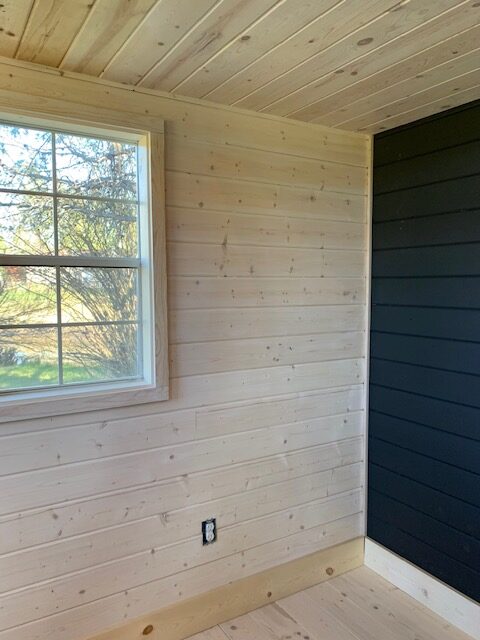
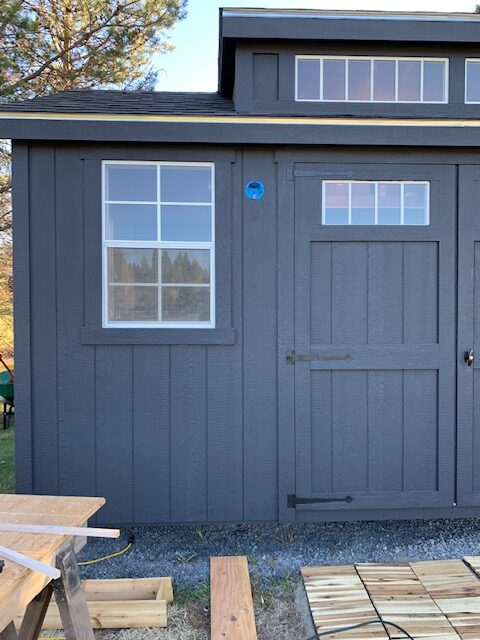
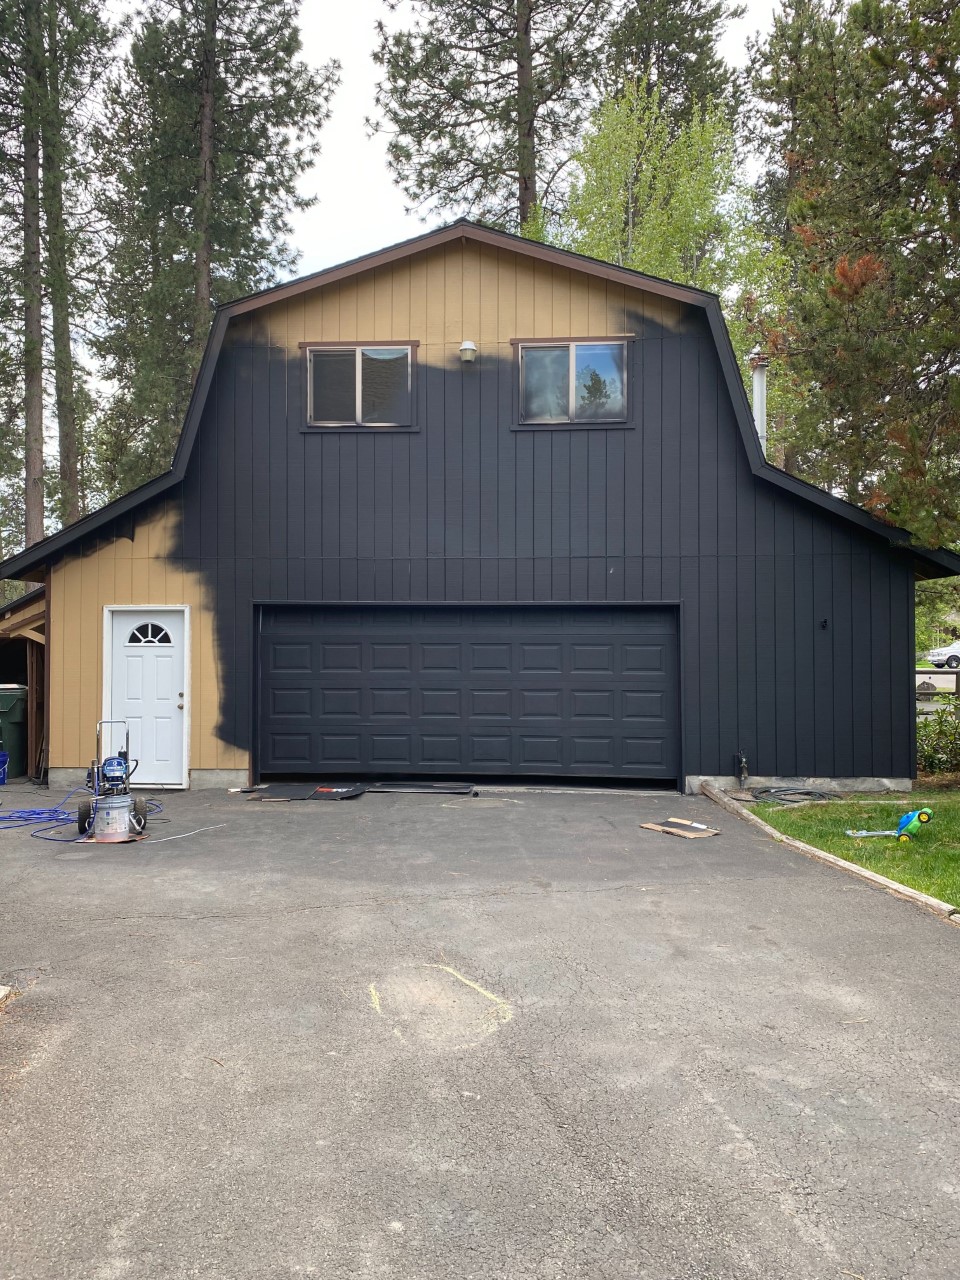
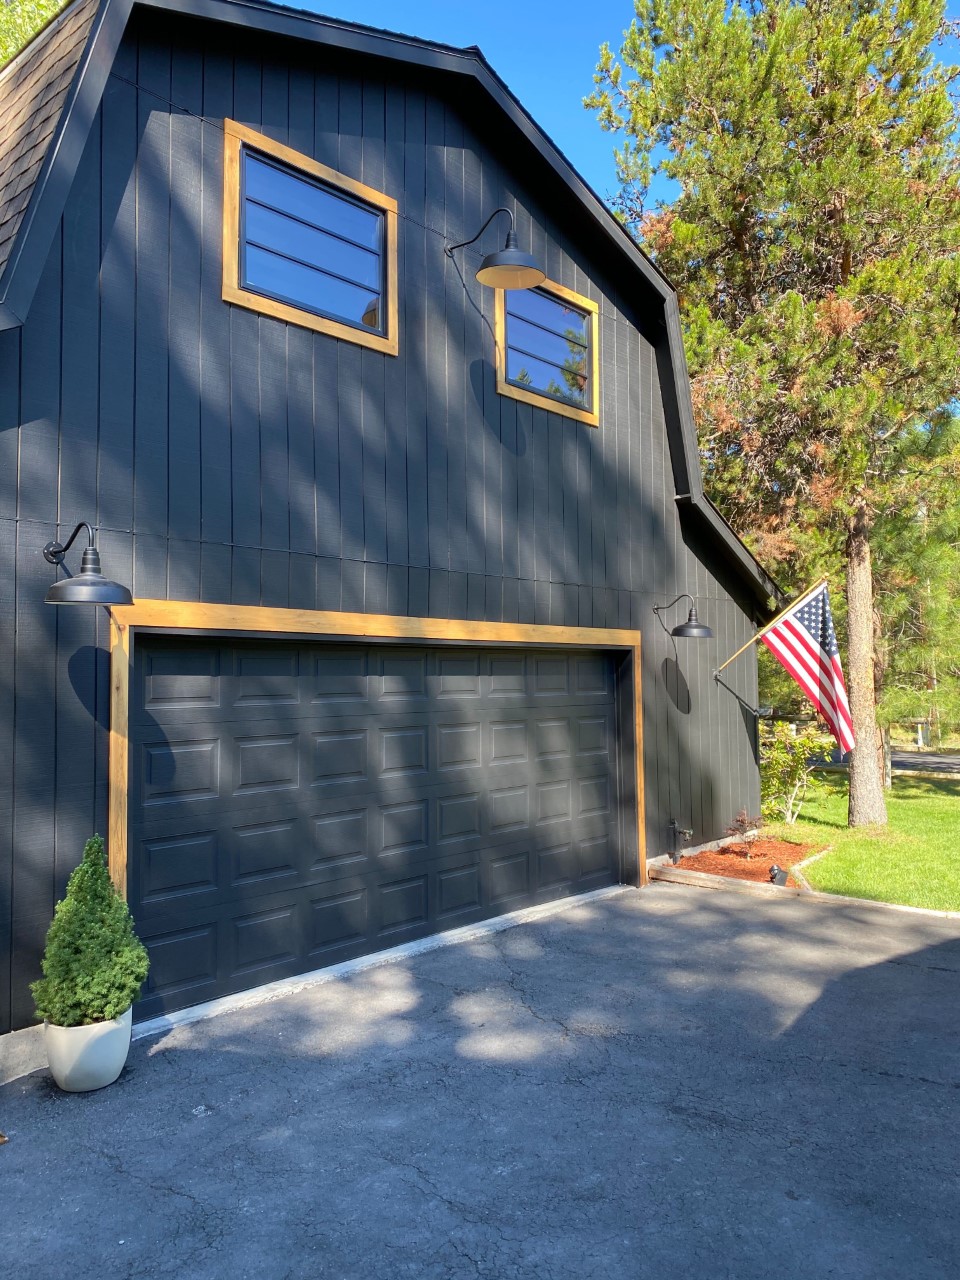
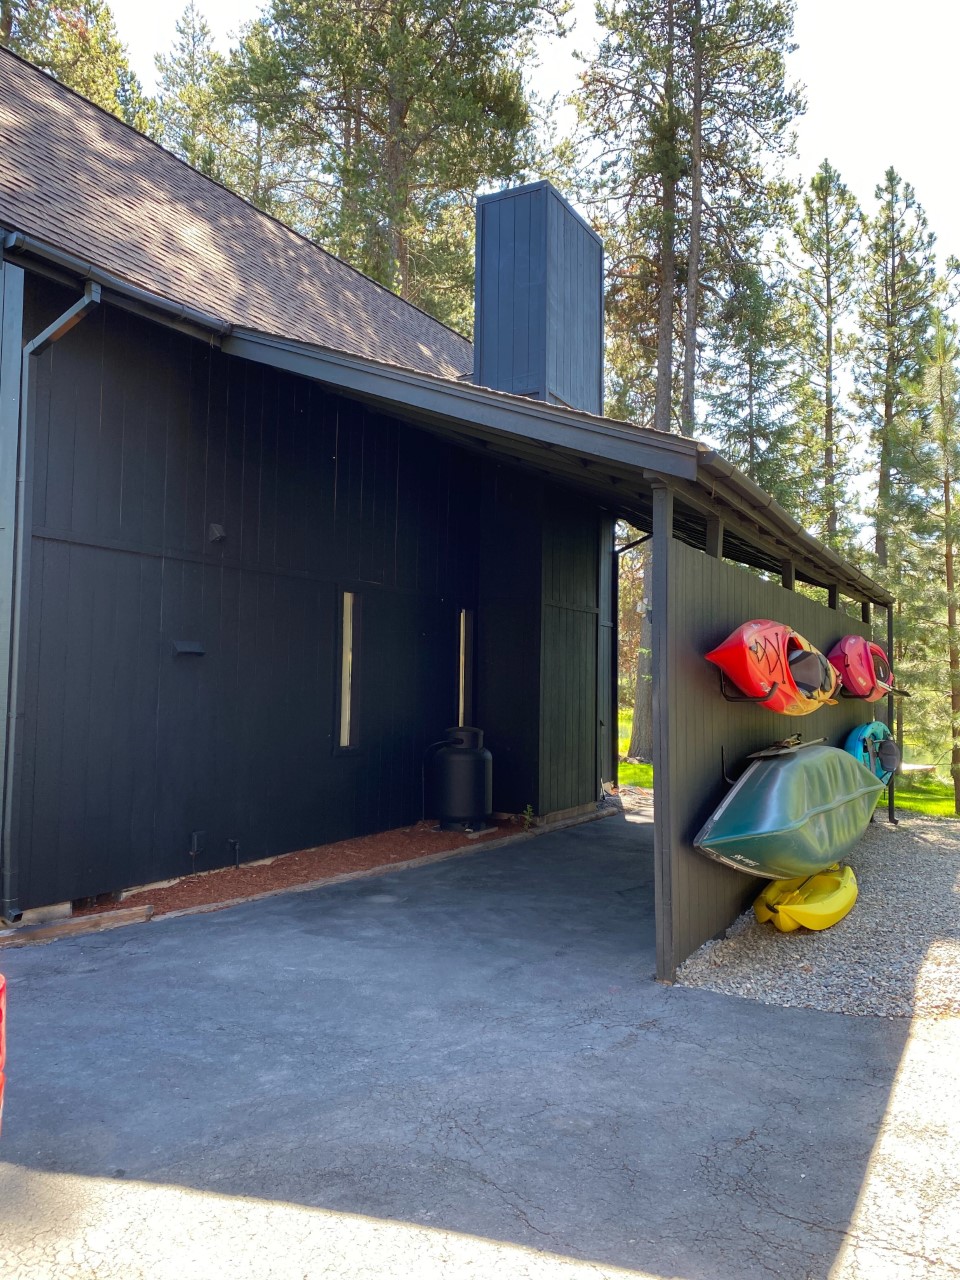
I love the monochromatic look with the trim and body all the same color. I also love how the windows offer just the slightest bit of contrast against the dark color. AND HOW AMAZING ARE THE WOOD ACCENTS??!!! I was sold! We had decided on a black…but ended up testing nine different shades on various spots around the house. Once we stared at them for a few days and had the numbers come in via story votes over on my instagram page, we decided on Tricorn Black in a flat sheen from their exterior line called, Emerald. After a quick phone call to our local Sherwin-Williams store, we decided just how much paint this house was going to need. They have a formula to help you figure that out, and it only took a few minutes. For our house, we ended up using forty gallons! I doubted that we would use that much, but I was wrong. We only have half of a gallon left in the garage that we are saving for touch-ups! We loved this paint so much and it basically covered evenly in one coat, but more on that later! Let me show you our house before we painted!

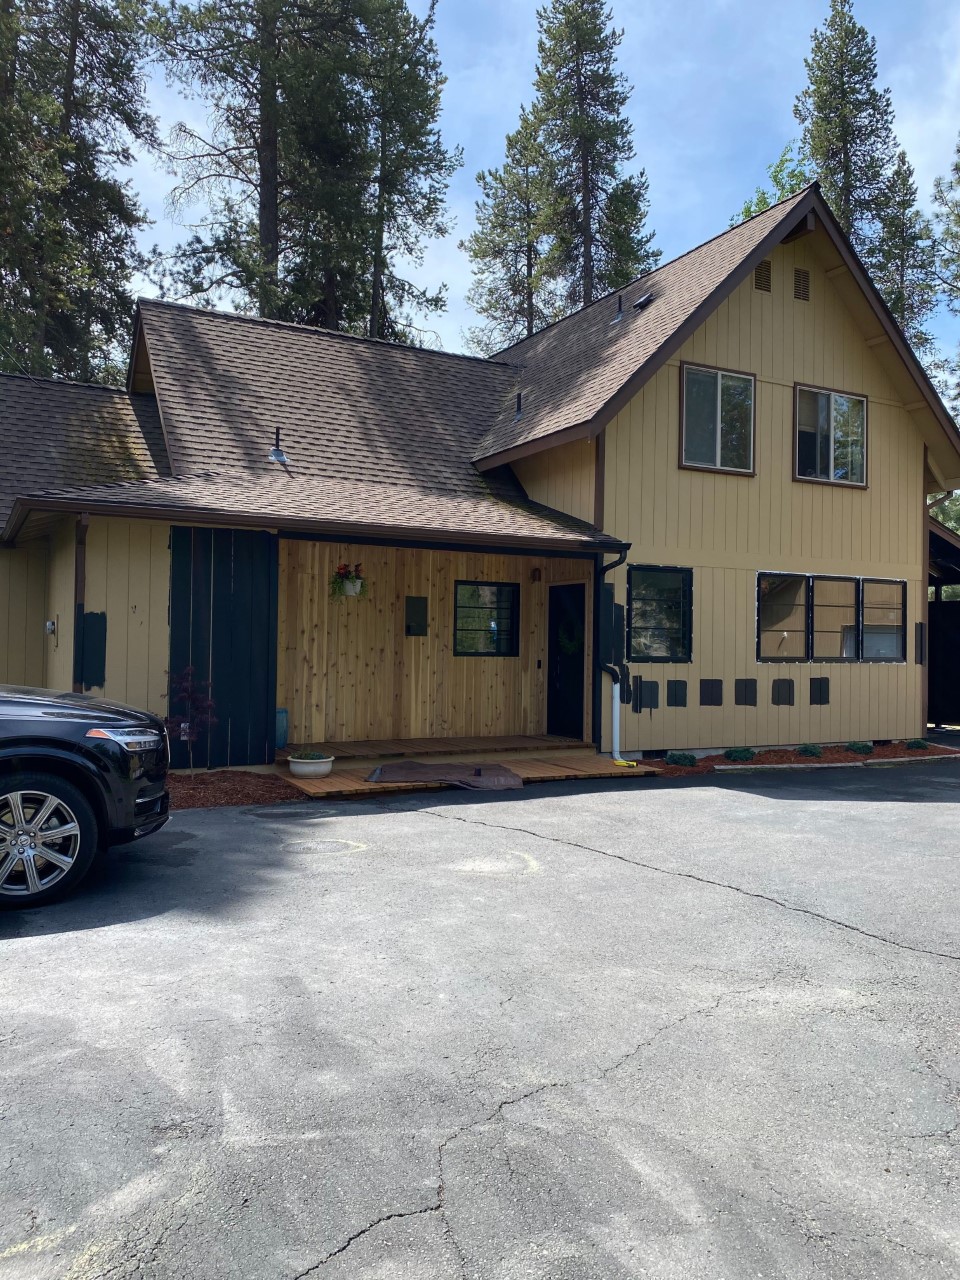
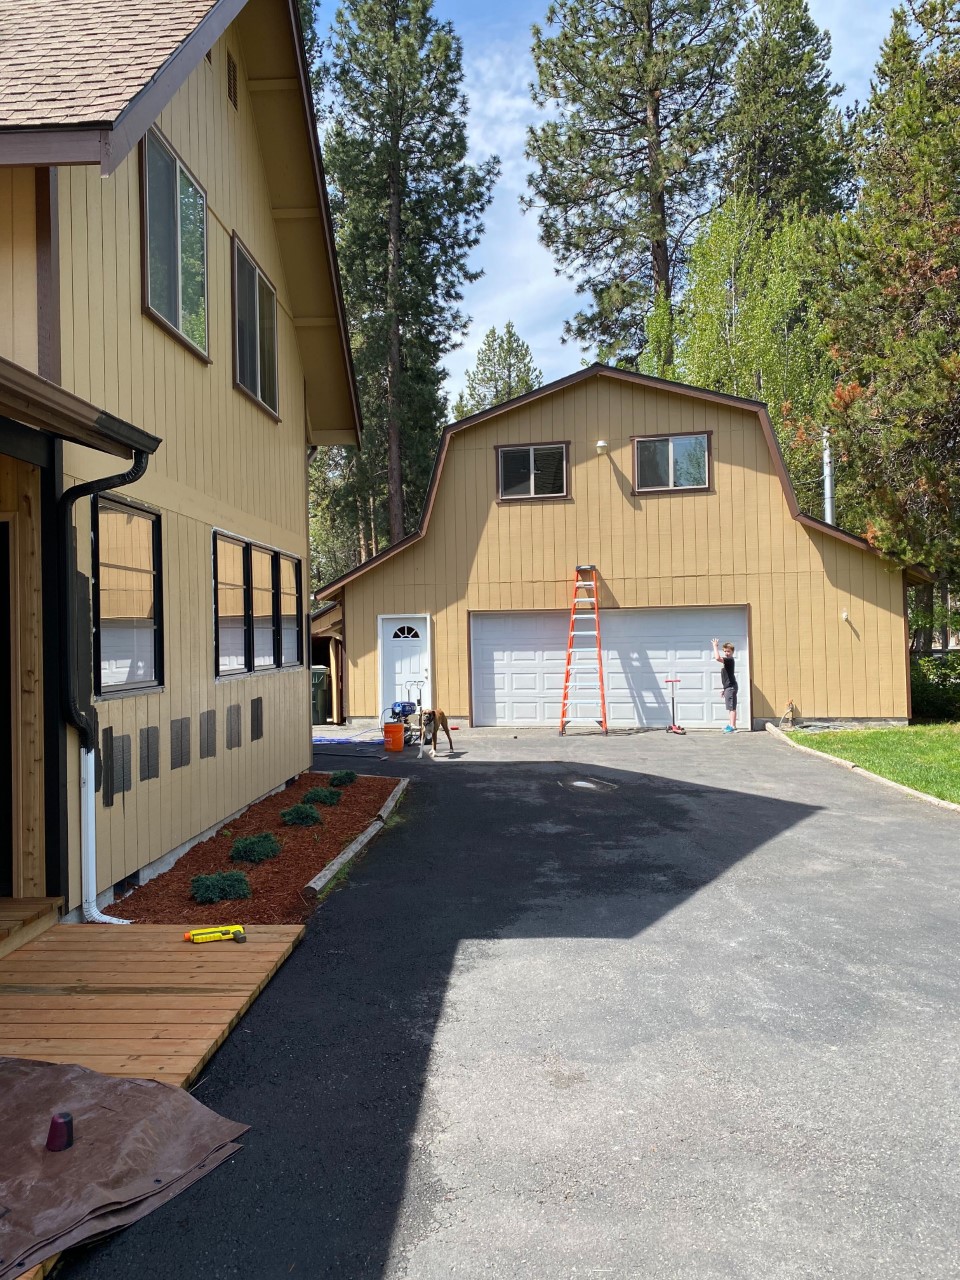
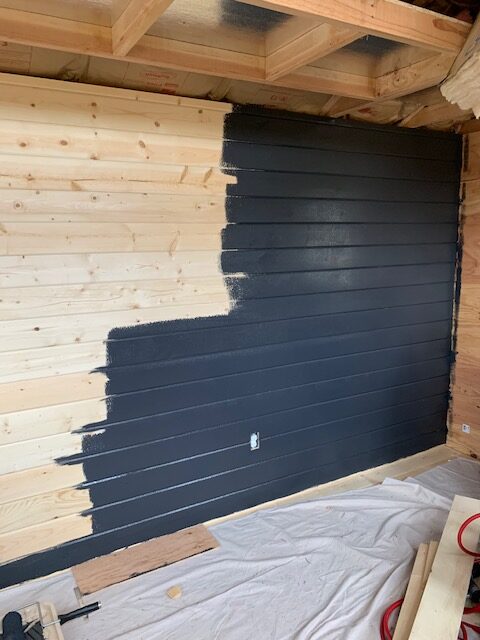
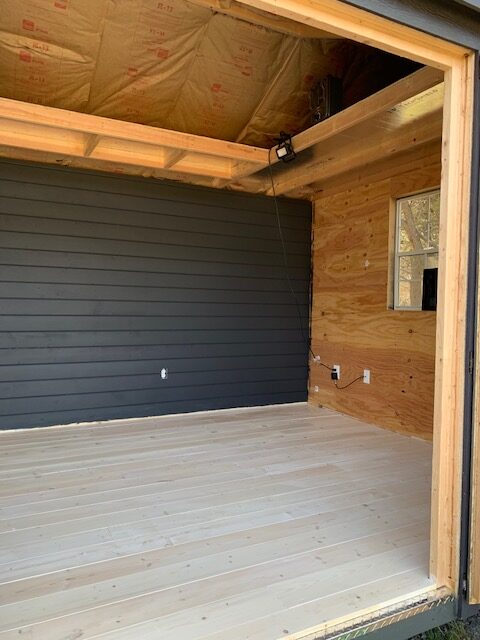
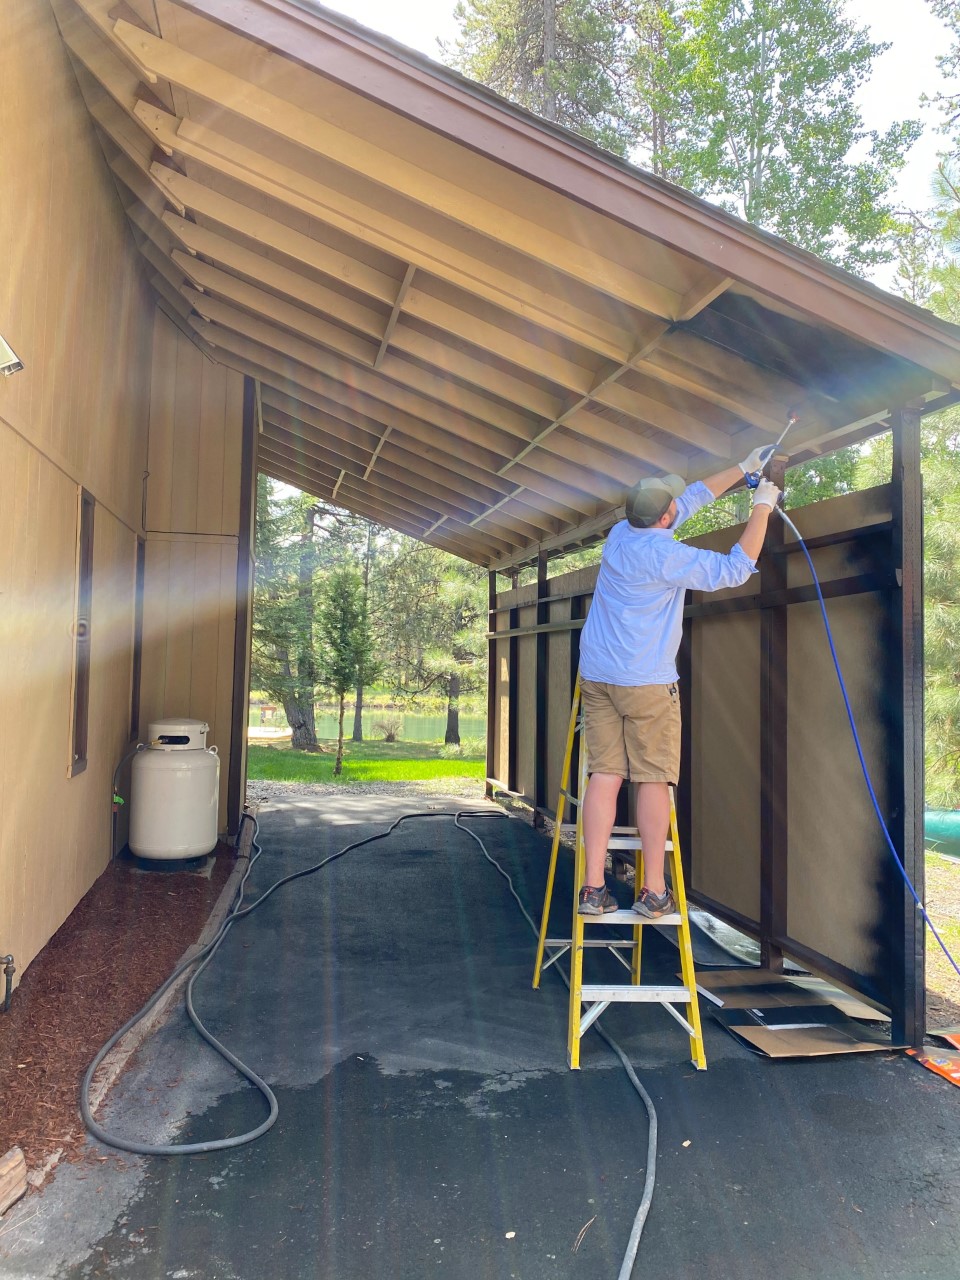
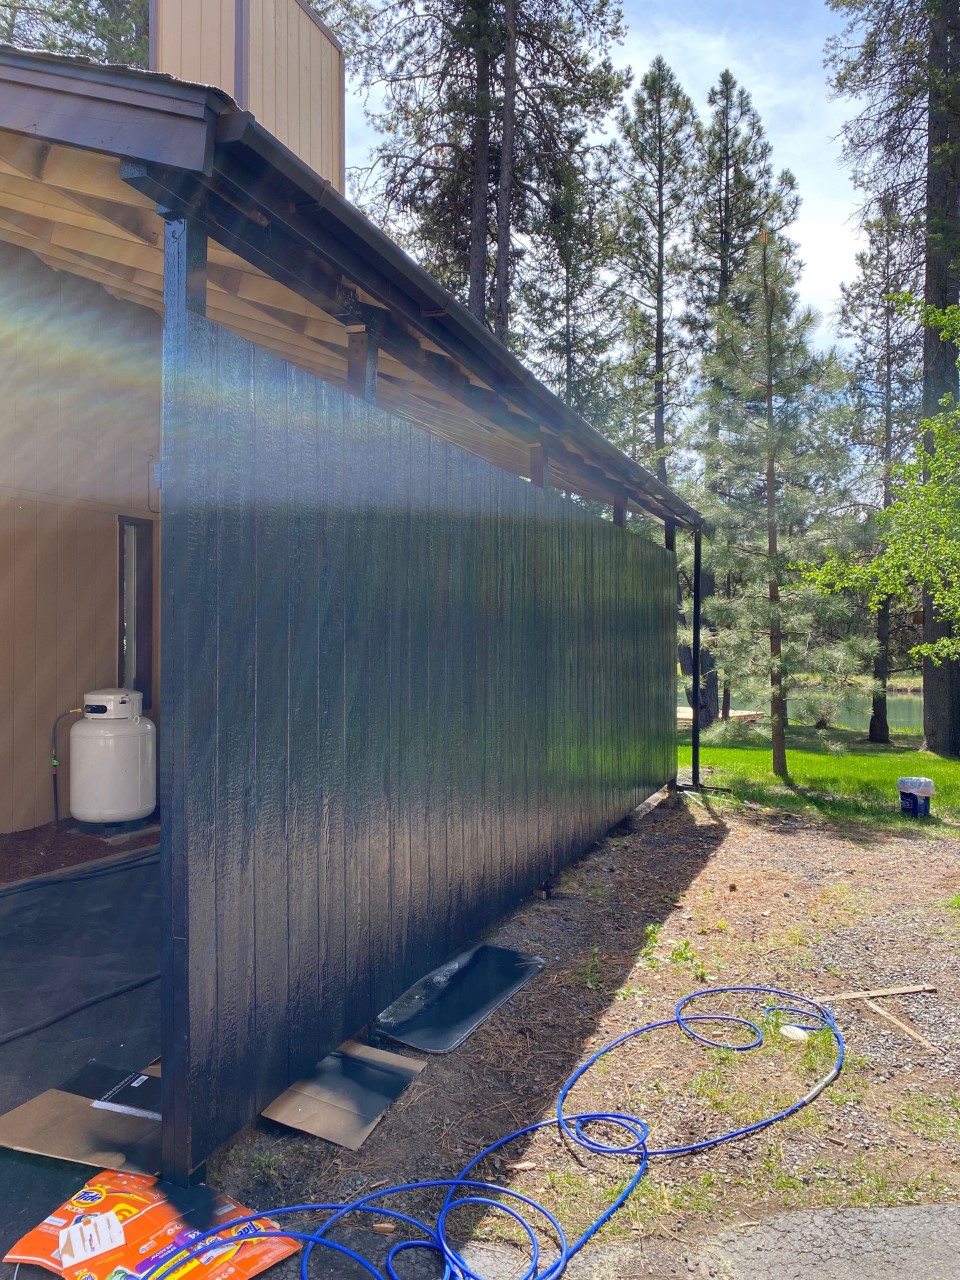
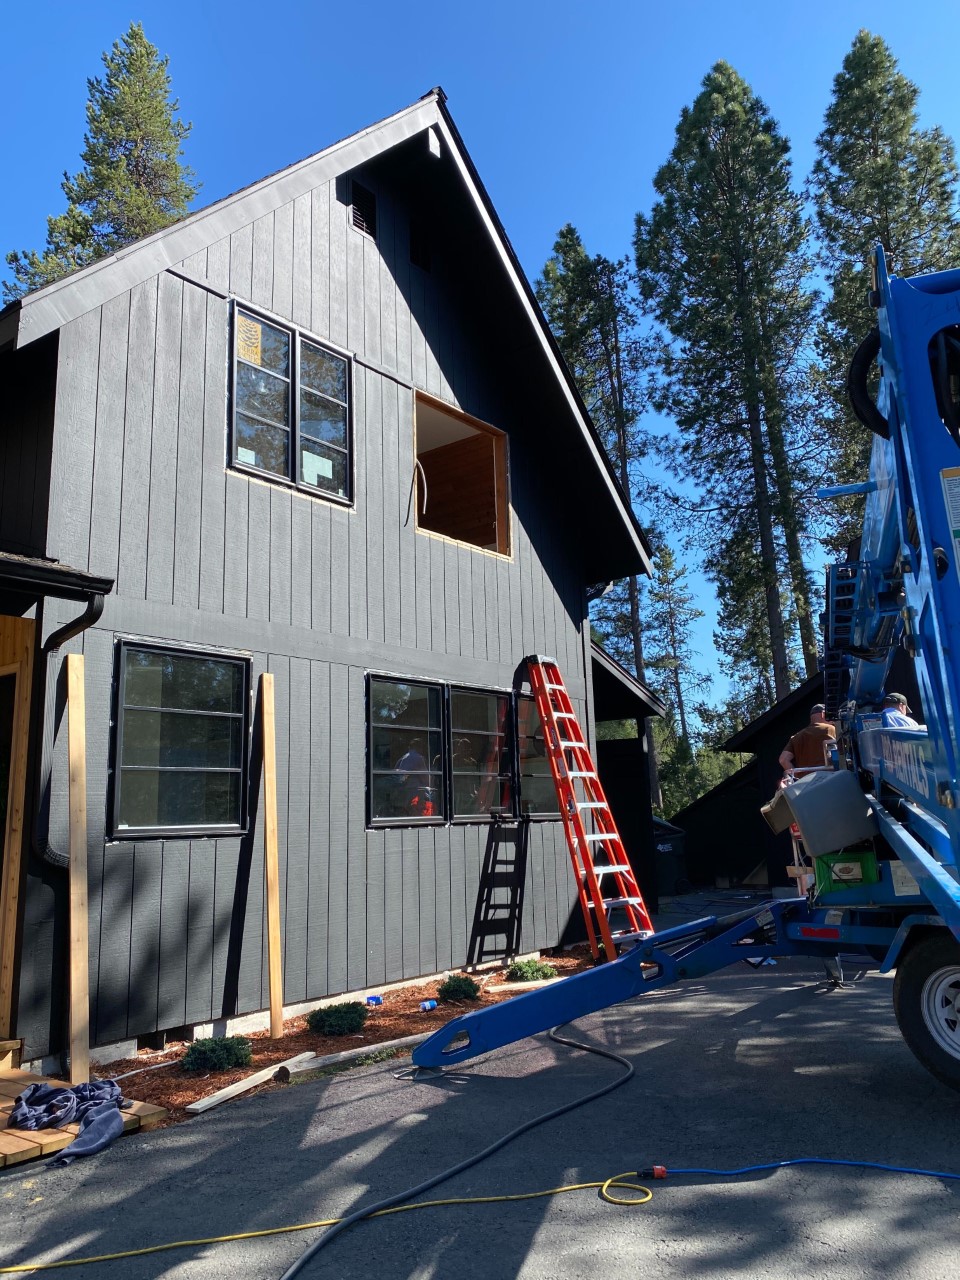
We were lucky enough to have a friend offer up his paint sprayer for the project (thank you again, Jordan!) and it made the project go so smoothly! After we had pressure washed the entire house and taped off all the windows with a light-weight plastic and tape, we got busy spraying. Basically, our process looked like this; Nate sprayed the paint from the top to the bottom, and I followed up with a brush and touched up any spots as needed. Easy peasy! I think the reason that this project went so smoothly was because of the quality of paint we were using. The emerald exterior line is self priming with a smooth beautiful finish. We did the entire house with just one coat! Can you believe it??! The emerald line also has a mildew-resistant coating and won’t blister, peel, or color fade. These factors help put our minds at ease since we were going with such a deep, saturated hue. Also, did you guys know that the Emerald line is backed by a lifetime warranty?! I didn’t even realize paint companies offered such a thing!

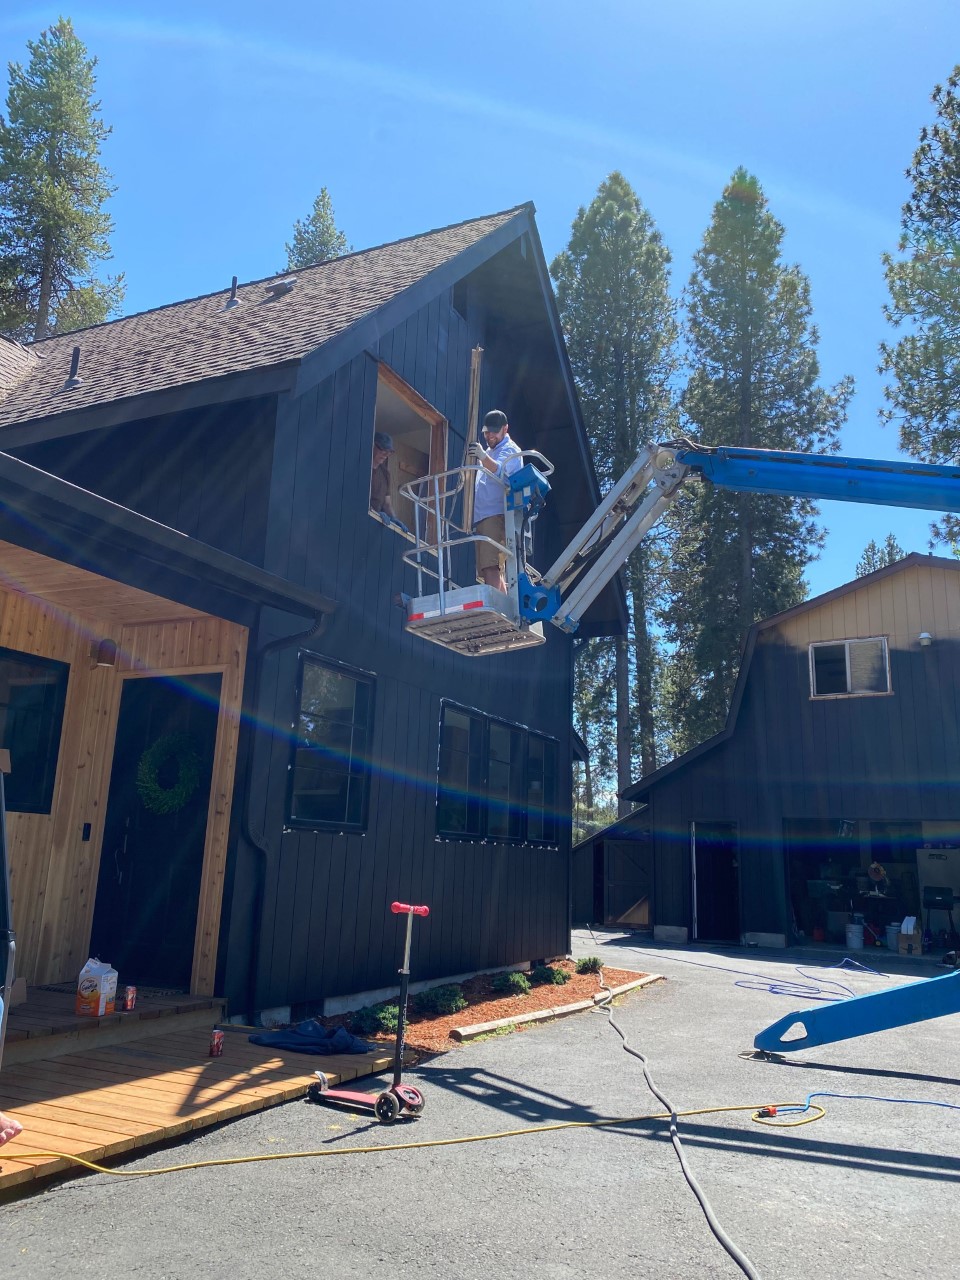
This project was so much fun! It was almost like watching our old fixer upper come back to life after it had been asleep for a looooong time! The neighbors all loved watching and some even set up lawn chairs across the street for front row seats to watch all the activity at our place. So many of them stopped by just to tell us how excited they were about all of the changes, and how much they loved the color! This was music to my ears as I was VERY worried that our neighbors might think we were nuts for painting our house BLACK!

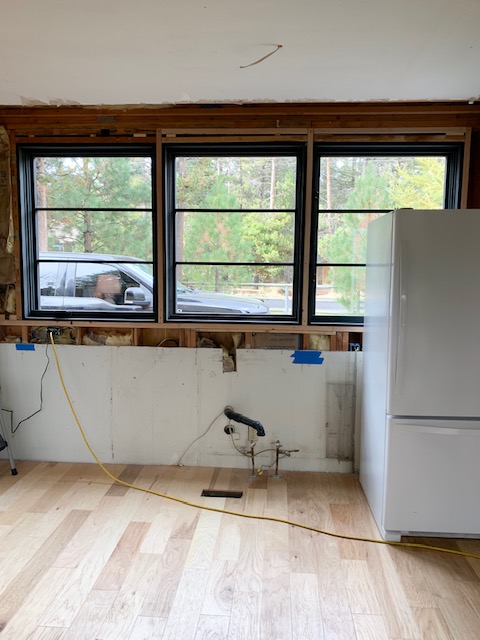
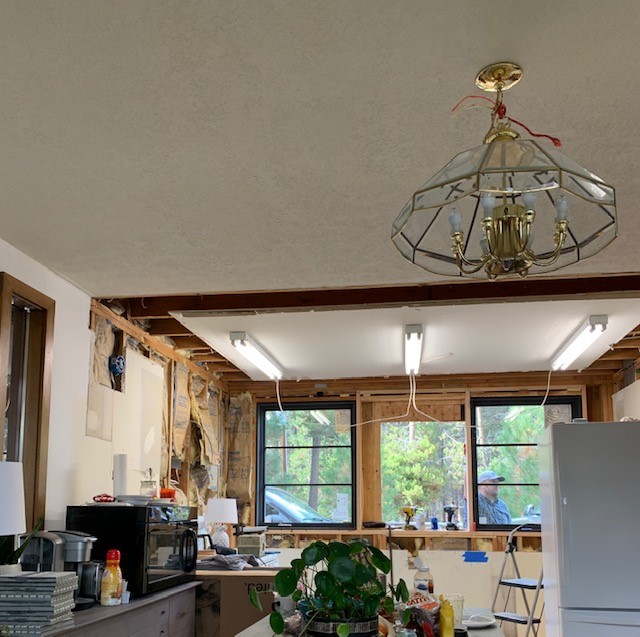
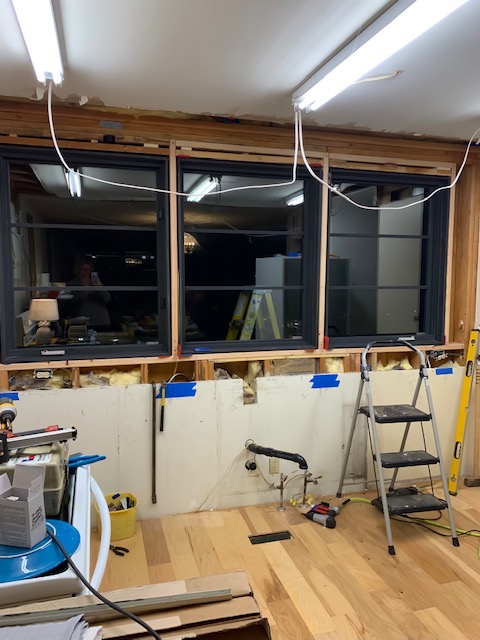
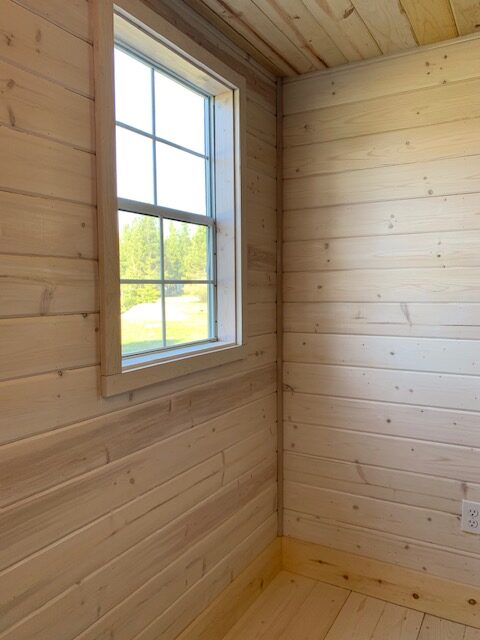
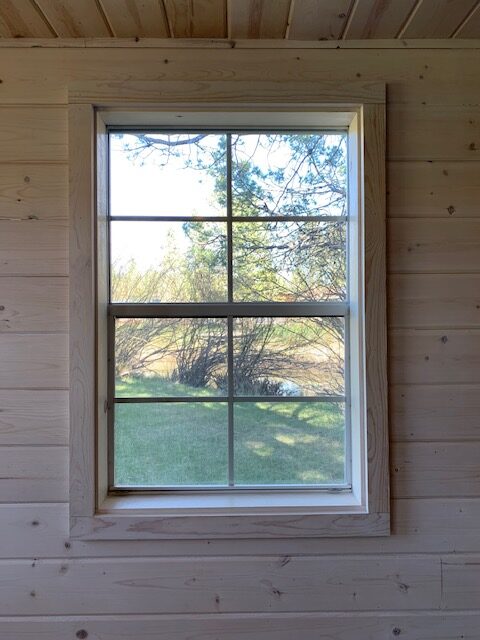
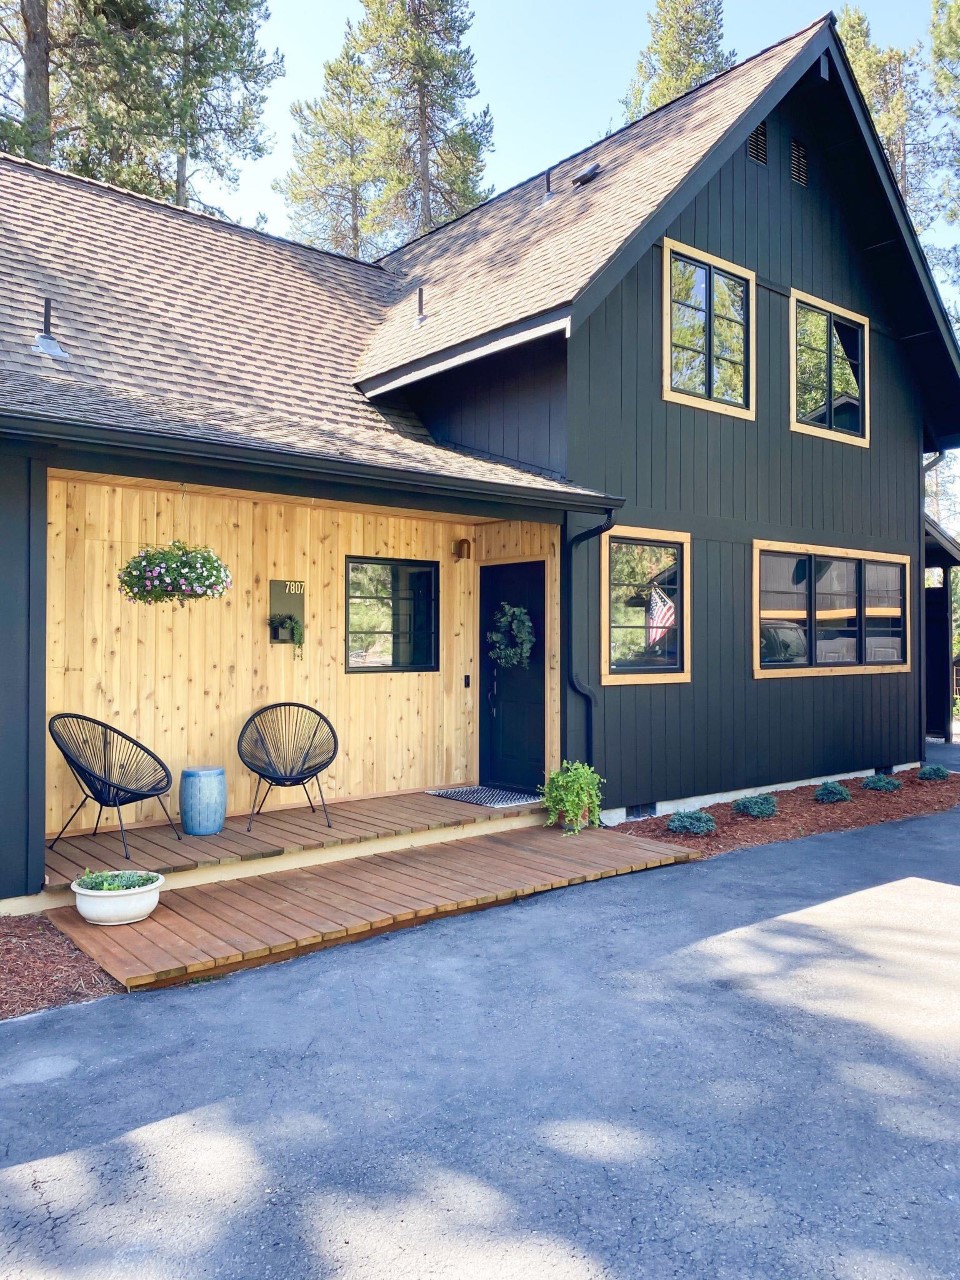
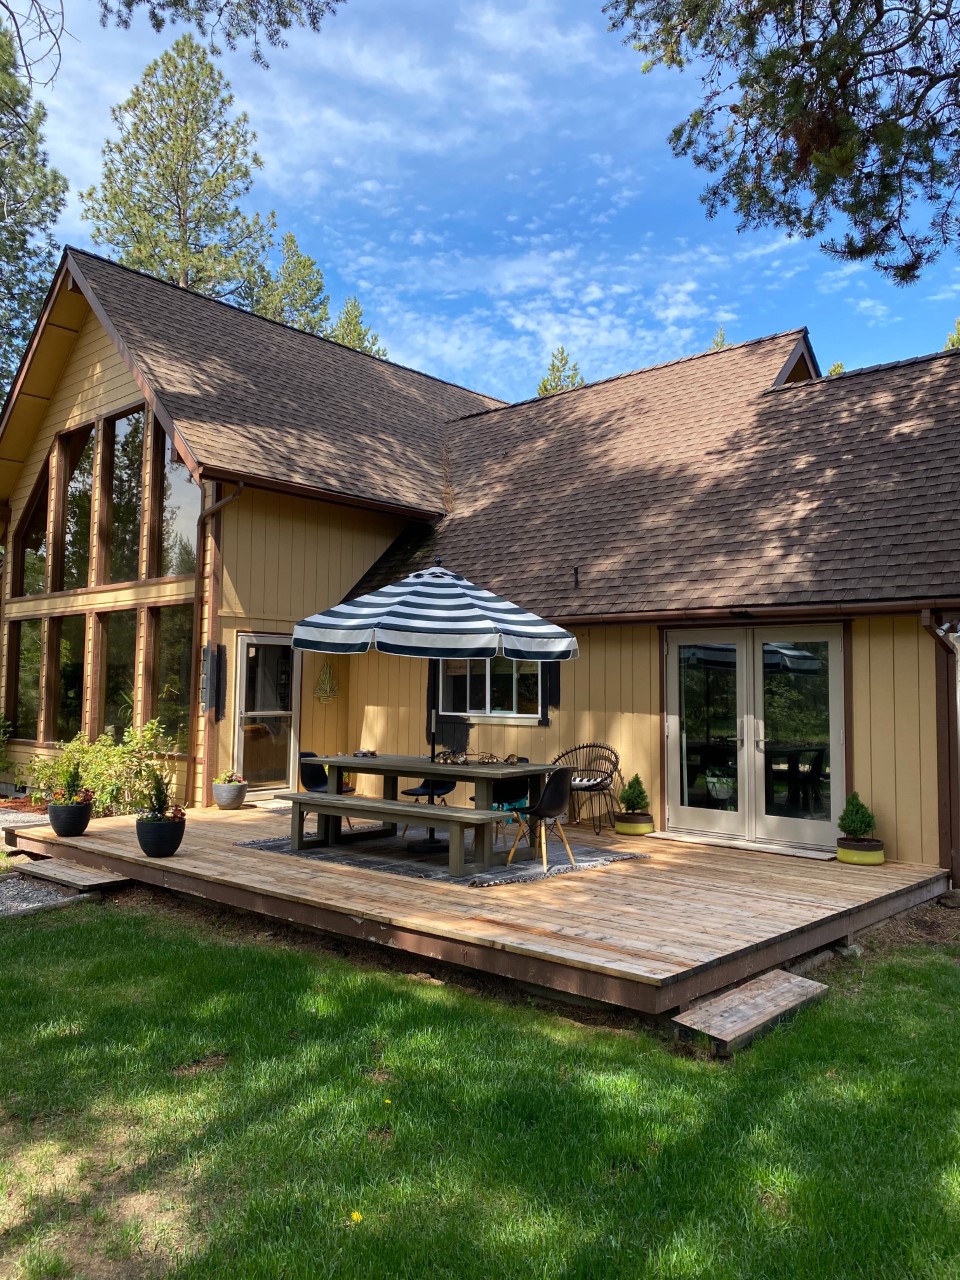
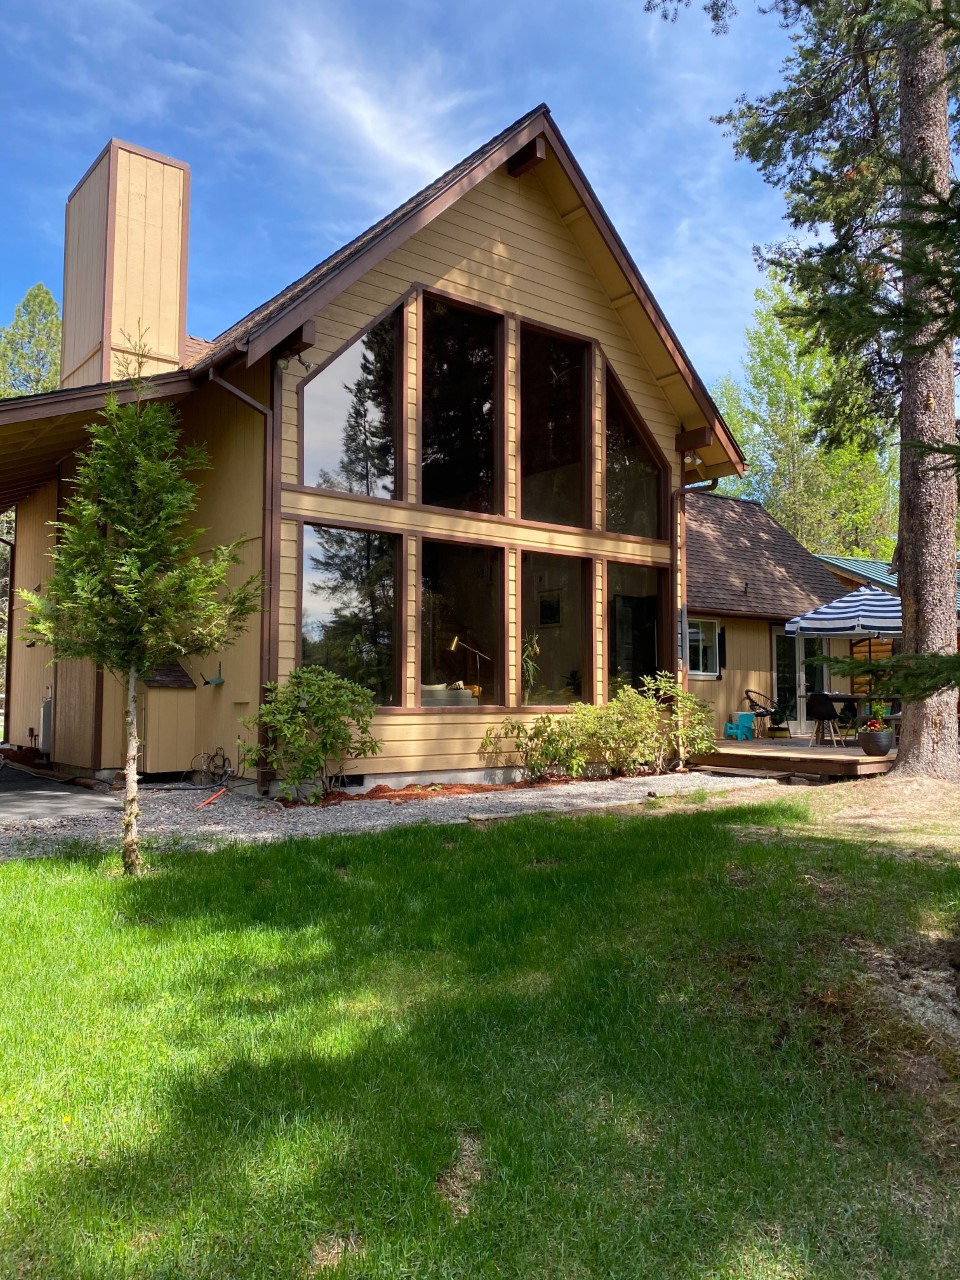
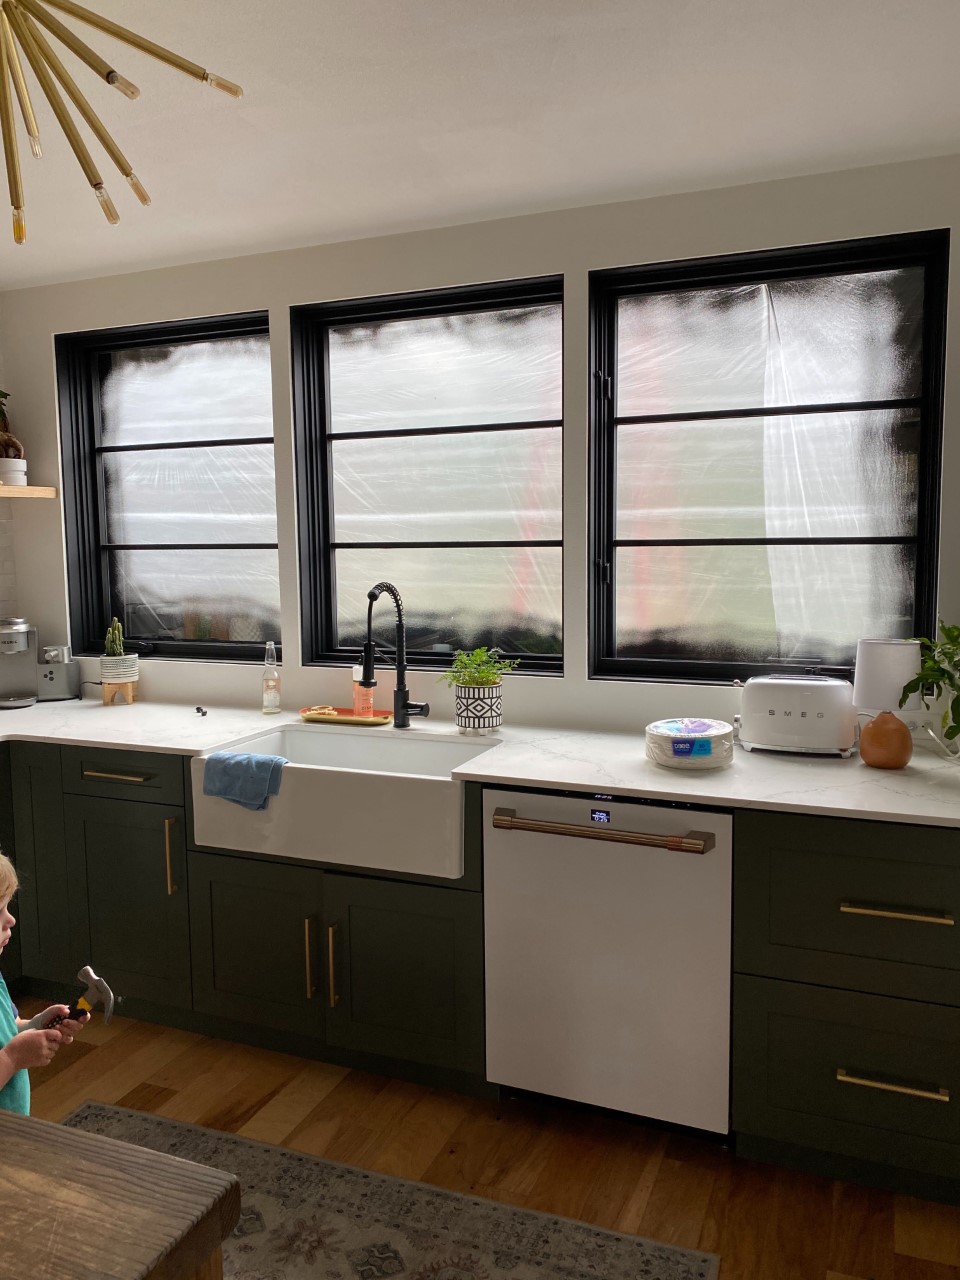
After we were finished with paint, we switched out our old vinyl windows for these casement style windows from Sierra Pacific Windows. We completed the look with cedar trim to complement the porch, and I’m officially crazy over this new look!

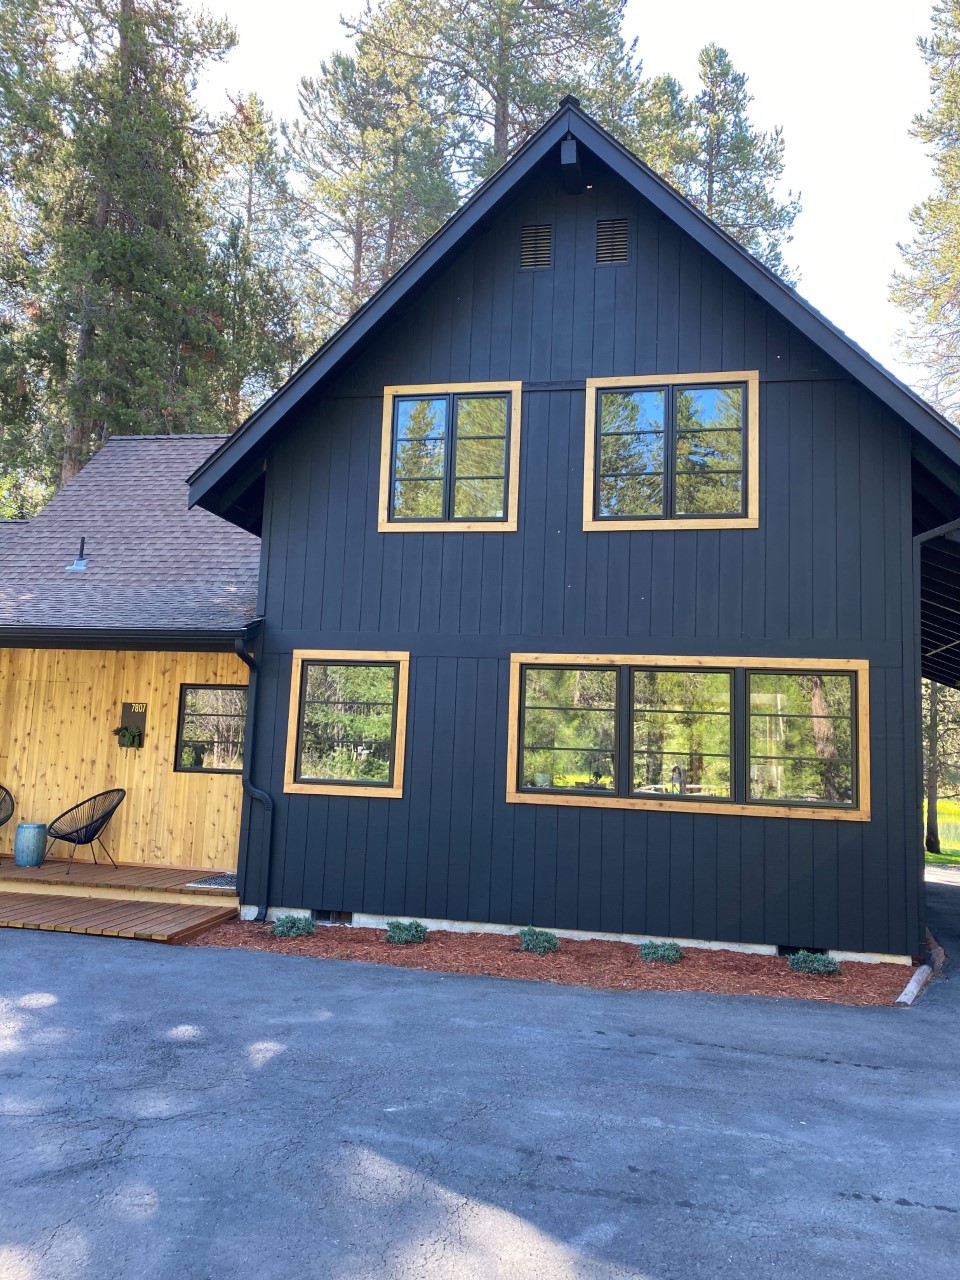
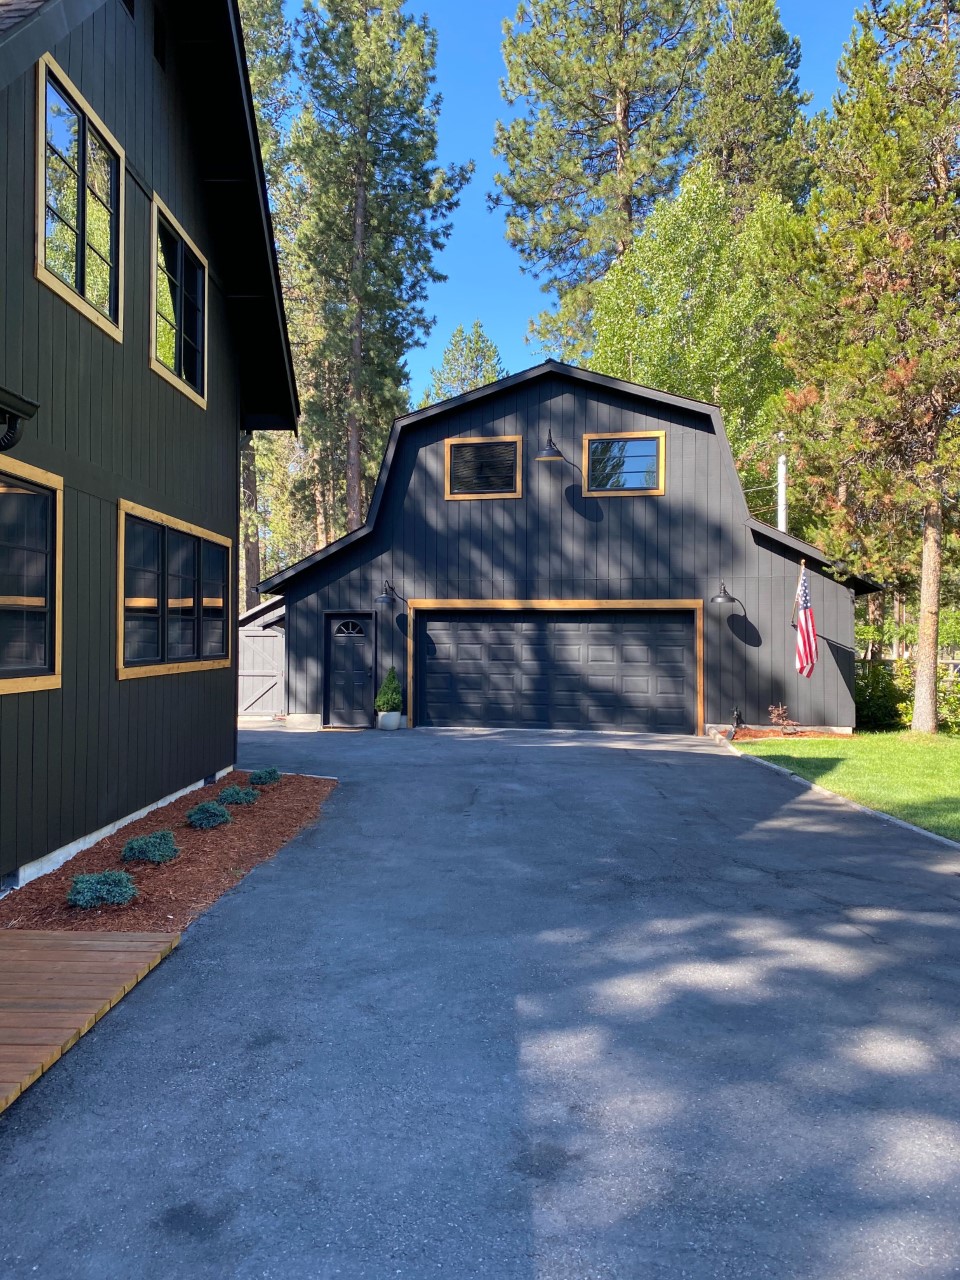
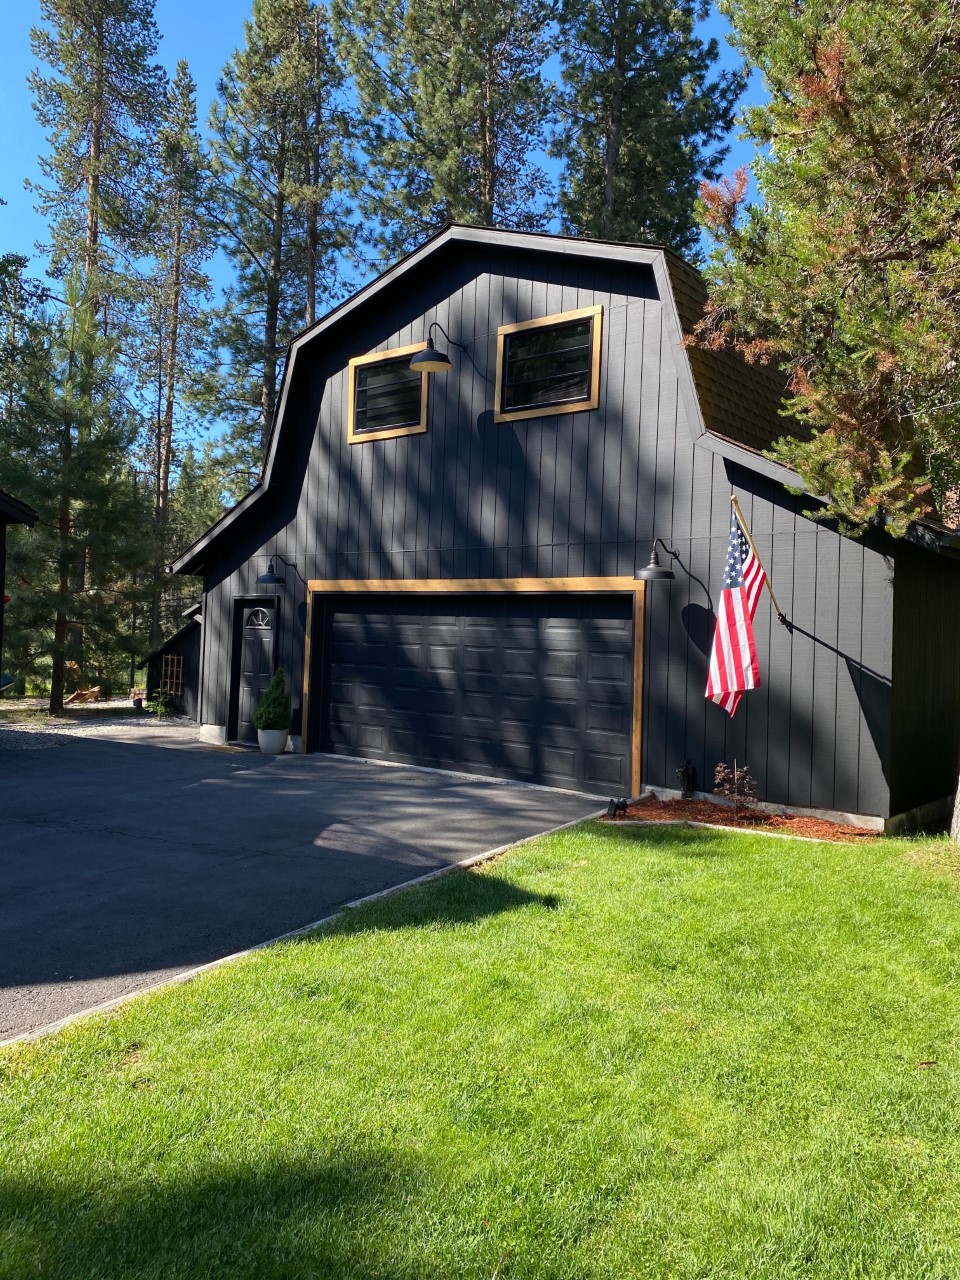
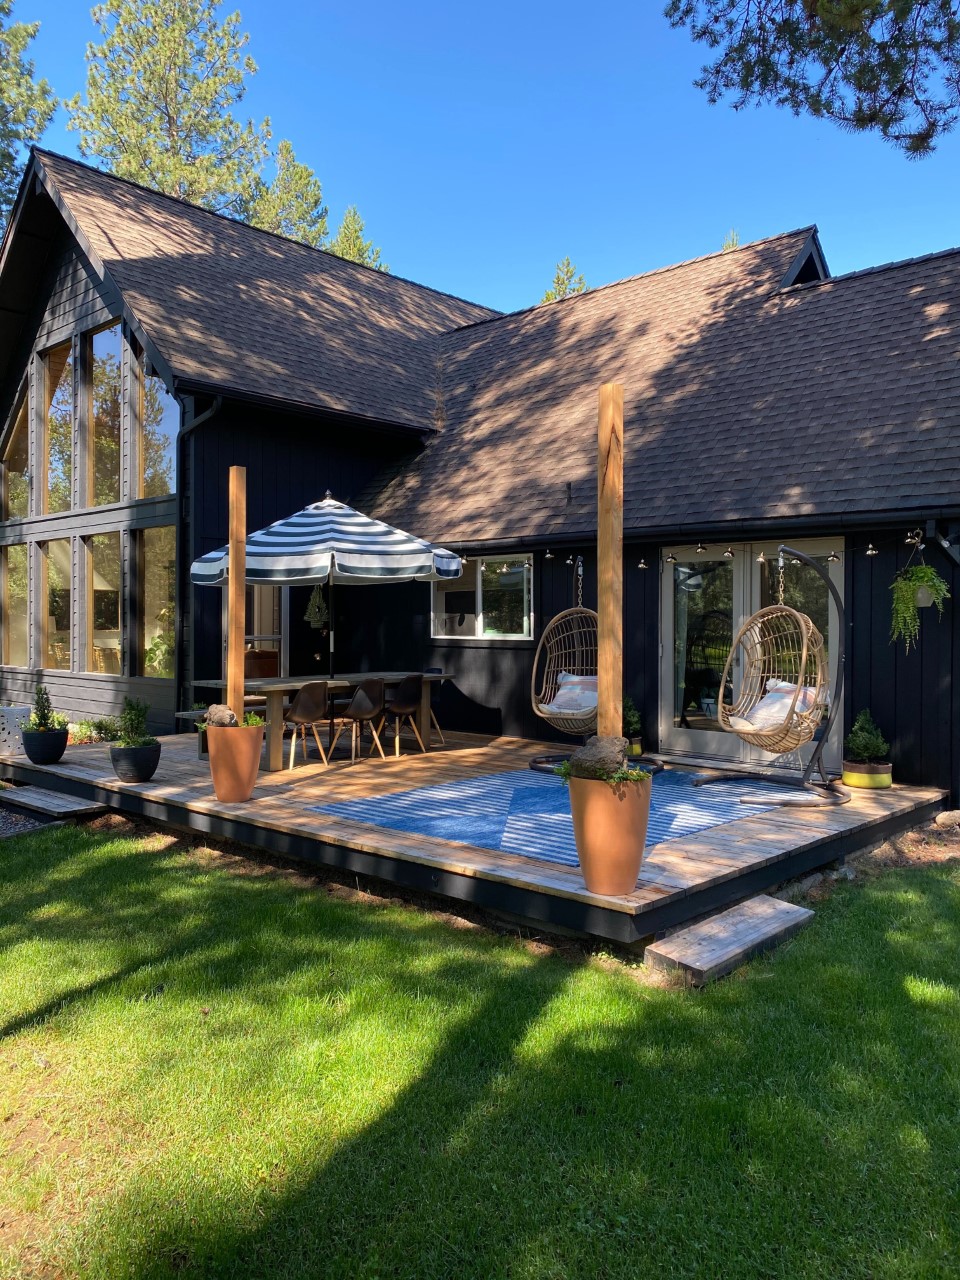
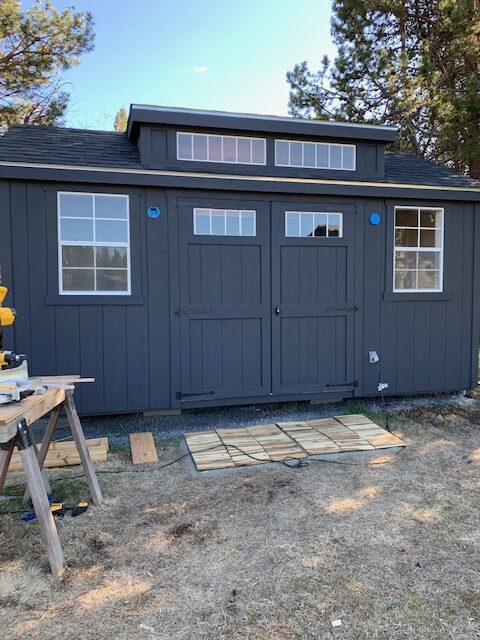
Doesn’t it look like a new house? Next, we have some fun landscaping plans and I can’t wait to see some green just POP against the black! We are so happy with how it all came together and I am so thankful for the wonderful folks at Sherwin-Williams for sponsoring this BIG project. Now tell me in the comments below, would you/have you ever consider(ed) painting your own house? It’s SO rewarding!


Our New Cafe Appliances: Range and Hood Edition

This post is sponsored by Cafe

Since we finished the kitchen for the One Room Challenge, one of the questions that keeps coming up is; what do we think of our new range from Cafe? Well, I LOVE IT! This range was quite an upgrade for us. We went from a 30″ mid 1990’s white electric range to Cafe’s Dual-Fuel Professional Range with six burners. I talked a little bit about Cafe a few posts ago, the ones that are customizable, and allow you to choose a base color as well as the hardware color. Which I am loving so much because I am a big fan of mixing metals in the kitchen.

This range is the perfect combination of form and function. Everyone is always saying how you have to choose between the two, but with this range, you get both.

Because this baby is a duel fuel (natural gas cooktop + convection oven) range, we had to add a gas line which was an additional cost of about $1,500 after permits and the cost of the plumber, but it was worth every penny. Nate, who is the cook in our family, has always wanted a duel fuel range so this was kind of a dream come true for him. Another thing to note is that if you live in higher elevations, like we do, then the convection oven will make your life so much easier. Higher elevation baking often means that your cookies are raw in the middle and your cakes will not rise, but not with this convection oven. We are able to follow regular baking instructions on mostly everything now and it comes out just perfectly!

Each of the six burners have their own knob (plus one for the oven) which makes operating the range very straightforward.

The grates are easy to remove and when I notice they need cleaning,  I just place them all in the sink and give them a good rinse. While the grates are off, I usually use this opportunity to wipe off the cooktop. Just a sponge with a spot of dish soap, and all of the cooking messes wipe right up. Easy peasy.

The width of this range is 36″, when a standard range is 30″, and this extra six inches allows you to bake multiple dishes at once. This came in handy over the holidays when the green bean casserole was ready to go in the oven, while the turkey was still roasting away. My mom and I made Thanksgiving dinner together this year, and she LOVED that the racks are on rollers and slide in and out with ease. It’s these small details that make a big difference!

For our hood, we went with their 36″ commercial style hood. It’s mounted to the wall and then we built the cedar surround. The hood cover was a relatively simple DIY. After the hood was installed and secured to the wall, Nate built a frame around it with 2×4’s, and then wrapped the entire structure with cedar 1×2’s. I am always a fan of adding natural wood tones whenever and wherever I can, I love the warmth that wood adds to a space. It’s a statement maker and only cost around $75 in materials.

Here is what the hood looked like before we wrapped it with the cedar. I love how it matches the white appliances, but also comes in all of the same color options that the range is offered in, so you can coordinate accordingly. It’s pretty enough to leave as is, or you can customize your look, like we did.

The fan is so quiet, even on the highest of settings and the grates easily remove in case they need a good cleaning. Also, I love the light that comes inside the hood. You guys know how I HATE a cold, blue LED light bulb…makes me feel like I’m the operating room at the hospital. But, these lights are warm and lovely and even have a Nite setting, which is a very low light that I have been turning on every evening after the kids are in bed. It’s soft and adds such a nice ambience to the kitchen.

With the kitchen finally complete and all of the Cafe Appliances stealing the show, we are just LOVING all of them! They all look and function the part. We knew we loved how they looked when we picked them out, but now that we’ve been using them in our kitchen for a few months, we are hooked!


The Sink And Faucet That I Couldn’t Stop Pinning

This post is sponsored by Kraus

I don’t know if I told you guys this but when we were remodeling our kitchen for the One Room Challenge, we were without a working sink in the kitchen for twelve weeks…yep, you heard that right. TWELVE LONG WEEKS! So when our sink from Kraus was finally installed, I was a over the moon! Has anyone else washed dishes in the bath tub before? Well, believe me…it’s not a fun job.

It seems kind of funny, but when you’re planning a full kitchen remodel, the sink has to be selected at the very early stages. Which makes sense if you think about it because cabinets can’t be ordered and counter tops can’t be measured until the exact dimensions for the sink are set. And there are lots of options too; under-mount, apron-style (like mine), drop-in style, single or double bowl….whew! In our last house, we had a single bowl, under-mount sink and I LOVED being able to drop a full baking sheet right to the bottom for washing. But, I didn’t love the stainless steel finish and was always fighting with water spots. So I knew I didn’t want to do a stainless steel sink again but wasn’t sure what new direction to go…until I saw it. THE ONE. I went with the 33″ Reversible Apron front Fireclay Single Bowl Sink in gloss white from Kraus. Are you wondering what they mean when they say reversible???? I know I was when I first read the description. Well, this sink is so cool and allows you to choose which style you would like for the front, or the exposed apron. Isn’t it rad that you have the option?

I opted for the flat front because I was attracted to the slightly more modern vibe of the flat front, versus the rounded front, which felt more traditional to me. It’s such a great size too! You could easily fit two baby bums for a soak in the sink or to hide all the dirty dinner pots and pans until you feel like doing the dishes.


It comes with a grid that lives on the bottom that I LOVE! It’s so handy, especially for watering all of your plant babes as it lets the water drain freely from the bottom of the pot.

For the faucet, I selected the 18″ Commercial Style Pull-Down in matte black. This baby is sleek and I will never get over how it pairs so well with the black windows. Meow.

I also have really been enjoying the pull down option, and the button on the back which allows you to switch the water stream to a spray. It makes cleaning up a breeze. And the shiny finish always looks clean and sparkly, which is such a nice perk! I couldn’t be happier with this duo from Kraus, and know we will love them for many years. A BIG thank you goes out to Nick from Kraus who was so helpful and even tracked down another sink option for us at the last minute, when the sink we had originally selected was out of stock. He made it possible for us to keep our ORC deadline and for that, I’m so grateful!


One Room Challenge – Modern Mountain Kitchen and Family Room – Week Three

Howdy friends! Welcome to week three of the One Room Challenge and I can’t even believe it! Where is the time going? Let’s get into this, and I will fill you in on allll the happenings around these parts! There are LOTS! For anyone who’s new here, here is my vision for the space, and if you’d like to look back to week two or week one, feel free to clickity click!

Let’s start with windows! Sierra Pacific Windows provided me+ with three of the most glorious, modern, sleek, black windows and to say that I love them would be the understatement of the century. Here is what the above the sink situation looked like before SPW came to the rescue.

And now LOOK!!!!

CAN YOU EVEN?! Guys…I love these windows so much that I could write them a poem about my deep, intense and everlasting love. Just kidding…but only sorta. We spent an entire day installing these bad boys and lucked out big with a Dad who was a commercial glazier for forty years. So he definitely knows his way around a window install. It was so exciting and scary all at the same time! It seems obvious when you think about it, but you have to cut giant holes in the side of your house, and that is NERVE WRACKING! I will write a blog post in the coming weeks to show you guys these beautiful windows up close and personal. Also, they have some pretty cool features!

  Another thing that we worked on this week was giving the fireplace a face lift. This is what the fireplace used to look like in all of its brown glory.

I decided right away that the brick was calling for some bright white paint to freshen it up.

The old pellet stove that has been residing in this spot since 1993 was re-homed with a local family who have a rustic cabin on the river that they rent out to vacationers.  For the hearth, I am going to add a cool cement tile from Zia Tile that will add a pop of pattern. I have mentioned before that my goal is make this house feel alive again, and I think this funky tile addition will help do just that.

Finally, the last bit of demo was completed this weekend because this old pantry is going to house the new refrigerator with a cabinet surround.

The closet that you see on the backside of the pantry will be removed to make room for the refrigerator and additional cabinetry. I was hoping to keep the closet for obvious reasons, but lost that battle so new drywall will be added in its place. And speaking of sheet rock, we decided to hire out some of the drywall/texture work out and I am so excited! We could really use the help, as our list of to-do’s is looking looooong.

Tearing out these two closets brought us to our first major hiccup in our plans as well. We were sure that there wasn’t any plumbing/electrical inside these walls that would get in the way of the refrigerator placement, but we were wrong. SO WRONG. Allow me to introduce our upstairs shower drain pipe. Which is now going to be re-routed to make way for the refrigerator. Not a huge deal…but definitely an unwelcome sight.

Ok…so here’s what’s on the list for this next week.

  1. Finish flooring
  2. Tile hearth
  3. Finish painting walls and any touch ups that need some attention
  4. Paint the ceilings
  5. Rent scaffolding
  6. Install new lighting in family room/dining room

I can’t believe week three marks the half way point! OMGOSH there is so much to do! I’ll be back next week with all the dirty deets for week four and don’t forget to check out all of the other designers to see their progress! Until next week! XOXO

At Charlotte’s House | Design Addict Mom | Erika Ward Interiors | Erin Kestenbaum | Girl & Grey

Gray Malin | Hommeboys | I Spy DIY | Jewel Marlowe | The Learner Observer | Making it Lovely

 Nicole White Designs | Old Brand New | Oscar Bravo Home | Place of My Taste | The Rath Project

Room for Tuesday | SG Style | Undecorated Home | Veronica Solomon Media BH&G | TM by ORC


Sneak Peek at Walmart’s new MoDRN line

Hey guys! We are busy getting settled into our new house and lemme tell ya…things are a bit crazy atm. My big kids are back in school and between their new schedules, unpacking alllll the boxes, and starting some exciting new projects, things are BUSY around these parts. But before we lost our minds, (jk…kinda) packed up our house, only to move a couple streets over, I had the pleasure of testing out and styling a few of the new and exciting pieces that are fresh from Walmart‘s new line, MoDRN. Stylish beautiful home decor and at affordable prices??? Sounds good to me!

The new MoDRN line is so good, guys. Think earthy materials, raw finishes, and simple shapes…yes yes and yes. This dresser is a part of the new MoDRN Naturals line and I am IN LOVE! It is so sturdy and feels very well-made. Also, the detail on the legs add a nice touch, don’t ya think. The shade of wood is perfect and light and shows off the wood grain for some added texture. The size is also great and could work in a number of different spaces around the house…think kid room for gathering all the toys, or maybe in the living room for storing all of your extra home decor items. I can’t be the only one who stashes extra decor all over the house, right?! Also, peep that cute teal throw! That’s also part of the new line and it’s soooo soft and cozy.

Ok. Next up, is this mirror. I love this mirror. It has a metallic frame with rounded corners for an industrial/modern look that I cannot get enough of. I love to decorate with mirrors because not only are they beautiful, but they are particularly useful, especially in an entryway, above a bathroom vanity, or for bouncing light around above your mantel. They add a lot of visual interest to a space and this one does not disappoint.

And lastly, I had some fun with this copper floor lamp. Copper is a metal that I don’t use very much, but I love the warmth of it. The clean-lines are inspired by Danish design, which celebrates function ahead of form. The lamp has the cutest marble base and the neck adjusts to a variety of positions…great for reading. Something to note: the lamp came with its own edison bulb and that is one detail that I appreciate very much. I have bought lamps before only to find that I didn’t have an extra light bulb in the house. Not a huge deal…but still annoying.

Fun fact; if you zoom in on this last pic, then you might spy the reflection of yours truly while I was taking this photo. But seriously, I am loving this new line and I think you guys will love it too! You can check it out here or you can find them on Instagram @MoDRNliving or try searching the hashtag #liveMoDRN

That’s all for now! Wish me luck on all the unpacking!

One Room Challenge – Modern Rustic Office – Week Five

GUYS! We have one week left to finish this office space! Cross your fingers for me, say a prayer, wish me luck, or anything else you can think of because we have a lot of details to check off the ol’to-do list. Like always, if you’re new here, I am participating in the One Room Challenge, a biannual, six week challenge in which you document the process of re-imagining a space from top to bottom! If you would like to catch up, here are links to week one, week two, week three, and week four. And as just another quick refresher, here is the mood board from which I am using as a visual guide for the space.

So here we are in week five, and I am still talking about walls, floors, and ceilings. But, if you start without any of those, they become your focus. And we have been focusing on these three features throughout these last five weeks. I’m happy to finally report that we do in fact, have walls, floors and ceilings as of today! We are working on all the details now, trimming out the windows, baseboards and adding some corner trim.

If you’ve been following along in my instagram stories, then you know that I started out staining the floor and said I would stop there. My original plan was to leave the rest of the wood in its natural state. Well, since then, I have stained every piece of wood that has been installed. I just don’t want this knotty pine to darken and turn yellow over time so I’m hoping that this stain will do the trick. So far, I have stained the floor, three walls, and the entire ceiling. Staining a ceiling is no joke….hoping that this will be a job that I won’t be doing again any time soon.

Big things are happening on the exterior of this lil’ shed as well! I decided that I loved the color that I used on the accent wall so much that I bought more and painted the outside with the same color! Goodbye green and blue and hello to solid black! Have no fear though, I have some plans for some pops of color though.

Next time you all see this space, it’s going to look like a proper office! This is going to be the most fun week of them all because I finally get to make the space beautiful. My head is totally in the clouds thinking about furniture, lighting, art and accessories galore! What do you guys think? Think I can pull it off? I think I might surprise you! See you next week for the BIG reveal! XOXO

One Room Challenge – Rustic Modern Office Space – Week Three

OK! Here we are again…week three is already upon us! If you’re new here, let me fill you in on what’s going on! I am totally redesigning an office space/outdoor shed for my husband, who works from home, as part of the One Room Challenge. If you would like to catch up in order, here’s a link to Week One and Week Two. Once again, here’s a looky at my vision or plan for the space.

So this week was all about paints and stains. I needed to make a choice for a treatment for the floors ( 1×6 pine boards) and I have been planning on a moody accent wall since we began envisioning the space. I needed a rich, dark color and after looking at 975,873,489 black(ish) paint swatches, I landed on Black Jack by Benjamin Moore. Here’s the wall for which the paint was intended.

The sofa that is going to be sitting against this wall is a butterscotch color and I’m so excited to see it just POP against this moody color. In fact, I just recieved word today that the sofa is shipping out in the next few days….someone pinch me!

I have painted lots of walls during the course of my diy adventures, but painting wood paneling is no joke. Getting the paint between the boards is a time sucker. Also, a tip that I thought I would share would be, that if you’re planning on painting paneling a dark color, paint the wall behind in a dark shade before you install the wood. This way, any cracks that are visible when you finish installing, are already dark in color. Mmmmmmkay??  Out of the three previous photos, the third one most accurately represents the color in real life. And of course, I went with a matte finish because I just can’t ever get enough of that velvety finish.

Next up was choosing the stain and polyurethane for the floors. I mentioned this in my last post but a very wise reader wrote and warned me that if I didn’t use some kind of stain, then the floors would eventually darken and yellow. A look that I am trying to avoid.

When I found this antique white by Varathane, I knew I had found what I was looking for. It gave the floors a very bright white look but didn’t cover any of the wood grain or knots.

I applied the first coat of polyurethane just this afternoon and am still undecided about how many coats I should do. I will probably do at least one more for good measure. It is pine which means it’s a very soft wood, so we need maximum protection.

Finally, I liked the color that I used on the accent wall inside so much, that I may just use it for the exterior too. I tested a spot and me likey…

But we’ll save that discussion for next week! See ya in a week! Oh…and if you have any questions for me….don’t be shy! Leave me a comment below! XO

One Room Challenge – Rustic Modern Office Space – Week Two

Hi guys! It’s week two already, and things are happening over here! Last week, I let you in on my exciting plans to completely revamp my husbands shack of an office as part of the One Room Challenge. And just a refresher, here’s a look at the mood board from which I’m using to plan the space.

1./2./3./4./5./6.

So this week was all about the floors and walls…as in, we needed both. When the shed arrived, it had just plywood for both so I was excited to get started and get some walls and floors down. For the floors, we went with pine 1×6 boards. Originally, I was just going to leave them as-is, and add a poly for a protective coat, but then a reader informed me (you guys are SO helpful…keep sending me all your tips) that if I went that route, the floors would darken over time leaving us with a 1950’s cabin vibe (a look that I love, actually), but not the Scandi look I am going for for this project. So…in order to keep these floors from darkening, I am going to use a white stain that I’m hoping will keep them light and bright. I considered a lime wash, but was discouraged when I started researching the process. Seems so complicated! For now, the plan is to stain with a transparent white stain and then lots of poly to protect and seal them.


For the walls, we are going to use the same tongue and groove pine planking that we used for our stair well project that we completed this winter. I’m a big fan of the texture that it brings to a space. Also, it lends itself to a more casual look and I’m all about casual, comfortable spaces.

Because the floors are going to be so bright and natural light isn’t an issue for this office space, I am thinking about painting the long wall (the one that doesn’t have a window) a deep, matte black. Originally, I was contemplating trying the shou sugi ban technique, where you actually singe and burn the wood for a dark and dramatic effect. But, since the paneling is already installed and I don’t want to burn the shed down, paint will have to do!

See how much lighter the paneling is (on the left) versus the old plywood (on the right)??? The plywood has a lot of orange and pink undertones that I am just not feeling. This project is really making me get creative because I LOVE a rustic look, but for the shed, if I go too rustic, then it starts to resemble that murder shack look that I am desperately trying to avoid. So balance is the key here, folks.

So that’s the skinny on our progress for our second week! Guys, I cannot wait to get to the pretty stuff…furniture, lighting, accessories….ya know, the fun part! Have any questions for me? Hit me up! Until next week!

rustic modern office space – one room challenge: week one

Well….here we go again! It’s time start another round of the One Room Challenge…only this time, spring edition 2019. Last fall, was my first stab at the ORC and I had so much fun transforming a boring little half bath into a rad, ostrich filled powder room. So, I’m back again, but with a whole new game plan! Here’s what I’m thinking!

1./2./3./4./5./6.

Now, as some of you know, my hubs works from home full-time. When we first moved into our house, we made the loft area at the top of the stairs (the space that I now lovingly refer to as the mom loft) into his office. Well, it didn’t take us long to figure out that that space was not going to work…think screaming toddlers, barking puppies, and a constant flow of kids coming and going with their friends. My hubs needed a quiet place to work so we had to come up with a solution that would better suit the needs of our very busy, and very LOUD family. After some research, we found a local place where you design your own shed online and they bring your designs to life and build it on site. The whole process only takes a few weeks and then they come and deliver your new shed in the spot of your choice. It took some convincing by the hubs, but eventually I caved and here we are!

THE BEFORE

Okay, here’s our starting point. A truly blank slate.

We added the window boxes that you see but they didn’t make it through the winter…but that’s another story (insert eye roll here). We also added electricity, cable/internet and have also wired it for two exterior lights that will flank the front door. The outside is cute….but wait until you see the inside…gulp.

GENERAL DIRECTION I’M HEADING

Ok…so the goal for this project is to transform this murder shack into a cozy, rustic office; heavy on the PNW vibes. The walls will be shiplap all the way around and the long wall without any windows is going to get the shou sugi ban treatment. Can’t wait to try that! If I can find one that is the right size, a wood stove for the corner and a built-in to house some stacked wood. His desk will stay in the same location but we have a new desk picked. There will also be a seating area to hang out for when one of the kids or myself go out to deliver a hot coffee or a sandwich for lunch. This is just a quick run-down and meant to give you an overall and very general idea of the direction that I’m heading. That’s it for now!

And stay tuned because I have a few surprises up my sleeve too! See ya next week!


Tiny, Funky Half Bath: One Room Challenge Reveal

*this post contains affiliate links

Ohhhhh myyyyyy goshhh….today is the day! It’s been six weeks in the making and I am so excited (and SOOOOOOO relieved) that today is FINALLY reveal day for the One Room Challenge!

Are you ready for this? Ok – first, if anyone needs to catch up, here are links to Week 5, Week 4, Week 3, Week 2, and Week 1. Also, let’s take a walk down memory lane to remind you what this space used to look like.

This little powder room is just off our front entrance so this update was much needed as it’s one of the first sights you see when you enter our home. Did you just die of boredom? Or maybe just doze off for a quick nap? Just me? Well…this new view is giving me all those good feeling feels.

One of my goals for this house when it comes to design choices is to just go for it! Every wall (and ceiling) was beige when we moved in and so I am doing my best to inject some personality into this place of ours.

The room all started with when I found this wallpaper from Milton & King. Everything else was planned with this paper in mind. I wanted to keep the art simple and opted for a single statement piece with a map from Mapiful. It was so fun to customize this baby with a simple black and white map of the city in which we live. It feels like a special touch!

I’ve always loved this sink and think that it gives the room a funky, retro vibe. I’m so happy to have finally found a place to use it!

I wanted to keep the lighting modern and simple and I think this light from Modern Komfort works perfectly for this small space.

I’m so excited to have a new powder room for our guests to enjoy as we will have a house full of family while we host Christmas this year. I owe my boo a BIG thank you for all his hard work and for not running away when I said, “I found some ostrich wallpaper that I wanna use in the bathroom.” Also, a big thank you to Phil, my dad, and my sister and her husband for donating their time to help me out as well!  Welllll…what do you think? I hope you love it as much as I do! And be sure to check out all of the other reveals! I did a little snooping around today and have already found some amazing transformations!