One Room Challenge – Modern Mountain Kitchen and Family Room – Week Five

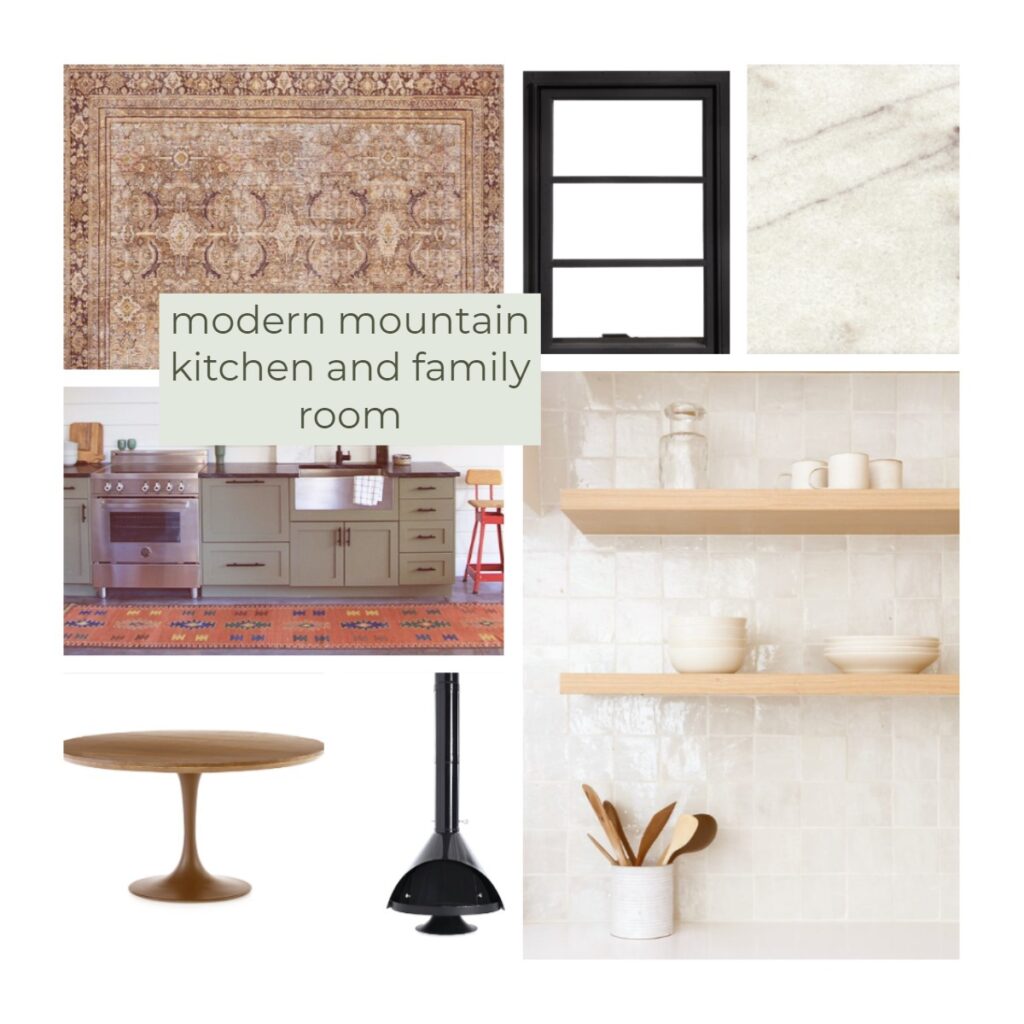
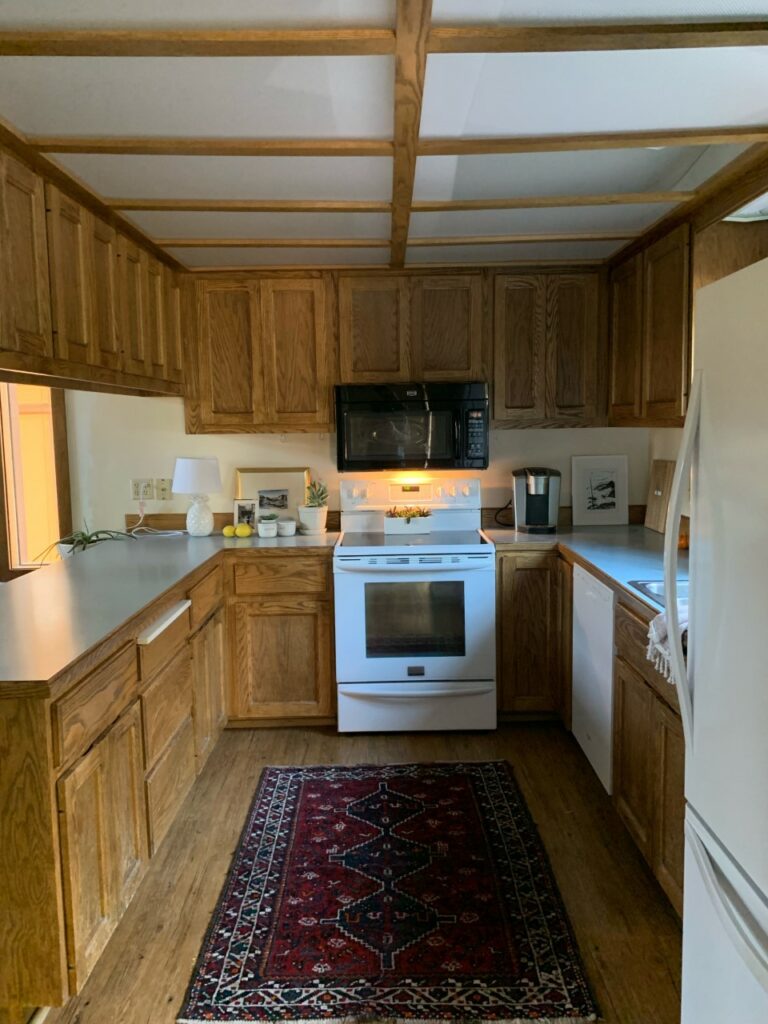
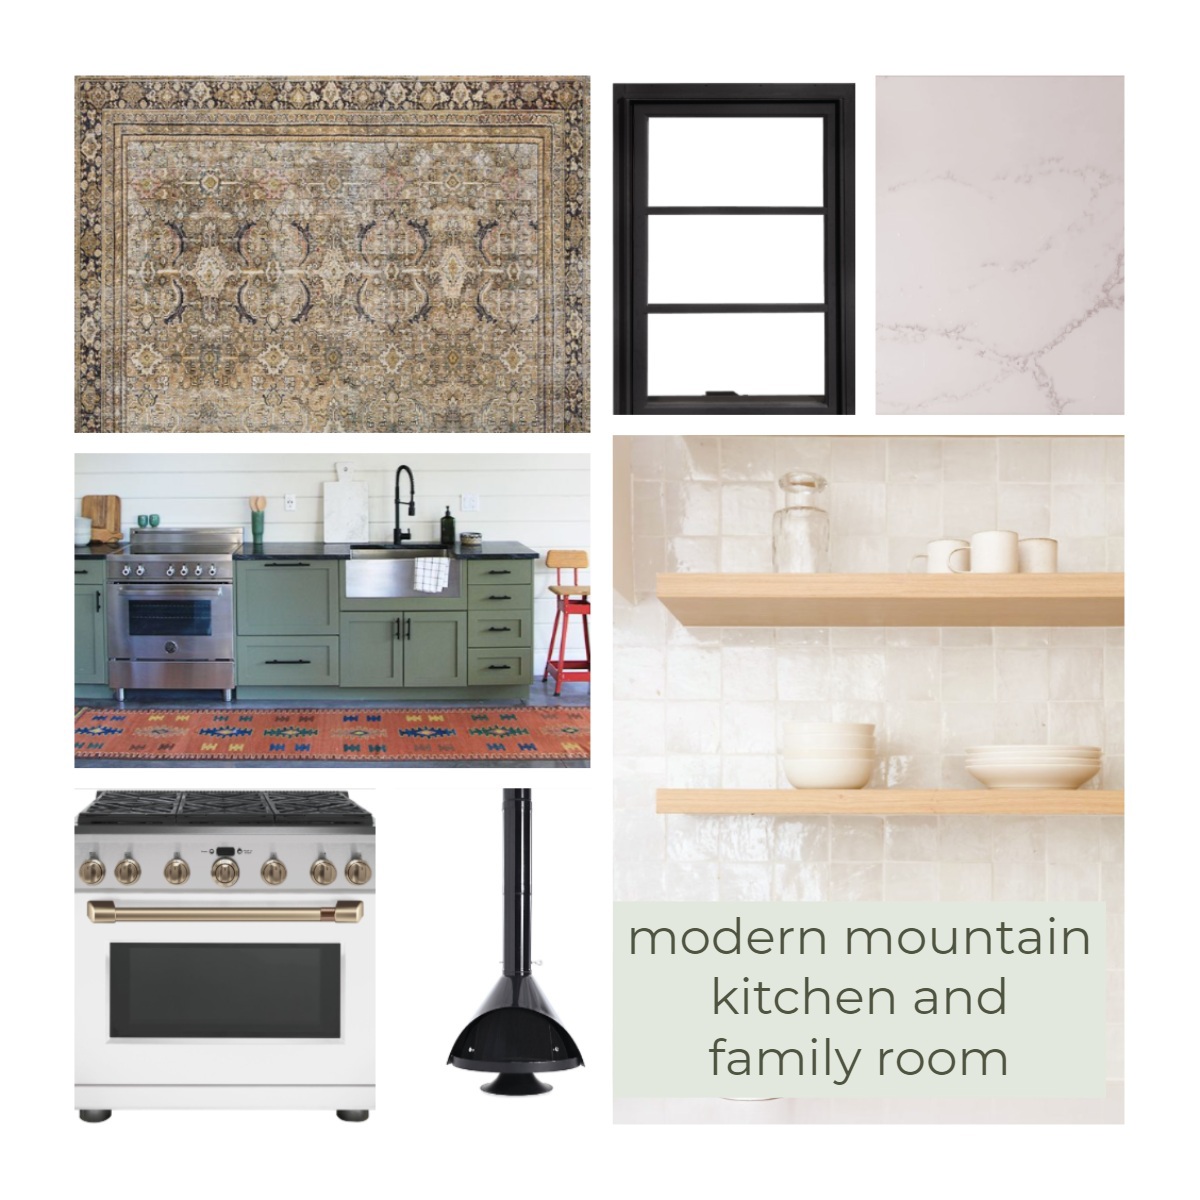
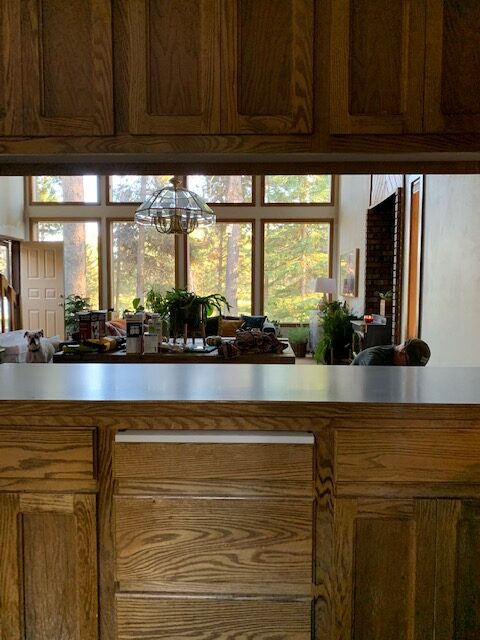
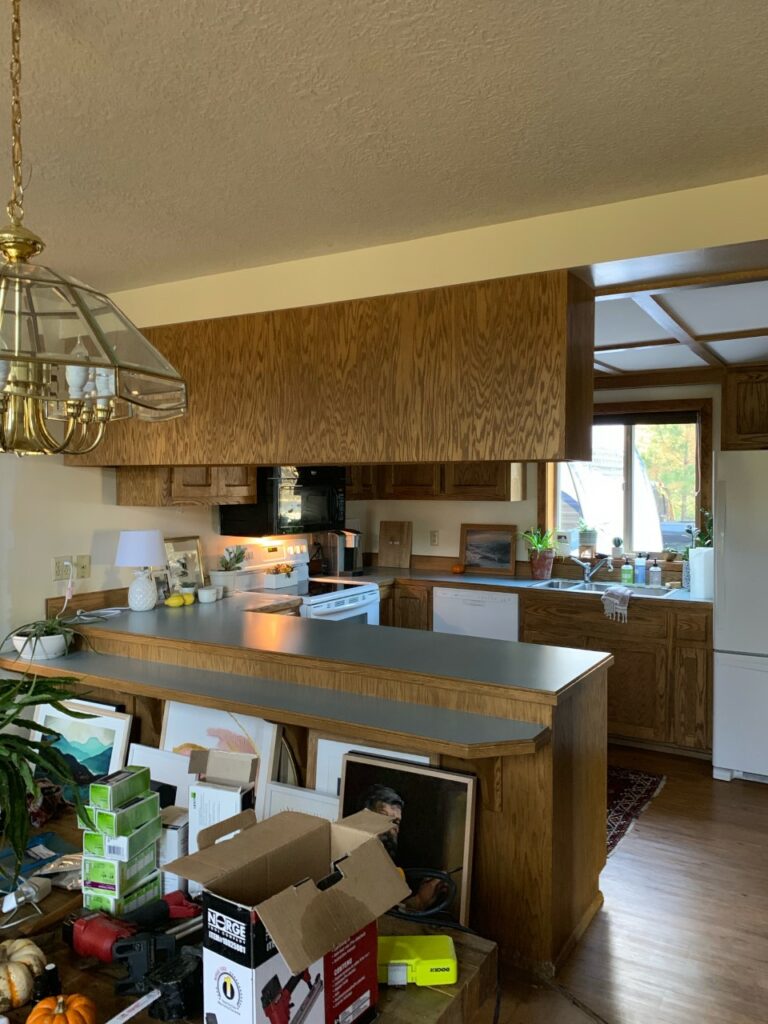
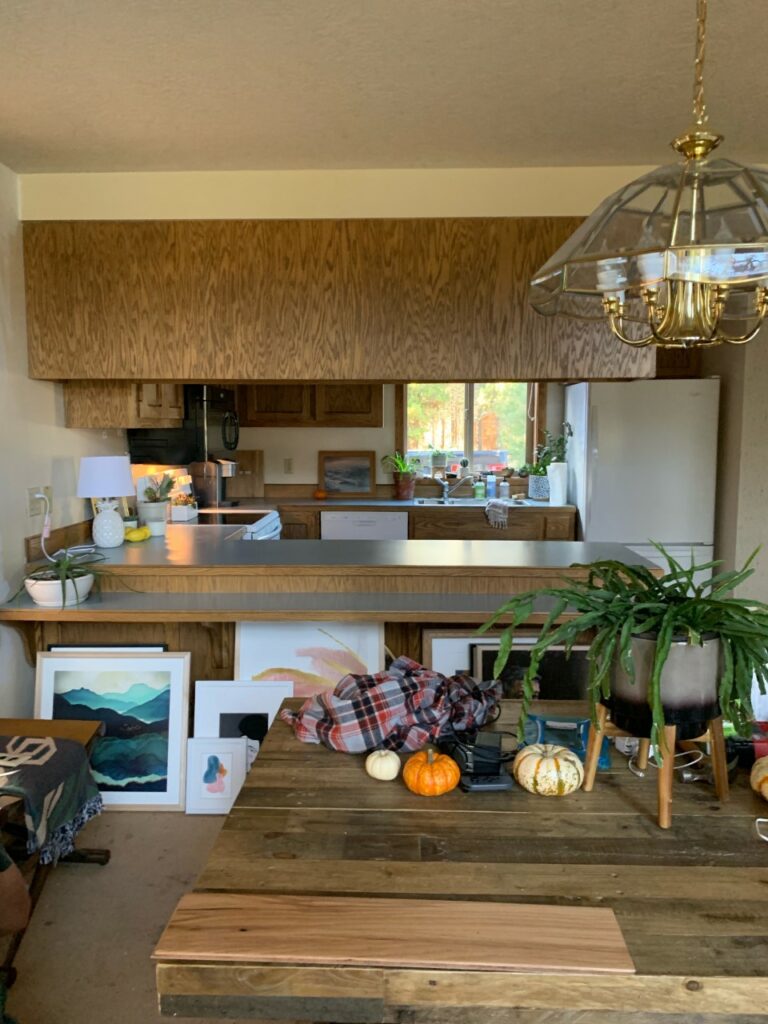
Oh my gosh it’s week five and I can’t believe it! How do we only have one week left until the big reveal? Well, whether I like it or not, we have one week left and I’m gonna finish this dang space up even if it kills me! And it just might! I joke, I joke. For now, lets talk week five and what has been going on during this fuller than full week. But just in case anyone is new here, we are just one week away from finishing our One Room Challenge, a six week challenge where you renovate/re-imagine a space from top to bottom! I was very ambitious this round and committed to a very big, kitchen and family room overhaul. Here’s a visual of the space that I’m planning, to help you picture what this crazy lady is picturing in her head.

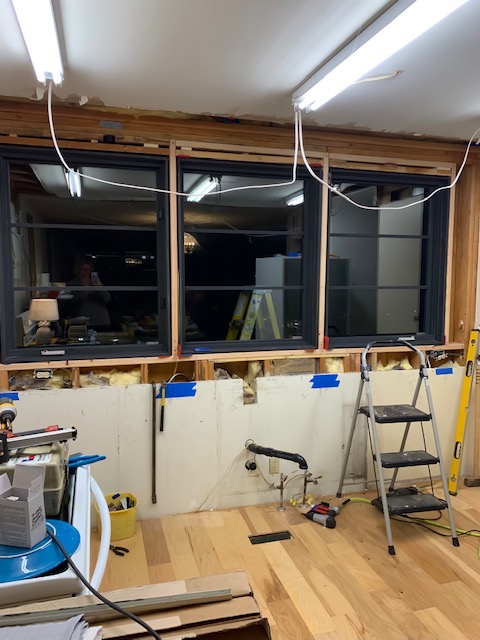
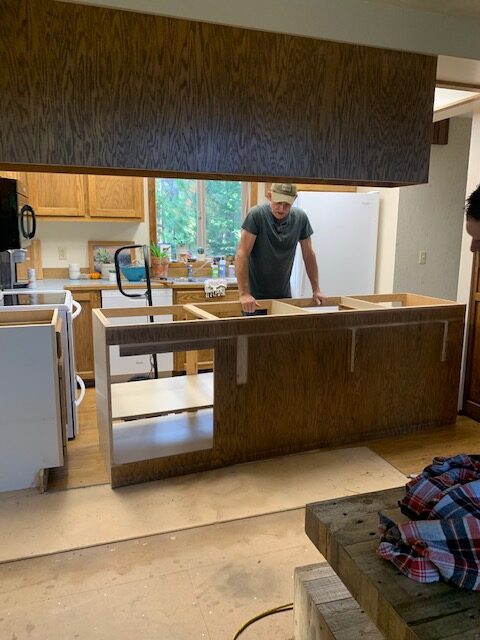
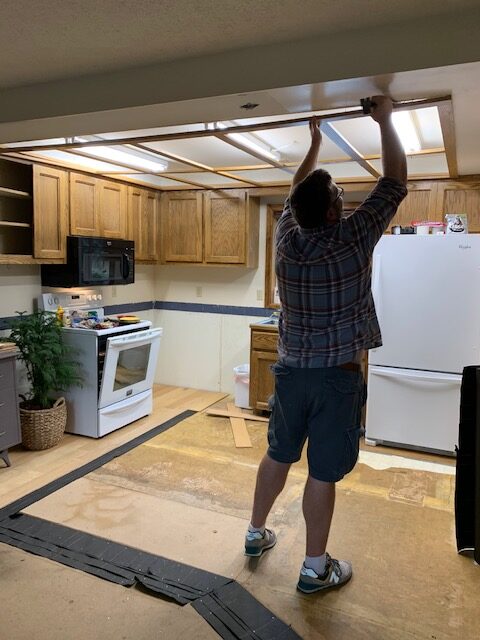
A few big things happened this week and LOTS of little things too! The kitchen cabinets are finally installed, thanks to Jennifer and Chris at Nelson Tile & Stone, who came and walked us through the install process when we were struggling. We were supposed to have our cabinets installed and ready to measure for counter tops when they arrived. But since we have been running behind schedule, and instead of leaving us high and dry (like ANY other countertop place would have), they helped us get the cabinets installed and Jennifer even helped me tear out the old carpet on our stairs. Seriously!!! I mentioned in Insta stories the other day, but if you live in Central Oregon and are going to be remodeling a kitchen or bathroom, GO TO THEM! They are the best!

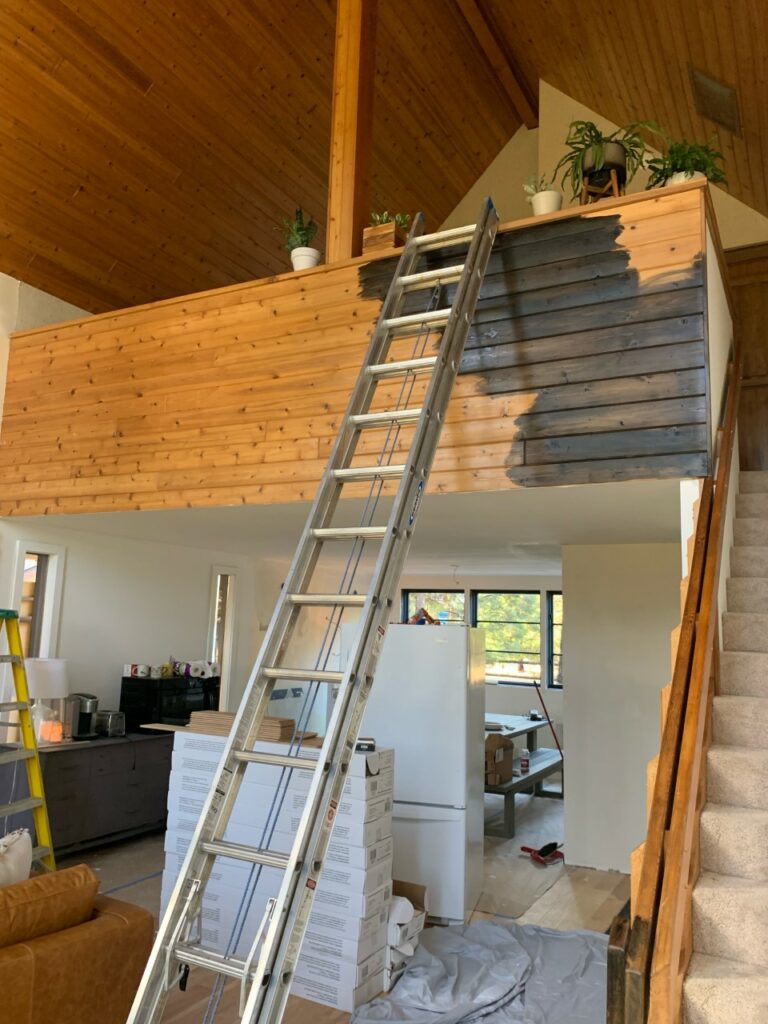
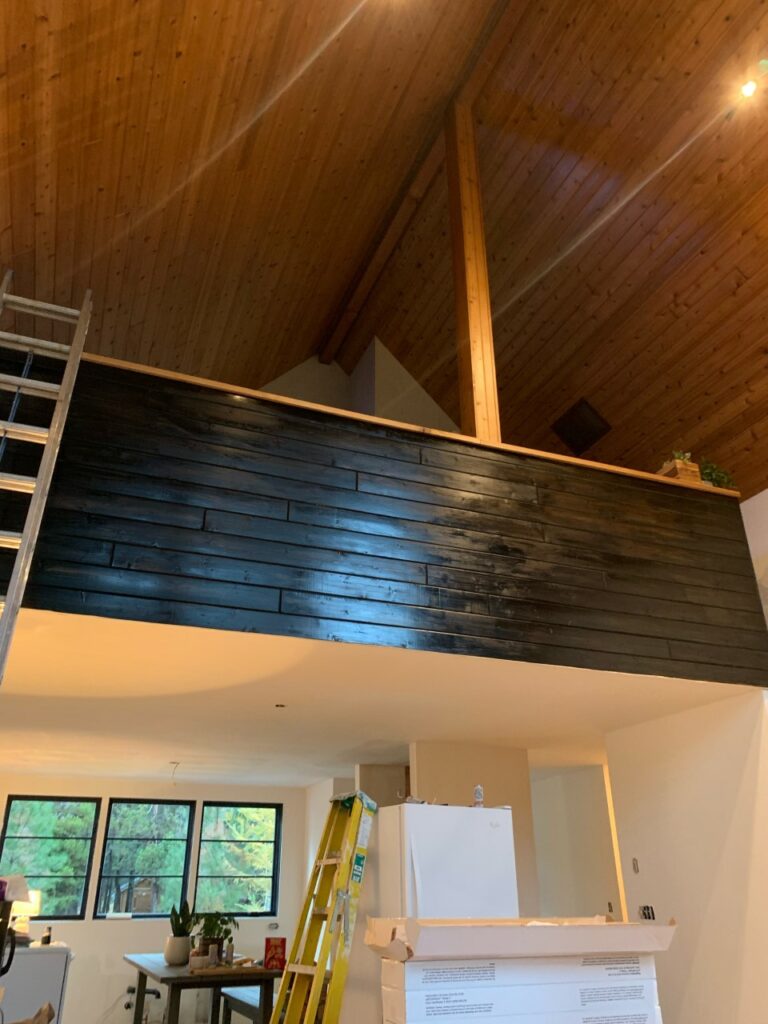
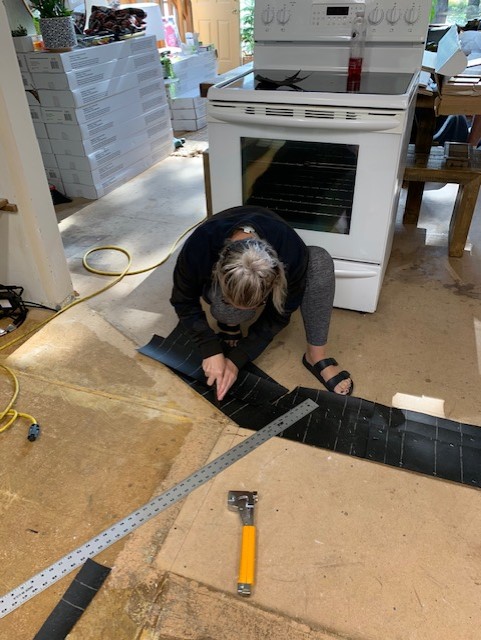
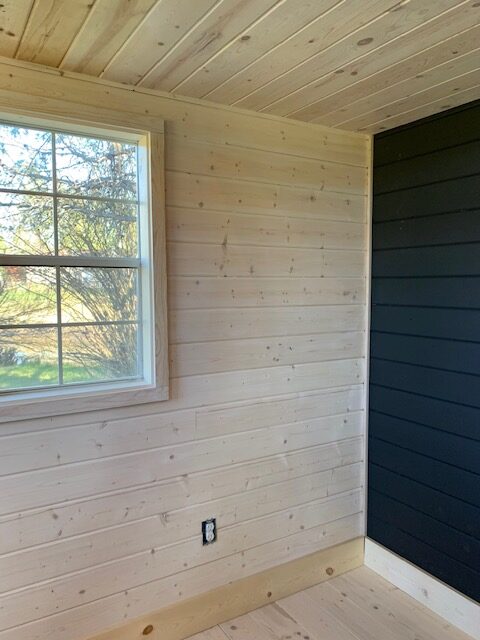
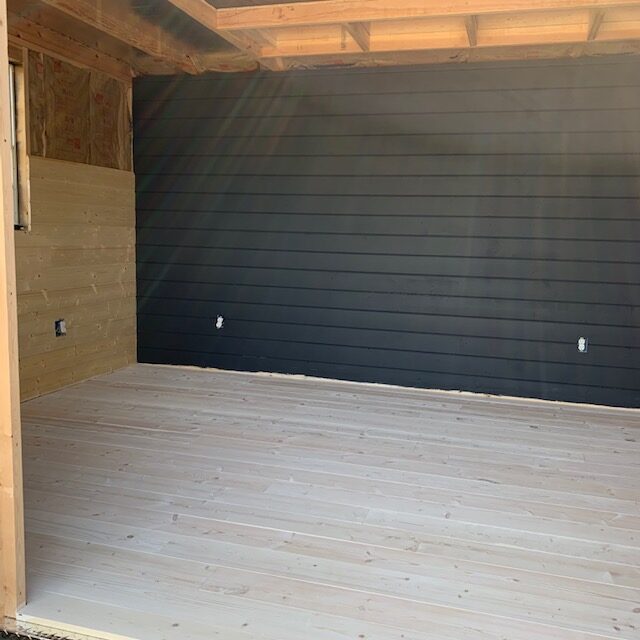
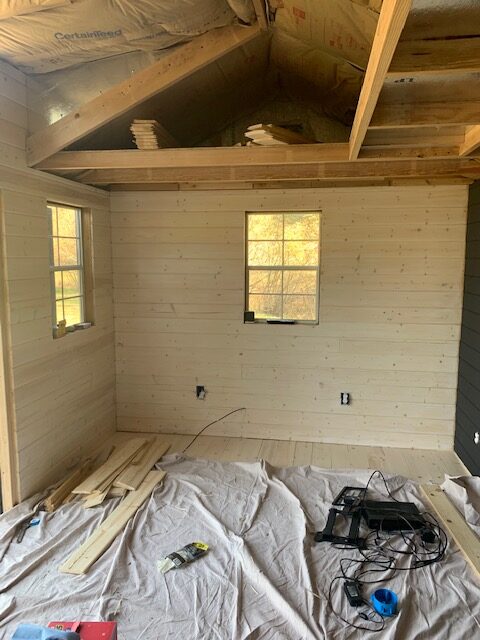
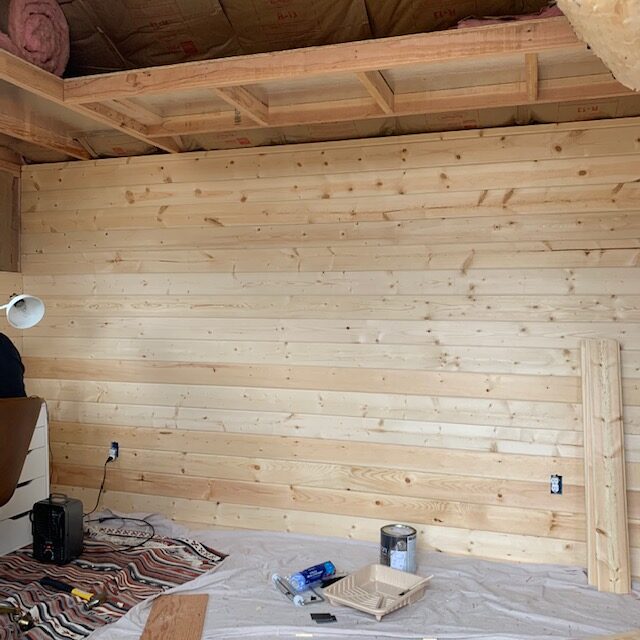
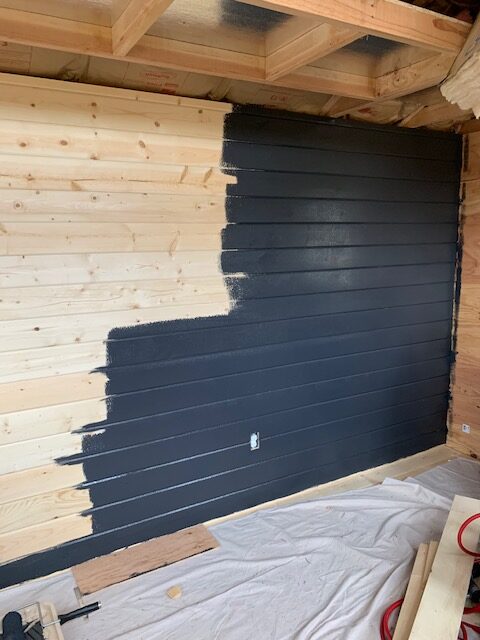
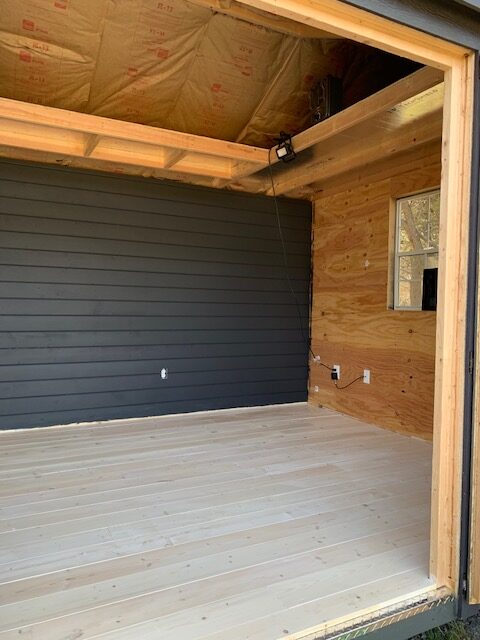
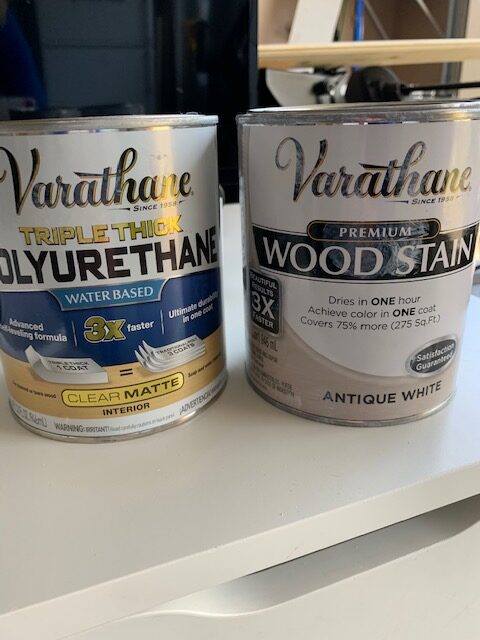
Also this week, I have been busy painting, painting, and painting. After our drywall was finished last week, all the fresh walls and ceilings needed paint. And my black staining project from last week didn’t come out how I had hoped, so I decided to paint it. The stain was shiny in some spots and matte in others and I was just not feeling it. But now it has a fresh coat of black paint and I’m loving it!

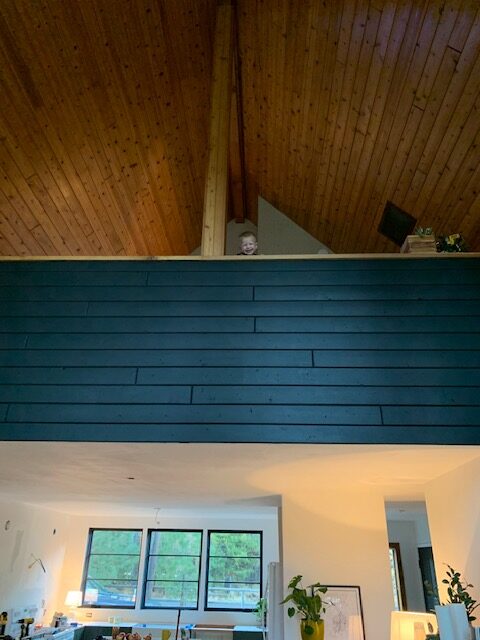
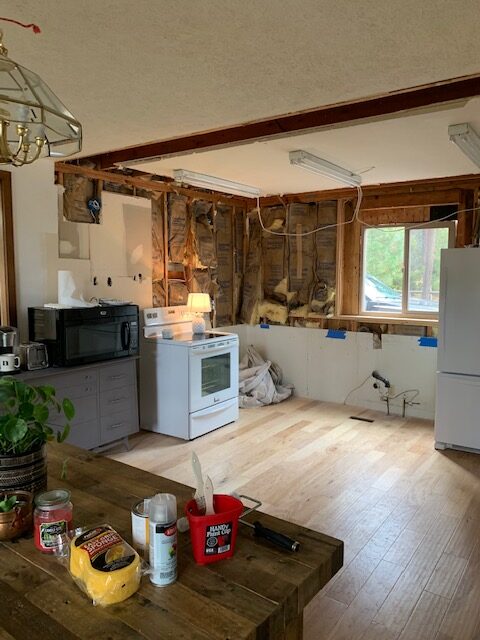
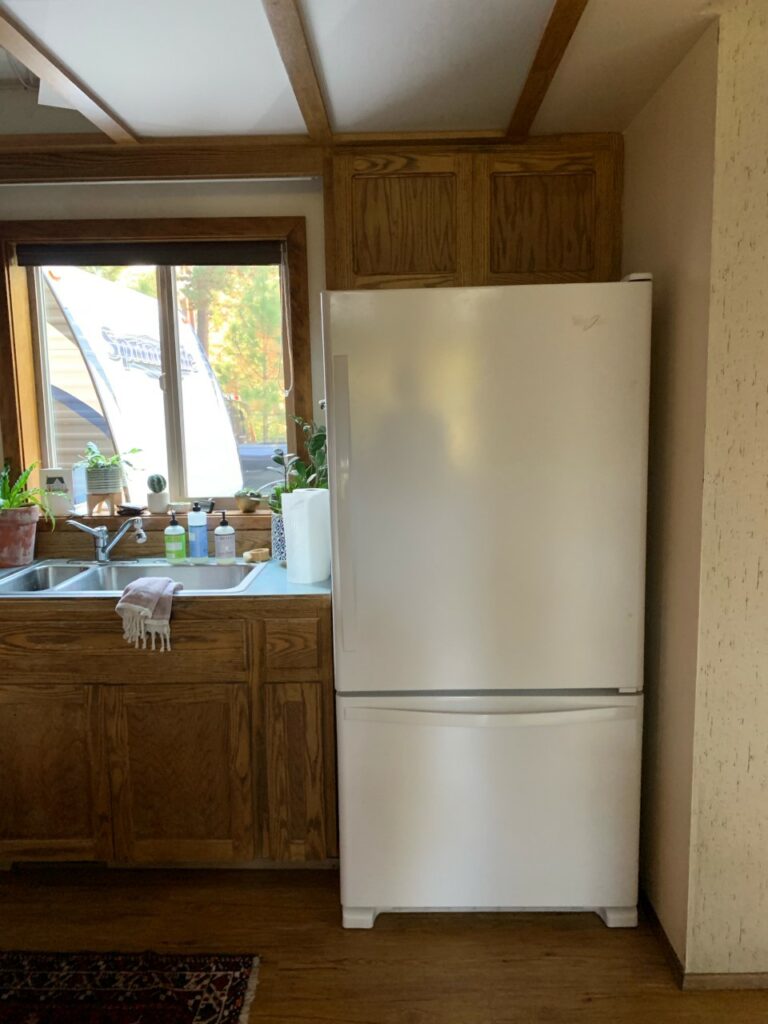
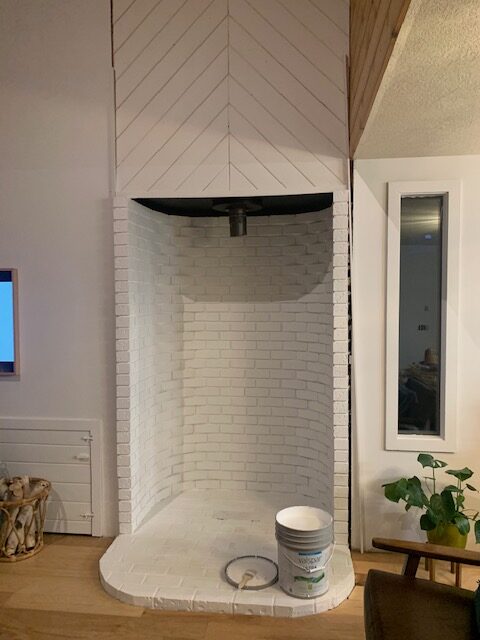
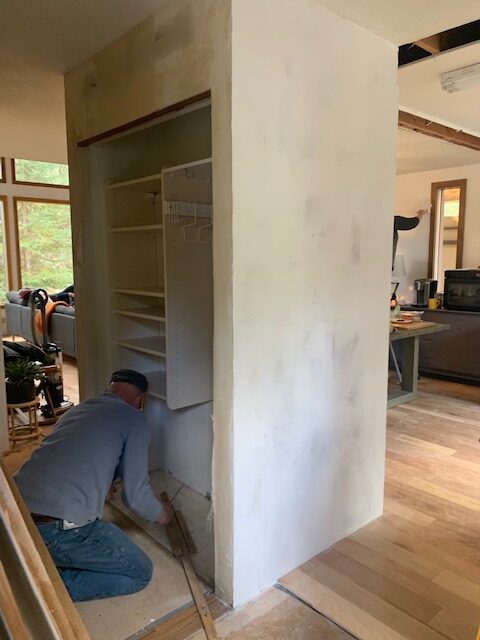
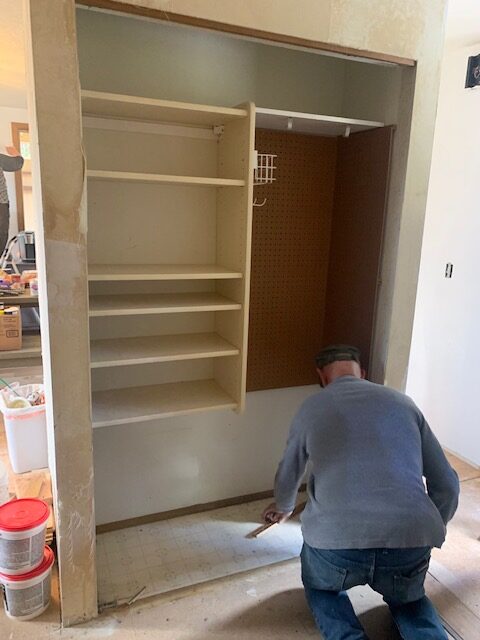
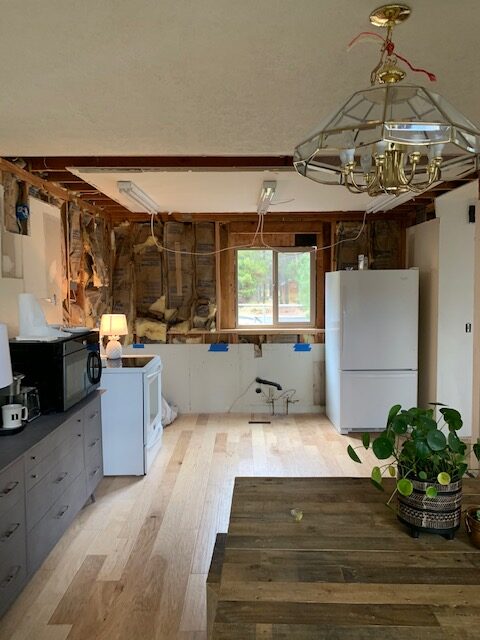
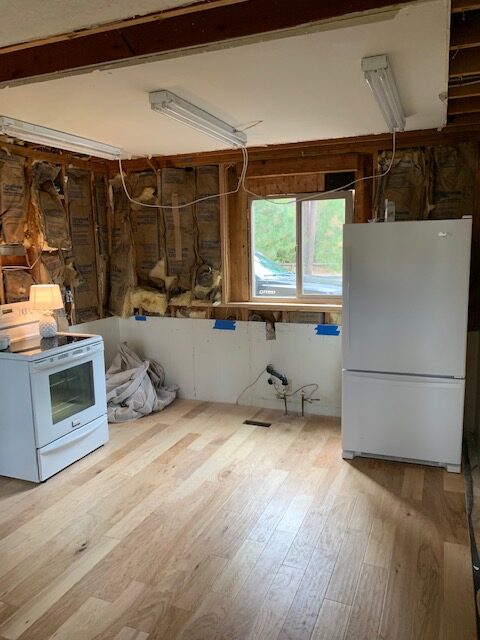
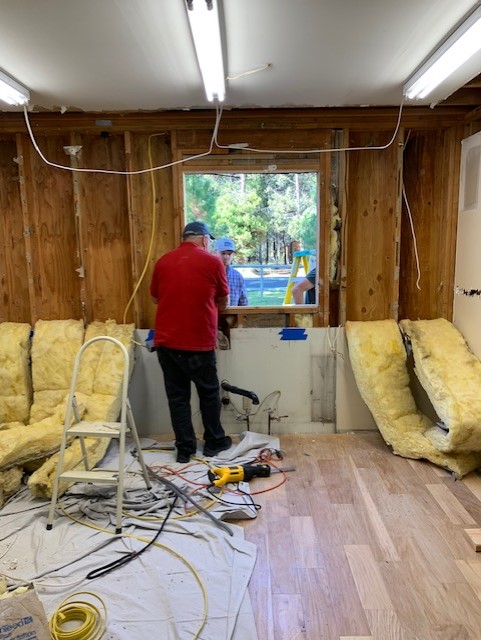
That cute face gets me every time I see that pic. And check out the fireplace progress! Here’s what it looked like when we moved in.

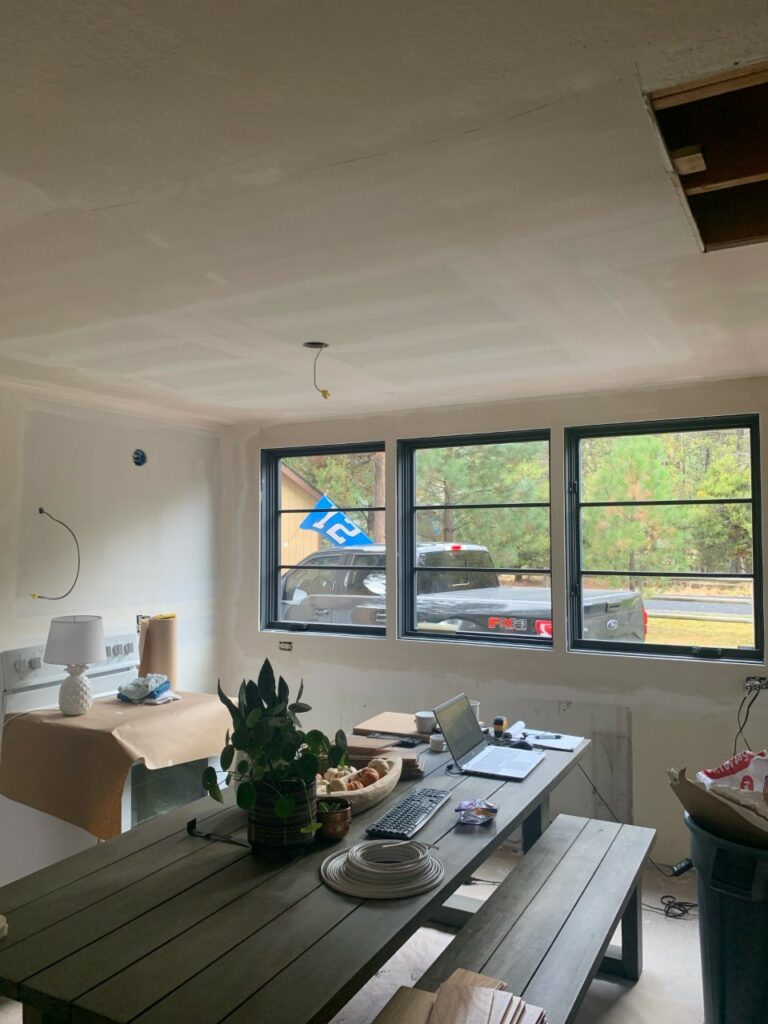
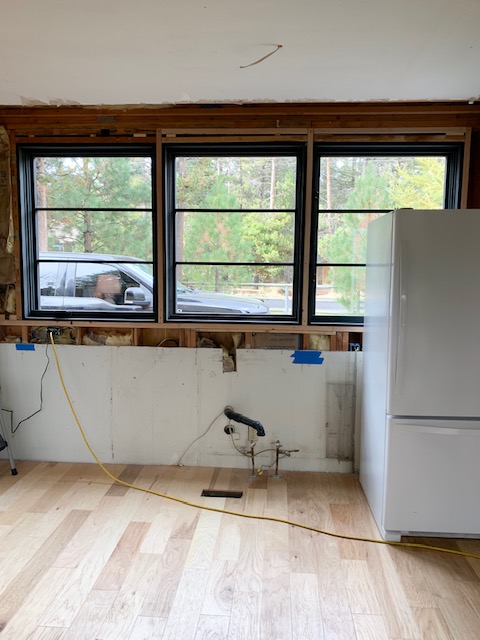
And now…after the paneling was replaced with fresh dry wall and everything was coated with bright, white paint.

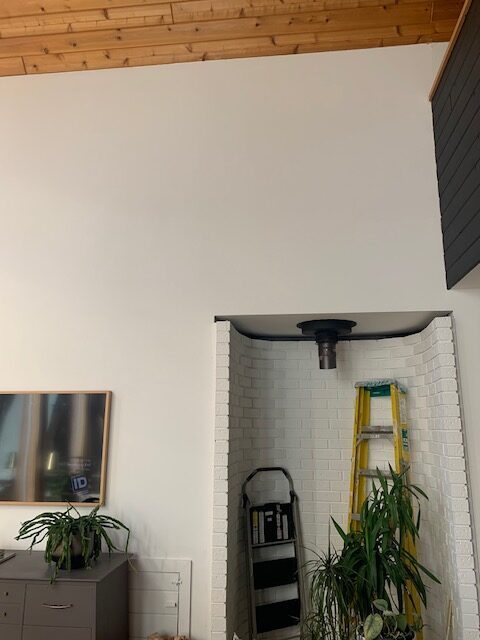
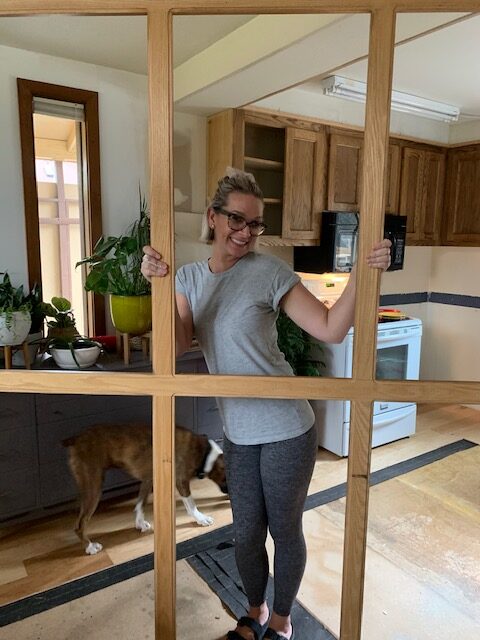
Now, I just have to tile the hearth with those cute cement tiles from Zia Tile, and install our new fireplace. Cross your fingers that it shows up in time as it’s shipping out of California, and we have been warned that everything is running way behind schedule due to all the fires that have been burning there.

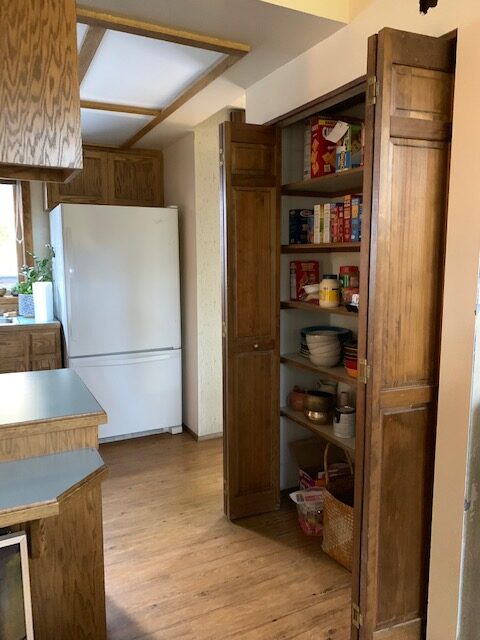
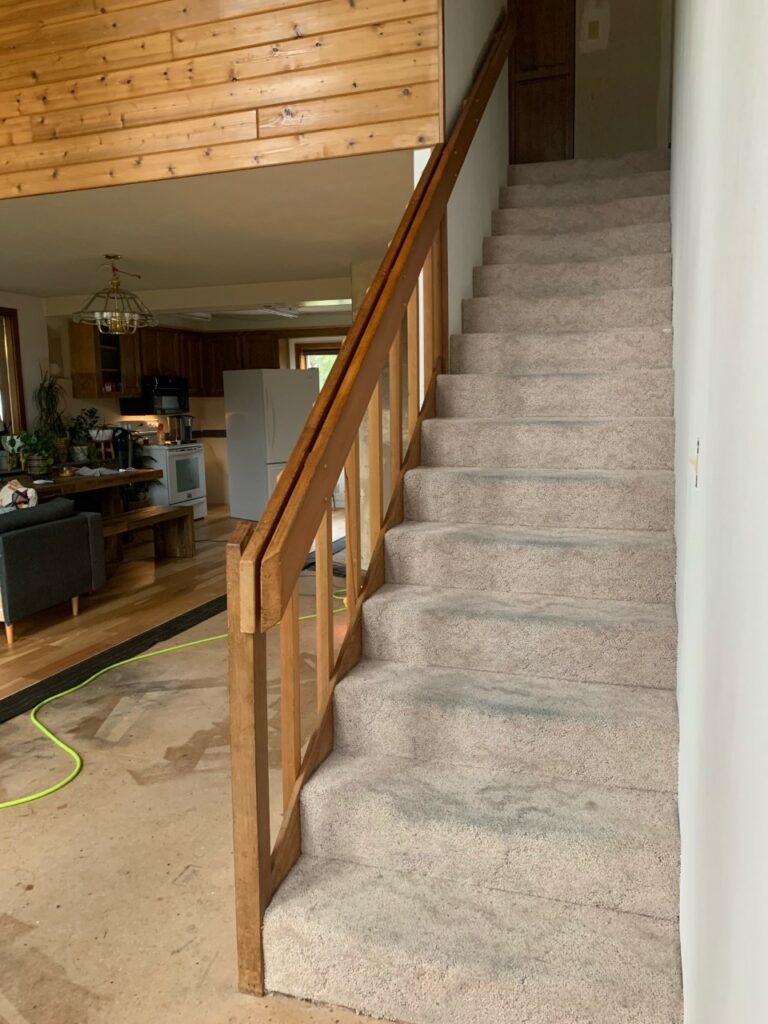
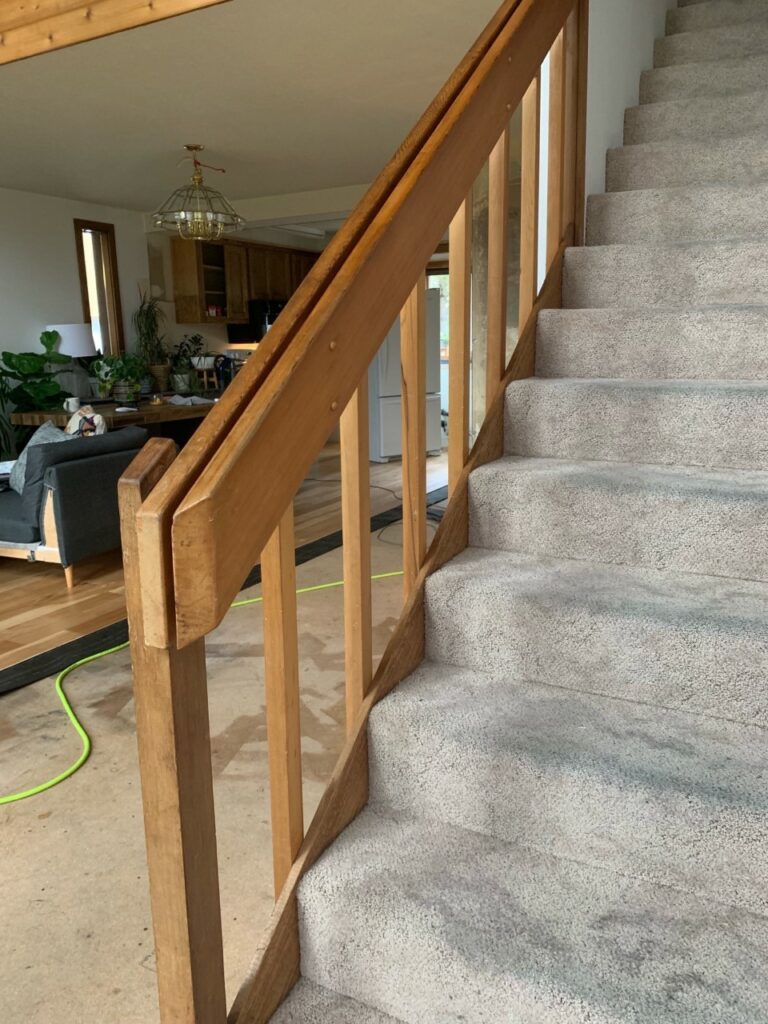
Another fun project that we have been working on this week was updating our scary stairs….seriously this carpet was keeping me up at night. SO BAD! LJ Smith offered to help us do just that, and I am very grateful! Here’s what they looked like before we started.

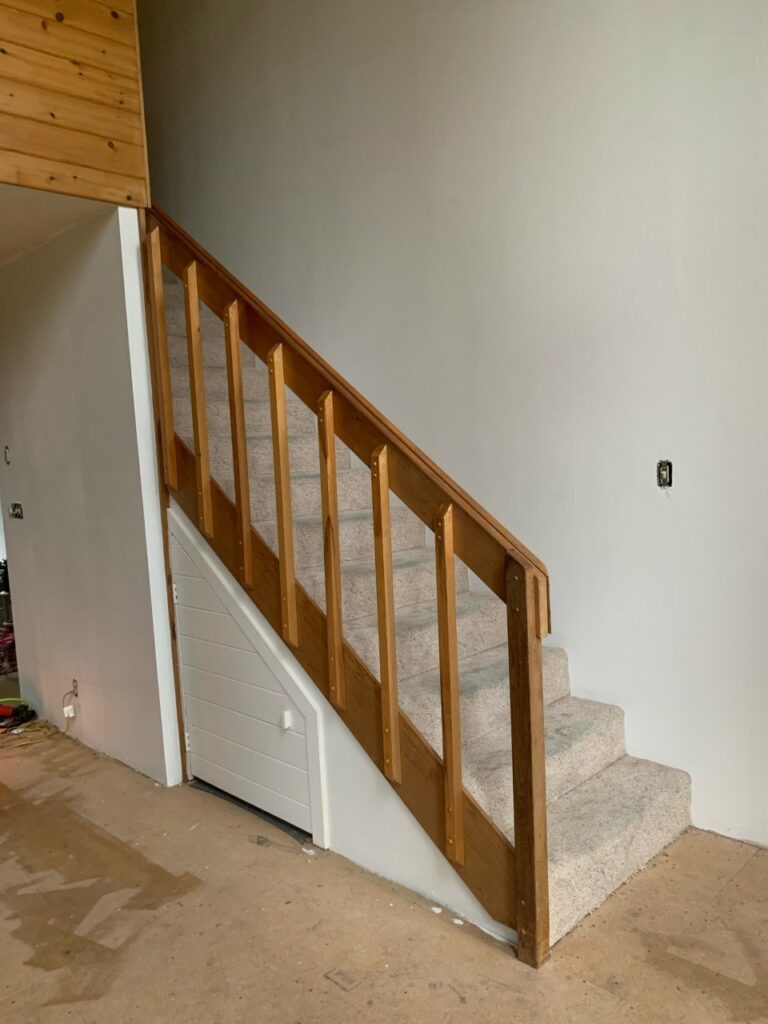
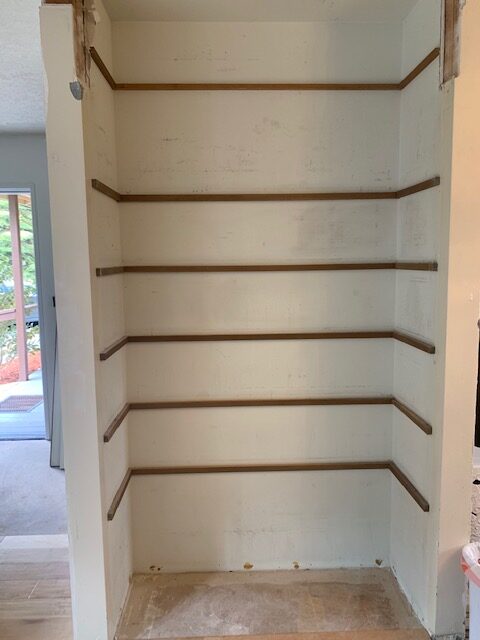
And here’s how we look after removing the old carpet and stair railing. Look at those gorgeous hickory treads and risers!

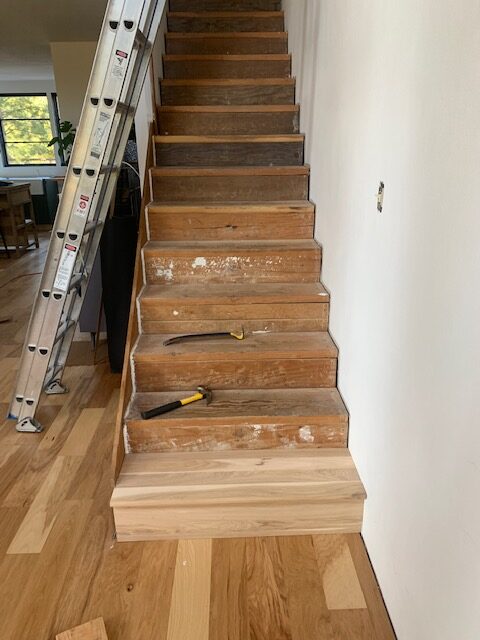
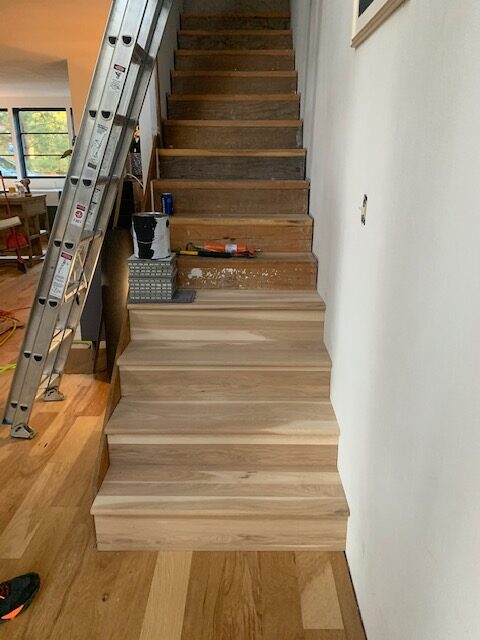
We are almost finished with the treads and risers and are set to begin on the railing portion of the project this evening when the hubs is finished with work for the day!  It’s going to make such a big impact on the entire space!

And lastly, instead of writing a very LONG to-do list for the next week, I will just touch on a few of the big items left to take care of.

  • countertops arrive on friday morning
  • tile fireplace hearth
  • tile backsplash in kitchen
  • install appliances
  • open shelving install
  • there are many more but if I keep listing them, then I’m afraid I might have a cardiac episode of sorts, and then I’ll be in the hospital instead of finishing up this project. HA!

Ok….that’s it for now! Cross your fingers for me and send me all the energetic, caffeinated and positive thoughts! XOXO

Ps…don’t forget to check in with the other 19 designers to see what they’ve been up to this week! I linked them below for ya!

At Charlotte’s House | Design Addict Mom | Erika Ward Interiors | Erin Kestenbaum | Girl & Grey

Gray Malin | Hommeboys | I Spy DIY | Jewel Marlowe | The Learner Observer | Making it Lovely

 Nicole White Designs | Old Brand New | Oscar Bravo Home | Place of My Taste | The Rath Project

Room for Tuesday | SG Style | Undecorated Home | Veronica Solomon | Media BH&G | TM by ORC

One Room Challenge – Modern Mountain Kitchen and Family Room – Week Four

Hi friends! Welcome to week four of the One Room Challenge. This week we’ve been all over the place, and I mean that it in a very literal way. One day I’m painting a wall, the next I’m tiling and the next, I’m off to hunt down slabs of wood for our shelving. I’m all over the place, but It’s finally feeling so bright and fresh in here, and I’m loving it. For weeks, all we did was tear this place apart so it’s nice to see it finally coming back together and starting (just barely) to shine! As always, lets have a look at the vision for the space.

First up, we made the decision last week to hire out our drywall work out, and I’m quite sure that is one of the best decisions I’ve ever made! Jordan from Summit Drywall of Bend (message me if you would like his contact info. I can’t recommend him enough!) came and transformed this shell of a space into a real house complete with beautifully textured walls and ceilings. He finished everything in just a few days which would have taken Nate and I at least a week to complete and I KNOW our work wouldn’t have the professional look that Jordan delivered.

Before Jordan came

After Jordan worked his magic

Another project that I tackled this week was staining the wood on the half wall that surrounds the loft. It was the same knotty pine that is on the ceiling, and because there is so much of it between the two spaces, I knew this loft wall needed a face lift. My mom suggested that I paint it black and after talking it over in Insta stories, I decided that staining it black would be a better option. It would show the wood grain while masking some of those orange tones. Win Win! I couldn’t be happier with how this one came out!

The other major thing that happened this week was we road tripped up to Sumner, WA to pick up our kitchen cabinets! After going over delivery options with the cabinet company, we discovered that we could have our cabinets 10 to 14 days sooner if we picked them up, vs. having them shipped to our door. So off we went! It was a fun trip and felt so good to get out of the house for a couple of days because it’s been nothing but craziness since we started our big reno, so this mini break was a welcome one. However, we drove into crazy rain (welcome to Oregon) which nearly put me into a catatonic state of panic and despair. After trying our best to cover them with tarps, on a whim, we decided to rent an enclosed u-haul, and spent an extra night at my sisters house in Portland. Actually, it turned out to be quite the fun evening while they calmed my rattled nerves and all the cousins camped out together in sleeping bags.

These next two weeks are going to be crazy as we get down to crunch time! Here’s a list so you can see how much is left –

  1. Cabinet install
  2. Countertop/sink install
  3. Tile – backsplash and fireplace hearth(i know i know…I STILL haven’t tiled the hearth)
  4. Fresh paint for all the newly textured walls and ceilings
  5. Stair demo and install new railing and treads/risers
  6. Open shelving install
  7. Range hood installed
  8. New kitchen appliances installation
  9. New lighting EVERYWHERE
  10. Paint window trim black on the skinny windows in dining room

Ok…here we go! There’s a lot to do, but I’m feeling good at the moment! I better get busy so I’ll be back next week for week five…how is it going so fast?!

Ps…Don’t forget to check out what’s been going this week with the other designers! Things are starting to come together!!!!

At Charlotte’s House | Design Addict Mom | Erika Ward Interiors | Erin Kestenbaum | Girl & Grey

Gray Malin | Hommeboys | I Spy DIY | Jewel Marlowe | The Learner Observer | Making it Lovely

 Nicole White Designs | Old Brand New | Oscar Bravo Home | Place of My Taste | The Rath Project

Room for Tuesday | SG Style | Undecorated Home | Veronica Solomon | Media BH&G | TM by ORC

One Room Challenge – Modern Mountain Kitchen and Family Room – Week Three

Howdy friends! Welcome to week three of the One Room Challenge and I can’t even believe it! Where is the time going? Let’s get into this, and I will fill you in on allll the happenings around these parts! There are LOTS! For anyone who’s new here, here is my vision for the space, and if you’d like to look back to week two or week one, feel free to clickity click!

Let’s start with windows! Sierra Pacific Windows provided me+ with three of the most glorious, modern, sleek, black windows and to say that I love them would be the understatement of the century. Here is what the above the sink situation looked like before SPW came to the rescue.

And now LOOK!!!!

CAN YOU EVEN?! Guys…I love these windows so much that I could write them a poem about my deep, intense and everlasting love. Just kidding…but only sorta. We spent an entire day installing these bad boys and lucked out big with a Dad who was a commercial glazier for forty years. So he definitely knows his way around a window install. It was so exciting and scary all at the same time! It seems obvious when you think about it, but you have to cut giant holes in the side of your house, and that is NERVE WRACKING! I will write a blog post in the coming weeks to show you guys these beautiful windows up close and personal. Also, they have some pretty cool features!

  Another thing that we worked on this week was giving the fireplace a face lift. This is what the fireplace used to look like in all of its brown glory.

I decided right away that the brick was calling for some bright white paint to freshen it up.

The old pellet stove that has been residing in this spot since 1993 was re-homed with a local family who have a rustic cabin on the river that they rent out to vacationers.  For the hearth, I am going to add a cool cement tile from Zia Tile that will add a pop of pattern. I have mentioned before that my goal is make this house feel alive again, and I think this funky tile addition will help do just that.

Finally, the last bit of demo was completed this weekend because this old pantry is going to house the new refrigerator with a cabinet surround.

The closet that you see on the backside of the pantry will be removed to make room for the refrigerator and additional cabinetry. I was hoping to keep the closet for obvious reasons, but lost that battle so new drywall will be added in its place. And speaking of sheet rock, we decided to hire out some of the drywall/texture work out and I am so excited! We could really use the help, as our list of to-do’s is looking looooong.

Tearing out these two closets brought us to our first major hiccup in our plans as well. We were sure that there wasn’t any plumbing/electrical inside these walls that would get in the way of the refrigerator placement, but we were wrong. SO WRONG. Allow me to introduce our upstairs shower drain pipe. Which is now going to be re-routed to make way for the refrigerator. Not a huge deal…but definitely an unwelcome sight.

Ok…so here’s what’s on the list for this next week.

  1. Finish flooring
  2. Tile hearth
  3. Finish painting walls and any touch ups that need some attention
  4. Paint the ceilings
  5. Rent scaffolding
  6. Install new lighting in family room/dining room

I can’t believe week three marks the half way point! OMGOSH there is so much to do! I’ll be back next week with all the dirty deets for week four and don’t forget to check out all of the other designers to see their progress! Until next week! XOXO

At Charlotte’s House | Design Addict Mom | Erika Ward Interiors | Erin Kestenbaum | Girl & Grey

Gray Malin | Hommeboys | I Spy DIY | Jewel Marlowe | The Learner Observer | Making it Lovely

 Nicole White Designs | Old Brand New | Oscar Bravo Home | Place of My Taste | The Rath Project

Room for Tuesday | SG Style | Undecorated Home | Veronica Solomon Media BH&G | TM by ORC


One Room Challenge – Modern Mountain Kitchen and Family Room – Week Two

Well hellllllllooooo week two! Things have been moving right along over here with this One Room Challenge and I am so excited to finally be able to catch you guys up on all the good progress we have been making! Last week, I mentioned that we have been busy planning and working on this space for the last few months but couldn’t fill you in on all the details in an effort to keep the project documented for you all in a way that makes sense for the timeline. As always, here’s a look back at my vision for the space.

Every time I look at this moodboard…I get butterflies in my stomach. Seriously so excited to see this project come together! But for now, let’s focus on Week Two. The name of the game for this week was all about demo! Here is what the kitchen looked like last week.

And here’s how we look today!

You can see we have been busy tearing this house apart! But, we can’t put it back together until we have a blank slate! One thing to note as well, a lot of things are happening here simultaneously. You might notice that we have brand new wood floors down here that my saint of a husband has been laying during every spare moment he has. The kitchen was totally rewired this weekend to accommodate an entirely new lighting plan. All the walls have been getting fresh coats of white paint. Which was the first time I have ever painted any room white, but this house is screaming for light, bright and fresh. So, I listened to my house and happily hopped on the white band wagon. And lastly, the kitchen window is just propped up there in its original spot, but is being replaced this week after the new windows arrive. Told ya we have lots of stuff going on here at once!

Here are some more shots of us from the demo during the last few weekends.

Thought I would also add this one of my sister because it’s such a cute one.

Being kitchenless hasn’t been as bad as I thought it would be. Dinners have become pretty simple around these parts, and I’m not the primary cook in our house so it doesn’t bother me one bit. Think lots of cereal and frozen pizzas! We convinced our kids that living without a kitchen is a lot like camping and they love to camp, so they are thinking that this whole thing is rather exciting! Plus, we will have a new kitchen to enjoy when this is all over so I am keeping my head in the game and my eye on the prize!

What’s up next –

Finish floor installation

Touch up paint

Paint fireplace brick and tile hearth

Install new fireplace

CABINET INSTALL

Countertops/sink/faucet install

Tile

Range hood

Shelves

Lighting

Is it me or did it just get hot in here? Deep breaths and one thing at a time, right? Wish me luck this week and watch my Instagram stories for all the reno progress videos and pics. See ya next week!!! XOXO

AND BE SURE TO CHECK OUT ALL OF THE OTHER DESIGNERS THIS WEEK TO SEE WHAT THEY’RE UP TO!

At Charlotte’s House | Design Addict Mom | Erika Ward Interiors | Erin Kestenbaum | Girl & Grey

Gray Malin | Hommeboys | I Spy DIY | Jewel Marlowe | The Learner Observer | Making it Lovely

 Nicole White Designs | Old Brand New | Oscar Bravo Home | Place of My Taste | The Rath Project

Room for Tuesday | SG Style | Undecorated Home | Veronica Solomon Media BH&G | TM by ORC

One Room Challenge – Modern Mountain Kitchen and Family Room – Week One

OMG TODAY IS THE DAY! It’s the first day of the first week of the One Room Challenge! I’m back at it, but this time, as a Featured Designer (still pinching myself that my name is among the list of amazing designers) and I couldn’t be more excited about it! I have been planning this space for months now, and it’s been nearly impossible to keep all of this a secret from you guys! This is my third crack at the challenge, and if you’ve been following along for a while now then you might have seen my powder room transformation from Fall of 2018, or my shack turned office project from the Spring of 2019. If you don’t know what I’m talking about…then go and check them out! Now lets get down to biz. Here’s a visual of what I’m thinking!


1./2./3./4./5./6./7.

Many of you already know that the hubs and I sold our house over the summer and moved into a fixer upper. And when I say fixer upper…I mean it. For reals, guys. This new house of ours is in serious need of some love. When I was trying to decide which room I would be tackling for the ORC, I thought about doing a smaller project like a bathroom or a bedroom because it felt like a safer choice. But, my hubs gave me the pep talk of all pep talks and convinced me to “go big, or go home.” So, that’s been my motto as I’ve been planning and we are def going BIG with a complete kitchen remodel as well as the attached family room. Am I crazy? Have I lost it? Maybe. But I’ve had three cups of coffee and full of nervous energy so I’m gonna do my best to pull this thing off!

THE BEFORE

Here’s how the kitchen looked last month on move in day.

What do you guys think? Are you scared for me? You can see we have a lot of work ahead of us! The goal is to transform this sad space into a living/dining/and kitchen that we love. This house needs to be brought back to life again and I am up to the task! That’s all for now!

See ya next week!

Ps…don’t forget to check out the other fabulous featured designers! I’m just giddy about all the inspo that’s going to be floating around over the next six weeks!

At Charlotte’s House | Design Addict Mom | Erika Ward Interiors | Erin Kestenbaum | Girl & Grey

Gray Malin | Hommeboys | I Spy DIY | Jewel Marlowe | The Learner Observer | Making it Lovely

 Nicole White Designs | Old Brand New | Oscar Bravo Home | Place of My Taste | The Rath Project

Room for Tuesday | SG Style | Undecorated Home | Veronica Solomon Media BH&G | TM by ORC

One Room Challenge – Modern Rustic Office – The Reveal

Today is the day – it’s reveal day for the One Room Challenge! It feels like Christmas morning when you’re six and it’s snowing outside and you walk down the stairs to see the bike you’ve been wishing for with a big bow on it! Ok…back on track now, and I will try my hardest to keep from adding an ! at the end of every sentence.

And if you’re new here, here are links back to Week One, Week Two, Week Three, Week Four, and Week Five, so you can catch up on all the details throughout the entire process.

I am dyyyyyying to show you all the after’s but first, let’s take a walk down memory lane and have a look at where we started. Here is the mood board from which I planned the space. Also, check out these before shots…it was so bad.

I know what you’re thinking…it was UGLY. Well, here is how we are looking now!

And now for the good stuff…the inside…

Whew….I’m so in love with this cutie little office now, that I’m thinking about kicking my hubs out of there and keeping this space for myself…jk. I’m loving the textures and all of the wood makes it feel homey and cozy. We’ve even had family stake claim on the space for their next overnight visit, so that just gives me all the warm fuzzies. Remember at the very beginning, I said that my goal was to create a comfortable space where you actually wanted to hang and spend time. Mission accomplished.

The biggest task for this project was that we were starting from nothing. There were no walls, floors, or ceilings. So that’s what we focused on for the majority of the six weeks. Everything was covered in pine. Tongue and groove for the walls and ceilings and pine 1×6’s for the floors. Then, everything was stained antique white by varathane to give it that Scandi look and keep those yellow and orange tones at a minimum.

The dark accent wall was painted Black Jack by Benjamin Moore. A color that I haven’t used before, but will definitely use again. I loved it so much that I ended up using it on the exterior, and gave the outside a new look. I have been playing around with the idea of painting our house a dark color like this, so it was fun to experiment. I also love how the trim is the same color as the siding.

When it was time to furniture shop, I knew I wanted a leather sofa for its durability since my hubs will be using this space the most. Anyone else have a husband that spills everything? No….just me?? I selected this sofa from American Leather and it is a treat for the senses. It is buttery soft and now when you walk into the office, you are hit with the most incredible leather smell. It is definitely the most beautiful and luxe piece of furniture I’ve ever owned. It is a beauty!

The chandelier was the starting point for the whole space because I knew I wanted a modern chandelier to juxtapose the firewood that would be lining the loft space. The Mitzi collection from Hudson Valley Lighting had so many good contenders but as soon as I saw the Astrid Chandelier, I knew she was THE ONE. This chandy is the centerpiece for the whole space and that black and brass combo has my heart forever.

The rug is from the Skye collection from Loloi Rugs. It is gorgeous and goes with everything…seriously, everything. I love the golds and greens but my favorite part about this rug was that it allowed me to sneak a little bit of pink into this manly office space. My hubs is color blind and thinks it’s more of a red. It’s our little secret….mmmmkay?

The art above the sofa is from Minted. Minted has such an amazing selection of art and really has something for everyone. My prints arrived framed and ready to hang…couldn’t be easier. And if you need yet another reason to love Minted, they support independent artists.

The gray chair and ottoman are both from Homepop and really help the space to feel balanced and complete. Plus, the ottoman doubles as a storage spot, and I love pieces that serve dual purposes (especially for small spaces).

So that’s about it! What do you guys think? Did you think I was nuts when I showed you this space six weeks ago?

I can’t believe we made it! We worked on this almost every free moment we had for the last six weeks which included one snowy weekend and several rainy weekends, but we are done and I’m feeling pretty proud of us.

Also, thank you so much to all of you who sent messages of encouragement, cheered us on, and followed along throughout this process. Your kindness and support really means the world to me. A big hug and kiss goes out to my dad who came to our house THREE weekends in a row to help…love you, Dad. Finally, an ENORMOUS thank you goes out to all of the sponsors who put their faith in me and this project. We couldn’t have done it without you…really! XOXO


One Room Challenge – Modern Rustic Office – Week Five

GUYS! We have one week left to finish this office space! Cross your fingers for me, say a prayer, wish me luck, or anything else you can think of because we have a lot of details to check off the ol’to-do list. Like always, if you’re new here, I am participating in the One Room Challenge, a biannual, six week challenge in which you document the process of re-imagining a space from top to bottom! If you would like to catch up, here are links to week one, week two, week three, and week four. And as just another quick refresher, here is the mood board from which I am using as a visual guide for the space.

So here we are in week five, and I am still talking about walls, floors, and ceilings. But, if you start without any of those, they become your focus. And we have been focusing on these three features throughout these last five weeks. I’m happy to finally report that we do in fact, have walls, floors and ceilings as of today! We are working on all the details now, trimming out the windows, baseboards and adding some corner trim.

If you’ve been following along in my instagram stories, then you know that I started out staining the floor and said I would stop there. My original plan was to leave the rest of the wood in its natural state. Well, since then, I have stained every piece of wood that has been installed. I just don’t want this knotty pine to darken and turn yellow over time so I’m hoping that this stain will do the trick. So far, I have stained the floor, three walls, and the entire ceiling. Staining a ceiling is no joke….hoping that this will be a job that I won’t be doing again any time soon.

Big things are happening on the exterior of this lil’ shed as well! I decided that I loved the color that I used on the accent wall so much that I bought more and painted the outside with the same color! Goodbye green and blue and hello to solid black! Have no fear though, I have some plans for some pops of color though.

Next time you all see this space, it’s going to look like a proper office! This is going to be the most fun week of them all because I finally get to make the space beautiful. My head is totally in the clouds thinking about furniture, lighting, art and accessories galore! What do you guys think? Think I can pull it off? I think I might surprise you! See you next week for the BIG reveal! XOXO

One Room Challenge – Modern Rustic Office – Week Four

When I woke up this morning, I somehow convinced myself that it was week five instead of week four and almost started hyperventilating. So, instead of feeling panicking about only having two weeks left, I’m feeling good about these last two weeks…even though we have LOTS left to do. For those of you who are new here, I signed up for the One Room Challenge, a biannual, six week challenge in which you document the process of re-imagining a space from top to bottom. It’s hosted by Better Homes and Gardens and is loads of fun! If you would like to catch up, here are links to week one, week two, and week three.

Here is the mood board that I put together to help me visualize the space better. Although, lots has been happening this week, and some tweaks have been made to the original plan. But, I think I’m going to keep those changes a secret until the big reveal. A girl needs to keep a surprise or two up her sleeve, ya know?

The biggest accomplishment this week is that we HAVE FOUR WALLS! Yes, four walls! And I decided to stain those walls. I wanted to get some of the yellow and orange tones out of the wood and hopefully, keep it from darkening into a big orange mess. Here is what the walls were looking like before the stain.

And after the stain…

It might be hard to tell from these photos, but IRL this wood is looking WAY whiter, and WAY brighter! I’m really happy that it matches the floors now so it doesn’t feel visually overwhelming with multiple wood tones all happening in a small space.

Ok…so now down to business. Here is the to-do list so we can finish this sucker on time!

TO-DO

  1. Ceiling finished
  2. Install baseboards
  3. Install lighting – interior/exterior
  4. Paint touching up – interior/exterior
  5. Window boxes
  6. Install blinds
  7. Furniture install and figure out layout
  8. Decide on a coffee table

These are the big items but there are a few other odds and ends that I need to figure out as well. Lots of little details left! So that’s it for now! Until next week! And as always, if you have any questions, leave them below! XOXO


One Room Challenge – Rustic Modern Office Space – Week Three

OK! Here we are again…week three is already upon us! If you’re new here, let me fill you in on what’s going on! I am totally redesigning an office space/outdoor shed for my husband, who works from home, as part of the One Room Challenge. If you would like to catch up in order, here’s a link to Week One and Week Two. Once again, here’s a looky at my vision or plan for the space.

So this week was all about paints and stains. I needed to make a choice for a treatment for the floors ( 1×6 pine boards) and I have been planning on a moody accent wall since we began envisioning the space. I needed a rich, dark color and after looking at 975,873,489 black(ish) paint swatches, I landed on Black Jack by Benjamin Moore. Here’s the wall for which the paint was intended.

The sofa that is going to be sitting against this wall is a butterscotch color and I’m so excited to see it just POP against this moody color. In fact, I just recieved word today that the sofa is shipping out in the next few days….someone pinch me!

I have painted lots of walls during the course of my diy adventures, but painting wood paneling is no joke. Getting the paint between the boards is a time sucker. Also, a tip that I thought I would share would be, that if you’re planning on painting paneling a dark color, paint the wall behind in a dark shade before you install the wood. This way, any cracks that are visible when you finish installing, are already dark in color. Mmmmmmkay??  Out of the three previous photos, the third one most accurately represents the color in real life. And of course, I went with a matte finish because I just can’t ever get enough of that velvety finish.

Next up was choosing the stain and polyurethane for the floors. I mentioned this in my last post but a very wise reader wrote and warned me that if I didn’t use some kind of stain, then the floors would eventually darken and yellow. A look that I am trying to avoid.

When I found this antique white by Varathane, I knew I had found what I was looking for. It gave the floors a very bright white look but didn’t cover any of the wood grain or knots.

I applied the first coat of polyurethane just this afternoon and am still undecided about how many coats I should do. I will probably do at least one more for good measure. It is pine which means it’s a very soft wood, so we need maximum protection.

Finally, I liked the color that I used on the accent wall inside so much, that I may just use it for the exterior too. I tested a spot and me likey…

But we’ll save that discussion for next week! See ya in a week! Oh…and if you have any questions for me….don’t be shy! Leave me a comment below! XO

One Room Challenge – Rustic Modern Office Space – Week Two

Hi guys! It’s week two already, and things are happening over here! Last week, I let you in on my exciting plans to completely revamp my husbands shack of an office as part of the One Room Challenge. And just a refresher, here’s a look at the mood board from which I’m using to plan the space.

1./2./3./4./5./6.

So this week was all about the floors and walls…as in, we needed both. When the shed arrived, it had just plywood for both so I was excited to get started and get some walls and floors down. For the floors, we went with pine 1×6 boards. Originally, I was just going to leave them as-is, and add a poly for a protective coat, but then a reader informed me (you guys are SO helpful…keep sending me all your tips) that if I went that route, the floors would darken over time leaving us with a 1950’s cabin vibe (a look that I love, actually), but not the Scandi look I am going for for this project. So…in order to keep these floors from darkening, I am going to use a white stain that I’m hoping will keep them light and bright. I considered a lime wash, but was discouraged when I started researching the process. Seems so complicated! For now, the plan is to stain with a transparent white stain and then lots of poly to protect and seal them.


For the walls, we are going to use the same tongue and groove pine planking that we used for our stair well project that we completed this winter. I’m a big fan of the texture that it brings to a space. Also, it lends itself to a more casual look and I’m all about casual, comfortable spaces.

Because the floors are going to be so bright and natural light isn’t an issue for this office space, I am thinking about painting the long wall (the one that doesn’t have a window) a deep, matte black. Originally, I was contemplating trying the shou sugi ban technique, where you actually singe and burn the wood for a dark and dramatic effect. But, since the paneling is already installed and I don’t want to burn the shed down, paint will have to do!

See how much lighter the paneling is (on the left) versus the old plywood (on the right)??? The plywood has a lot of orange and pink undertones that I am just not feeling. This project is really making me get creative because I LOVE a rustic look, but for the shed, if I go too rustic, then it starts to resemble that murder shack look that I am desperately trying to avoid. So balance is the key here, folks.

So that’s the skinny on our progress for our second week! Guys, I cannot wait to get to the pretty stuff…furniture, lighting, accessories….ya know, the fun part! Have any questions for me? Hit me up! Until next week!