Search results
38 results found.

diy'ing our way through house number two
38 results found.
Today is an exciting day around our house! Our kitchenette in the guest house is finally complete and I am so dang excited about how it came out that I could shout it from the roof tops! I think we should just get right into it, because I just can’t wait to show you guys! Sorry in advance for the amount of !!!!! that you will see in this post…please forgive me in advance.
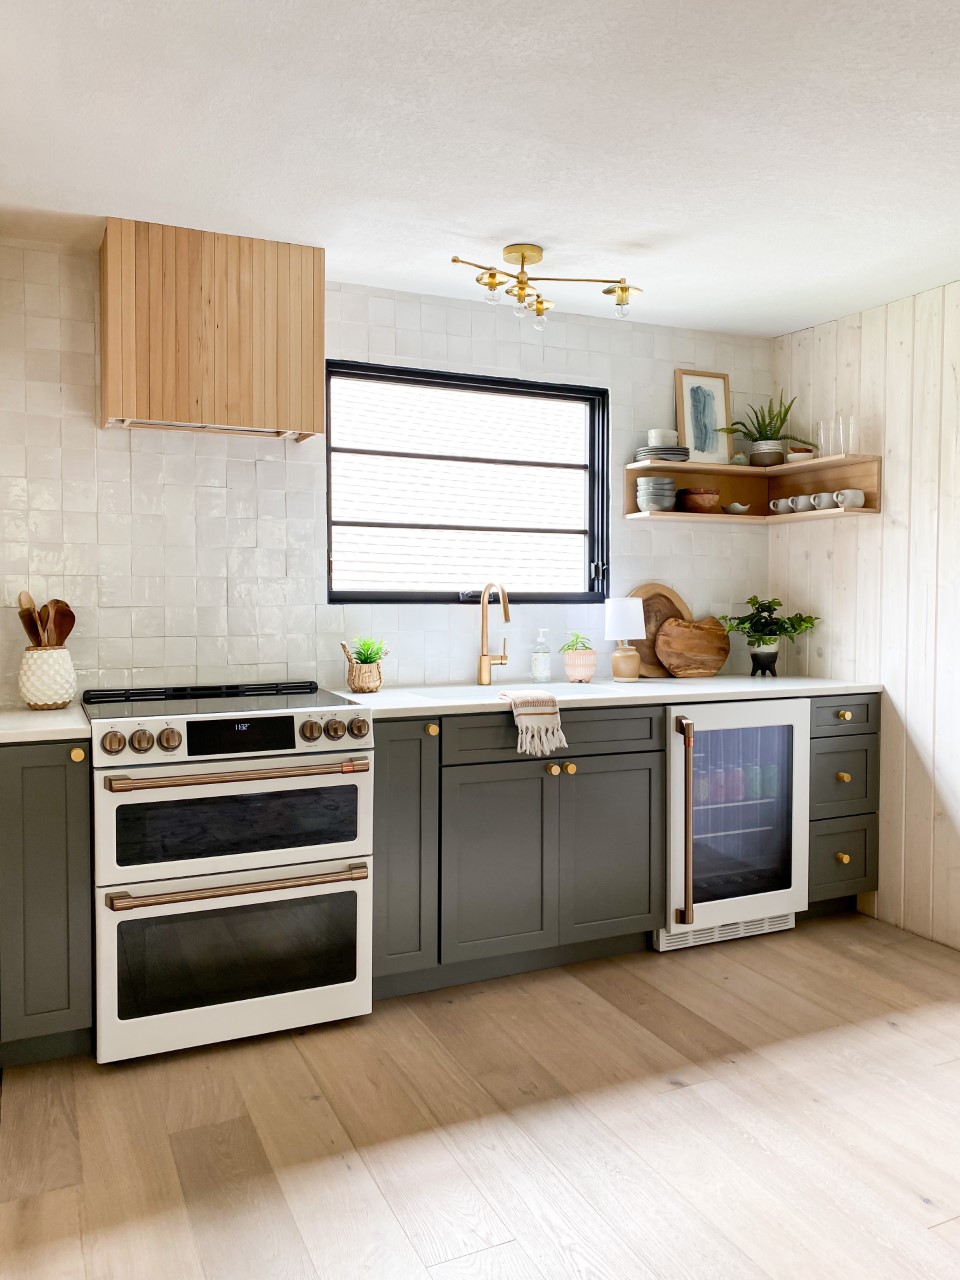
Ahhhhhh are you screaming yet??? Cause I am! My goal was to create a fun and collected space that didn’t feel too serious. I also wanted it to feel like it was related to the main house. Think cousins, but not twins, ya know? We had so much fun putting this little kitchen baby together, and I couldn’t be happier with this new look! Check out how this same space looked a few months ago…
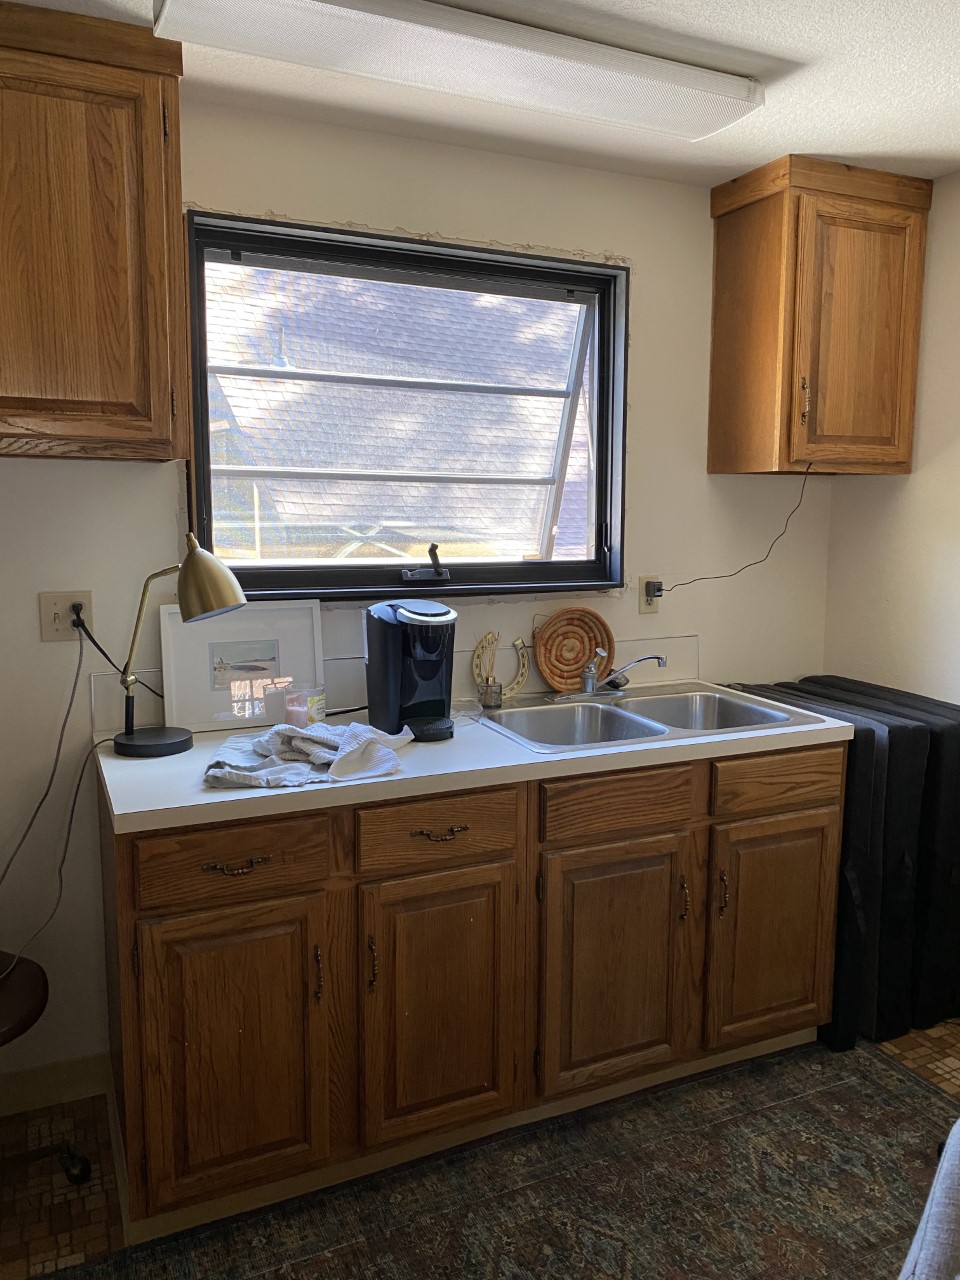
The cabinetry was problematic, and like everything else in this old place, was in very poor working order. Saggy cabinet doors and drawers that were completely stuck in place! The biggest problem with the cabinetry before, aside from its ugliness, was that it wasn’t a well thought out use of space. Nothing about this sad space made sense. So, we decided early on that we would gut the entire thing, and start over fresh!
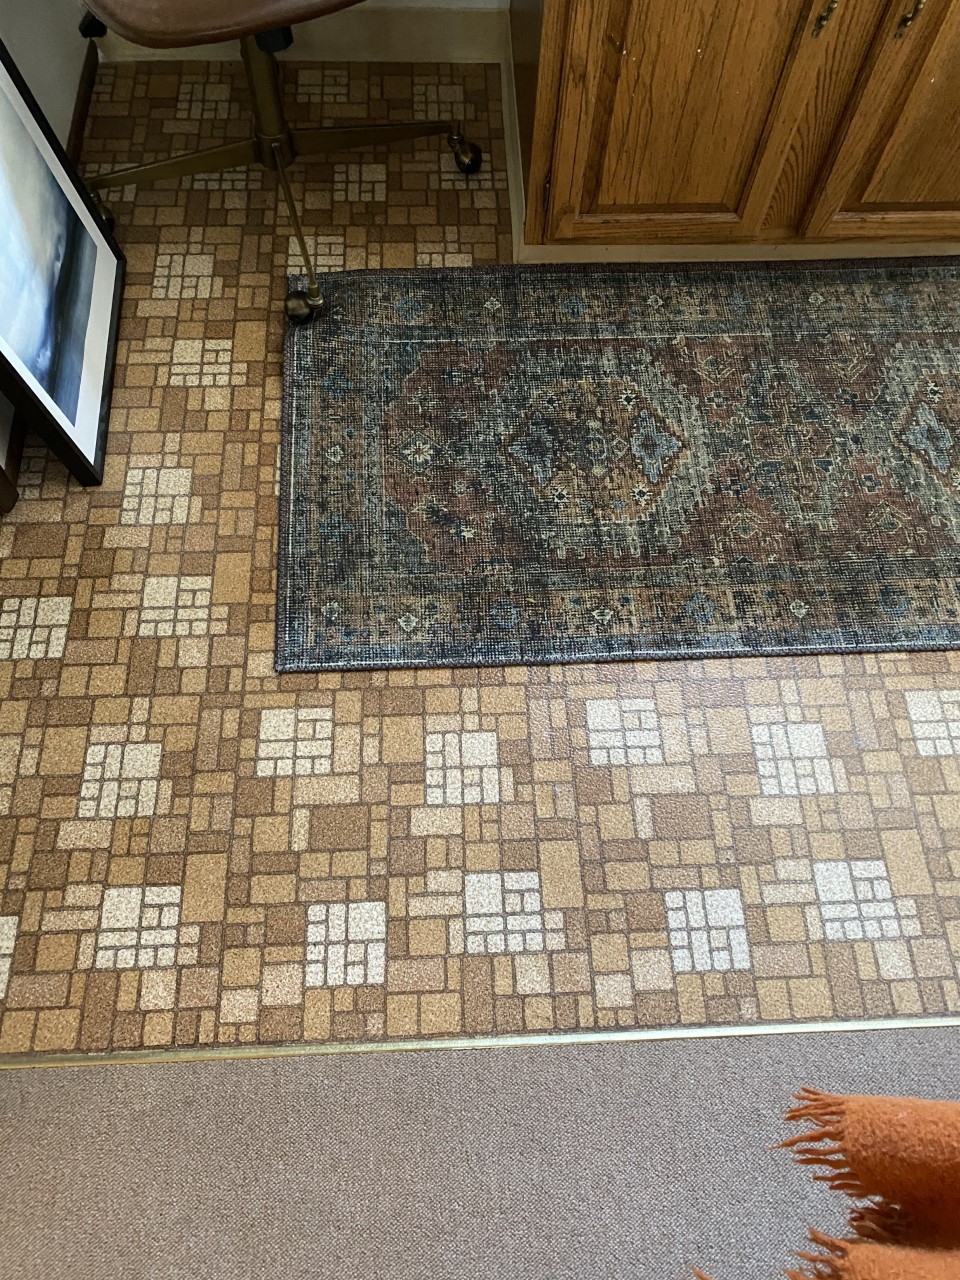
The started from the bottom and replaced a linoleum and carpet situation from the 80’s with the most beautiful engineered wood from Provenza Floors. These are from their Affinity Collection in the Couture Color option. I could write an entire post on how deep my love runs for these wood floors, so I think I will do just that! I will be back next week to give a play-by-play on everything about these beauties; like how the install process went for us and how they are holding up. Guys, seriously, these floors MAKE THE SPACE. But, more on that later!
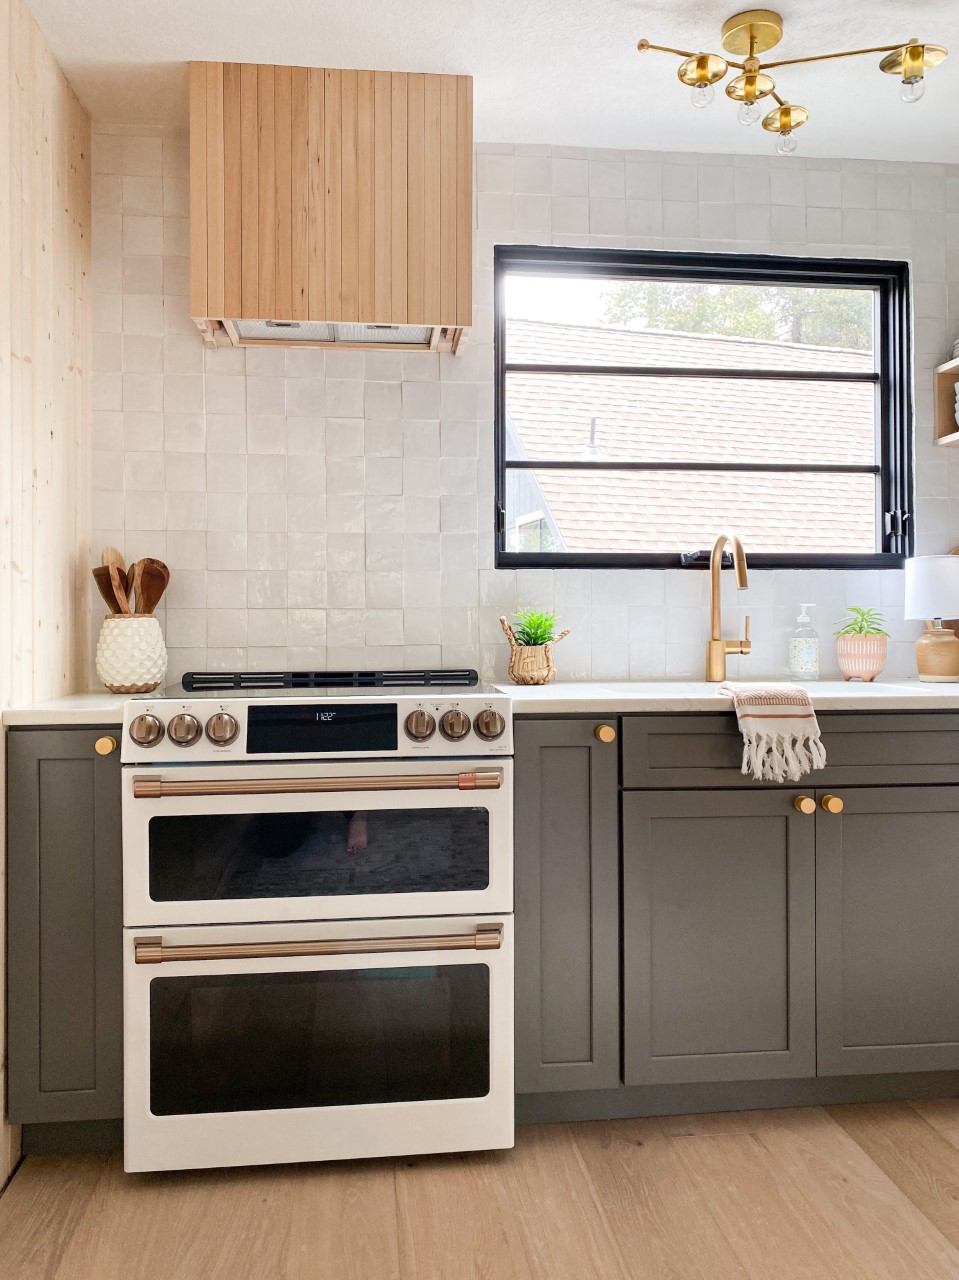
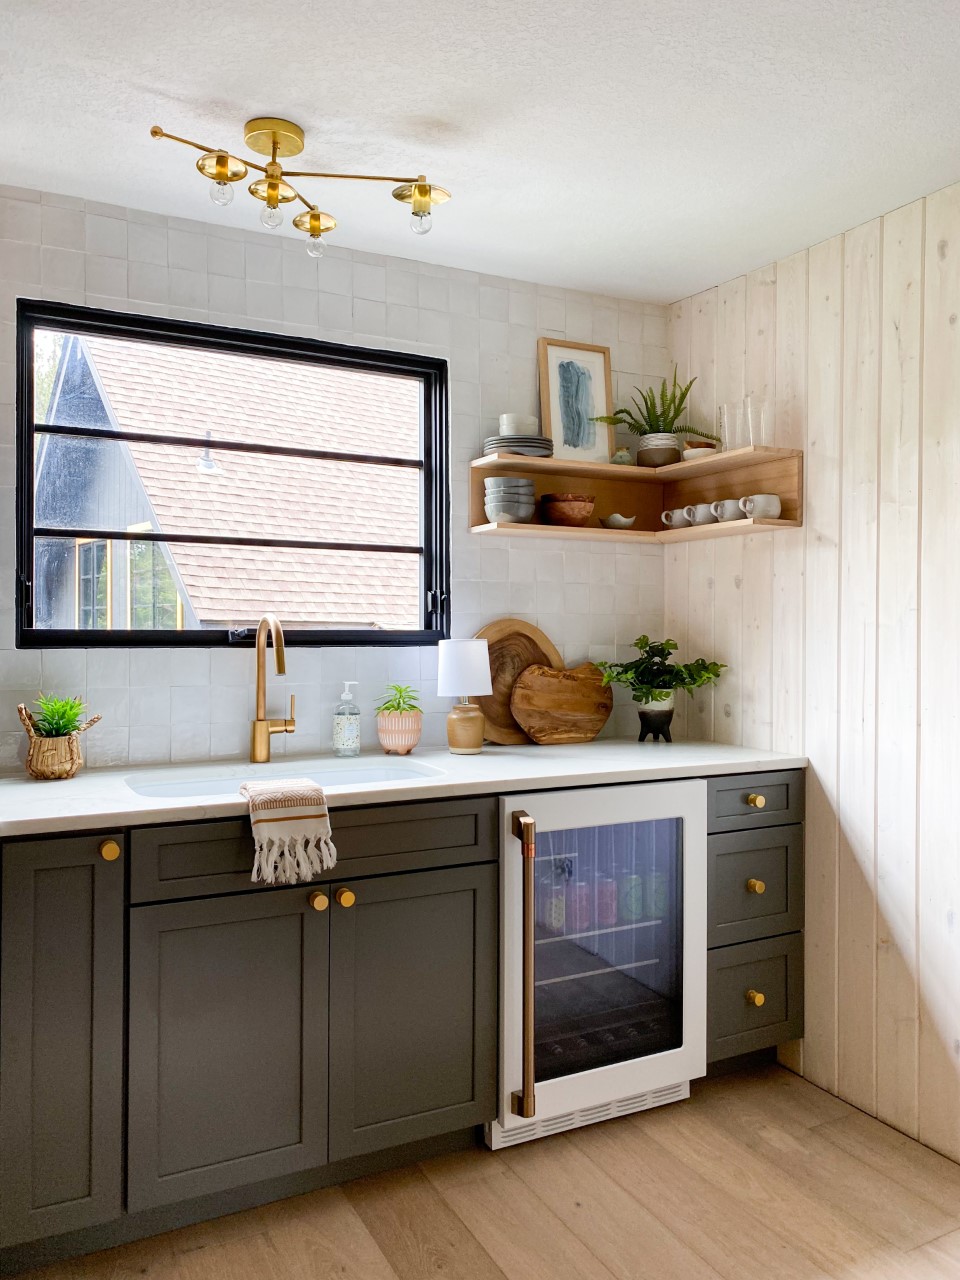
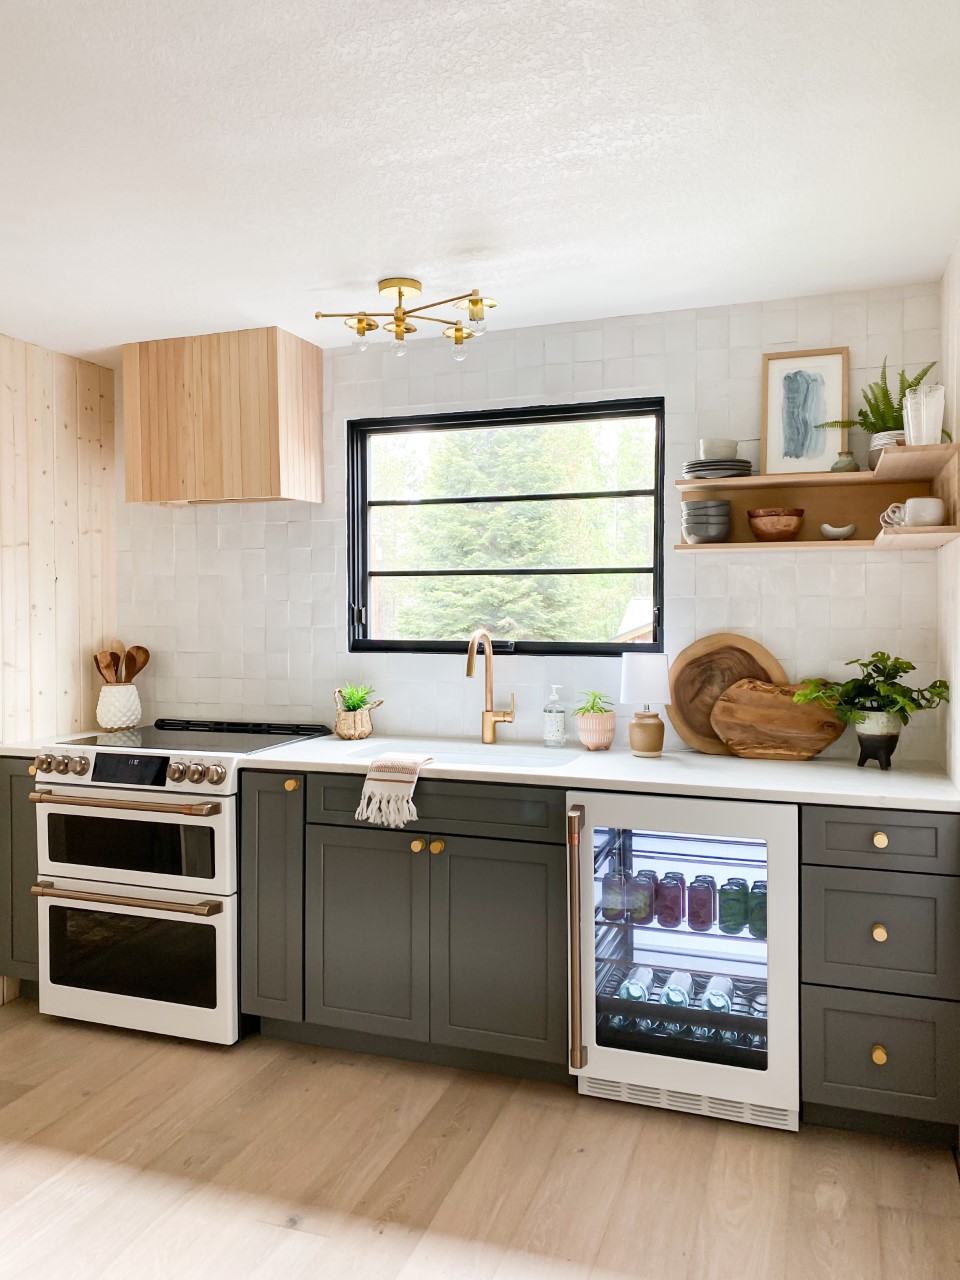
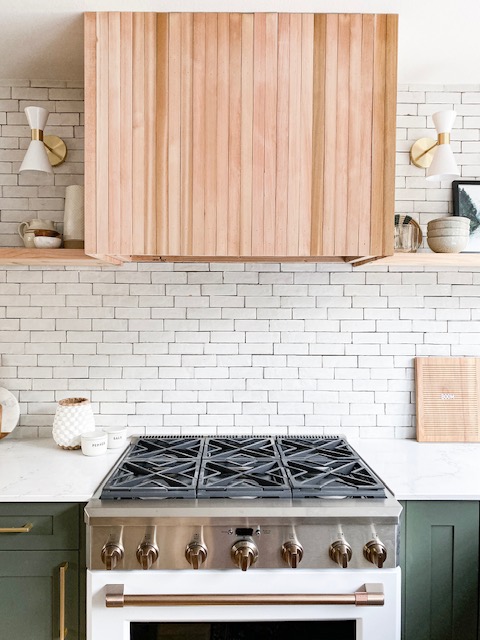
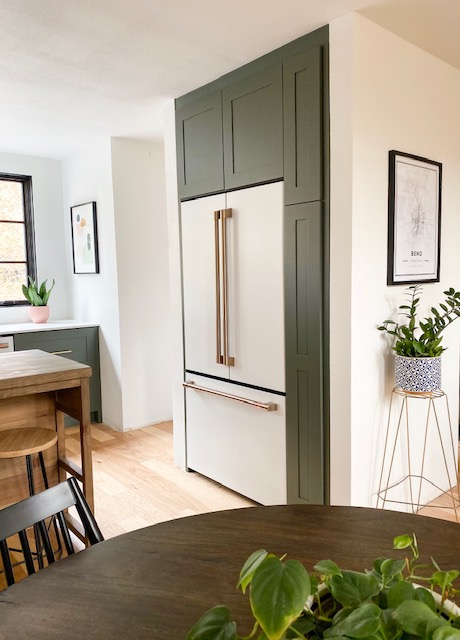
The appliances are from Cafe and they are AMAZING. Our kitchen in the main house has appliances from Cafe, so I can attest to their quality. Cafe is really on the forefront of mixing beauty with functionality IMHO. They look great and function even better…it’s a win win. We went with this range for its double oven option. I’m thinking about all of the desserts that could go in the top tier while dinner is in the lower tier. Ummmm…..yes yes yes. Instead of going with a full-sized refrigerator, which would remain mostly empty, most of the time, we opted for this beverage center which offers up a surprising amount of storage but with all spots for storing wine/water bottles. It’s been really fun to stock the beverage center with drinks for our guests. When my Mom and Dad come over to stay, I fill it up with sparkling waters for my Mom and some bottles of Pinot for my Dad.
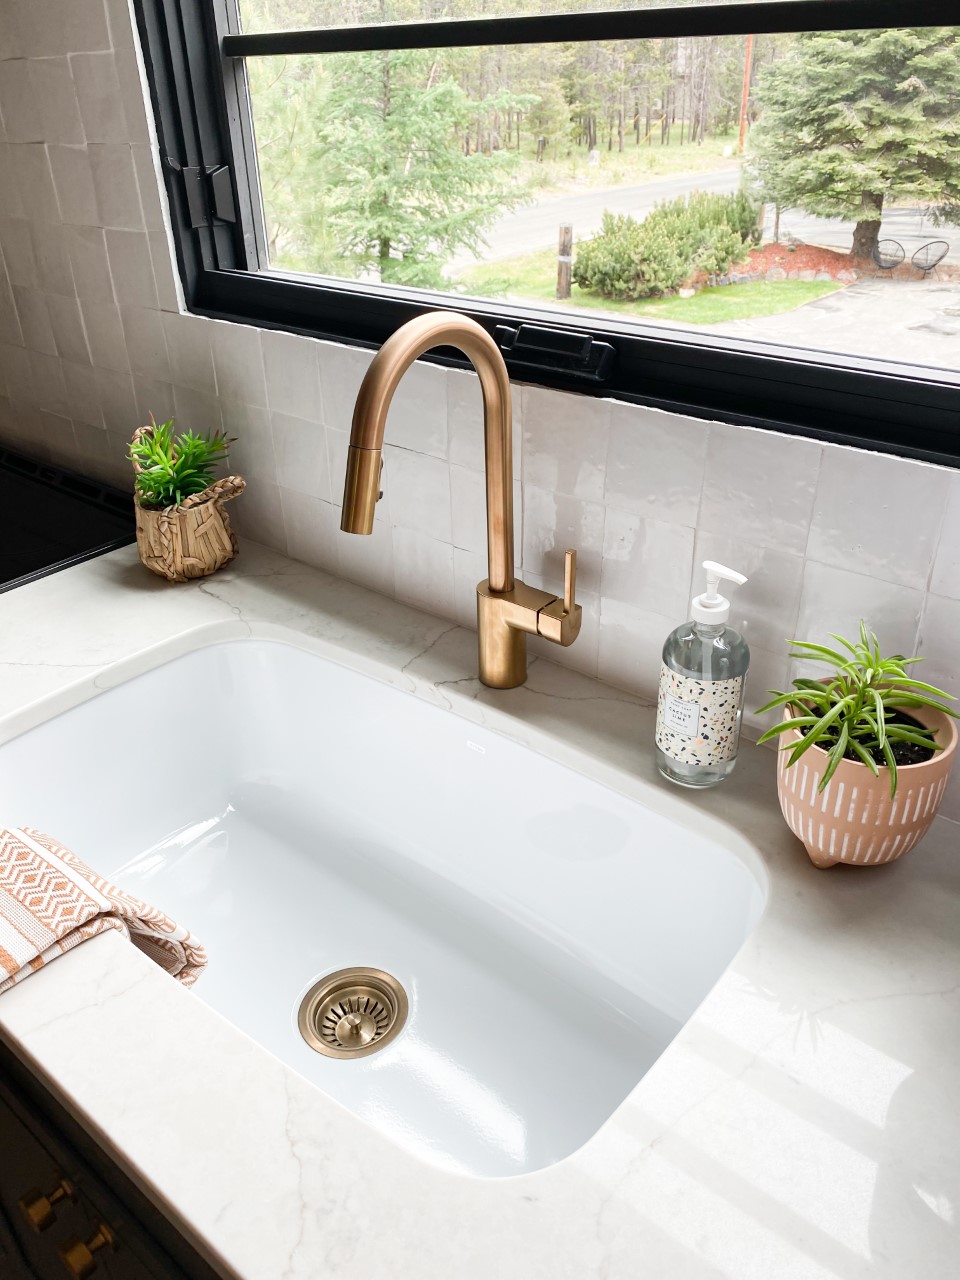
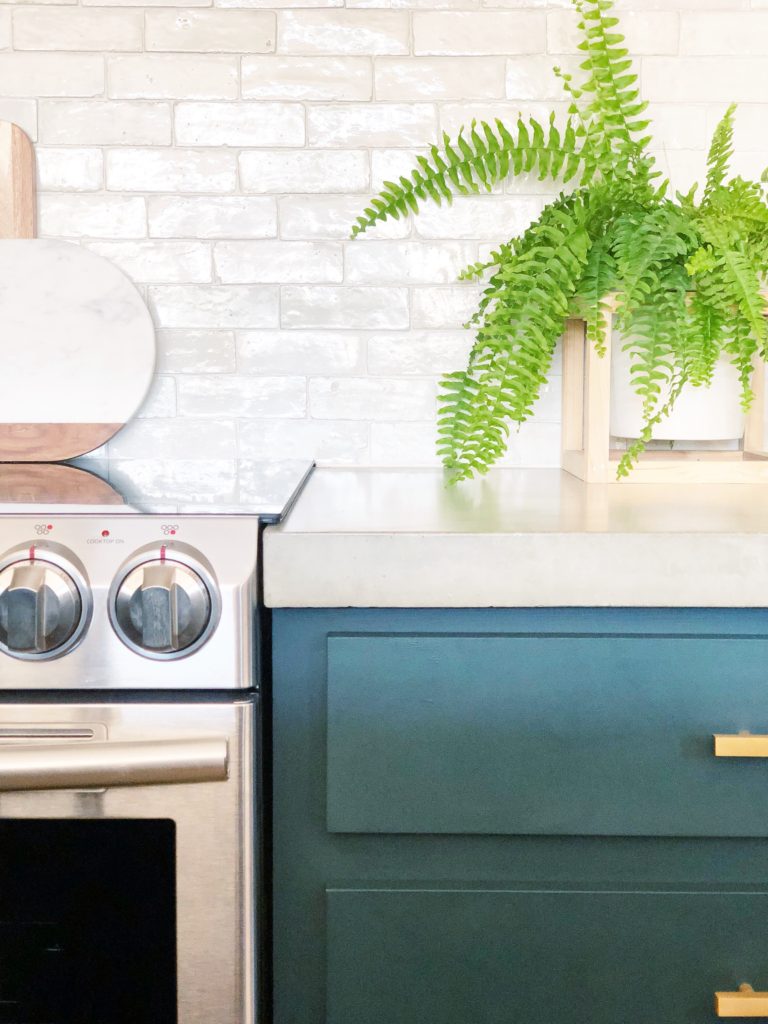
For the countertops, we enlisted the help of our friends at Nelson Tile & Stone, who also did our countertops in the main house. We decided on their Calcatta Quartz, in the Valentin color. It’s soft and subtle, with veining in both gray and gold tones. It’s STUNNING! And just as an FYI, they keep this particular stone in stock! We love everyone at Nelson Tile & Stone, and Jennifer, was instrumental in the design process of the space. She helped me decide on the stone itself, then found the perfect faucet, (it was exactly what I was picturing) and even a drain to match!
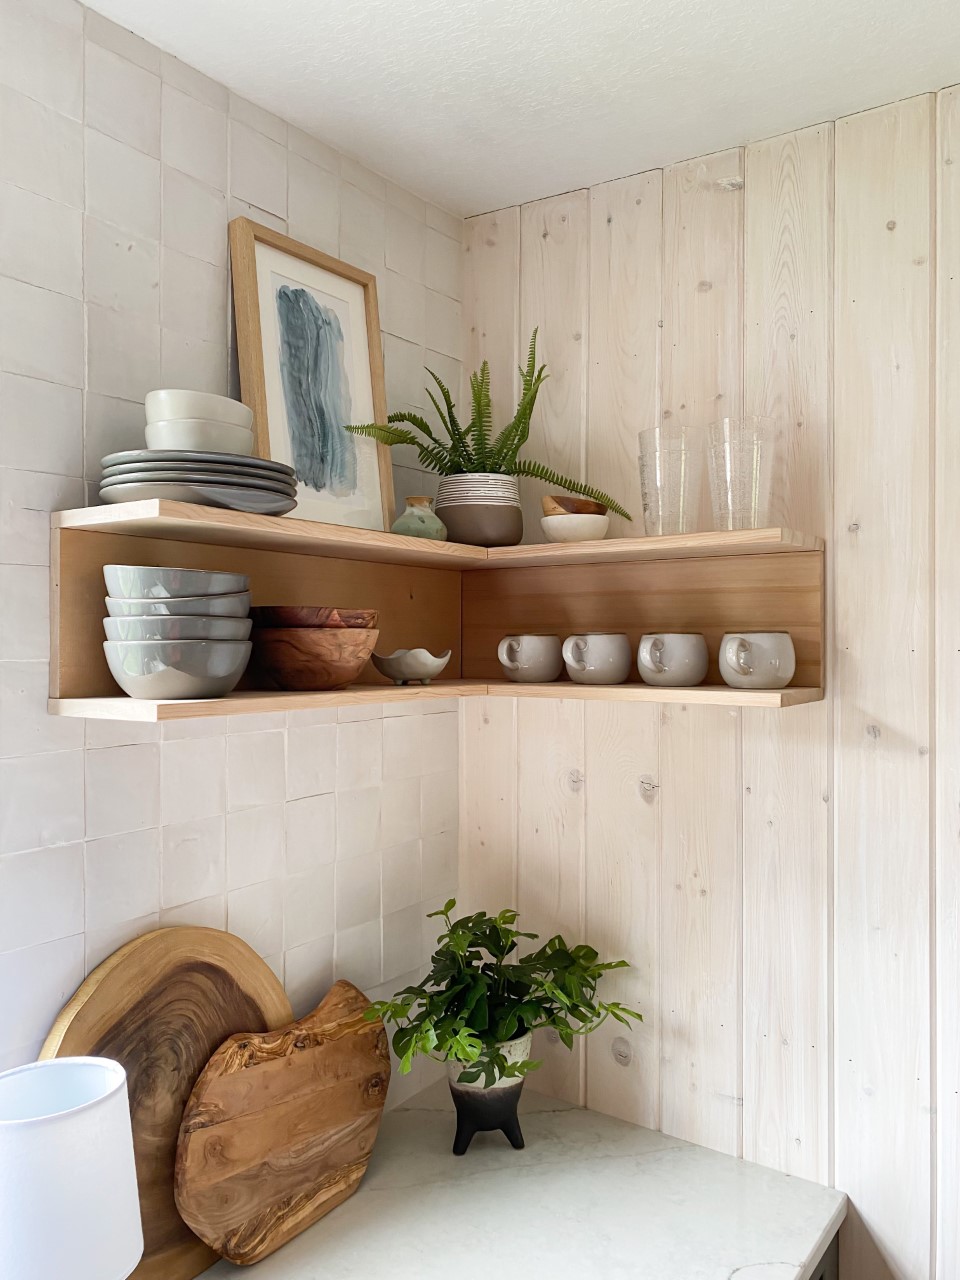
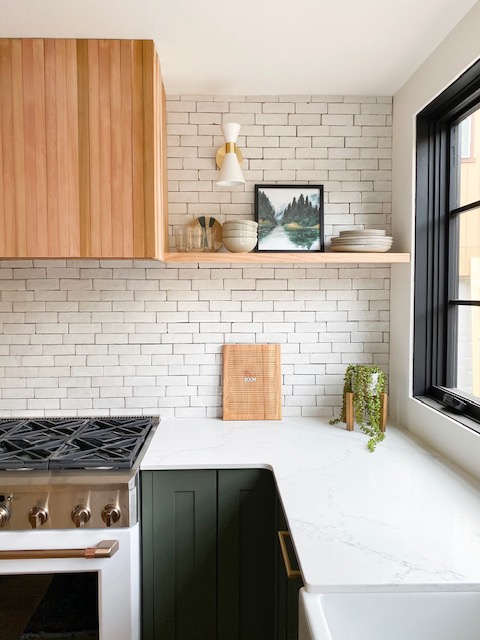
The tile is from Ann Sacks and I smile every time I see it. Seriously, it’s that good! This is their Idris by Ait Manos in the 4×4 size. I went with the White Carrare color, but Ann Sacks carries this tile in six other colors. I have been drooling over the powder pink color for our next bathroom remodel and think I even have Nate talked into the idea of a pink shower! The cool thing about these tiles is that they are all hand-made and offer up an earthy, organic vibe to any space, which works in just about any style of home. Each piece is a little different from the next and I just love that!
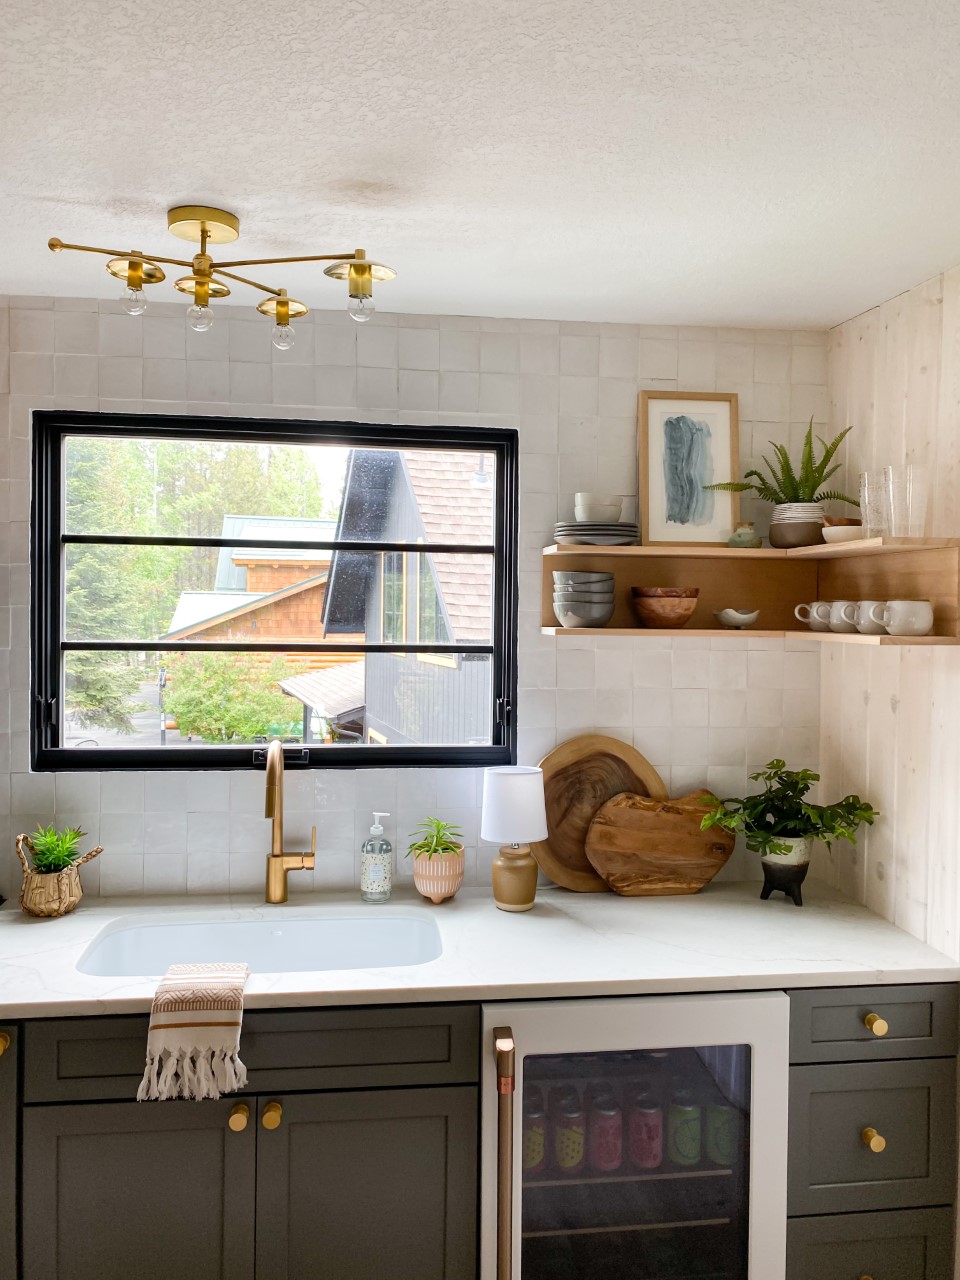
This showpiece of a light is from Sazerac Stitches. This is their Cancer Flushmount and can be used as a flushmount fixture or a sconce! Cool, right? This hand-made brass work of art is designed to look like the cancer astrological constellation. The combos of socket and disc sizes, as well as arms with brass balls mimic the look of the small and large stars in the constellation. This piece in particular, saved the day for me and solved the issue of the lighting placement not being centered above the window/sink. The assymetrical design creates the illusion that the light is centered in the space. And the brass complements the cabinet hardware and faucet just perfectly! Sazerac Stitches has a variety of styles, and their designs are unique and offer something unexpected, if you are wanting to add some serious pizzazz to your home. I have another cutie from Sazerac Stitches that’s going up soon when work on the rest of this space! I can’t wait to show you that one!
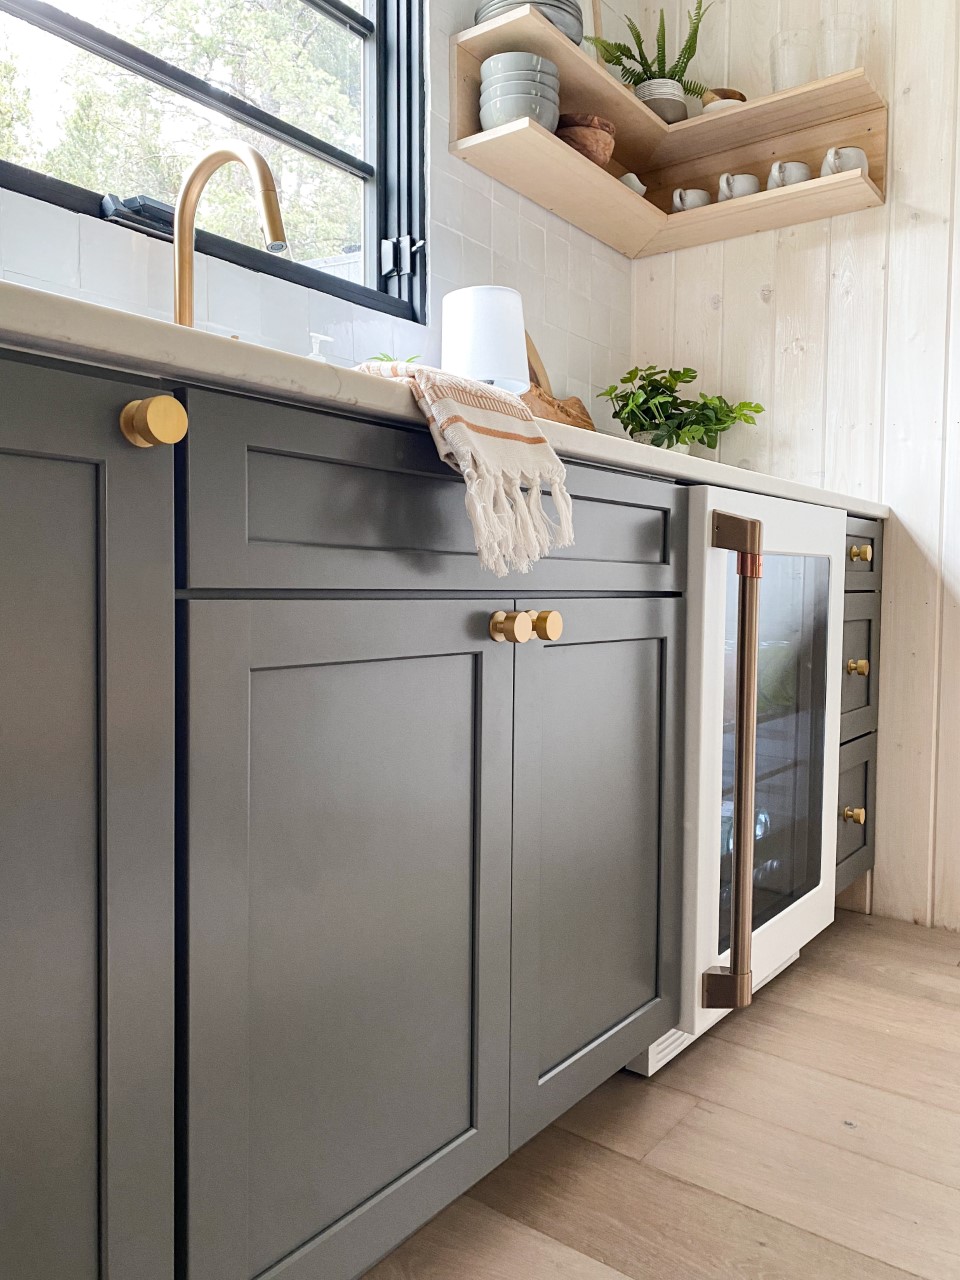
The cabinet hardware is also brass and I am digging the simplicity of it! With just a few cabinets in our small space, I wanted the cabinet hardware to not steal the show from the other elements in the space. I think these little round beauties, do just that! They are also surprisingly substantial, and are quite heavy!
Ok guys! I think that’s about it…did I miss anything? So what do ya think? As always, a big thank you goes out to all of you for cheering us on throughout this project! Your questions, comments, and support really mean the world to me and make big projects like this one, so much more fun! Leave me a comment below and tell me what you think of the new space! I’d love to hear your thoughts!
This post is sponsored by Sierra Pacific Windows. All opinions are my own.
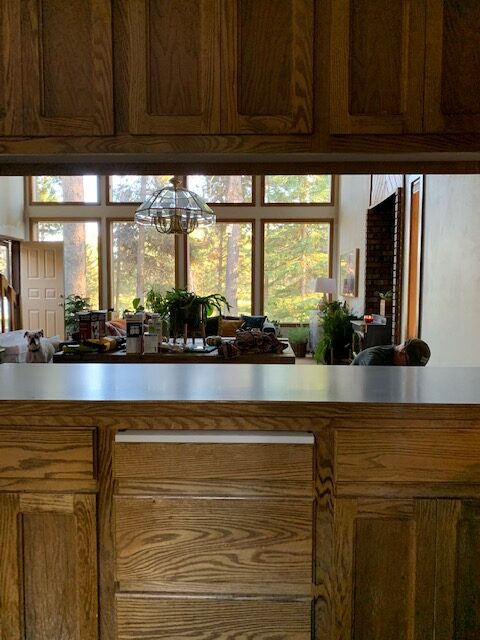
Hi guys! I’m back today to fill you in on some more kitchen details! We recently remodeled our kitchen in our new house, as part of the One Room Challenge, and we added the most beautiful windows to the space. I’m not sure if I’ve ever shared before, but my Dad(who can almost always be seen in all of my insta stories, working along side Nate) worked as a Commercial Glazier AKA he installed windows, for more than forty years before retiring six years ago. And on one of our many walk-throughs of the new house during the purchasing process, pointed out how he thought that the old kitchen window was feeling a little “skimpy.” When he said this, I looked at it and instantly knew he was right. We actually have a lovely view from the front of our house, we just needed to showcase it!
See what I mean?
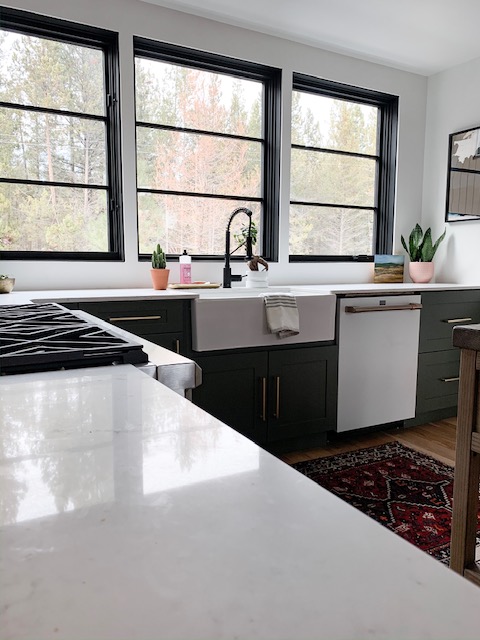
And wouldya just take a look at the difference! Here’s how the kitchen looks now!
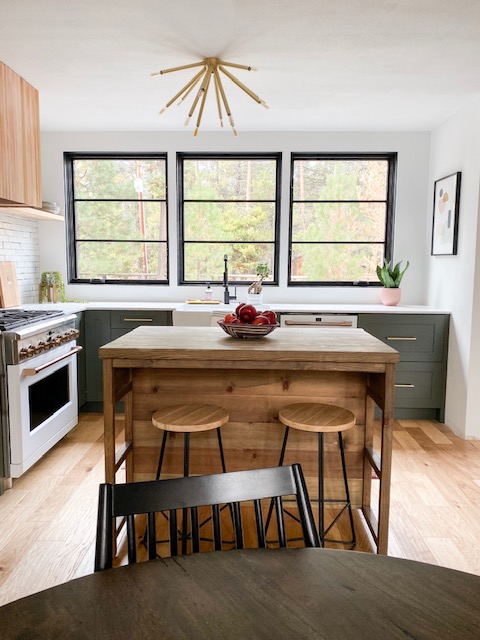
Isn’t it just amazing how transformative windows can be? There’s a lot of buzz around furniture, art, and decor…you know, all the pretty things. But, adding an architectural element, like windows, is a game changer. I read a blog post by Emily Henderson where she said, “a small odd vinyl window can ruin a perfectly good room, but a large pretty window that is rightly appointed can literally make a room.” Well, I used to have that small odd vinyl window and replaced it with three (imho) rightly appointed windows…and woweee, was she ever right?! I’m still shocked sometimes when I look into that kitchen and see those beautiful windows staring back at me. I LOVE them.
Like any good fairy tale with a happy ending, I found my knight in shining armor, with Sierra Pacific Windows. When they agreed to partner with me for the One Room Challenge, I was over the moon! But, even with all of my Dad’s window expertise, I was still a little hesitant about replacing windows. It just seems so intimidating! Even the ordering process seemed like it might be tough. What if my measurements are off? There are so many styles of windows; how do you decide which one is best? Well, Sierra Pacific Windows made it SO easy! Allow me to break down their ordering process for you in case you’re intimidated, like I was.
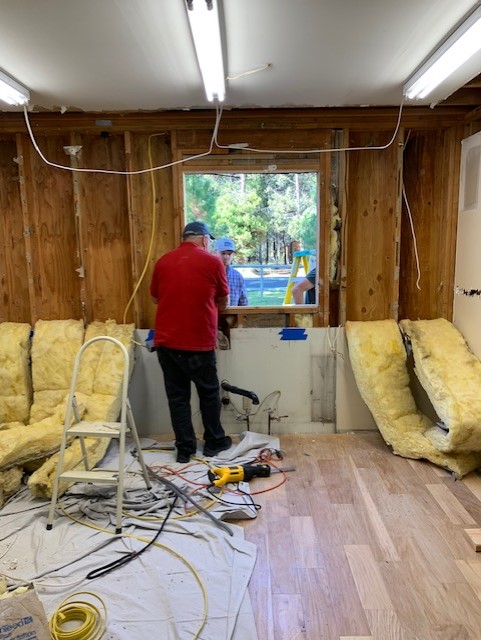
They put me in touch with their local territory manager, Ted, who let me know that he would be happy to come and meet me on-site to talk through details and measurements. We agreed on a date and Ted met Nate and I at the new house where I filled him on all the details about the (massive) project and described the look I wanted. I had been dreaming of a more modern look for the kitchen and adjoining living space and most importantly, allowing some more light to flow throughout the house. Ted was so knowledgeable and educated me on all the options that were available, and also did all the measuring for me…whew! I was so worried that I might flub a number and then my windows would arrive, only to not fit properly. A MAJOR mistake. But after he left, I knew I was in good hands. The next day, he emailed the quote for the windows with all of their specs for me to review. When I was satisfied with how everything looked on paper, I signed off and he finalized the order. Seriously…so easy. Ted was so patient with me as I had a thousand questions along the way and even tweaked the measurements, and added the three lites at the last minute. A few weeks later, they arrived at our door. Easy peasy.
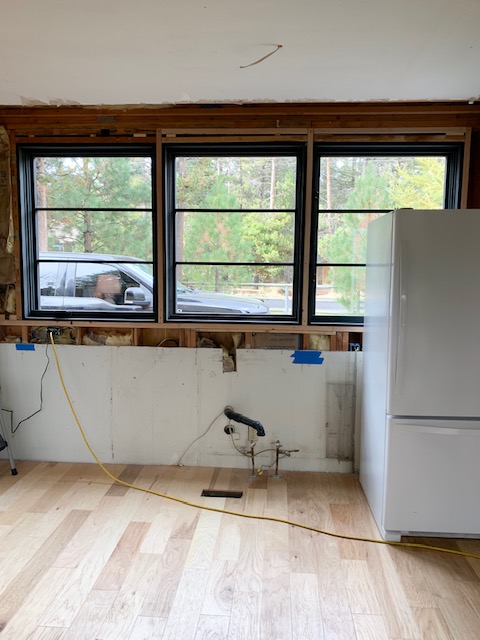
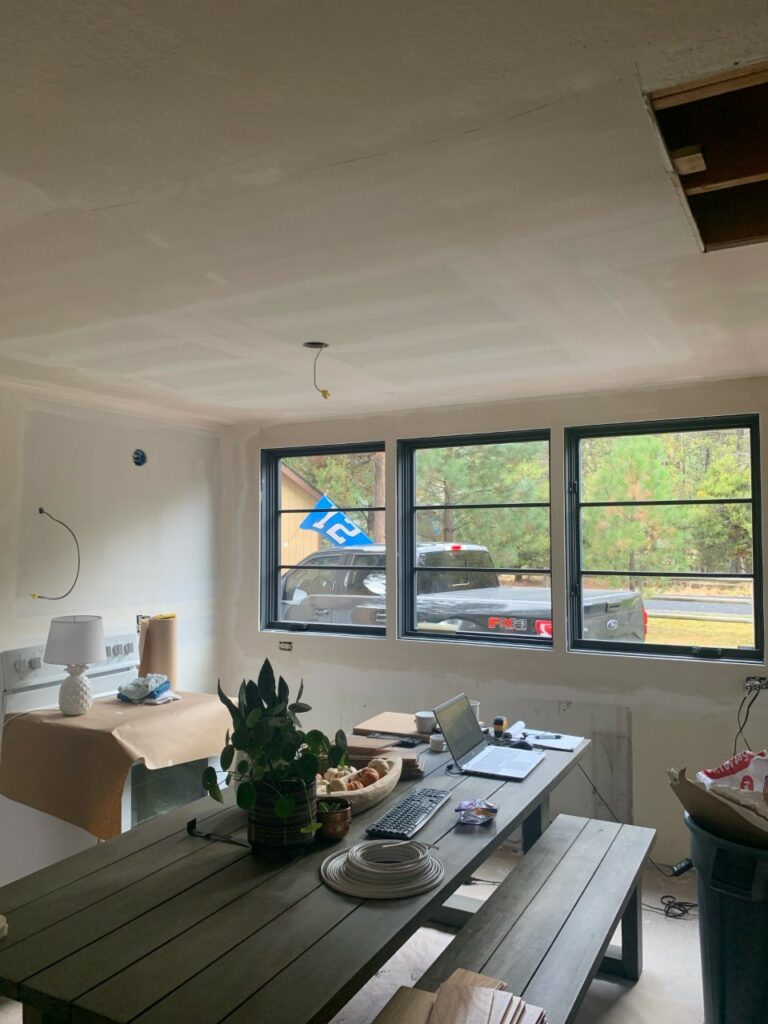
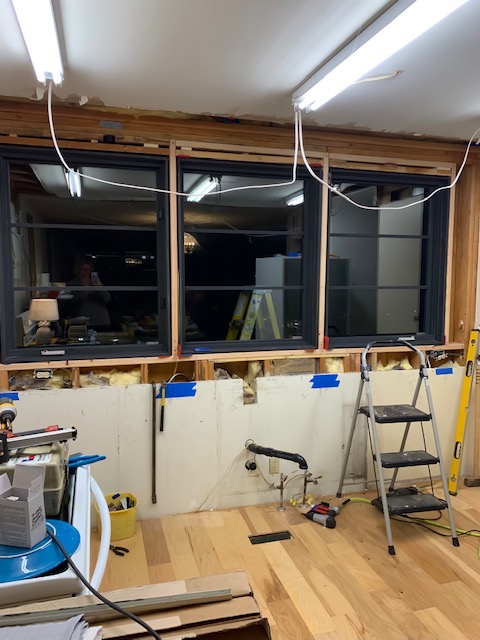
Here’s a progress shot of the kitchen after demolition but before the new windows were installed.
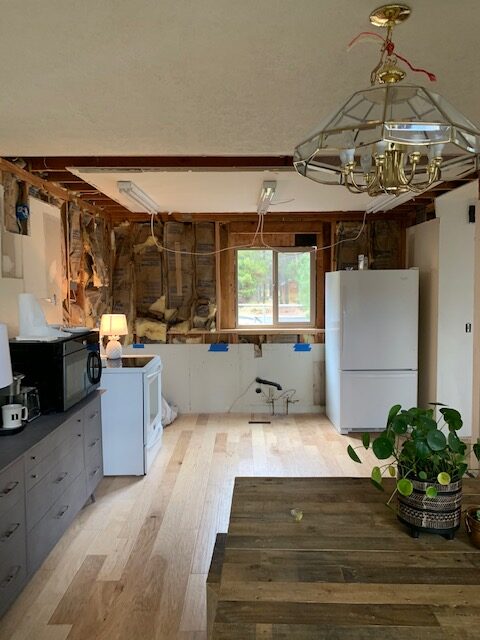
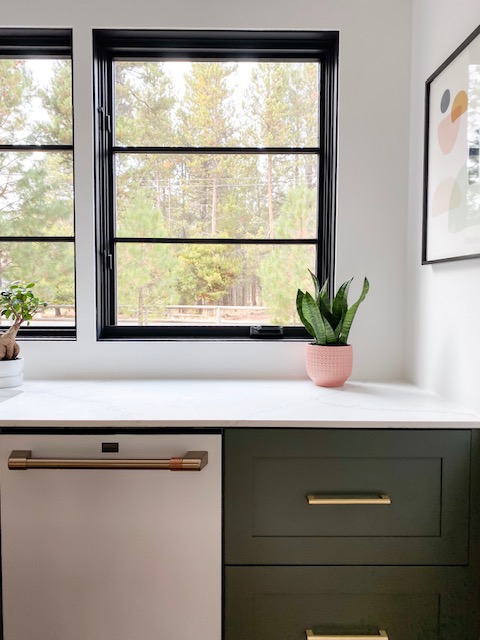
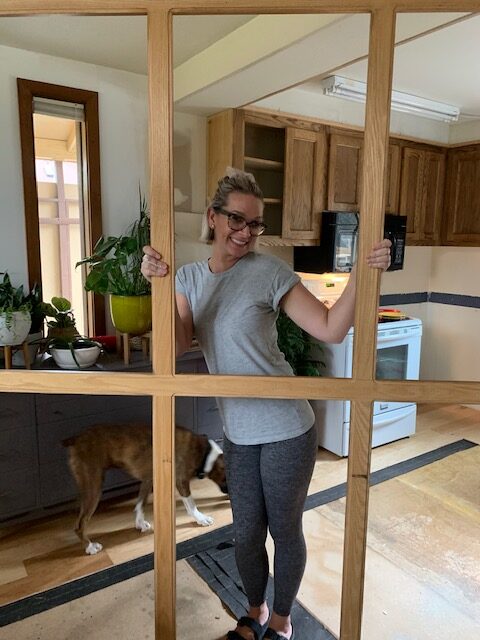
And after install…
We went with their Urban casement style and it’s so sleek and beautiful. With their powder-coated aluminum on the exterior and solid wood on the interior, they are low maintenance, but HIGH impact(in the best way possible). They give our home more of a Modern Pacific Northwest feel that I am hoping to achieve. Eventually, the plan is to change all of our windows in the entire house to these black beauties…we already have another one on order for the entryway! Can’t wait to show you all!
The middle window is a picture window, which is code for, doesn’t open, or is fixed.
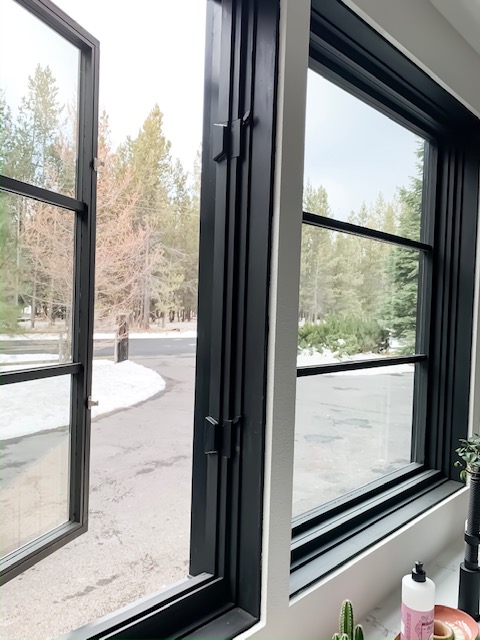
The two windows on the left and right both have screens and crank all the way open to a full 90 degrees, if you’d like. They also came with screens so you can open them on a cool summer evening without having to worry about pesky bugs/mosquitoes.
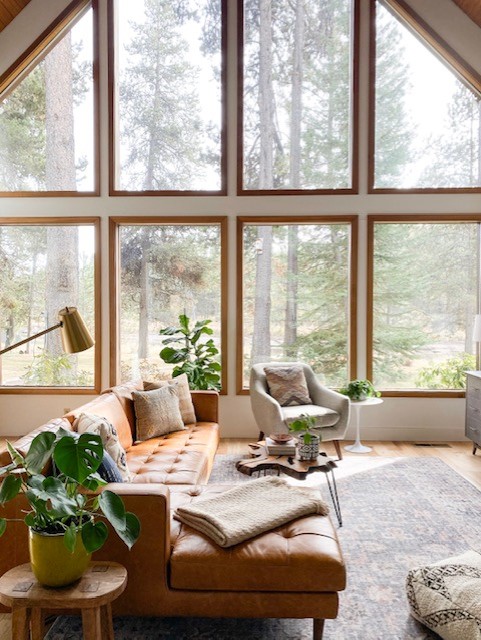
These new windows have been such an impactful addition to our home and now I’m wondering, where else can I add a window?! If you’re considering replacing windows, then look no further than Sierra Pacific Windows. I am forever a fan! They have an amazing assortment of styles, options and colors…something to suit everyone, I’m sure of it! A BIG thank you to Jennifer and Ted for being so awesome to work with…you both made the entire process so seamless! Here’s a few more shots of how these windows have changed the entire look of our home.
And one more before and after because you guys know I can’t resist…

Thanks for reading! XOXO
OH MY GOSH WE MADE IT! It’s reveal day for the One Room Challenge and I am so excited that I couldn’t even sleep…and I’m one tired lady too! Let’s get right into it, shall we?!
And just in case you’re new here, here are links to Week One, Week Two, Week Three, Week Four, and Week Five so you can catch up on all the craziness that has been my life during these last six weeks.
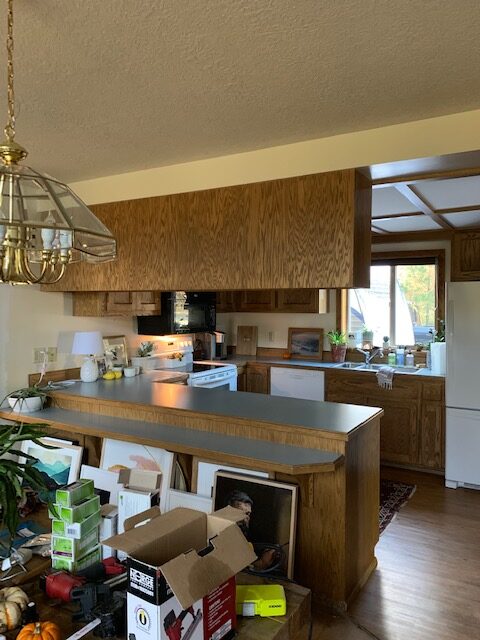
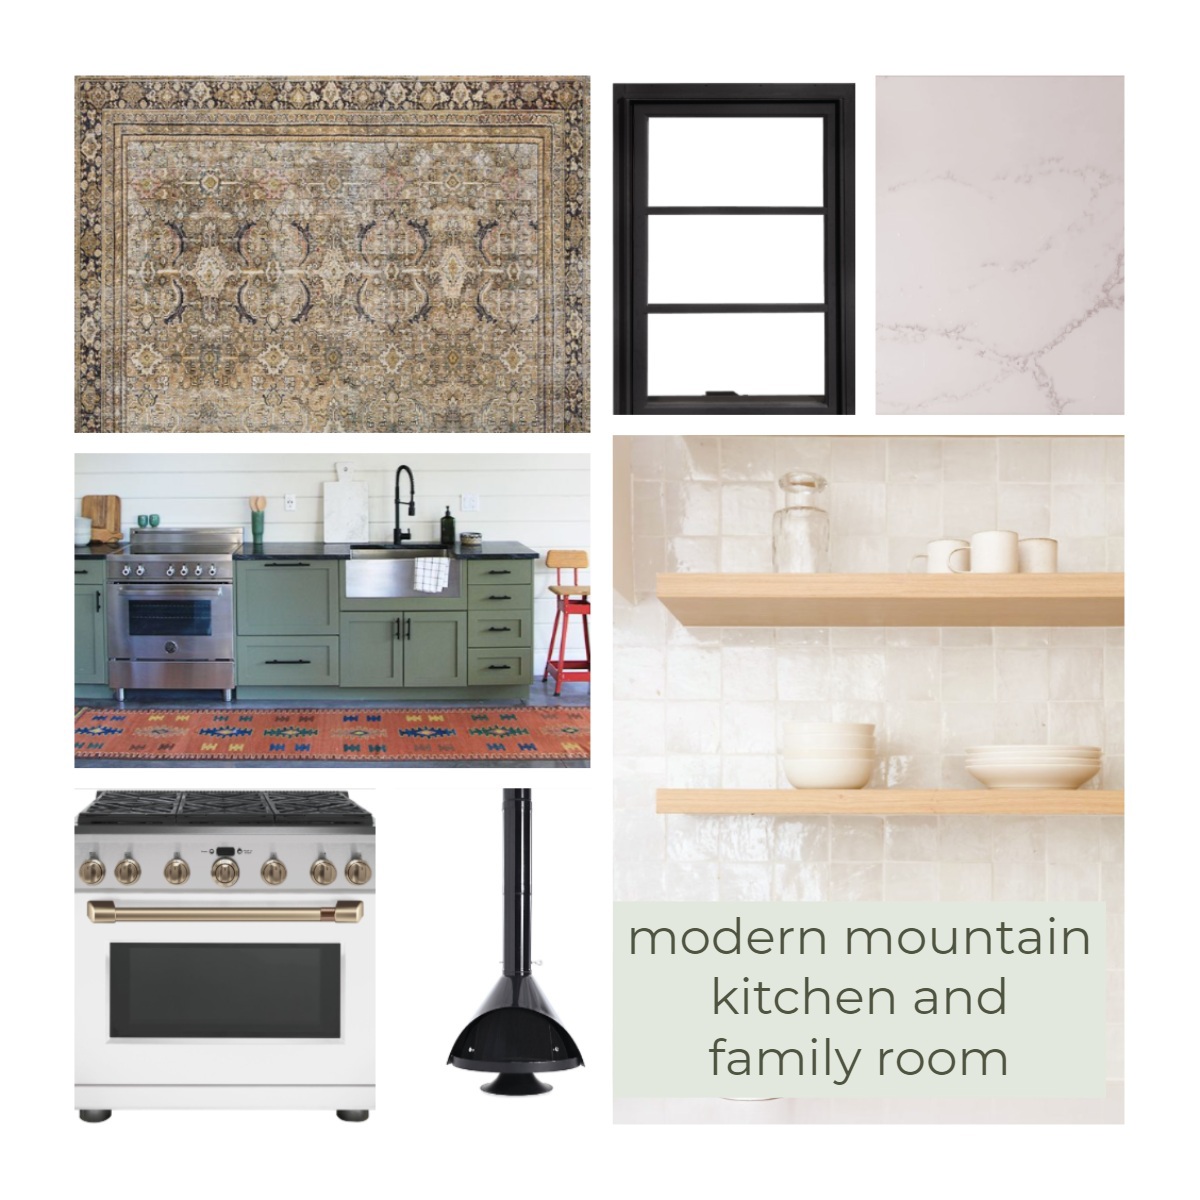
I am dyyyyyyying to show you all the After pics that I snapped yesterday (nothing like waiting until the last minute, right?), but first, let’s take a walk down memory lane and have a look back at where we started. Here is the moodboard from which I planned the space. Also, peep these before pics…this place has come a long ways, guys.

How about these…
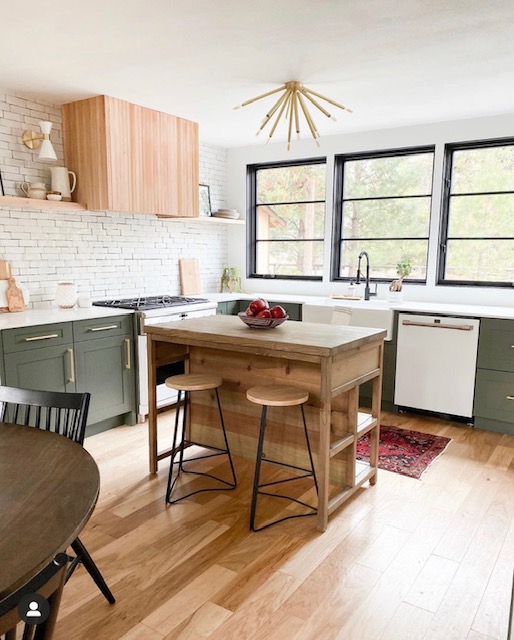
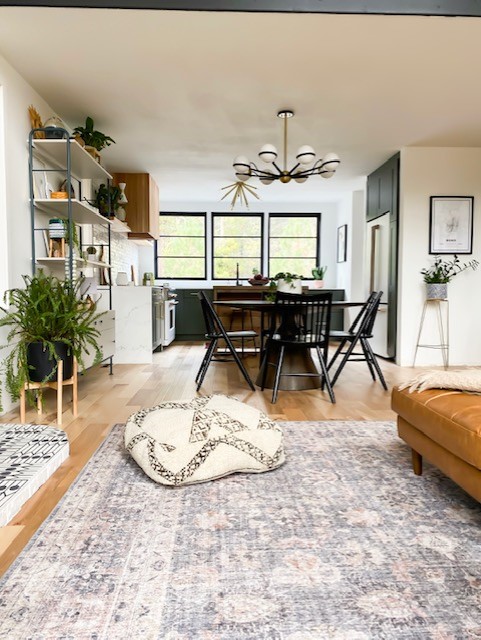
Did I scare you away, yet? We fell in love with this home (even in its very sad state) and hoped that we could turn this home into something that was beautiful and comfortable for our family. Well, here’s how we’re looking now!!!
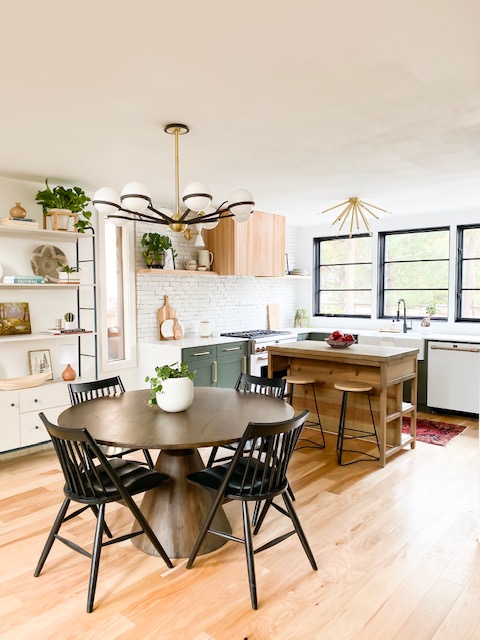
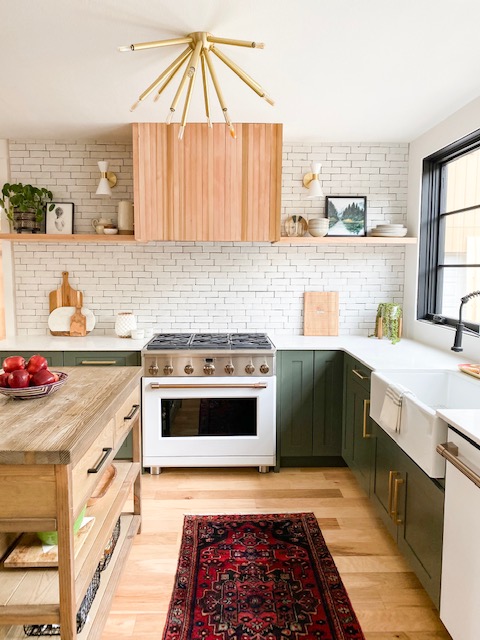
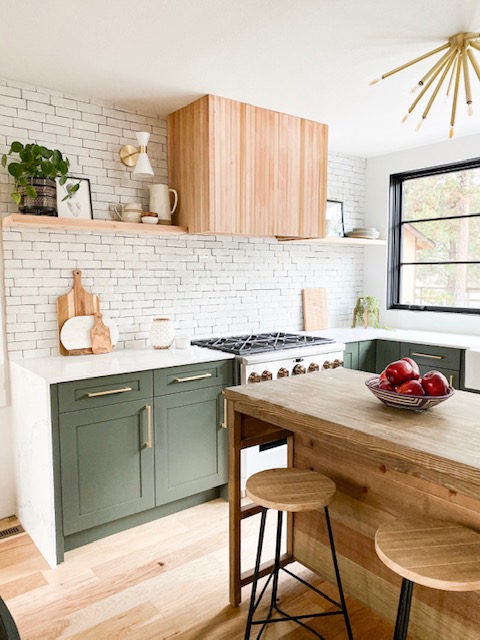
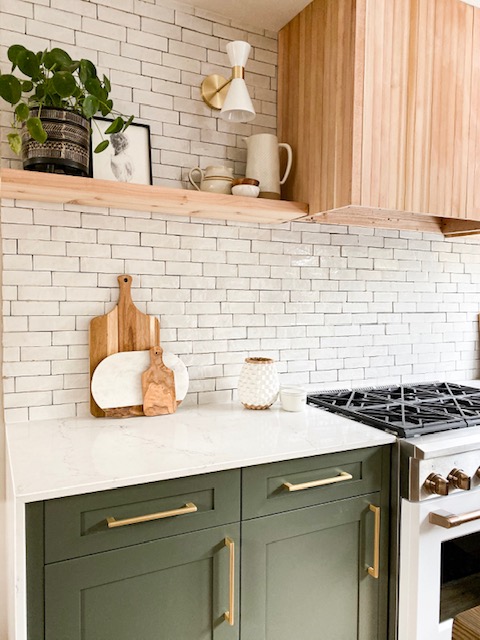


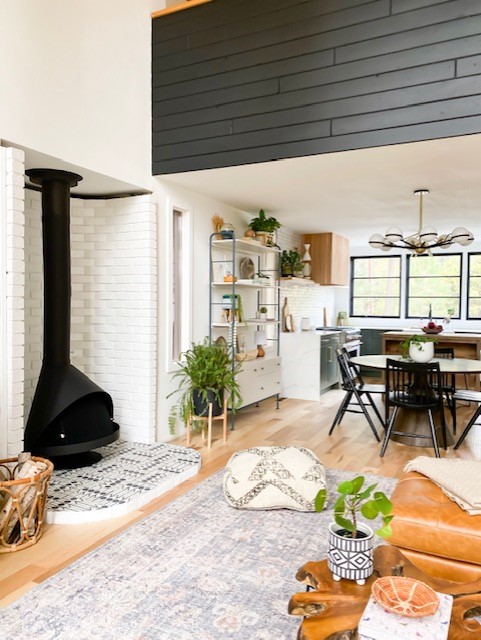
I couldn’t be happier with how this new kitchen turned out. And did you notice the green? My kitchen at our last house was green as well, and when I was planning this new kitchen, I kept trying to plan something that was different than my last so I could surprise you guys with something fresh and new. But the heart wants what the heart wants!!! Also, don’t you think these green cabinets suit this NW style house???
The kitchen cabinets and countertops are from a local business here in Bend, called Nelson Tile and Stone. We have been planning this kitchen for months and Chris and Jennifer have been there to help us every step of the way. I can’t recommend them enough and would go back to them for any of our future projects. The cabinet hardware is from EMTEK from their Trail Line.
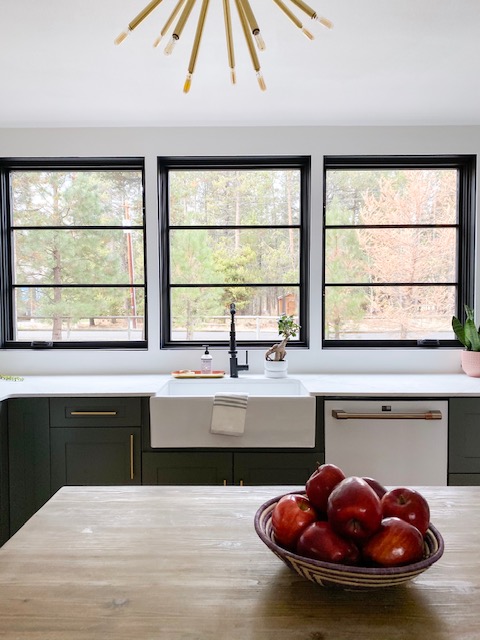
The sink and faucet are both from Krauss and are both beautiful and I loved mixing the white apron sink with a black faucet. Such a cool combo!
The windows are from Sierra Pacific Windows and you guys already know how much I love them as I’ve been gushing about them for weeks.
The appliances are all from CAFE and are amazing! We just discovered last night that we can preheat our oven via voice command. Tech-y type stuff doesn’t usually impress me, but that is just too cool! I love the white, matte finish and the coordinating brush handles. It feels special, almost like jewelry. I’ll be writing a few more blog posts about them in the coming weeks and I will show you guys some more of their cool features!
All of the lighting in the kitchen is by Blue Print Lighting and couldn’t love them more! The flush mount is such a statement maker and gives the kitchen a certain something. And I love the sconces above the open shelving…white and brass have my heart forever.
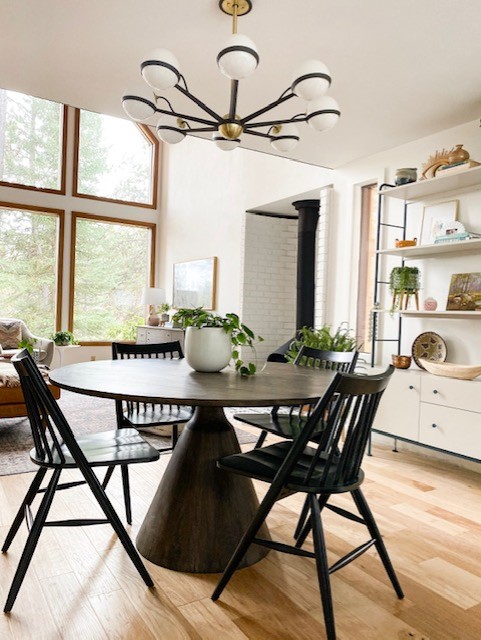
The barstools and dining chairs are both from Overstock. I love how they coordinate with their black legs and modern lines. The chandelier above the dining table is also by Hudson Valley Lighting and it’s called the Ace….appropriate, huh?
The art in the kitchen is from Minted and adds such a cute touch. I’ll show you some close ups very soon.
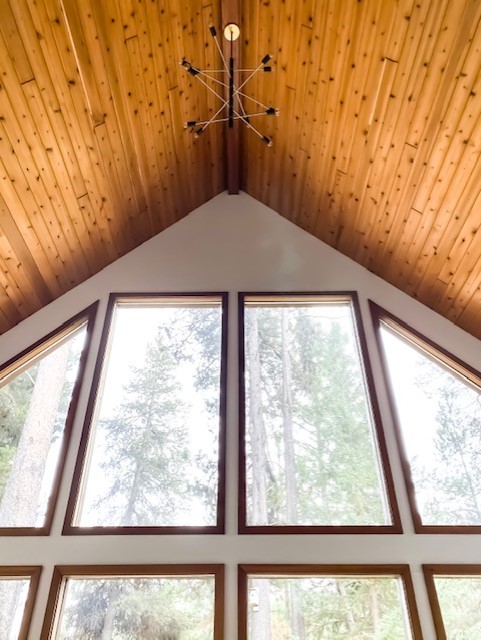
The family room didn’t change much with the exception of a fireplace upgrade, some snazzy new cement tiles from Zia Tile, new wood floors, and the most fabulous chandelier from Hudson Valley Lighting.
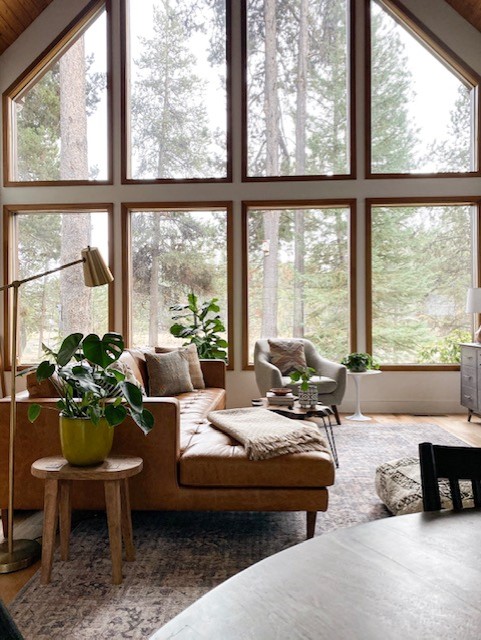
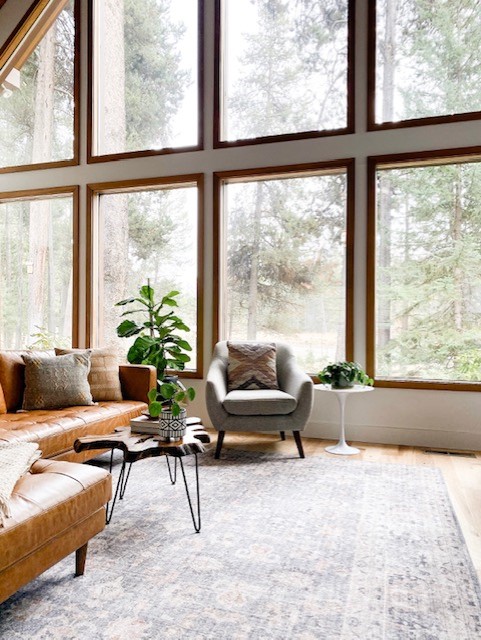
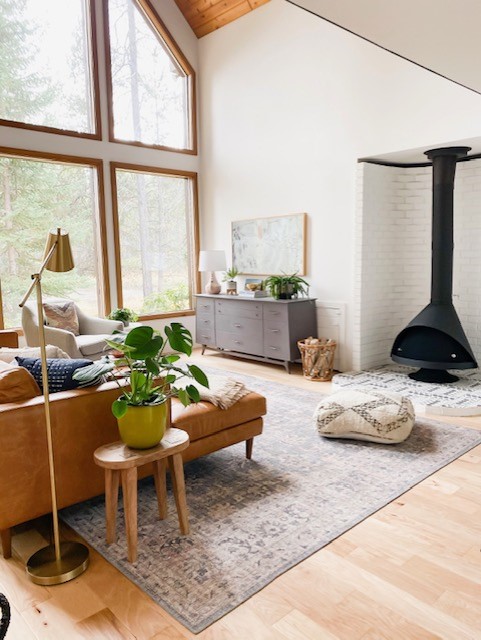
The new gorgeous leather sectional is from Rove Concepts and it is a beaut! I was a little worried about how leather and kids would mix but this sucker is durable and SO wipable…and let’s not forget, so beautiful! The rug is from Loloi and is a part of their Skye collection in grey and apricot color option. LJ Smith came to the rescue with some new stair parts that aren’t quite finished so I will show you guys in a few days, but they are looking SO GOOD!
If I may, I’d like to get personal for a sec and just tell you guys what this has meant to me, personally. There was never a moment during this giant project, where I took this opportunity for granted. I feel so lucky to have had the privilege to work with so many amazing sponsors during this project and will be writing lots of blog posts in the coming weeks about these partnerships, but I wanted to mention how grateful I am to have had this opportunity, and will do my best to make them all proud. I’m not crying, I swear.
On to the thank you’s now…
Thank you so much to all of you who sent messages of encouragement, cheered us on, and followed along throughout this process. Your kindness and support really means the world to me. A big hug and kiss goes out to my mom and dad who came to our house almost every weekend to help…love you, Mom and Dad. And my sister and brother in-law who were also here almost every weekend and kept me calm (sort of calm, anyways). A BIG thank you goes out to Linda for allowing me to be a part of such an amazing event and answering my thousands of questions over email. Finally, an ENORMOUS thank you goes out to all of the sponsors who put their faith in me and this project. We couldn’t have done it without you…really! XOXO
Be sure to check out all the amazing work from the other designers too! So amazing!
At Charlotte’s House | Design Addict Mom | Erika Ward Interiors | Erin Kestenbaum | Girl & Grey
Gray Malin | Hommeboys | I Spy DIY | Jewel Marlowe | The Learner Observer | Making it Lovely
Nicole White Designs | Old Brand New | Oscar Bravo Home | Place of My Taste | The Rath Project
Room for Tuesday | SG Style | Undecorated Home | Veronica Solomon | Media BH&G | TM by ORC
![]()
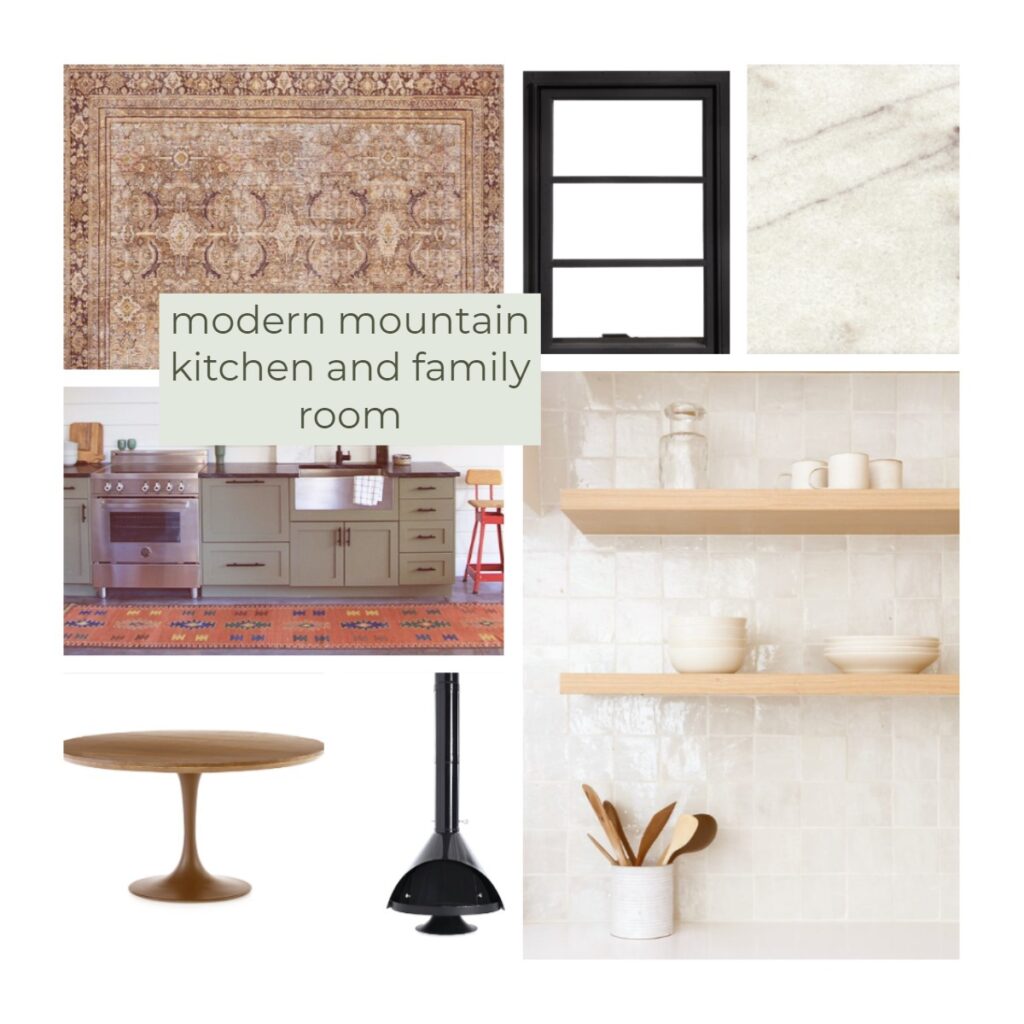
Oh my gosh it’s week five and I can’t believe it! How do we only have one week left until the big reveal? Well, whether I like it or not, we have one week left and I’m gonna finish this dang space up even if it kills me! And it just might! I joke, I joke. For now, lets talk week five and what has been going on during this fuller than full week. But just in case anyone is new here, we are just one week away from finishing our One Room Challenge, a six week challenge where you renovate/re-imagine a space from top to bottom! I was very ambitious this round and committed to a very big, kitchen and family room overhaul. Here’s a visual of the space that I’m planning, to help you picture what this crazy lady is picturing in her head.
A few big things happened this week and LOTS of little things too! The kitchen cabinets are finally installed, thanks to Jennifer and Chris at Nelson Tile & Stone, who came and walked us through the install process when we were struggling. We were supposed to have our cabinets installed and ready to measure for counter tops when they arrived. But since we have been running behind schedule, and instead of leaving us high and dry (like ANY other countertop place would have), they helped us get the cabinets installed and Jennifer even helped me tear out the old carpet on our stairs. Seriously!!! I mentioned in Insta stories the other day, but if you live in Central Oregon and are going to be remodeling a kitchen or bathroom, GO TO THEM! They are the best!
Also this week, I have been busy painting, painting, and painting. After our drywall was finished last week, all the fresh walls and ceilings needed paint. And my black staining project from last week didn’t come out how I had hoped, so I decided to paint it. The stain was shiny in some spots and matte in others and I was just not feeling it. But now it has a fresh coat of black paint and I’m loving it!
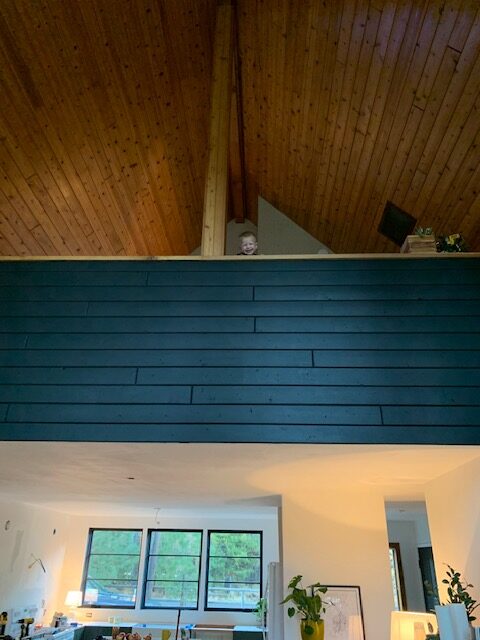
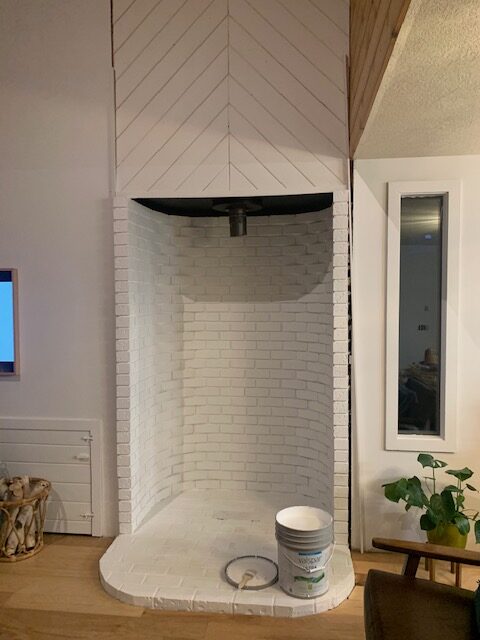
That cute face gets me every time I see that pic. And check out the fireplace progress! Here’s what it looked like when we moved in.
And now…after the paneling was replaced with fresh dry wall and everything was coated with bright, white paint.
Now, I just have to tile the hearth with those cute cement tiles from Zia Tile, and install our new fireplace. Cross your fingers that it shows up in time as it’s shipping out of California, and we have been warned that everything is running way behind schedule due to all the fires that have been burning there.
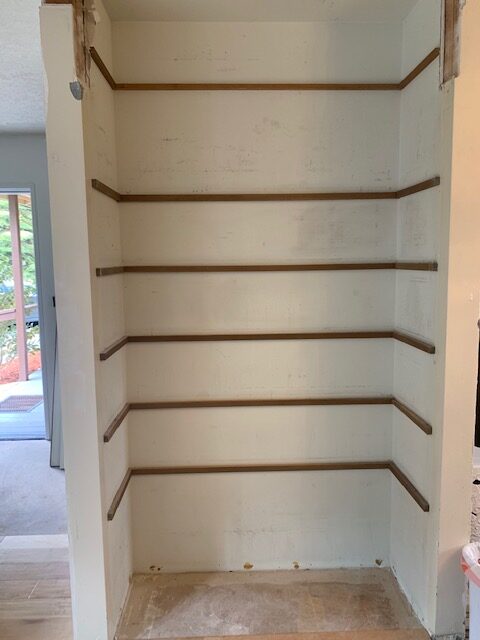
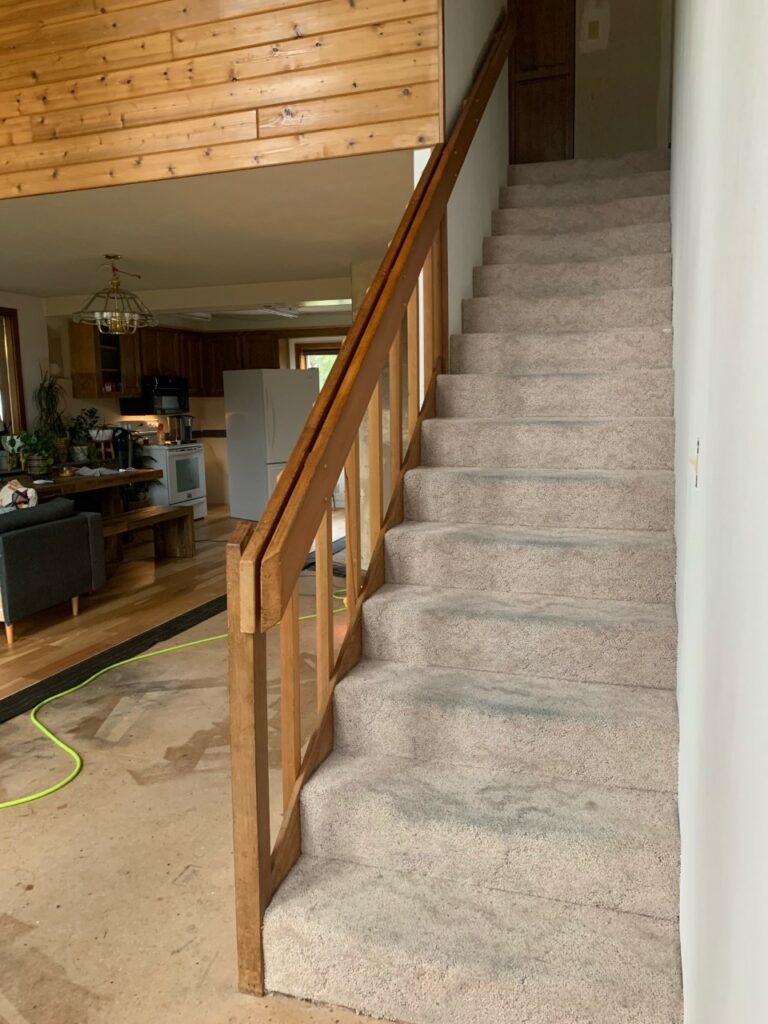
Another fun project that we have been working on this week was updating our scary stairs….seriously this carpet was keeping me up at night. SO BAD! LJ Smith offered to help us do just that, and I am very grateful! Here’s what they looked like before we started.
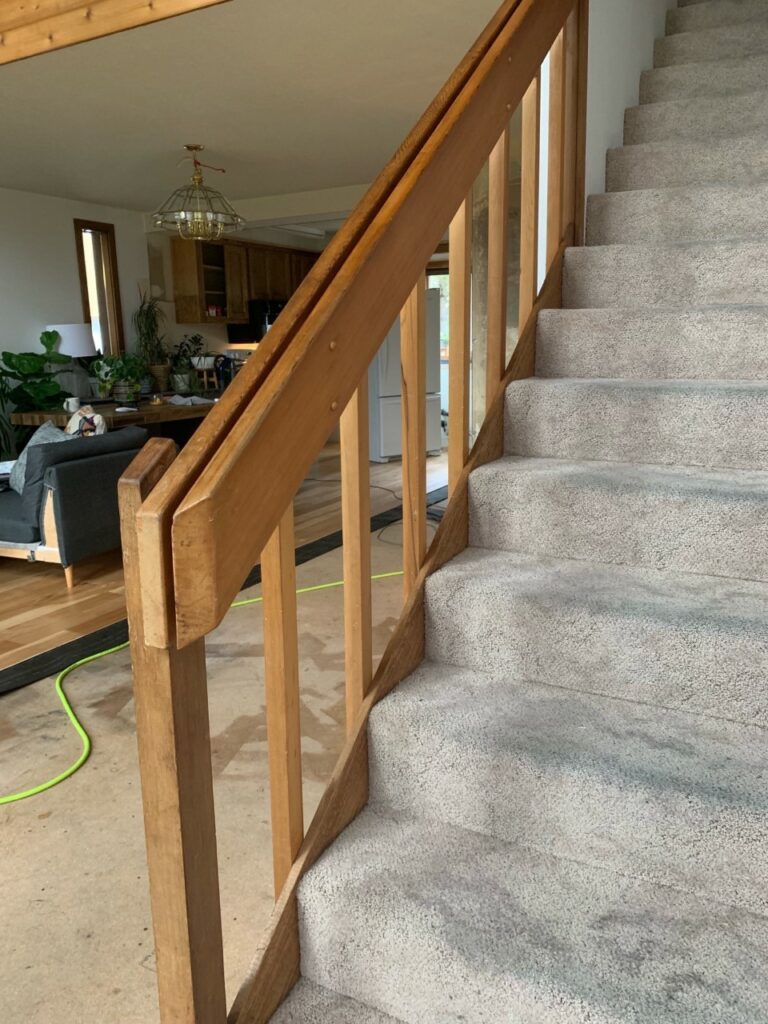
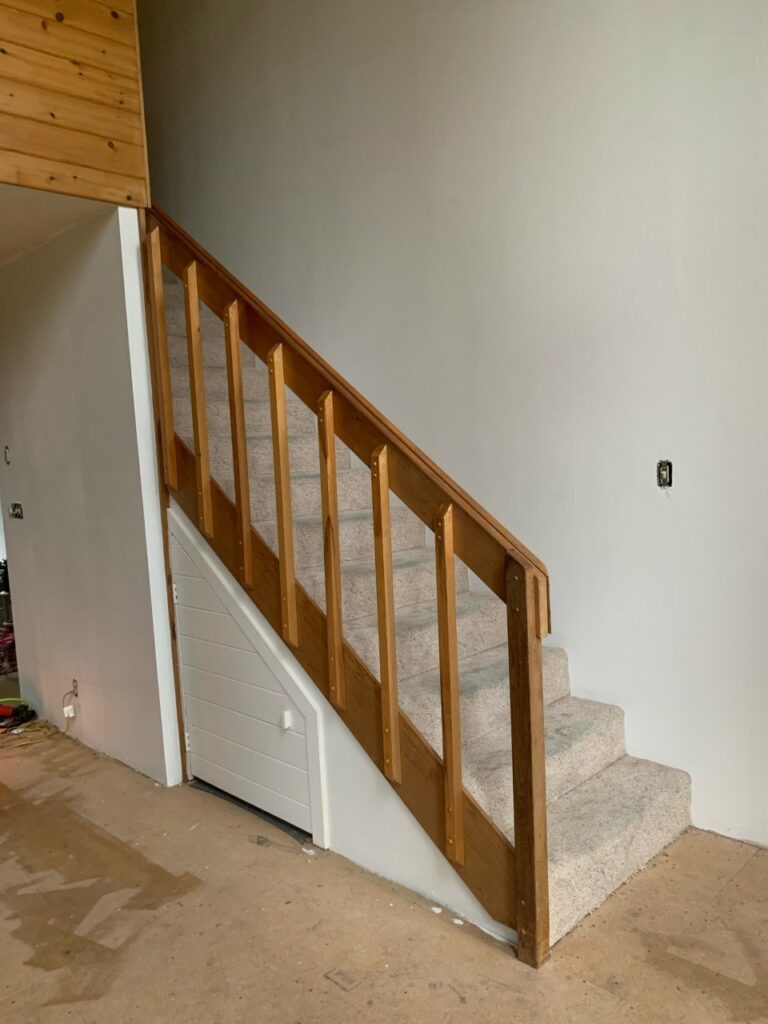

And here’s how we look after removing the old carpet and stair railing. Look at those gorgeous hickory treads and risers!
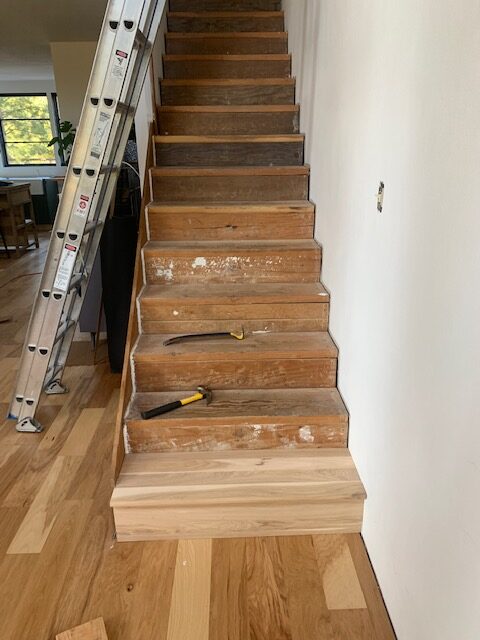
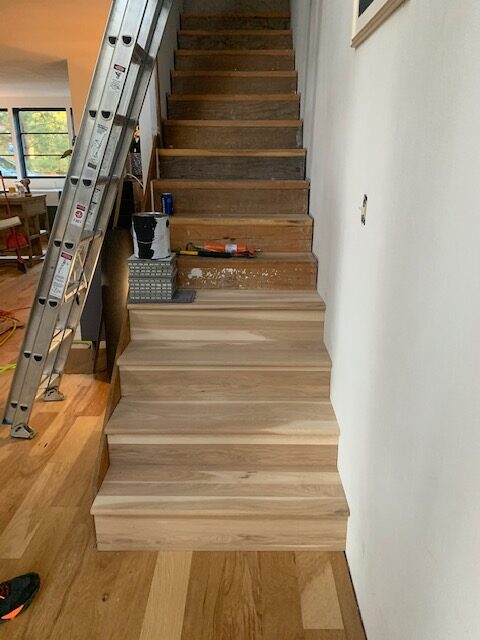
We are almost finished with the treads and risers and are set to begin on the railing portion of the project this evening when the hubs is finished with work for the day! It’s going to make such a big impact on the entire space!
And lastly, instead of writing a very LONG to-do list for the next week, I will just touch on a few of the big items left to take care of.
Ok….that’s it for now! Cross your fingers for me and send me all the energetic, caffeinated and positive thoughts! XOXO
Ps…don’t forget to check in with the other 19 designers to see what they’ve been up to this week! I linked them below for ya!
![]()
At Charlotte’s House | Design Addict Mom | Erika Ward Interiors | Erin Kestenbaum | Girl & Grey
Gray Malin | Hommeboys | I Spy DIY | Jewel Marlowe | The Learner Observer | Making it Lovely
Nicole White Designs | Old Brand New | Oscar Bravo Home | Place of My Taste | The Rath Project
Room for Tuesday | SG Style | Undecorated Home | Veronica Solomon | Media BH&G | TM by ORC
Hi friends! Welcome to week four of the One Room Challenge. This week we’ve been all over the place, and I mean that it in a very literal way. One day I’m painting a wall, the next I’m tiling and the next, I’m off to hunt down slabs of wood for our shelving. I’m all over the place, but It’s finally feeling so bright and fresh in here, and I’m loving it. For weeks, all we did was tear this place apart so it’s nice to see it finally coming back together and starting (just barely) to shine! As always, lets have a look at the vision for the space.
First up, we made the decision last week to hire out our drywall work out, and I’m quite sure that is one of the best decisions I’ve ever made! Jordan from Summit Drywall of Bend (message me if you would like his contact info. I can’t recommend him enough!) came and transformed this shell of a space into a real house complete with beautifully textured walls and ceilings. He finished everything in just a few days which would have taken Nate and I at least a week to complete and I KNOW our work wouldn’t have the professional look that Jordan delivered.
Before Jordan came
After Jordan worked his magic
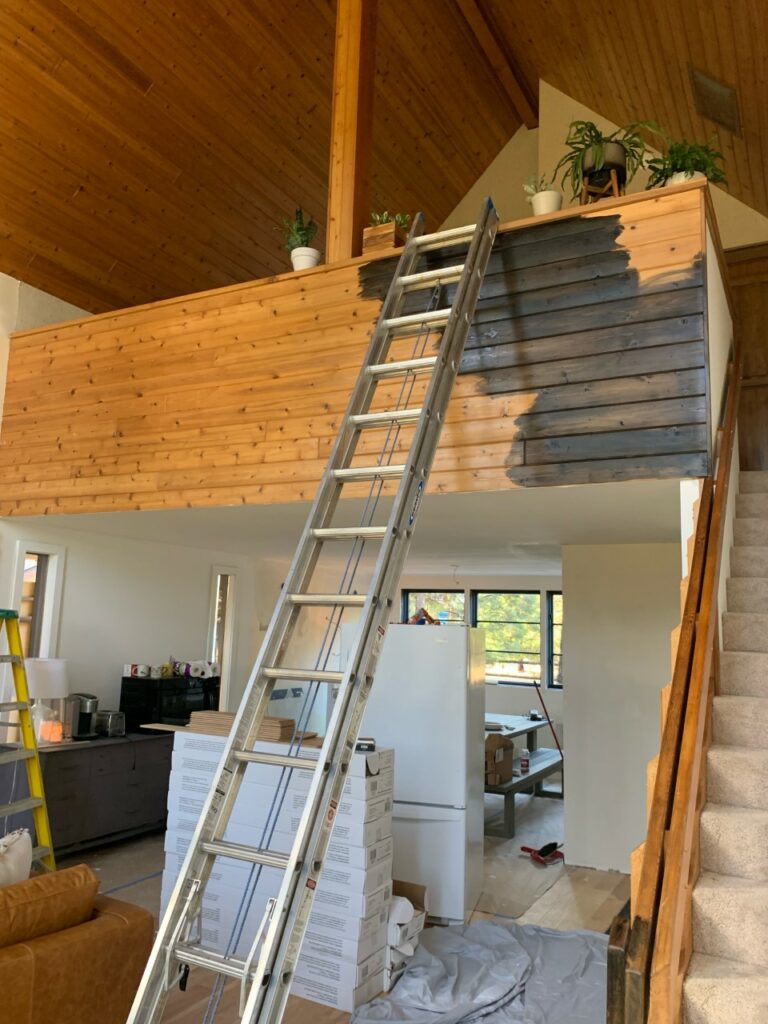
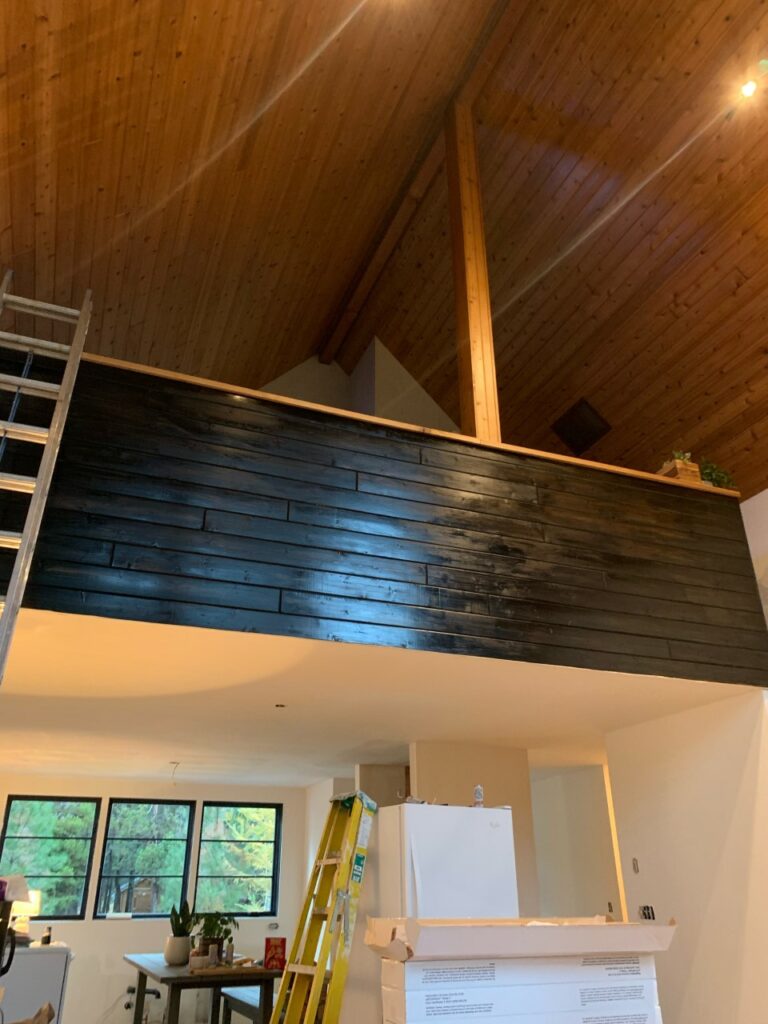
Another project that I tackled this week was staining the wood on the half wall that surrounds the loft. It was the same knotty pine that is on the ceiling, and because there is so much of it between the two spaces, I knew this loft wall needed a face lift. My mom suggested that I paint it black and after talking it over in Insta stories, I decided that staining it black would be a better option. It would show the wood grain while masking some of those orange tones. Win Win! I couldn’t be happier with how this one came out!
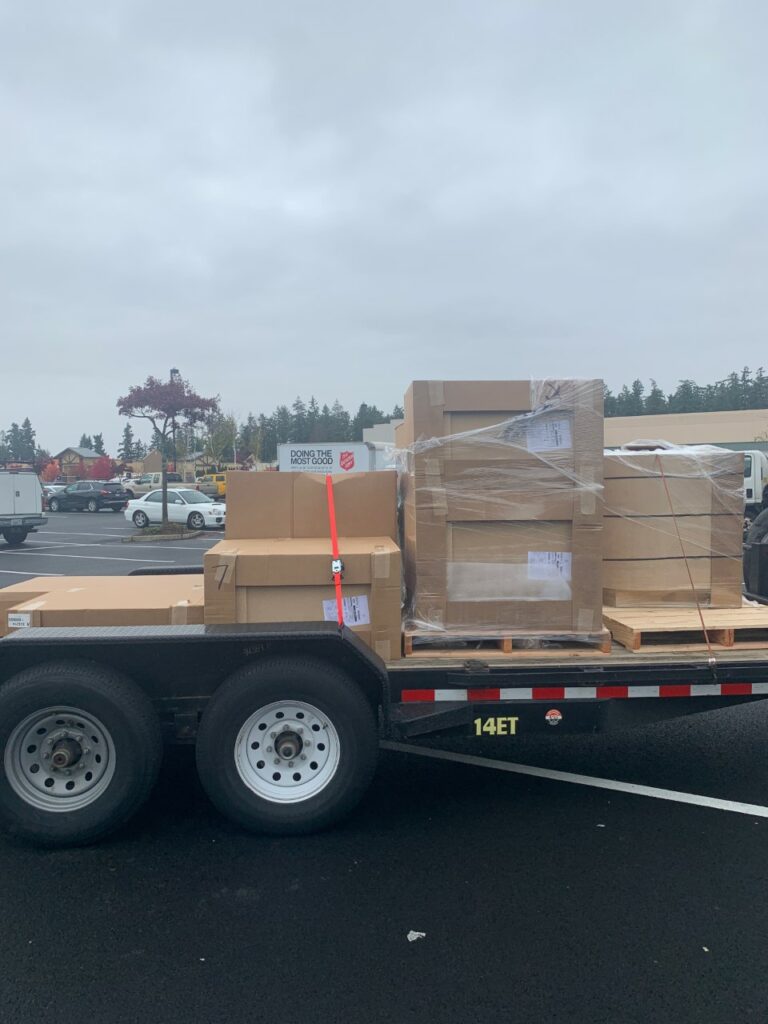
The other major thing that happened this week was we road tripped up to Sumner, WA to pick up our kitchen cabinets! After going over delivery options with the cabinet company, we discovered that we could have our cabinets 10 to 14 days sooner if we picked them up, vs. having them shipped to our door. So off we went! It was a fun trip and felt so good to get out of the house for a couple of days because it’s been nothing but craziness since we started our big reno, so this mini break was a welcome one. However, we drove into crazy rain (welcome to Oregon) which nearly put me into a catatonic state of panic and despair. After trying our best to cover them with tarps, on a whim, we decided to rent an enclosed u-haul, and spent an extra night at my sisters house in Portland. Actually, it turned out to be quite the fun evening while they calmed my rattled nerves and all the cousins camped out together in sleeping bags.
These next two weeks are going to be crazy as we get down to crunch time! Here’s a list so you can see how much is left –
Ok…here we go! There’s a lot to do, but I’m feeling good at the moment! I better get busy so I’ll be back next week for week five…how is it going so fast?!
Ps…Don’t forget to check out what’s been going this week with the other designers! Things are starting to come together!!!!
![]()
At Charlotte’s House | Design Addict Mom | Erika Ward Interiors | Erin Kestenbaum | Girl & Grey
Gray Malin | Hommeboys | I Spy DIY | Jewel Marlowe | The Learner Observer | Making it Lovely
Nicole White Designs | Old Brand New | Oscar Bravo Home | Place of My Taste | The Rath Project
Room for Tuesday | SG Style | Undecorated Home | Veronica Solomon | Media BH&G | TM by ORC
Howdy friends! Welcome to week three of the One Room Challenge and I can’t even believe it! Where is the time going? Let’s get into this, and I will fill you in on allll the happenings around these parts! There are LOTS! For anyone who’s new here, here is my vision for the space, and if you’d like to look back to week two or week one, feel free to clickity click!
Let’s start with windows! Sierra Pacific Windows provided me+ with three of the most glorious, modern, sleek, black windows and to say that I love them would be the understatement of the century. Here is what the above the sink situation looked like before SPW came to the rescue.
And now LOOK!!!!
CAN YOU EVEN?! Guys…I love these windows so much that I could write them a poem about my deep, intense and everlasting love. Just kidding…but only sorta. We spent an entire day installing these bad boys and lucked out big with a Dad who was a commercial glazier for forty years. So he definitely knows his way around a window install. It was so exciting and scary all at the same time! It seems obvious when you think about it, but you have to cut giant holes in the side of your house, and that is NERVE WRACKING! I will write a blog post in the coming weeks to show you guys these beautiful windows up close and personal. Also, they have some pretty cool features!
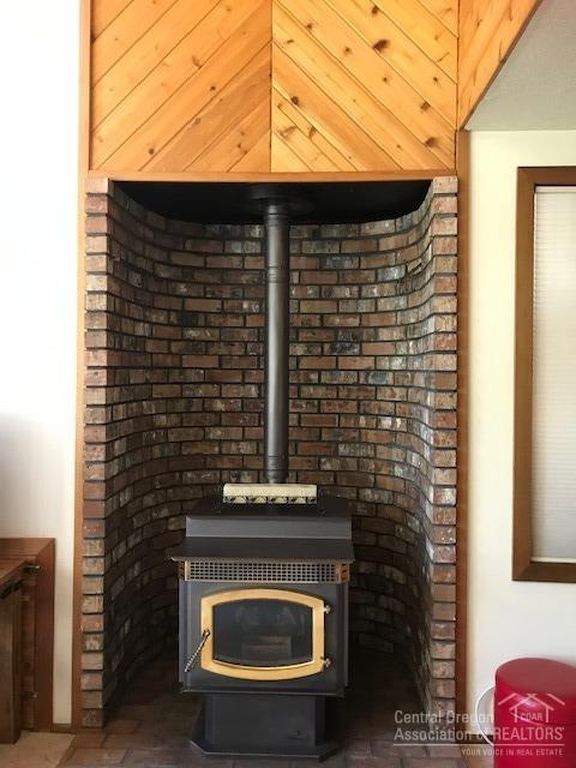
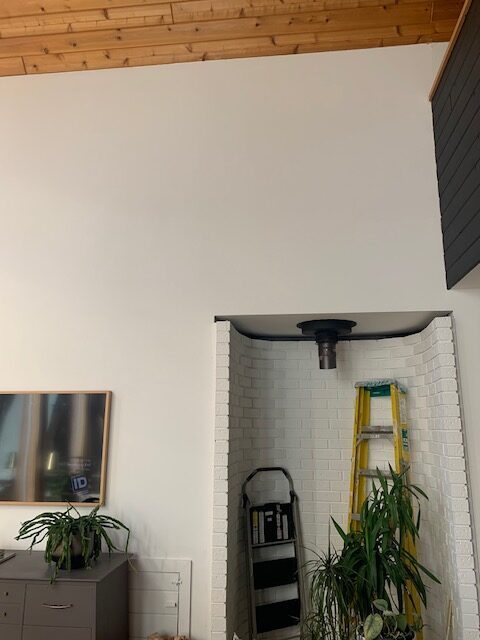
Another thing that we worked on this week was giving the fireplace a face lift. This is what the fireplace used to look like in all of its brown glory.
I decided right away that the brick was calling for some bright white paint to freshen it up.
The old pellet stove that has been residing in this spot since 1993 was re-homed with a local family who have a rustic cabin on the river that they rent out to vacationers. For the hearth, I am going to add a cool cement tile from Zia Tile that will add a pop of pattern. I have mentioned before that my goal is make this house feel alive again, and I think this funky tile addition will help do just that.
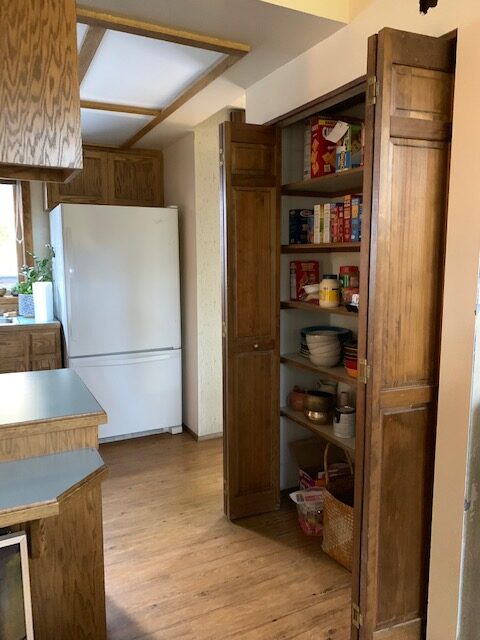
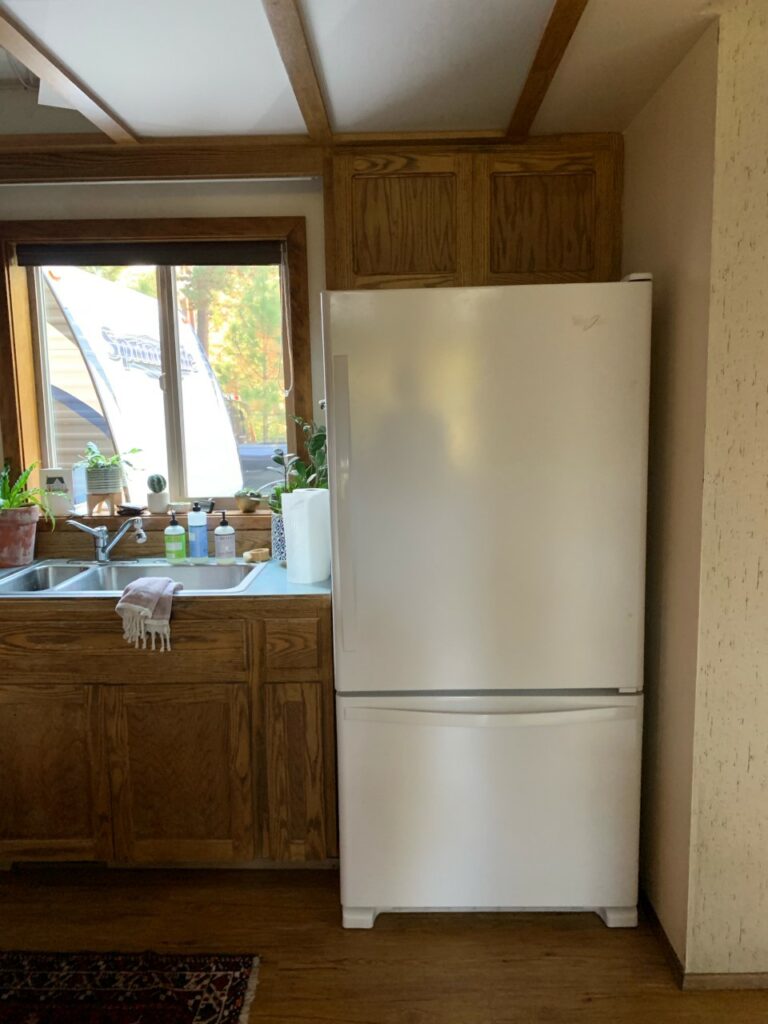
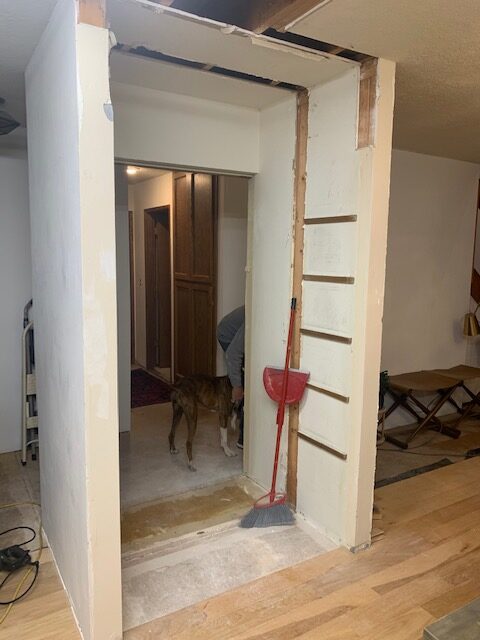
Finally, the last bit of demo was completed this weekend because this old pantry is going to house the new refrigerator with a cabinet surround.
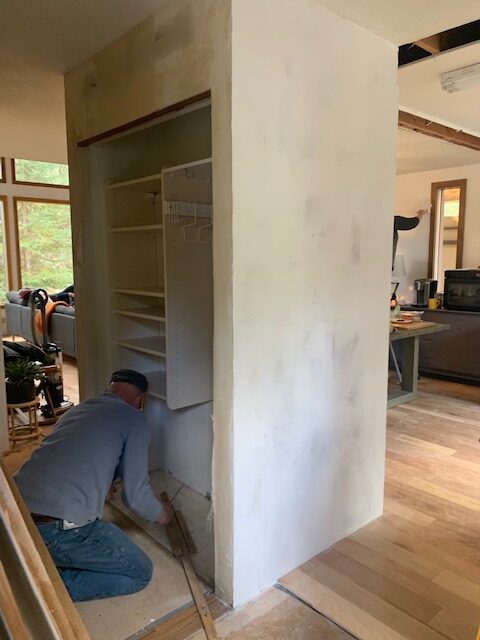
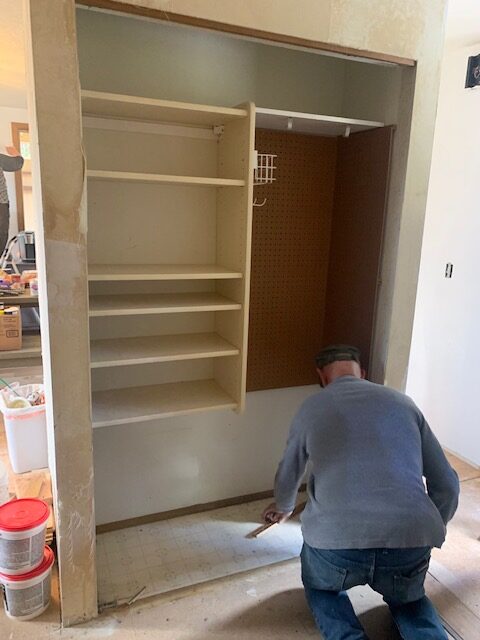
The closet that you see on the backside of the pantry will be removed to make room for the refrigerator and additional cabinetry. I was hoping to keep the closet for obvious reasons, but lost that battle so new drywall will be added in its place. And speaking of sheet rock, we decided to hire out some of the drywall/texture work out and I am so excited! We could really use the help, as our list of to-do’s is looking looooong.
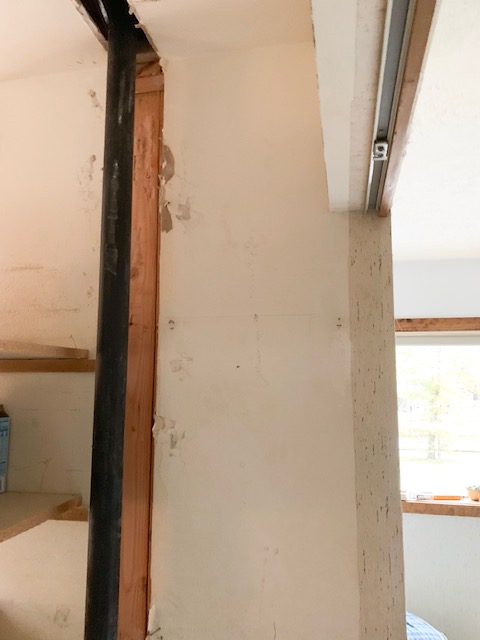
Tearing out these two closets brought us to our first major hiccup in our plans as well. We were sure that there wasn’t any plumbing/electrical inside these walls that would get in the way of the refrigerator placement, but we were wrong. SO WRONG. Allow me to introduce our upstairs shower drain pipe. Which is now going to be re-routed to make way for the refrigerator. Not a huge deal…but definitely an unwelcome sight.
Ok…so here’s what’s on the list for this next week.
I can’t believe week three marks the half way point! OMGOSH there is so much to do! I’ll be back next week with all the dirty deets for week four and don’t forget to check out all of the other designers to see their progress! Until next week! XOXO
At Charlotte’s House | Design Addict Mom | Erika Ward Interiors | Erin Kestenbaum | Girl & Grey
Gray Malin | Hommeboys | I Spy DIY | Jewel Marlowe | The Learner Observer | Making it Lovely
Nicole White Designs | Old Brand New | Oscar Bravo Home | Place of My Taste | The Rath Project
Room for Tuesday | SG Style | Undecorated Home | Veronica Solomon | Media BH&G | TM by ORC
![]()
Well hellllllllooooo week two! Things have been moving right along over here with this One Room Challenge and I am so excited to finally be able to catch you guys up on all the good progress we have been making! Last week, I mentioned that we have been busy planning and working on this space for the last few months but couldn’t fill you in on all the details in an effort to keep the project documented for you all in a way that makes sense for the timeline. As always, here’s a look back at my vision for the space.
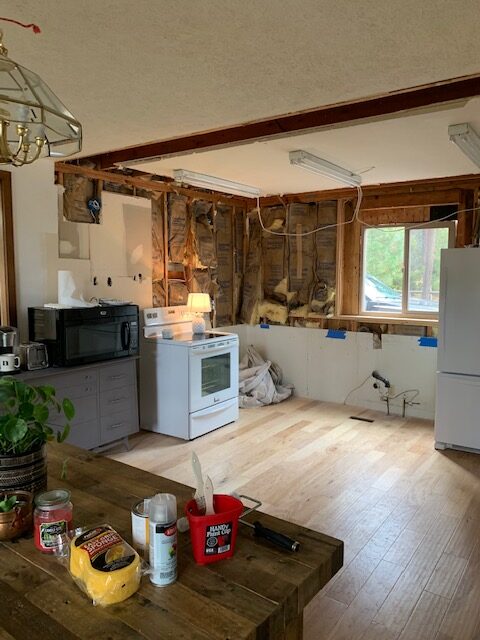
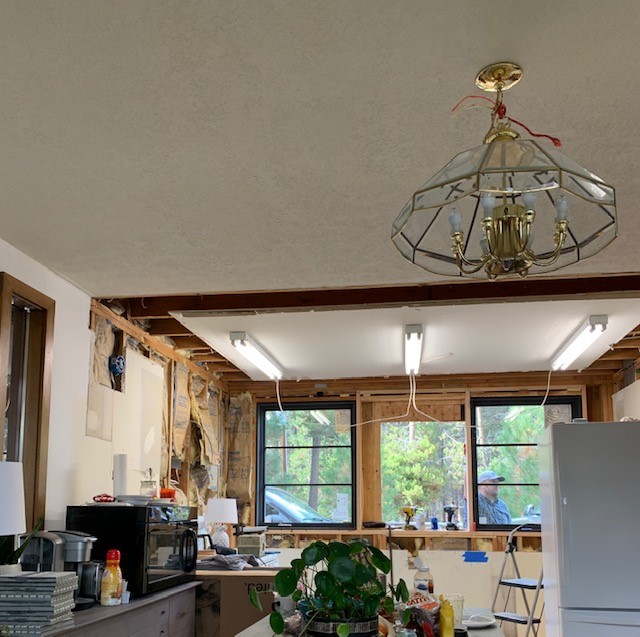
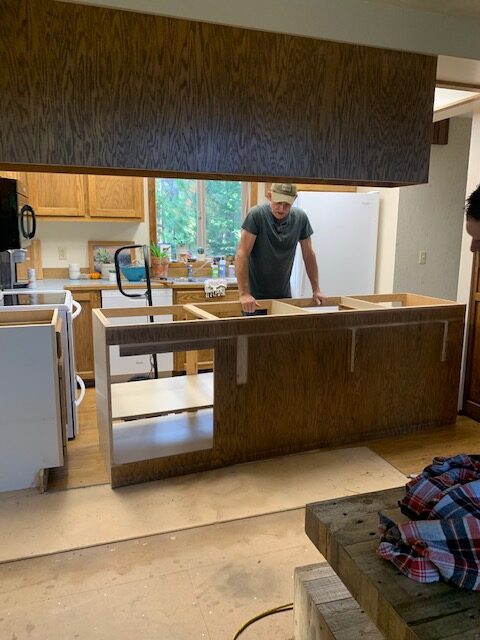
Every time I look at this moodboard…I get butterflies in my stomach. Seriously so excited to see this project come together! But for now, let’s focus on Week Two. The name of the game for this week was all about demo! Here is what the kitchen looked like last week.
And here’s how we look today!
You can see we have been busy tearing this house apart! But, we can’t put it back together until we have a blank slate! One thing to note as well, a lot of things are happening here simultaneously. You might notice that we have brand new wood floors down here that my saint of a husband has been laying during every spare moment he has. The kitchen was totally rewired this weekend to accommodate an entirely new lighting plan. All the walls have been getting fresh coats of white paint. Which was the first time I have ever painted any room white, but this house is screaming for light, bright and fresh. So, I listened to my house and happily hopped on the white band wagon. And lastly, the kitchen window is just propped up there in its original spot, but is being replaced this week after the new windows arrive. Told ya we have lots of stuff going on here at once!
Here are some more shots of us from the demo during the last few weekends.
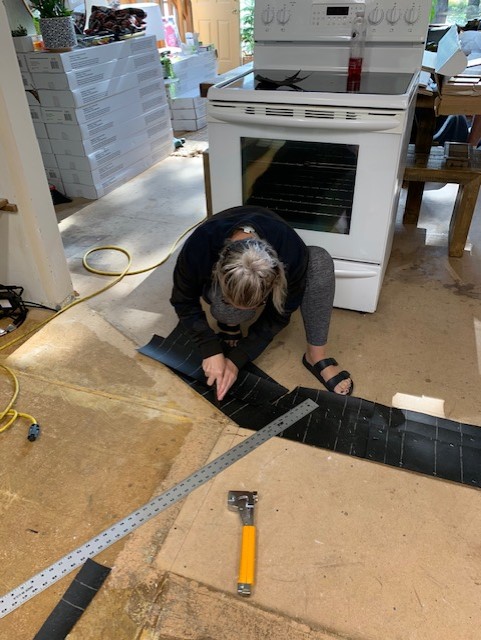
Thought I would also add this one of my sister because it’s such a cute one.
Being kitchenless hasn’t been as bad as I thought it would be. Dinners have become pretty simple around these parts, and I’m not the primary cook in our house so it doesn’t bother me one bit. Think lots of cereal and frozen pizzas! We convinced our kids that living without a kitchen is a lot like camping and they love to camp, so they are thinking that this whole thing is rather exciting! Plus, we will have a new kitchen to enjoy when this is all over so I am keeping my head in the game and my eye on the prize!
What’s up next –
Finish floor installation
Touch up paint
Paint fireplace brick and tile hearth
Install new fireplace
CABINET INSTALL
Countertops/sink/faucet install
Tile
Range hood
Shelves
Lighting
Is it me or did it just get hot in here? Deep breaths and one thing at a time, right? Wish me luck this week and watch my Instagram stories for all the reno progress videos and pics. See ya next week!!! XOXO
AND BE SURE TO CHECK OUT ALL OF THE OTHER DESIGNERS THIS WEEK TO SEE WHAT THEY’RE UP TO!
At Charlotte’s House | Design Addict Mom | Erika Ward Interiors | Erin Kestenbaum | Girl & Grey
Gray Malin | Hommeboys | I Spy DIY | Jewel Marlowe | The Learner Observer | Making it Lovely
Nicole White Designs | Old Brand New | Oscar Bravo Home | Place of My Taste | The Rath Project
Room for Tuesday | SG Style | Undecorated Home | Veronica Solomon | Media BH&G | TM by ORC
![]()
OMG TODAY IS THE DAY! It’s the first day of the first week of the One Room Challenge! I’m back at it, but this time, as a Featured Designer (still pinching myself that my name is among the list of amazing designers) and I couldn’t be more excited about it! I have been planning this space for months now, and it’s been nearly impossible to keep all of this a secret from you guys! This is my third crack at the challenge, and if you’ve been following along for a while now then you might have seen my powder room transformation from Fall of 2018, or my shack turned office project from the Spring of 2019. If you don’t know what I’m talking about…then go and check them out! Now lets get down to biz. Here’s a visual of what I’m thinking!
Many of you already know that the hubs and I sold our house over the summer and moved into a fixer upper. And when I say fixer upper…I mean it. For reals, guys. This new house of ours is in serious need of some love. When I was trying to decide which room I would be tackling for the ORC, I thought about doing a smaller project like a bathroom or a bedroom because it felt like a safer choice. But, my hubs gave me the pep talk of all pep talks and convinced me to “go big, or go home.” So, that’s been my motto as I’ve been planning and we are def going BIG with a complete kitchen remodel as well as the attached family room. Am I crazy? Have I lost it? Maybe. But I’ve had three cups of coffee and full of nervous energy so I’m gonna do my best to pull this thing off!
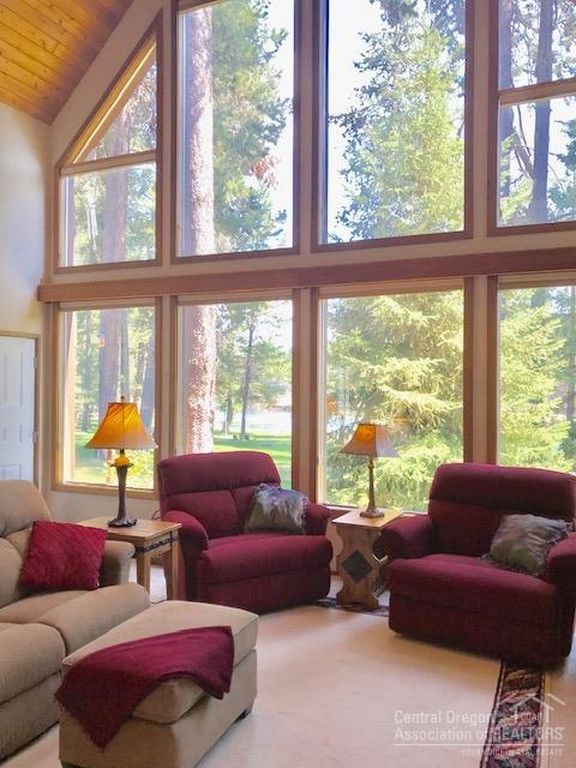
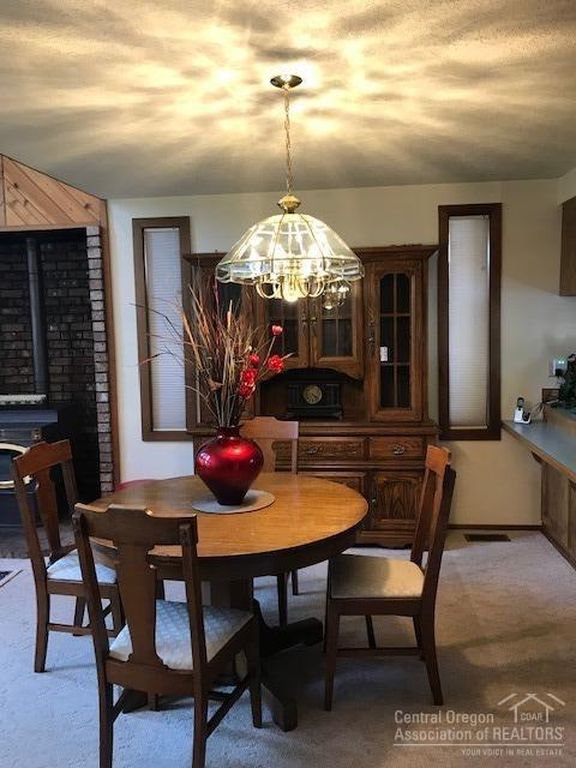
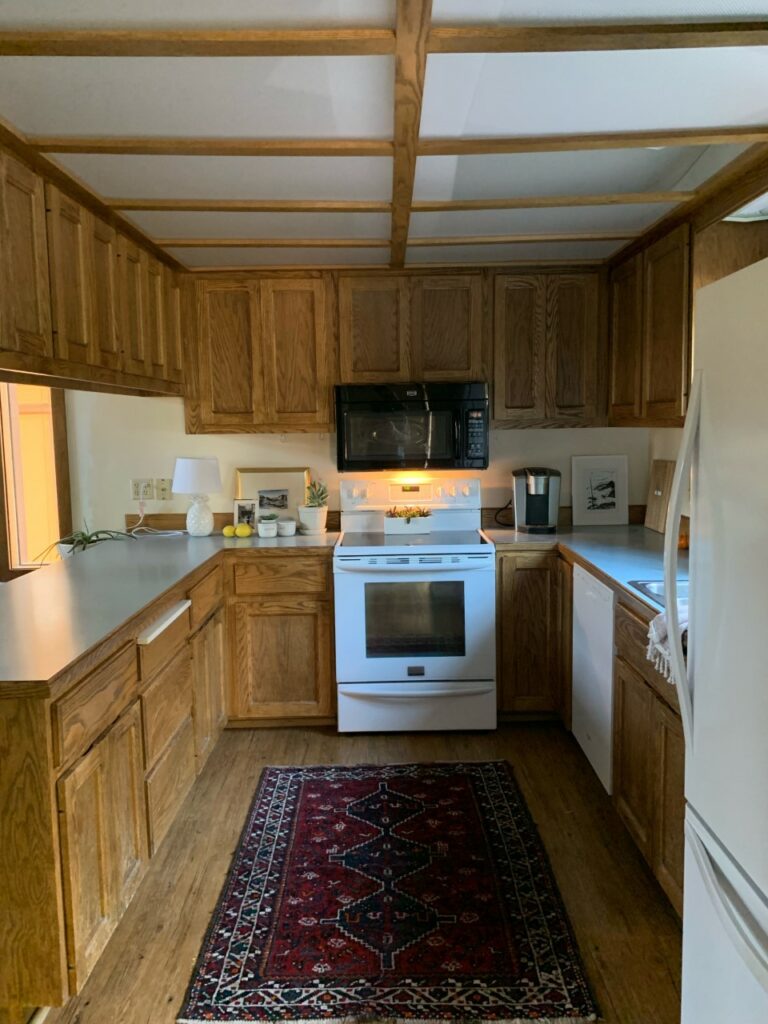
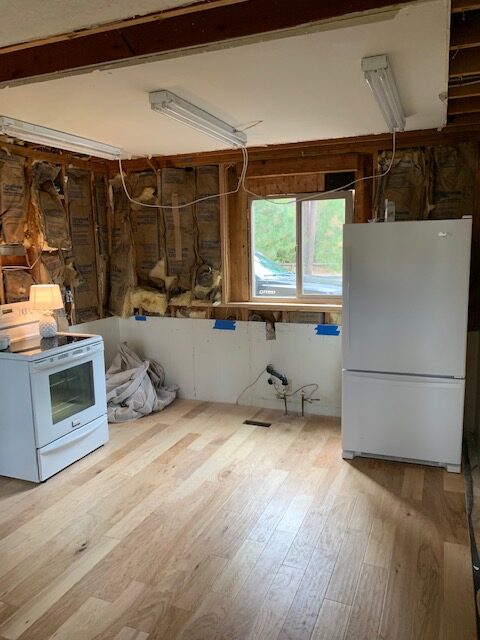
THE BEFORE
Here’s how the kitchen looked last month on move in day.
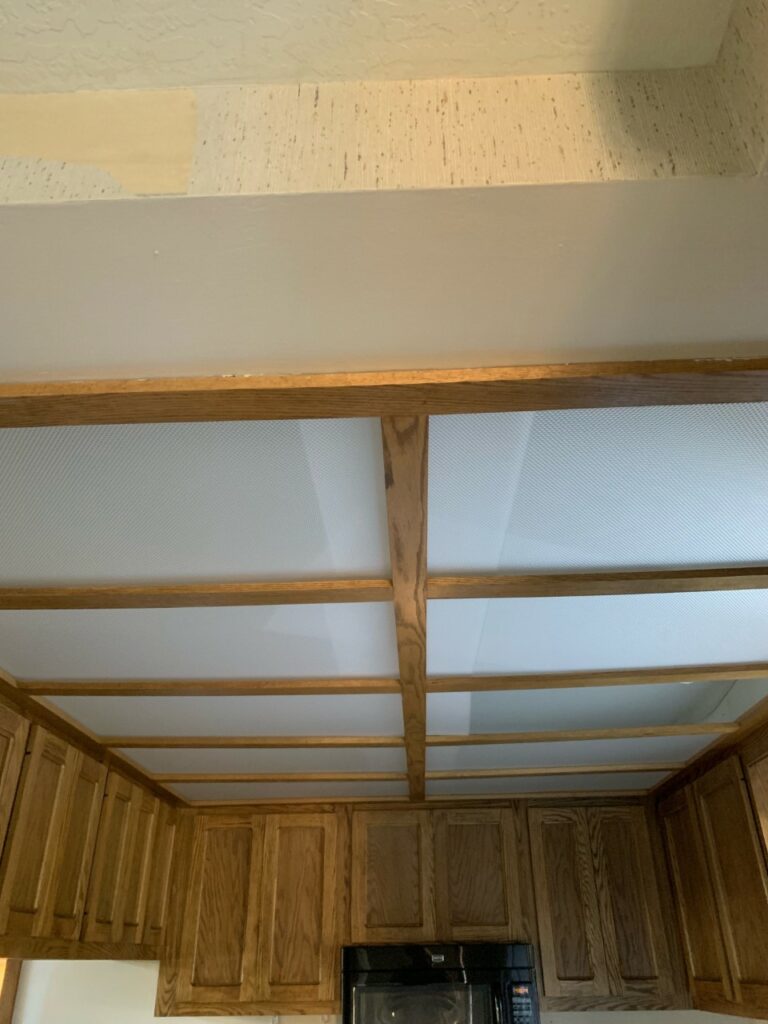

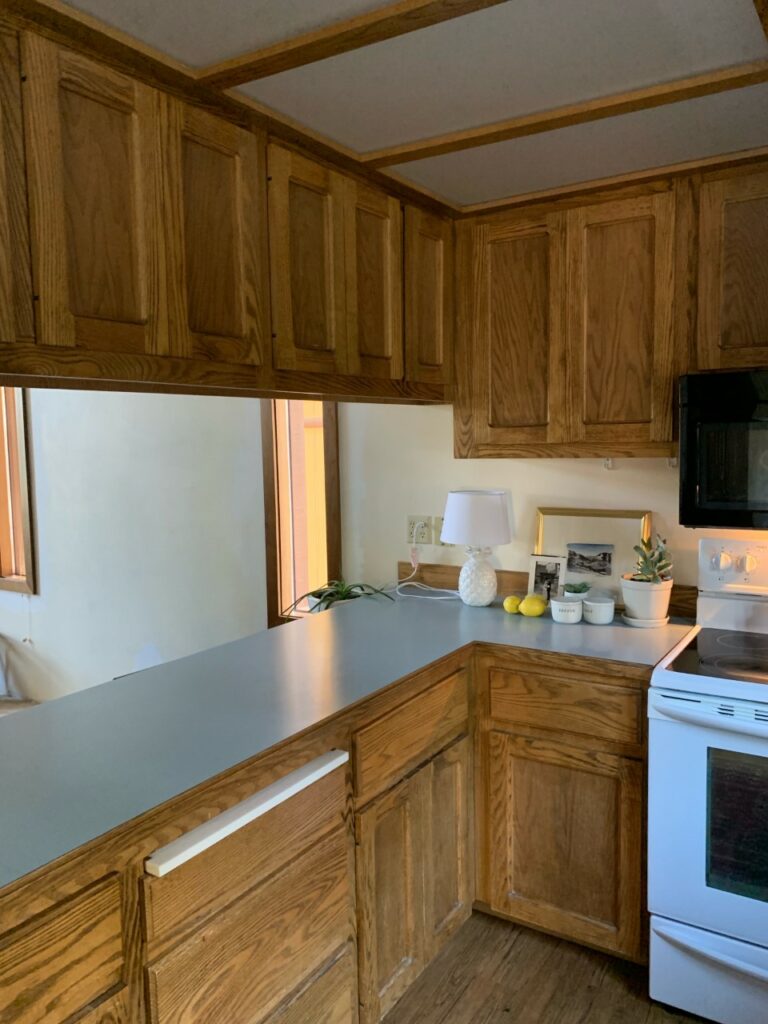
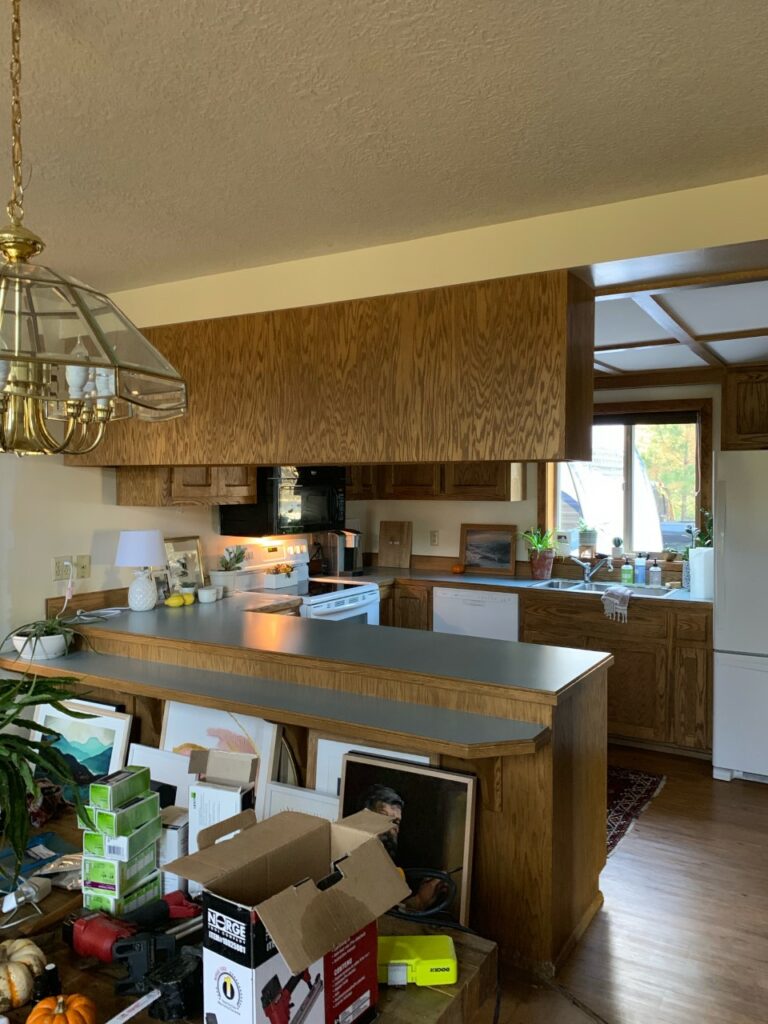

What do you guys think? Are you scared for me? You can see we have a lot of work ahead of us! The goal is to transform this sad space into a living/dining/and kitchen that we love. This house needs to be brought back to life again and I am up to the task! That’s all for now!
See ya next week!
Ps…don’t forget to check out the other fabulous featured designers! I’m just giddy about all the inspo that’s going to be floating around over the next six weeks!
At Charlotte’s House | Design Addict Mom | Erika Ward Interiors | Erin Kestenbaum | Girl & Grey
Gray Malin | Hommeboys | I Spy DIY | Jewel Marlowe | The Learner Observer | Making it Lovely
Nicole White Designs | Old Brand New | Oscar Bravo Home | Place of My Taste | The Rath Project
Room for Tuesday | SG Style | Undecorated Home | Veronica Solomon | Media BH&G | TM by ORC
![]()
This post is sponsored by Inmod
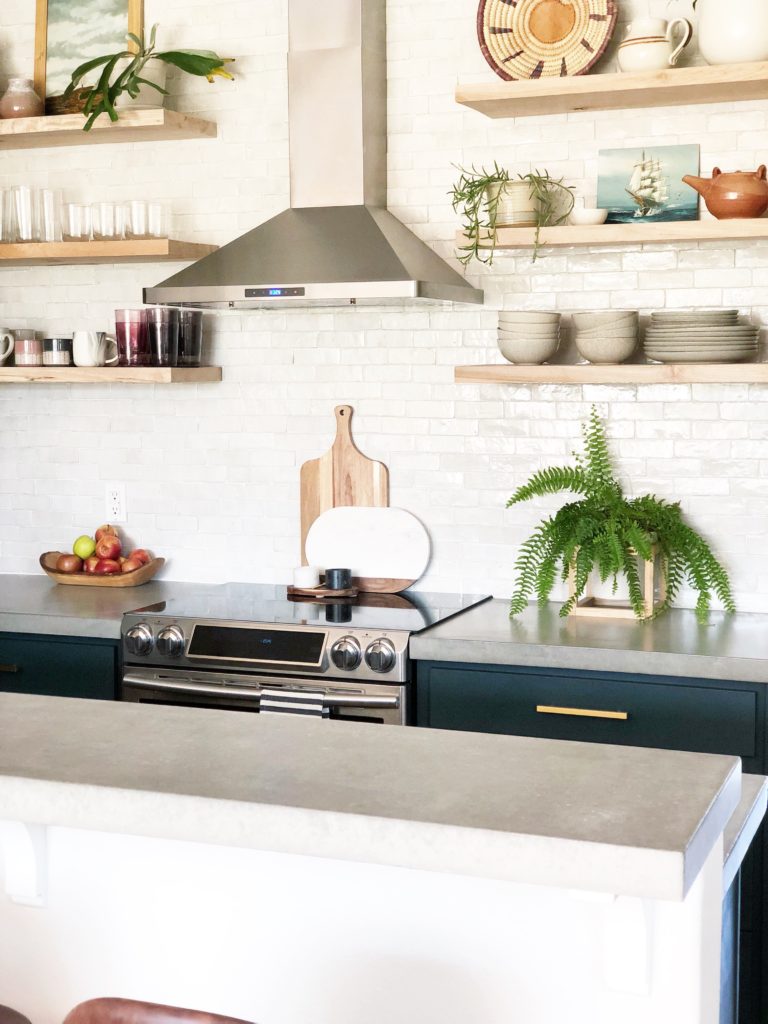
I’m so excited to share our finished kitchen with you guys today! It was a long, long process and it feels BEYOND good to be all finished up! Our kitchen was a diy through and through and has me feeling some major pride. We were newbies to some of the projects (tiling) but also old hats at others (painting the kitchen cabs). But, this story has a happy ending and we are thrilled with how it came out!

Let’s take a look back at where we began, shall we?
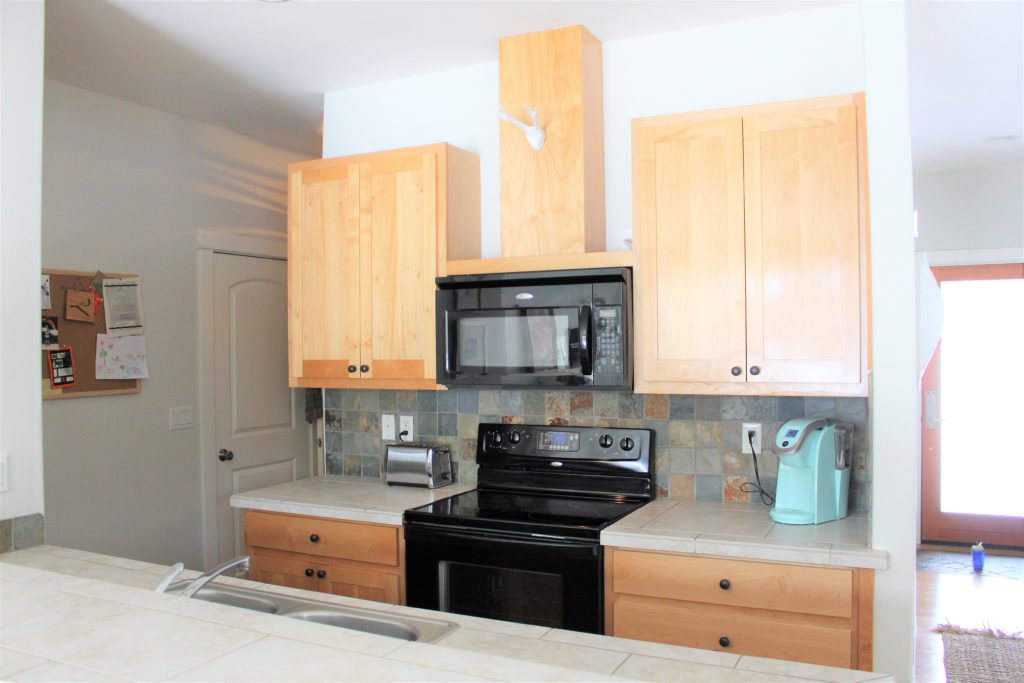
Although we kept the original footprint of the kitchen, we changed almost everything else. There wasn’t really anything wrong with the kitchen before, but it wasn’t our style and just kinda fell flat. That feeling of blah.
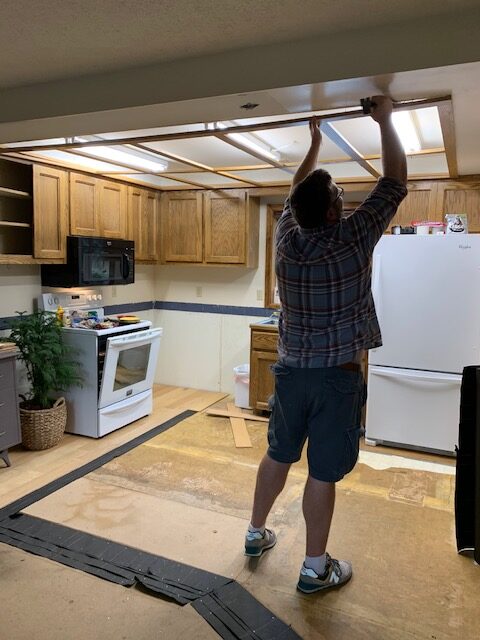
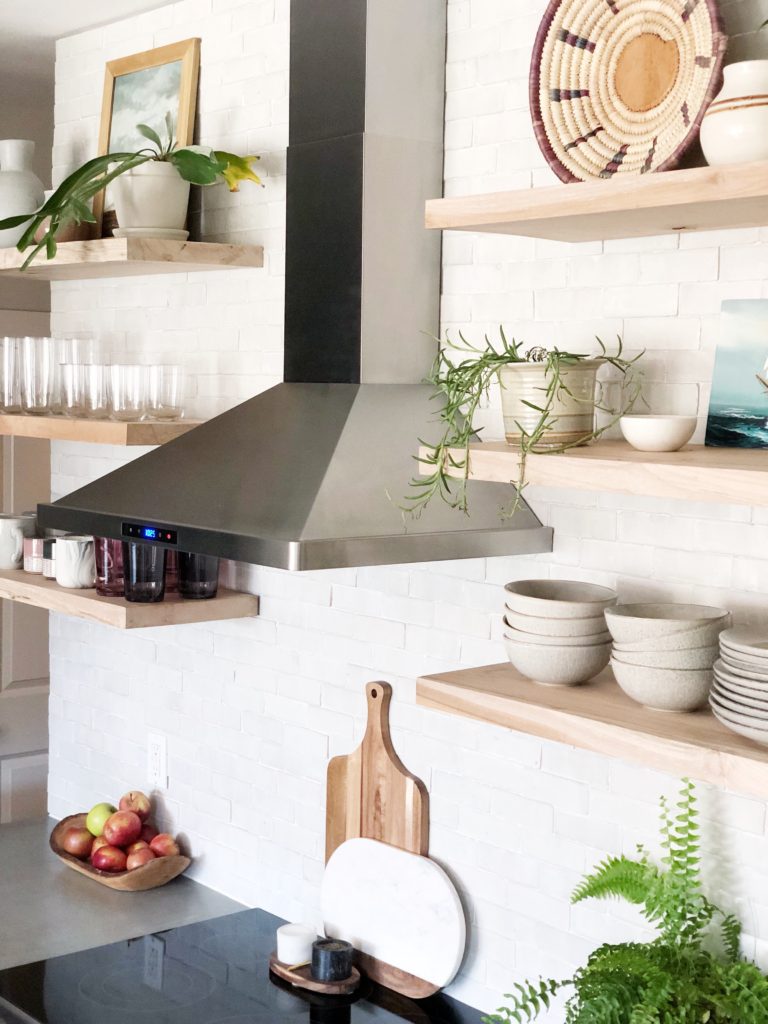
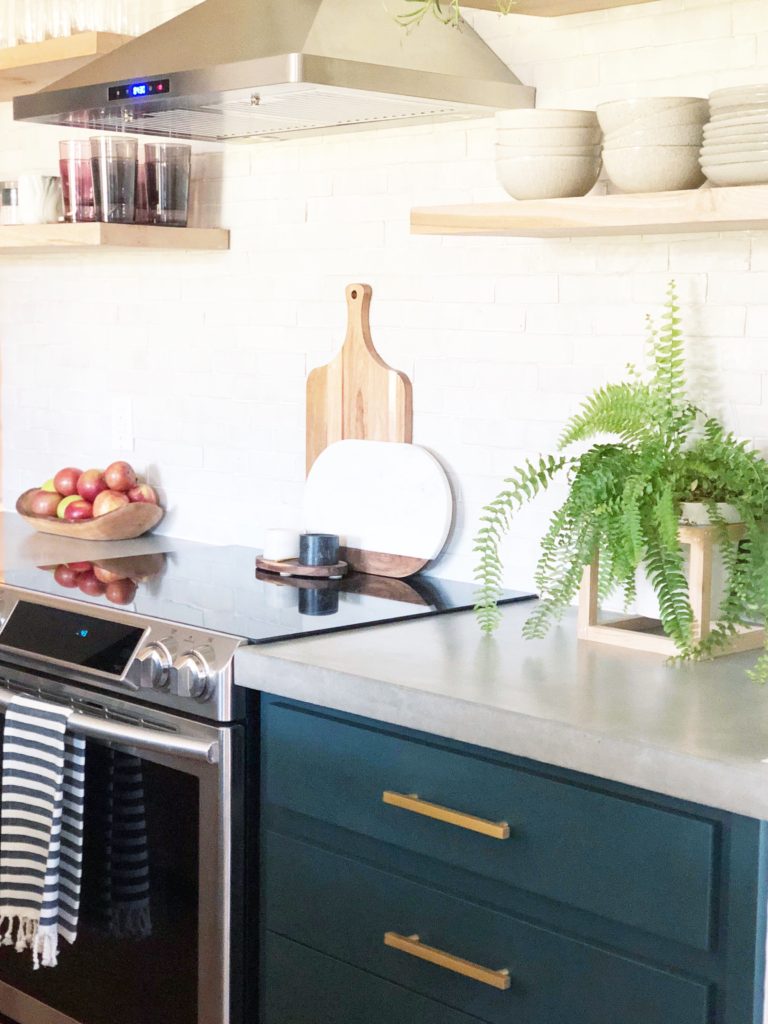
Our first task was removing the old upper cabinets and the vent hood. I hated how the original cabinets were floating in the middle of the wall. Our ceilings are high at nine feet and that area above the cabinets didn’t seem like a good use of space. Our kitchen is small so wasted space is a no no. This seemed like an opportunity for tile all the way up to the ceiling and some open shelving.
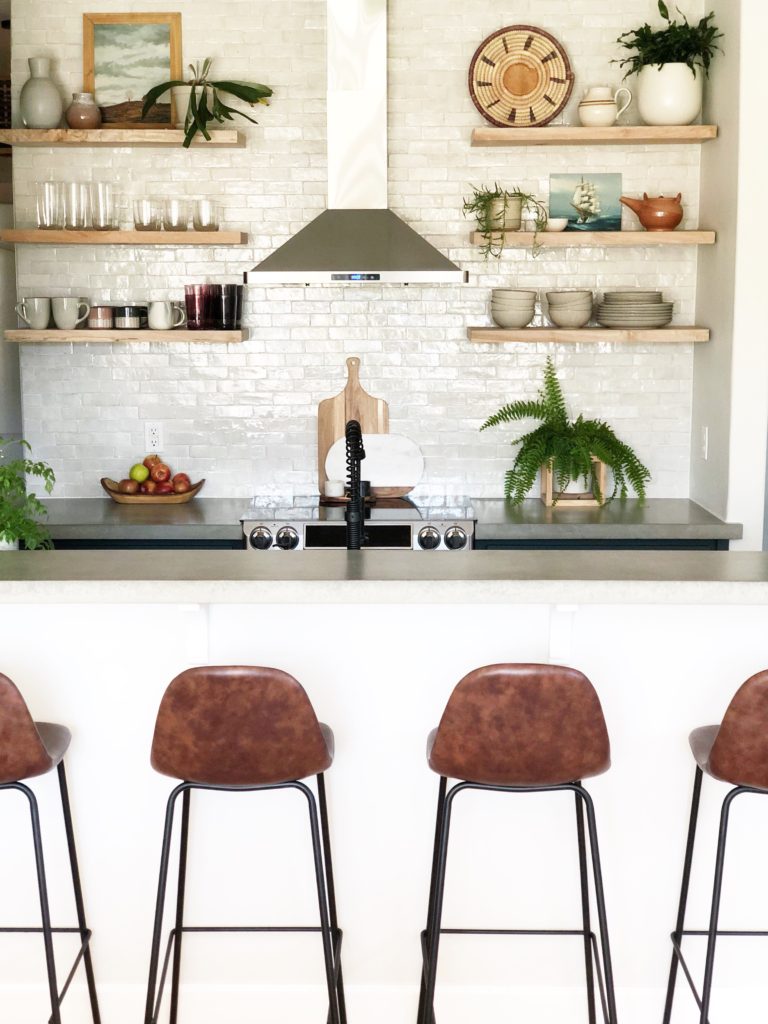
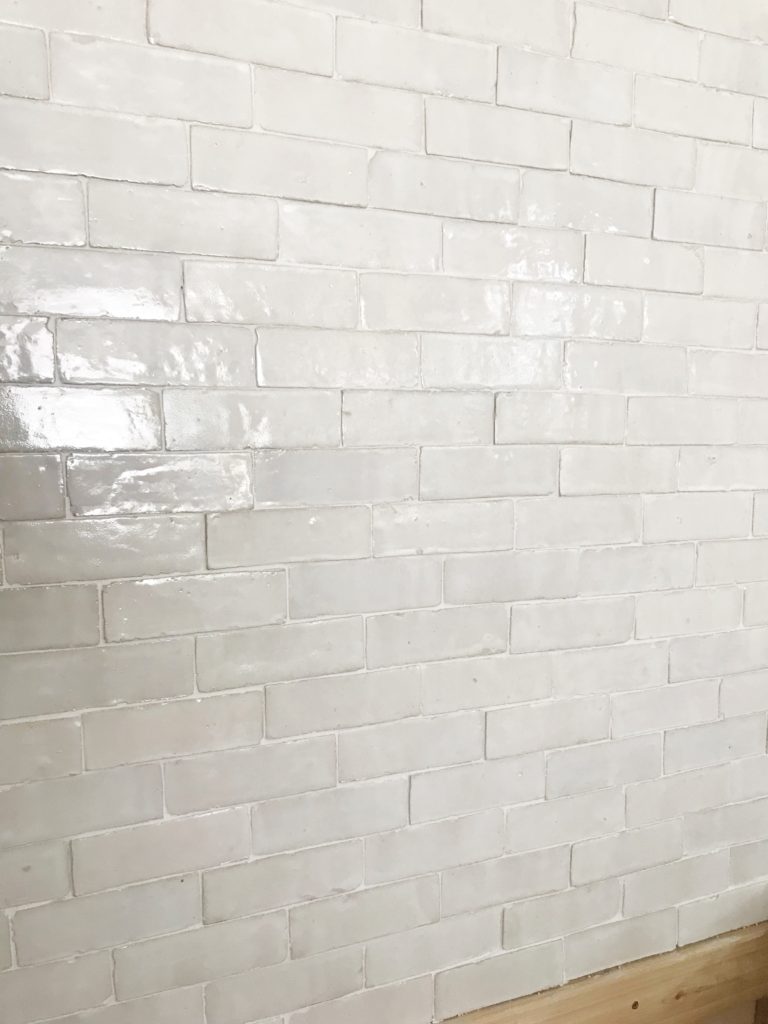
For tile, we chose the 2×6 weathered white zellige from Cle Tile. I have been in love with this tile ever since Emily Henderson used it in her kitchen last year. I have never tiled anything of this scale before and I was actually pretty nervous about tackling this project, but it turned out to be kinda fun! My sister and her husband came for the weekend to help us and we made a party out of it! I definitely recommend drinking cocktails while tiling…as long as you can keep your lines straight. The tile came out beautifully and I LOVE it. It’s my favorite part of the kitchen. And let me tell ya…it’s even better in person.
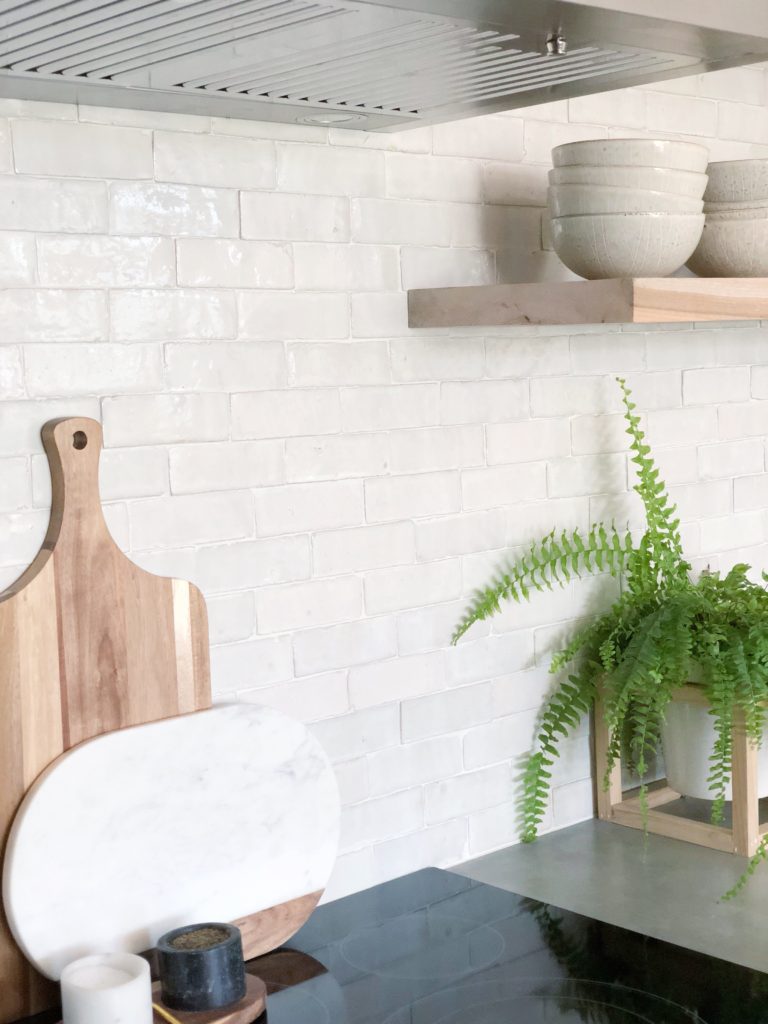
For the open shelves, we tracked down a local who sells wood slabs of all kinds. All we had to do was decide on a type of wood and he cut it down to size for us. We ended up going with a couple of slabs of maple. I wanted a light colored wood with some grain and the maple fit the bill. It’s a hardwood too so that’s another bonus. After they were hung, I sealed the shelves with wax.
Our countertops are concrete and we poured them ourselves. I’ve actually been getting so many questions about them and the process that I am going to dedicate an entire post just to the countertops. Coming soon! It was a BIG job but they are perfectly imperfect and just what I was envisioning for the kitchen! A big thank you to Jimmy and Dani for coming from Idaho and showing us the ropes.
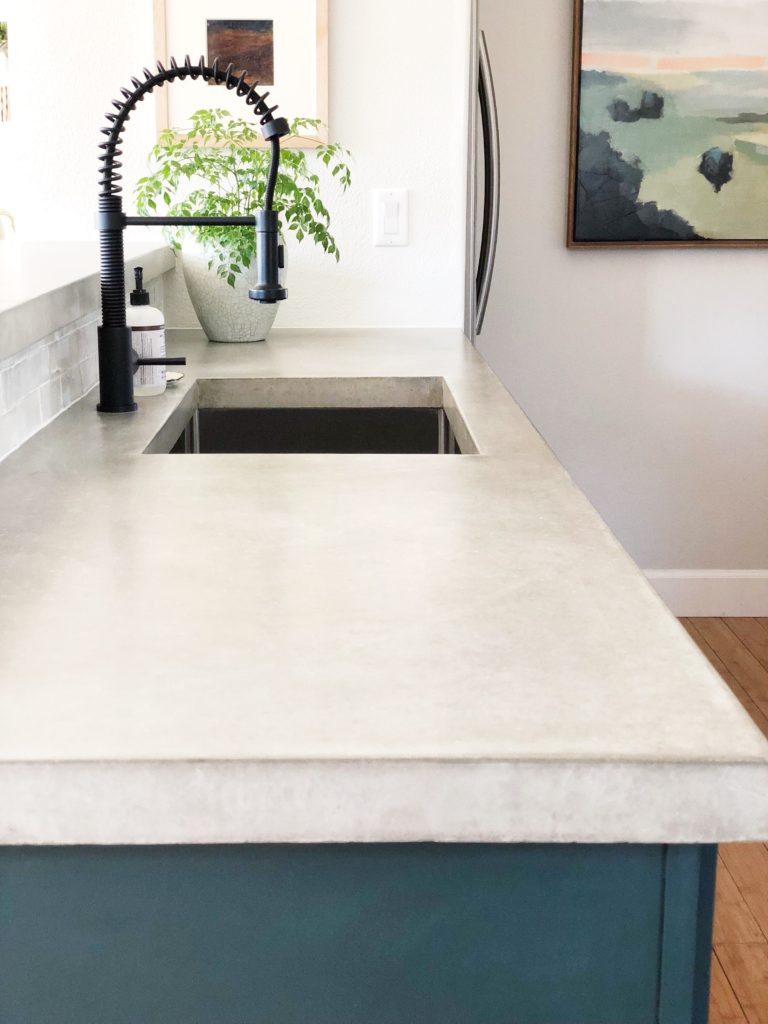
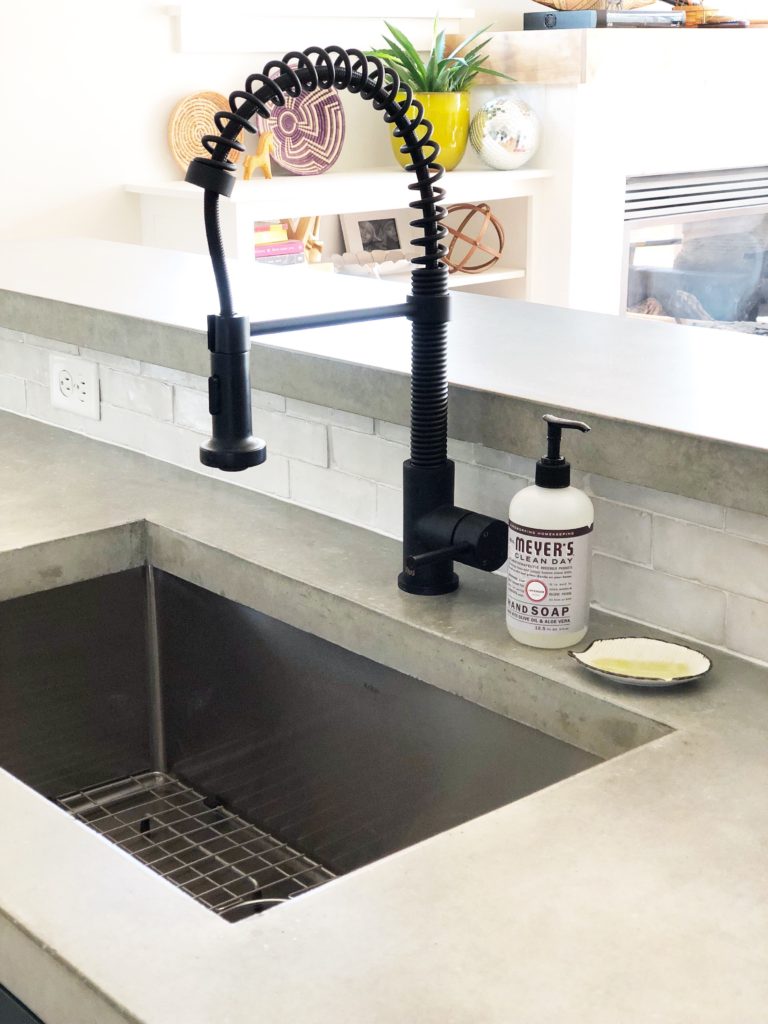
Deciding on the faucet for the kitchen sink was a tough one for me. I don’t know why exactly, but I ended up ordering three before I settled on this matte black guy. My husband wanted to kill me (not really…but, kinda) but my folks ended up adopting the first one for their kitchen and the second one is living out its days in the box in the garage. I’m confident we will find it a new home though! Maybe Facebook marketplace or craigslist?
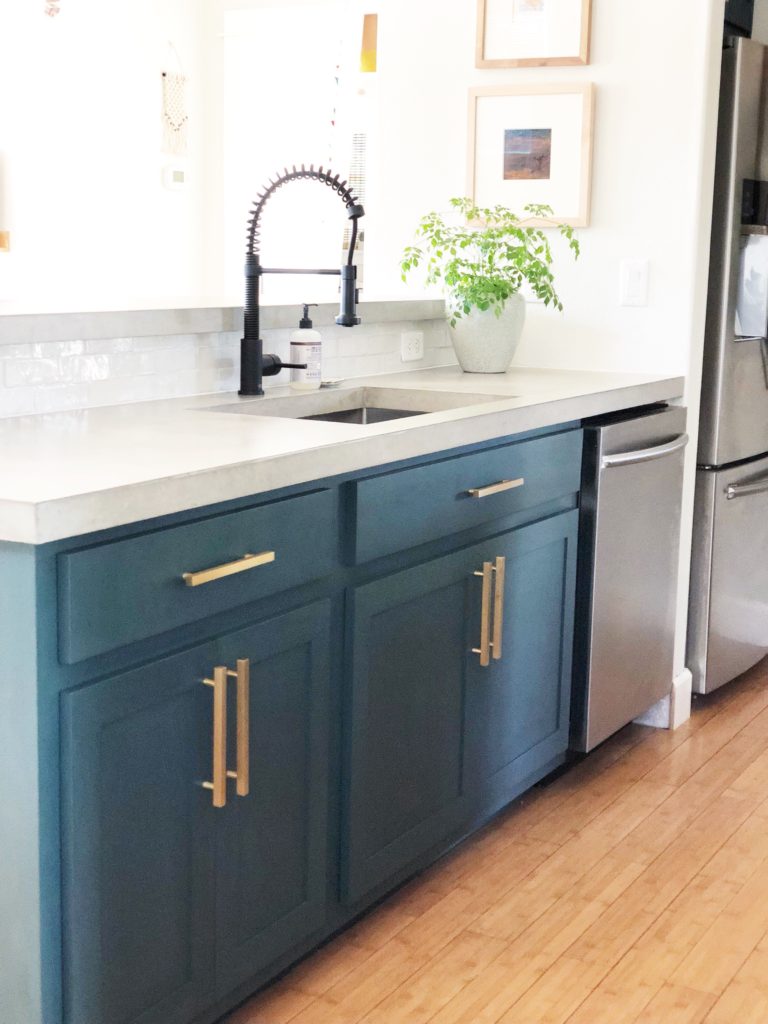
For our cabinets, we painted them Hidden Falls by Benjamin Moore and added new brass hardware from Cb2. The new color is a deep green with some blue undertones and I love the moody vibe it gives the kitchen.
And just when we were putting the finishing touches on the kitchen, Inmod approached me and asked if I would be interested in working together. I jumped at the shot. You see, I couldn’t decide on bar stools for the new kitchen and after the whole faucet debacle, I knew I needed to be sure of my decision (i.e. not order online and then hate them in person). Inmod is famous for their crazy big selection of modern, mid-century, industrial, and Scandinavian furniture. They also sell styles from world revered designers such as Eames, Wegner, and Saarinen, just to name a few! So knowing this, I knew I could pick some bar stools that would function well and look beautiful in the new kitchen.
I ended up choosing their Sigfred Barstools in the tobacco color and I’m. In. Love. They have a beautiful leather padded seat with the most lovely stitching detail. The legs are a black metal and I love how it plays so well with my matte black faucet. Aren’t they the perfect pair? Putting them together was a breeze, and I assembled them by myself one evening while my husband gave the baby a bath. I finished before he had his jams on!
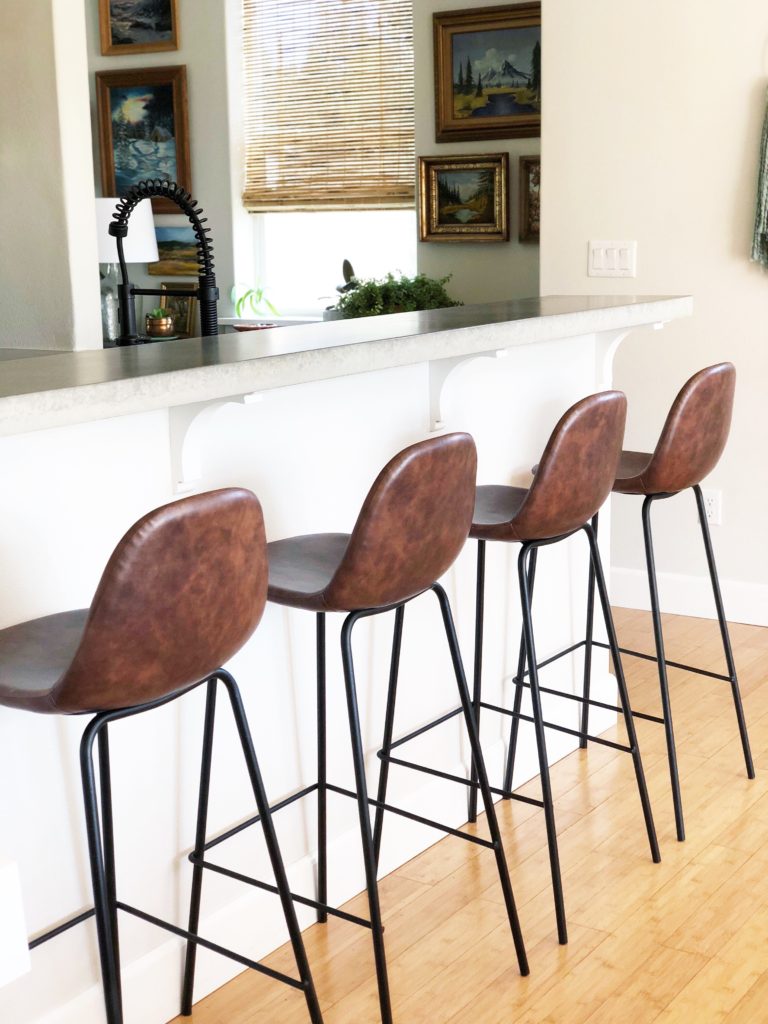
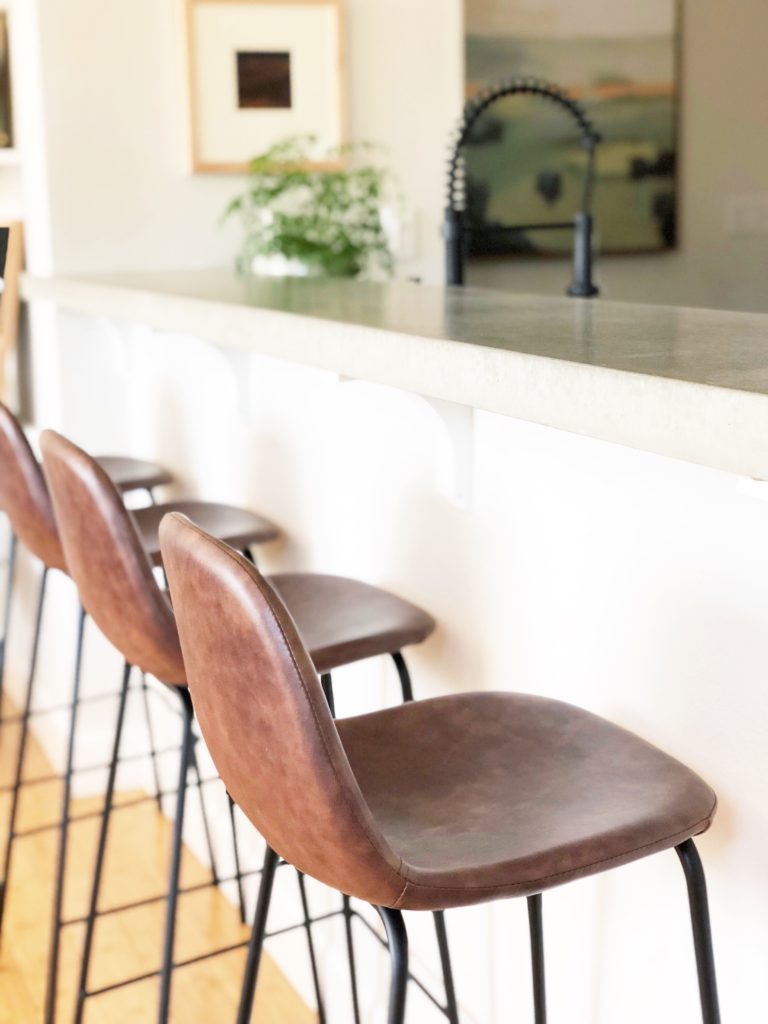
And because we eat all of our meals at the bar in these barstools, I can attest to their comfort. We spend a lot of time in this area because we don’t have a dining room (but this is a whole different story, for another time). Also, it is worth mentioning that there may have been a spaghetti supper on their first night in the house and they wipe up beautifully. I’m a big fan, can you tell?
So there you have it! The kitchen is done! What do you think? Does anyone have any DIY tales where something went horribly awry?? Did anyone order multiple kitchen faucets? I want all the details. Leave me a comment…I’d love to hear!
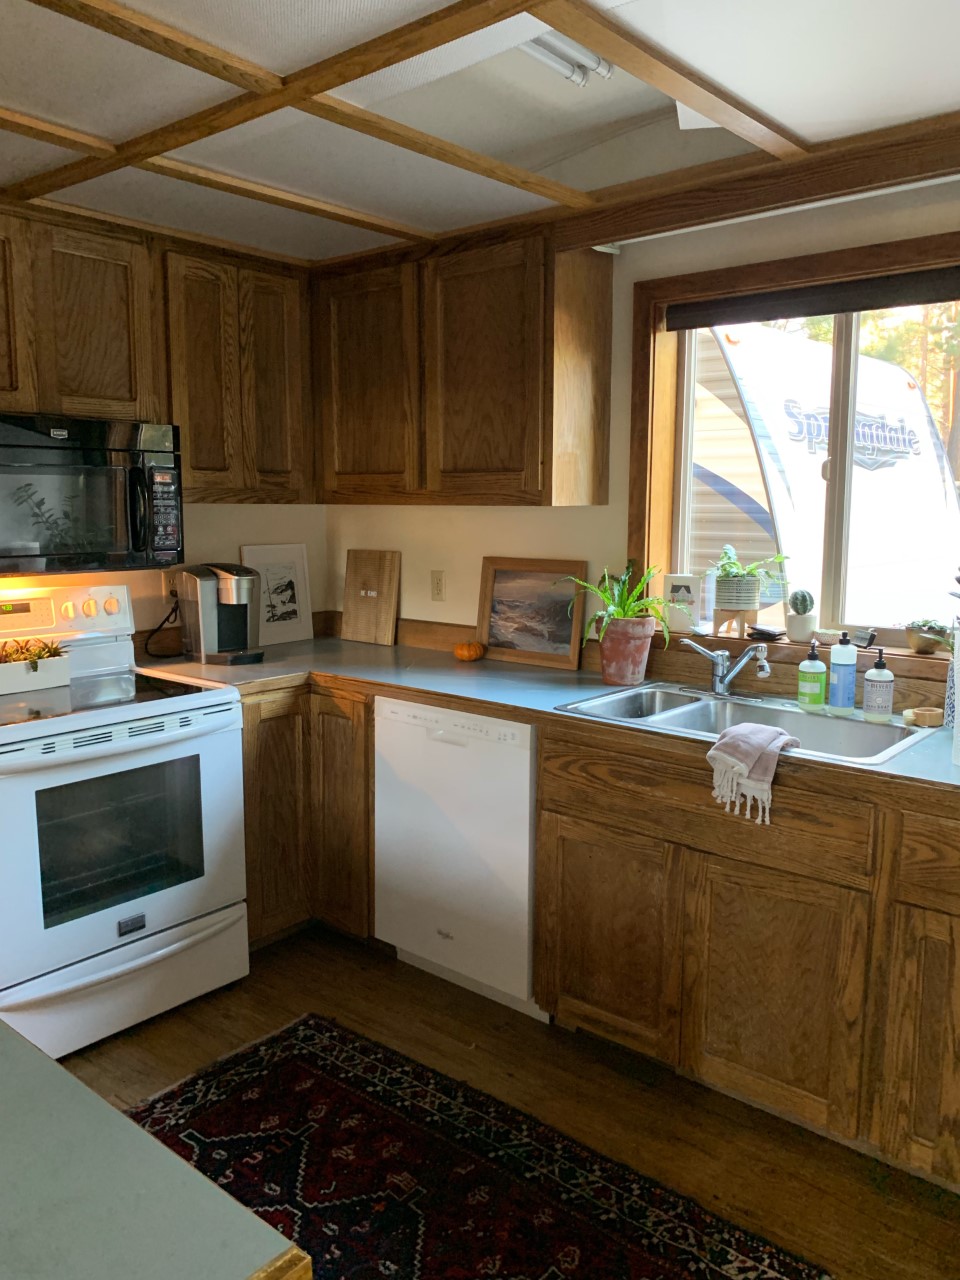
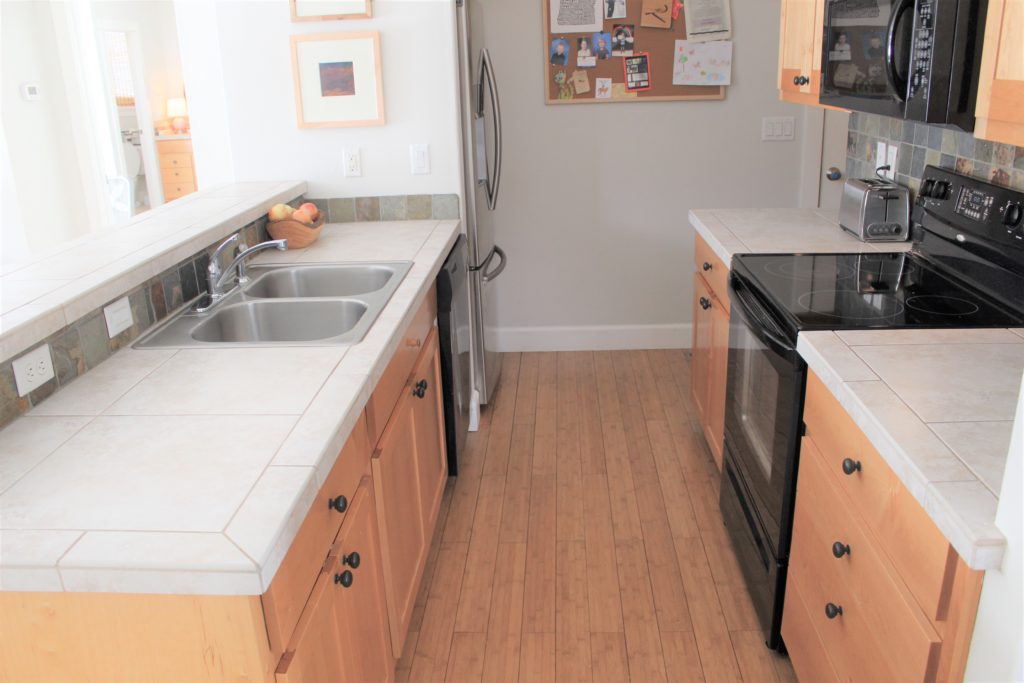
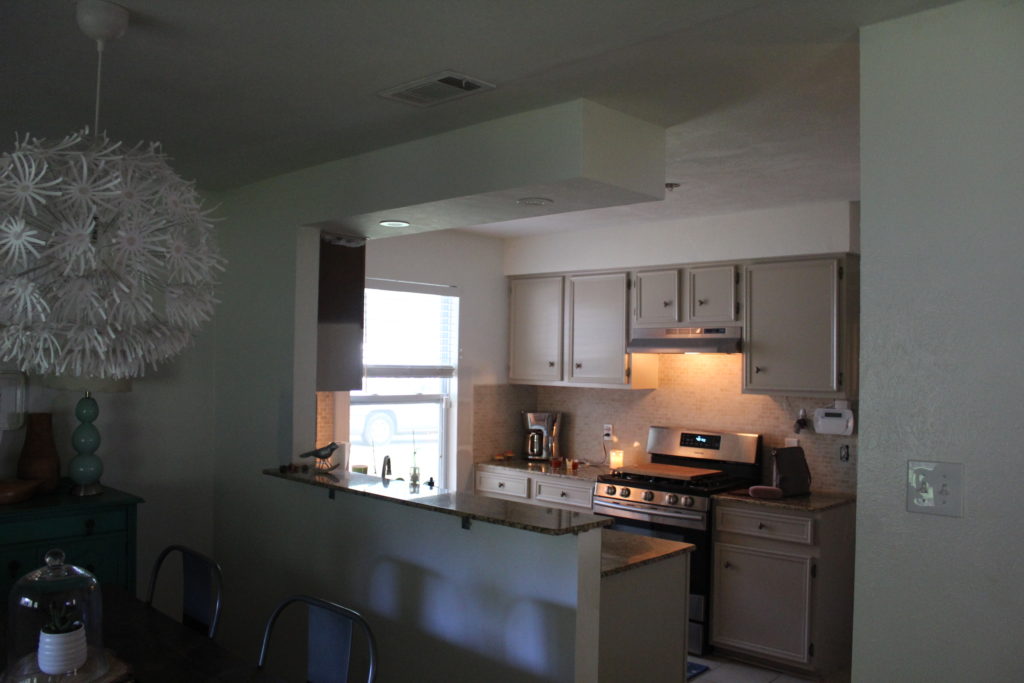
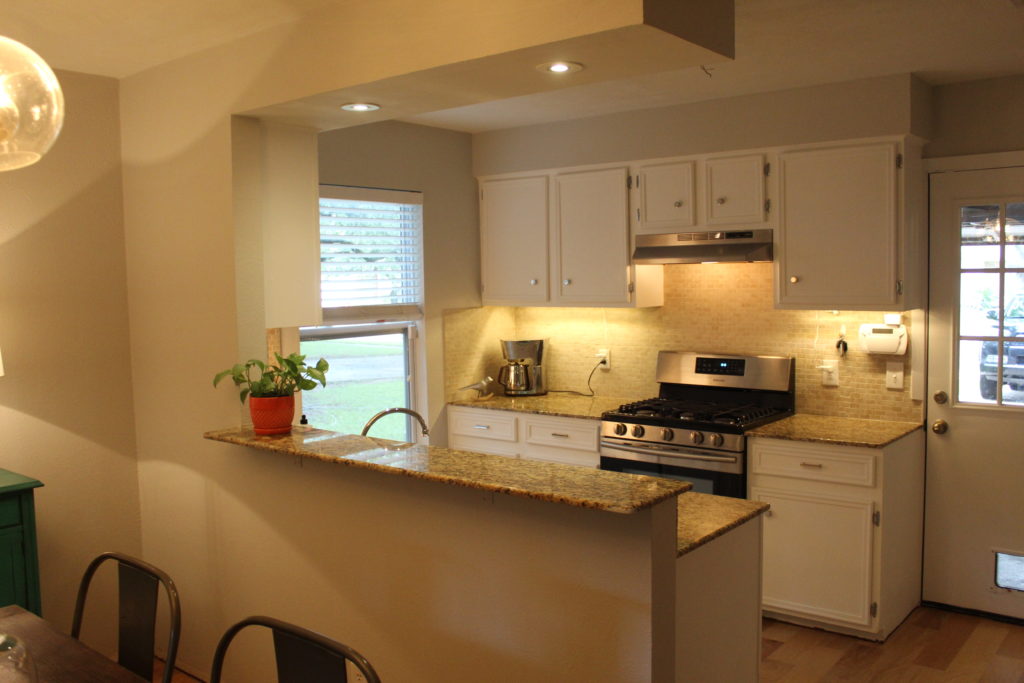
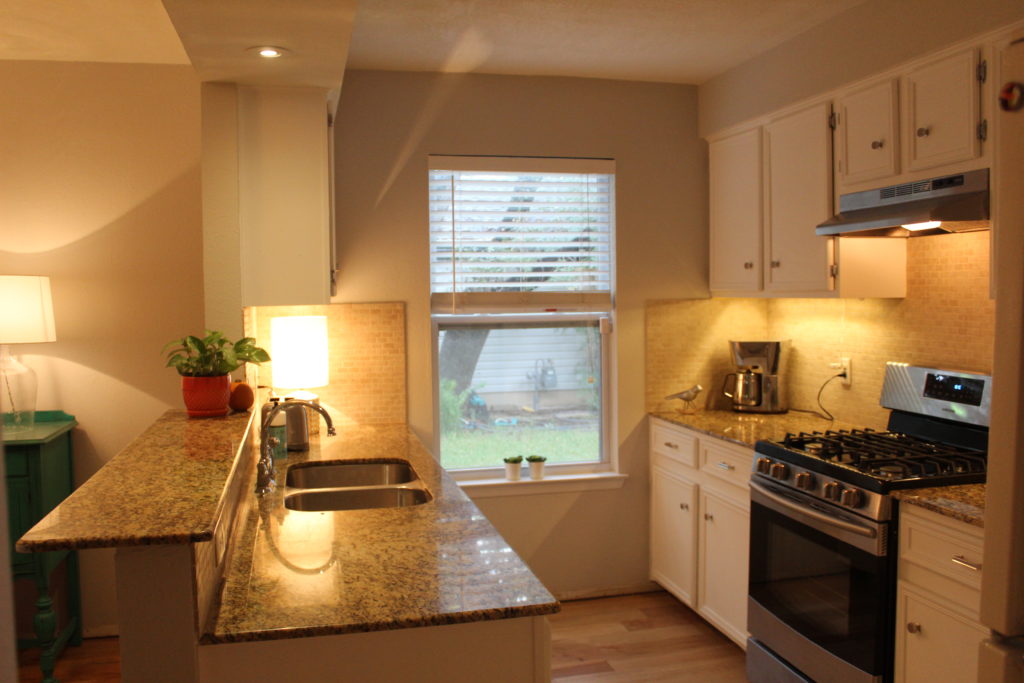
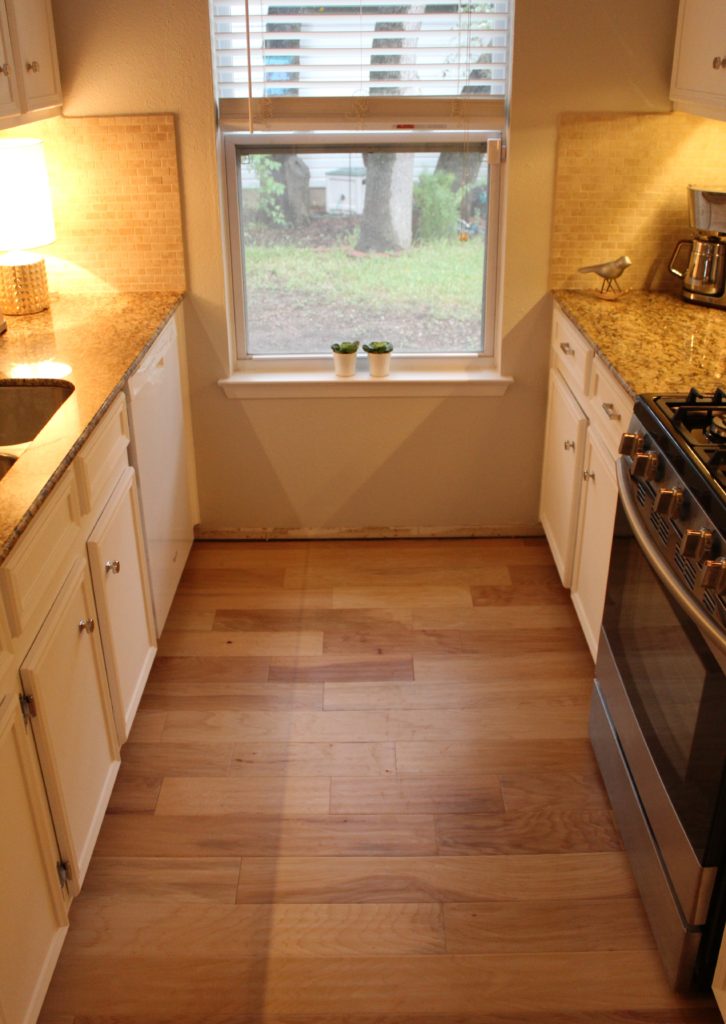
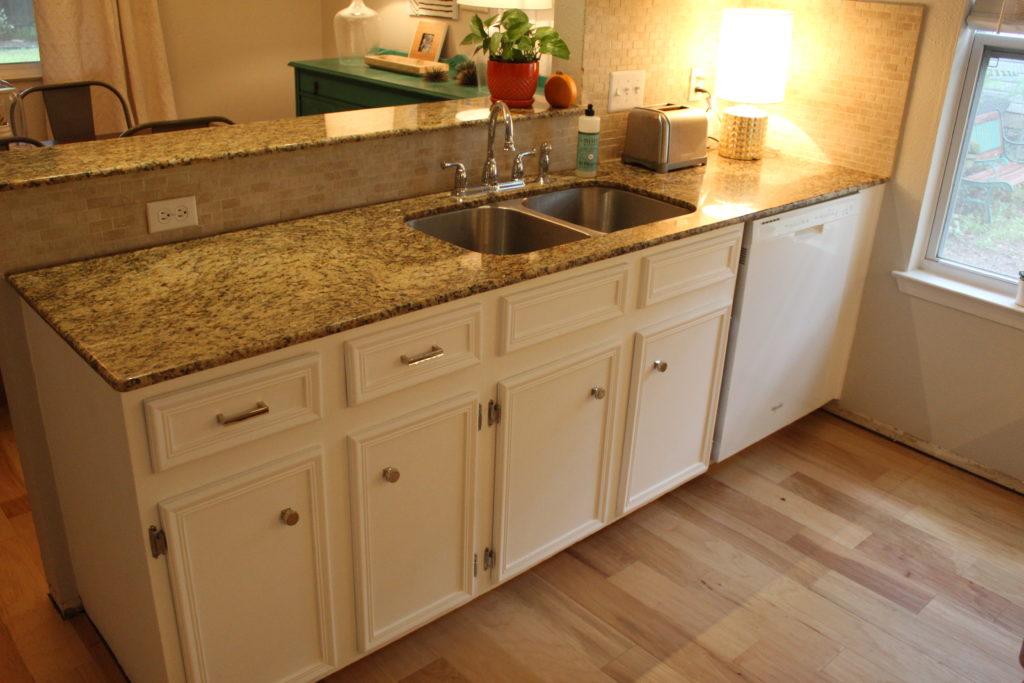
The last few weeks have been a whirlwind. We have had our spare time filled with football games and house projects galore. My parents’ are coming into town on Wednesday to meet this new baby of ours. With my c-section scheduled for Friday morning (yes, as in three days from now…gulp), we have been rushing to try and squeeze in a few last minute to-do’s. The kitchen finally got some much needed attention as we made a few simple(ish) updates and gave the cabinets a fresh coat of paint. Other than the addition of our new range, and the new floors, not much had changed in this space. Here are a few pics to jog your memory.
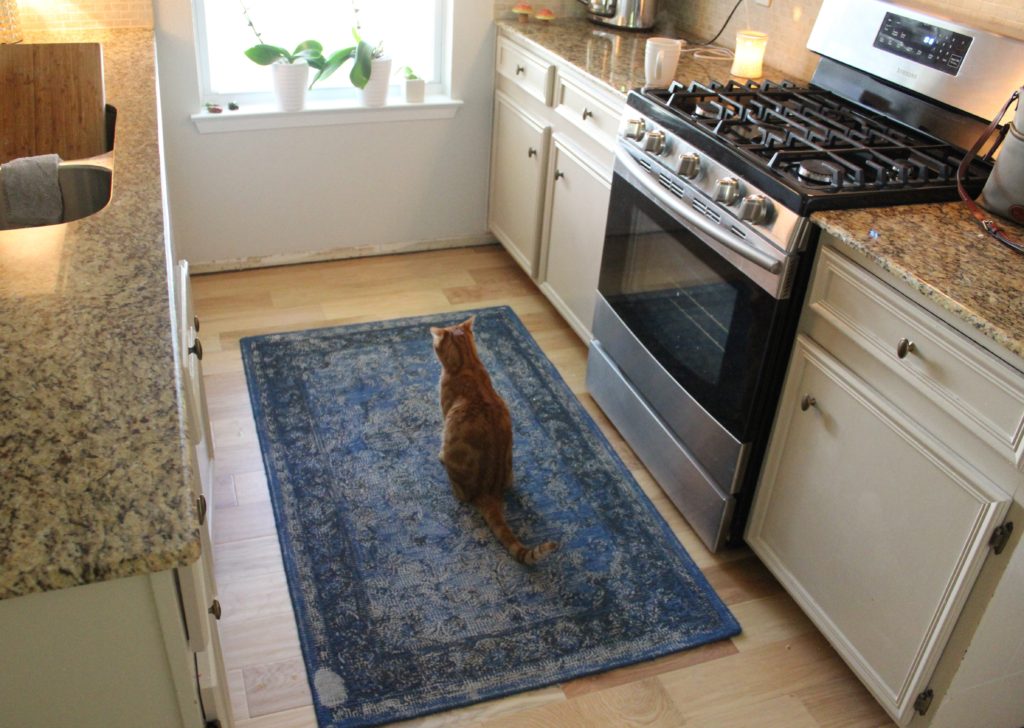
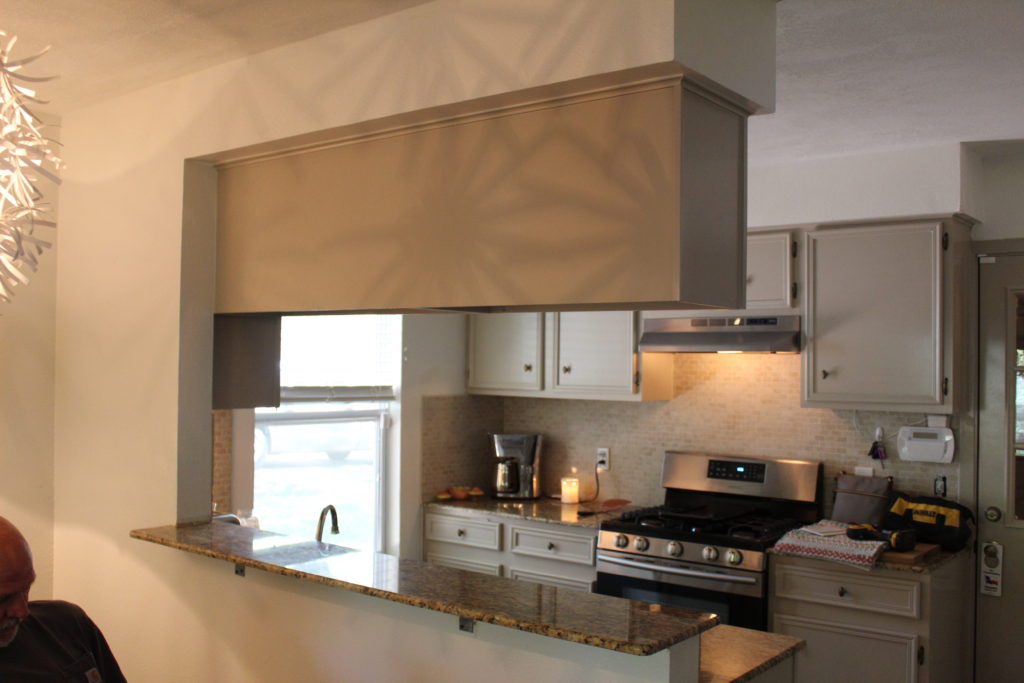
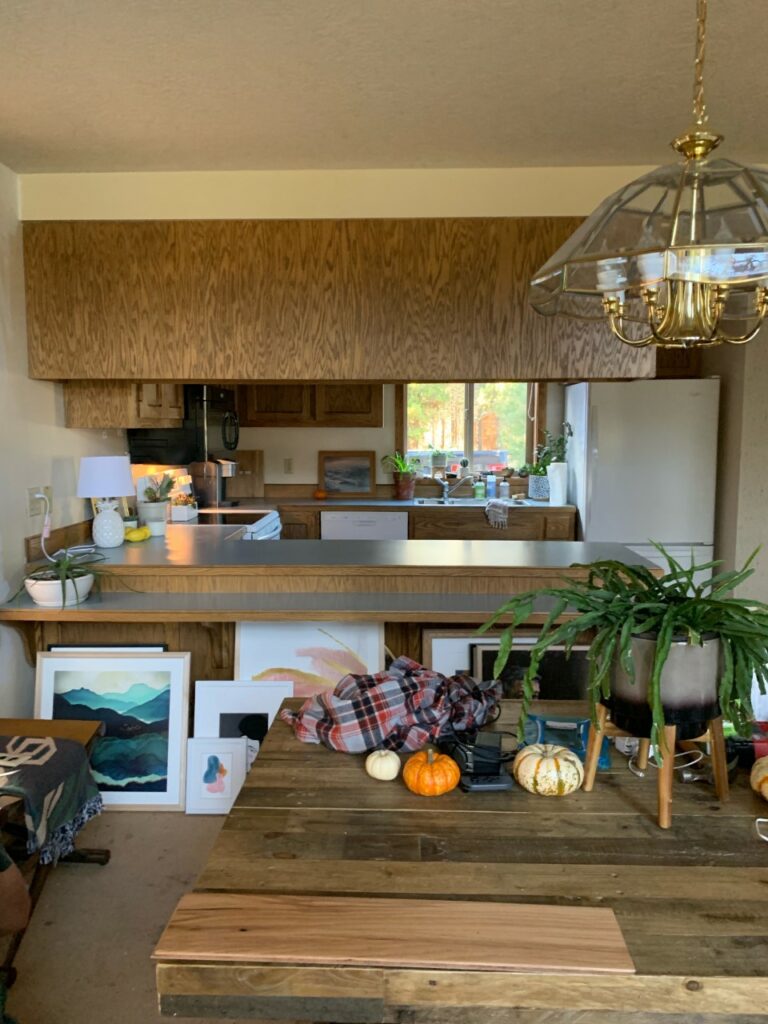
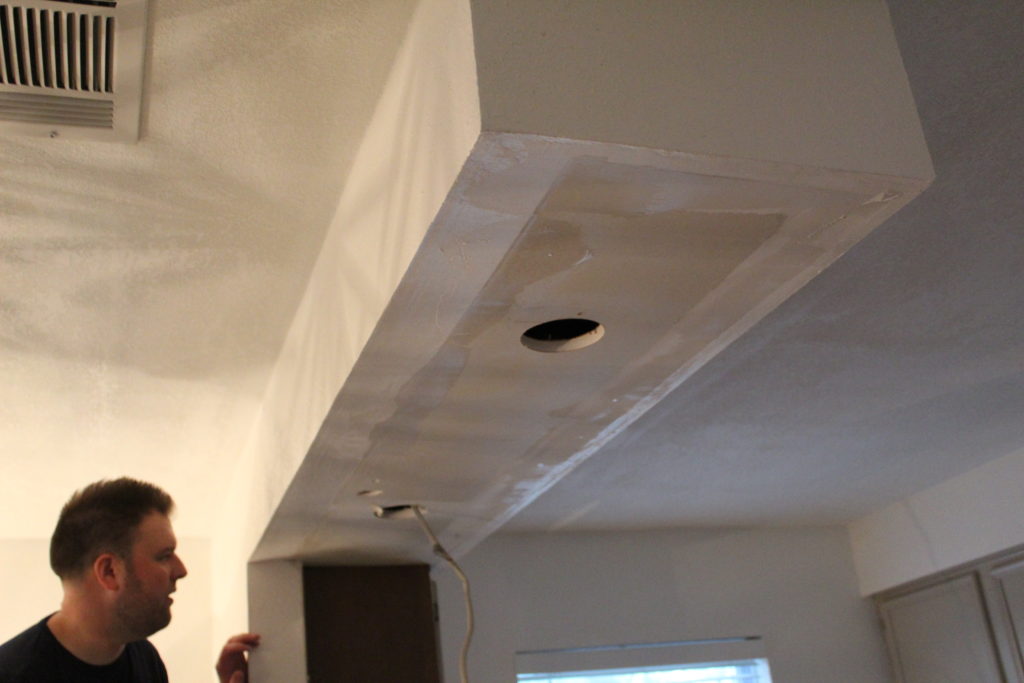
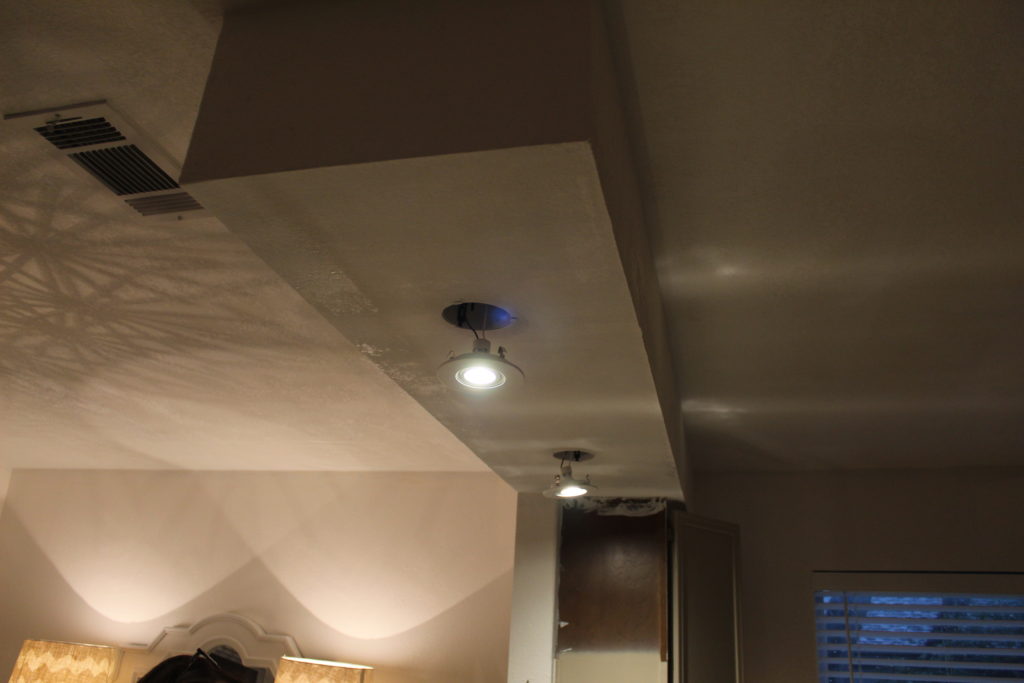
The first thing that needed to be done in the kitchen was very obvious to us from the first time we saw the house. Notice in the second photo, the bank of cabinets above the sink that obstruct your view into the dining room? Yes, those had to go. And go they did, way back in August, in fact. While my parents were visiting, my mom and dad helped me tear these suckers out one morning while Nate was at work. It was fun to send him a picture surprising him with our little demolition session. After a lot of debate and going back and forth between leaving the soffit and taking it out all the way to the ceiling, we decided it would be easier to leave it. Taking it completely out felt a bit like opening a can of worms since the rest of the kitchen would be staying as-is. So, our solution was to texture it to match the new ceilings, paint it, and add two can lights.
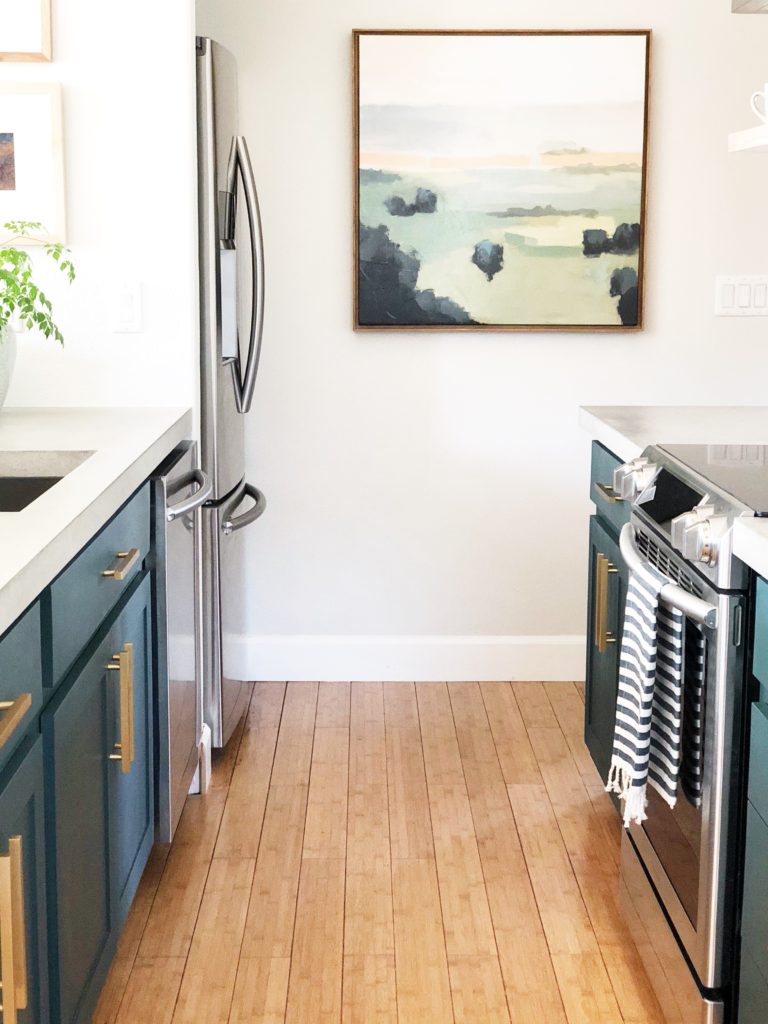
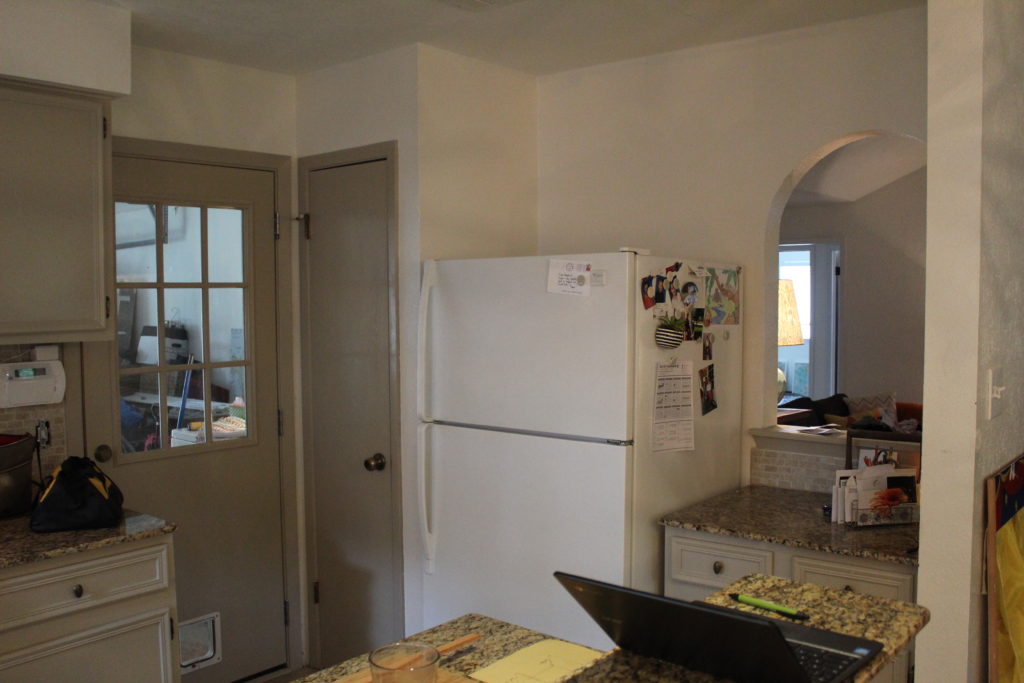
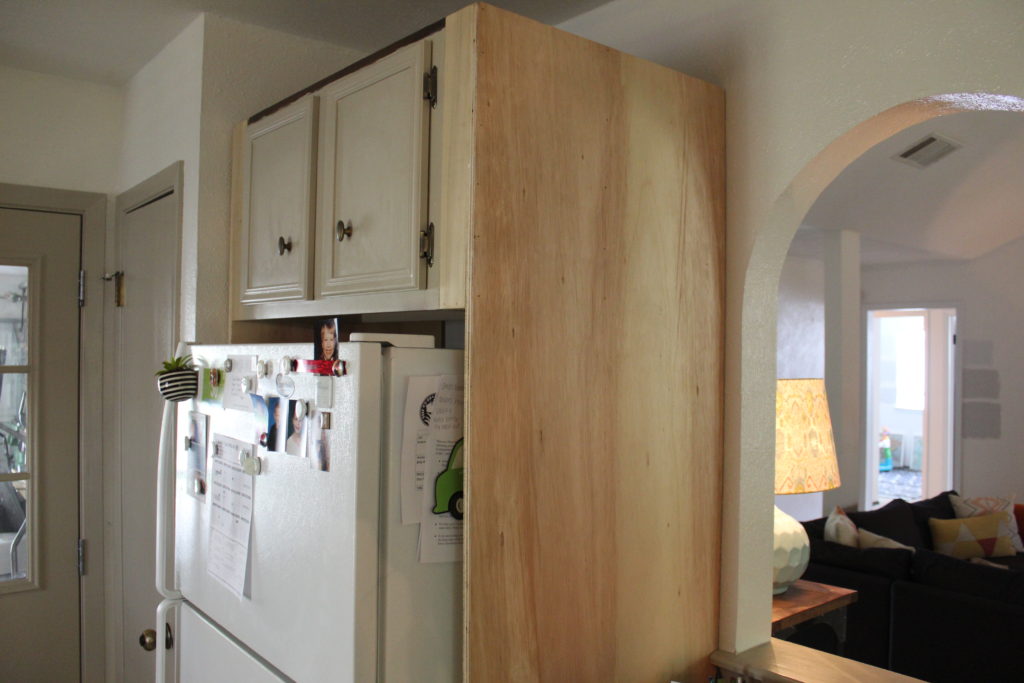
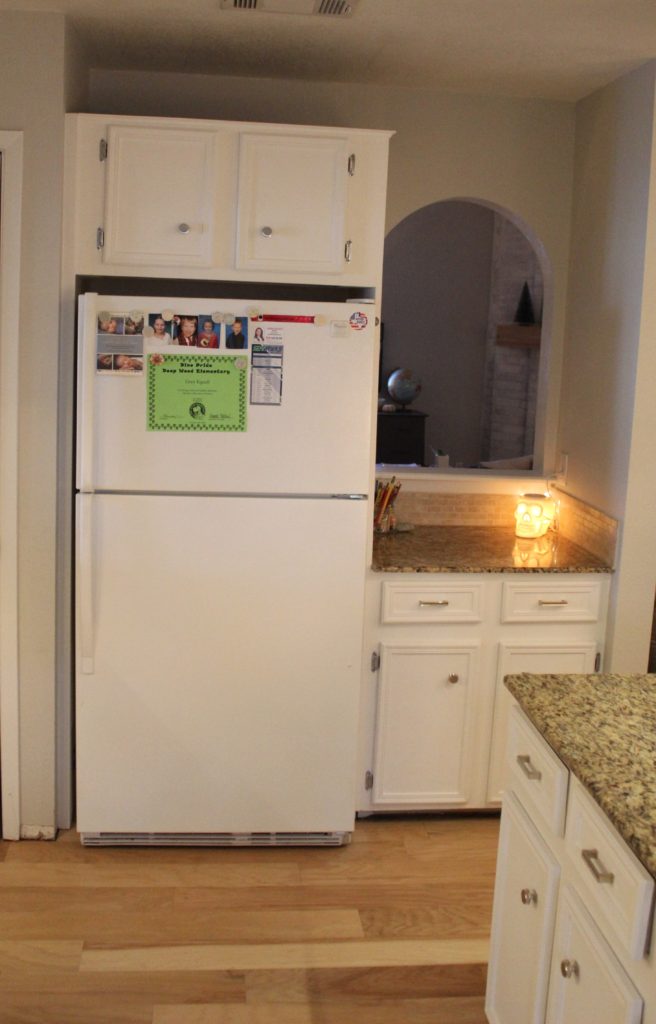
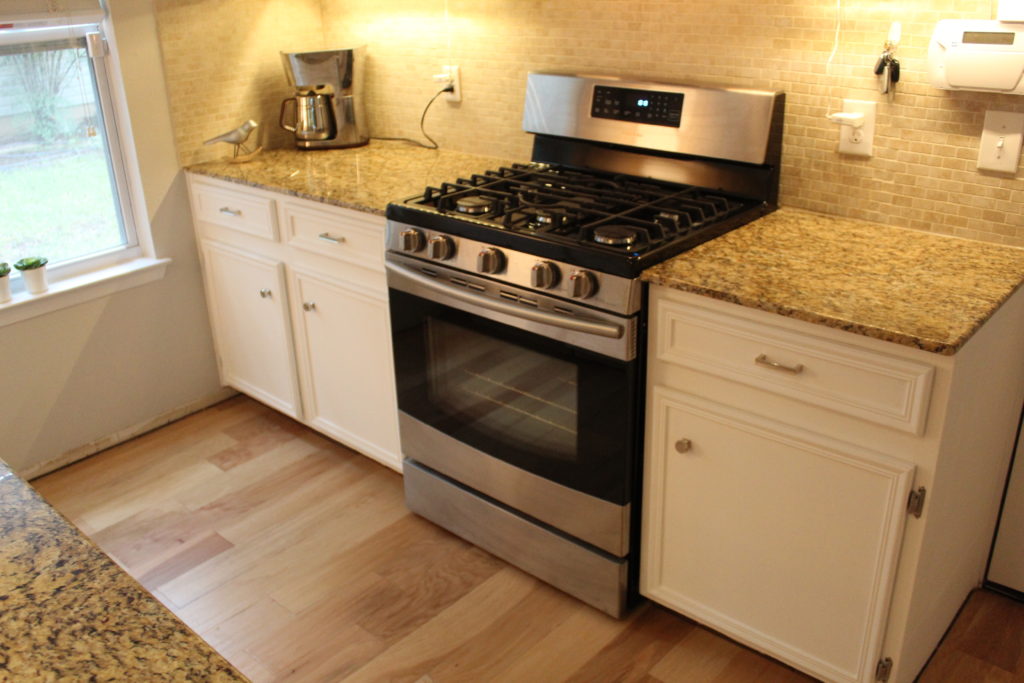
Our next big kitchen goal was to find a way to dress up the space around the lonely refrigerator. I always thought it looked unfinished and a bit out of place just sitting on this wall all by itself.
I have seen quite a few tutorials online about building a simple surround for a refrigerator with a cabinet above, to give it a more permanent, built-in impression. And the best part was, we had a cabinet that we took down from above the sink that was the perfect size for the refrigerator space. So, I ran this idea by my dad (yes, this project was also done back in August during their visit) and Nate who immediately rejected it and told me I was nuts. But, after some online research and some serious convincing (picture me with a power point presentation, pie charts and a pointing stick) they reluctantly gave my idea a whirl. Here is what we came up with.
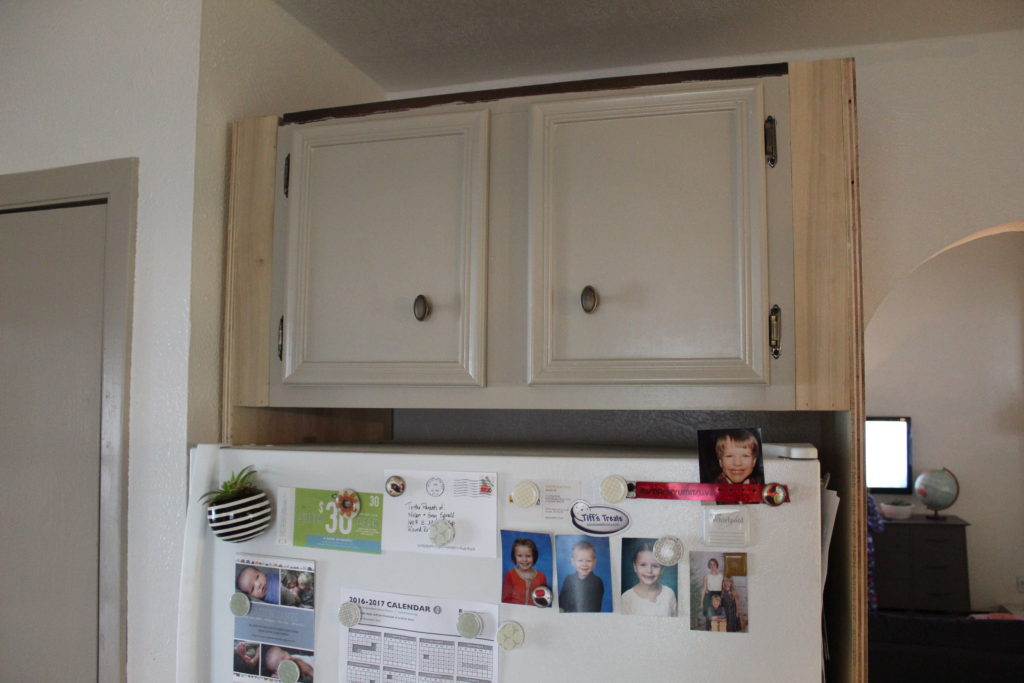
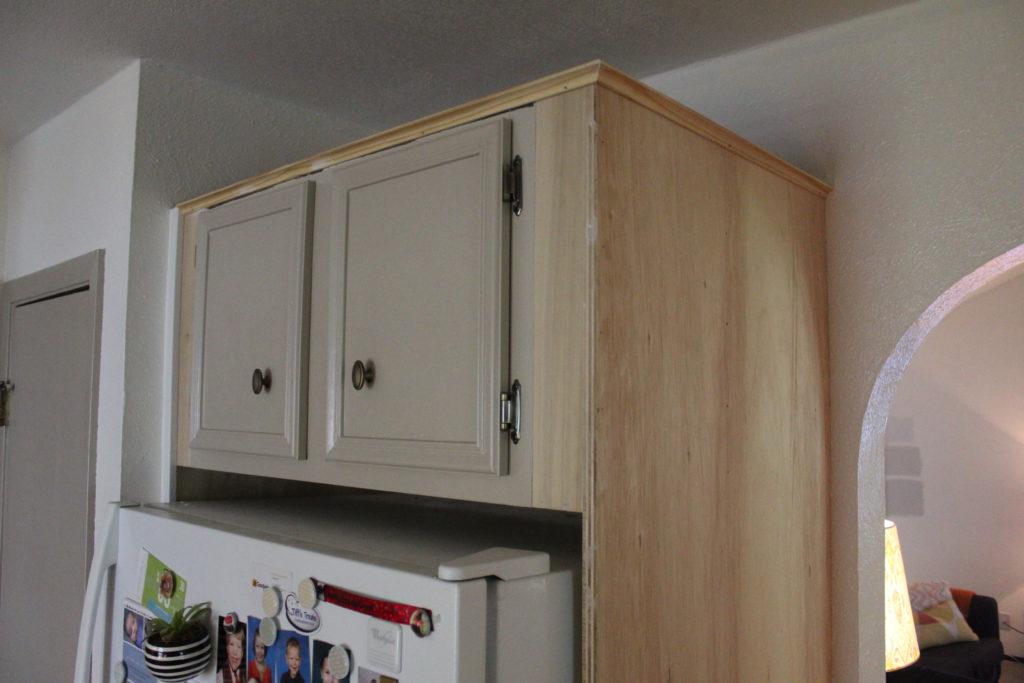
After the addition of trim, caulking and paint, I’m very pleased that I pushed these guys to help make my built-in refrigerator dreams come true.
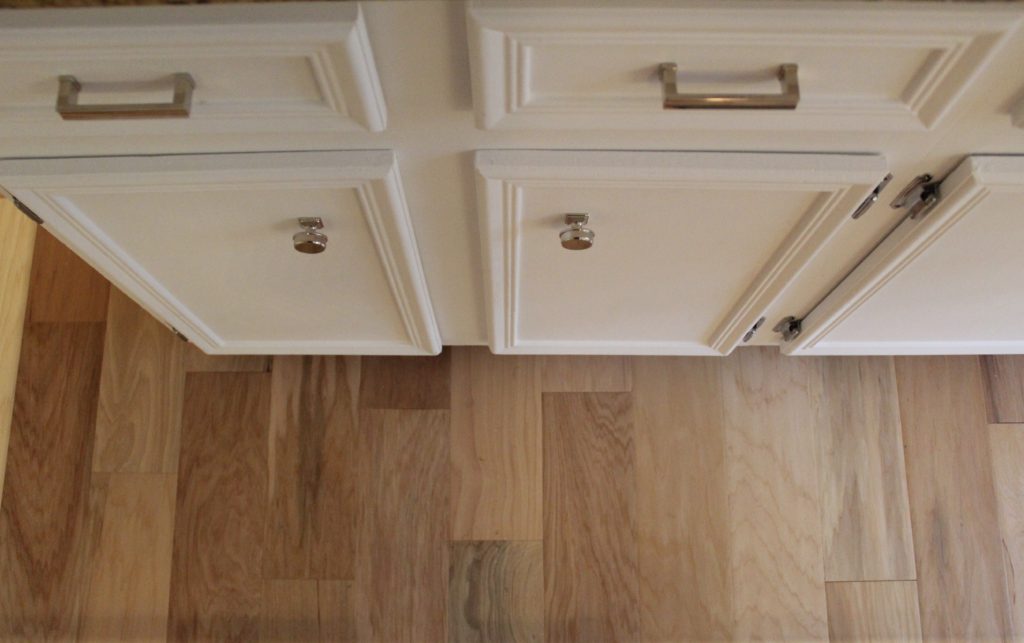
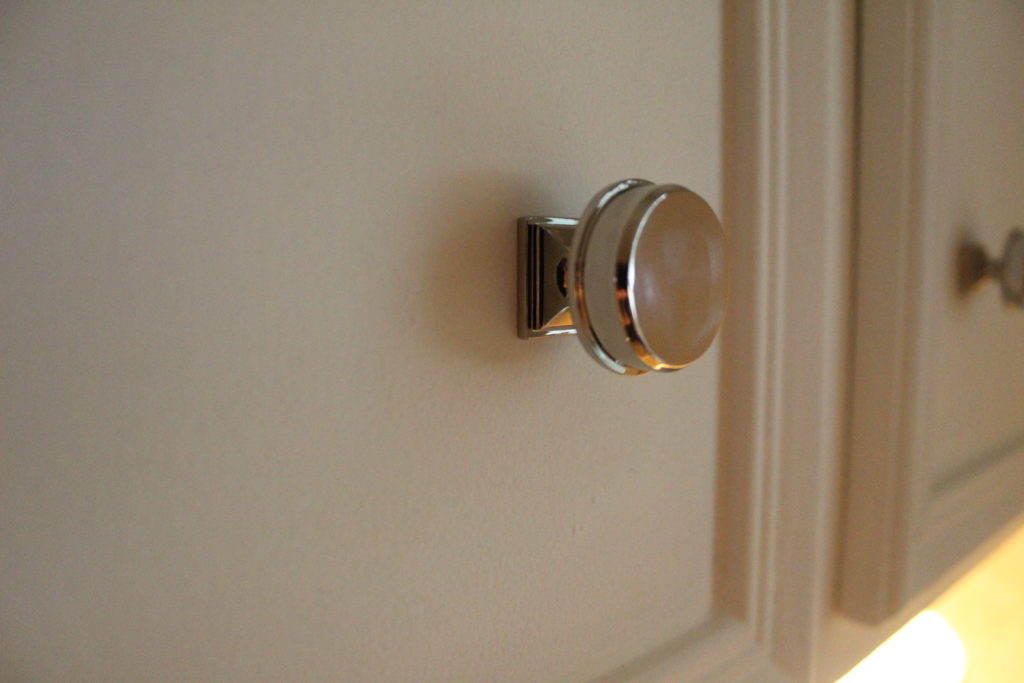
The last goal for the kitchen before baby was some paint for the cabinets and add some pretty hardware. I decided early on that white was the direction we were taking because if you follow along, you probably already know that I am on a quest to brighten up this place. So, white cabinets felt like a very natural way to go. We aren’t reinventing the wheel by painting our cabinets. Pretty much everyone who lives on the planet is well aware of the power of paint. Amen. Just look at the difference it has made for our little space.
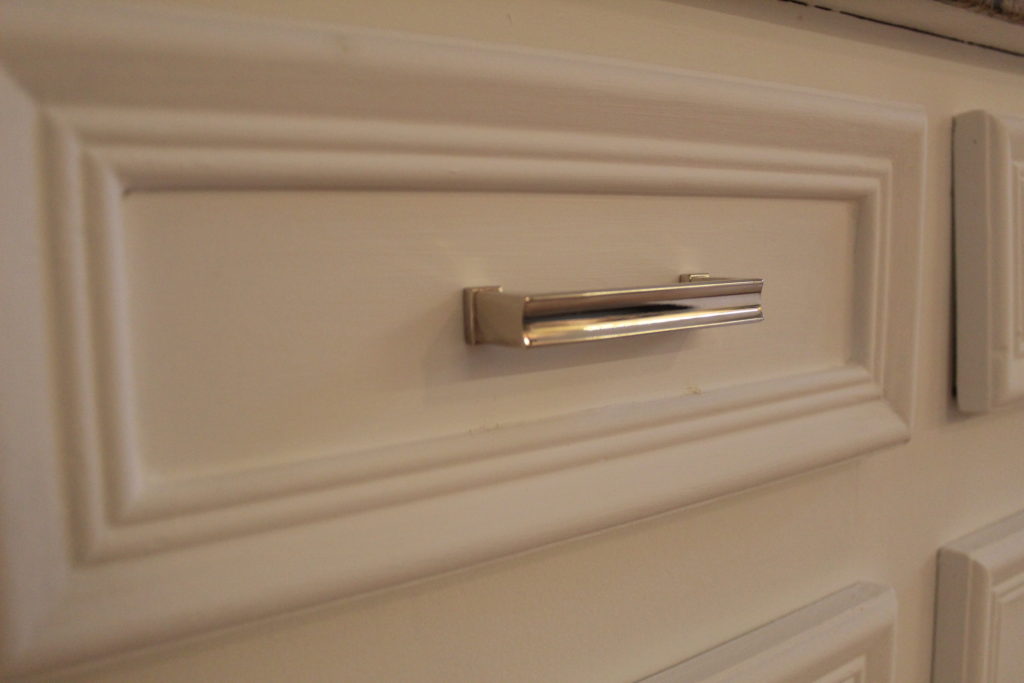
Painting the cabinets was a pretty straight forward process. I used Annie Sloan chalk paint and I loved using it. It was perfect for this pregnant lady with virtually no odor and low VOC’s. It’s environmentally friendly and my favorite part was that it’s water soluble. So, if I found myself running low on paint, I could mix it with some water to really make it stretch. Brilliant. With the painting process complete, I sealed the cabinets with the Annie Sloan wax which leaves you with a rich, almost velvet-y finish. I love the finished product.
P.s. Unless I go into labor before Friday, I should be back with a nursery tour! I am putting finishing touches on the sweetest little space for our new guy and I am so excited to share. Stay tuned…
P.s.s. Also, I am going to get our house tour page updated so you can see all the good progress we have made lately.