My favorite airbnb’s for a romantic weekend away!

This post is sponsored by airbnb

Hi friends! I had so much fun putting together my first airbnb list for a uniquely Central Oregon experience, I thought I would put together another list for you guys. Only this time, I focused on more of a romantic or couple vibe for this trip. After 2020, I think we all deserve a little getaway with our significant other. Our kids have been home since March, and while it has been a great opportunity for quality family time, the thought of getting away for a few days sans kiddos sounds VERY appealing.

And because you guys are spread out all over the US (and abroad too…maybe I’ll do another International list soon), the list covers airbnb’s all over the country! I wanted to include a little bit of everything, from waterfront homes, remote cabins, and the CUTEST a-frame! Let’s get to it!

1. Charleston, South Carolina – Little Pink House

via airbnb

This Charleston, SC charmer would make for the perfect couples getaway! The home is situated along a tree lined street with restaurants and shops within walking distance. The interior is so cozy with its picturesque living spaces, and the lofted ceilings in the master bedroom are a bonus too!

2. Skykomish, Washington – A-Frame in the Woods

via airbnb

If you’re looking for a slower pace without the crowds, then this idyllic A-Frame 50 miles south of Seattle could be the perfect vacation spot with your love. It’s just minutes away from some of the best skiing in the PNW, and boasts a brand new hot tub on the back deck for some post-ski soaking!

3. Cortez, Colorado – Canyon Cliff House

via airbnb

The unique home is built right into the red rock cliff wall of Sleeping Ute Mountain, a private red rock canyon alcove just 40 minutes from Mesa Verde, CO. Many of the reviews describe the scenery and sunsets as breathtakingly beautiful. Do yourself a favor and check out the interior too – it’s really amazing!

4. Sitka, Alaska – Sitka Lighthouse

via airbnb

This lighthouse would be a vacation of a lifetime! You arrive to the lighthouse by boat, and a water taxi is included when you book this unique airbnb. It was completely remodeled in 2018, and it shows when you see the beautifully furnished and cozy interior. It’s situated on a one-acre private island with a private boat dock that you are free to explore as a guest of the lighthouse.

5. Key West, Florida – Tiki Suite

via airbnb

This houseboat looks like an idyllic spot for a weekend away! Spend your days swaying in the hammock, snorkeling and paddleboarding in the bright blue sea water. And if you’re lucky, you might be able to spot dolphins, manatees, or sting ray’s!

6. Bozeman, Montana – Timber Carriage House

via airbnb

I have no words to describe how much I love this studio in Bozeman, Montana. This cabin has all the modern amenities to make your stay a comfortable one with your own kitchen, full bathroom, and washer/dryer. There are french doors on two sides of the cabin that lends itself to an indoor/outdoor living. There is a wood stove inside for evening fires, and trail heads for hiking are at your door step. And another bonus – Yellowstone National Park is just an hour away!

So there you have it! I’m hoping to someday visit at least a couple of these magical destinations. Would you guys want to vacation at any of these spots? Or have you been before? Leave me a comment below and tell me what ya think!

My favorite airbnb’s in Central Oregon right now

This post is sponsored by airbnb

I’m here today to deliver on a promise…a long overdue promise too! You see, I get asked (almost) daily via direct messages from you guys to offer up my thoughts about Bend and Central Oregon. How do we like it? What’s it like living there? What’s the weather like there? Where are the good spots to stay while you’re visiting Bend? So, I decided to put together a list of my favorite Airbnb’s to book if you are planning a trip to Central Oregon. Almost all of them are either in or around Bend, and vary from sleek and modern with walkable restaurants and shopping, to remote rustic log homes with views and hiking just out your front door.

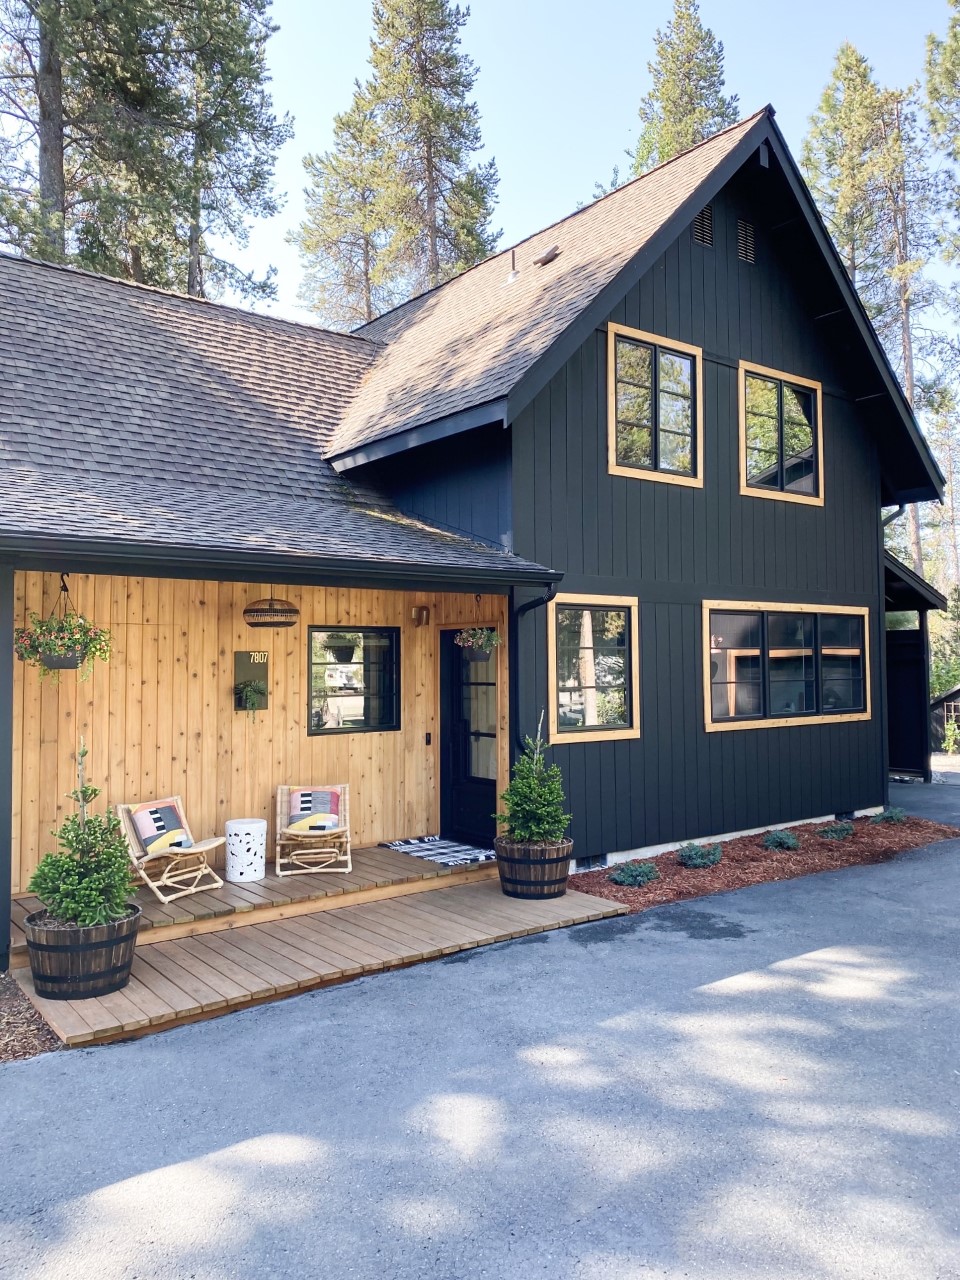
Before we start with the list, I thought I would give you a few general tid-bits about Central Oregon living. Although Bend is growing like crazy, it maintains a laid-back, small-town feeling. The people are generally friendly and we enjoy a relatively low cost of living. Much of Central Oregon is high desert, with a dry and sunny climate. This varies a bit depending on your elevation, but will see approximately 300 days of sunshine a year, which is my favorite part about this area of Oregon. It is an outdoor enthusiasts dream come true with endless hiking, skiing, snow shoeing, fly fishing, kayaking, camping, and I could go on and on. It’s a great place to be outside!

Ok…now onto the good stuff! I found some good airbnb’s that I think you guys will love!

1. The Sawmill in Bend’s Westside

via airbnb

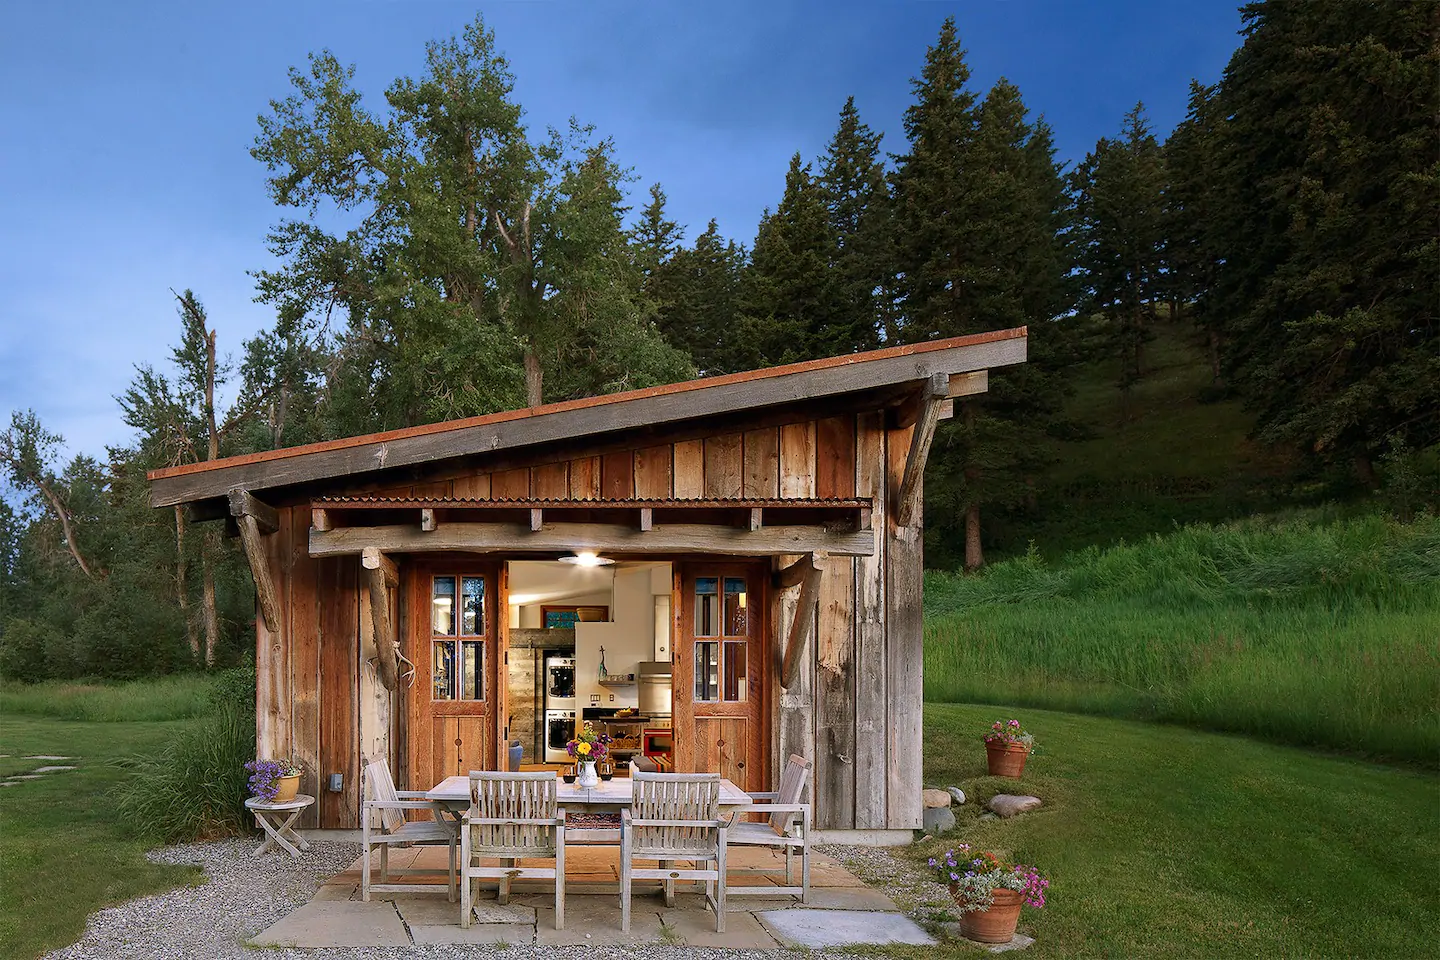
This abode was so beautifully designed that I couldn’t not include it. No detail was missed when this Scandinavian-inspired space was designed.  Perfect vacation if you’re wanting to check out of the city itself, and is located on the popular Westside of Bend, where breweries, restaurants, and shopping are all within walking distance.

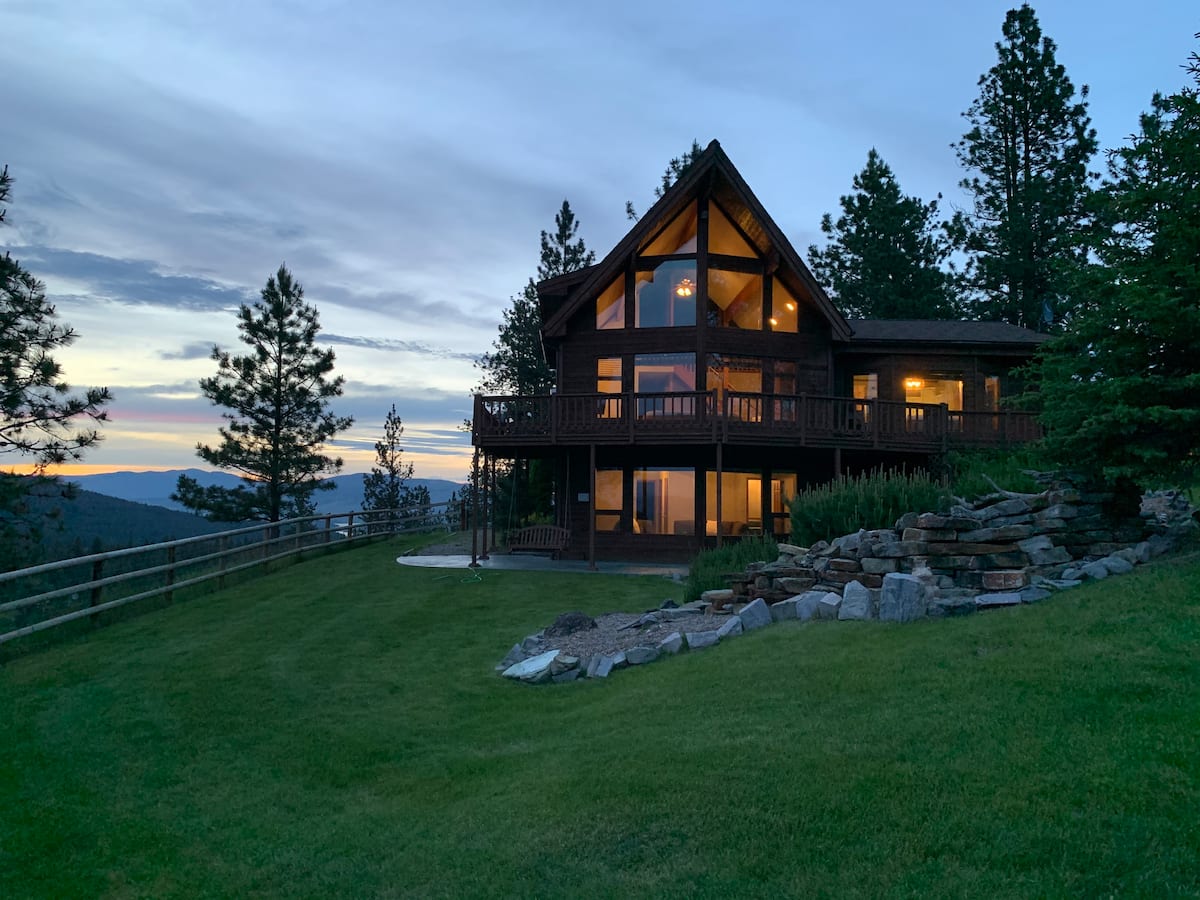
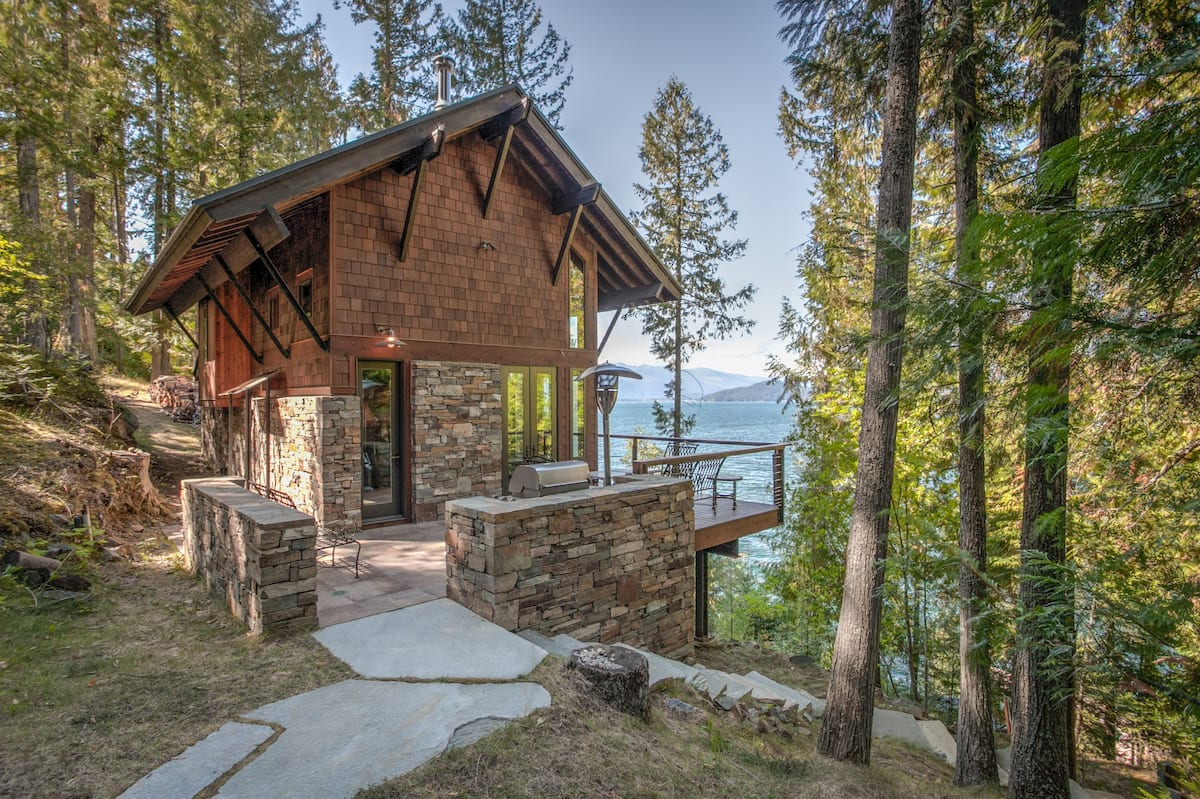
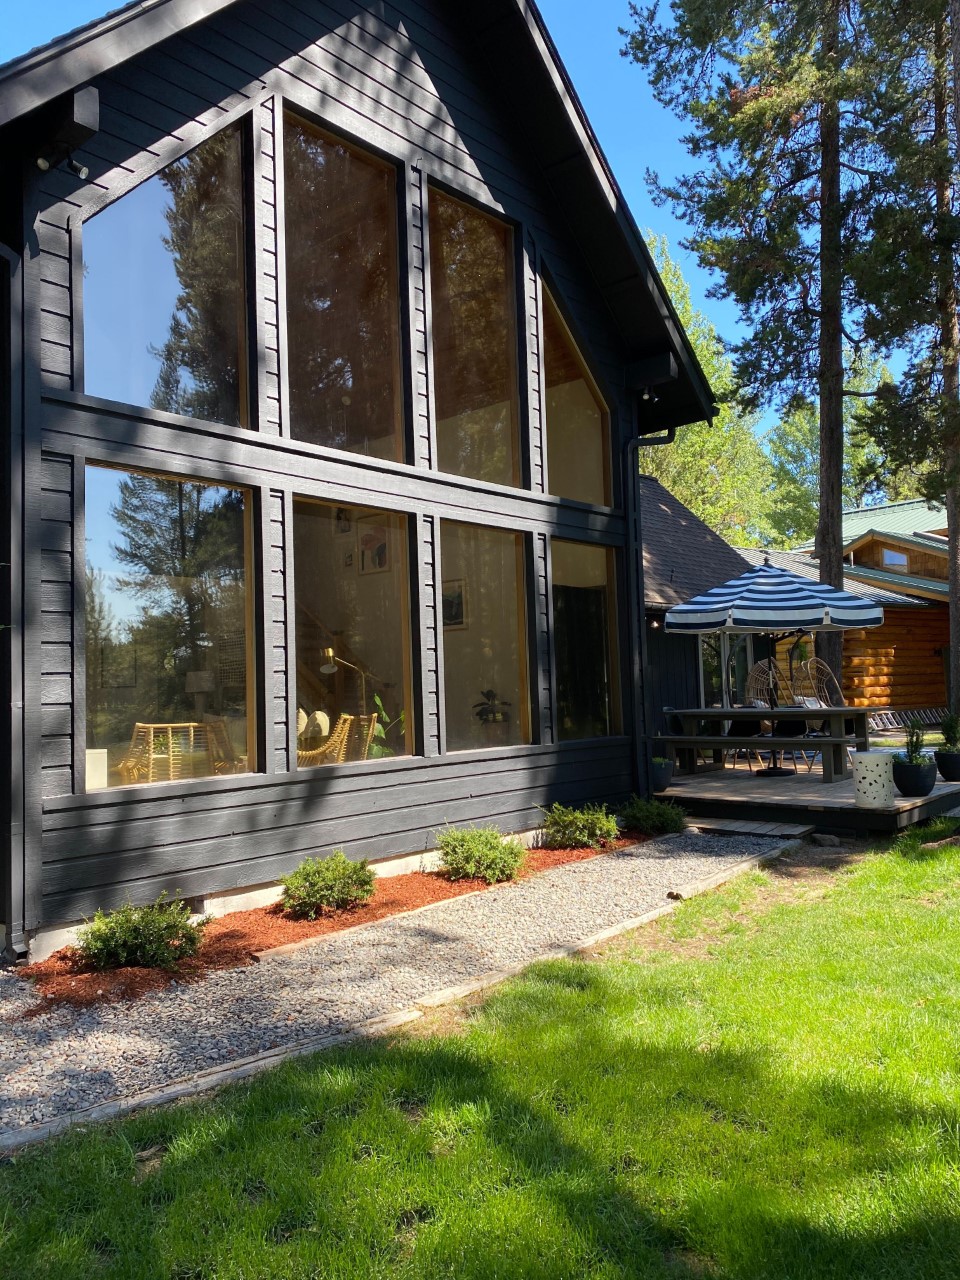
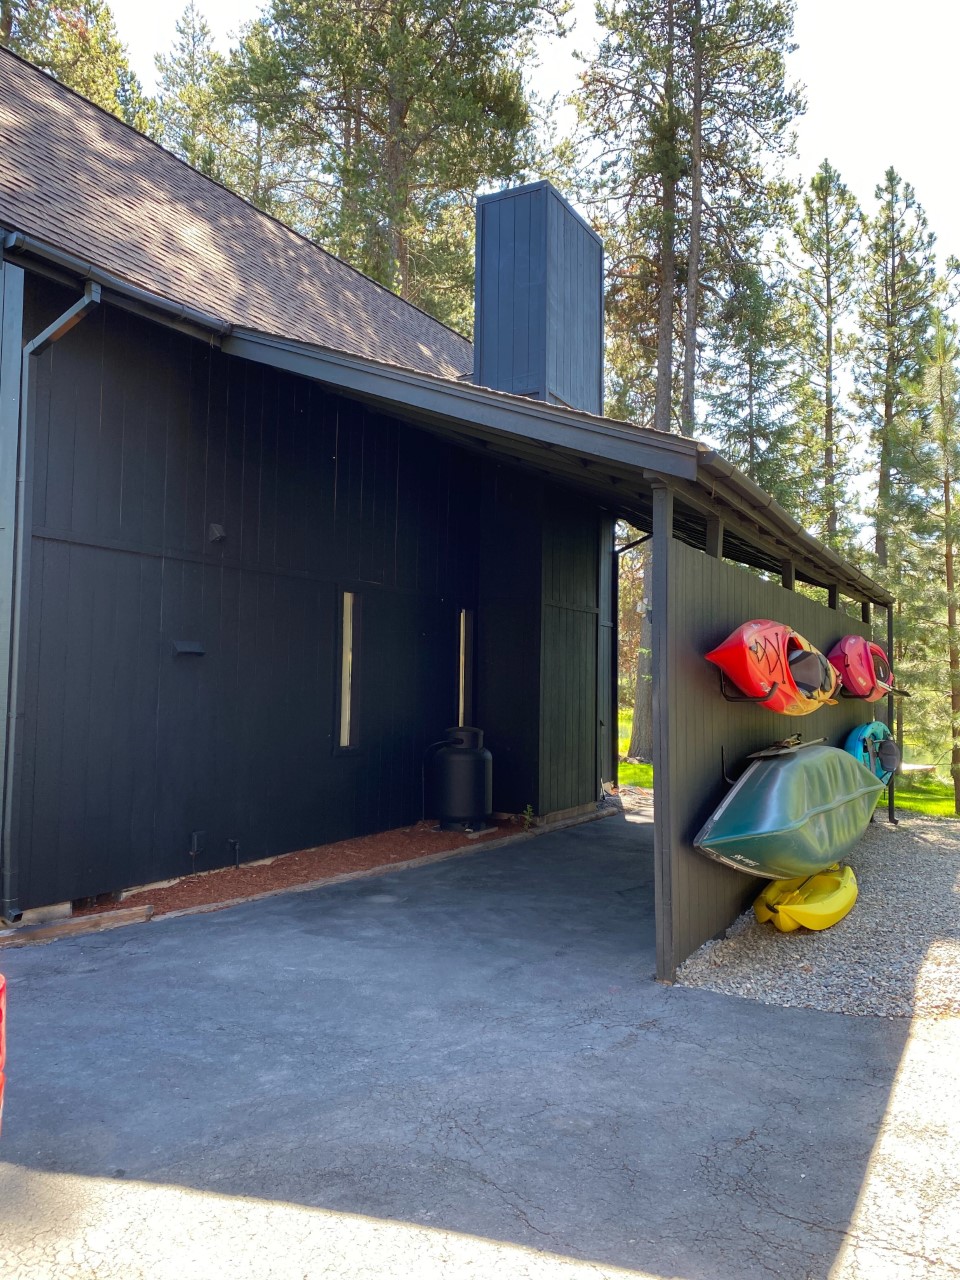
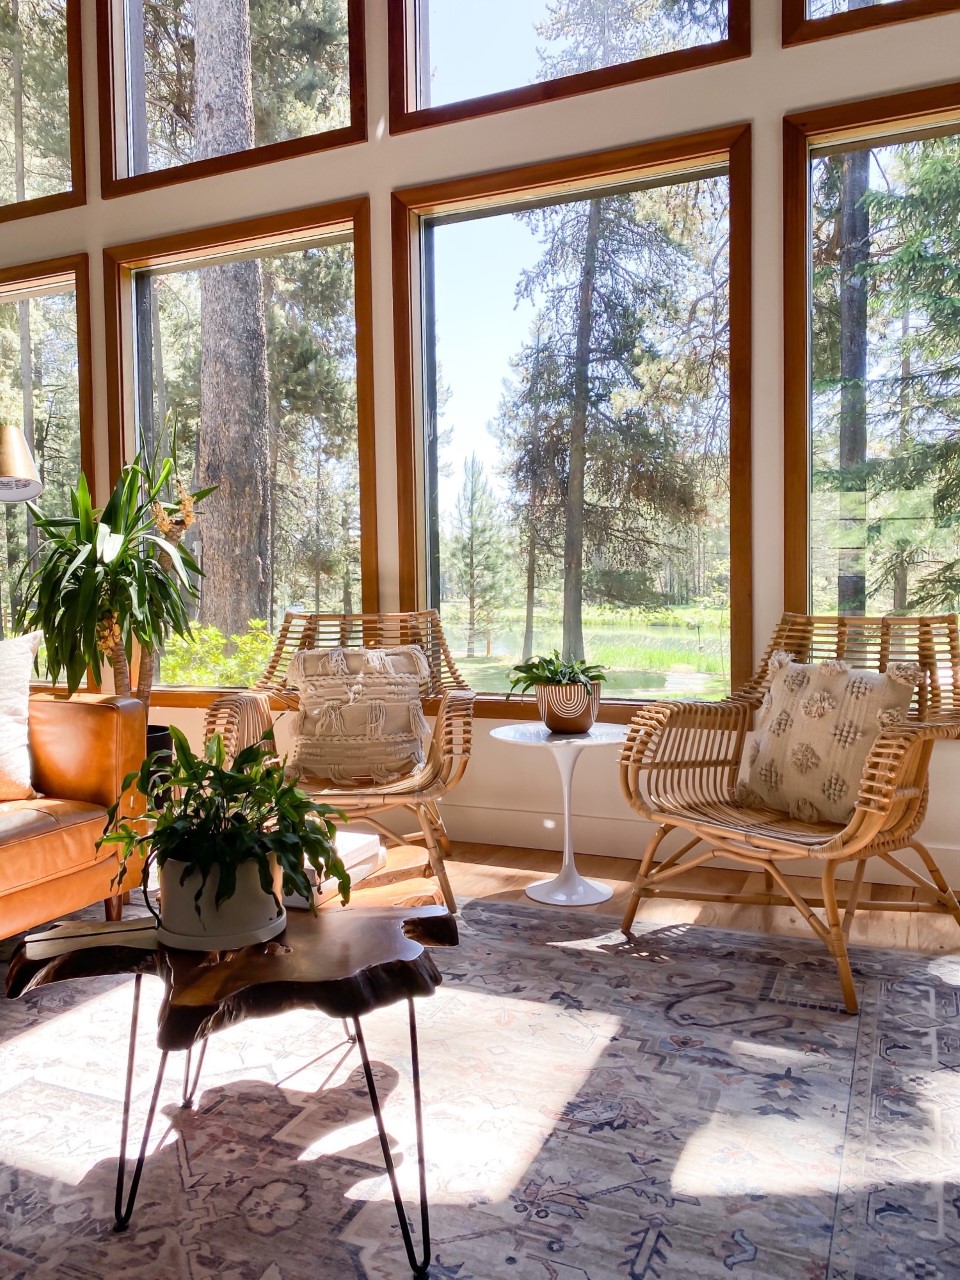
2. Luxury Cabin on Tumalo Lake
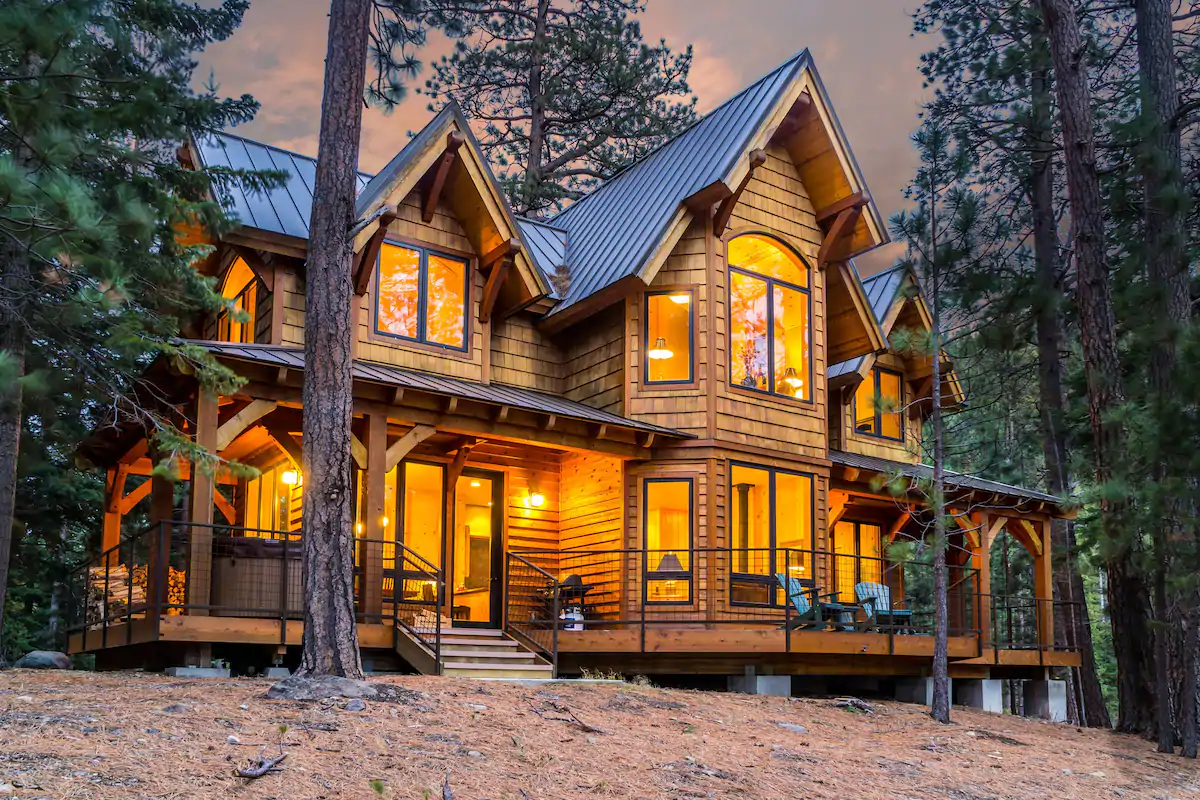
via airbnb

This gorgeous cabin overlooks Tumalo Lake and is surrounded by ponderosa pine trees. It’s 12 miles outside of Bend, and is the best of both worlds with seclusion and privacy, and just a quick drive to Bend for anything you might need. The home is perfect for kayaking, canoeing, paddle boarding, and Tumalo Lake has world-class trout fishing. It also has a fire pit and horseshoe pits as well. So much to do here! In the winter months, skiing, snow shoeing and sledding are just a few of the favorite activities enjoyed by Central Oregon residents and visitors.

3. Remodeled Airstream
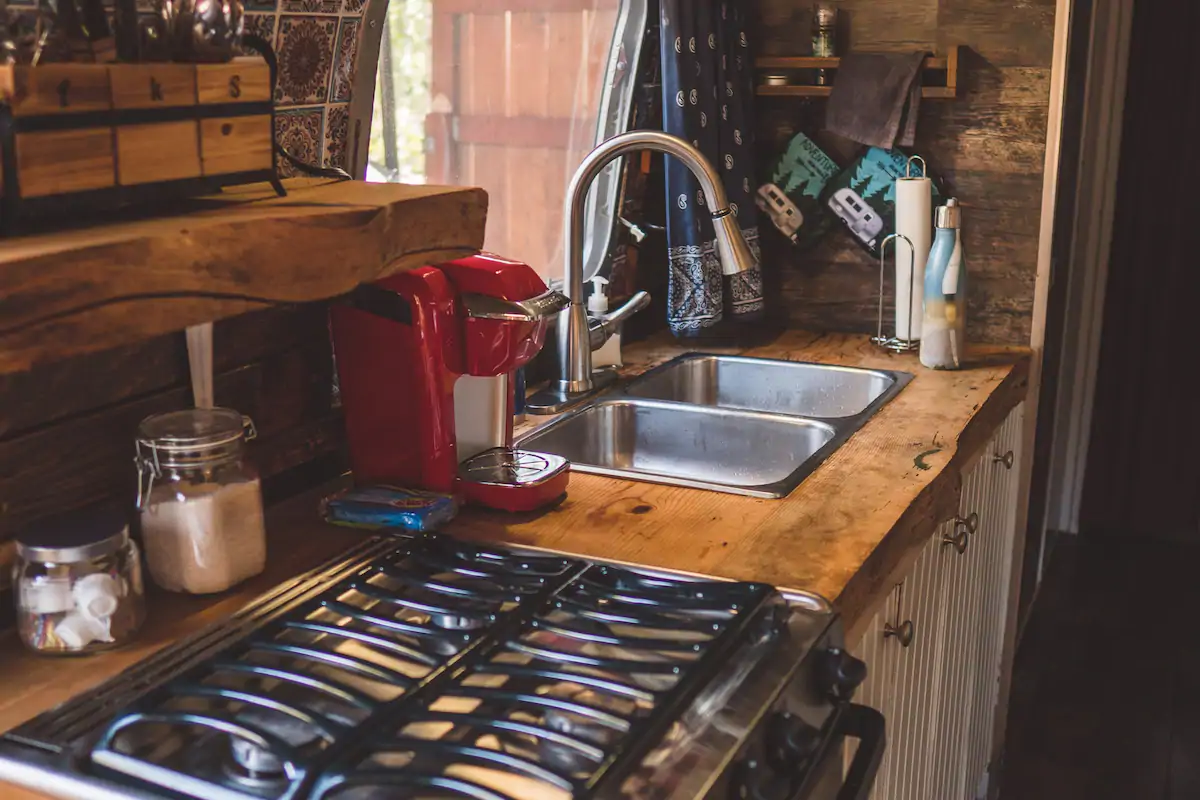
via airbnb

If you’re open to something a little different, then Miss Clementine, a fully restored and upgraded 1973 Airstream might be perfect for you! So many cute details throughout, and is located on a 2.5 acre property with its own private entrance. It even has its own deck and hot tub, which I thought sounded so fun! Also, feel free to bring your pets along on this one!

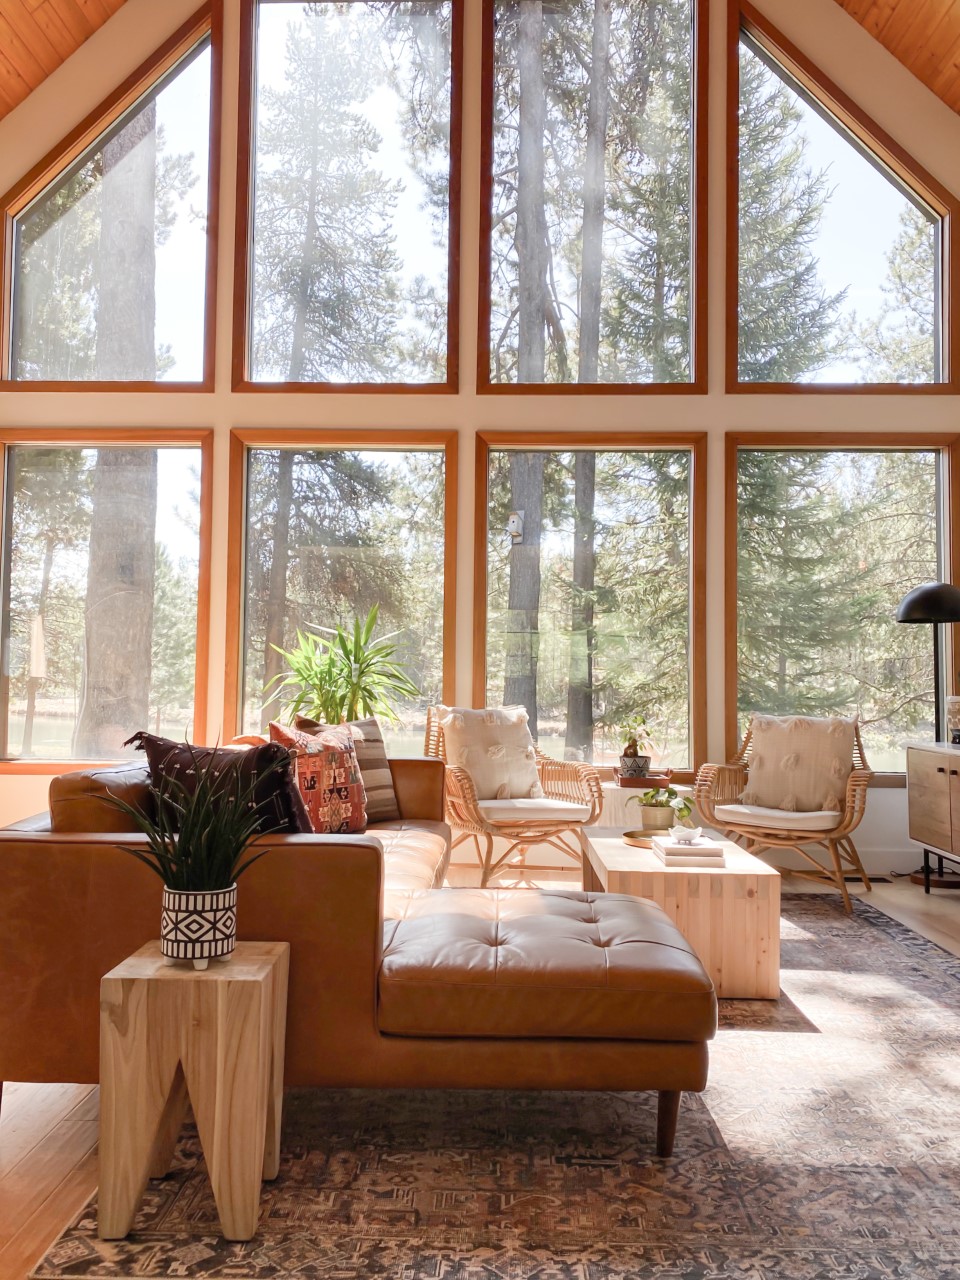
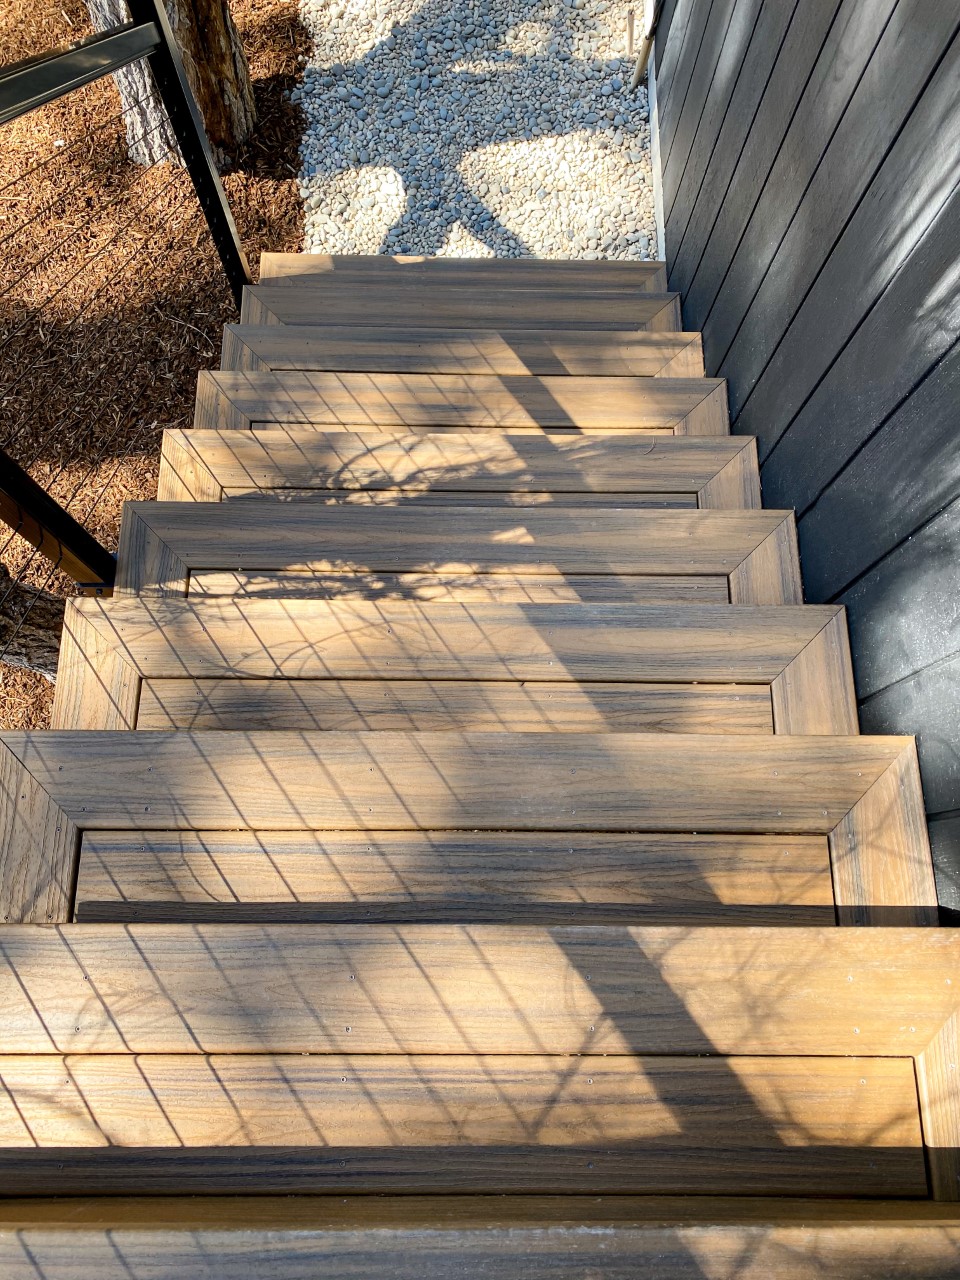
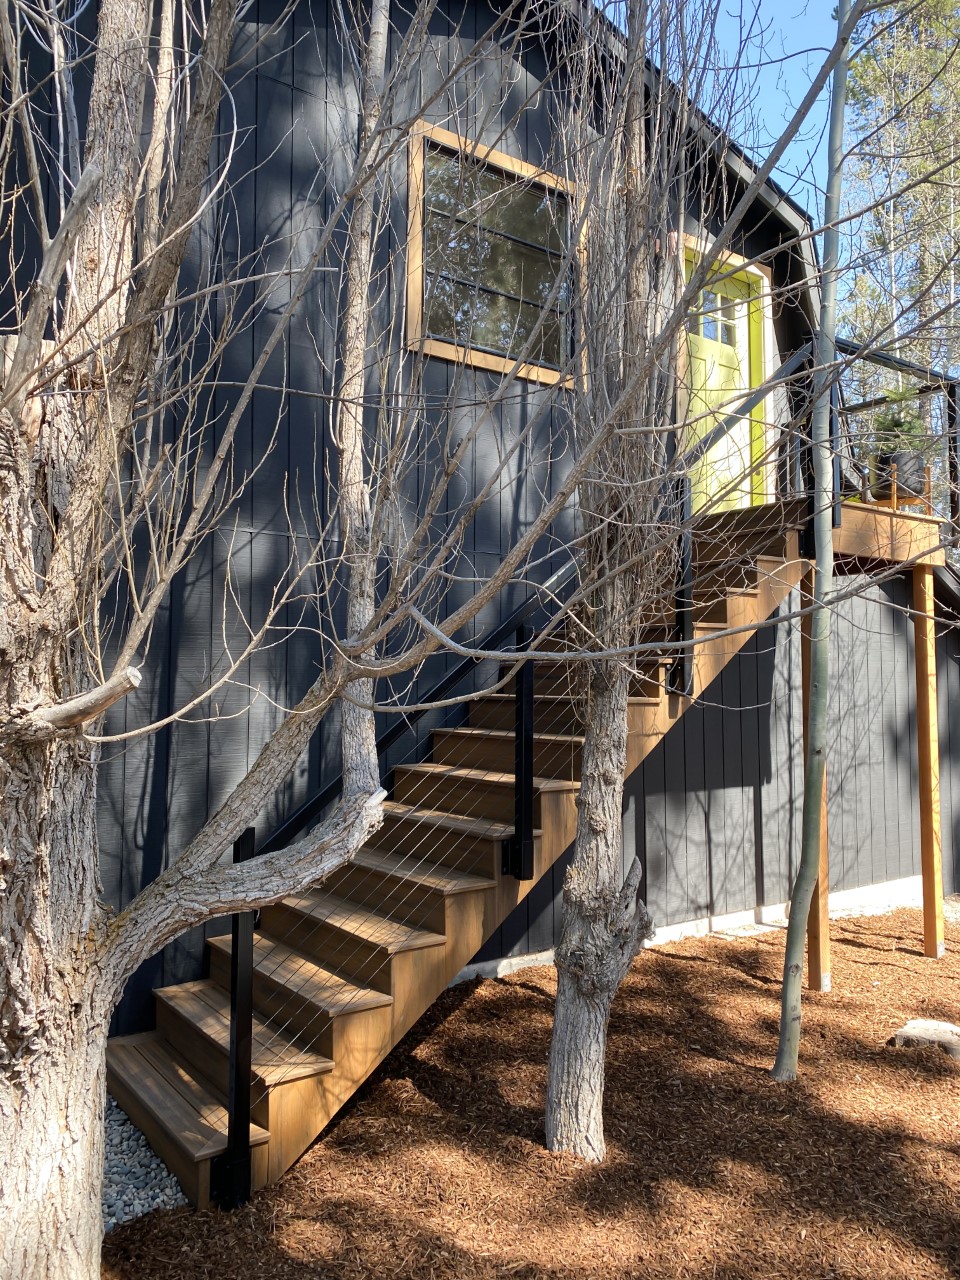
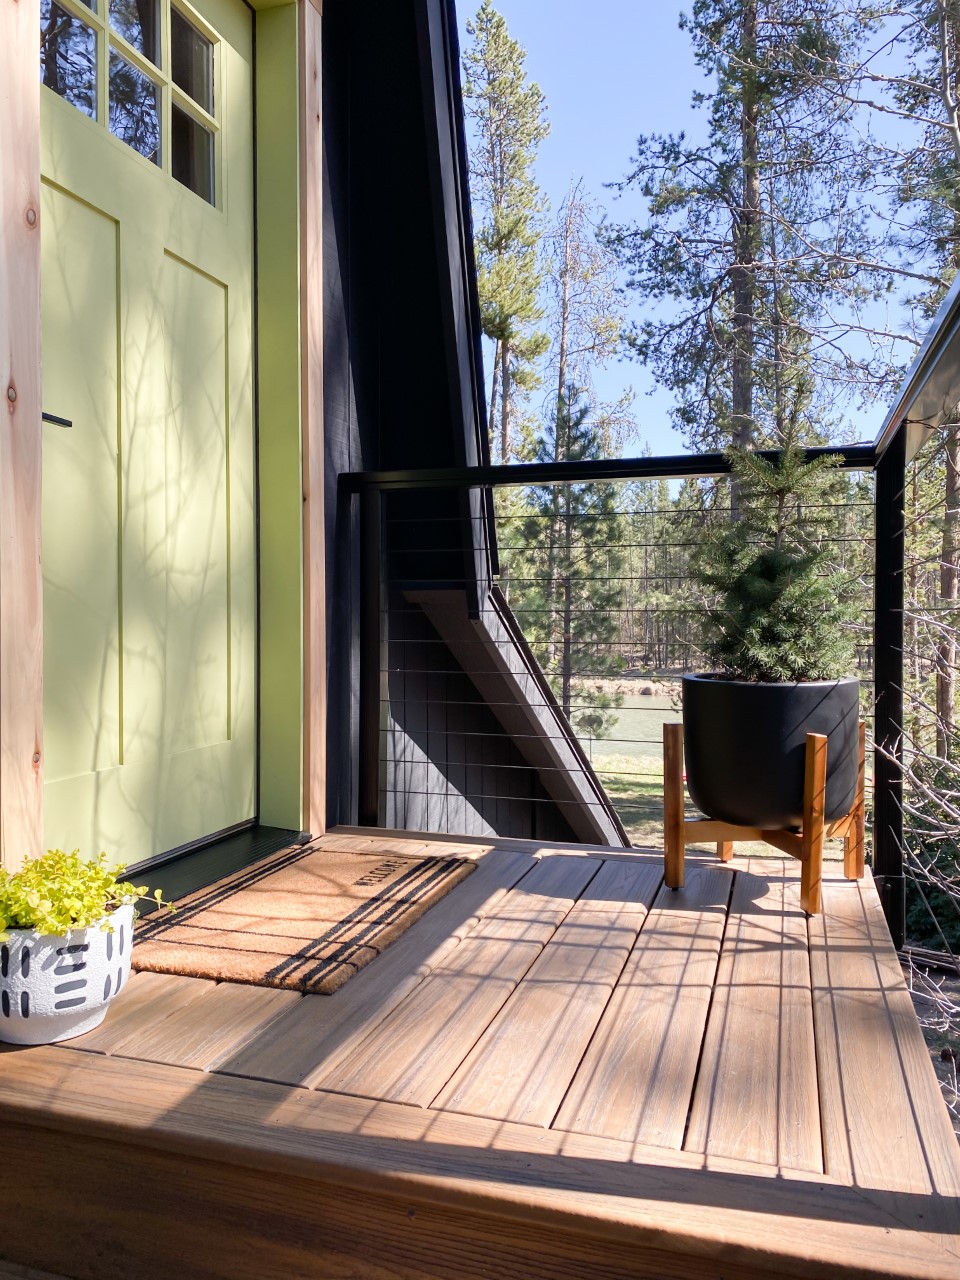
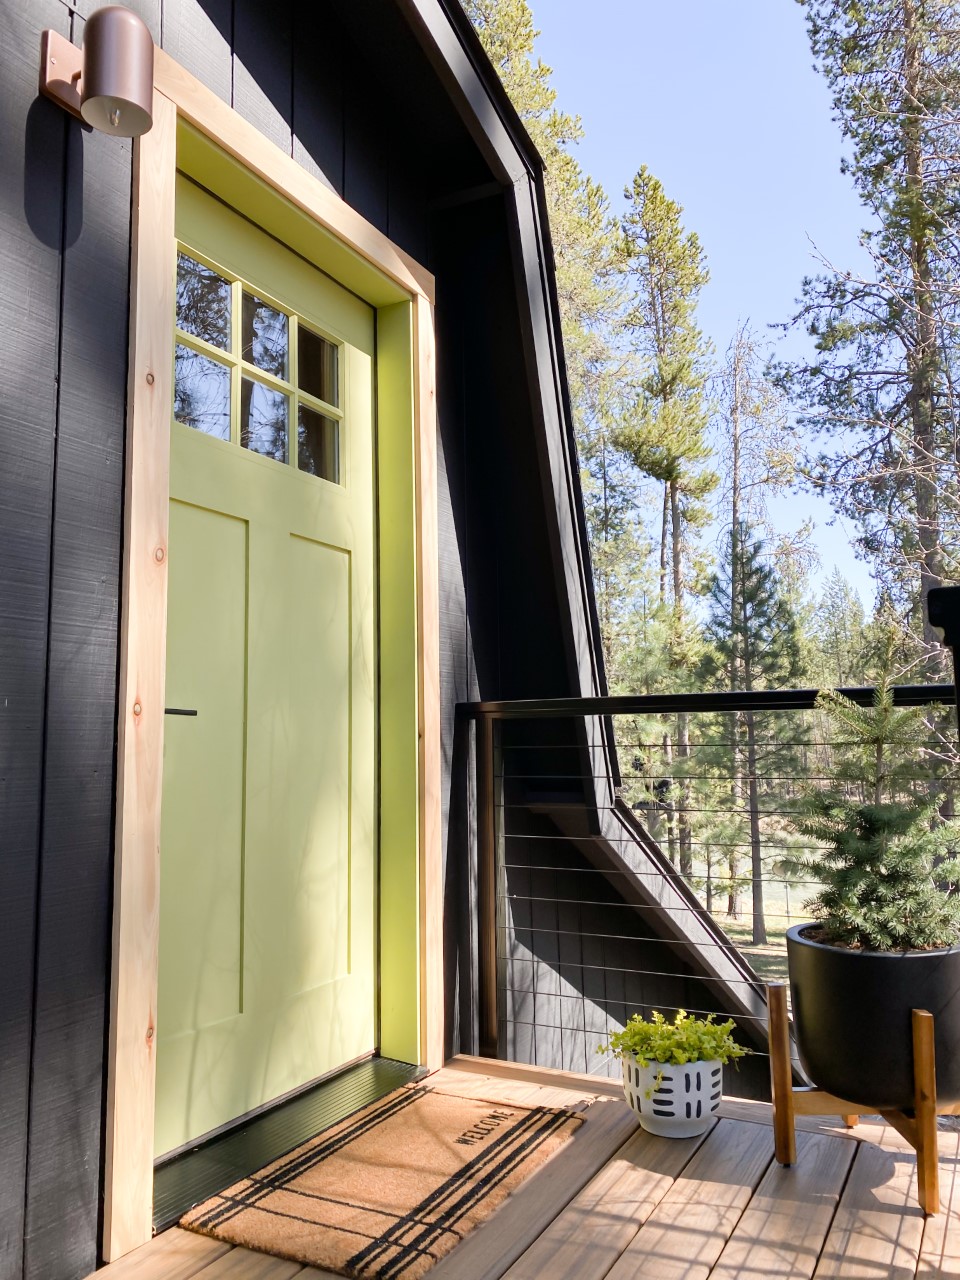
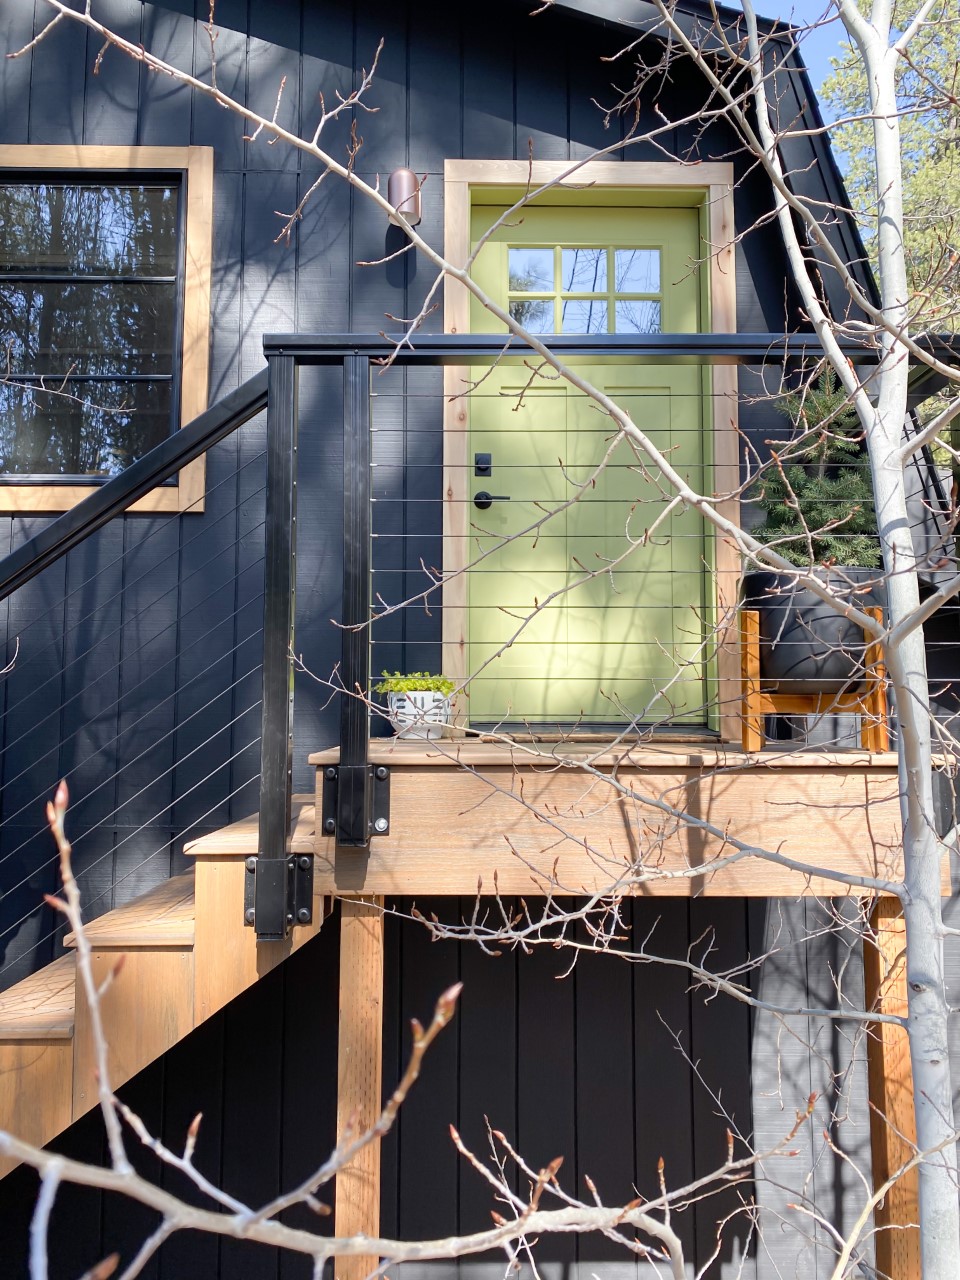
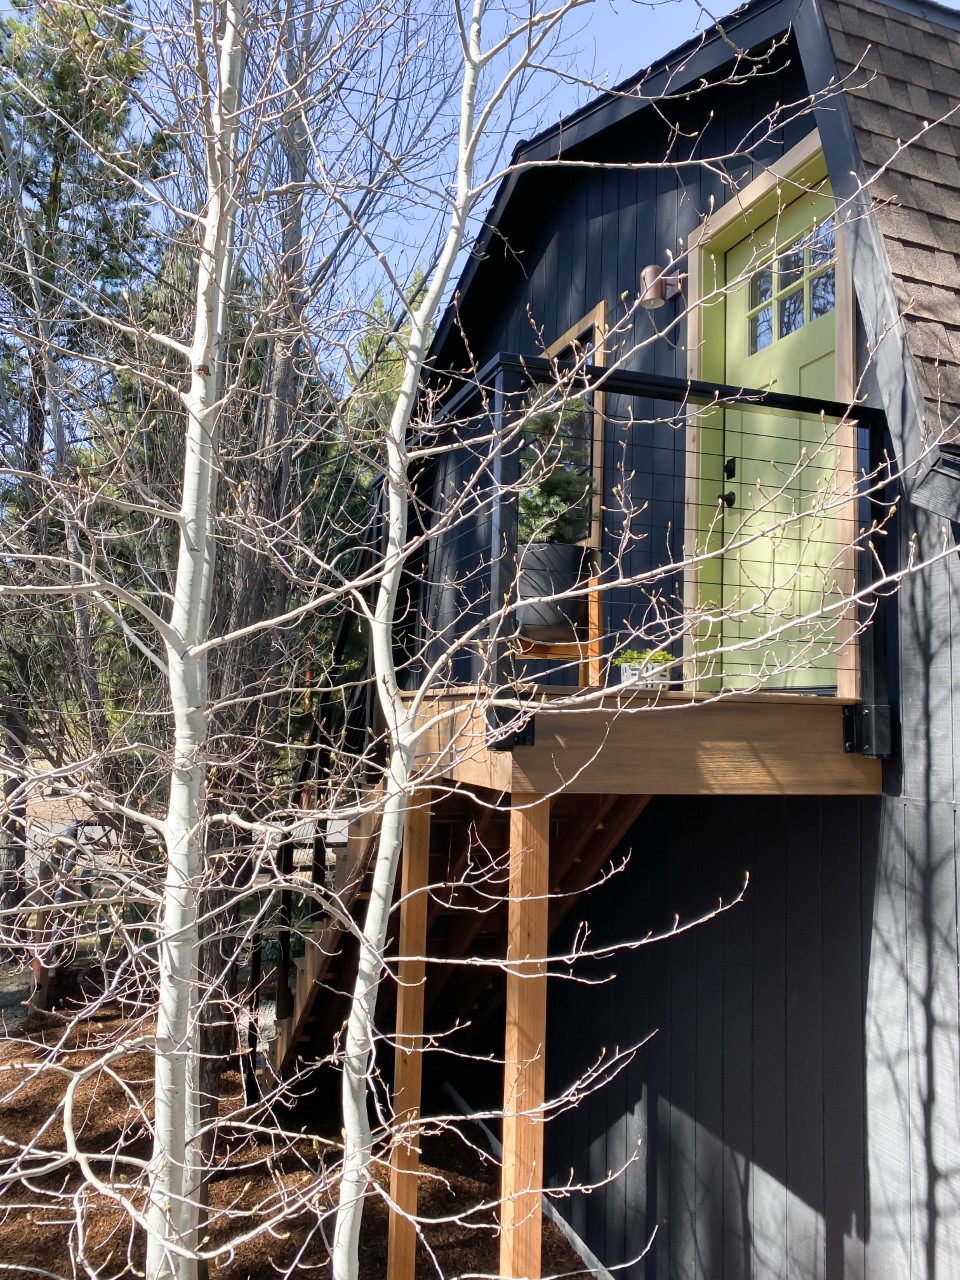
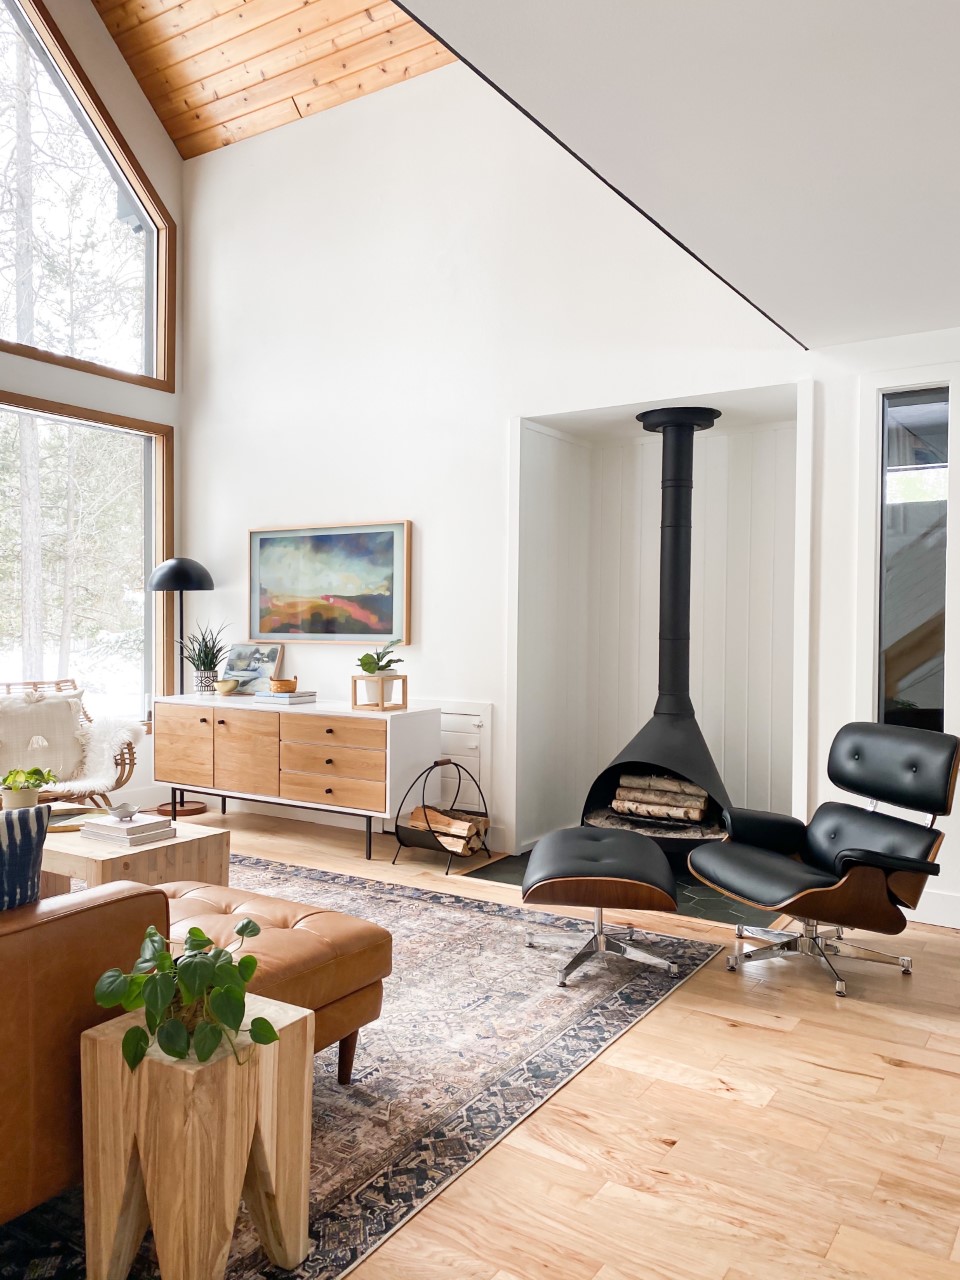
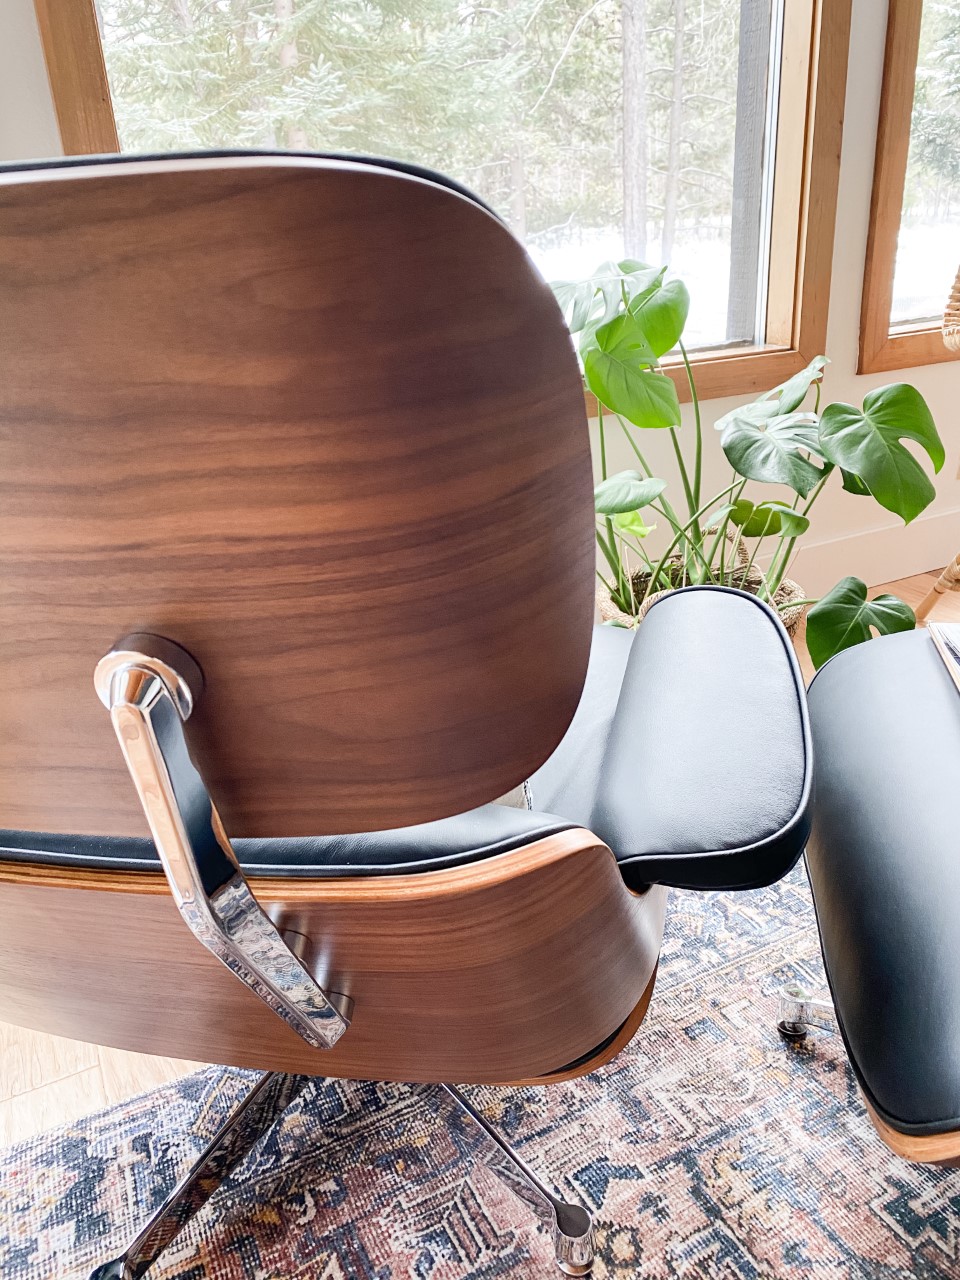
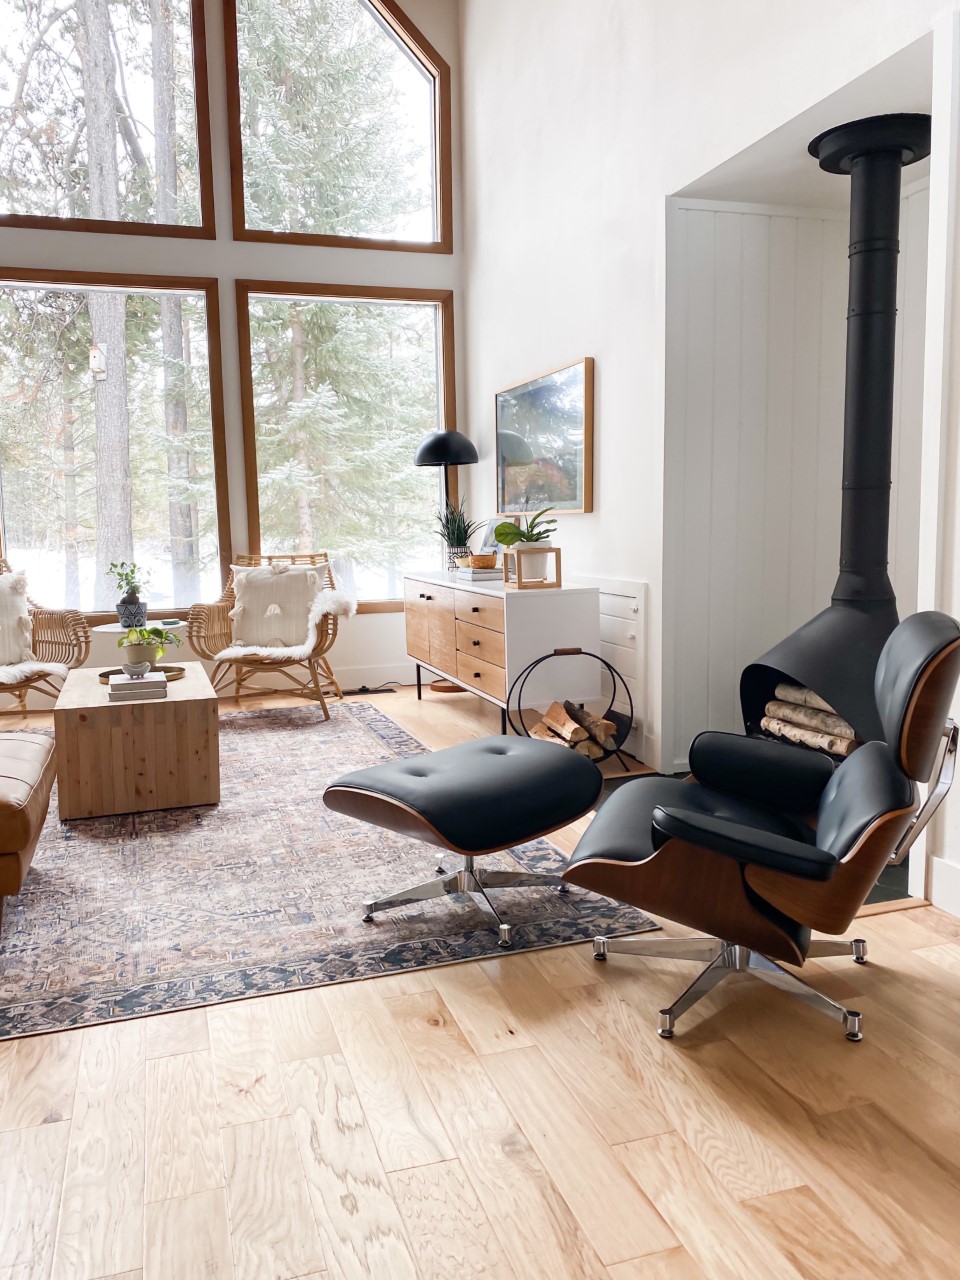
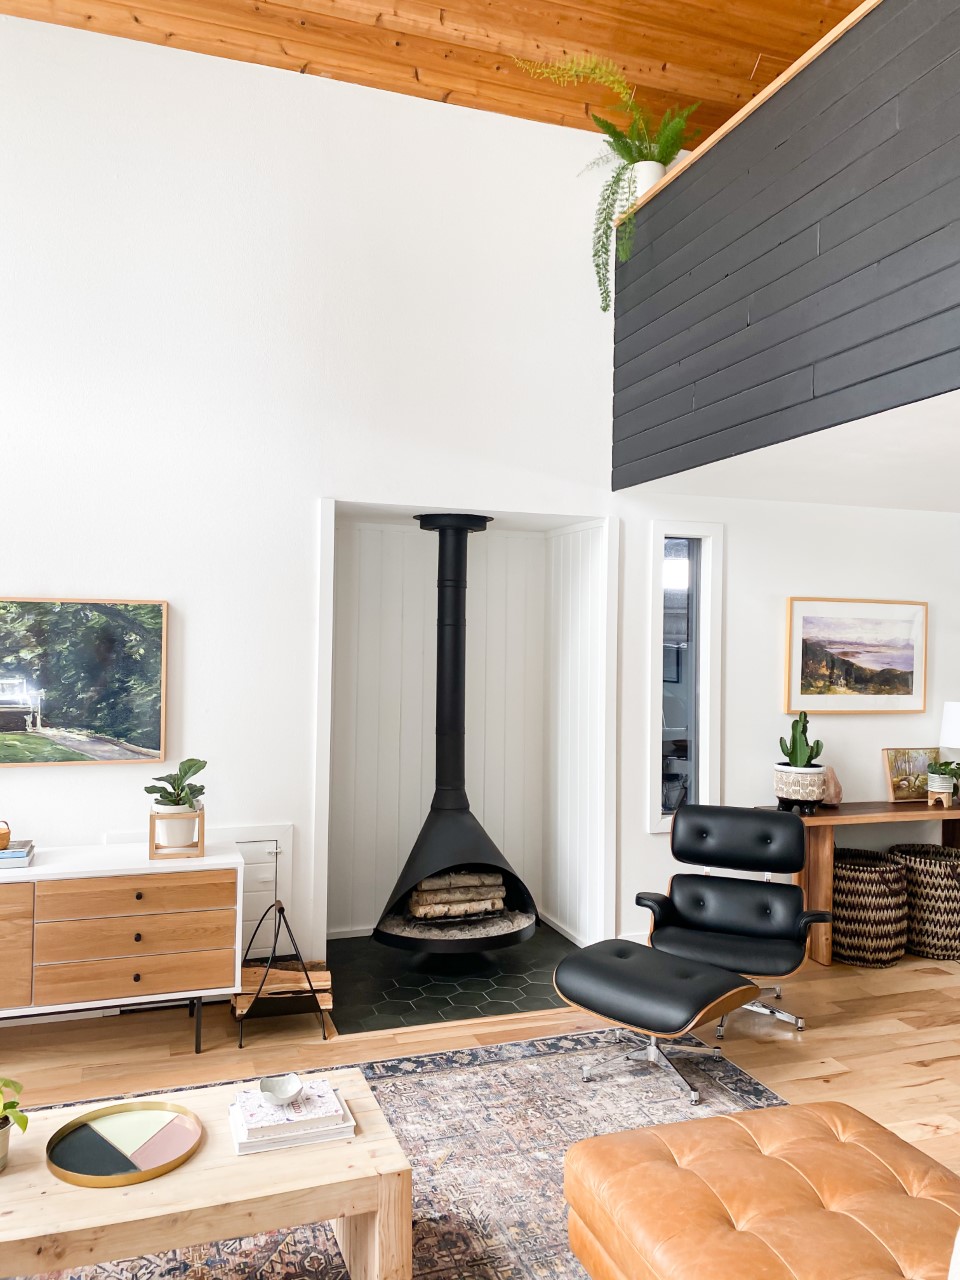
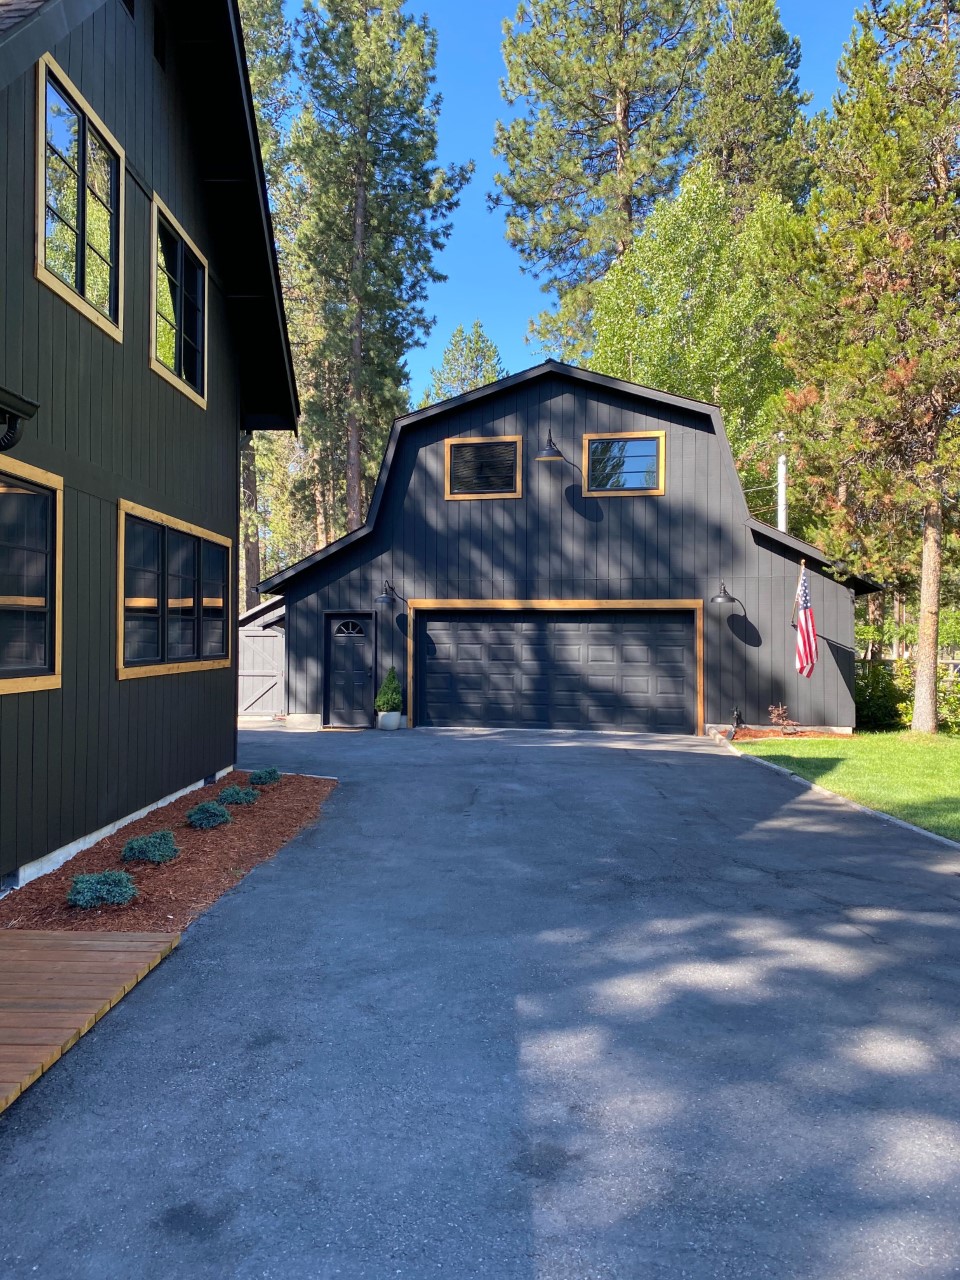
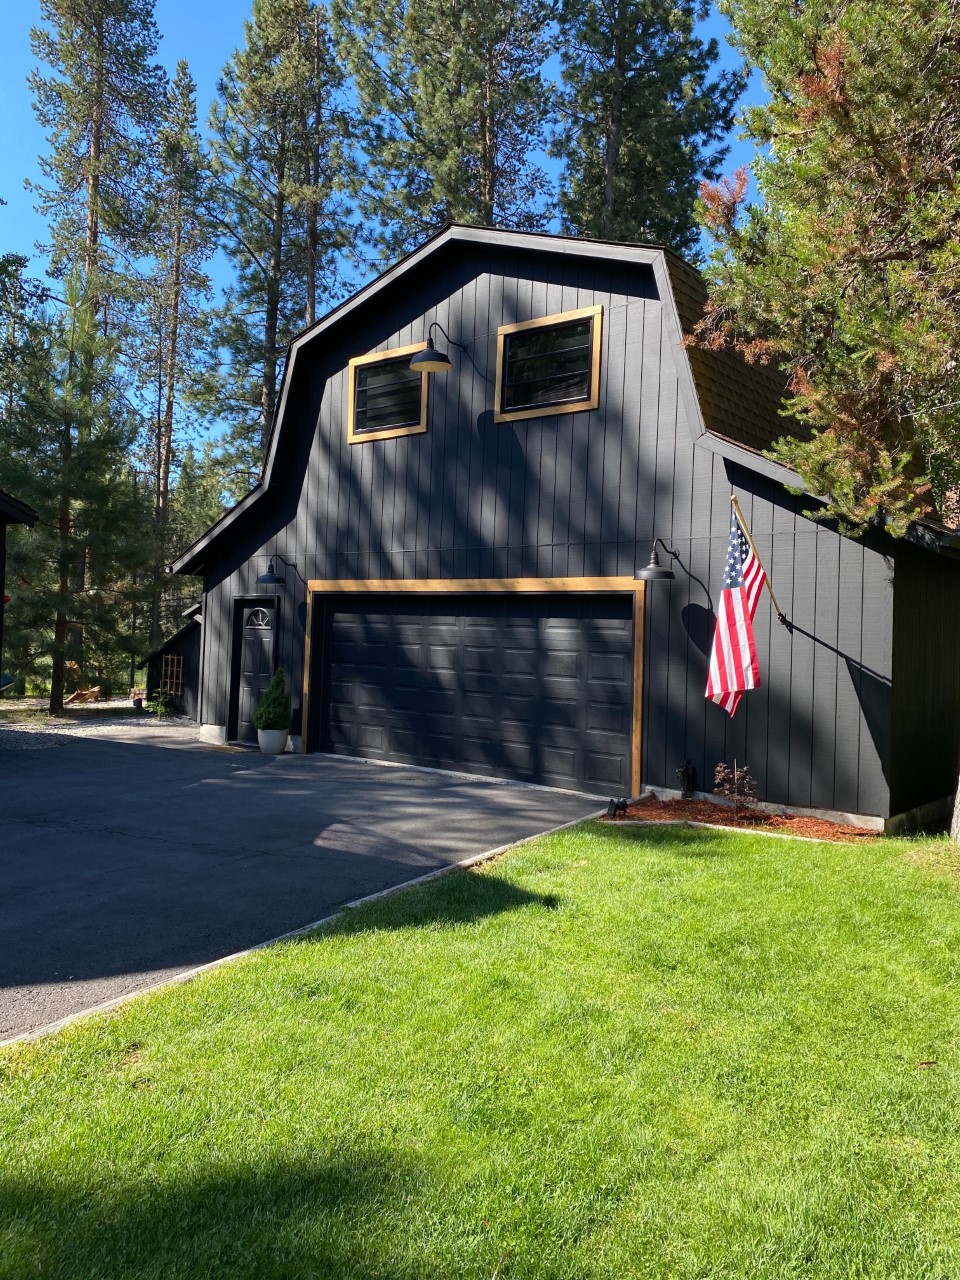
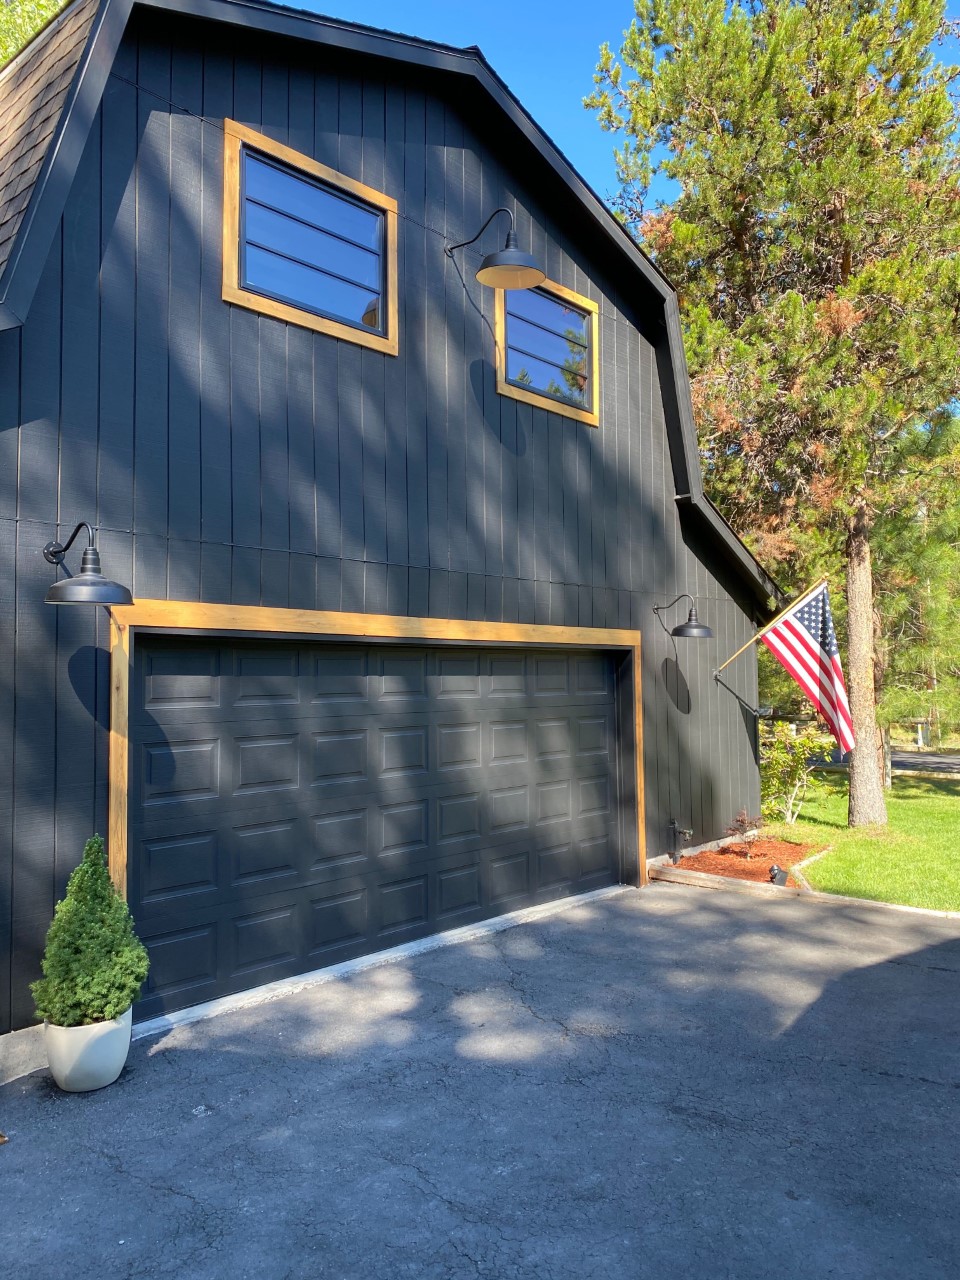
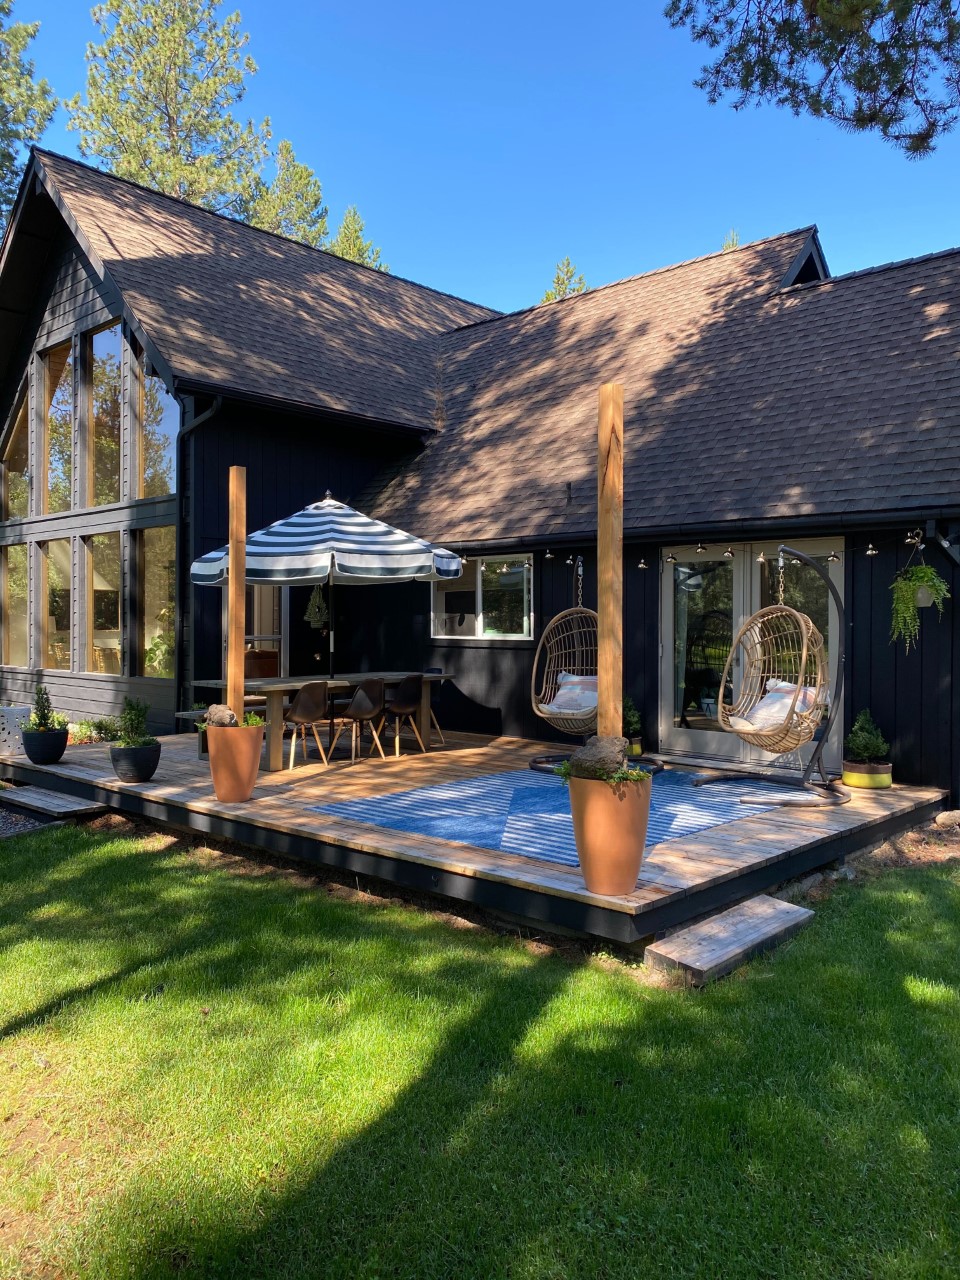
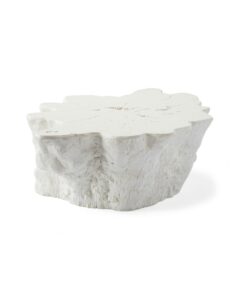
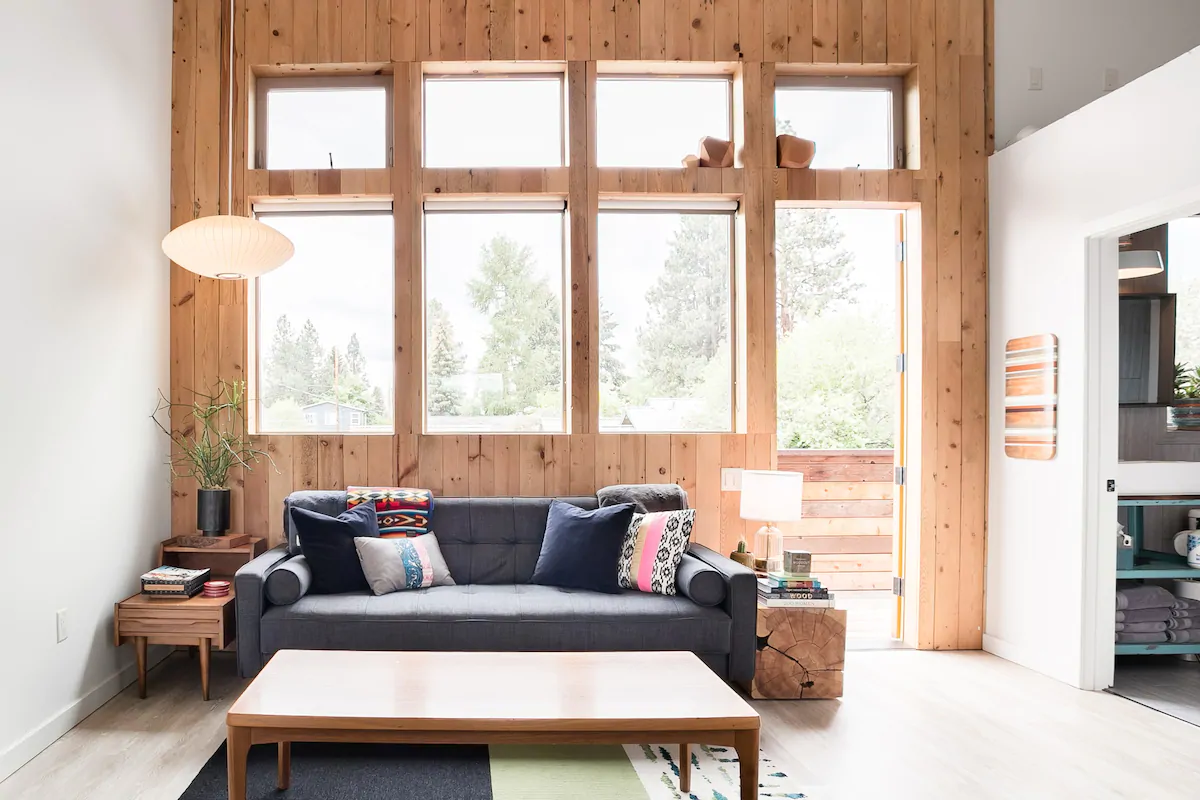
4. Modern Mountain View Home in the Old Mill District 

via airbnb

This modern home is located in the ever popular Old Mill District of Bend. With mountain views and city conveniences , it has something for everyone. The aesthetic is a combination of industrial with a sleek concrete fireplace, and clean mid-century lines throughout the home. It has two levels of decks where you can enjoy the spectacular mountain views. The home also includes a pool table and a hot tub for guests.

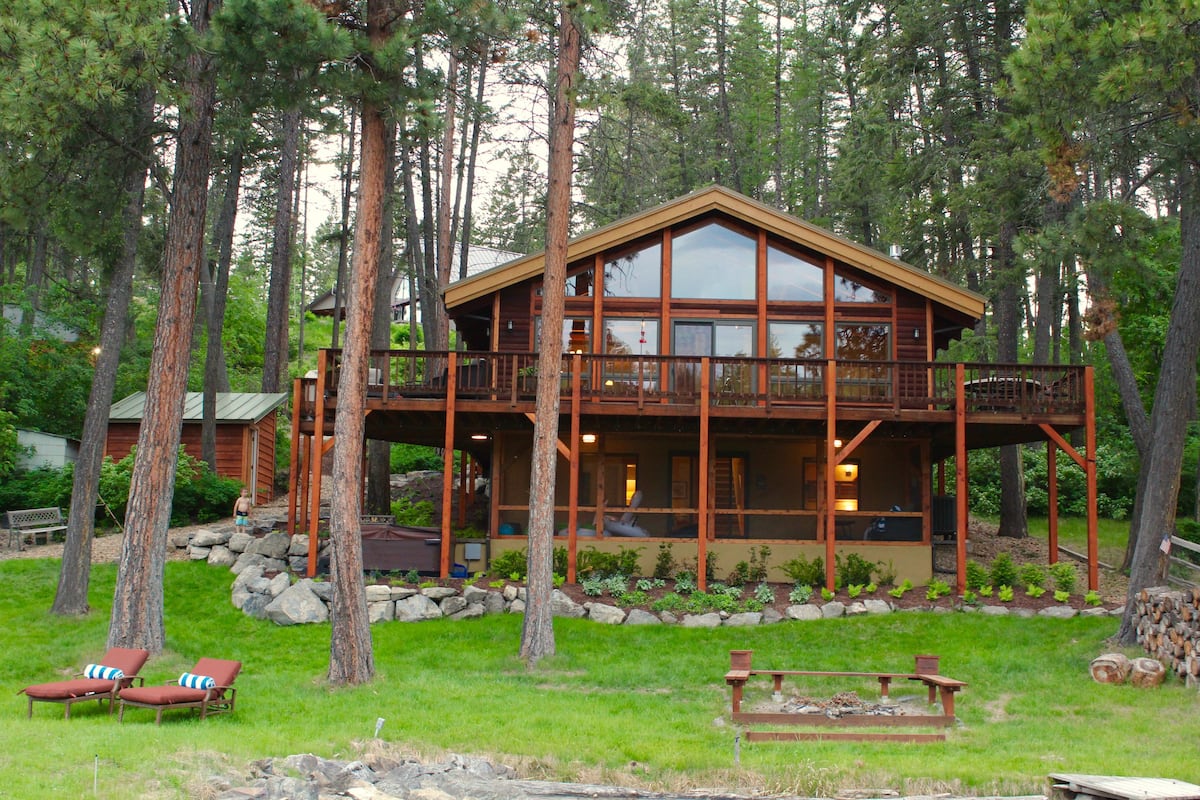
5. River View Inn on the Deschutes River
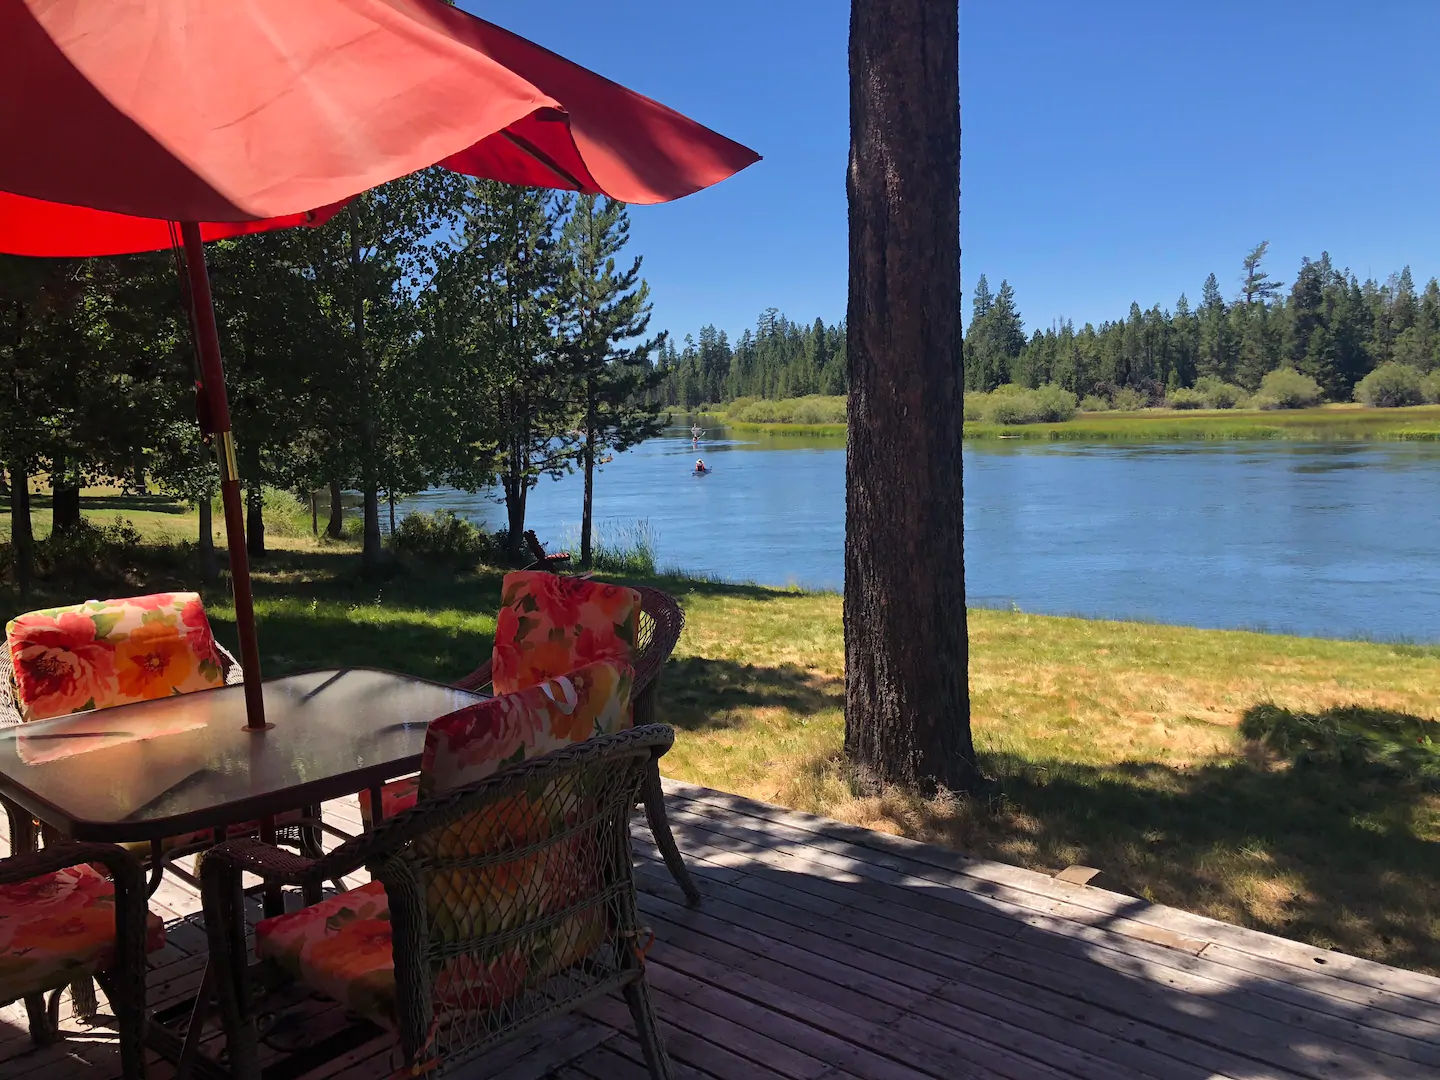
via airbnb

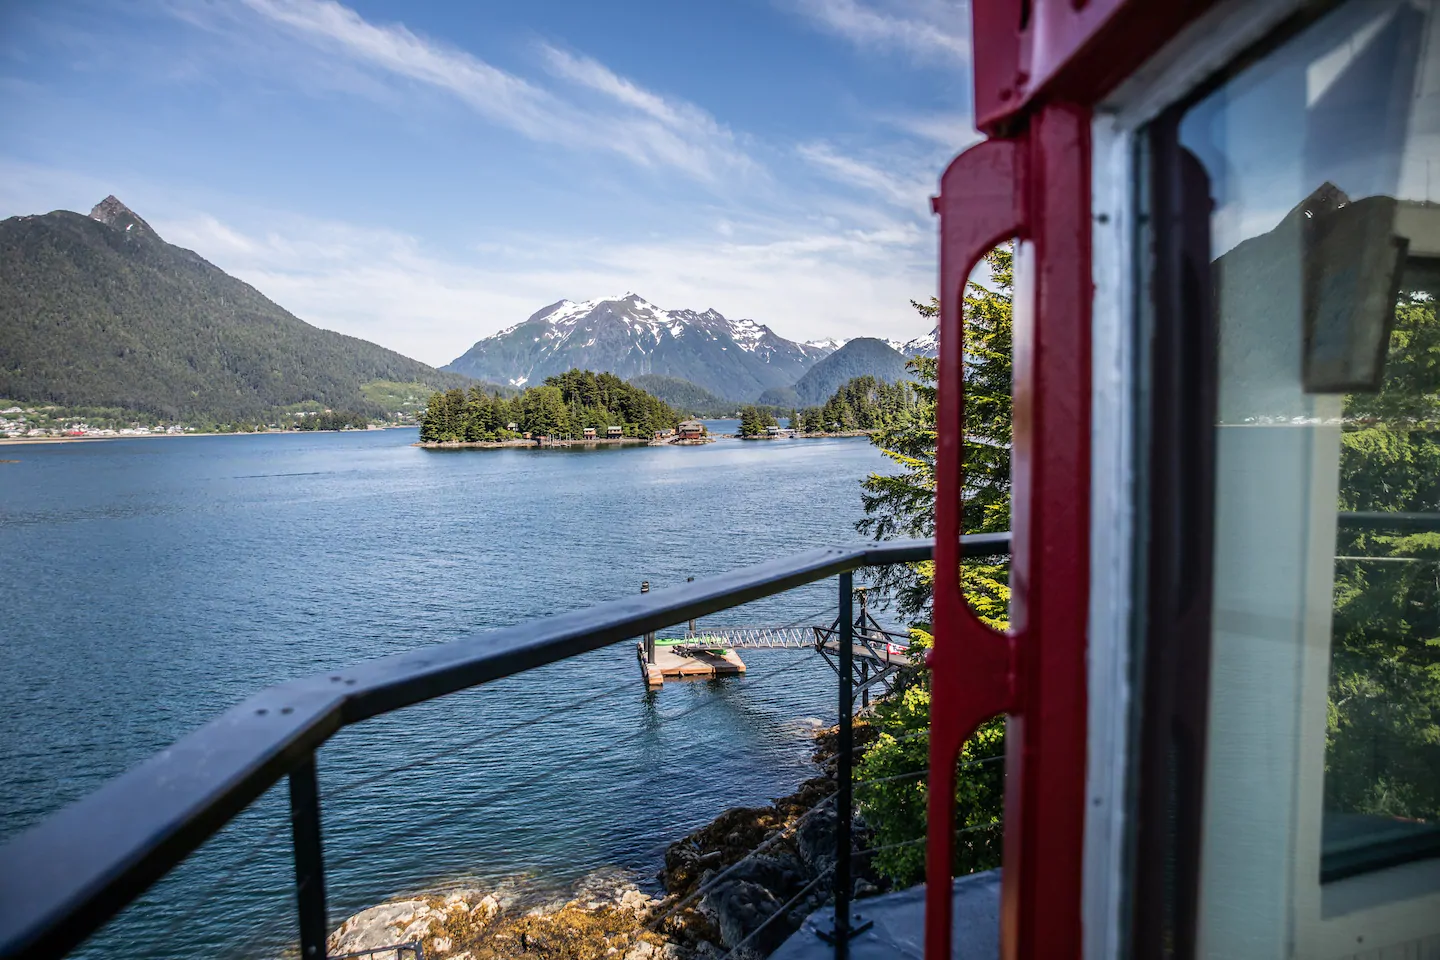
This cute home is all about that river life. Just 40 feet from the shore where you can enjoy all things that the beautiful Deschutes River has to offer. Swimming, floating, kayaking, and fishing are LITERALLY right at your back door!

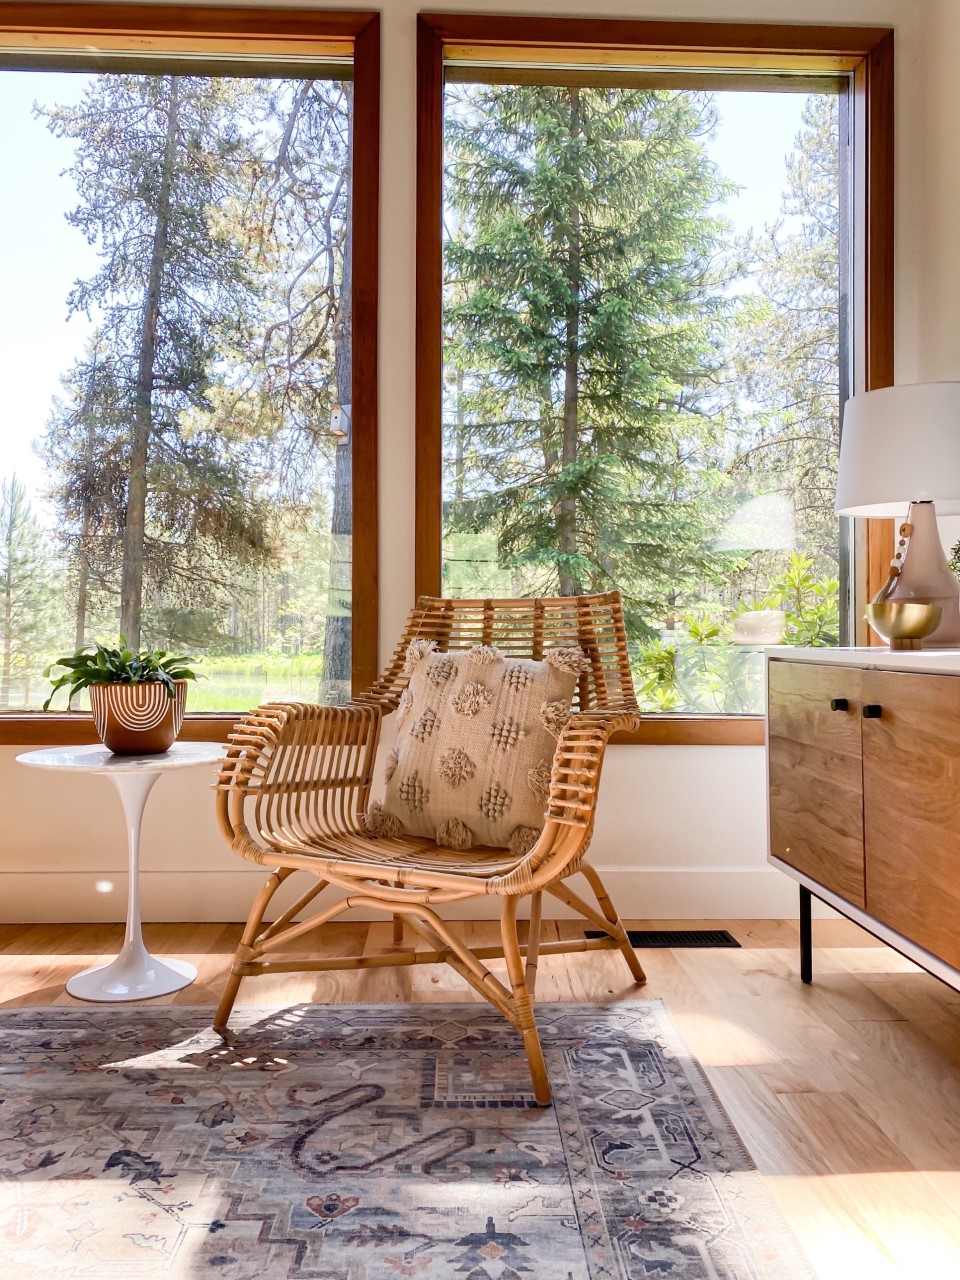
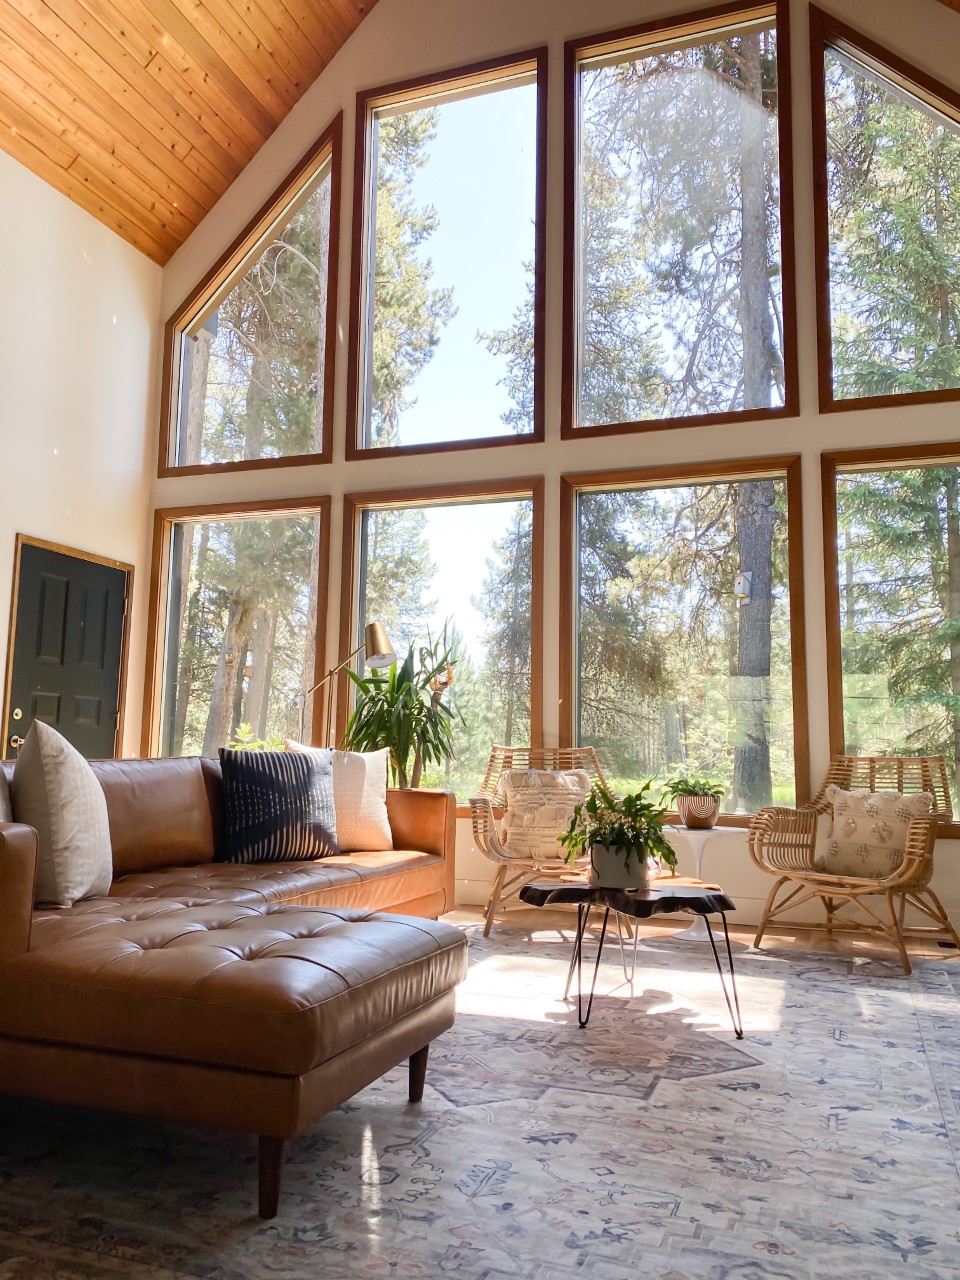
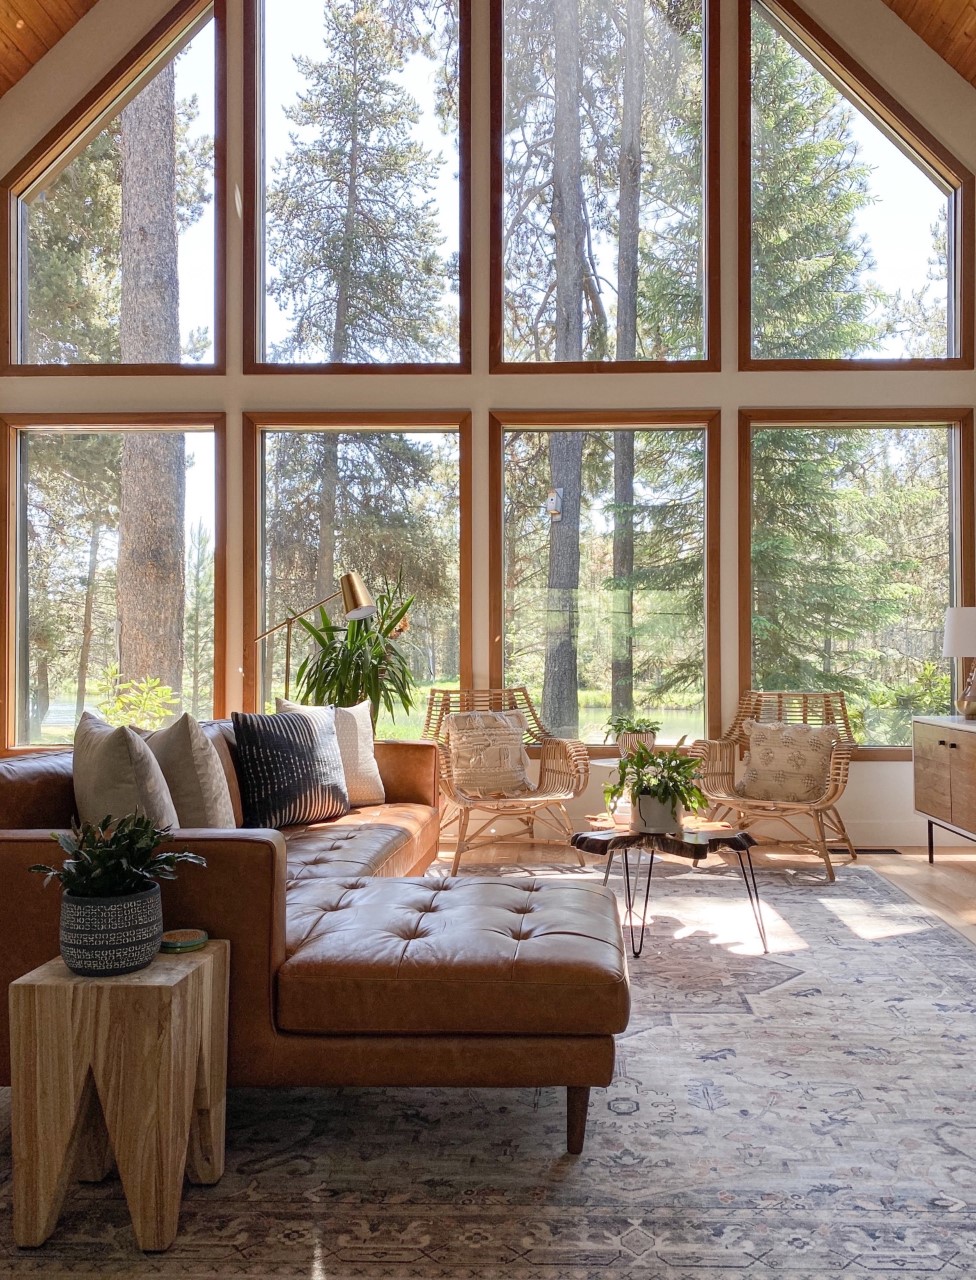
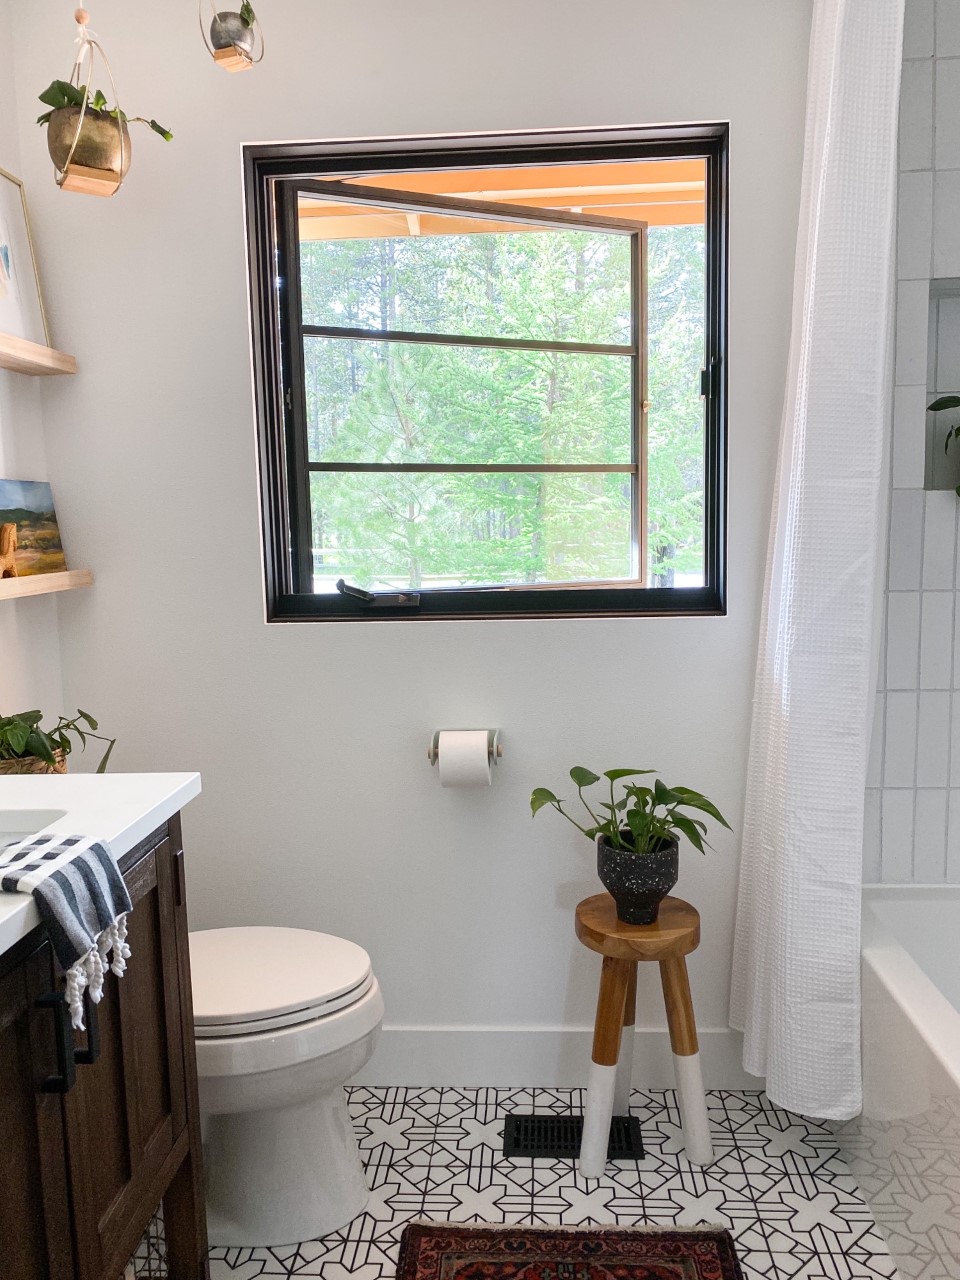
6. Geodesic Dome Home
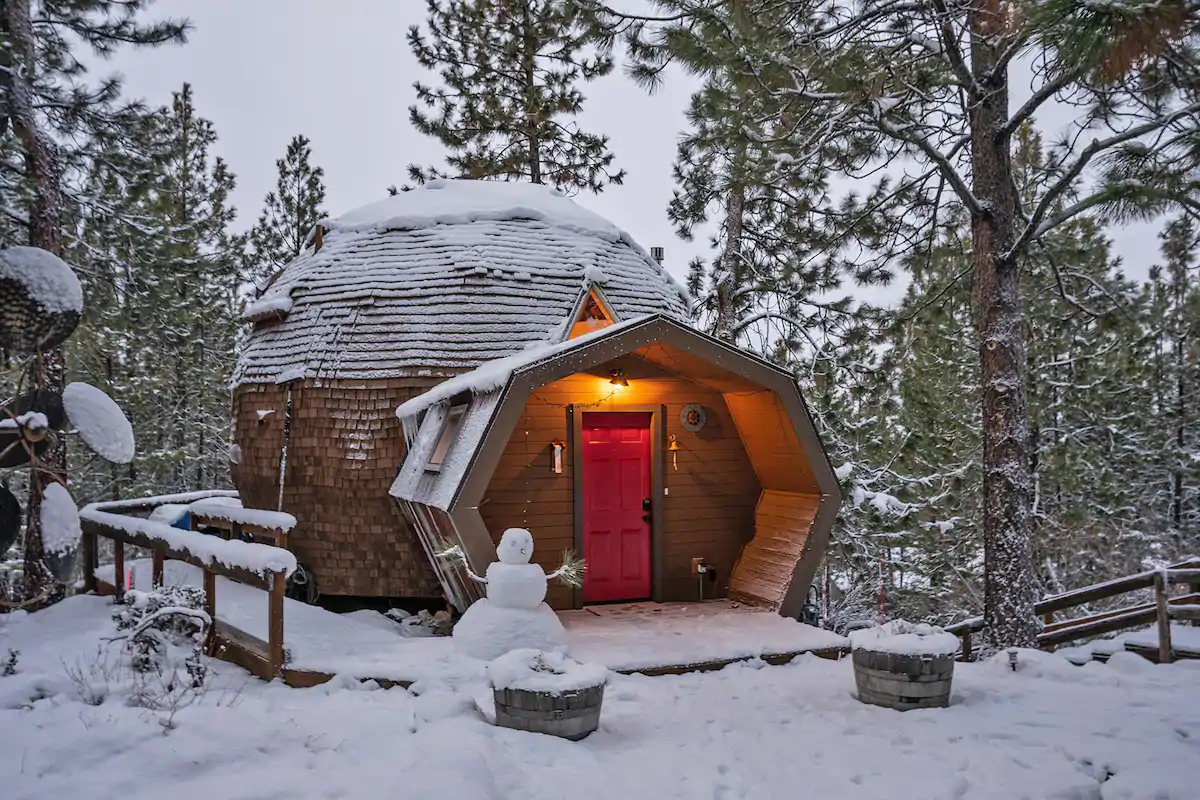
via airbnb

I want to book a stay for my family at this fun Dome Home for a quiet vacation in the woods. This home is recently renovated & stylishly redecorated while situated on a large private and peaceful lot. Perfect central location with an easy walk to Deschutes River Trail or a quick bike ride to Old Mill area or downtown.

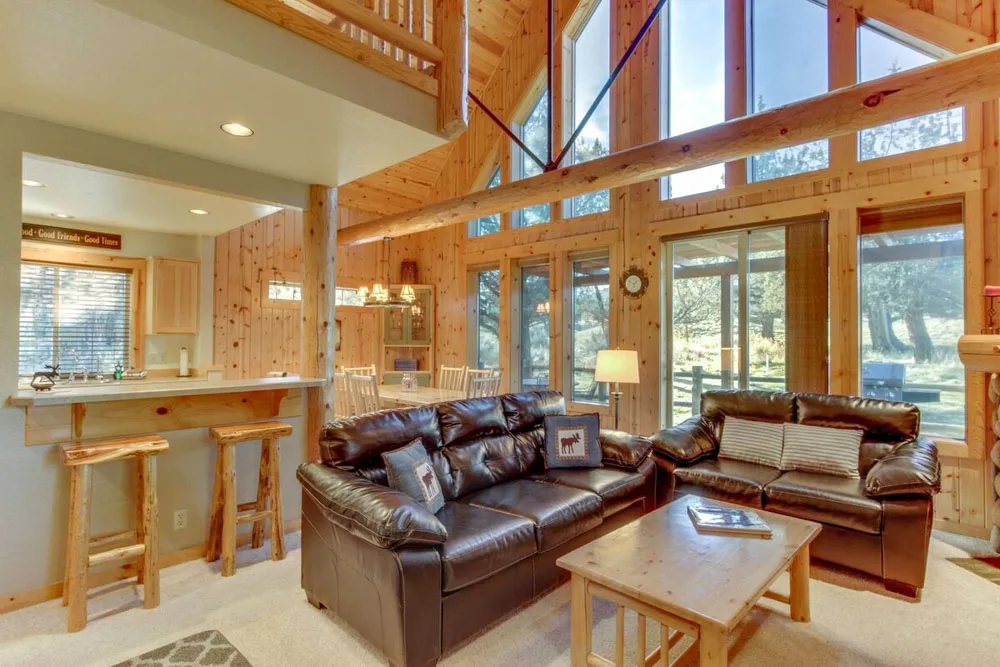
7. Log Cabin on Tumalo Creek

via airbnb

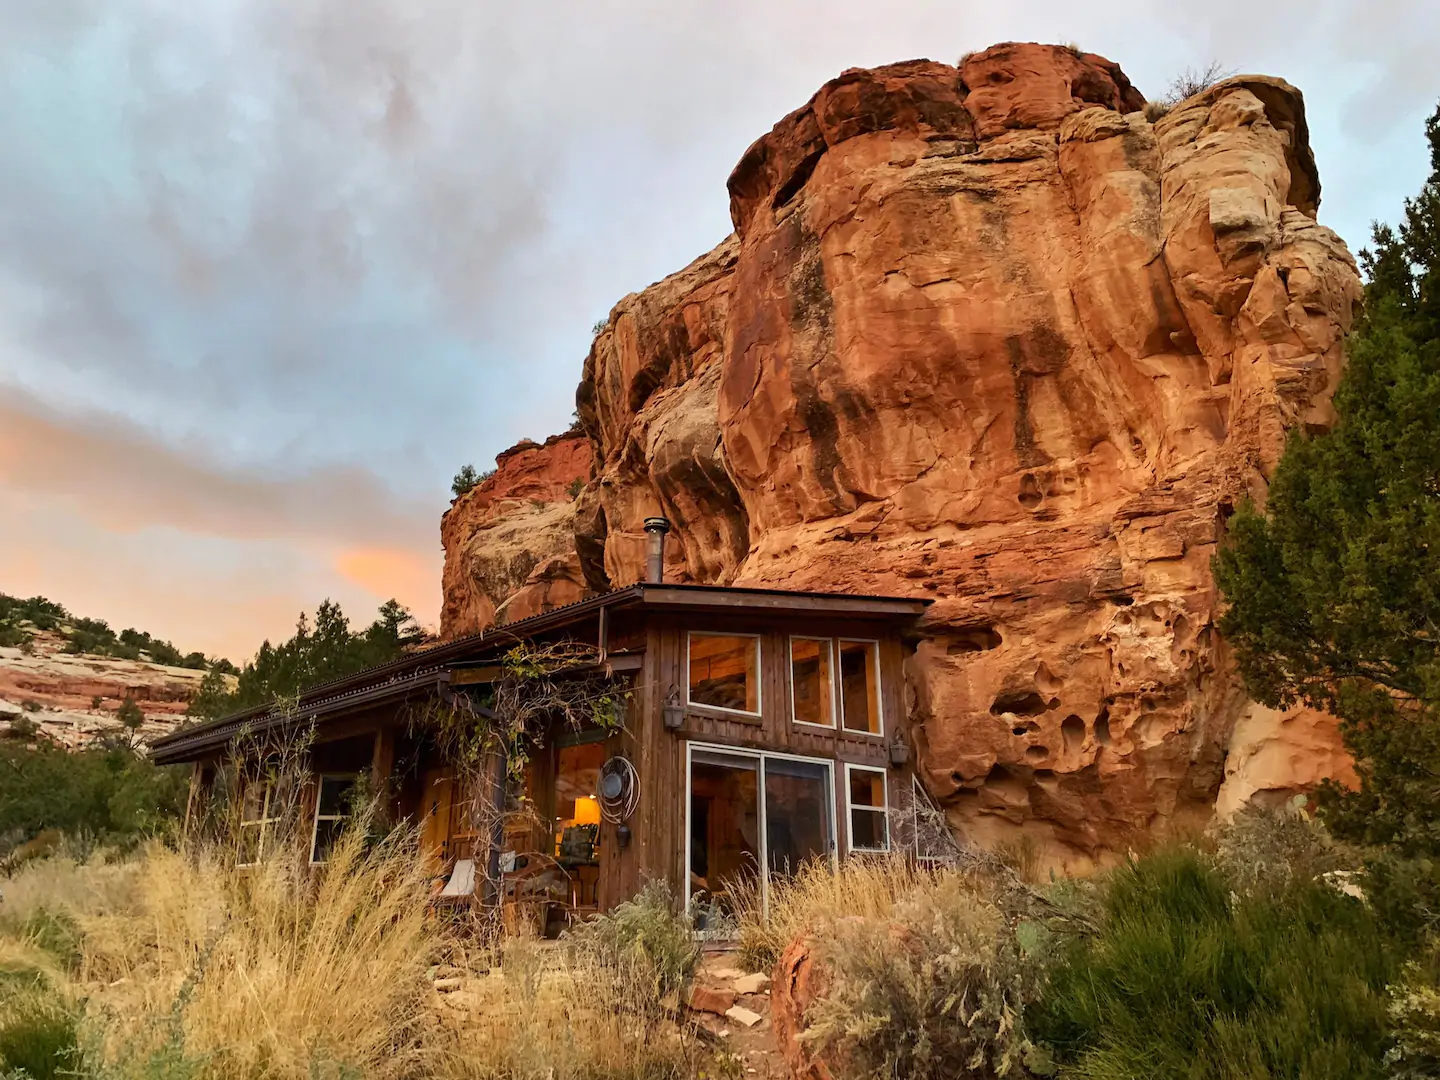
If you’re looking for something more secluded and rustic, then this handbuilt log home in the historic Skyliner neighborhood might be perfect for you! This cabin is nestled between tall old growth pines and Tumalo Creek and is loaded with charm. Located just 9 miles from the west side of Bend and downtown. Its private and serene, cozy and simple.

8. Family Cabin in Eagle Crest Resort

via airbnb

This home would be perfect for a family vacation and is located in Eagle Crest Resort. It sits on one of three on-site golf courses that Eagle Crest has to offer. It includes a private hot tub, shared pool and sauna – something for every member of your fam!

So that’s my list!!! I hope this helps anyone who was curious about Bend and/or Central Oregon living or might be planning an upcoming vacay! Which one is your dream vacation situation? Leave me a comment below and tell me which number is your fave!


The light of all lights!

This post is sponsored by Blueprint Lighting 

Ever since we finished our bathroom at the beginning of the summer, the most frequently asked question that I get is; Where did you get the light above the vanity? I knew it was the ONE as soon as soon as I laid eyes on it! See what I mean…

This particular light is the Monarch Articulating Wall lamp in the Greece color from Blueprint Lighting. If you aren’t familiar with Blueprint Lighting, they are an NYC based company that produces quality, boutique wall/ceiling lamps, as well as chandeliers at a palatable price. Easier said than done! I love them (well, for many reasons really) but, especially because they produce handcrafted lighting, without the crazy lead times that you see from other custom lighting companies… I have seen anywhere from 8 to 24 weeks from other places! And with all of the color and metal options they offer, they really have something for everyone!

The Monarch light is perfect for a vanity light as it adjusts in two different spots so you can direct light in any direction that you prefer, but also disperses the light beautifully in a way that lights up the entire bathroom. The glossy blue and brass combination is so funky and adds just a little bit of personality and sass to the bathroom. It’s really the perfect combination of form and function.

Our kitchen is also outfitted in Blueprint Lighting lights. For our flushmount, we went with their Model 130 Strobus in unlaquered brass. It is a show piece and definitely acts as the star of the kitchen!

The sconces are their Campana Wall Sconce in stark white. I love them! Just like the bathroom fixture, they are fully adjustable and make a statement without overpowering the overall design of a room.

If you are in the market for some quality, handmade lighting, you’ll definitely want to check out Blueprint Lighting. I have a feeling you guys will love their selection of beautiful fixtures. AND OMG I just saw on their site that many of their wall lamps are BOGO right now! SERIOUSLY, RUN!!! Happy Shopping, friends!


Painting the exterior of our home with Sherwin-Williams

This post is sponsored by Sherwin-Williams 

I am beeeeyond excited to share our freshly painted home with you guys today! When we bought this house last summer, we knew it needed paint and it needed paint BADLY! But, we had too many other projects going on (ummm talking to you kitchen remodel) and there wasn’t enough time before winter hit, which was when we decided that exterior paint would have to wait until spring. All winter, I dreamt of paint colors and I kept coming back to this inspiration photo.

Source unknown (if you know, send me a message and I’d be happy to credit them)

I love the monochromatic look with the trim and body all the same color. I also love how the windows offer just the slightest bit of contrast against the dark color. AND HOW AMAZING ARE THE WOOD ACCENTS??!!! I was sold! We had decided on a black…but ended up testing nine different shades on various spots around the house. Once we stared at them for a few days and had the numbers come in via story votes over on my instagram page, we decided on Tricorn Black in a flat sheen from their exterior line called, Emerald. After a quick phone call to our local Sherwin-Williams store, we decided just how much paint this house was going to need. They have a formula to help you figure that out, and it only took a few minutes. For our house, we ended up using forty gallons! I doubted that we would use that much, but I was wrong. We only have half of a gallon left in the garage that we are saving for touch-ups! We loved this paint so much and it basically covered evenly in one coat, but more on that later! Let me show you our house before we painted!

We were lucky enough to have a friend offer up his paint sprayer for the project (thank you again, Jordan!) and it made the project go so smoothly! After we had pressure washed the entire house and taped off all the windows with a light-weight plastic and tape, we got busy spraying. Basically, our process looked like this; Nate sprayed the paint from the top to the bottom, and I followed up with a brush and touched up any spots as needed. Easy peasy! I think the reason that this project went so smoothly was because of the quality of paint we were using. The emerald exterior line is self priming with a smooth beautiful finish. We did the entire house with just one coat! Can you believe it??! The emerald line also has a mildew-resistant coating and won’t blister, peel, or color fade. These factors help put our minds at ease since we were going with such a deep, saturated hue. Also, did you guys know that the Emerald line is backed by a lifetime warranty?! I didn’t even realize paint companies offered such a thing!

This project was so much fun! It was almost like watching our old fixer upper come back to life after it had been asleep for a looooong time! The neighbors all loved watching and some even set up lawn chairs across the street for front row seats to watch all the activity at our place. So many of them stopped by just to tell us how excited they were about all of the changes, and how much they loved the color! This was music to my ears as I was VERY worried that our neighbors might think we were nuts for painting our house BLACK!

After we were finished with paint, we switched out our old vinyl windows for these casement style windows from Sierra Pacific Windows. We completed the look with cedar trim to complement the porch, and I’m officially crazy over this new look!

Doesn’t it look like a new house? Next, we have some fun landscaping plans and I can’t wait to see some green just POP against the black! We are so happy with how it all came together and I am so thankful for the wonderful folks at Sherwin-Williams for sponsoring this BIG project. Now tell me in the comments below, would you/have you ever consider(ed) painting your own house? It’s SO rewarding!


Summer Refresh with Serena & Lily

This post is sponsored by Serena & Lily

Hey guys! So, if you’ve been around here for a while then you know how I love switching things up around the house! For a homebody, like I am, it really helps keeps things feeling fresh! Also, rearranging a room might just be my favorite way to get a work out in. When Serena & Lily reached out and asked if I wanted to partner up for a room refresh, I didn’t have to think twice! If you aren’t familiar with Serena & Lily, they are a furniture and home goods brand with breezy California vibes. Think casual and coastal, with classic American influences and modern lines. I, for one, am a BIG fan.

I have been eyeing this chair for months (told ya I was a big fan) and thought it would be the perfect addition to our living room, especially for the summer months. I love how it doesn’t feel heavy visually, and still even allows light to flow through it. The lines are clean, modern and lend themselves to a mid-century style that I always gravitate towards. Serena & Lily also carries cushions for the seat and I’m thinking about ordering them next. The chair feels so well made with its sturdy rattan frame and I love the deep seat too!

The two chairs feel much more balanced in our living room and really create an inviting spot for conversation. Can’t wait until we can have guests again!

Another favorite from Serena & Lily is this little stool. I have used this little cutie in a variety of spaces and I swear, it looks good everywhere! It’s been hanging out in our newly remodeled bathroom and is a great spot for wash cloths, pretty display soaps, or a nice candle….oh yeah, I forgot, PLANTS! How could I forget about plants?!

I also have one more really fun item that’s coming soon so stay tuned! I can’t wait to show you guys! And just for fun, I thought I would add a few more of my faves from Serena & Lily right now. Summer is the best time of year to refresh a space if you’ve been thinking about changing things up! Just simply click the picture! Happy shopping, friends! XOXO


Bathroom Reveal…It’s Finally Done!

Hiya guys! I can hardly believe that I’m typing these words, but THE BATHROOM IS DONE!!! Even though this was a small space (just 5’x8′!), it was definitely one of the more challenging spaces that we’ve remodeled. COVID certainly didn’t help, and we found ourselves without supplies that we just couldn’t get our hands on for weeks at a time. At one point, we ran out of grout, and thought we would be able to simply pick some more up curbside from our local home depot, but they were out of stock. So, we ordered from them online, and didn’t receive it for almost three weeks. Insert eye roll here. But, that’s all in the past, and I can’t wait to show you how it looks now!

I thought it would be fun to take a trip down memory lane and have a look at this space pre-renovation. Allow me to set the mood…think lots of dark, oak cabinetry from the 1980’s, reflective shower doors (adjacent to the toilet, so I’ll let that sink in for a sec), and the color brown for dayzzzzz. WARNING – it was so bad!

The space just felt sad. I assumed that it hadn’t been updated since the house was originally built in 1984, but we found wallpaper behind the cabinets so I guess it had to have been updated at some point. Scary, but true! In addition to how bad it looked, it also didn’t function well. The cabinet above the toilet was a hazard, and we were always bumping our heads on the doors when they were left open, which they always were. The faucet was leaking, and constantly had a small stream of water running down into the sink. The shower doors spent more time off of their tracks than on. Finally, the shower head was so low that Nate and I both had to crouch just to fit underneath for rinsing off during a shower.

The bathroom is so small that I decided early on that leaving the layout as is would be the best choice. Tip for ya; if you’re thinking about starting a bathroom renovation (or any room, really!), keeping the existing layout will save you lots of dough, in terms of budget. Moving plumbing/electrical is costly, and you’ll be forced to hire that work out. With that said, don’t be afraid TO hire work out, if needed. Nate and I aren’t comfortable with drywall/texture work, and can’t achieve the look of a professional no matter how hard we try…and trust me, we’ve tried! We always hire that out, and I feel good about that decision. We save money doing most of the work ourselves, so it feels justified in that way.

Ok ok ok…let’s get to the good stuff! Here’s how the bathroom looks now!


Ahhhhhhh can you believe it?! What do you guys think? Can you even handle how cute it is now? I will admit, I have been caught a few times over the past couple days just staring. It makes me so happy now!

A few thoughts on the overall process:  I wanted to have some fun with this space and mix some metals, you can see that I mixed brass, matte black and brushed gold. They all are different but I think it works! Everything had to go during the renovation which allowed us to start fresh. After the new water resistant sheet rock went in, we applied a coat of Redgard, and then had all the walls repaired, skim coated, and fresh texture was added. If you have a keen eye, then you might have noticed that we even replaced that old vinyl window with a modern black window from Sierra Pacific Windows. The clear glass lets in waaaay more light, and the modern lines helped to bring this bathroom from sad 1980’s to modern 2020. Welcome to the new century, Bathroom! We debated (heavily) on doing a glass shower door, but ultimately opted for a simple shower rod and shower curtain combo just to keep things light and airy. The shower tile pattern is a vertical stack, which I worried might feel too modern, but I think the handmade artisan look of the tile keeps it from feeling toooo modern. Nate and I learned a lot during this remodel, and now I’m itching to use everything we learned on our upstairs bathroom!

Link time! So if you wanna know where I scored a certain something, it should all be there for you in the list!

Vanity – The Morris 30″ from Signature Hardware

Hand soap

Mirror above vanity

Vanity light – Monarch Articulating wall light from Blueprint Lighting. Mine is in the color called Greece.

Sink faucet – Matte Black Tenet Widespread Bathroom Faucet from Pfister Faucets

Tub – Sitka Tub from Signature Hardware

Shower tile – Glazed Thin Bricks in Lewis Range from Fireclay Tile

Shower grout

Shower trim kit – Brushed Gold Tenet Tub and Shower Trim Kit from Pfister Faucets

Shower curtain

Shower rod

Shower hooks

Black heat register cover

Floor tile – Kasbah Trellis from Fireclay Tile 

Floor grout

Window – Urban casement style from Sierra Pacific Windows

Window Blind (that has yet to arrive) This is another good option for bamboo blinds that I have used in the past and loved (ships super fast too)!

Shelves above Toilet – Made by Nate who has a tutorial saved on his Instagram page @honeydudelist

Print on shelves (top left)

Print on shelves (top right) – Corinne Bizzle Art

Print on shelves (bottom right) – Thrifted but I linked a very similar look here

Wall baskets on shelves – Thrifted but I linked an even better set here

TP holder 

Stool by the tub

Rug – Vintage rug from Rug & Weave but I linked a similar one here. Everything on their site is amazing!

Plant hangers – Braid & Wood Design Studio

Whew! Well, I think that’s about it! Thank you so much for following along and for all of your comments, questions, and for cheering me on during this project (love you guys!)…even though it seemed like it kept going and going and going. Also, I’d like to thank my sponsors who I worked with and I’d just like to say how much I appreciated their patience with me during this project. Everything took WAAAAAY longer than I had originally planned, and everyone was so gracious. So a big thank you and a big hug (virtual, of course. Thanks to COVID) goes out to all of these generous partners for believing in me, and this little bathroom! I couldn’t have done it without you! XOXO

The most popular seat in the house

This post is sponsored by Sixpenny 

Hi guys! Hope everyone is doing well during this mess that is COVID, and everything that goes with it. All this time at home has recently allowed me to really see how we use our living spaces since we’ve moved into this new (old) house of ours. It’s funny to think about how I thought we would be using our spaces vs. how we are REALLY using them. I usually try and provide the most seating as possible for guests in our living room, so that everyone has a comfortable place to sit when they visit. But, quarantine means less visitors (ahem…no visitors) and I set up an additional TV zone upstairs in the loft for the kids. I mean…how much Blippi can one person take before they want to pull their hair out?! This meant that I spread out my extra living room chairs throughout the house which left the living room feeling a little bare. So when Sixpenny reached out and asked if I wanted to work together to refresh some seating options at our house, I jumped at the chance!

If you aren’t familiar with Sixpenny, they are a furniture brand that specializes in premium furniture – all natural fabrics, down fill (or poly fill as the vegan option), luxury leathers, solid wood frames, and so much more! Somehow, they still manage to offer all this at digestible prices and if in stock, ships within 2-3 weeks. Pretty great, right?! Now you can see why I was so excited to work with them!

I wanted a comfortable chair to accent our leather sofa for the living room. Something that you could curl up with a book, or for some serious Netflix binging. And then I found Gabriel…

I selected their Gabriel Chair in the medium weight linen, and the poppy seed color. I like that the cushions are down filled as it allows for easy fluffing. And do you want to know the best part? It’s slip covered, which makes throwing this baby in the wash a breeze. Now I won’t be holding my breath every time my three year old is running amok with a chocolate chip cookie in hand. Peace of mind for the win!

Nate and I have been racing to the living room each night after we get the kids to bed to see who can score this cozy new spot for the evening. Spoiler alert – I’ve won the last three nights! The poppy seed color compliments my leather sofa and the colors in the rug too, don’t ya think?

I love the linen and its casual vibes work so well in our home. And have a look at all this texture!

I also should mention how seamless Sixpenny’s ordering process was. After I selected my Gabriel, it shipped within two weeks and was delivered to our front door in less than a week after that! Usually, Sixpenny offers white glove delivery, where they come right inside your home, unbox the piece, and then place it wherever you’d like. But, during COVID, they are exercising an abundance of caution (which I appreciated), and just left it on our front porch for us. Completely contact-less!

Every time I see this view, it puts a smile on my face. And I would be more than happy to answer any questions you guys might have about Sixpenny or the ordering process! It was a truly a breeze, and I am still totally smitten with Gabriel…although I call him Gabe now, as we’ve gotten to know one another a little better. Ha!

XOXO, Courtney


Our New Cafe Appliances: Range and Hood Edition

This post is sponsored by Cafe

Since we finished the kitchen for the One Room Challenge, one of the questions that keeps coming up is; what do we think of our new range from Cafe? Well, I LOVE IT! This range was quite an upgrade for us. We went from a 30″ mid 1990’s white electric range to Cafe’s Dual-Fuel Professional Range with six burners. I talked a little bit about Cafe a few posts ago, the ones that are customizable, and allow you to choose a base color as well as the hardware color. Which I am loving so much because I am a big fan of mixing metals in the kitchen.

This range is the perfect combination of form and function. Everyone is always saying how you have to choose between the two, but with this range, you get both.

Because this baby is a duel fuel (natural gas cooktop + convection oven) range, we had to add a gas line which was an additional cost of about $1,500 after permits and the cost of the plumber, but it was worth every penny. Nate, who is the cook in our family, has always wanted a duel fuel range so this was kind of a dream come true for him. Another thing to note is that if you live in higher elevations, like we do, then the convection oven will make your life so much easier. Higher elevation baking often means that your cookies are raw in the middle and your cakes will not rise, but not with this convection oven. We are able to follow regular baking instructions on mostly everything now and it comes out just perfectly!

Each of the six burners have their own knob (plus one for the oven) which makes operating the range very straightforward.

The grates are easy to remove and when I notice they need cleaning,  I just place them all in the sink and give them a good rinse. While the grates are off, I usually use this opportunity to wipe off the cooktop. Just a sponge with a spot of dish soap, and all of the cooking messes wipe right up. Easy peasy.

The width of this range is 36″, when a standard range is 30″, and this extra six inches allows you to bake multiple dishes at once. This came in handy over the holidays when the green bean casserole was ready to go in the oven, while the turkey was still roasting away. My mom and I made Thanksgiving dinner together this year, and she LOVED that the racks are on rollers and slide in and out with ease. It’s these small details that make a big difference!

For our hood, we went with their 36″ commercial style hood. It’s mounted to the wall and then we built the cedar surround. The hood cover was a relatively simple DIY. After the hood was installed and secured to the wall, Nate built a frame around it with 2×4’s, and then wrapped the entire structure with cedar 1×2’s. I am always a fan of adding natural wood tones whenever and wherever I can, I love the warmth that wood adds to a space. It’s a statement maker and only cost around $75 in materials.

Here is what the hood looked like before we wrapped it with the cedar. I love how it matches the white appliances, but also comes in all of the same color options that the range is offered in, so you can coordinate accordingly. It’s pretty enough to leave as is, or you can customize your look, like we did.

The fan is so quiet, even on the highest of settings and the grates easily remove in case they need a good cleaning. Also, I love the light that comes inside the hood. You guys know how I HATE a cold, blue LED light bulb…makes me feel like I’m the operating room at the hospital. But, these lights are warm and lovely and even have a Nite setting, which is a very low light that I have been turning on every evening after the kids are in bed. It’s soft and adds such a nice ambience to the kitchen.

With the kitchen finally complete and all of the Cafe Appliances stealing the show, we are just LOVING all of them! They all look and function the part. We knew we loved how they looked when we picked them out, but now that we’ve been using them in our kitchen for a few months, we are hooked!


The Sink And Faucet That I Couldn’t Stop Pinning

This post is sponsored by Kraus

I don’t know if I told you guys this but when we were remodeling our kitchen for the One Room Challenge, we were without a working sink in the kitchen for twelve weeks…yep, you heard that right. TWELVE LONG WEEKS! So when our sink from Kraus was finally installed, I was a over the moon! Has anyone else washed dishes in the bath tub before? Well, believe me…it’s not a fun job.

It seems kind of funny, but when you’re planning a full kitchen remodel, the sink has to be selected at the very early stages. Which makes sense if you think about it because cabinets can’t be ordered and counter tops can’t be measured until the exact dimensions for the sink are set. And there are lots of options too; under-mount, apron-style (like mine), drop-in style, single or double bowl….whew! In our last house, we had a single bowl, under-mount sink and I LOVED being able to drop a full baking sheet right to the bottom for washing. But, I didn’t love the stainless steel finish and was always fighting with water spots. So I knew I didn’t want to do a stainless steel sink again but wasn’t sure what new direction to go…until I saw it. THE ONE. I went with the 33″ Reversible Apron front Fireclay Single Bowl Sink in gloss white from Kraus. Are you wondering what they mean when they say reversible???? I know I was when I first read the description. Well, this sink is so cool and allows you to choose which style you would like for the front, or the exposed apron. Isn’t it rad that you have the option?

I opted for the flat front because I was attracted to the slightly more modern vibe of the flat front, versus the rounded front, which felt more traditional to me. It’s such a great size too! You could easily fit two baby bums for a soak in the sink or to hide all the dirty dinner pots and pans until you feel like doing the dishes.


It comes with a grid that lives on the bottom that I LOVE! It’s so handy, especially for watering all of your plant babes as it lets the water drain freely from the bottom of the pot.

For the faucet, I selected the 18″ Commercial Style Pull-Down in matte black. This baby is sleek and I will never get over how it pairs so well with the black windows. Meow.

I also have really been enjoying the pull down option, and the button on the back which allows you to switch the water stream to a spray. It makes cleaning up a breeze. And the shiny finish always looks clean and sparkly, which is such a nice perk! I couldn’t be happier with this duo from Kraus, and know we will love them for many years. A BIG thank you goes out to Nick from Kraus who was so helpful and even tracked down another sink option for us at the last minute, when the sink we had originally selected was out of stock. He made it possible for us to keep our ORC deadline and for that, I’m so grateful!


I Can See Clearly Now: My New Kitchen Windows

This post is sponsored by Sierra Pacific Windows. All opinions are my own.

Hi guys! I’m back today to fill you in on some more kitchen details! We recently remodeled our kitchen in our new house, as part of the One Room Challenge, and we added the most beautiful windows to the space. I’m not sure if I’ve ever shared before, but my Dad(who can almost always be seen in all of my insta stories, working along side Nate) worked as a Commercial Glazier AKA he installed windows, for more than forty years before retiring six years ago. And on one of our many walk-throughs of the new house during the purchasing process, pointed out how he thought that the old kitchen window was feeling a little “skimpy.” When he said this, I looked at it and instantly knew he was right. We actually have a lovely view from the front of our house, we just needed to showcase it!

See what I mean?

And wouldya just take a look at the difference! Here’s how the kitchen looks now!

Isn’t it just amazing how transformative windows can be? There’s a lot of buzz around furniture, art, and decor…you know, all the pretty things. But, adding an architectural element, like windows, is a game changer. I read a blog post by Emily Henderson where she said, “a small odd vinyl window can ruin a perfectly good room, but a large pretty window that is rightly appointed can literally make a room.” Well, I used to have that small odd vinyl window and replaced it with three (imho) rightly appointed windows…and woweee, was she ever right?! I’m still shocked sometimes when I look into that kitchen and see those beautiful windows staring back at me. I LOVE them.

Like any good fairy tale with a happy ending, I found my knight in shining armor, with Sierra Pacific Windows. When they agreed to partner with me for the One Room Challenge, I was over the moon! But, even with all of my Dad’s window expertise, I was still a little hesitant about replacing windows. It just seems so intimidating! Even the ordering process seemed like it might be tough. What if my measurements are off? There are so many styles of windows; how do you decide which one is best? Well, Sierra Pacific Windows made it SO easy! Allow me to break down their ordering process for you in case you’re intimidated, like I was.

They put me in touch with their local territory manager, Ted, who let me know that he would be happy to come and meet me on-site to talk through details and measurements. We agreed on a date and Ted met Nate and I at the new house where I filled him on all the details about the (massive) project and described the look I wanted. I had been dreaming of a more modern look for the kitchen and adjoining living space and most importantly, allowing some more light to flow throughout the house. Ted was so knowledgeable and educated me on all the options that were available, and also did all the measuring for me…whew! I was so worried that I might flub a number and then my windows would arrive, only to not fit properly. A MAJOR mistake. But after he left, I knew I was in good hands. The next day, he emailed the quote for the windows with all of their specs for me to review. When I was satisfied with how everything looked on paper, I signed off and he finalized the order. Seriously…so easy. Ted was so patient with me as I had a thousand questions along the way and even tweaked the measurements, and added the three lites at the last minute. A few weeks later, they arrived at our door. Easy peasy.

Here’s a progress shot of the kitchen after demolition but before the new windows were installed.

And after install…

We went with their Urban casement style and it’s so sleek and beautiful. With their powder-coated aluminum on the exterior and solid wood on the interior, they are low maintenance, but HIGH impact(in the best way possible). They give our home more of a Modern Pacific Northwest feel that I am hoping to achieve. Eventually, the plan is to change all of our windows in the entire house to these black beauties…we already have another one on order for the entryway! Can’t wait to show you all!

The middle window is a picture window, which is code for, doesn’t open, or is fixed.

The two windows on the left and right both have screens and crank all the way open to a full 90 degrees, if you’d like. They also came with screens so you can open them on a cool summer evening without having to worry about pesky bugs/mosquitoes.

These new windows have been such an impactful addition to our home and now I’m wondering, where else can I add a window?! If you’re considering replacing windows, then look no further than Sierra Pacific Windows. I am forever a fan! They have an amazing assortment of styles, options and colors…something to suit everyone, I’m sure of it! A BIG thank you to Jennifer and Ted for being so awesome to work with…you both made the entire process so seamless! Here’s a few more shots of how these windows have changed the entire look of our home.

And one more before and after because you guys know I can’t resist…

Thanks for reading! XOXO